
Sooner or later, even the most patient is bored to enter each time the password when entering the operating system. Especially in situations when you are the only PC user and do not keep secret information. In this article, we will share with you in several ways that will remove the security key on Windows 10 and facilitate the logging process.
Password deletion methods on Windows 10
Turn off the password you can both using standard Windows tools and by using specialized software. Which of the described methods to choose is to solve only you. All of them workers and ultimately help to achieve the same result.Method 1: Specialized Software
Microsoft has developed a special software called AUTOLOGON, which for you edits the registry accordingly and allows you to enter the system without entering the password.
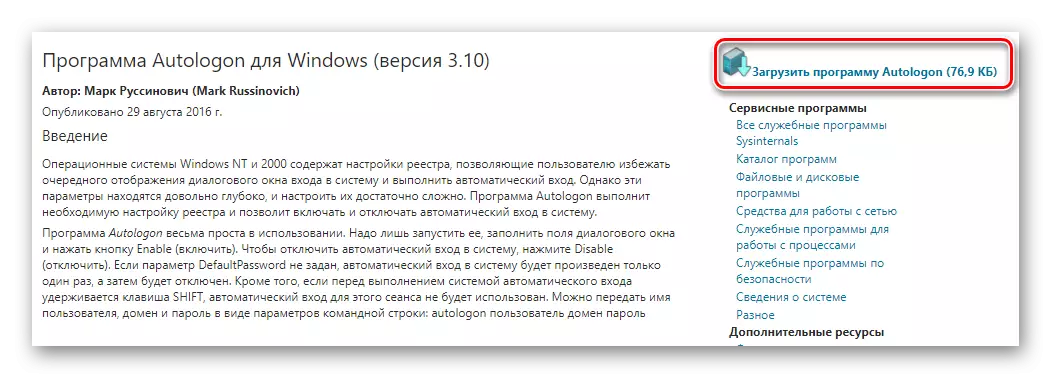
Download AutoGon.
The process of using this software in practice is as follows ::
- We go to the official page of the utility and click on the right side to "download AUTOLOGON program".
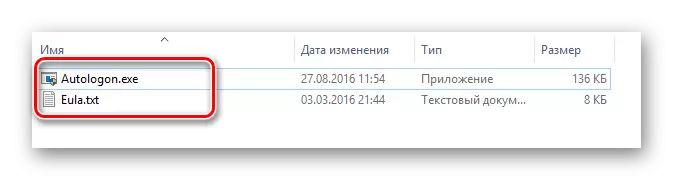
- As a result, the archive boot will begin. At the end of the operation, remove its contents into a separate folder. By default, it will contain two files: text and executable.
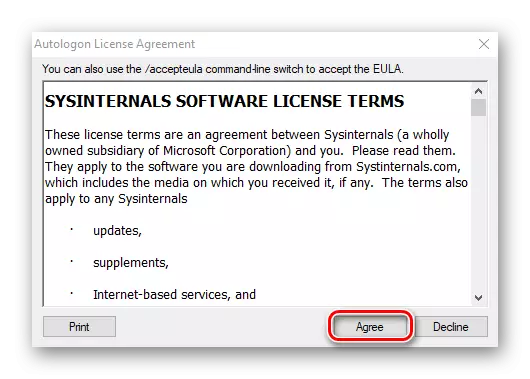
- Run the executable file double clicking the left mouse button. Installation of software in this case is not needed. It is enough to adopt the terms of use. To do this, click the "AGREE" button in the window that opens.
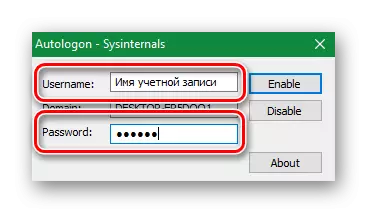
- Next will appear a small window with three fields. In the "UserName" field, we enter the name of the account, and in the Password string, you specify the password from it. The Domain field can be left unchanged.
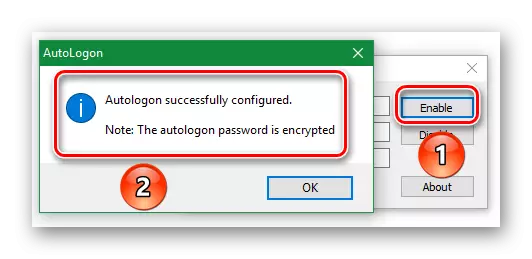
- Now apply all changes. To do this, click the "Enable" button in the same window. If everything is done correctly, you will see a notification on the screen about the successful configuration of files.
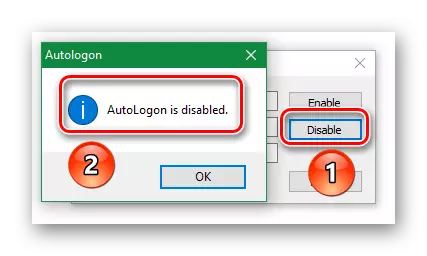
- After that, both windows will automatically close and you only need to restart the computer. No longer have to enter a password from the account. In order to return everything to the original state, start the program again and simply click the Disable button. A notification appears on the screen that the option is disabled.
This method is completed. If you do not want to use third-party software, then you can resort to the help of standard OS funds.
Method 2: Administration of Accounts
The method described below is one of the most popular due to its relative simplicity. To use it, you just need to perform the following actions:
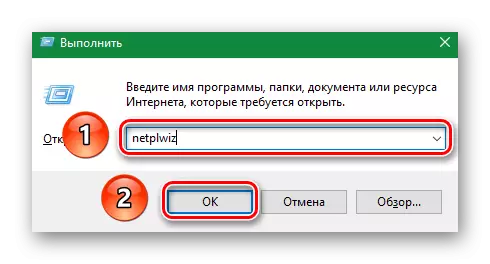
- Click on the keyboard at the same time the "Windows" and "R" buttons.
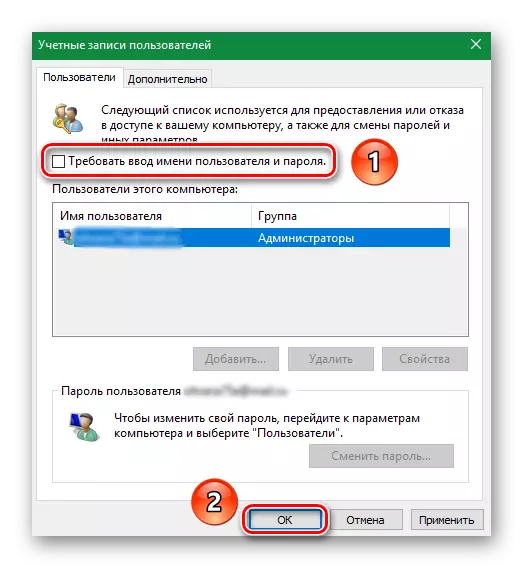
- The standard program "Run" window opens. It will be the only active line in which you want to enter the NetPLWIZ parameter. After that, click the "OK" button in the same window or "Enter" on the keyboard.
- As a result, the desired window will appear on the screen. In the upper part of it, locate the "Require user and password input". Remove the tick, which is the left of this line. After that, click "OK" at the bottom of the same window.
- Another dialog box opens. In the "User" field, enter the name of your account. If you use Microsoft's profile, then you need to enter all login (for example, [email protected]). In the two lower fields it is necessary to enter a valid password. Duplicate it and click the "OK" button.
- By clicking the "OK" button, you will see that all windows are automatically closed. Do not be afraid. So it should be. It remains to restart the computer and check the result. If everything was done correctly, the password entry step will be absent, and you will automatically enter the system.

If in the future you want for some reason to return the password input procedure, then simply check the box again where you cleaned it. This method is completed. Now let's look at other options.
Method 3: Editing Registry
Compared to the past method, this is more complicated. You will have to edit system files in the registry, which is fraught with negative consequences in case of erroneous actions. Therefore, we are extremely recommended to accurately adhere to all given instructions so that there are no further problems. You will need the following:
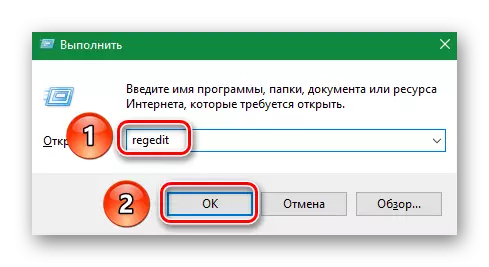
- Click on the keyboard at the same time the "Windows" and "R" keys.
- The "Run" window will appear on the screen. Enter the "REGEDIT" parameter and press the "OK" button just below.
- After that, a window with registry files opens. On the left you will see the directory tree. You need to open the folders in the following sequence:
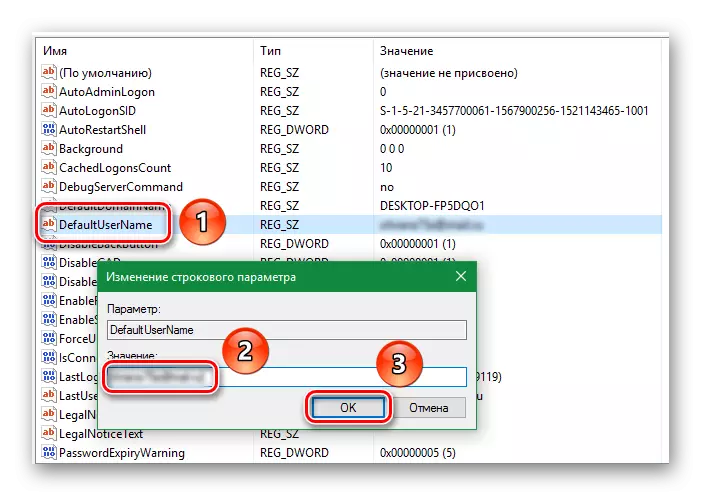
- Opening the latest folder "WinLogon", you will see the file list on the right side. Find the document with the name "DefaultUserName" among them and open it double clicking the left mouse button. The "Value" field must be spelled out the name of your account. If you use Microsoft's profile, your mail will be indicated here. We check whether everything is indicated correctly, then click the "OK" button and close the document.
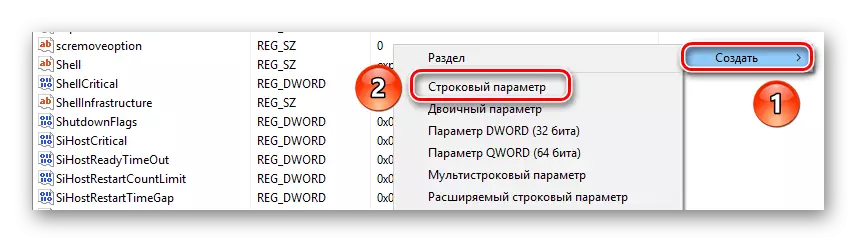
- Now you need to search the file with the name "DefaultPassword". Most likely, he will be absent. In this case, click anywhere in the right part of the PCM window and select the "Create" string. In the submenu, click on the "String parameter" line. If you have an English version of the OS, then the lines will be called "New" and "String Value".
- Assign the name "DefaultPassword" to the new file. Now open the same document and in the "Value" string enter your current password from the account. After that, click "OK" to confirm the changes.
- It remains the last step. Find in the list "Autoadminlogon" file. Opening it and change the value from "0" to "1". After that, we save edits by pressing the "OK" button.
HKEY_LOCAL_MACHINE \ SOFTWARE \ Microsoft \ Windows NT \ CurrentVersion \ WinLogon


Now you close the registry editor and reboot the computer. If you all did according to the instructions, you will no longer need to enter the password.
Method 4: Standard OS Parameters
This method is the easiest solution in the case when you need to delete the security key. But his only and significant disadvantage is that it works exclusively for local accounts. If you are using Microsoft account, it is better to use one of the above methods. The same method is implemented extremely simple.
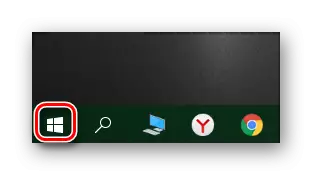
- Open the "Start" menu. To do this, click in the lower left corner of the desktop on the button with the image of the Microsoft logo.
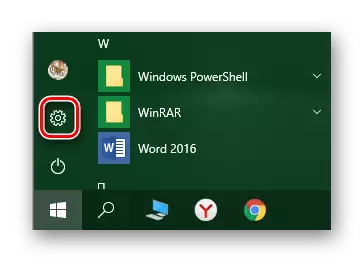
- Next, click the "Parameters" button in the menu that opens.
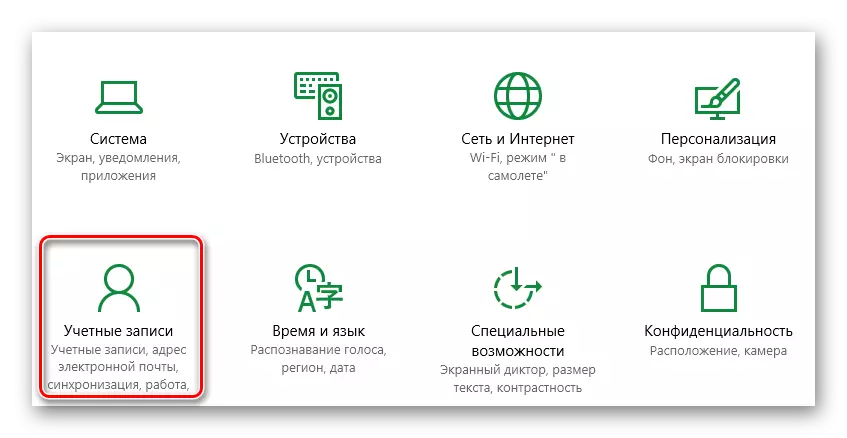
- Now go to the "Account" section. Press once the left mouse button according to its name.
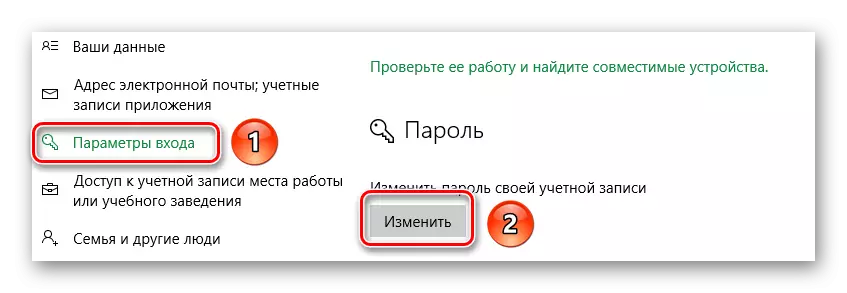
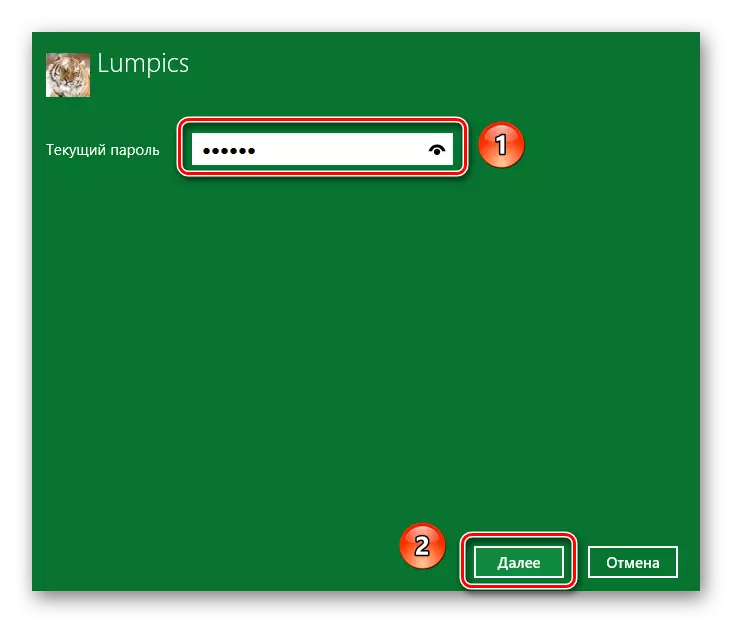
- From the left side of the window that opened the window, find the "Input Parameters" line and click on it. After that, find the "Edit" item in the block with the name "Password". Click on it.
- In the next window, enter your current password and click Next.
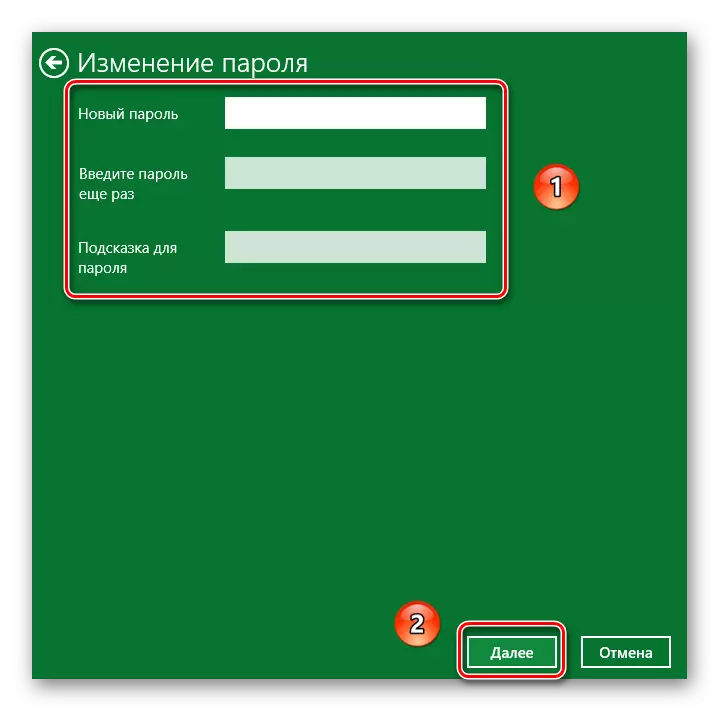
- When a new window appears, leave all fields empty in it. Just press "Next".
- That's all right. It remains at last to click "Finish" in the last window.

Now the password is missing and you will not need to enter it every time at the entrance.
This article approached its logical conclusion. We told you about all the methods that will allow you to disable the password entry function. Write in the comments if you have questions about the topic described. We will be happy to help. If in the future you want to set the security key back, then we recommend you to familiarize yourself with the special theme in which we described several ways to achieve the goal.
Read more: Change password in windows 10