
One of the innovations of the Windows 10 operating system is the function of creating additional desktops. This means that you can run various programs in different areas, thereby distinguishing the space used. From this article you will learn how to create and use the items mentioned.
Creating virtual desktops in Windows 10
Before you start using desktops, you need to create them. To do this, you need to make literally a couple of action. In practice, the process looks like this:
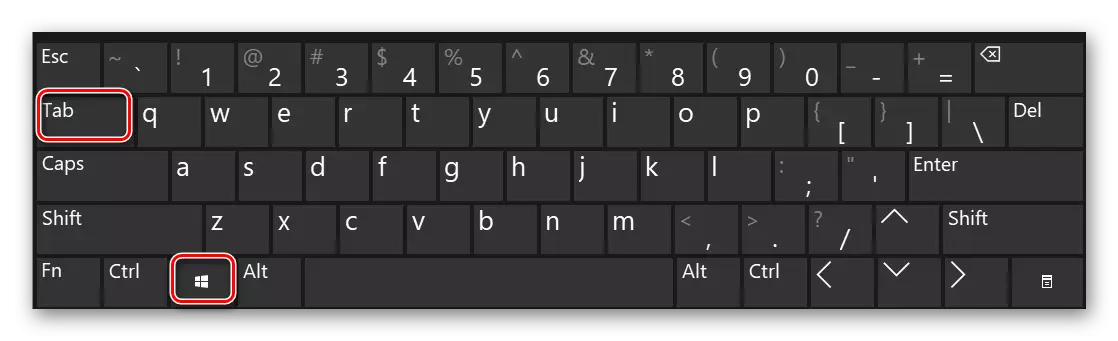
- Click on the keyboard at the same time the "Windows" and "Tab" keys.
You can also press once the LCM on the "Task Representation" button, which is on the taskbar. This will work only if the display of this button is turned on.
- After you perform one of the following steps, click the "Create Desktop" signature in the right side of the screen.
- As a result, two miniature images of your desktops will appear below. If you wish, you can create as many such objects for further use.
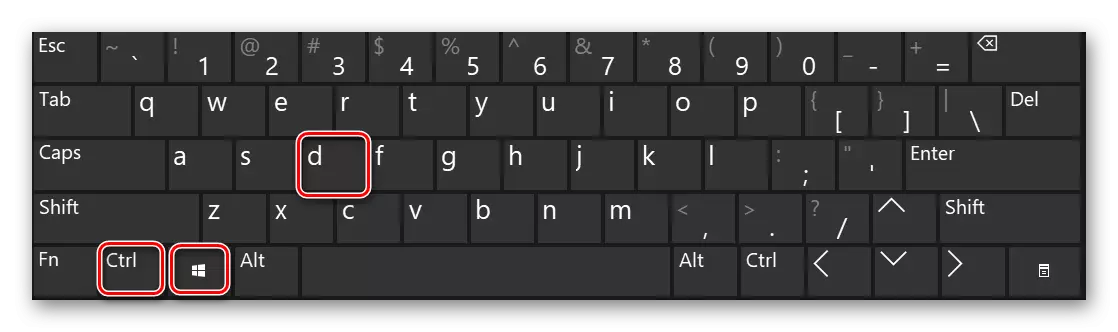
- All of the above actions can also be replaced by simultaneously pressing the "CTRL", "Windows" and "D" keys on the keyboard. As a result, a new virtual area will be created and immediately opened.


Having created a new workspace, you can proceed to use. Then we will tell about the features and intricacies of this process.
Work with virtual desktops Windows 10
Use additional virtual areas can also be just as creating them. We will tell you about three main tasks: switching between tables, starting applications on them and deleting. Now let's go about everything in order.Switch between desktops
To switch between desktops in Windows 10 and select the desired area to further use it as follows:
- Click on the keyboard together the "Windows" and "Tab" keys or click on the "Task Representation" button at the bottom of the screen.
- As a result, you will see the list of created desktops at the bottom of the screen. Press LKM by the miniature that matches the desired work area.

Immediately after that, you find yourself on the chosen virtual desktop. Now he is ready to use.
Running applications in different virtual spaces
At this stage, there will be no specific recommendations as well as the work of additional desktops is no different from the primary. You can just run a variety of programs and use the system functions. Let us pay attention only to the fact that in each space can open one and the same software, provided that it is supported by such a possibility. Otherwise, you simply transfer to the desktop, which is already open. Also note that when you switch from one desktop to another, running programs will not automatically close.
you can move running software from one desktop to another, if necessary. This is done as follows:
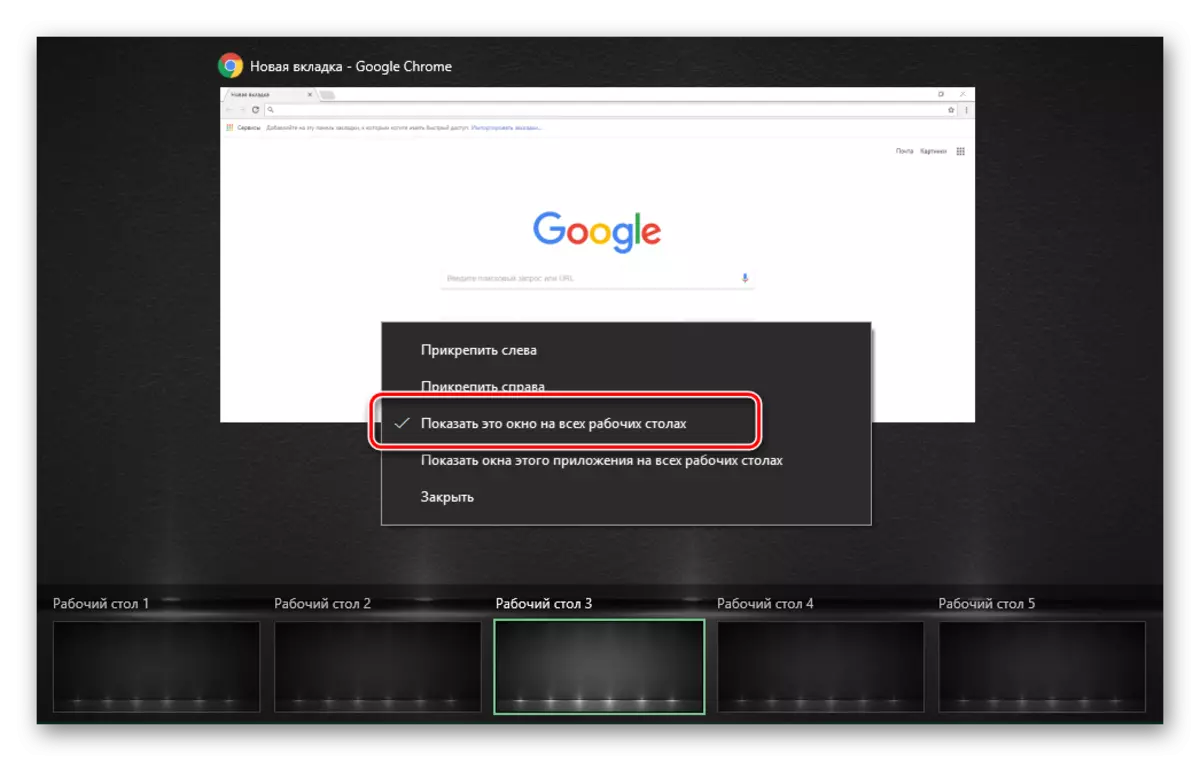
- Open the list of virtual spaces and hover the mouse pointer over any of them, from which you want to transfer software.
- Above the list there will be icons of all running programs. Click on the necessary elements of the right mouse button and select "Move to". The sub-list will be created on the desktop. Click on the title, in which the selected program will be moved.
- In addition, you can enable the display of specific programs in all available desktops. It is only necessary in the context menu, click on the line with the appropriate name.

Finally, we will talk about how to remove unnecessary virtual spaces, if they are no longer needed.
Remove virtual desktops
- Click on the keyboard instead of "the Windows" and "Tab" key, or click on the button "Presentation of problems."
- Hover the mouse pointer over the desktop, from which you want to get rid of. In the upper right corner of the icon will be a button in the form of a cross. Click on it.

Note that all open applications with unsaved data will be transferred to the previous space. But reliability is always better to save and close the software before removing the desktop.
Note that when the system is rebooted all workspaces are saved. This means that you do not need to create them from scratch each time. However, programs that are loaded automatically when you start the operating system will run only on the main table.
Here's all the information that we wanted to tell you in this article. Hopefully, these tips and guidelines help you.