
If there is a periodic shutdown of the screen when operating the computer, then the reason for this problem does not always lie on the display itself. It can be related to the video card, the connection cable, the operation of RAM, etc. The causes are many, and this article is dedicated to the consideration of the main of them.
Monitor disorders
Problems with a constantly disconnected display refer to the most difficult. To diagnose and identify the reason at home the usual user is very problematic. Such violations are related or with hardware, or with software malfunctions. The first, as a rule, require access to the service center, and the second can be learned to identify, having studied this article.Cause 1: Monitor Malfunction
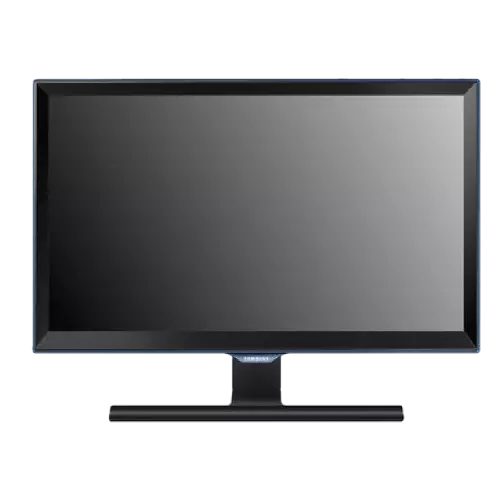
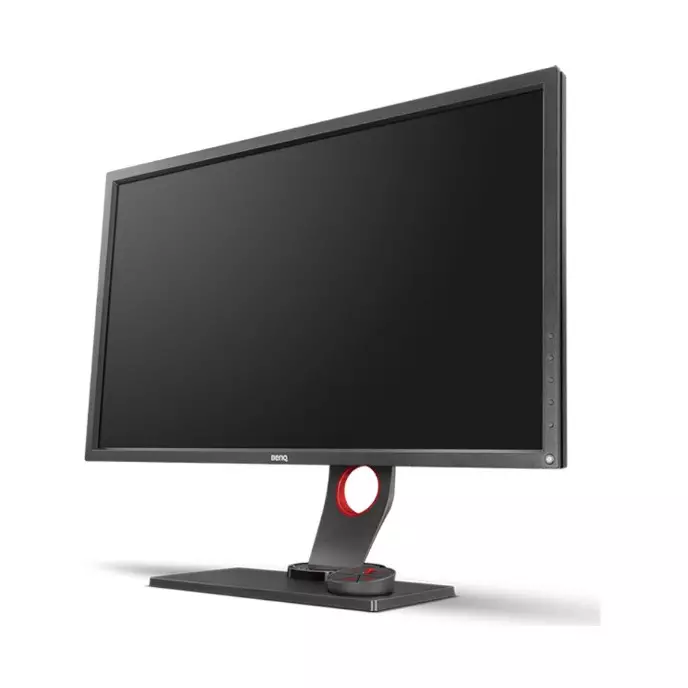
If the monitor turns off when the system unit is running, then it is not possible to exclude problems with the main output device. Most monitors have protection, triggered automatically when overheating occurs. But with standard means to check the temperature of the device will not be possible. Therefore, here you can advise only to check it on the touch. If the display housing is too hot, it should be put away from the wall or another place with the best air exchange.
Increased humidity level is one of the reasons for the periodic displays. Transfer the monitor to the room where there is no high humidity and let it stand for time. The monitor should not be connected to the network. And if corrosion still did not have time to form, then after evaporation of all moisture, the device should return to normal operation.
Disconnect the output device from the system unit. On the screen you should see the inscription like "no signal" or "missing connection". If there is no such message, it means that you need to contact the service center.
To remove the monitor from the circle of potential causes of the problem, you just need to connect another output device to a stationary PC or laptop. If the image is still missing, it means that the wine lies on the video card or cable.
Cause 2: Cable Defect
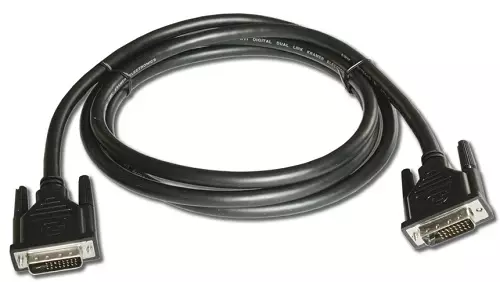
To the most common reason for the periodic shutdown of the output device refers to the cable damage. Most often, for output, DVI, HDMI connectors are used. But still meets the VGA format. You must make sure that the inserted cable holds securely and twisted on both sides (DVI).
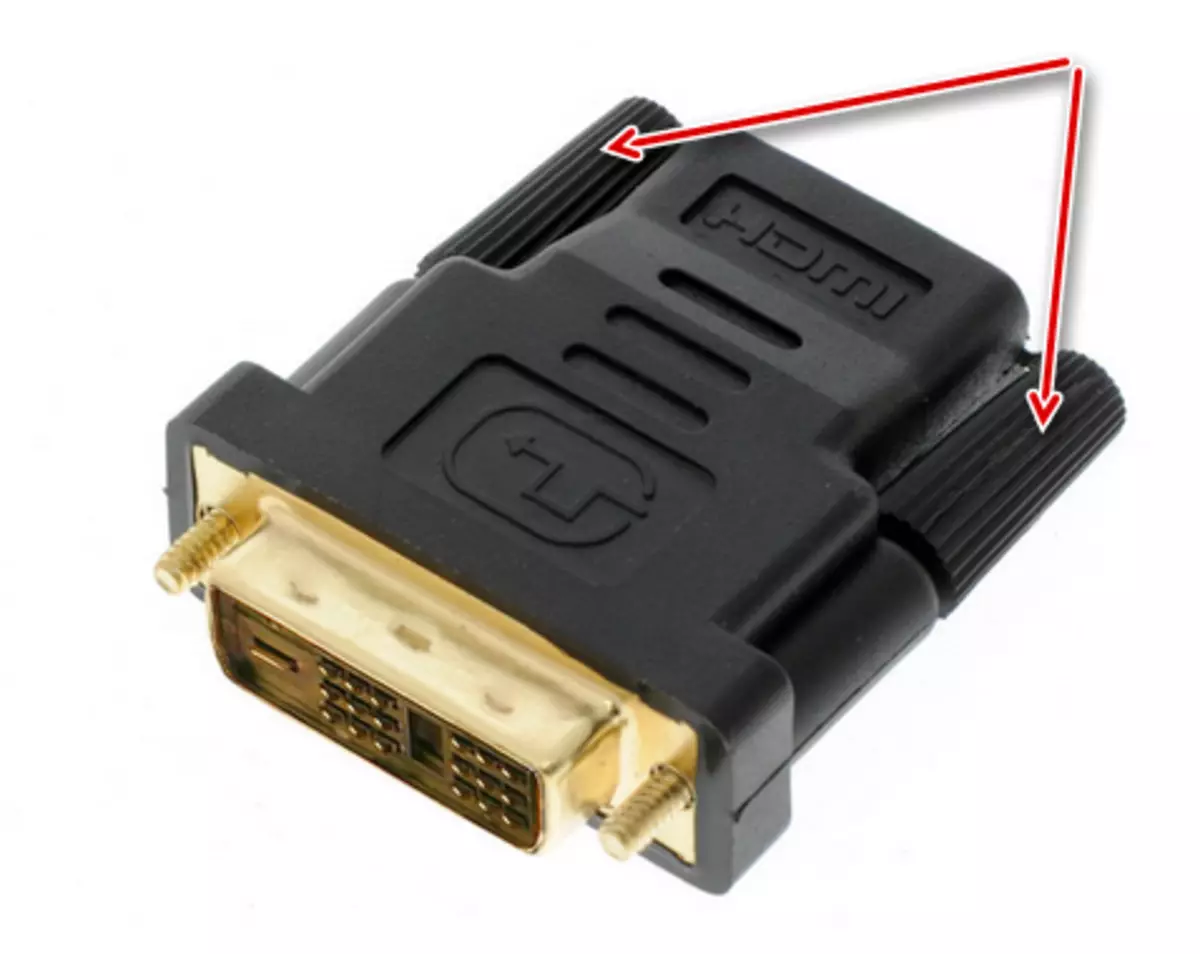
Next, show the troubleshooting algorithm regarding the display and cable.
- First you need to try to connect the display to another computer using the existing cable. If there are no changes, just replace the cable.
- If the cable change does not solve the problem, therefore, a malfunction in the monitor itself.
- If after joining another computer, the fault disappears, then the problem has no relation to the display or the cable. In this case, seek the reason implies in the depths of the system unit.
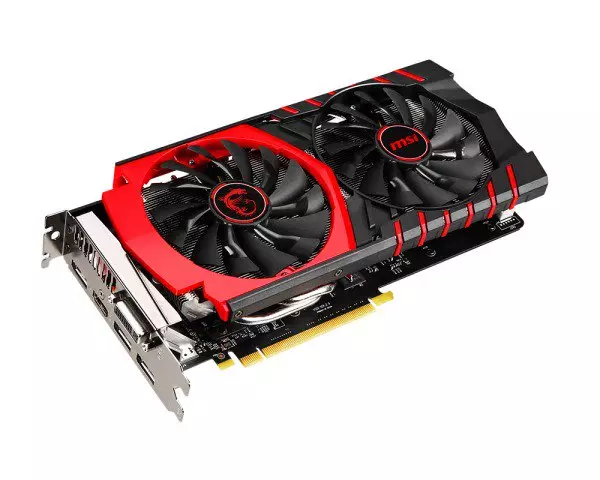
Cause 3: Video Card Malfunction
Another logical reason for constant shutdown screen of the monitor can be a hardware faction of a graphics adapter. For such cases, the following is characteristic:
- The appearance of various artifacts on the screen (stripes, distortions, broken lines, etc.)
- Error messages for video drives appearing in the system tray.
- Special BIOS signals when loading a computer.
About what should be done in such cases, read below:
Read more: Troubleshooting Video Cards
Cause 4: Overheating Video Card
In all modern PCs (including laptops) on motherboards are located at once two graphics adapters: internal and external. In the default BIOS settings, preference is given to that video card, which is considered to be more productive (usually discrete). Therefore, it is necessary to monitor the temperature of the external graphic module.
In most cases, the normal operating temperature of the graphics adapter is the one that does not exceed 60 degrees Celsius. But on powerful video cards to achieve this almost unreal. The maximum peak (load 100%) is usually determined at the level of 85 degrees. For individual GPU, the peak maximum reaches 95 degrees.
Almost for all existing GPUs the maximum allowable top limit is 105 degrees. After that, the graphical module of the board for cooling reducing the frequency. But such a measure may not give the result and then the PC is rebooting.
First of all, you should make sure that the video card is not cooled properly. For this, there are, for example, temperature monitoring software. Consider two of them.
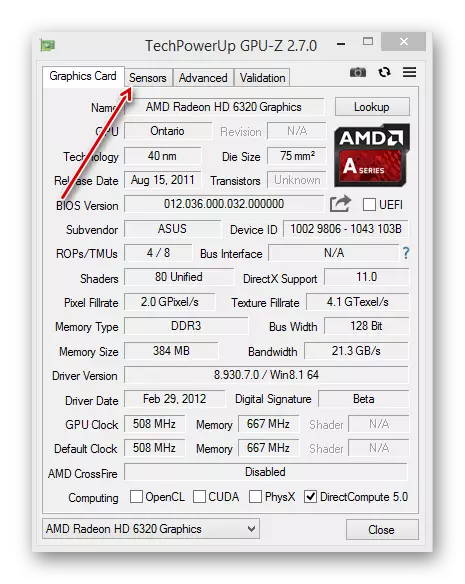
Method 1: GPU-Z
- Run the GPU-Z program.
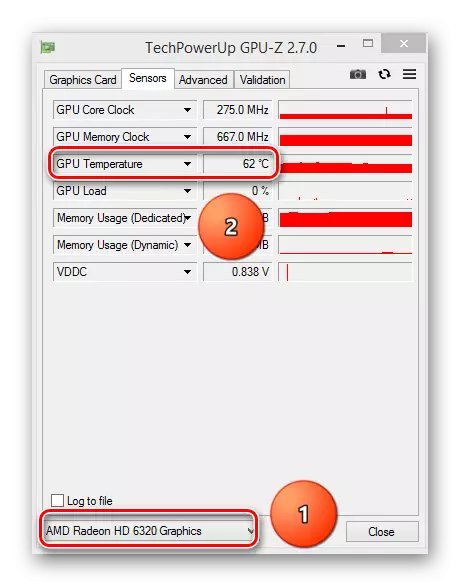
- Go to the "Sensors" tab.
- If you have a discrete video card, it should be selected in the drop-down list. If not, the integrated video card will be indicated by default (1).
- In the "GPU Temperature" string you can see the current map temperature (2).
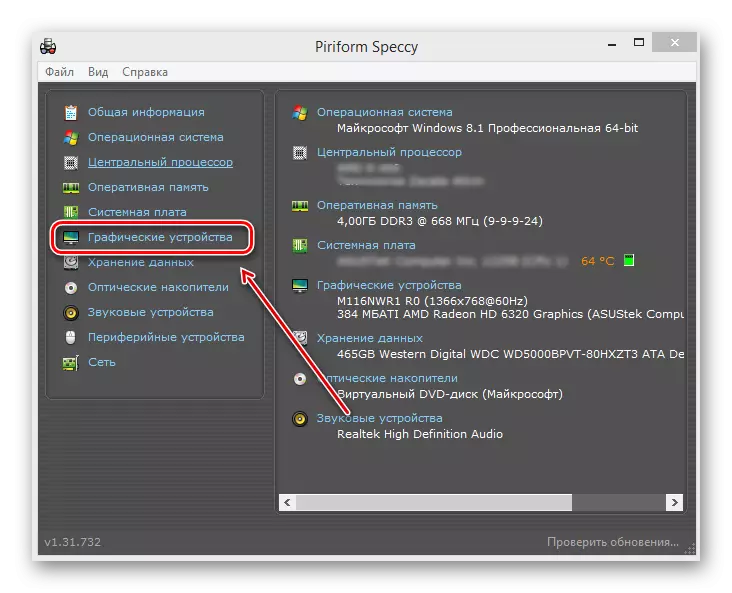
Method 2: Speccy
- By running the SPECCY, in the main window of the program, choose the left "graphics devices".
- Next, we look at the temperature of the desired component of the motherboard.
Read more: Video card temperature monitoring
Consider the main reasons leading to insufficient cooling of the graphics adapter.
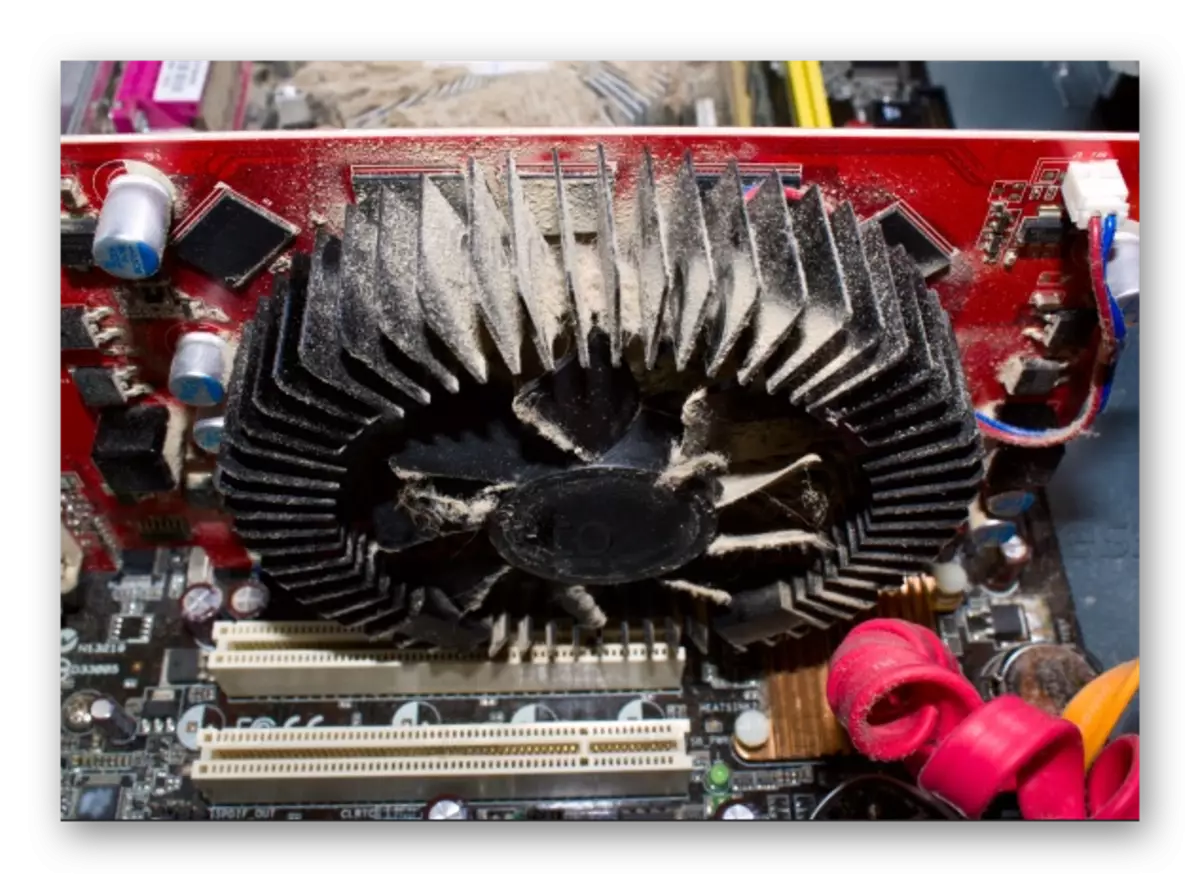
Dust
If the PC has not been cleaned from dust for a long time, then it's time to proceed to this. There is a chance that dust inside the system unit or on the cooler of the video card does not allow the latter normally cooling. Dirt and dust on the cooler of the map in particularly severe cases can lead to its stop. Cleaning from dust does not require special skills: you need to disassemble the system unit or open the laptop housing, then use the vacuum cleaner or a soft brush. It is recommended to carry out this cleaning at least 2 times a year.
Read more: Correct computer cleaning or dust laptop
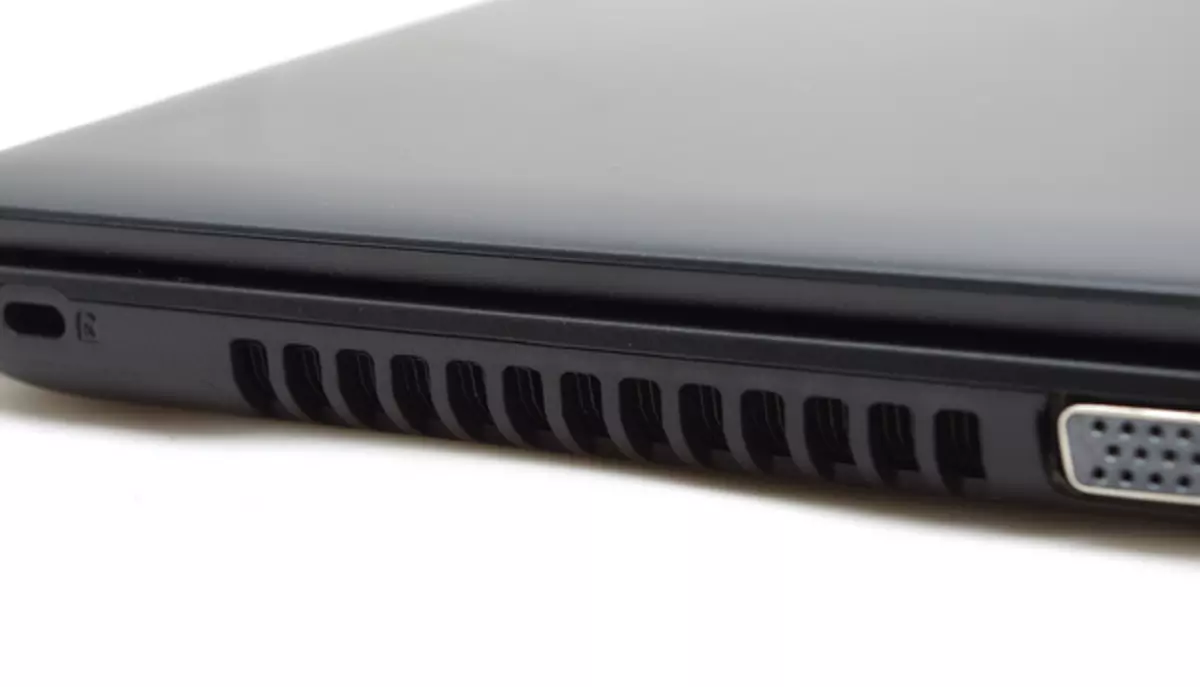
Design features of a laptop
Some laptop manufacturers already at the design stage of a certain model do not form a reliable heat sink system. In such cases, portable computers are, for example, very small grilles on the housing, which logically leads to the constant overheating of the entire device. Here you should take care of putting a back (or in front) under a laptop any stand, lifting it.
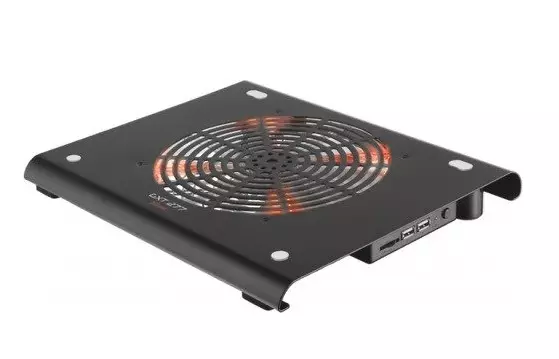
Alternatively, you can use special cooling support for portable PCs. They allow you to more intensively drive the air through the computer. There are models running from USB, as well as having their own battery.
Loss of properties Thermoplasts
The heat transfer between the GPU and the cooler is carried out by means of a special intermediary - thermal paste (or thermal interface). Over time, the substance loses its properties, which leads to insufficient cooling of the graphics adapter. In this case, the thermalcolus must be replaced urgently.
Note: An analysis of the video adapter will lead to a loss of the warranty if it has not passed. Therefore, contact the official service center. If the warranty period is already behind, read by reference below the thermal interface replacement guide for the graphics card.
Read more: change the thermal chaser on the video card
Reason 5: Energy Saving Mode
In the Windows operating system of all versions, there is a special service that turns off the unused device currently. The purpose of such a function is to save energy. By default, the downtime is never below 5 minutes, if it is a stationary computer or laptop. But various erroneous manipulations of the user or third-party programs can change this time to the smaller.
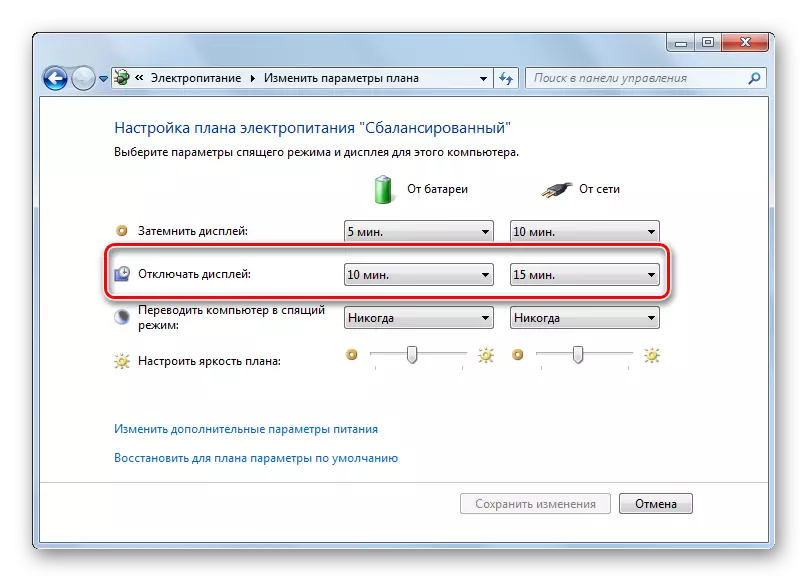
Window 8-10.
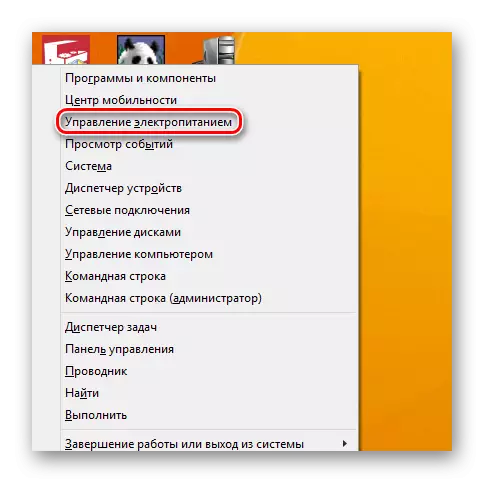
- We use the key combination "Win" + "x" to open the properties window.
- In the menu, click the mouse over "Power Management".
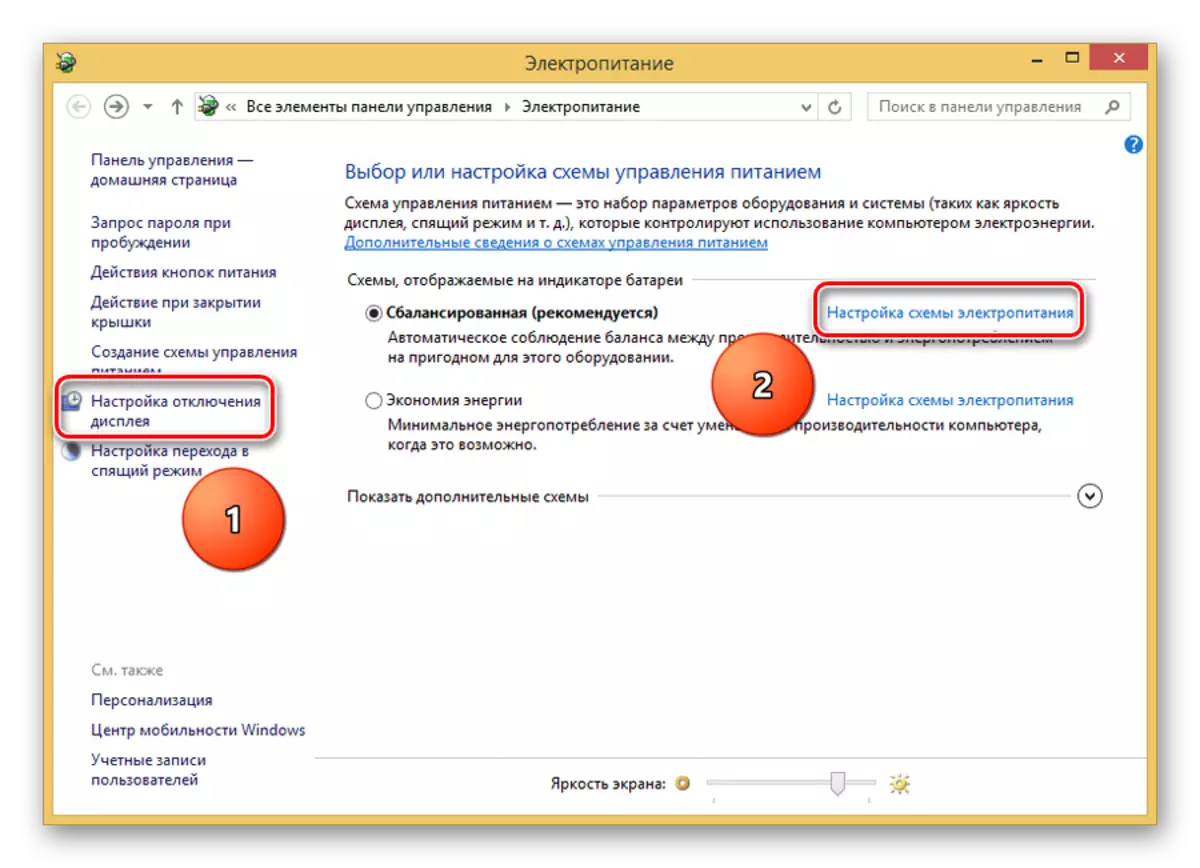
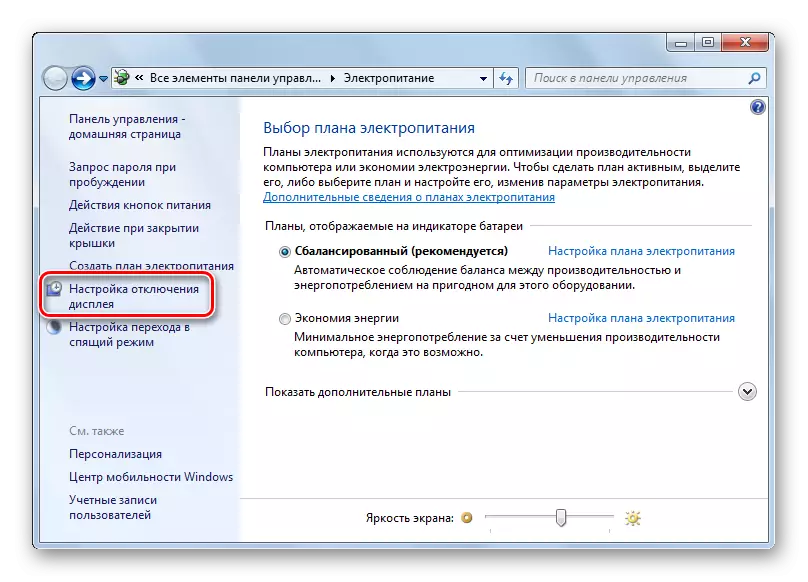
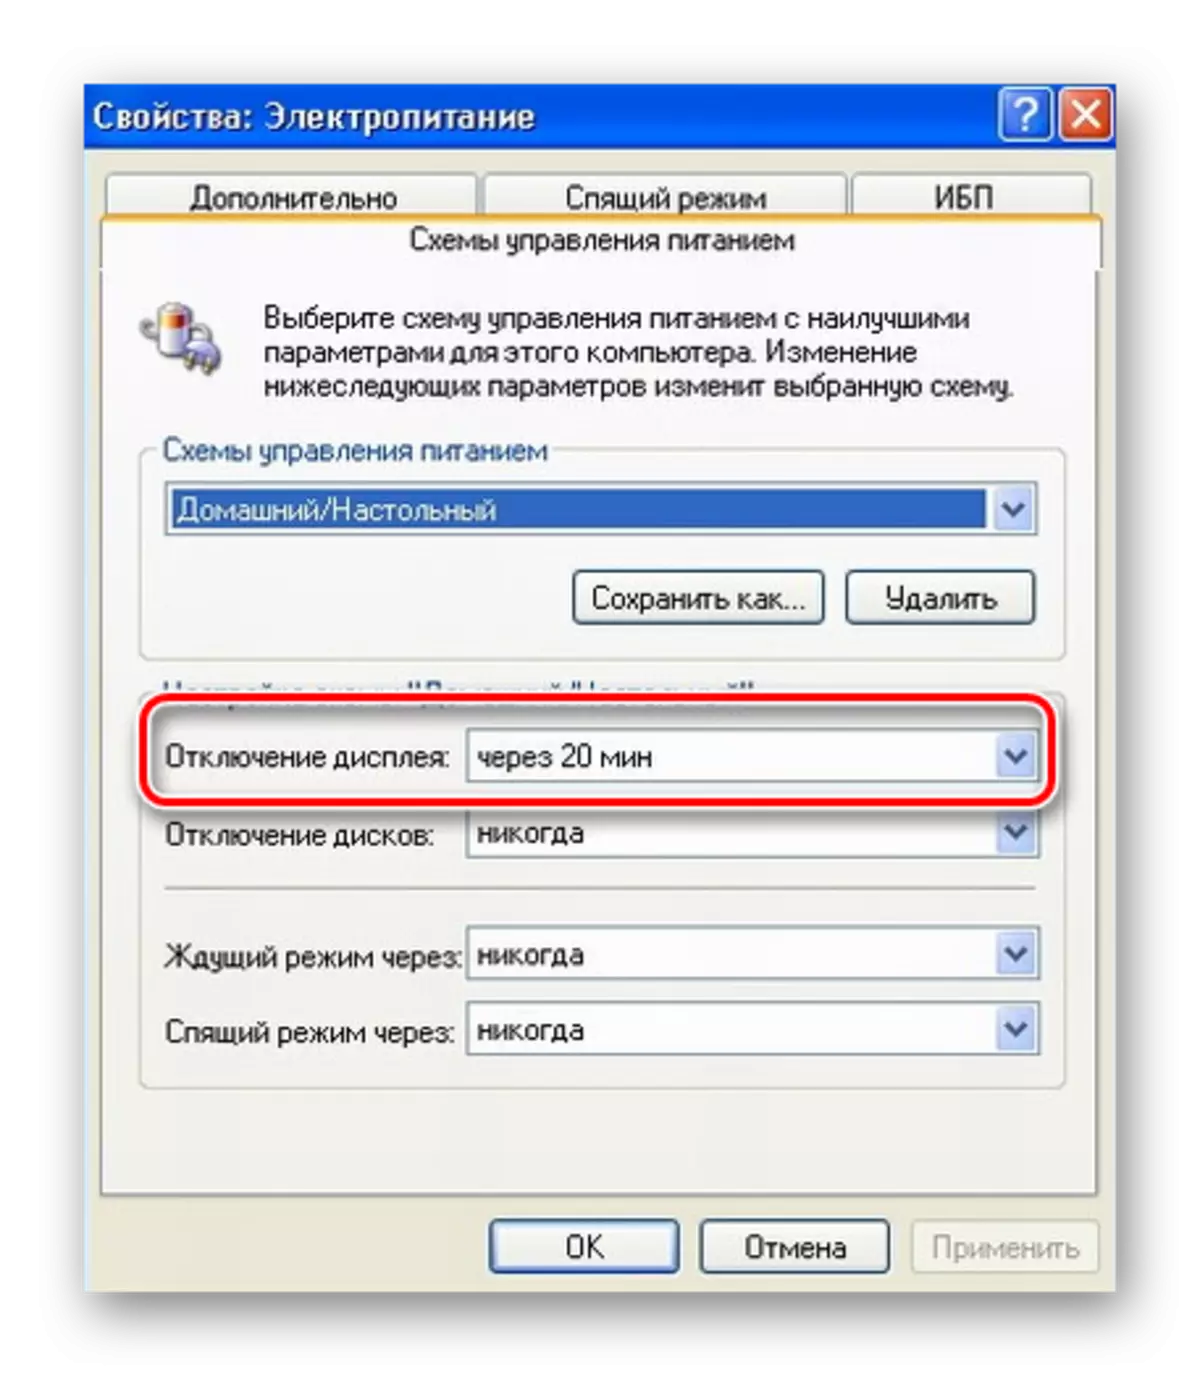
- Next, select or link "Setting the Display Disable" (1), or "Setting the Power Scheme" (2).
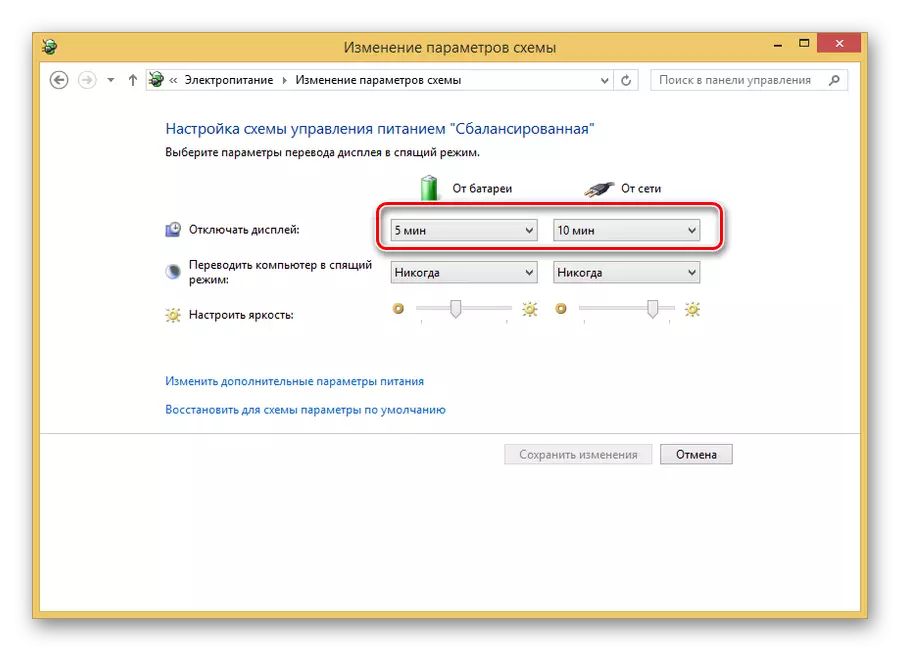
- In the "Disconnect" string, change the time if necessary.
Windows 7
- Using the key combination "Win" + "X" call the window "Windows Mobility Center".
- Select the power supply icon.
- In the window that appears, go further - "Configuring Display Disable".
- We specify the monitor shutdown parameters you need.

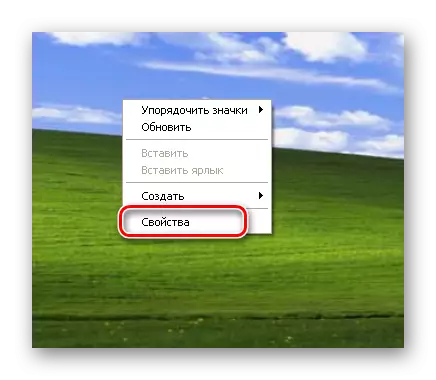
Winds XP.
- Click PCM on the desktop.
- Select "Properties".
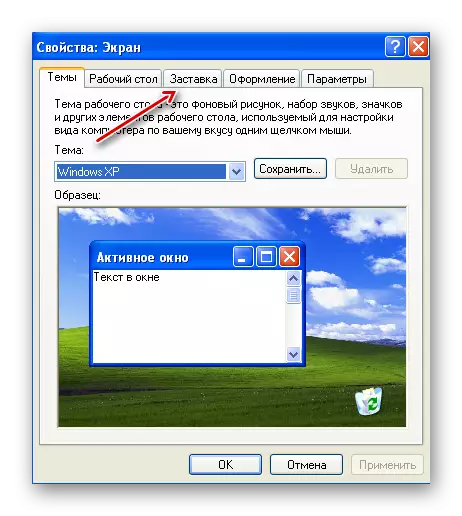
- Next, we move to the Screensaver tab.
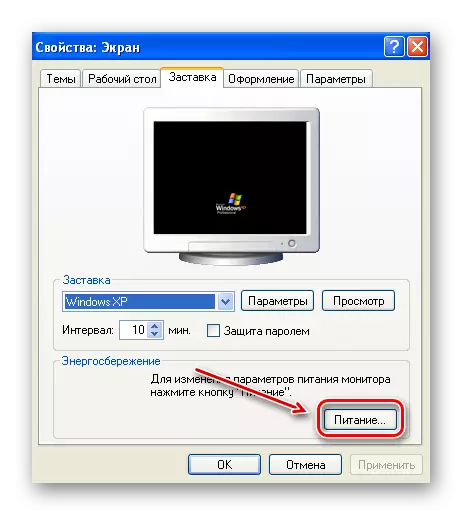
- Click on "Power".
- Set the desired display off parameters.
Cause 6: Video Card Driver
Incorrect operation of the graphics adapter drivers does not often lead to the problems under consideration. But it is not worth completely eliminating the influence of the conflict of drivers (or their absence) on unstable displays.
- We download the computer in the "safe mode".
- Press "Win" + "R".
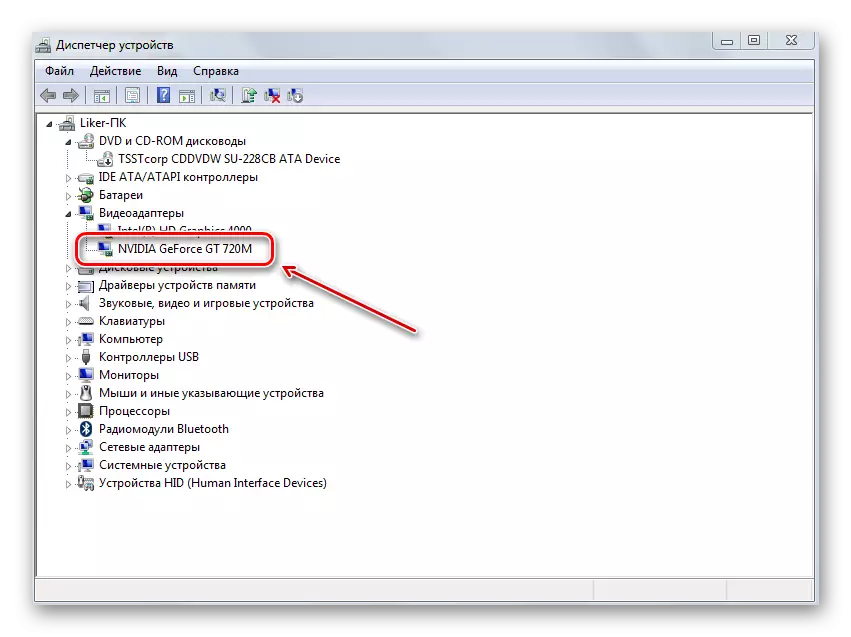
- Next, enter "Devmgmt.msc".
- We find a discrete map (if any) in the "Video adapter" section. No yellow icons with an exclamation mark next to the device name should not be.
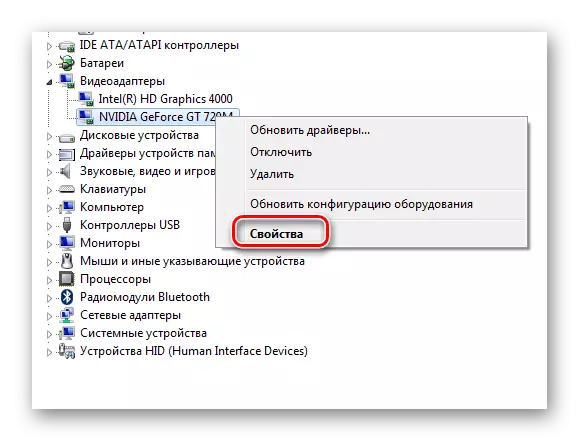
- Using the PCM by clicking on the adapter name, then select "Properties".
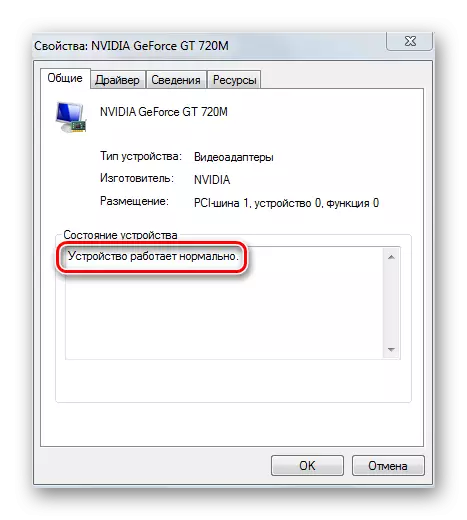
- In the "Device Status" field, a normal operation should be indicated.
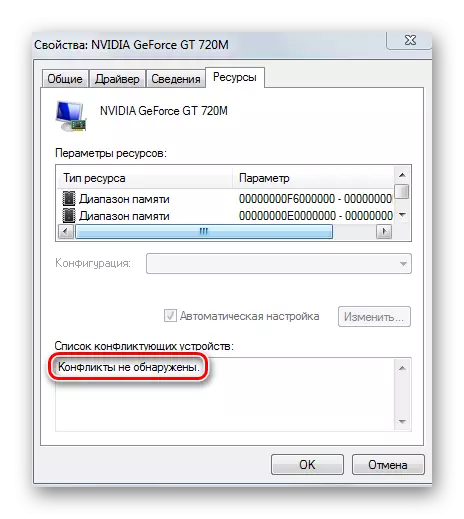
- Next, go to the "Resources" tab and make sure that there are no conflicts.
Read more: How to enter "Safe Mode" via BIOS, on Windows 10, Windows 8, Windows XP

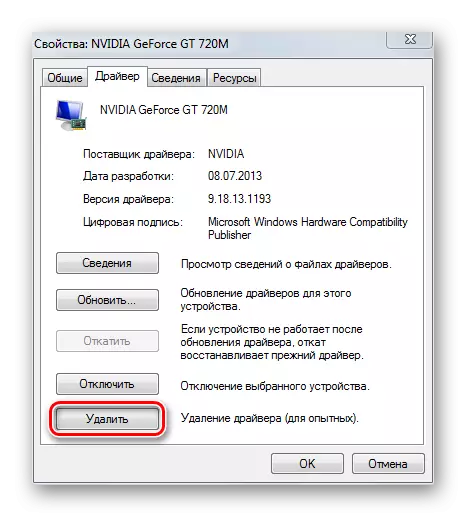
If the device is displayed with problems (availability of additional icons, resource conflicts, etc.), then the adapter driver should be deleted. To do this, carry out the following:
- Go to the same device properties window, which was considered above, but already on the "Driver" tab.
- Press the "Delete" button.
- Confirm your decision.
- Restart the computer as usual.
This method is effective when problems with video adapter drivers. But unfortunately, it does not always bring results. In challenging cases, the user will need to search and install the driver manually. About how to do this, read the links below.
Read more:
Re-install video card drivers
Find out which drivers need to be installed on a computer
Search for hardware drivers
The best programs for installing drivers
Causes and solving problems with the inability to install a video card driver
Tip: First of all, you should find and install drivers for the motherboard (if they are not installed), then - all others. This is especially true for laptop owners.
Cause 7: RAM
One of the most common causes causing the monitor self-off is the operational memory failure. To detect such problems there are special RAM checks on errors. Even when the malfunction occurs in a single module, it is enough to periodically disconnect the monitor during PC operation.
RAM modules are unsuitable for repair, therefore, when problems are found in their work, new ones should be purchased.
Method 1: MemTest86 +
Memtest86 + is one of the best tools for testing RAM for errors. To work with it, you will need to create a bootable media with this program and set the download from the flash drive to the BIOS. After testing is completed, the program will display the results.
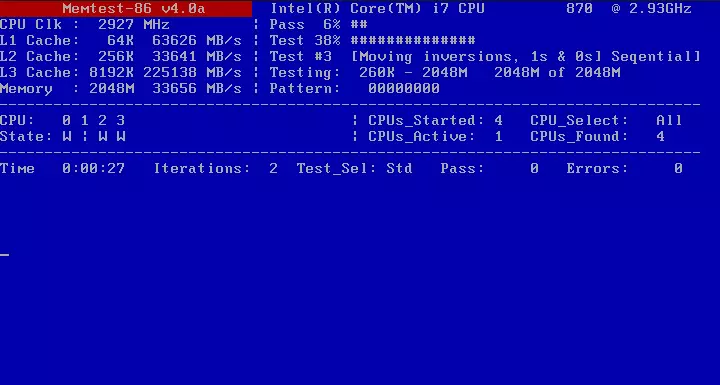
Read more: How to test RAM using the MemTest86 + program
Method 2: System Remedy for RAM
Another way to verify RAM does not require additional software. In the OS itself there is a special tool.
To launch the diagnostics of RAM tools for the Windows operating system itself, it is necessary:
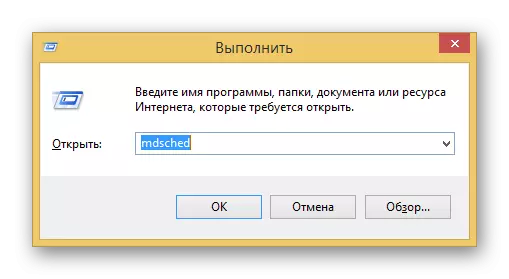
- Press the key combination "Win" + "R". This will cause the standard window "Run".
- Enter in the "MDSCED" string.
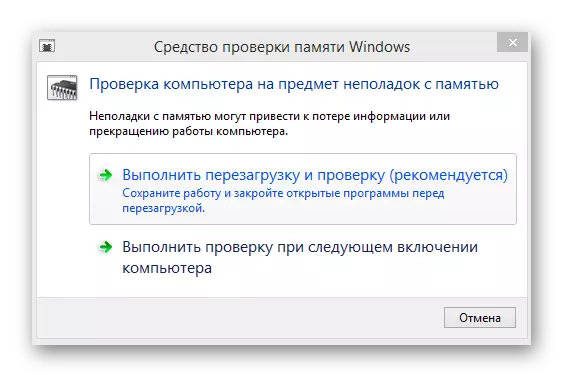
- Next, select the option to start checking RAM.
- After rebooting, the diagnostic procedure will start, and upon completion of the work, the test results will be displayed.
Read more: Programs for checking RAM
Thus, to determine the reason for the inoperability of the monitor, the user will need to perform a number of steps. Some of these activities relates to a simple and effective diagnosis of exception. For example, hardware problems associated with the display and cable are so easily identified. Program methods require sufficiently long time, but without them can not do to eliminate the malfunction of RAM.