

In the systems of the Windows family, there is a special built-in component, which allows you to schedule the challenge or assign a periodic execution of various procedures on the PC. It is called the "task scheduler." Let's find out the nuances of this tool in Windows 7.

Method 2: "Control Panel"
Also, "Task Scheduler" can be launched through the "Control Panel".
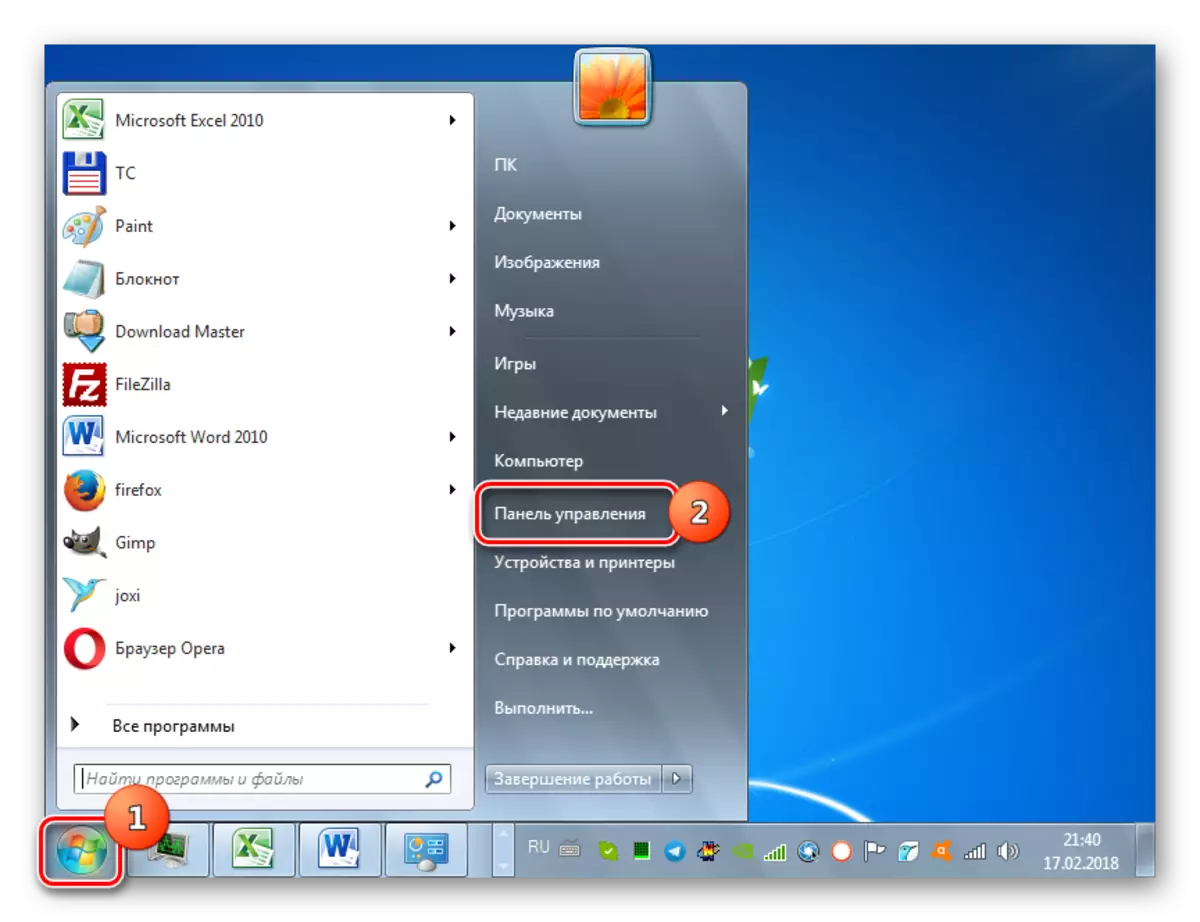
- Click "Start" again and go to the inscription "Control Panel".
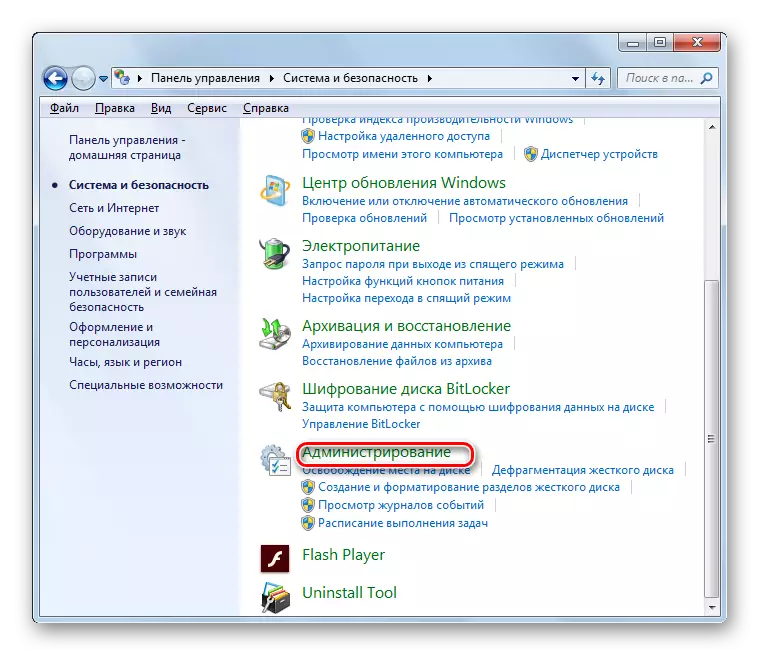
- Come in the "System and Security" section.
- Now click "Administration".
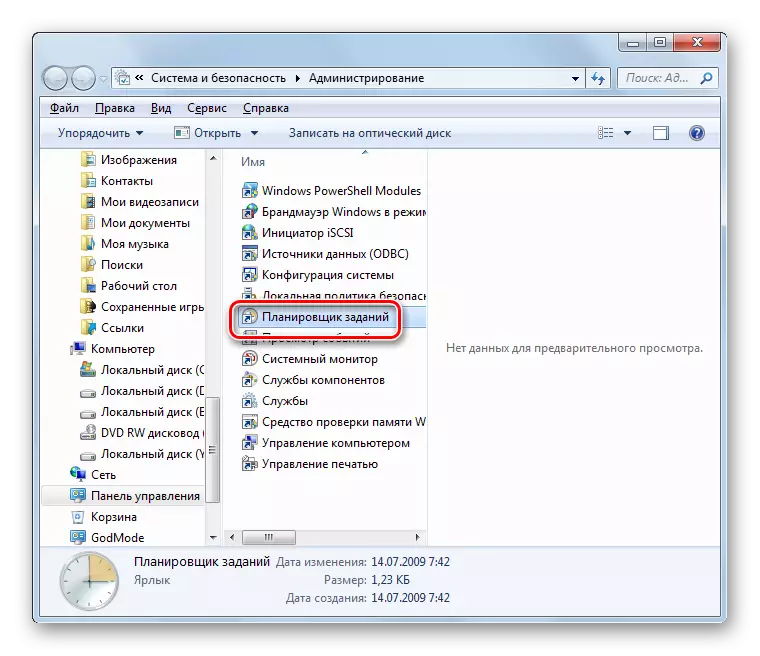
- In the discontinuing list of tools, select "Task Scheduler".
- The shell "Task Scheduler" will be launched.

Method 3: Search field
Although the two Task Scheduler opening methods described are generally intuitive, nevertheless, not every user can immediately remember the entire algorithm of actions. There is a simpler option.
- Click "Start". Install the cursor in the Find Programs and Files field.
- Enter the following expression there:
Task Scheduler
You can even fit completely, but only a part of the expression, since the search results will be displayed on the panel. In the "Programs" block, click on the displayed name "Task Scheduler".
- The component will be launched.


Method 4: "Run" window
The launch operation can also be implemented through the "Run" window.
- Type Win + R. In the field of the shell opened, enter:
Taskschd.msc.
Click "OK".
- The tool shell will be launched.

Method 5: "Command String"
In some cases, if there are viruses in the system or malfunctions, it is not necessary to start the "Task Scheduler" launch. Then this procedure can be tried to execute using the "command line" activated with the authority of the administrator.
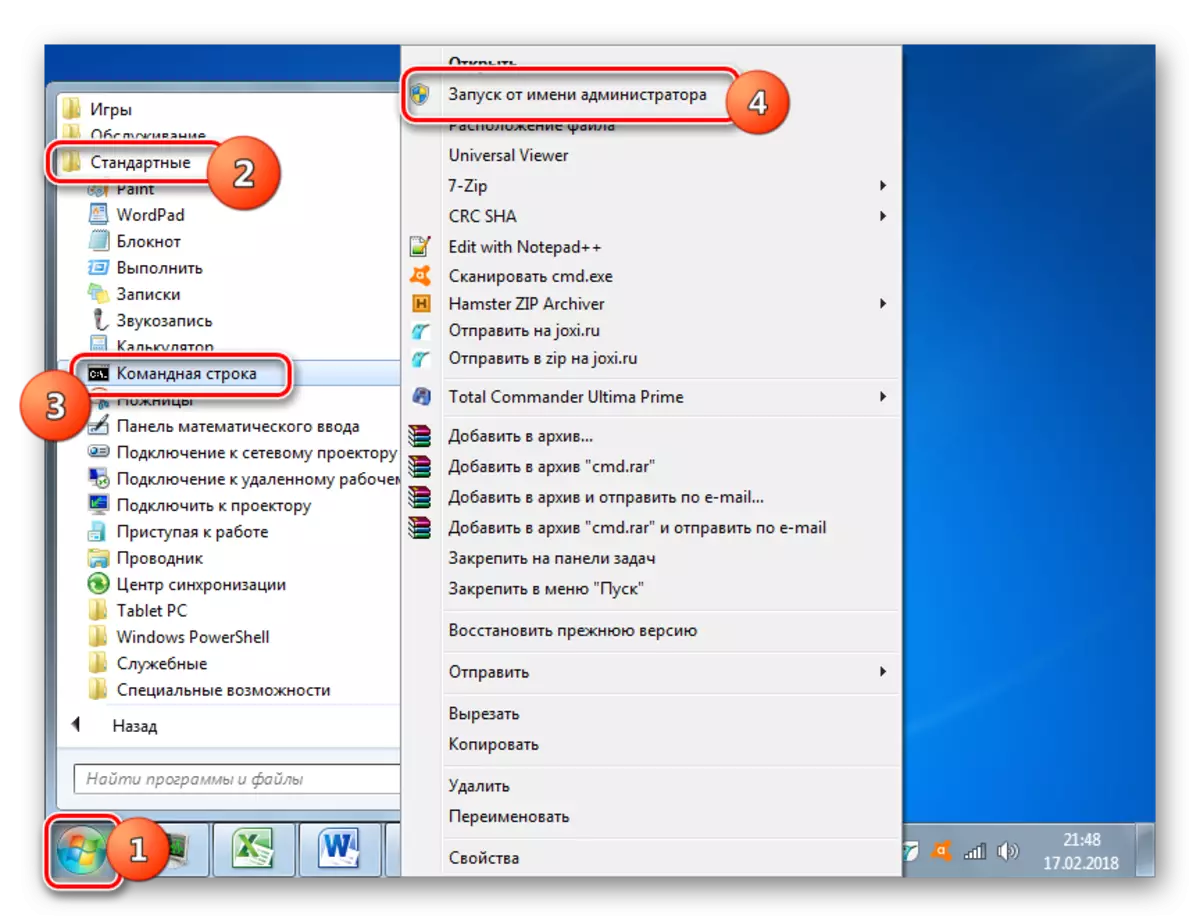
- Using the Start menu, in the All Programs section, move to the "Standard" folder. How to do this, it was indicated when explaining the very first method. Watch out the "Command Line" name and click on it with the right mouse button (PCM). In the displayed list, select the option of starting from the person of the administrator.
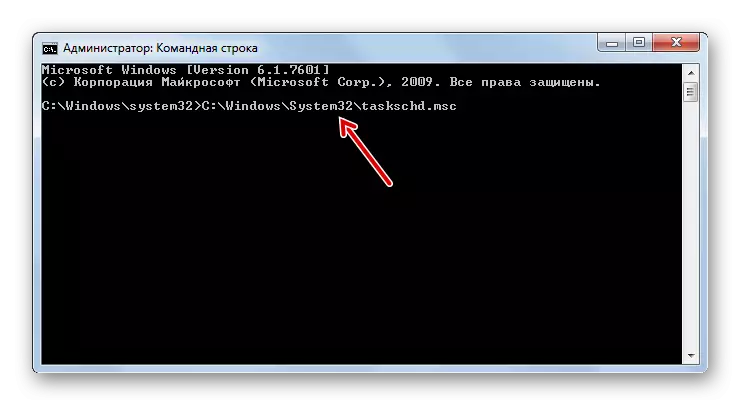
- The "Command Line" opens. Drive it:
C: \ Windows \ System32 \ Taskschd.msc
Click ENTER.
- After that, the "scheduler" will start.
Lesson: Run "Command Line"
Method 6: Direct Start
Finally, the "Task Scheduler" interface can be activated by directly launching its file - Taskschd.msc.
- Open the "Explorer".
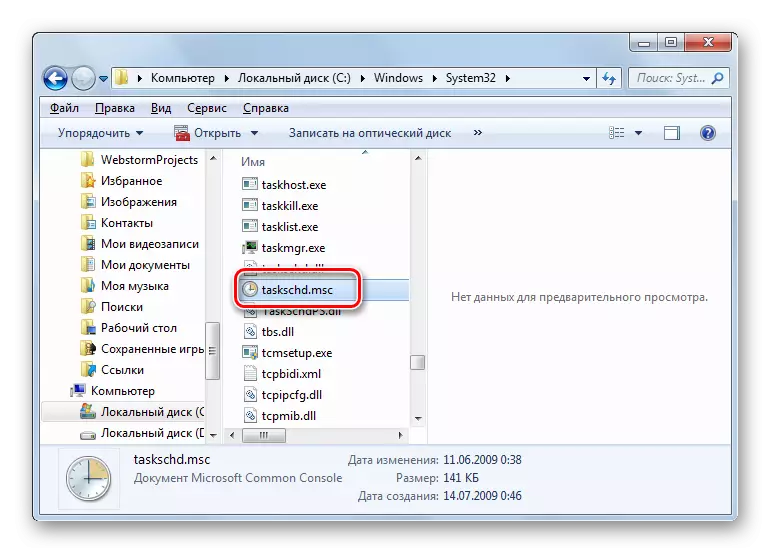
- In its address bar, write:
C: \ Windows \ System32 \
Click the icon in the form of an arrow to the right of the specified string.
- The "System32" folder will be opened. Lay in it the file Taskschd.msc. Since it is a lot of items in this directory, then for a more convenient search, you need to store them in order of alphabet, by clicking the name of the "Name" field. Having found the desired file, click on it twice with the left mouse button (LKM).
- "Planner" will start.

Opportunities "Task Scheduler"
Now, after we figured out how to run the "scheduler", let's find out what he can do, as well as define the user actions algorithm to achieve specific goals.Among the main actions performed by the "Task Scheduler" should be allocated as follows:
- Creating a task;
- Creating a simple task;
- Import;
- Export;
- Inclusion of the magazine;
- Displays all tasks performed;
- Creating a folder;
- Remove the task.
Next about some of these functions, we will talk more objectively.
Creating a simple task
First of all, consider how to form a simple task in Task Scheduler.
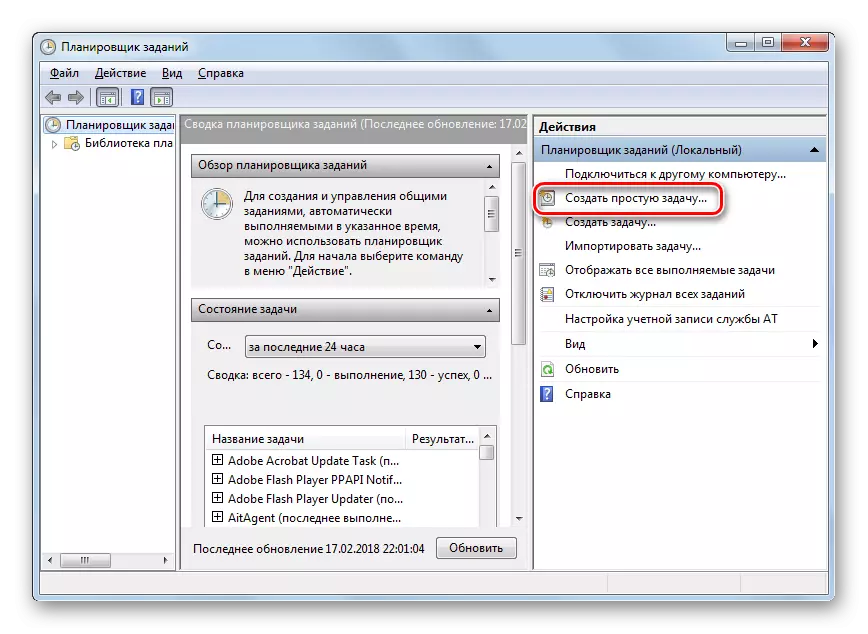
- In the "Task Scheduler" interface on the right side of the shell is the area "Actions". Click on the position "Create a simple task ...".
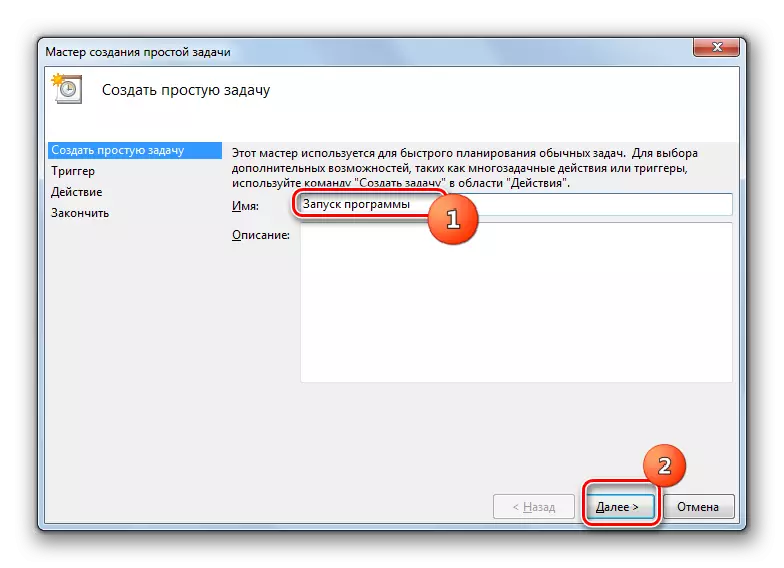
- The shell of creating a simple task is launched. In the "Name" area, be sure to enter the name of the element being created. You can enter any arbitrary name here, but it is desirable to briefly describe the procedure so that you can immediately understand that it represents. The "Description" field is optional to fill, but here, if you wish, you can describe the procedure performed in more detail. After the first field is filled, the "Next" button becomes active. Click on it.
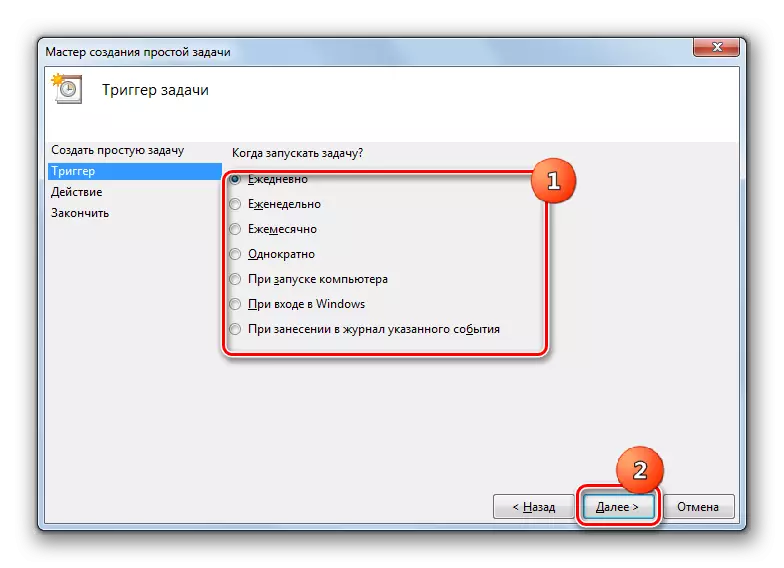
- Now the "Trigger" section opens. In it, by moving the radio channel, you can specify which frequency the activated procedure will be launched:
- When activating windows;
- When starting a PC;
- When logging in the log of the selected event;
- Every month;
- Every day;
- Every week;
- Once.
After you have made a choice, press "Next".
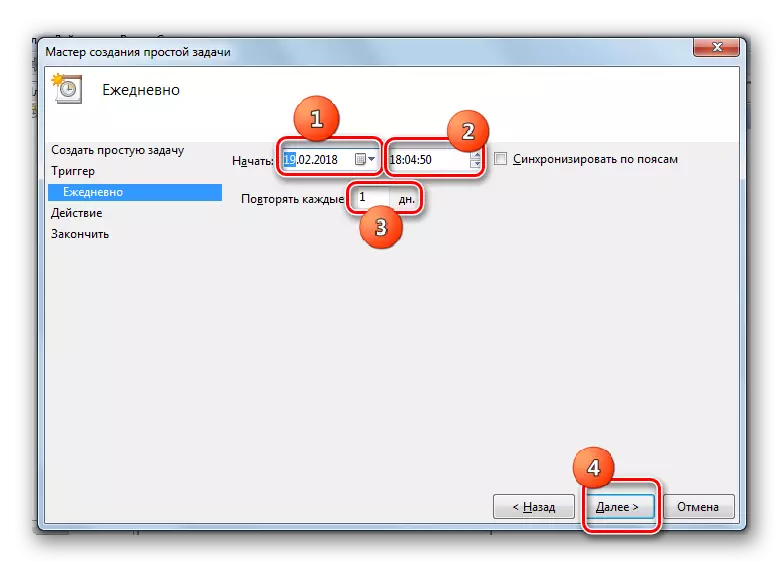
- Then, if you specified not a specific event, after which the procedure is launched, and you have selected one of the four items, you need to specify the date and time of startup, as well as the frequency if not one-time execution has been scheduled. This can be done in the corresponding fields. After the specified data is entered, press "Next".
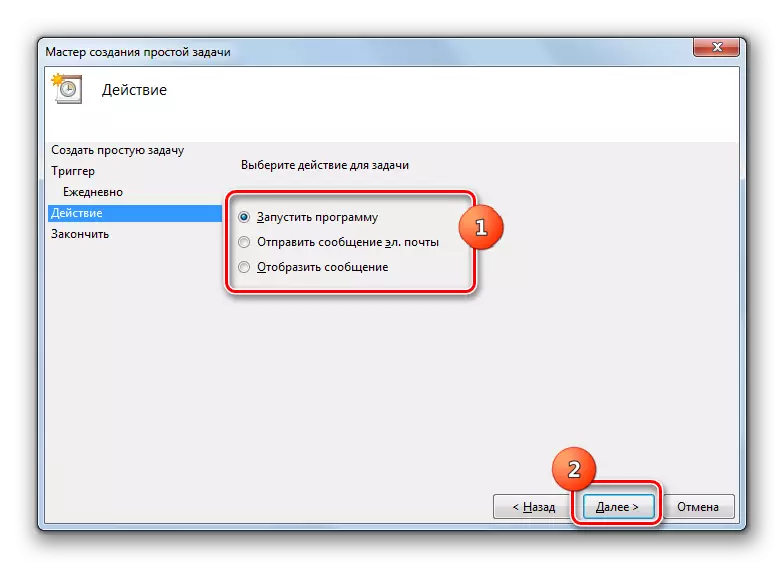
- After that, by moving the radio channels near the relevant items, you need to select one of three actions that will be performed:
- Launch an application;
- Sending email messages;
- Displaying a message.
After selecting the option, click "Next".
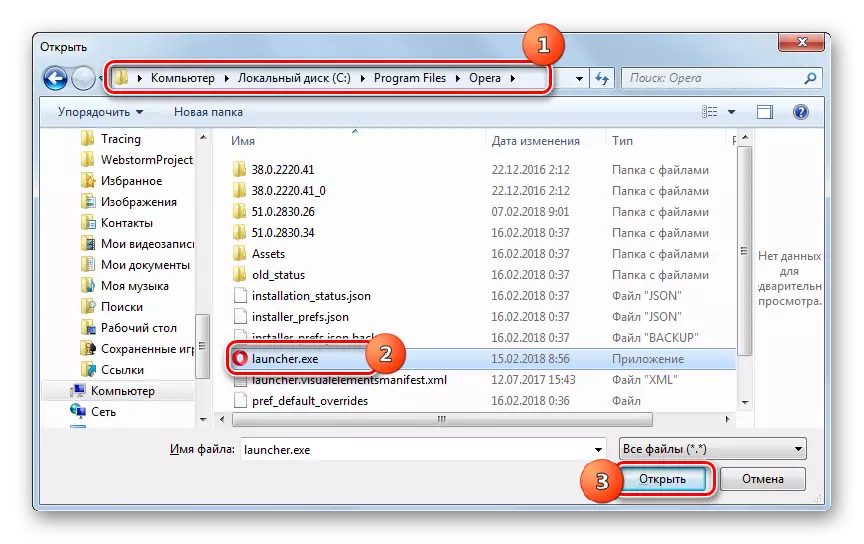
- If the program launch was selected at the previous stage, the subsection will open in which to specify a specific application intended for activation. To do this, click on the "Overview ..." button.
- The standard object selection window opens. It needs to go to the directory where the program is located, a script or another item you want to run. If you are going to activate a third-party application, most likely, it will be posted in one of the Program Files folder directories in the root directory of the C drive. After the object is noted, press "Open".
- After that, automatic returns to the "Task Scheduler" interface. The corresponding field displays the full path to the selected application. Click on the "Next" button.
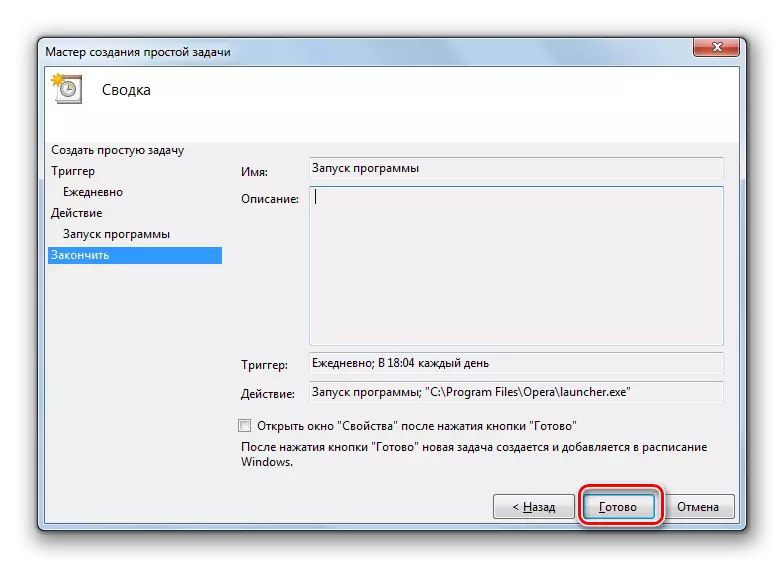
- A window will now open, where summary information will be presented on the formed task on the basis of the data entered by the user at the previous stages. If something does not suit you, click the "Back" button and edit at your discretion.
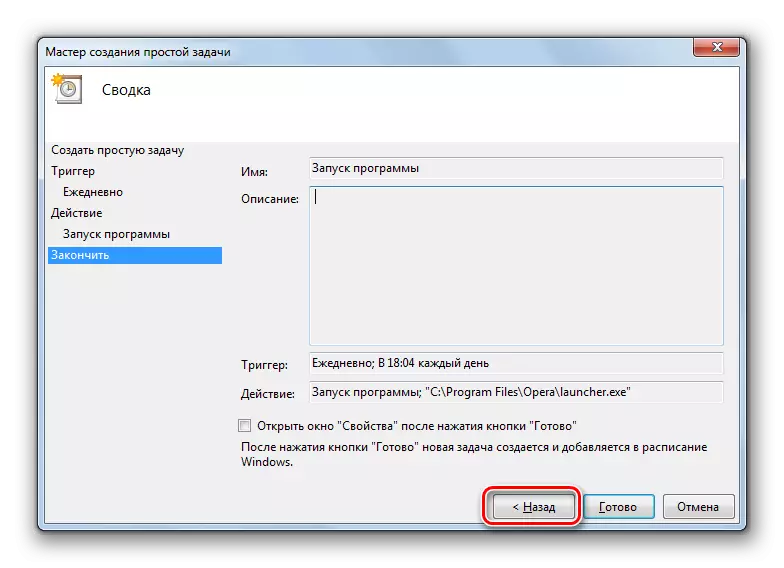
If everything is in order, then to complete the formation of the task, press "ready".
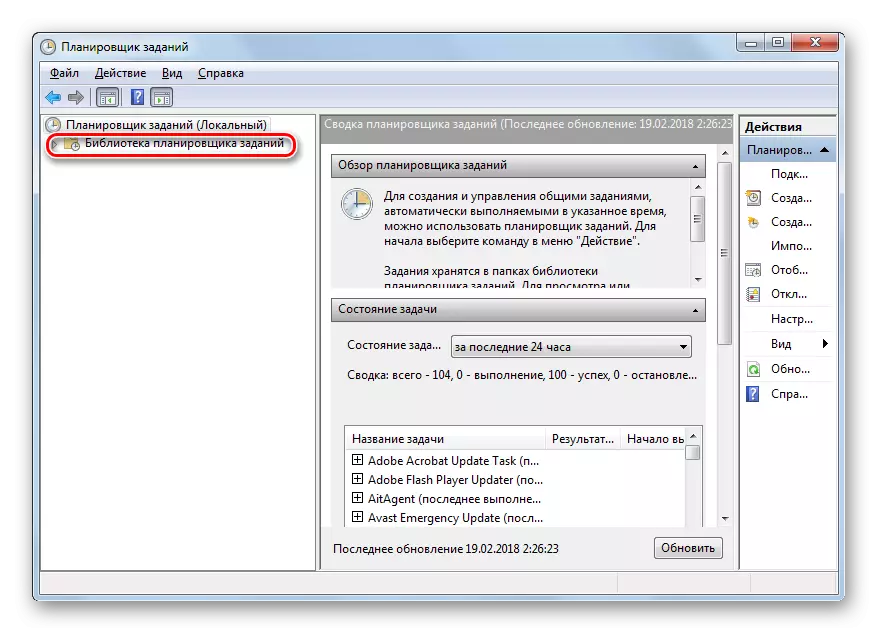
- Now the task is created. It will appear in the "job scheduler library".


Creating a task
Now we'll figure it out how to create an ordinary task. Unlike the simple analogue considered by us above, it will be possible to set more complex conditions.
- In the right area of the "Task Scheduler" interface, press "create a task ...".
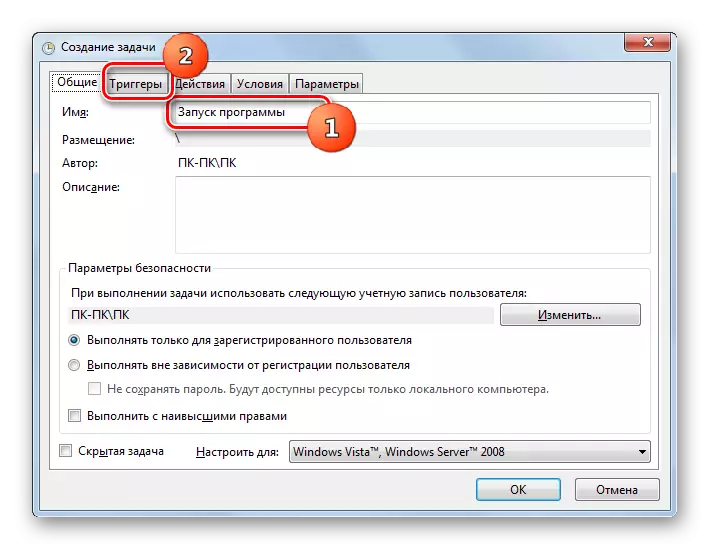
- The "General" section opens. Its purpose is very similar to the function of the partition where we set the name of the procedure when creating a simple task. Here in the "Name" field also need to specify the name. But unlike the previous version, except for this item and the possibility of making data in the "Description" field, you can produce a number of other settings if necessary, namely:
- Assign the highest rights procedure;
- Specify the user's profile, at the entrance to which this operation will be relevant;
- Hide the procedure;
- Specify compatibility settings with other OS.
But the obligatory in this section is only the introduction of a name. After here all the settings are completed, click on the name of the Triger tabs.
- In the "Triggers" section, the start time of the procedure is set, its frequency or situation at which it is activated. To go to the formation of the specified parameters, click "Create ...".
- A trigger creation shell opens. First of all, from the drop-down list you need to select the conditions for activation of the procedure:
- When starting;
- At an event;
- With simple;
- When entering the system;
- On schedule (default), etc.
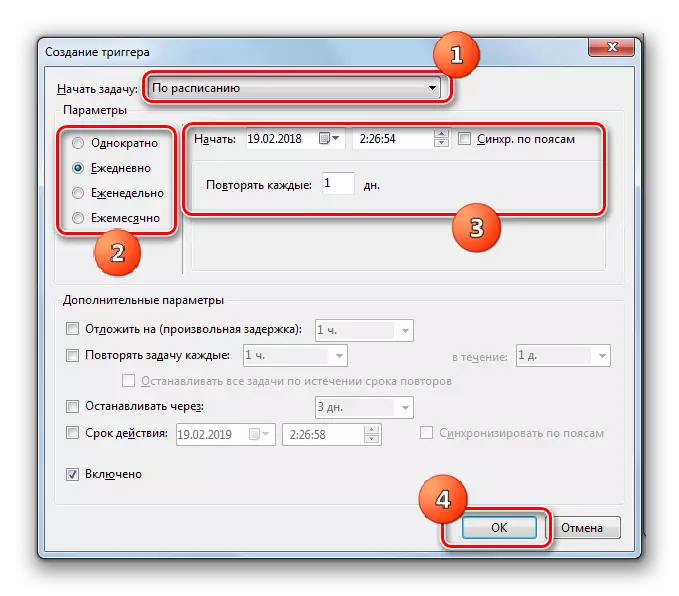
When you select the last of the listed options in the window in the "Parameters" block, it is required by activating the radio channels indicate the frequency:
- Once (default);
- Weekly;
- Daily;
- Monthly.
Next, you need to enter the date, time and period in the corresponding fields.
In addition, in the same window, you can configure a number of additional, but not required parameters:
- Validity;
- Delay;
- Repetition, etc.
After specifying all the necessary settings, click "OK".
- After that, the "Trigger" tab of the task window is returned. The trigger settings will immediately be displayed according to the data entered at the previous stage. Click on the name of the "Actions" tab.
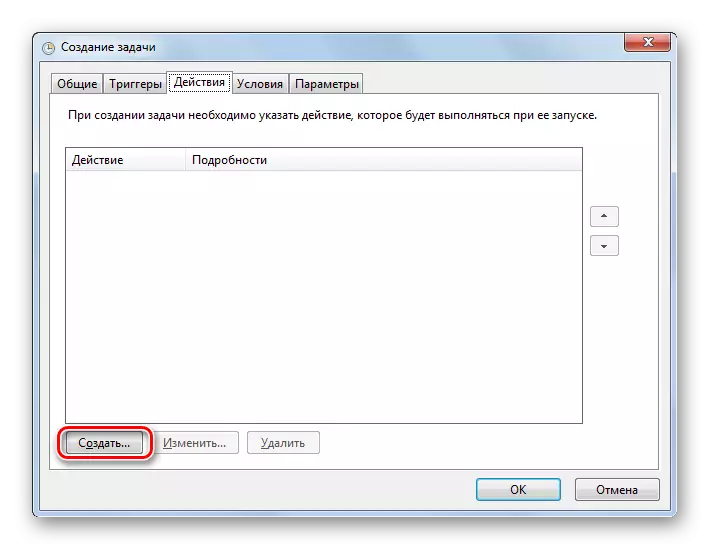
- Going to the above section to specify a specific procedure that will be performed, click on the "Create ..." button.
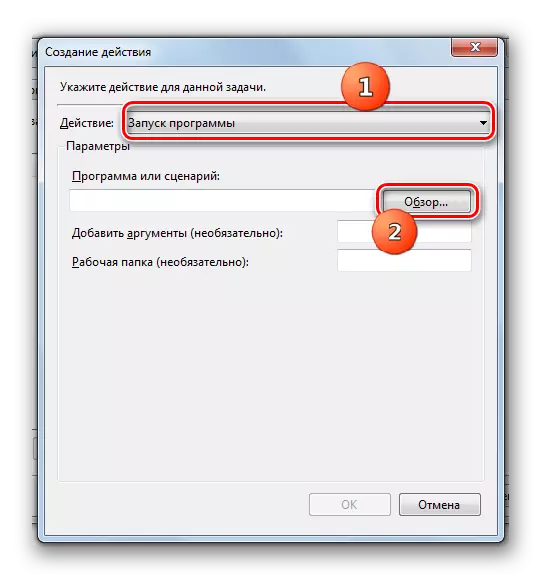
- The action creation window appears. From the drop-down list, select one of three options:
- Sending email;
- Post output;
- Starting the program.
If you select the launch of the application, you must specify the location of its executable file. To do this, click "Review ...".
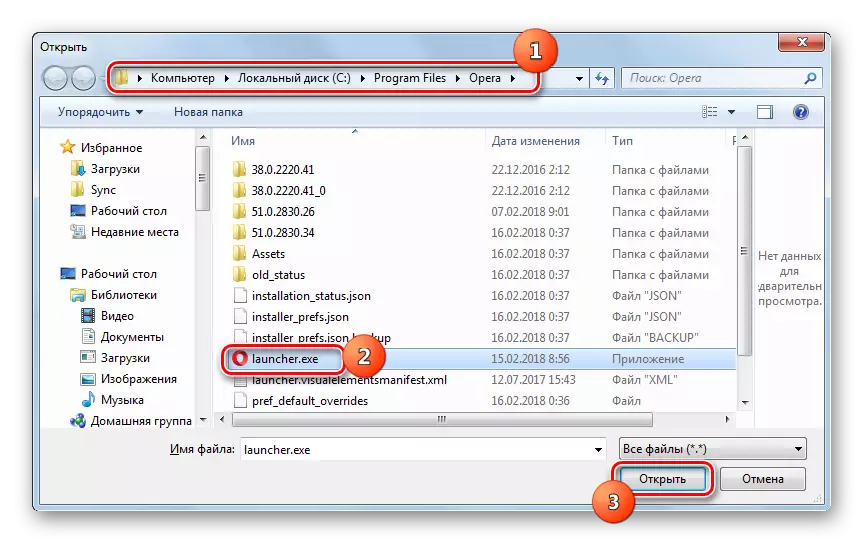
- The Open window is started, which is identically observed by the object by us when creating a simple task. In it, you also need to go to the file location directory, highlight it and click "Open".
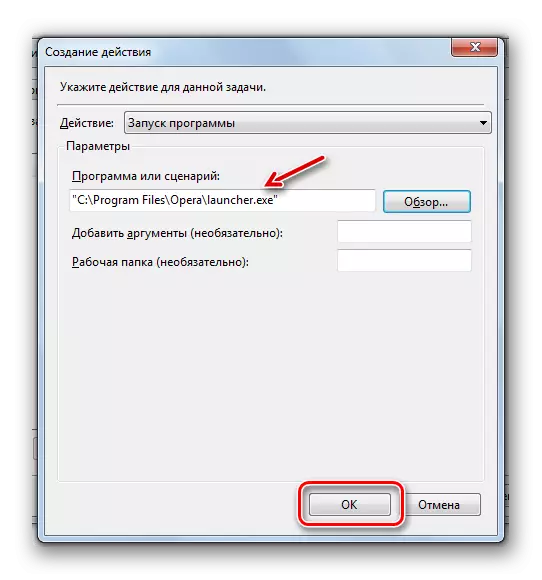
- After that, the path to the selected object will be displayed in the "Program or Script" field in the "Creating Action" window. We can only click on the "OK" button.
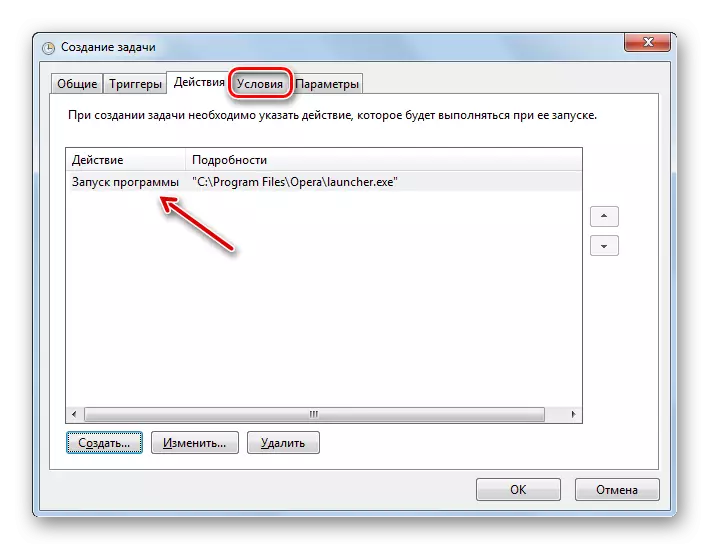
- Now, when the appropriate action is displayed in the main task creation window, go to the "Conditions" tab.
- In the opening section, there is an opportunity to set a number of conditions, namely:
- Specify the power settings;
- Awaken a PC to perform the procedure;
- Specify the network;
- Configure the start of the process at easy, etc.
All these settings are not mandatory and apply only for special cases. Next, you can go to the "Parameters" tab.
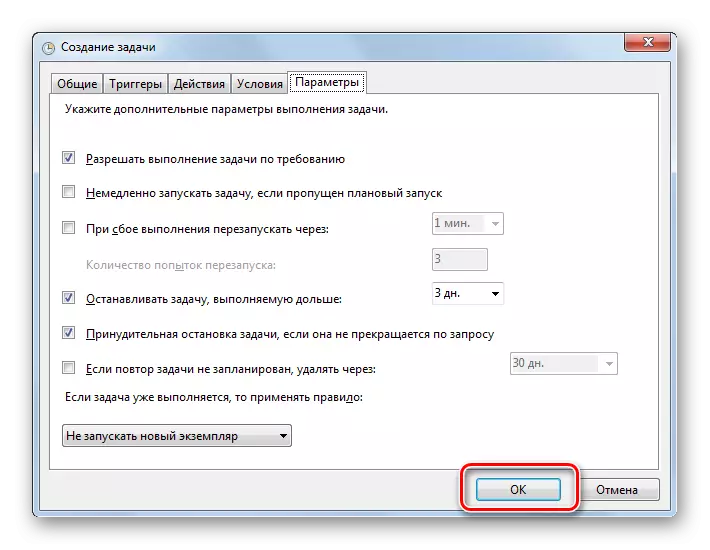
- In the above section, you can change the range of parameters:
- Allow the implementation of the procedure on request;
- Stop the procedure performed more than the specified time;
- Forced to complete the procedure if it fails on request;
- Immediately start the procedure if the planned activation is missing;
- If you fail to restart the procedure;
- Delete the task after a certain time if the repeat is not scheduled.
The first three default parameters are activated, and the remaining three are disabled.
After specifying all the necessary settings to create a new task, click on the "OK" button.
- The task will be created and will appear in the Library list.


Removing the task
If necessary, the created task can be removed from "Task Scheduler". This is especially important if you did not create it yourself, but some third-party program. Often, there are also cases when in the "scheduler" the implementation of the procedure prescribes viral software. In case of detection of this, the task should be removed immediately.
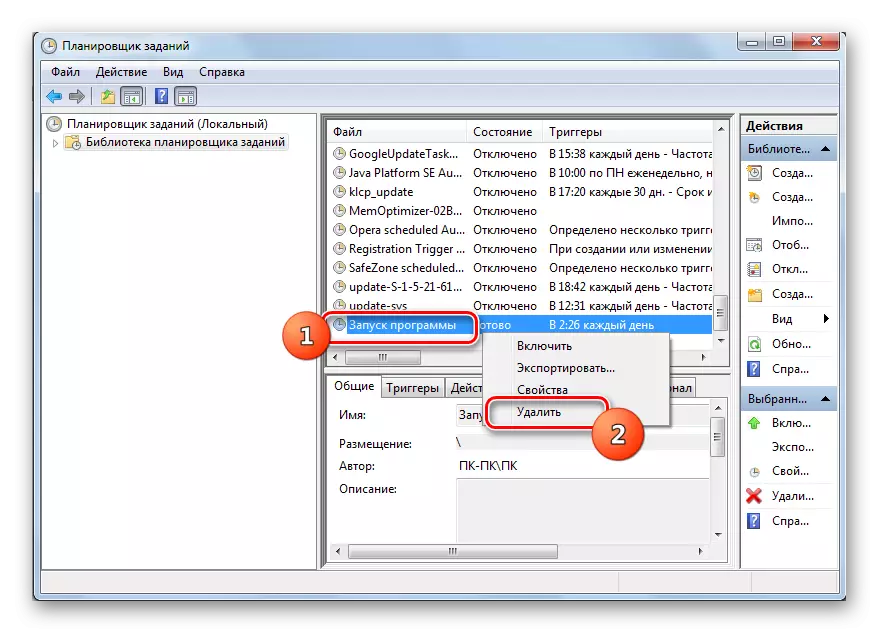
- On the left side of the "Task Scheduler" interface, click on the "job scheduler library".
- At the top of the central area of the window will open the list of scheduled procedures. Find the one of them you want to remove, click on it PCM and select "Delete".
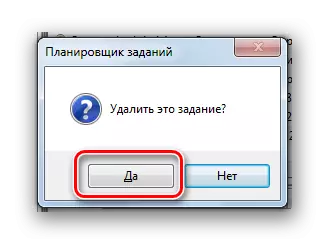
- A dialog box is displayed, where to confirm its solution by pressing "Yes".
- The planned procedure will be removed from the "library".
Disable "job scheduler"
"Task Scheduler" is extremely recommended to disable, as in Windows 7, unlike XP and earlier versions, it serves a number of system processes. Therefore, the deactivation of the "scheduler" can lead to incorrect operation of the system and a number of unpleasant consequences. It is for this reason that the standard shutdown is not provided in the "Service Manager" of the service that is responsible for the operation of this OS component. Nevertheless, in special cases it is temporarily required to deactivate "Task Scheduler". This can be done by manipulation in the system registry.
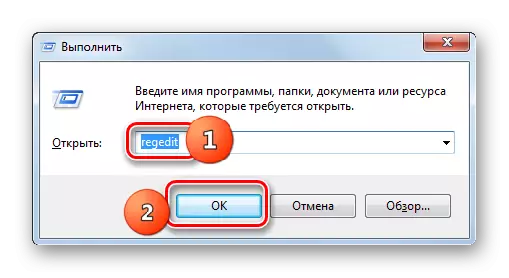
- Click Win + R. In the field displayed object, enter:
regedit.
Click "OK".
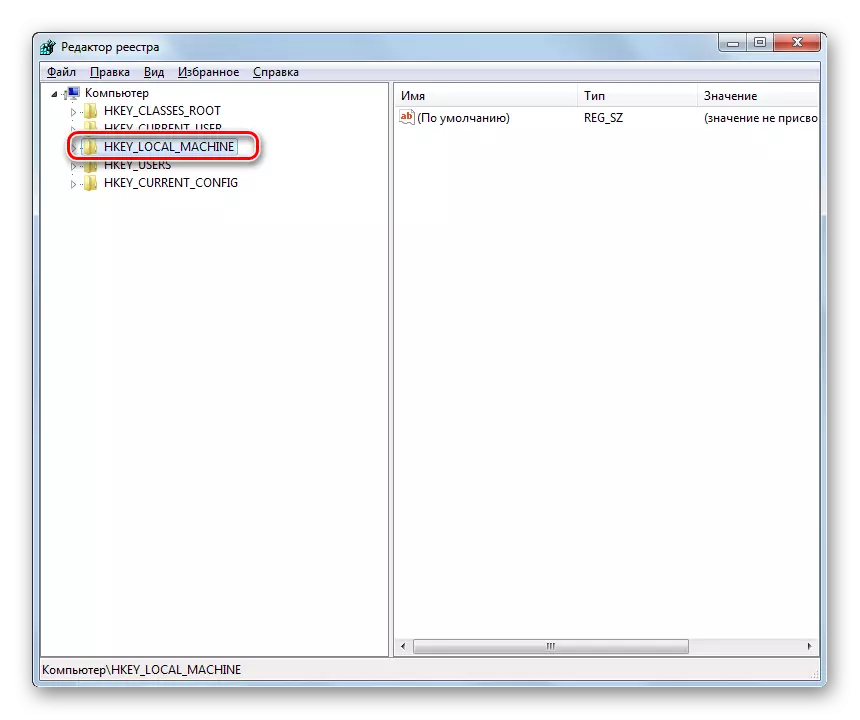
- The registry editor is activated. In the left area of its interface, click the name of the "HKEY_LOCAL_MACHINE" section.
- Go to the "SYSTEM" folder.
- Open the CurrentControlSet directory.
- Next click on the name of the "Services" section.
- Finally, in the Long List of Directors, find the "Schedule" folder and highlight it.
- Now we move on the right side of the editor's interface. Here you need to find the "Start" parameter. Click on it twice LKM.
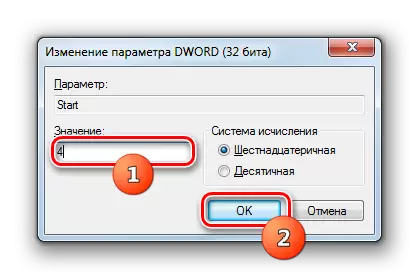
- The "Start" parameter editing is opens. In the "Value" field instead of the number "2" put "4". And press "OK".
- After that, there will be a refund to the main window "Editor". The "Start" parameter value will be changed. Close the "editor" by clicking on the standard closing button.
- Now you need to restart the PC. Click "Start". Then click on the triangular figure to the right of the "Completion" object. In the displayed list, choose "Reboot".
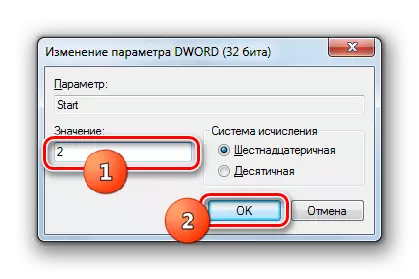
- A restart of PC will be performed. When it is re-enabling the "Task Scheduler" will be deactivated. But, as mentioned above, it costs for a long time without "Task Scheduler" is not recommended. Therefore, after the problems required it, the problems will be eliminated, go to the "Schedule" section in the Registry Editor window and open the "Start" parameter change. In the "Value" field, change the number "4" to "2" and press OK.
- After rebooting the Task Scheduler PC will again be activated.


Using the "job scheduler", the user can schedule the implementation of almost any one-time or periodic procedure performed on the PC. But this tool is also used for the internal need of the system. Therefore, it is not recommended to disable it. Although at the highest need there is a way to do this, and this is a change in the system registry.