

At some point, the user may encounter a problem when the computer reboots in itself. It happens most often while working in the operating system, but there are cases when a computer with Windows 7 reboots in itself. The article will consider the causes of such a malfunction and proposed ways to solve it.
Causes and ways to solve
In fact, the reasons may be an innumerable amount, ranging from the impact of malicious software and ending with a breakdown of a computer component. Below we will try in detail to consider each.Cause 1: The impact of viral
Perhaps most often the computer is spontaneously rebooted due to the effects of the virus. You can grab it on the Internet, without noticing it. That is why many specialists are advised to install an antivirus program on the PC, which will track and eliminate the threat.
Read more: Antiviruses for Windows
But if it is already too late, then to solve the problem you need to log in in "Safe Mode". To do this, during the launch of the computer, it is enough to press the F8 key and select the appropriate item in the start configuration menu.

Read more: How to enter the "Safe Mode" on the computer
Note: If your network adapter requires the installation of the proprietary driver, the Internet connection in "Safe Mode" will not be installed. To fix this, in the menu, select "Safe Mode with Network Driver Downloads".

Once on Windows, you can proceed directly to the attempts to eliminate the problem.
Method 1: Scanning System Antivirus
After you get on the desktop, you need to enter the antivirus and make a complete scanning of the system for the presence of malicious software. When it is discovered, select the "Delete" option, not quarantine.
Note: Before starting scanning, check the antivirus updates, and install them if any.
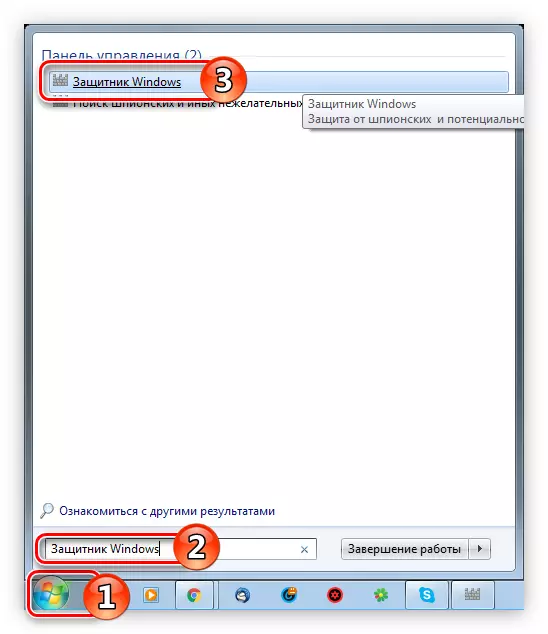
Now an example of a system scanning using the "Windows Defender" will be given, but the instruction has provided common to all antivirus programs, only the graphical interface may differ and the location of the interaction buttons on it.
- Run the Windows Defender. The easiest way to do this through the system search. To do this, open the Start menu and in the appropriate field enter the name, then press the results in the same time.
- Click on the drop-down list "Check", located at the top of the window, and select "Full Check".
- Wait until the end of the computer scanning for malicious software.
- Click the "Clear System" button if threats were detected.


The scanning process is quite long, its duration directly depends on the volume of the hard disk and the occupied space. According to the results of the check, remove all the "pests" if they were detected.
Read more: How to make a complete scanning system for viruses
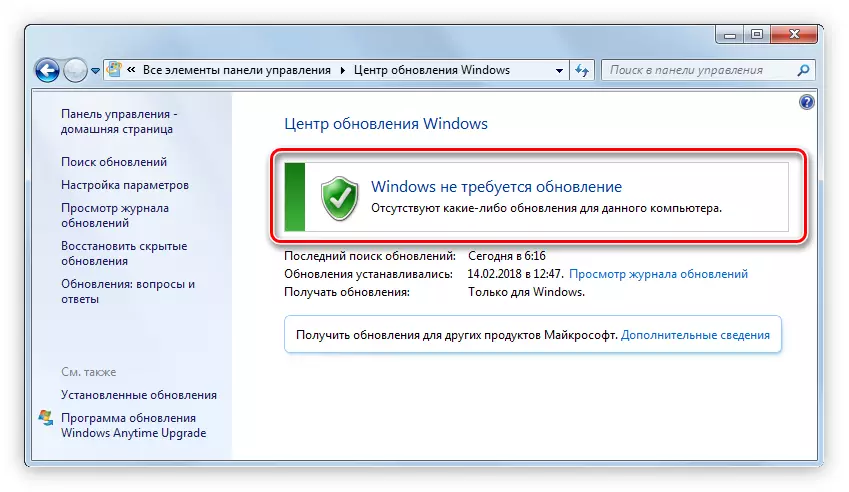
Method 2: System Update
If you have not updated the system for a long time, then check the availability of updates for it, perhaps the attackers used the security hole. Make it very simple:
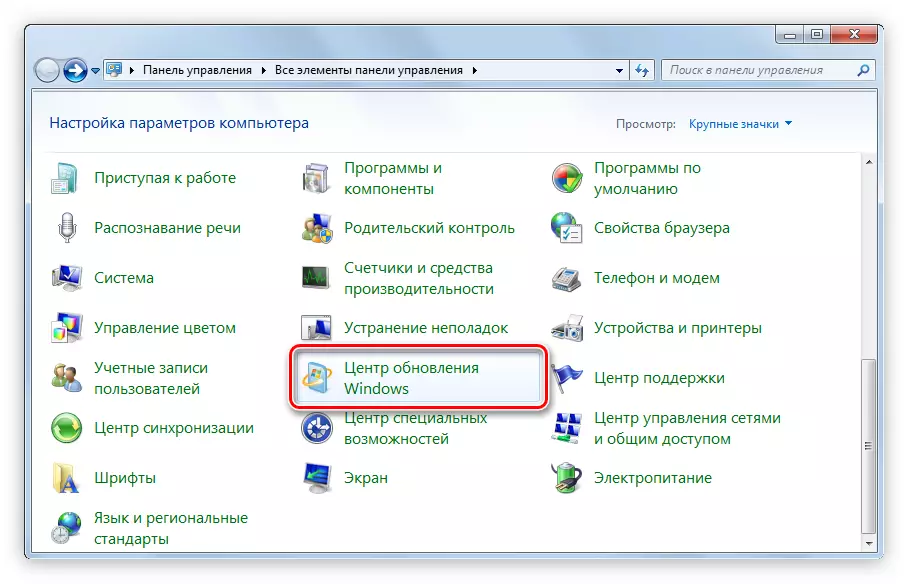
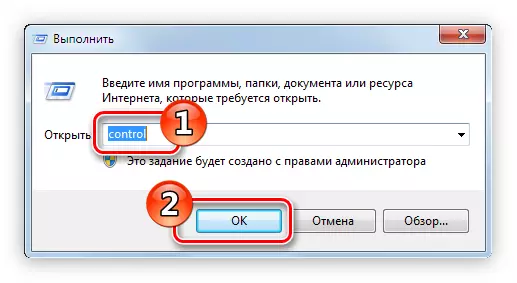
- Open the Control Panel. You can do this by executing the Control command in the "Run" window, which opens after pressing the Win + R keys.
- Find in the Windows Update List and click on the icon.
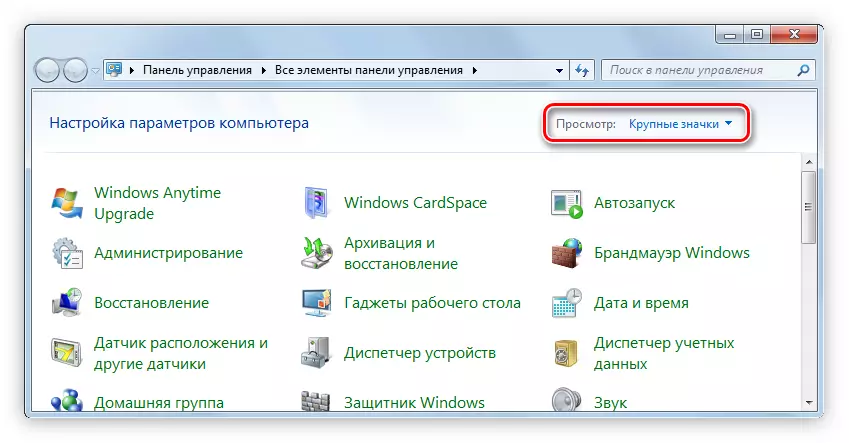
Note: If your list is displayed not as shown in the image above, change the "View" parameter, which is in the upper right corner of the program, to the value "Large icons".
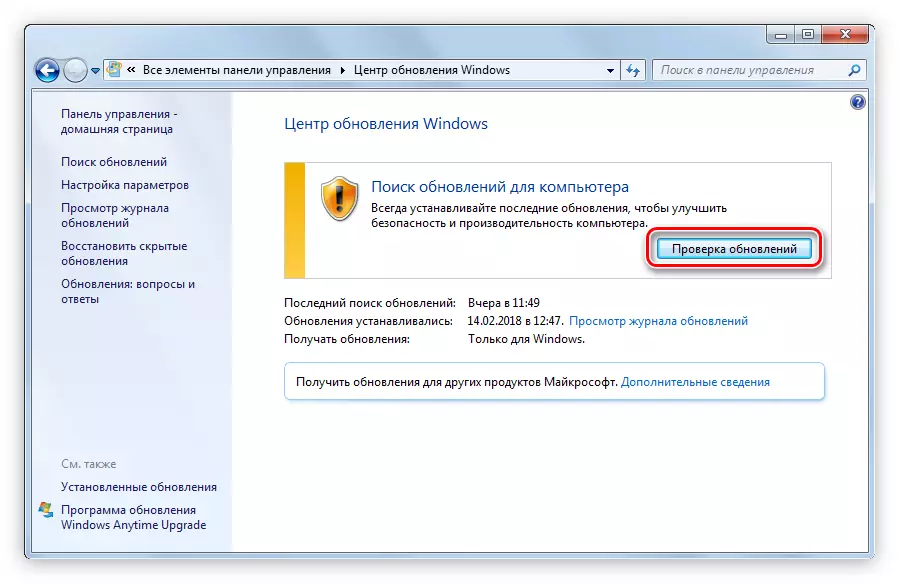
- Run the update check by clicking on the button of the same name.
- Wait for the process of searching for Windows updates.
- Click "Set Updates" if they were found, otherwise the system will report that the update is not required.


Read more: How to update Windows 10, Windows 8 and Windows XP
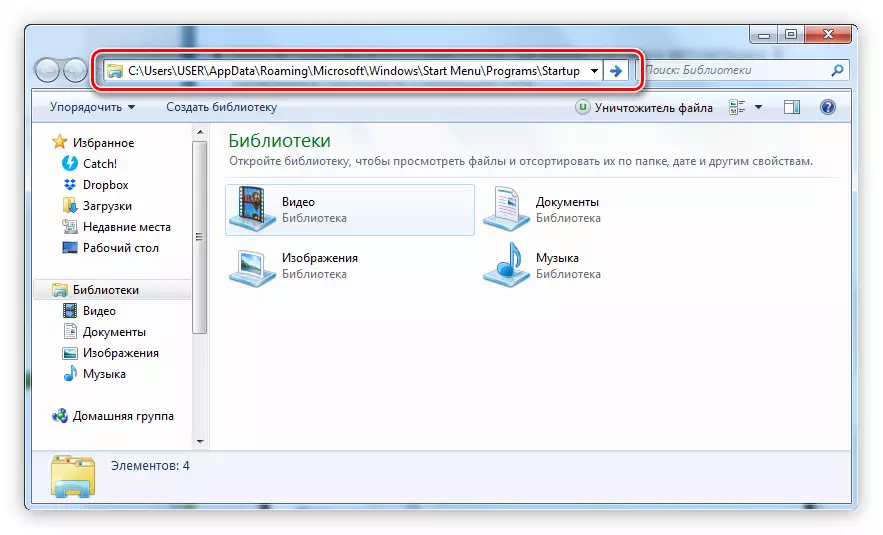
Method 3: Checking programs in autoload
It is also recommended to check the applications that are in the "autoload". It is possible that there is an unknown program that can be a virus. It is activated with the usual startup of the OS and entails the reboot of the computer. When you find it, remove it from "autoload" and delete it from the computer.
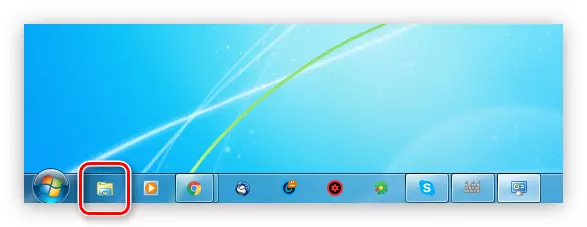
- Open the "Explorer" by clicking on the appropriate icon on the taskbar.
- Insert the next path in the address bar and press ENTER:
C: \ Users \ Username \ APPDATA \ Roaming \ Microsoft \ Windows \ Start Menu \ Programs \ Startup
Important: Instead of "UserName", you must enter the username that you specified when installing the system.
- Remove the shortcuts of the programs that you seem suspicious.
Note: If you accidentally delete the label of another program, it will not have serious consequences, you can always add it back simple copying.
Read more: how to enter Windows 10, Windows 8, Windows 7 and Windows XP
Method 4: System Rollback
If previous ways do not help correct the situation, then try to roll back the system by choosing a recovery point created before the problem appear. In each version of the OS, this operation is made differently, so familiarize yourself with the appropriate article on our website. But you can highlight the key points of this operation:
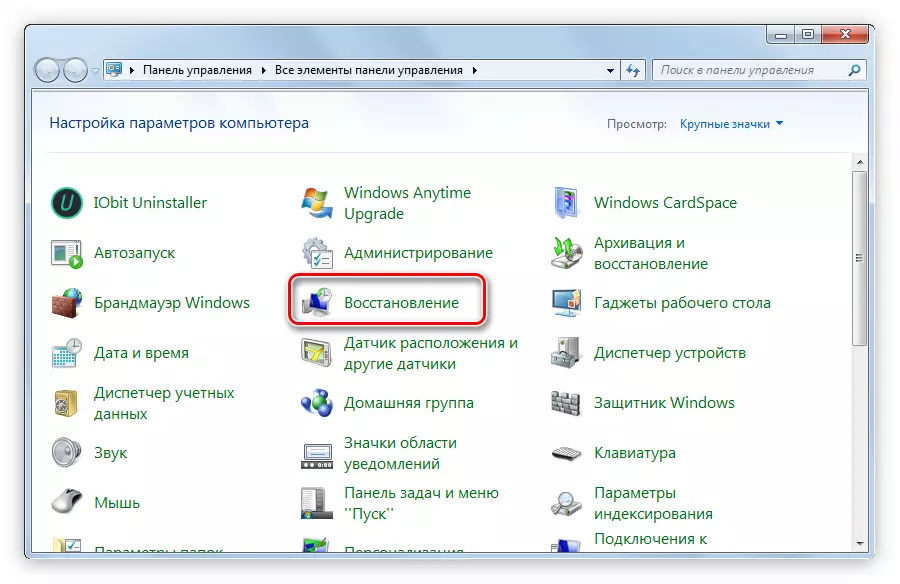
- Open the Control Panel. Recall that you can do this by running the Control command in the "Run" window.
- In the window that appears, find the "Restore" icon and click on it with the left mouse button.
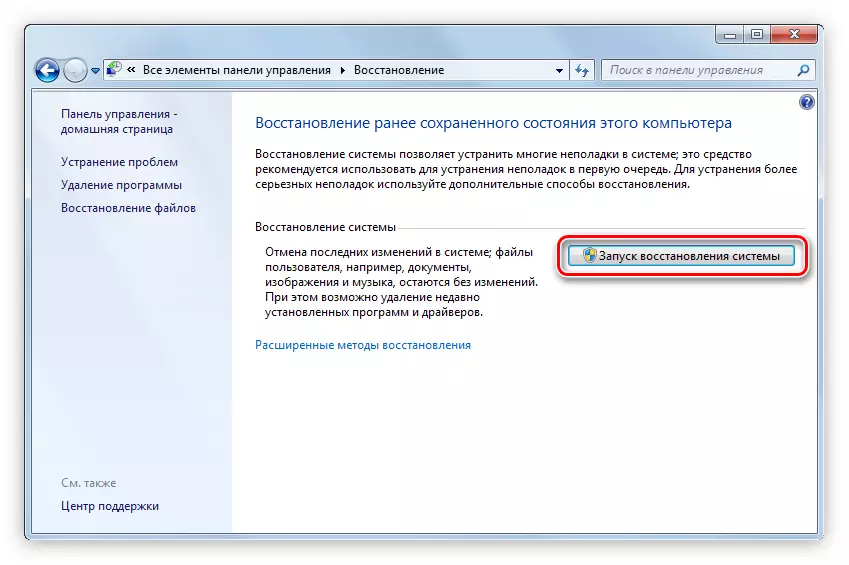
- Click the "Start System Recovery" button.
- In the window that appears, select the recovery point, which was created before the problem of the problem you disassemble, and click the Next button.

Next, you remain follow the instructions of the "Wizard of Recovery", and at the end of all actions you roll back the system to a normal state.
Read more: How to restore the system in Windows 10, Windows 8 and Windows XP
If you were able to roll back to the workable version of the operating system and entered into it, be sure to run the full scanning of antivirus software.
Method 5: Restore System from Disk
If you have not created the recovery points, it will not be possible to use the previous way, but you can apply the recovery tool available on the disk with the operating system distribution.
Important: Distribution on the disk should be the same version and assembly as well as your operating system
Read more: How to restore the system using boot disk Windows
Perhaps these are all the ways that can help eliminate the problem of spontaneous reboot of the computer due to the virus. If none of them helped, the reason lies in something else.
Reason 2: incompatible
The system may not work correctly due to incompatible software. Remember, possibly before the appearance of the problem you installed some new driver or other software package. You can correct the situation that has arisen only logging into the system, so boot again in "Safe Mode."
Method 1: Reinstall drivers
By running the operating system, open the Device Manager and check all the drivers. If you find outdated software, refresh it to the latest version. Also try to reinstall part of the drivers. Errors in drivers on the video card and the central processor can be caused by the PC restarting, so update them first. This can be done as follows:
- Open the Device Manager window through the Utility "Run". To do this, start it first by pressing Win + R, then enter the corresponding DevmGMT.msc field and click OK.
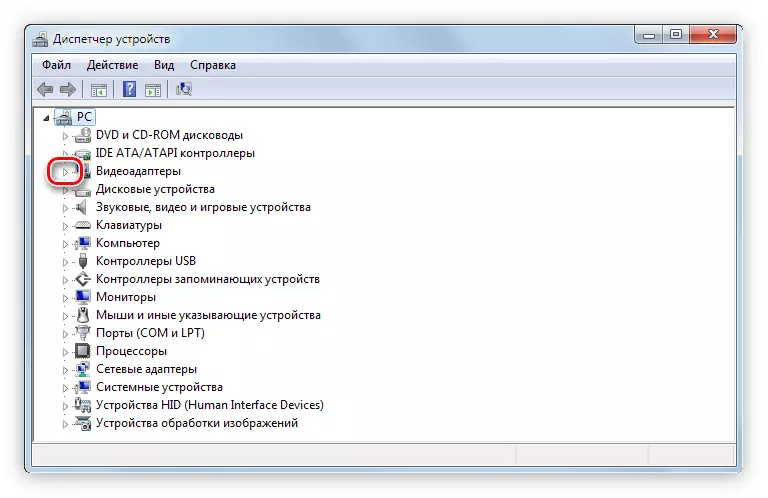
- In the window that opens, expand the list of drivers of the device you are interested in by clicking on the arrow next to its name.
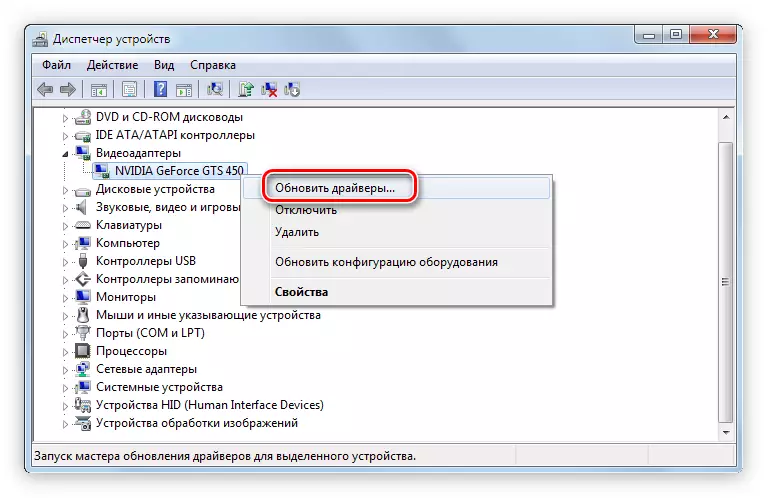
- Right-click on the driver name and select "Update Drivers".
- In the window that appears, click on the "Automatic Search for Update Drivers".
- Wait until the OS will automatically search for updates for the driver.
- Click "Set" if it was found, otherwise a message will appear that the latest version is installed.


This is just one way to update drivers. If you are faced with difficulties in performing actions from the instructions, we have an article on our site in which an alternative is offered.
Read more:
How to update the driver with standard Windows tools
How to update the driver using the DriverPack Solution program
Method 2: Removing incompatible
The computer can also reboot due to the impact of software that is incompatible with the operating system. In this case, it should be deleted. There are many ways, but as an example, we will use the system utility "Programs and Components", a link to the article in which all methods are presented.
- Open the Control Panel. How to do it, was described above.
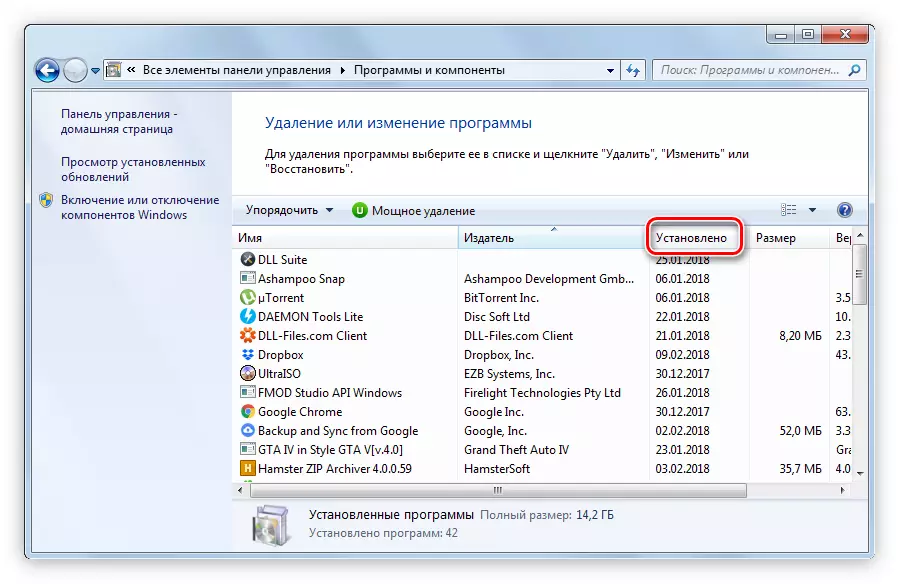
- Find the "Programs and Components" icon in the list and click on it.
- Find applications that have been installed before the emergence of the problem. The easiest way to do this, streamlining the list by the date of installation of software. To do this, click on the "Installed" item, the location of which is indicated in the image below.
- Alternately delete each application. This can be done in two ways: by clicking the "Delete" button (in some cases, "Delete / Edit") or selecting the same option from context.


If the list of remote programs was the one that was the cause of the problem, then after rebooting the system, the computer will stop independently rebooted.
Read more: Ways to remove programs in Windows 10, Windows 8 and Windows 7
Cause 3: BIOS error
It may happen that the operating system is generally refused to start. The above methods in this case will not be able to fulfill. But there is a chance that the problem lies in the BIOS, and it will be possible to eliminate it. You need to reset the BIOS settings to the factory. This will not affect the performance of the computer, but will allow us to find out if this is the cause of the problems.
- Enter the BIOS. To do this, when the computer starts, you must press a special button. Unfortunately, different computers are different and connected directly with the manufacturer. The table contains the most popular brands and buttons that are used on their BIOS input devices.
- Laying all the points "Load Setup Defaults". You can most often find it in the "EXIT" tab, but depending on the version of the BIOS location may vary.
- Press ENTER and answer the question affirmatively. Sometimes it is enough to press Enter for this second time, and sometimes they will be asked to fit the letter "Y" and press ENTER.
- Exit BIOS. To do this, select "SAVE & EXIT SETUP" or just press the F10 key.
| Manufacturer | Button for input |
|---|---|
| HP. | F1, F2, F10 |
| ASUS | F2, Delete. |
| Lenovo. | F2, F12, Delete |
| Acer. | F1, F2, Delete, Ctrl + Alt + ESC |
| Samsung | F1, F2, F8, F12, Delete |

Read more: All methods for resetting BIOS settings to factory
If the reason was in the BIOS error, then the computer will stop rebooted itself. If this happens again, then the problem is in the computer hardware.
Cause 4: Hardware component
If all of the above methods did not help solve the problem, it remains to chant on computer components. They can either be out of order, or overheat that it becomes the cause of the computer reboot. Talk about it now more detailed.
Method 1: Check hard disk
It is the hard disk that most often becomes the cause of PC reloads, and to be more accurate, then the malfunction in its operation. It is quite possible that there were broken sectors on it, in this case, part of the data that is in them can no longer be read by a computer. And if they appeared in the boot section, the system simply cannot start, constantly reloading the computer in attempts to do. Fortunately, it does not mean at all that it is necessary to think about acquiring a new drive, but does not allow the full guarantee of correcting the error by the staff, but you can still try.
You need to check the hard disk for the presence of broken sectors and restore them in case of detection. You can do this with the help of the CHKDSK console utility, but the problem is to start it. Since we can not fit into the system, there are only two available options: run the "command line" from the boot flash drive of the same Windows distribution or insert a hard drive into another computer and check it from it. In the second case, everything is simple, but first let's look.
- Create a boot disk with Windows of the same version that you have installed.
Read more: How to create a boot disk with Windows
- Run the PC from the boot disk by changing the BIOS settings.
Read more: How to start a computer from a flash drive
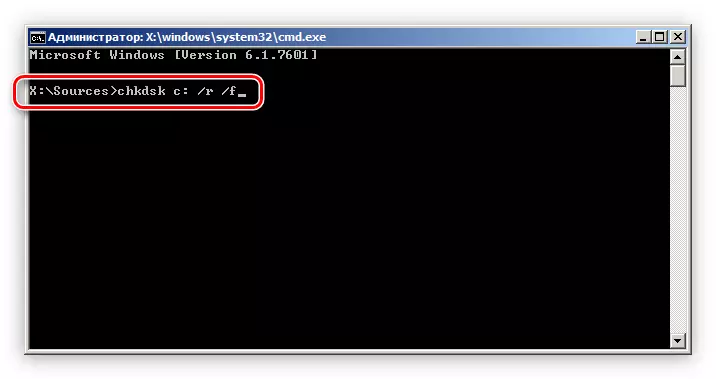
- In the Windows Installer that opens, open the "Command Line" by pressing the SHIFT + F10 keys.
- Run the following command:
CHKDSK C: / R / F
- Wait for the process of checking and recovering, after which try to restart the computer by driving a pre-boot drive.
As mentioned earlier, you can produce the same operation from another computer by connecting your hard drive to it. But in this case, there are several more ways that are described in the appropriate article on our website.
Read more: Methods for eliminating errors and battered storage sectors
Method 2: Verification of RAM
RAM is also an important component of the computer, without which it will not be launched. Unfortunately, if the reason lies in it, then the staff will not be able to eliminate the malfunction, they will have to buy a new RAM bar. But before doing this, it is worth checking the performance of the component.
Since we cannot run the operating system, we will have to get the RAM with the system unit and insert to another computer. After you start it and get to your desktop, you need to use Windows system tools to check RAM for errors. This can be done as follows:
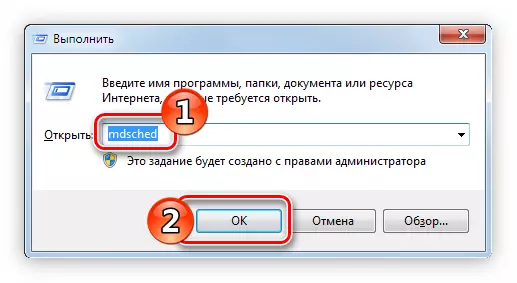
- Open the "Run" window and enter the MDSCHED command to the appropriate field, then click OK.
- In the window that appears, select "Run Restart and Check".
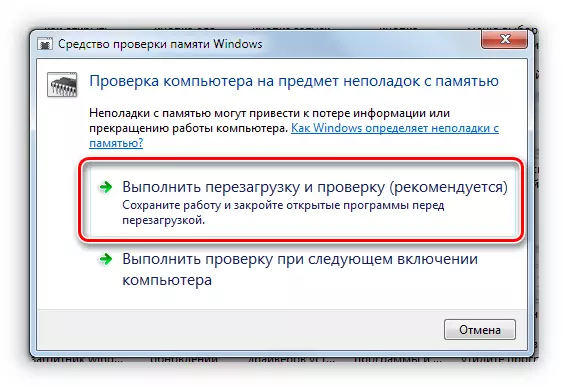
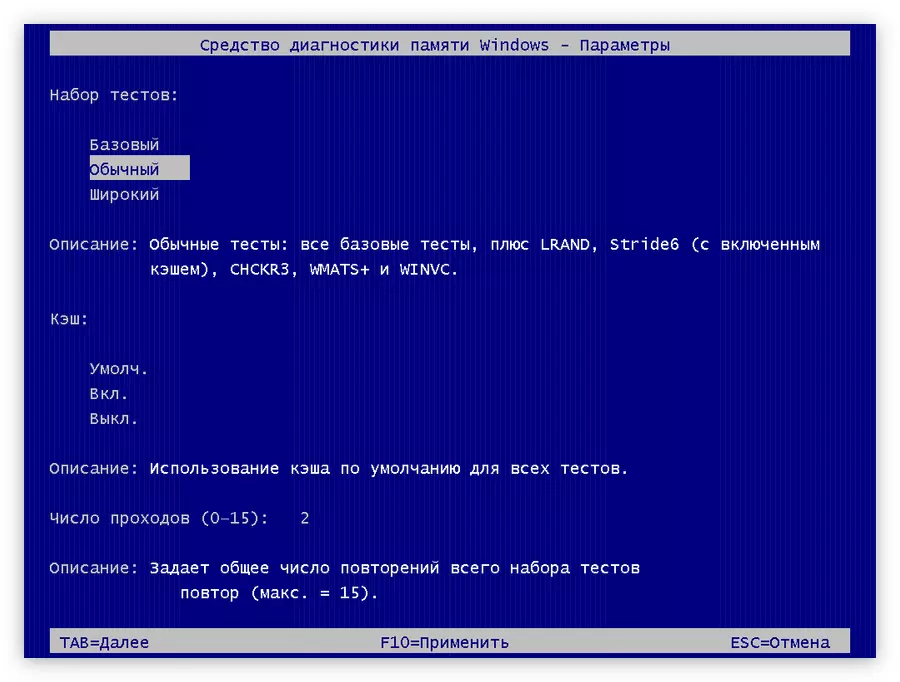
Note: After you choose this item, the computer will be rebooted.
- After rebooting, a window appears on the screen in which you want to press the F1 key to go to the check configuration menu. Specify all the necessary parameters (you can leave by default) and press F10.
Once the check is over, the computer will restart again and enter the Windows desktop where the result will be waiting for you. If there are errors, the system will notify you about it. Then it will be necessary to buy new planks RAM so that the computer stopped independently rebooted.
Read more: How to select RAM for Computer
If, when performing the actions described above, you did not work out, that is, more other ways to check RAM for errors. You can familiarize yourself with them in the article on the site.
Read more: How to check the rapid memory for performance
Method 3: Video Card Check
The video card is another of the most important components of the computer, and it can also cause cyclic reboots. Most often in the operating system, you can, but after a short work, the computer reboots. The reason for this can be both breakdown and the use of "poor-quality" drivers. In the second case, it will be necessary to enter the "Safe Mode" (how to do it, it was narrated earlier) and update or reinstall the video card driver. If it did not help, then the problem lies directly in the board itself. Independently correcting the situation is categorically not recommended, as you can only make it worse, just take it into a service center and trust the work by a specialist. But you can first check for performance.
- Enter Windows Safe Mode.
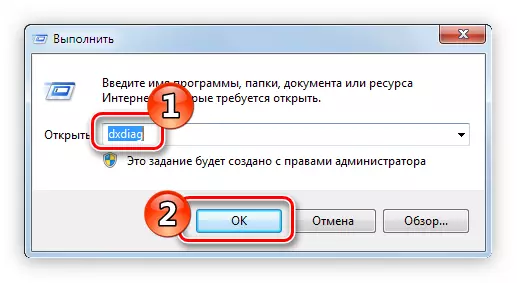
- Open the "Run" window by using the Win + R key combination.
- Enter the command below and click OK.
dxdiag
- In the "Diagnostics Tool" that appears, go to the "Screen" tab.
- Check out the information in the "Notes" field, it is there that the video card errors will be displayed.


If errors still have, carry the video card to the service center. By the way, there are some more ways to check, which are given in the relevant article on our website.
Read more: Verification of the video card
Other causes of malfunction
It happens that the system is rebooted due to other reasons, for example, due to the accumulated dust in the system unit or the laptop case, or due to the drying thermal paste.
Method 1: Cleaning the computer from dust
Over time, dust accumulates in the computer, it can cause numerous problems, ranging from spontaneous reboot of the device and ending with a breakdown of one of the components. To this not happen, it is necessary to periodically clean it. It is important to carefully clean from dust every component of the computer individually, also an important role is played by the correct sequence of actions. All this and much more you can learn from the article on our website.
Read more: How to clean your computer or laptop from dust
Method 2: Replacement Thermal Past
Thermalcaste is a vital component for the processor and video card. When buying a computer, it is already applied to chips, but with time drying occurs. Depending on the brand, this process lasts differently, on average it is necessary for 5 years so that the paste is completely dried (and it is necessary to change it at least once a year). Therefore, if after purchase, more than five years have passed, the reason for the constant restart of the computer can be exactly this factor.
First you need to choose a thermal path. It is worth considering a number of characteristics: toxicity, thermal conductivity, viscosity and much more. Determined with the choice you will help you on our website, in which all the nuances are described in detail.
Read more: How to choose a thermal power for computer or laptop
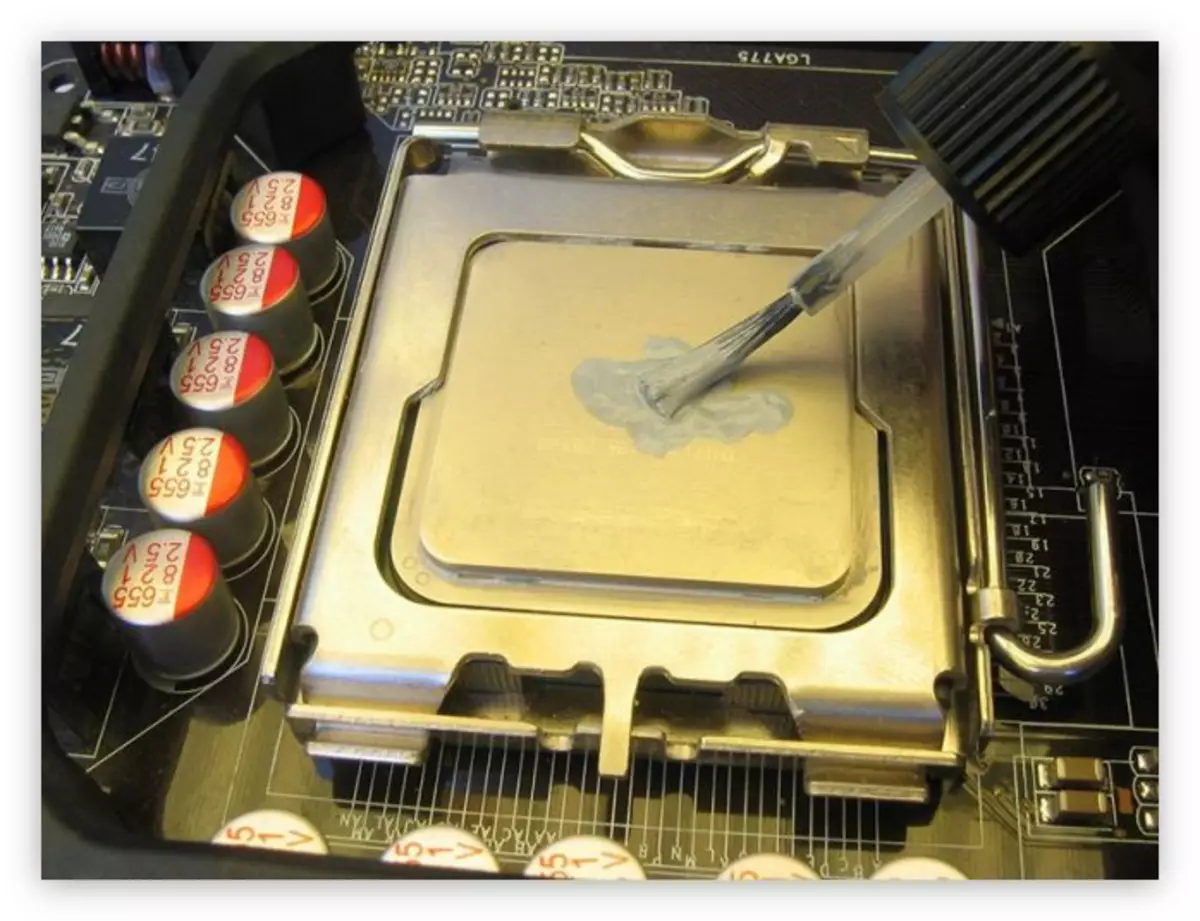
After the thermal paste is purchased, it will be possible to move directly to apply it to computer components. As it was already said, you need to smear the video card and processor. This process is quite time consuming and requires experience, otherwise you can damage the device. It is especially not recommended to try independently to replace the thermal path in a laptop, it is better to attribute it to a service center and entrust this is a specialist.
First you need to apply a thermal chaser for the processor. For this:
- Disassemble a computer. In person, remove the sidebar, unscrewing several bolts, and in the laptop, disobey the bottom of the case.
- Remove the cooler and radiator from the processor chip. AMD and Intel fastener mechanisms are different. In the first case, you will need to throw back the lever, turning it counterclockwise, and in the second - unscrew the four screws.
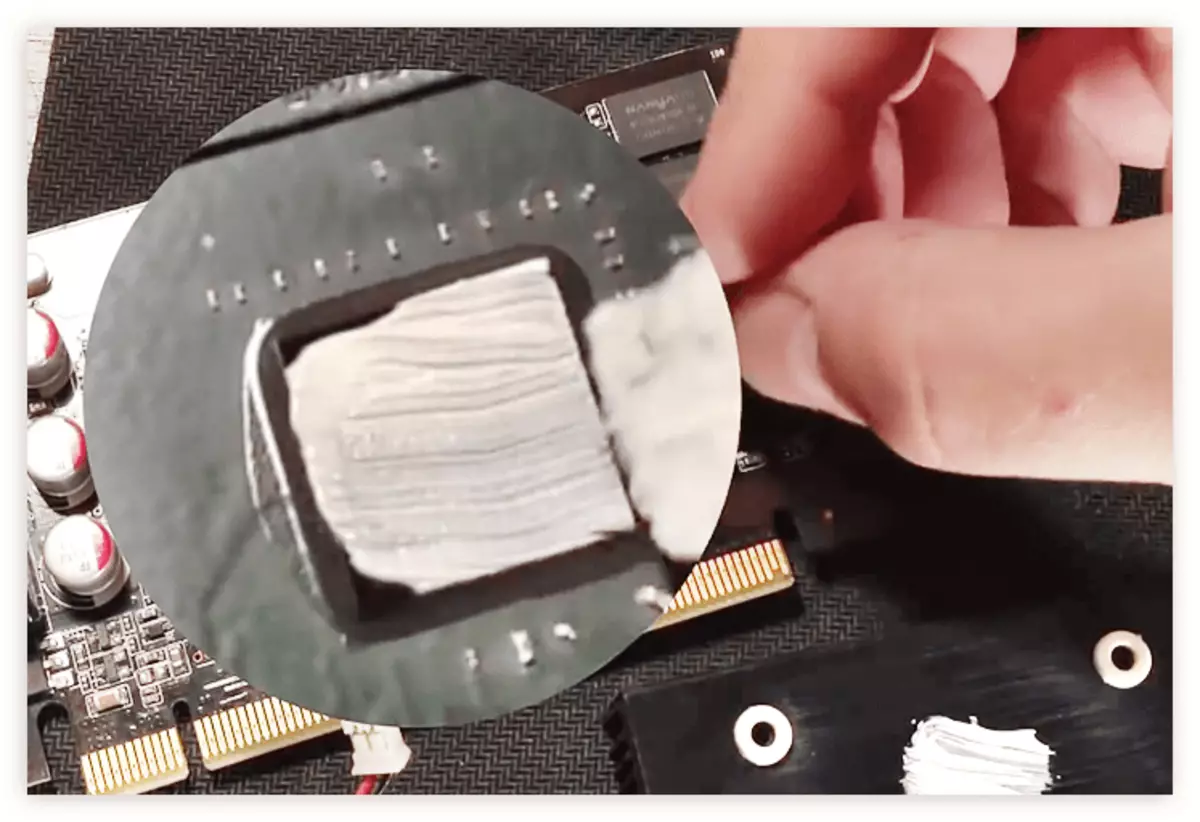
- Clean the surface of the chip from the residues of the dried thermal paste. It is necessary to do this using a napkin, cotton disk or eraser. You can also moisten them with alcohol to increase efficiency.
- We apply a thin layer with a thin layer on the entire surface of the processor. It is recommended to use a special tassel for these purposes, but the usual one will fit.

After completing all actions, you can fix the cooler with the radiator and collect the computer.
Read more: How to replace the thermal processor
The process of replacing thermal paste on a video card is largely similar: you will need to apply a thin gel layer on the chip. But the difficulty lies in the dismantling of this device. Unlike processors, the design of video cards is very different, so the universal instruction will not be possible. The following will be described in general features of a particular action that you need to perform:
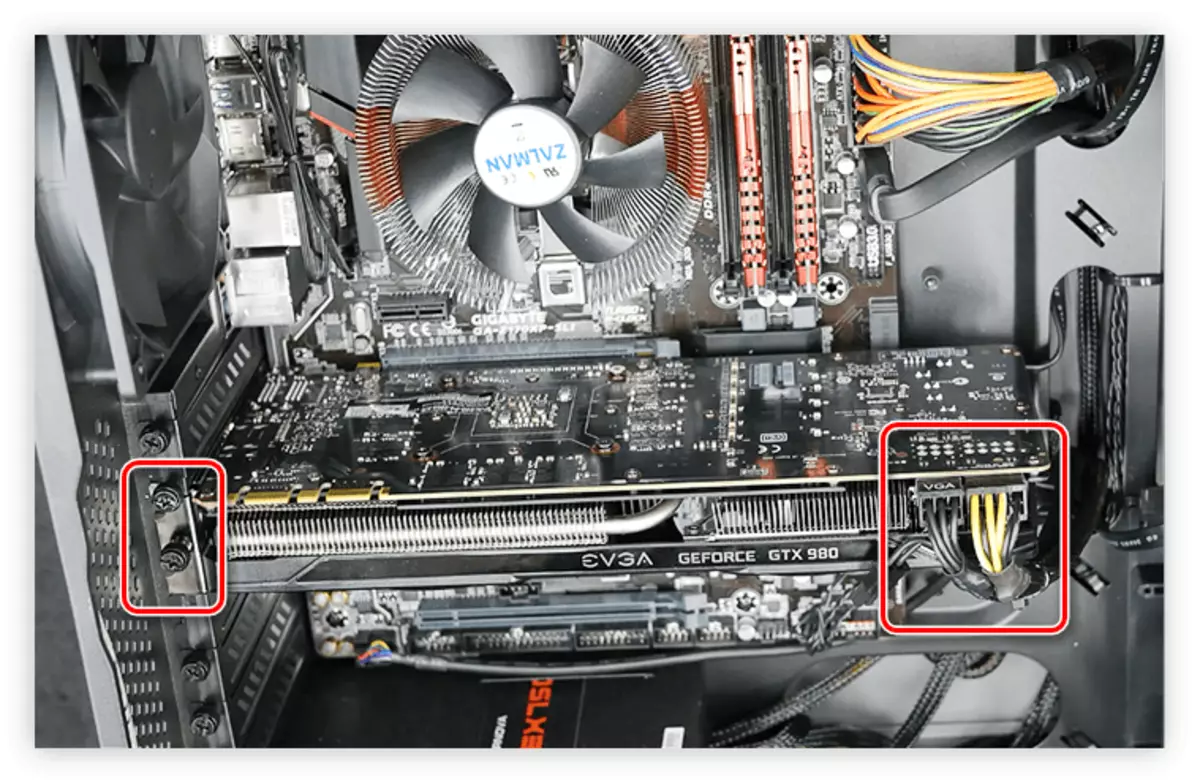
- Disassemble the system block or laptop housing (if there is a discrete video card), after turning off the power.
- Find the video card board and disconnect the wires leading to it, then unscrew the bolts that fasten the board with the housing.
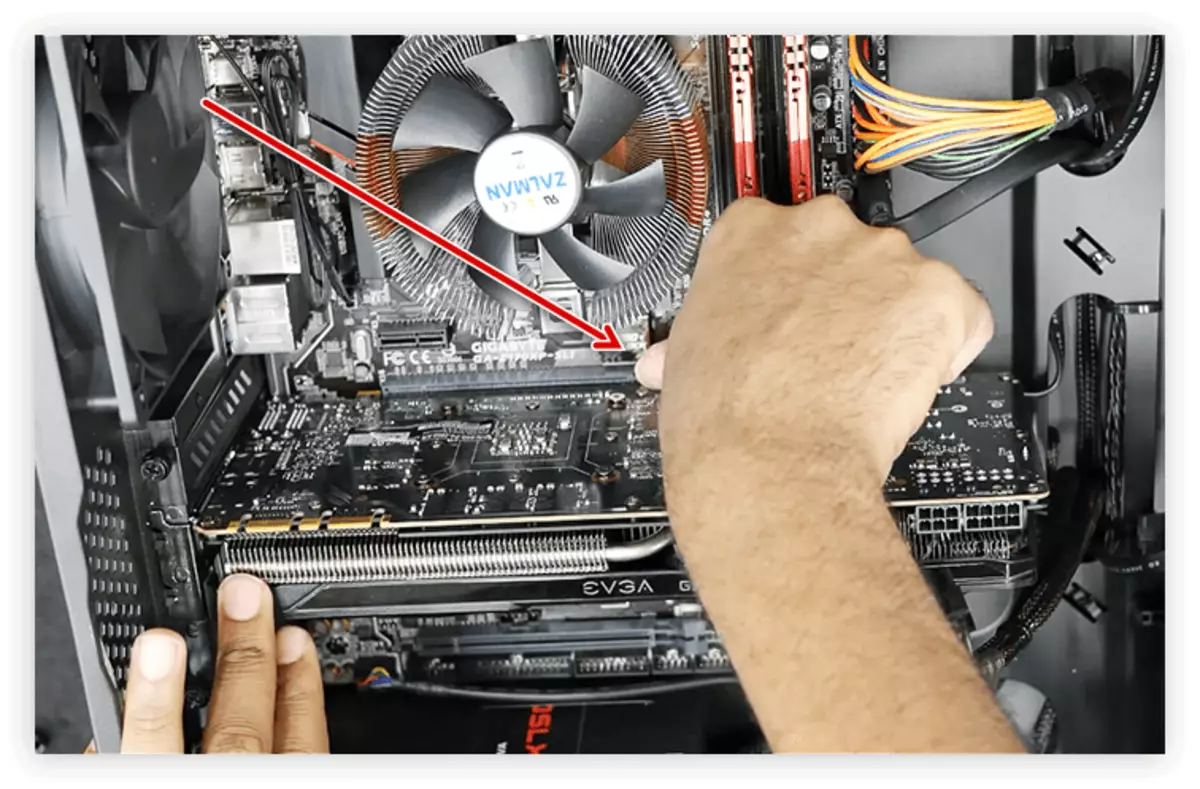
- Click on the lock that holds the video card in the slot.
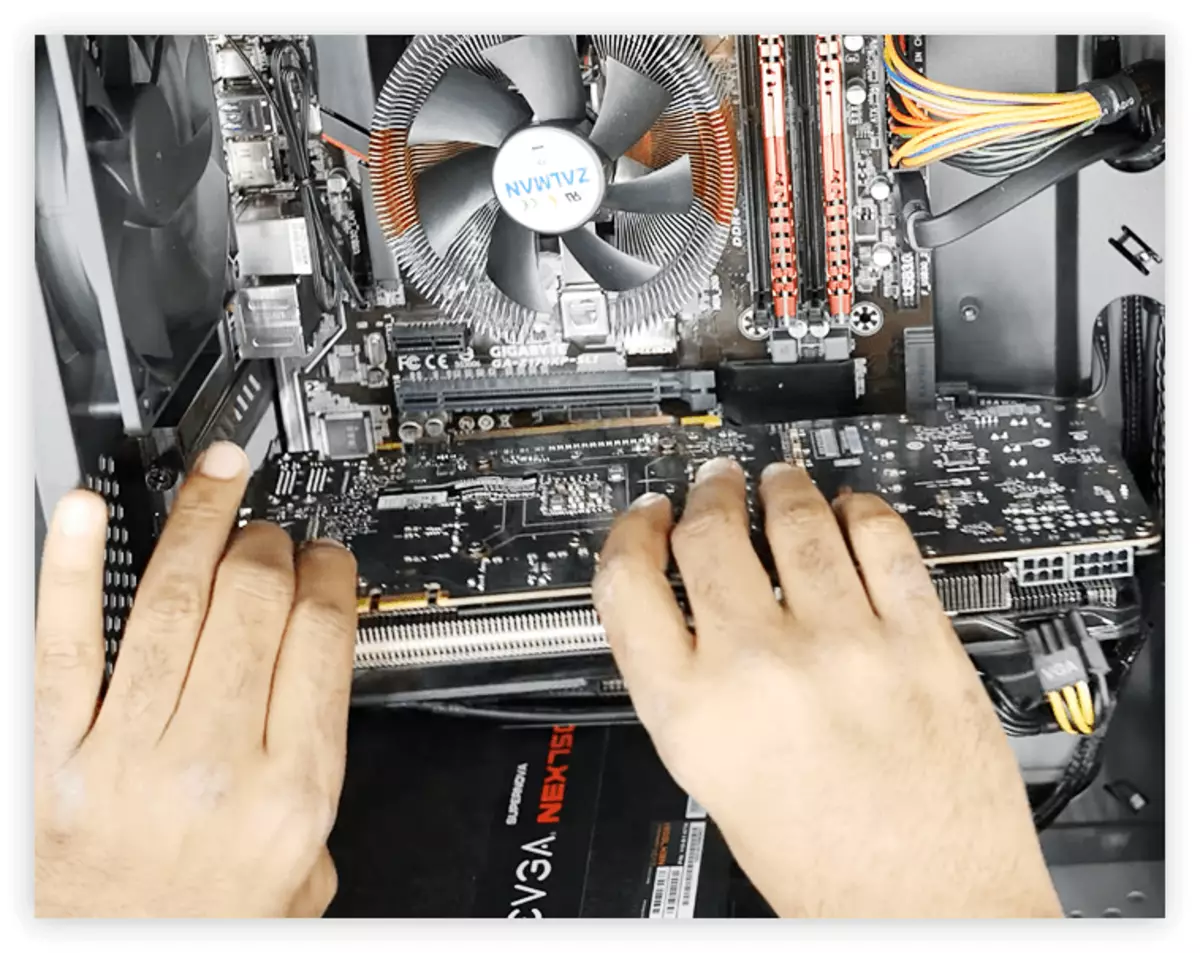
- Carefully remove the fee.
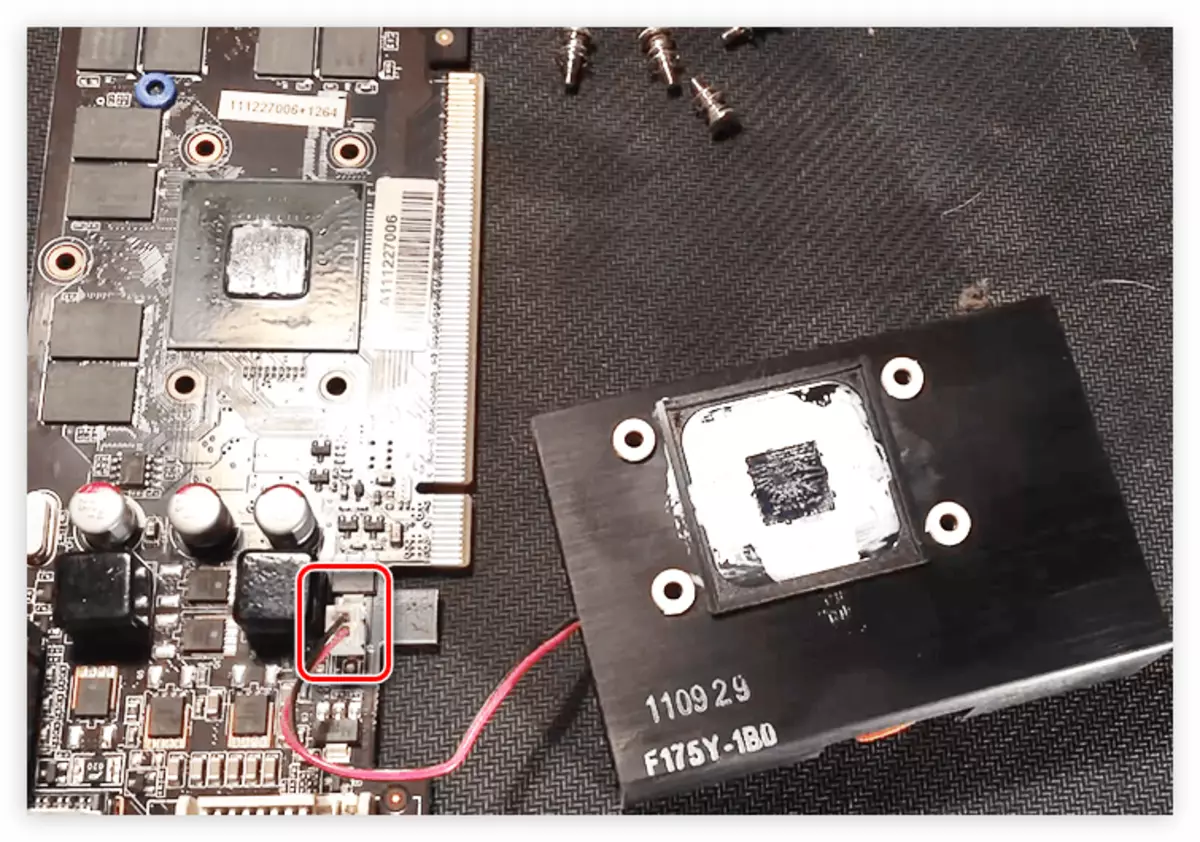
- Find the radiator and cooler mounting points on the board. They can be attached with bolts or special rivets.
- Disconnect the radiator with the cooler from the board. Be careful, because if the pasta dried, she could stick to the chip.
- Disconnect the wire leading from the cooler to the board.
- Remove the heel thermal paste, using a napkin, moistened with alcohol.
- Apply a thin layer of a new thermal paste on the device chip.

Next you remained to collect everything back:
- Attach the cooler wire to the board.
- Carefully, not a selection, attach the radiator to the board.
- Tighten the revealed bolts.
- Insert the video card in the connector on the motherboard.
- Connect all the wires to it and tighten the bolts.
After that, it remains to assemble the housing and ready - the thermal paste is replaced.
Read more: How to change the thermal chaser on the video card
Conclusion
As you can see, the reasons, due to which the computer can spontaneously reboot, abound, but the way to solve the problem is even more. Unfortunately, it is immediately impossible to determine the successful method that will absolutely help, but in the article, their sequence comes from efficient and easily accessible to more labor-intensive.