

Now many users use voice chat in games or communicate with other people using video links. This requires a microphone that can not only act as a separate device, but also part of the headset. In this article, we will consider in detail several ways to check the microphone on headphones in the Windows 7 operating system.
Checking the microphone on the headphones in Windows 7
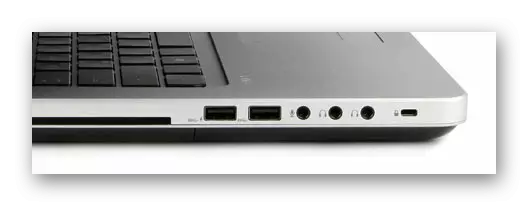
First you need to connect headphones to the computer. Most models use two Jack 3.5 outputs, separately for the microphone and headphones, they are connected to the appropriate connectors on the sound card. It is less commonly using one USB output, respectively, it connects to any free USB connector.
Before checking, you must configure the microphone, since the absence of sound is often accompanied by incorrectly set parameters. It is very easy to implement this procedure, you only need to use one of the ways and perform a few simple actions.
Read more: How to set up a microphone on a laptop
After connecting and pre-configured, you can proceed to check the microphone on the headphones, this is done using several simple ways.
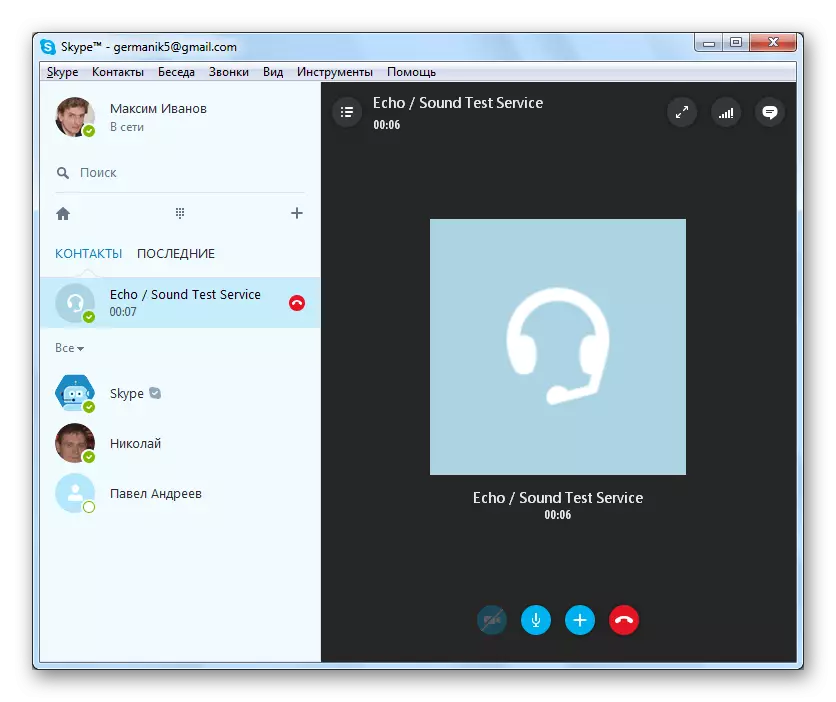
Method 1: Skype
Many use Skype to make calls, so users will easier customize the connected device directly in this program. You always have an ECHO / SOUND TEST service in contact listings, where you need to call to check the quality of the microphone. The announcer will voicate instructions, after their announcement will be checked.
Read more: Checking the microphone in the Skype program
After check, you can immediately go to conversations or configure unsatisfying parameters through the system tools or directly through the Skype settings.
If this program does not suit you, we recommend to get acquainted with the list of other similar software, with which sound is recorded from the microphone on the headphones.
Read more: Sound recording programs from a microphone
Method 4: Systems
Using the built-in Windows 7 functions, the devices are not only configured, but also checked. Check is easy to perform, you only need to perform a few simple actions:
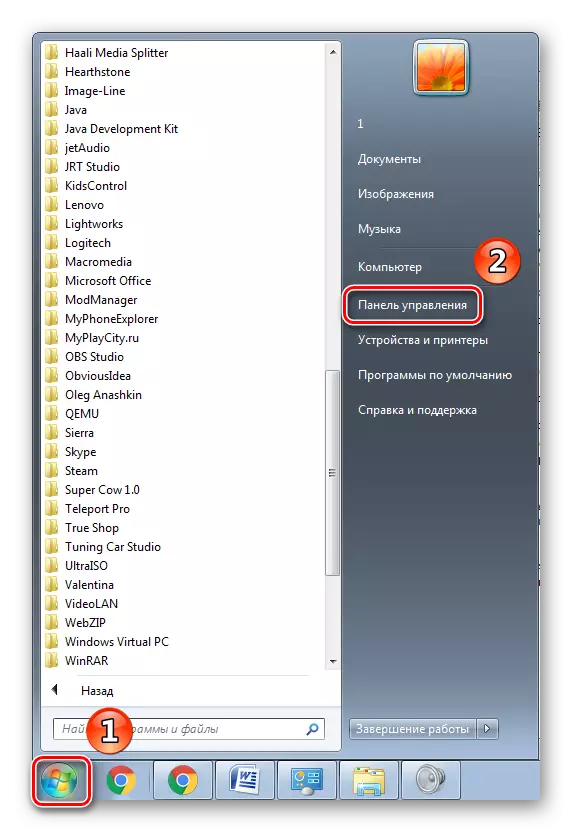
- Open "Start" and go to "Control Panel".
- Click on "Sound".
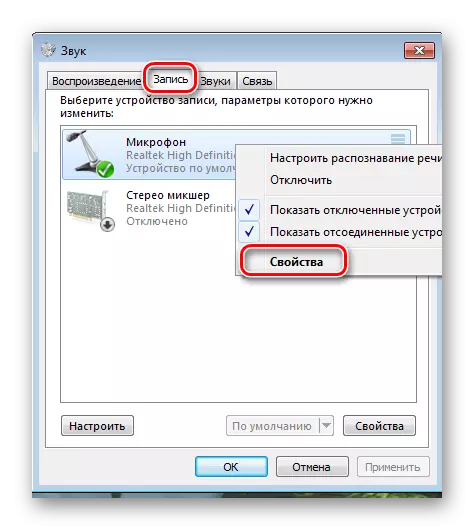
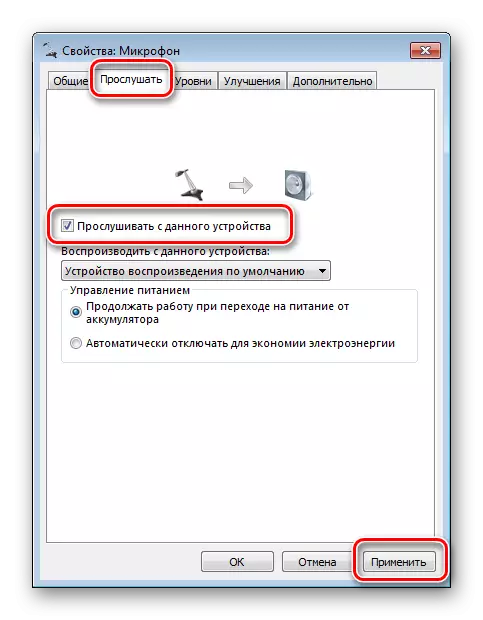
- Go to the "Record" tab, right-click on the active device and select "Properties".
- In the "Listen" tab, activate the "Listen to this device" parameter and do not forget to apply the selected settings. Now the microphone sound will be transmitted to the connected speakers or headphones, which will allow you to listen to it and make sure that sound.
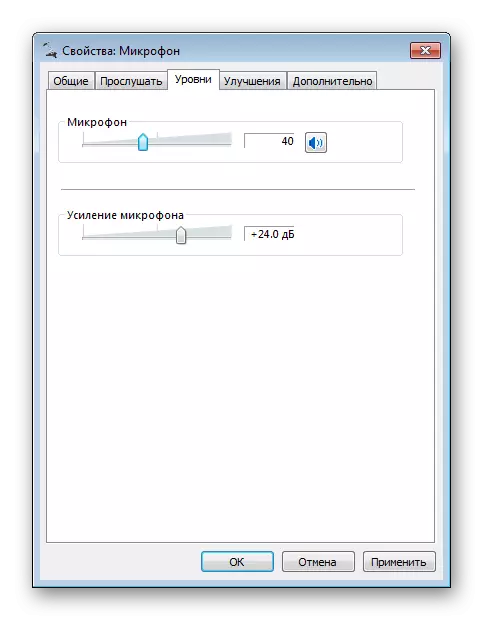
- If the volume does not suit you, or noise is heard, then go to the next Layer tab and set the Microphone parameter to the required level. The value "Microphone's amplification" is not recommended to be added above 20 dB, as too much noise begins to appear and the sound becomes distorted.

If data is not enough to check the connected device, we recommend using other methods using additional software or online services.
In this article, we reviewed the four main ways to check the microphone on headphones in Windows 7. Each of them quite simple and does not require certain skills or knowledge. It is enough to follow the instructions and everything will turn out. You can choose one of the ways that best suits you.