

The meaning of the DEP technology is that Windows based on NX hardware support (no execute, for AMD processors) or XD (Execute Disabled, for Intel processors) prevents execution of the executable code from those memory areas that are labeled as unwrked. If simpler: blocks one of the attack vectors of malware.
However, for some software, the enabled data prevention function may cause errors when starting - it is also found for application programs, and for games. View errors "Instructions for the address requested to memory at the address. Memory cannot be Read or Written »can also have their own cause DEP.
Disable DEP for Windows 7 and Windows 8.1 (for the entire system)
The first method allows you to disable DEP for all programs and Windows services. To do this, open the command prompt on behalf of the administrator - in Windows 8 and 8.1 it can be done using the menu that opens with the right click of the "Start" button, in Windows 7 you can find the command line in standard programs, click on it right mouse button And choose "Run from the administrator."
In the command prompt, enter the bcdedit.exe / set {current} nx alwaysOFF and press ENTER. After that, restart your computer: the next time you enter this DEP system will be disconnected.

By the way, if you wish, using BCDEDIT, you can create a separate entry with a disconnected DEP in the download and select the system and use it when required.
Note: In order to enable DEP in the future, use the same command with the Alwayson attribute instead of AlwaysOFF.
Two ways to disable DEP for individual programs
More reasonable may be disabling the prevention of data execution for individual programs causing DEP errors. You can do this in two ways - through the change in the additional parameters of the system in the control panel or using the registry editor.
In the first case, go to the control panel - the system (you can also click on the "My Computer" icon by right-click and select "Properties"). Select "Advanced System Options" in the list on the right, then on the Optional tab, click the "Parameters" button in the "Speed" section.
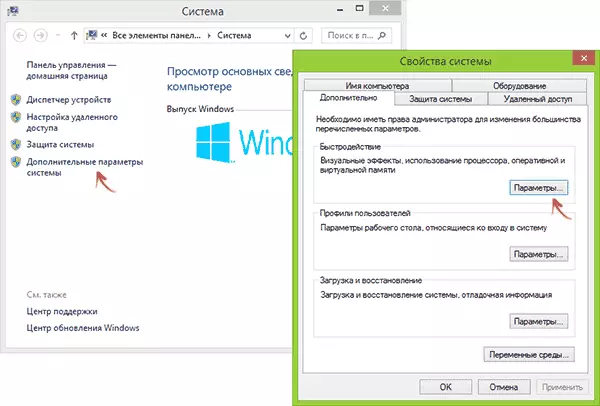
Open the "Enable Data Prevention" tab, check the "Enable DEP for All Programs and Services that selected below" and use the "Add" button specify paths to executable programs for which you want to disable DEP. After that, it is also desirable to restart the computer.

Disable DEP for programs in the registry editor
In essence, the same thing that has just been described using the control panel elements, can be made via the registry editor. To start it, press the Windows + R keys on the keyboard and enter the regedit then press ENTER or OK.
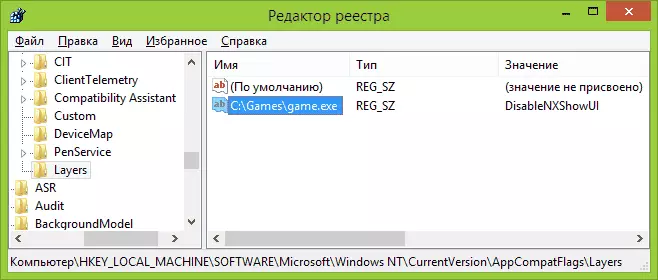
In the registry editor, go to the section (Folders on the left, if there is no Layers section, create it) HKEY_LOCAL_MACHINE \ Software \ Microsoft \ Windows NT \ Currentversion \ AppCompatFlags \ Layers
And for each program for which the DEP is disconnected, create a string parameter, the name of which corresponds to the path to the executable file of this program, and the value is disablenxshowui (see the example in the screenshot).
Well, finally, disconnect or disable DEP and how dangerous it is? In most cases, if the program for which you do it is loaded from a reliable official source, it is quite safe. In other situations - you do it at your own risk, although it is not too significant.