
On our site there are many instructions, how to make from a regular flash drive boot (for example, to install Windows). But what if you need to return the flash drive for the previous condition? We will try to answer this question today.
Video instruction
Return flash drive to normal state
The first thing to be noted - banal formatting will not be enough. The fact is that during the transformation of the flash drive into the bootable, a special service file is written to the inaccessible to the user, which cannot be erased by conventional methods. This file causes the system to recognize not the real volume of the flash drive, but a manifold system: for example, only 4 GB (image of Windows 7) from, permiss, 16 GB (actual capacity). As a consequence, only these 4 gigabytes can be formatted, which, of course, does not fit.
There are several solutions for this task. The first is to use a specialized software designed to work with the storage markup. The second is to use the built-in Windows tools. Each option is good in its own way, so let's consider them.
Note! Each of the following methods involves formatting a flash drive, which will cause the removal of all data available on it!
Method 1: HP USB Disk Storage Format Tool
A small program created to return to flash drives of a working state. She will help us solve today's task.
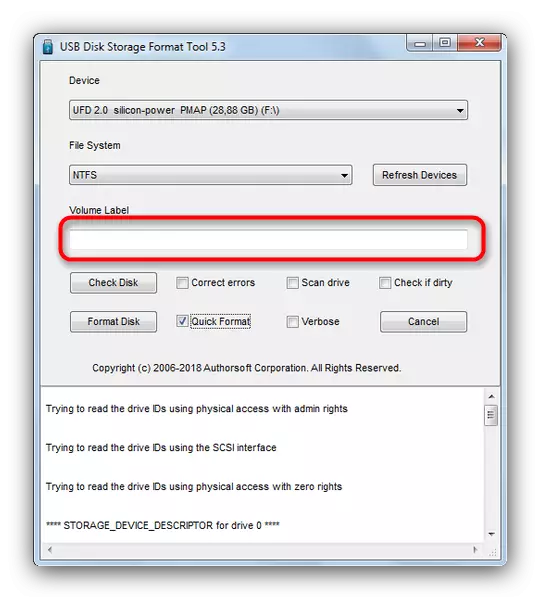
- Connect your flash drive to a computer, then run the program. First of all, pay attention to the "Device" item.
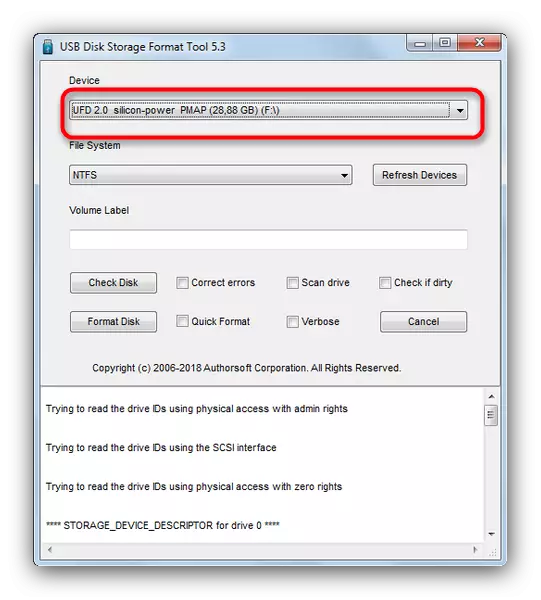
It needs to select the flash drive connected before this.
- Further - menu "File System". It requires a file system to which the drive will be formatted.
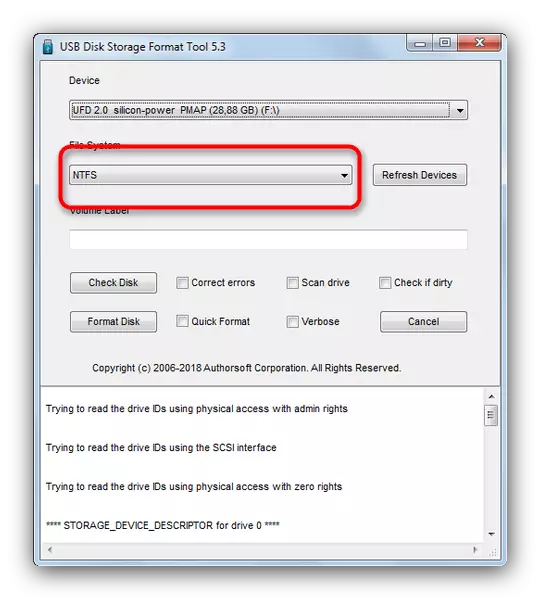
If hesitated with the choice - at your service the article below.
Read more: What file system to choose
- The "VOLUME LABEL" item can be left unchanged - this is a change in the name of the flash drive.
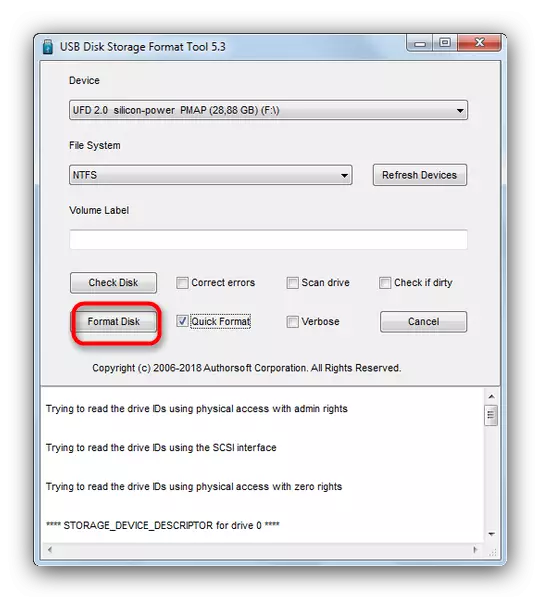
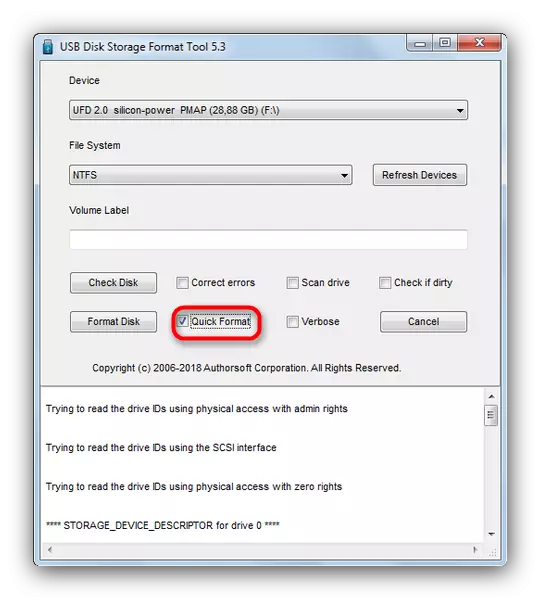
- Mark the option "Quick Format": This, first, will save time, and secondly, it will minimize the possibility of problems when formatting.
- Check the settings again. Make sure that you have chosen the desired, press the "Format Disk" button.
The formatting process will start. It will take time about 25-40 minutes, so be patient.
- At the end of the procedure, close the program and check the drive - it must return to the usual state.
Simply and reliably, however, some flash drives, especially the manufacturers of the second echelon, may not be recognized in HP USB Disk Storage Format Tool. In this case, use another method.
Method 2: RUFUS
Superpopular utility Rouffus is used mainly to create bootable media, but is capable of returning a normal state.
- Running the program, first of all, learn the "Device" menu - you need to choose your flash drive.
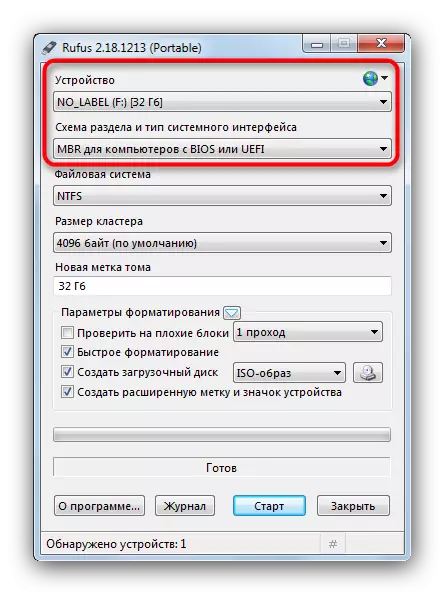
In the list "Scheme of the section and the type of system interface" do not need to change anything.
- In the "File System" item, you need to select one of the three available - you can select NTFS to speed up the process.
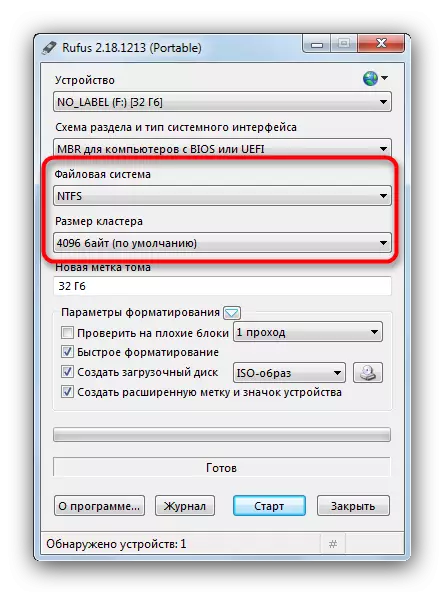
The size of the cluster is also better to leave the default.
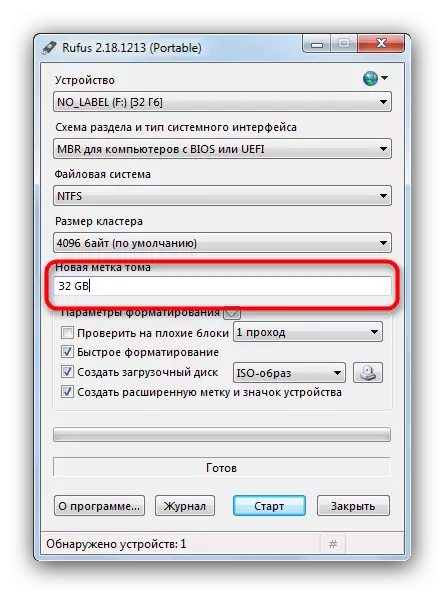
- The option "Tom Tag" can be left unchanged or change the name of the flash drive (only English letters are supported).
- The most important step is the mark of special options. So, you should work out as shown in the screenshot.

Points "Fast formatting" and "Create an extended label and device icon" must be marked, and "check on bad blocks" and "Create a boot disk" - no!
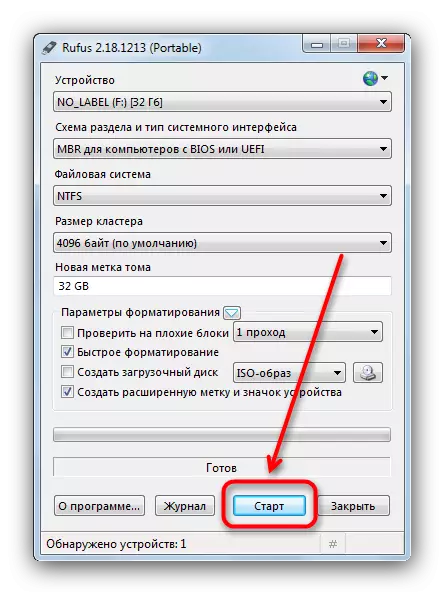
- Check the settings again, and then start the process by clicking on "Start".
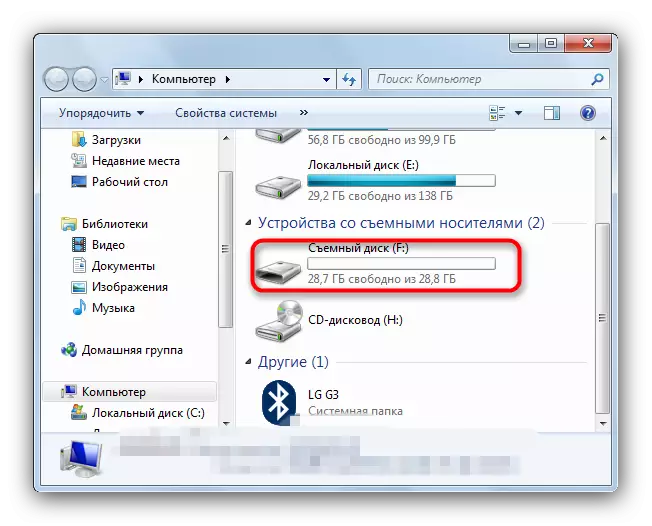
- Upon completion of the regular state, turn off the flash drive from the computer for a few seconds, then connect again - it must be recognized as a regular drive.
As in the case of HP USB Disk Storage Format Tool, in Rufus cheap flash drives Chinese manufacturers may not be recognized. Faced with such a problem, go to the way below.
Method 3: Diskpart System Utility
In our article on formatting a flash drive using the command line, you can learn about using the DiskPart Console Utility. It has a wider functionality than the built-in formatting means. There are among its capabilities and those that will be useful to fulfill our today's task.
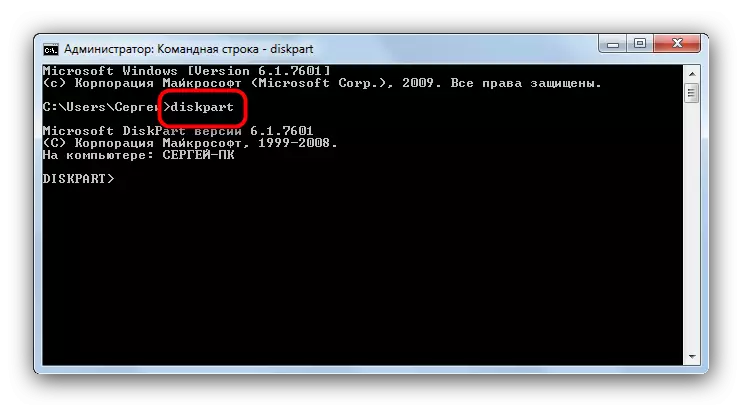
- Run the console on behalf of the administrator and call the DiskPart utility by entering the appropriate command and pressing Enter.
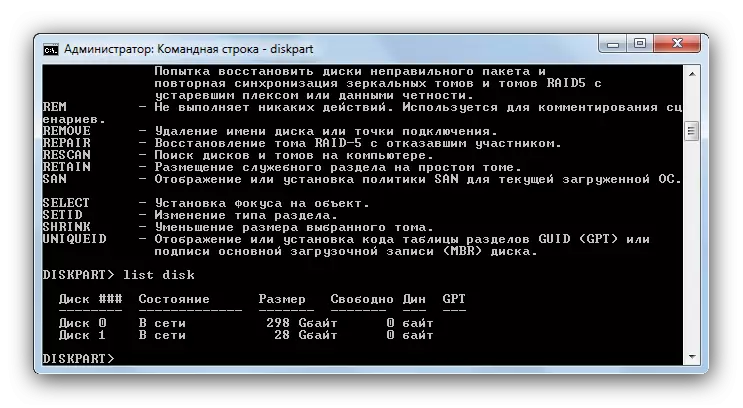
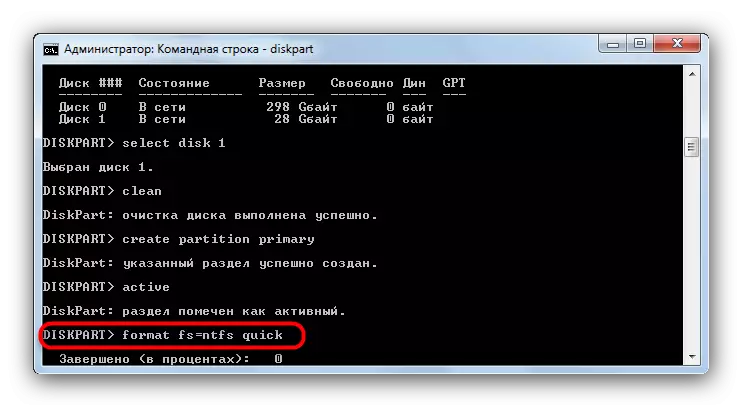
- Enter the LIST DISK command.
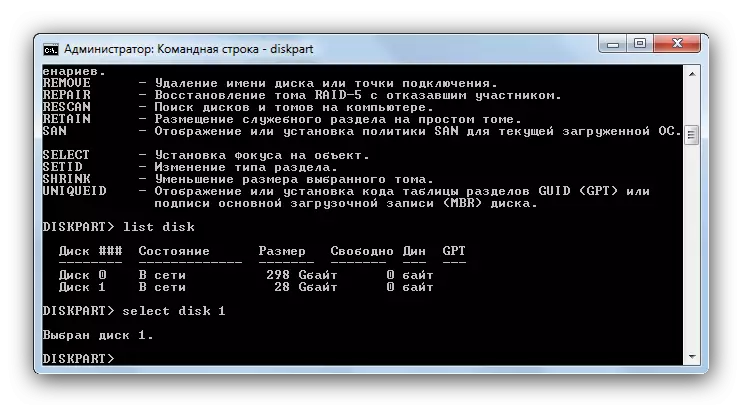
- Here you need a limiting accuracy - focusing on the volume of the disk, you should select the desired drive. To select it for further manipulations, write in the SELECT DISK string, and at the end via space Add the number under which your flash drive is on the list.
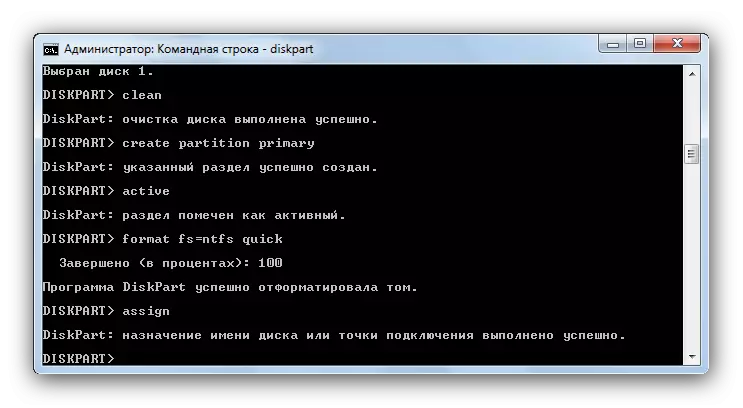
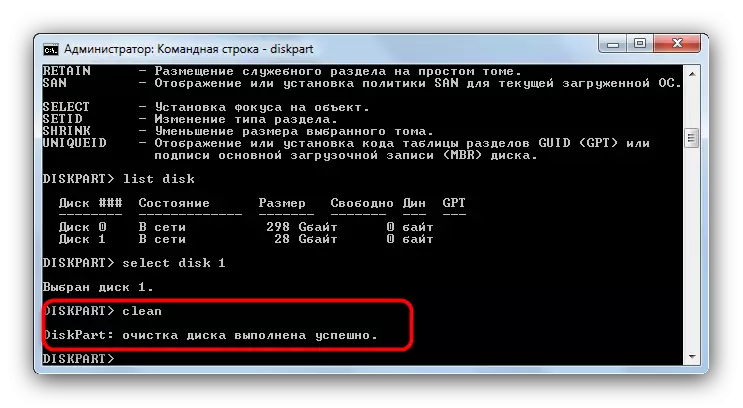
- Enter the Clean command - it will completely clean the drive, deleting including sections marking.
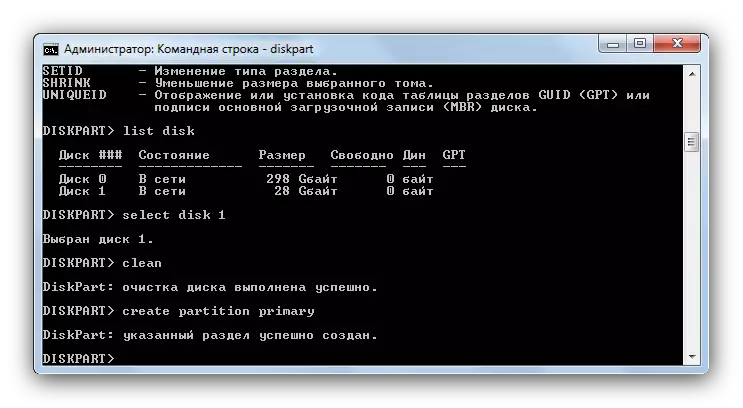
- The next step is to dial and enter the Create Partition Primary: This will re-create the correct marking on your flash drive.
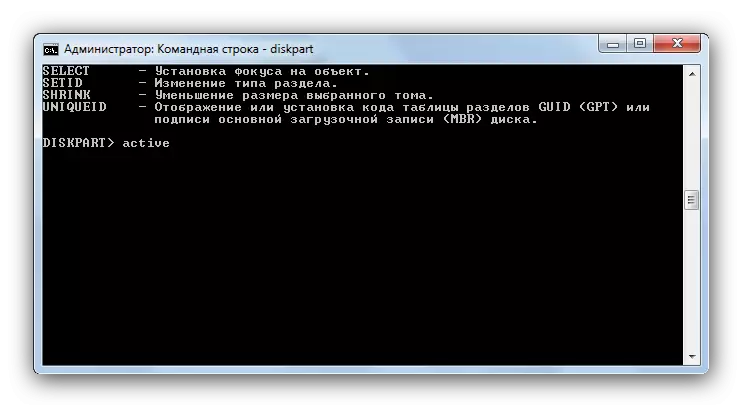
- Next, you should mark the created as active - write Active and press ENTER to enter.
- Further action - formatting. To start the process, enter the Format FS = NTFS Quick command (the main command formats the drive, the "NTFS" key sets the corresponding file system, and "Quick" is a quick type of formatting).
- After successfully completing the formatting, sucking Assign - this needs to be done to assign the name of the volume.
It can be changed at any time after the end of manipulations.
Read more: 5 ways to change the name of the flash drive
- In order to correctly complete the process, enter the EXIT and close the command prompt. If you are all done correctly, your flash drive returns to a working condition.
Despite its cumbersome, this method is good almost one hundred percent guarantee of a positive result in most cases.
The methods described above are most convenient for the end user. If you are known alternatives - please, share them in the comments.