

OpenVPN is one of the VPN options (Virtual Private Network or private virtual networks), allowing you to implement data transmission on a specially created encrypted channel. Thus, you can connect two computers or build a centralized network with a server and several clients. In this article, we will learn to create such a server and set it up.
Configure OpenVPN Server
As mentioned above, with the help of technology, we can transfer information to a secure communication channel. It can be sharing files or secure Internet access via a server that is a common gateway. To create it, we will not need additional equipment and special knowledge - everything is done on the computer that is planned to be used as a VPN server.For further work, it will also be necessary to configure the client part on network user machines. All work comes down to creating keys and certificates that are then transmitted to customers. These files allow you to get an IP address when connected to the server and create the above encrypted channel. All information transmitted by it can only be read if there is a key. This feature allows you to significantly improve security and ensure the safety of data.
Install OpenVPN on Machine-Server
Installation is a standard procedure with some nuances, which will talk more.
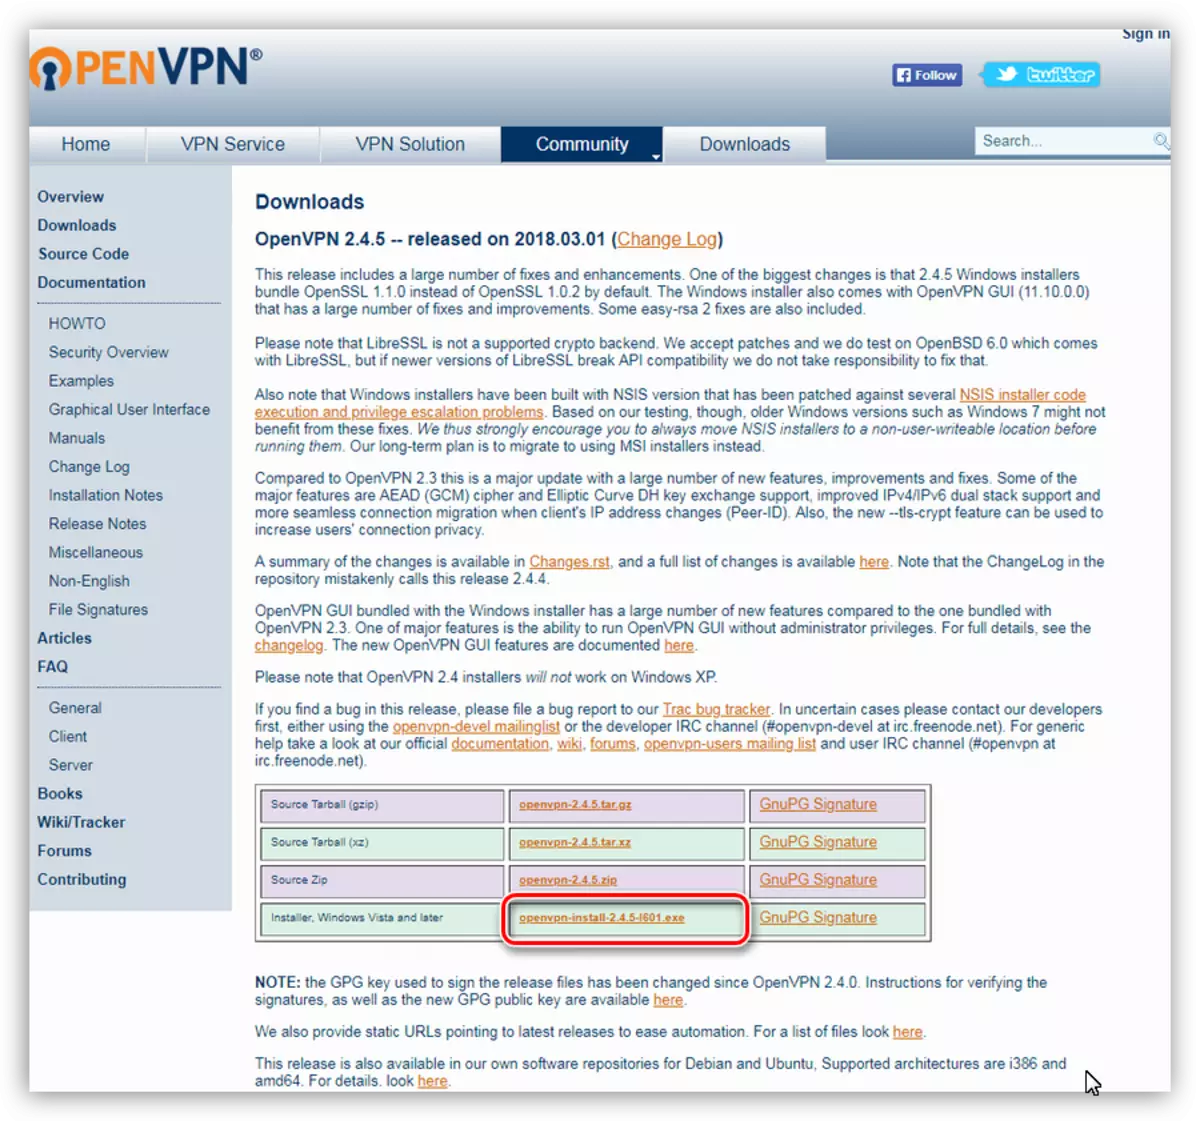
- First of all, you need to download the program on the link below.
Download OpenVPN.
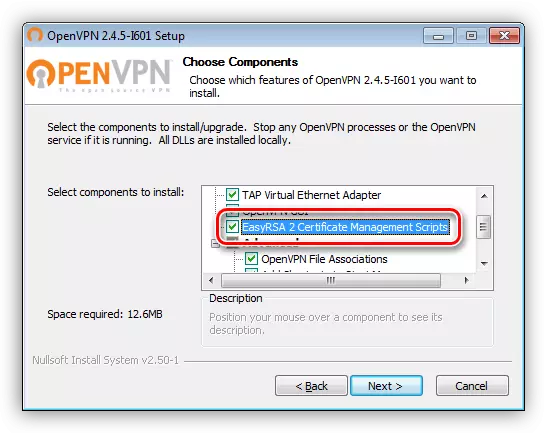
- Next, run the installer and reach the component selection window. Here we will need to put a tank near the point with the name "Easyrsa", which will allow you to create certificate and keys files, as well as manage them.
- The next step is to choose a place to install. For convenience, put the program to the root of the system disk S:. To do this, just delete too much. It should work out
C: \ OpenVPN
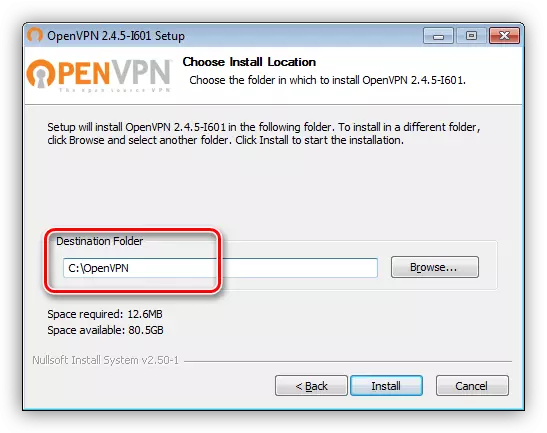
We do it in order to avoid failures when executing scripts, since the spaces in the path are not allowed. You can, of course, take them in quotes, but attentiveness can and sum up, and look for errors in the code - the case is not easy.
- After all settings, install the program in normal mode.
Configuring server part
When performing the following actions should be as attentive as possible. Any flaws will lead to the inoperability of the server. Another prerequisite - your account must have administrator rights.
- We go to the "Easy-RSA" catalog, which in our case is located at
C: \ OpenVPN \ Easy-RSA
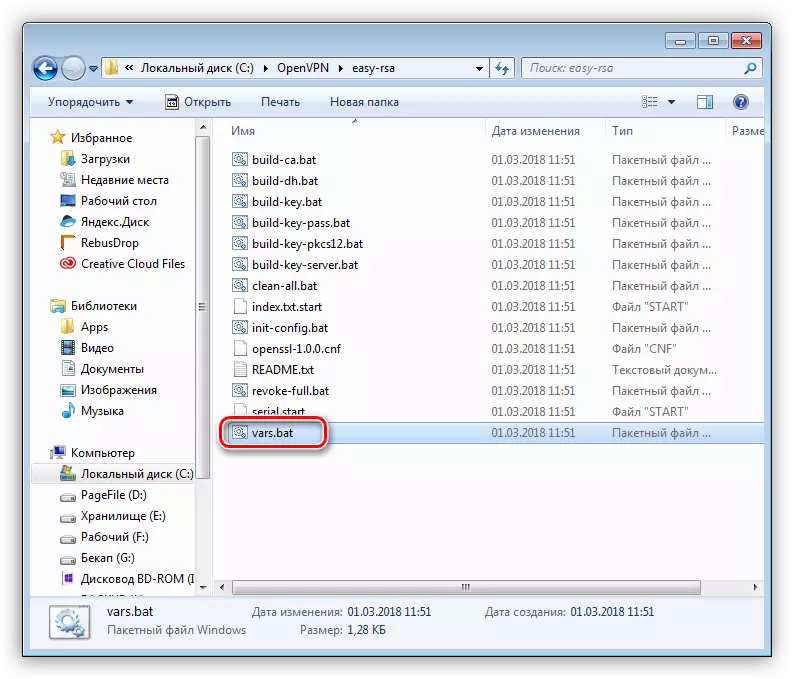
Find the vars.bat.sample file.
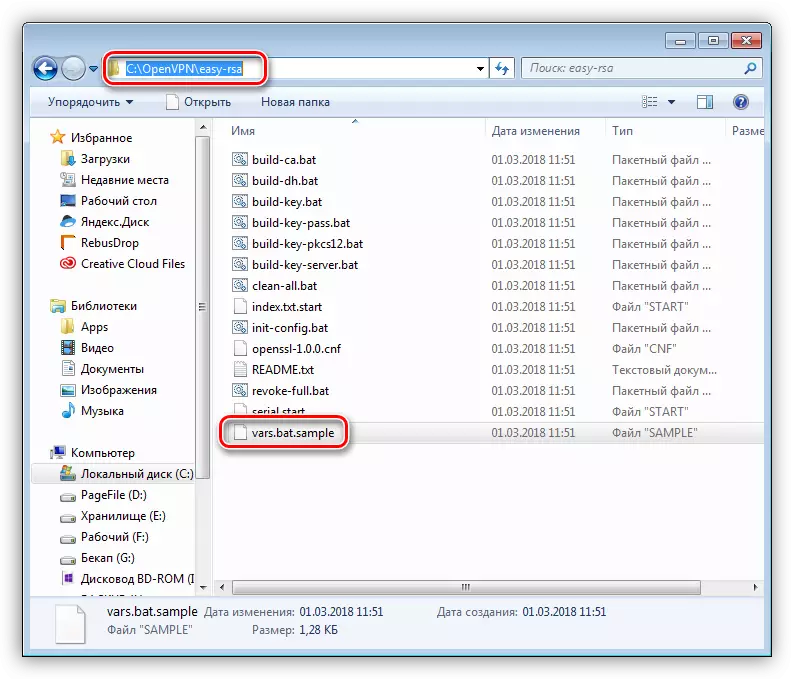
Rename it to Vars.Bat (We delete the word "sample" along with a point).
Open this file in the NotePad ++ editor. This is important, since it is this notebook that allows you to correctly edit and save codes, which helps to avoid errors when performing them.
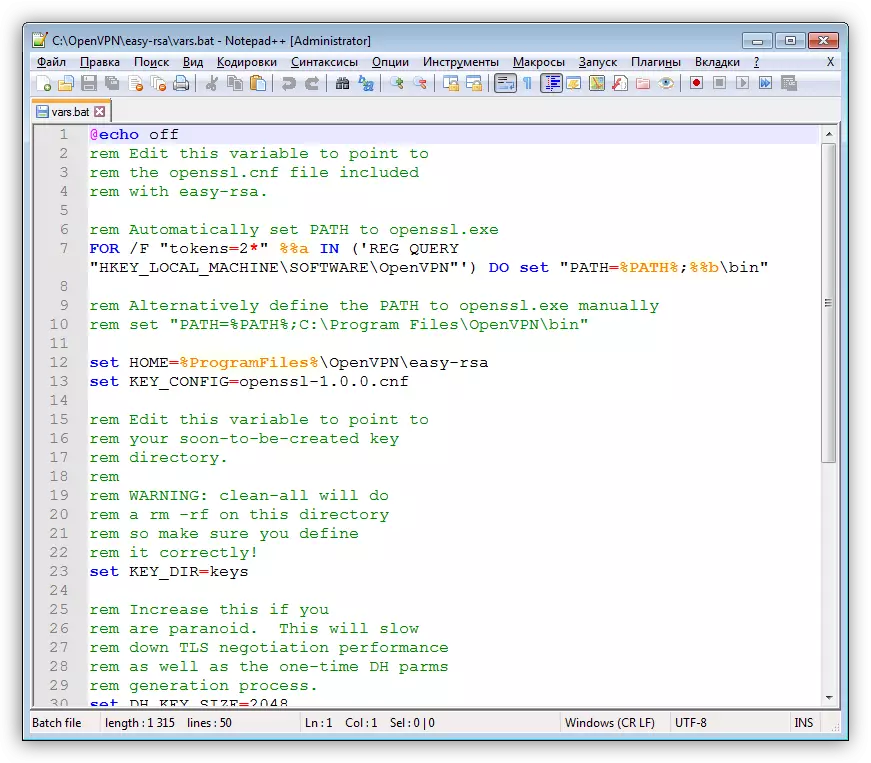
- First of all, we delete all comments allocated by green - they will only interfere with us. We get the following:
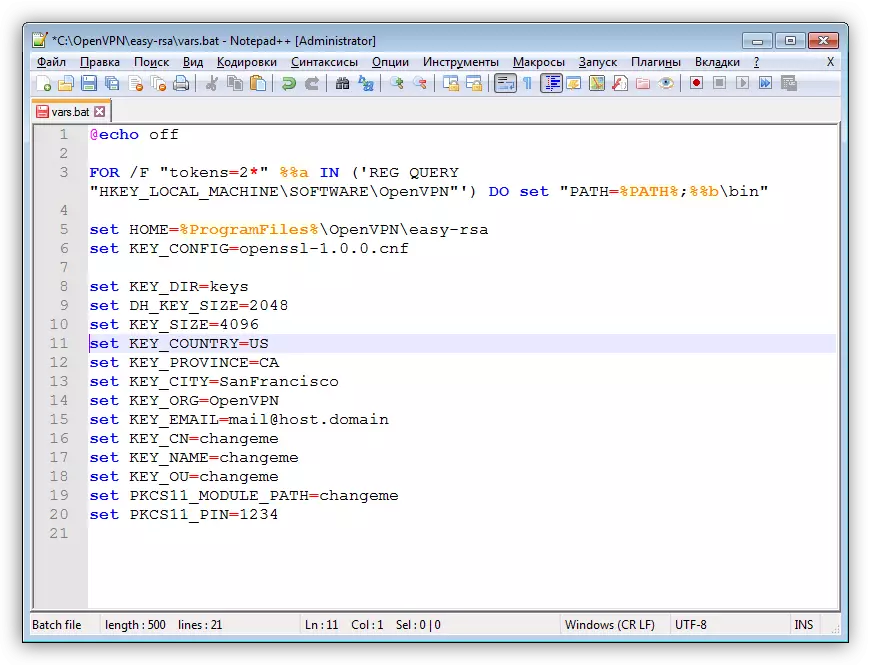
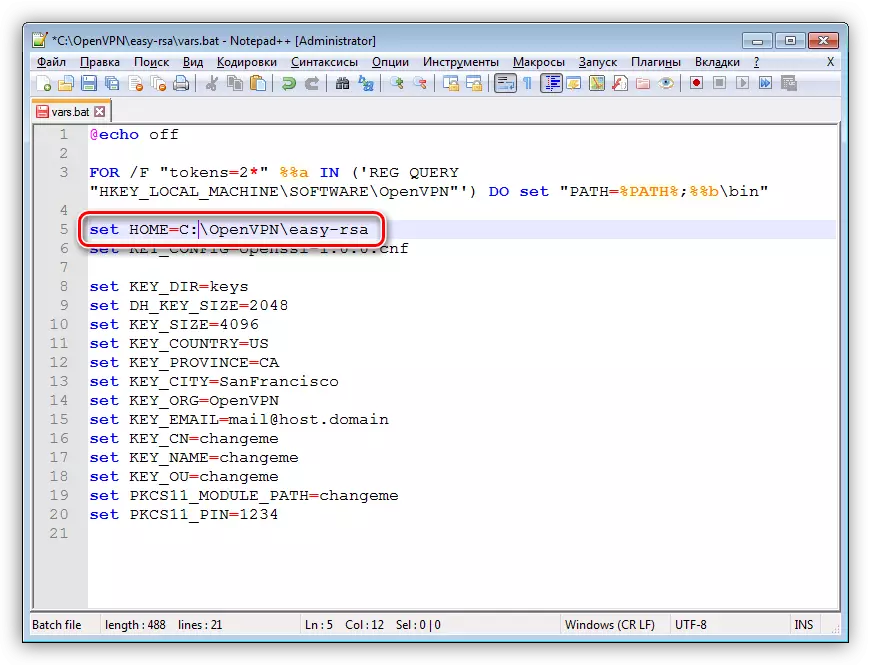
- Next, change the path to the "Easy-RSA" folder to the one we specified during installation. In this case, simply delete the variable% programfiles% and change it on C:.
- The following four parameters are left unchanged.
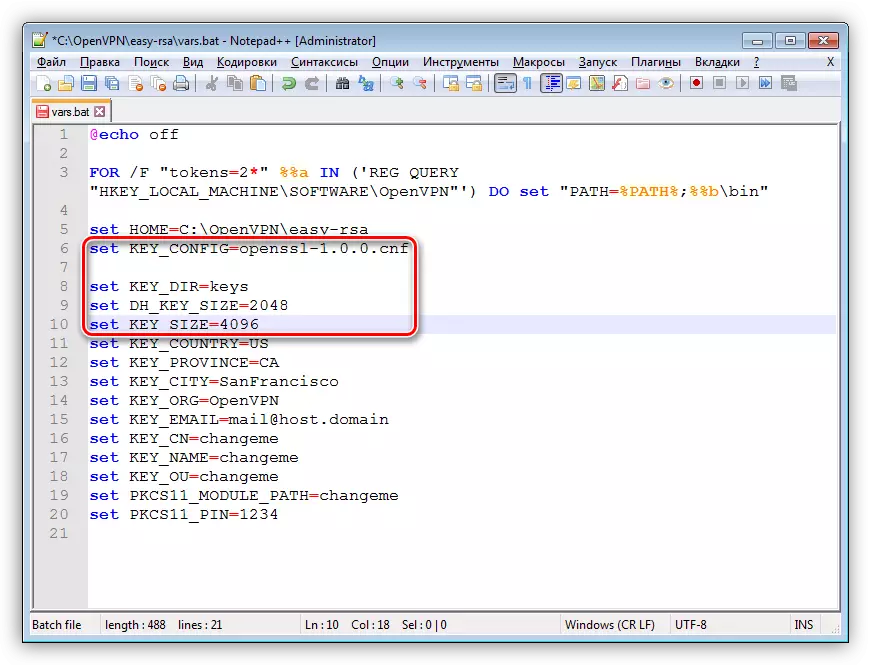
- The remaining lines fill out arbitrarily. Example on the screenshot.
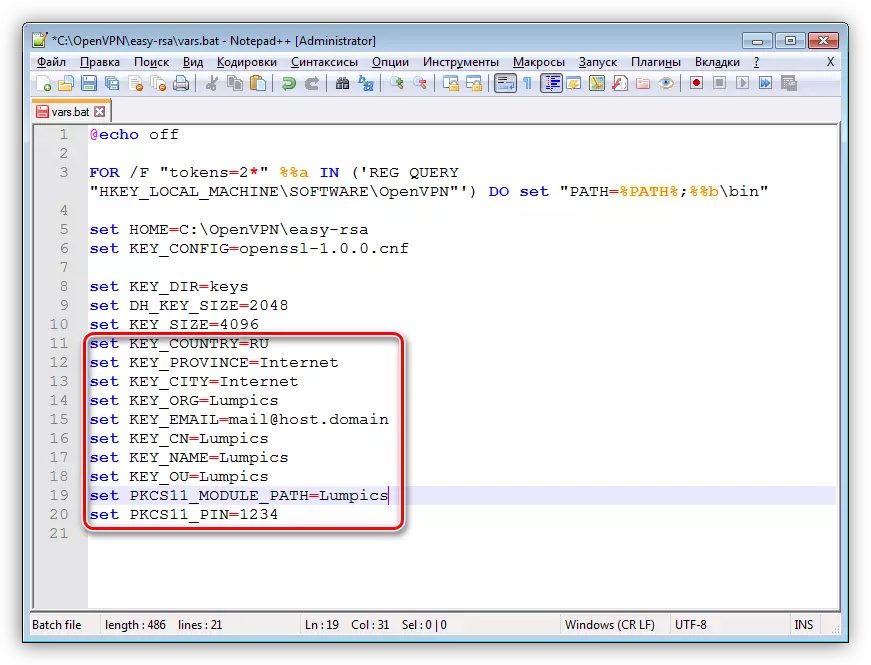
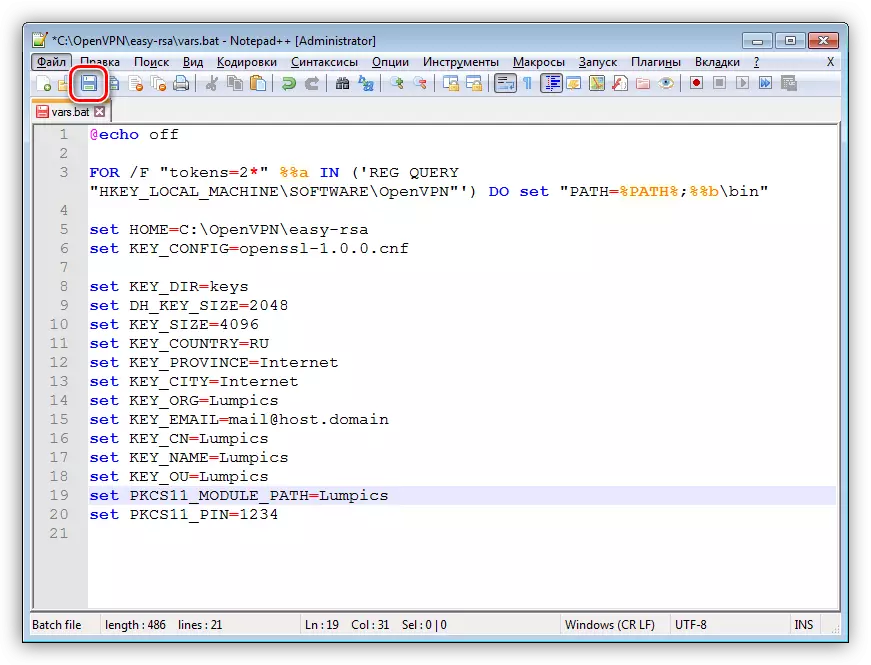
- Save the file.
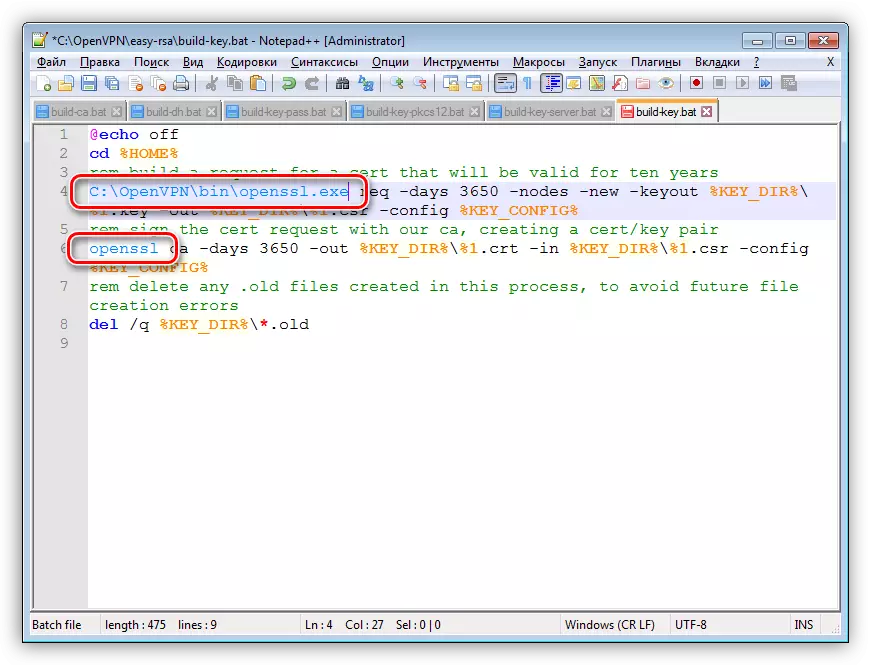
- You also need to edit the following files:
- Build-Ca.Bat.
- Build-Dh.Bat.
- Build-Key.Bat.
- Build-Key-Pass.bat
- Build-Key-PKCS12.Bat
- Build-Key-Server.bat

They need to change the team
OpenSSL.
On the absolute path to the corresponding OpenSSL.EXE file. Do not forget to save changes.
- Now open the "Easy-RSA" folder, clamp shift and click on the PCM at a free place (not on files). In the context menu, select the "Open command window" item.
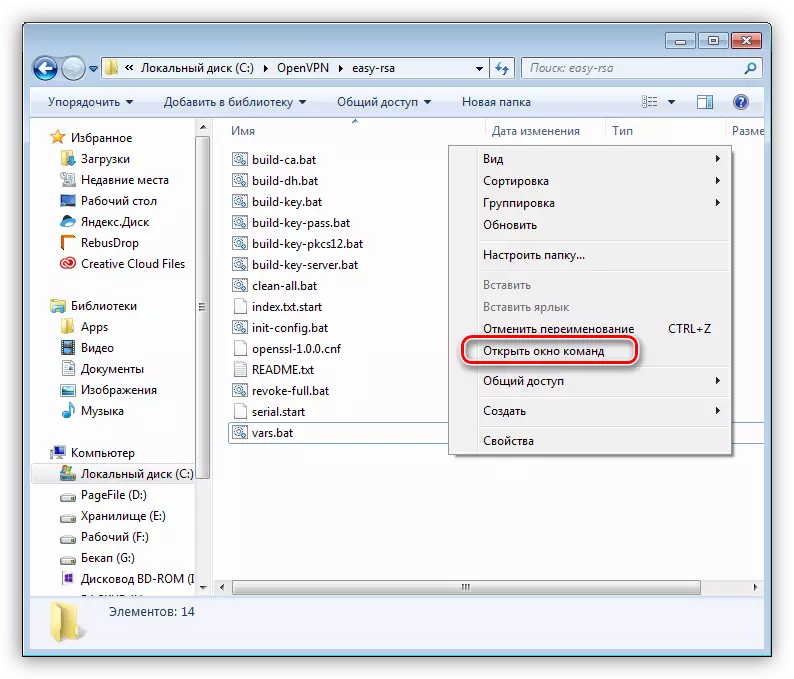
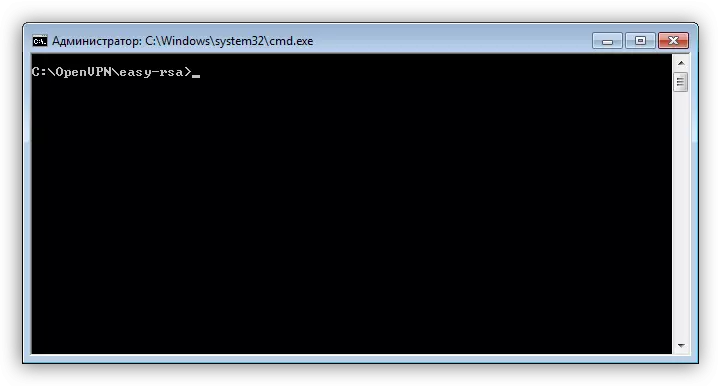
The "Command Line" starts with the transition to the target directory already implemented.
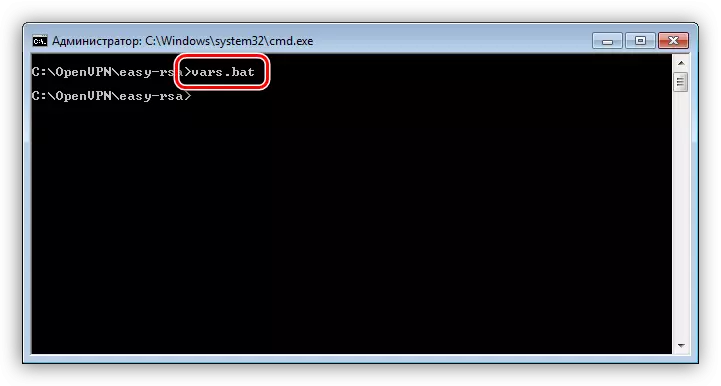
- We enter the command specified below and click Enter.
vars.Bat.
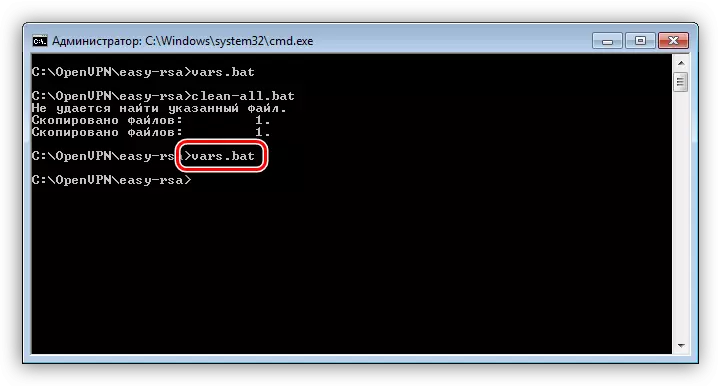
- Next, launch another "batch file".
Clean-all.bat.

- We repeat the first command.
- The next step is to create the necessary files. To do this, use the team
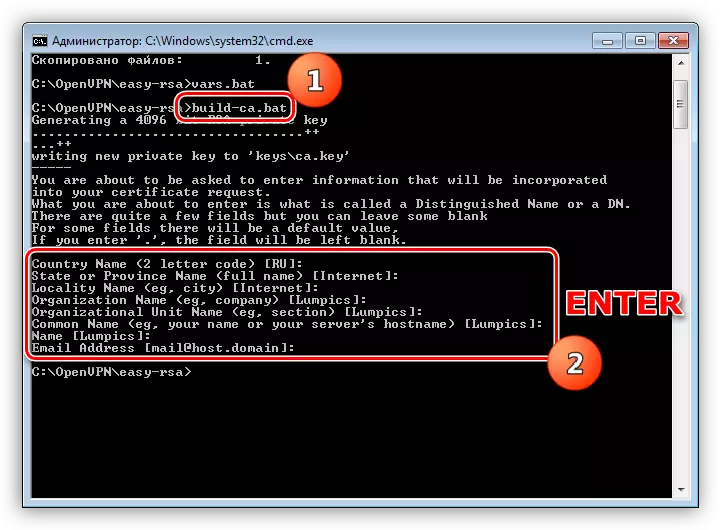
Build-Ca.Bat.
After executing the system, it will offer to confirm the data that we entered the VARS.BAT file. Just press ENTER several times until the original string appears.
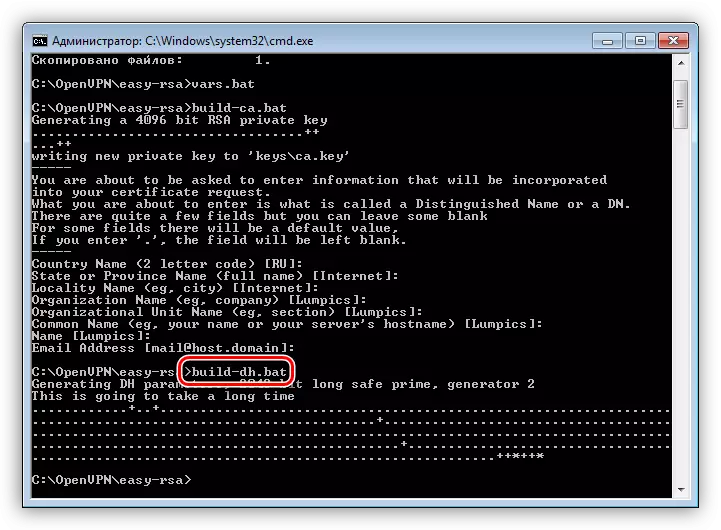
- Create a DH key using the file startup
Build-Dh.Bat.
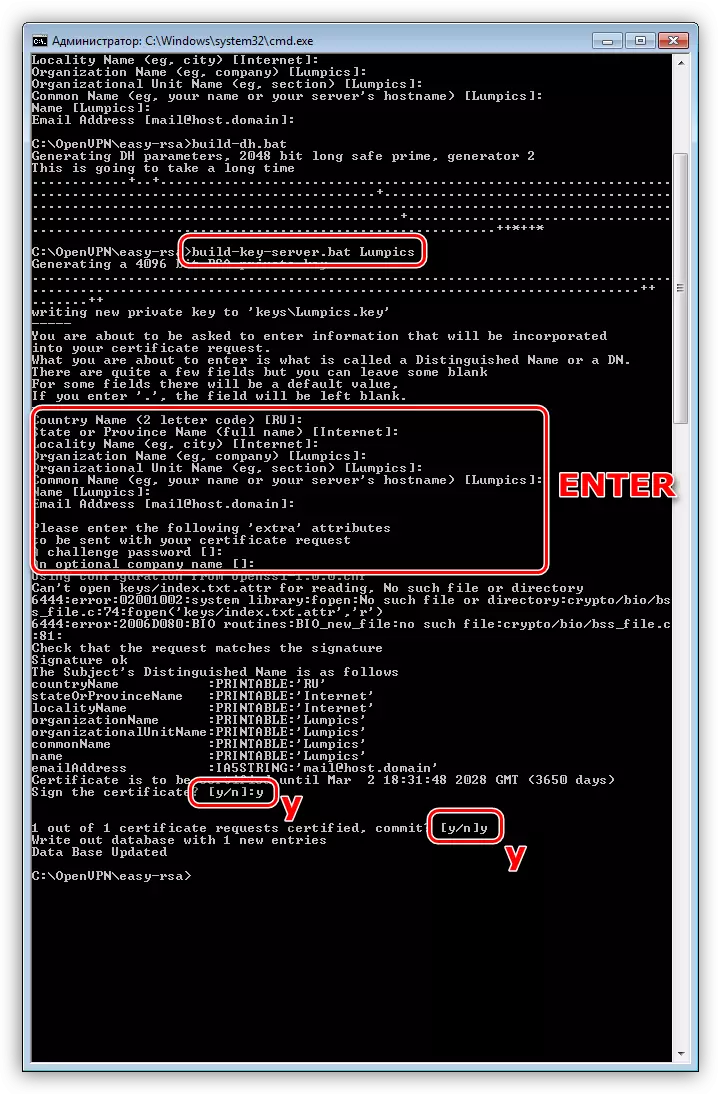
- Create a certificate for server part. There is one important point here. He needs to assign the name that we registered in Vars.Bat in the "key_name" row. In our example, it is Lumpics. The command looks like this:
Build-Key-Server.bat Lumpics
It also needs to confirm the data using the Enter key, and also twice enter the letter "Y" (YES), where it will be required (see Screenshot). Command line can be closed.
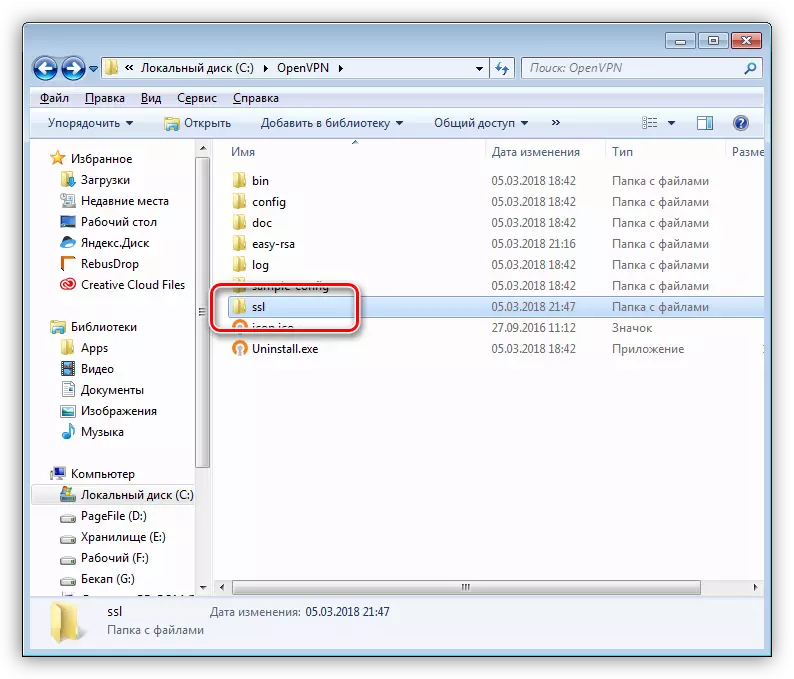
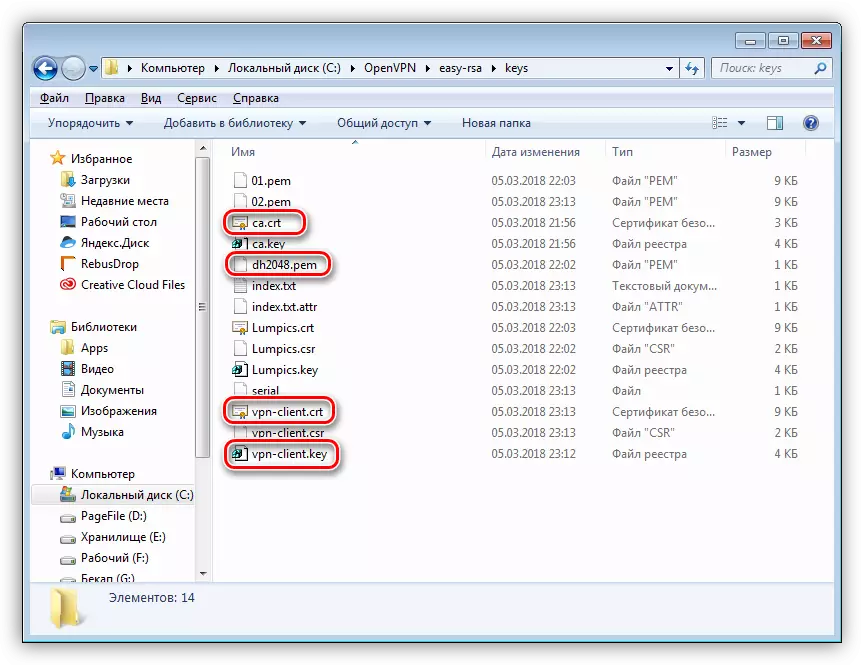
- In our catalog "Easy-RSA" a new folder appeared with the title "Keys".
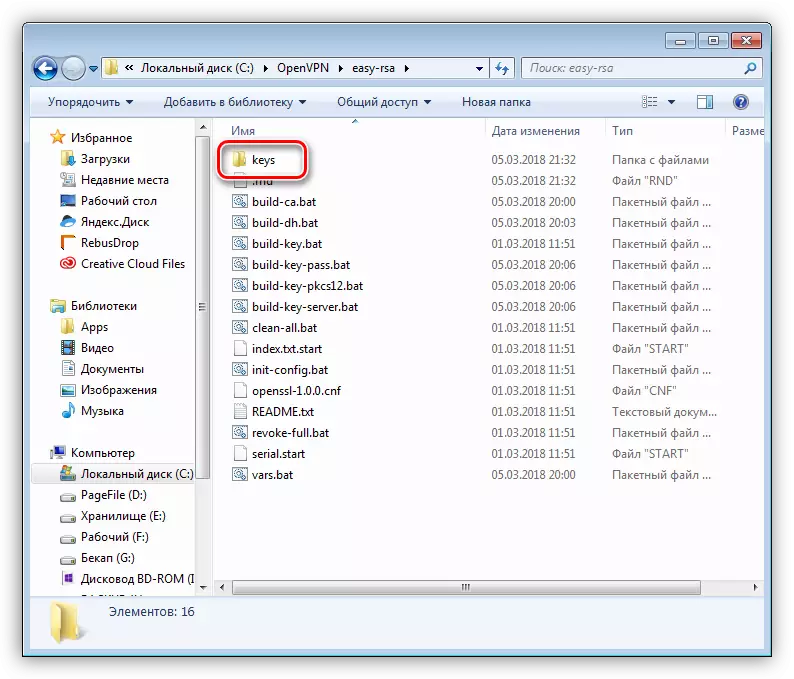
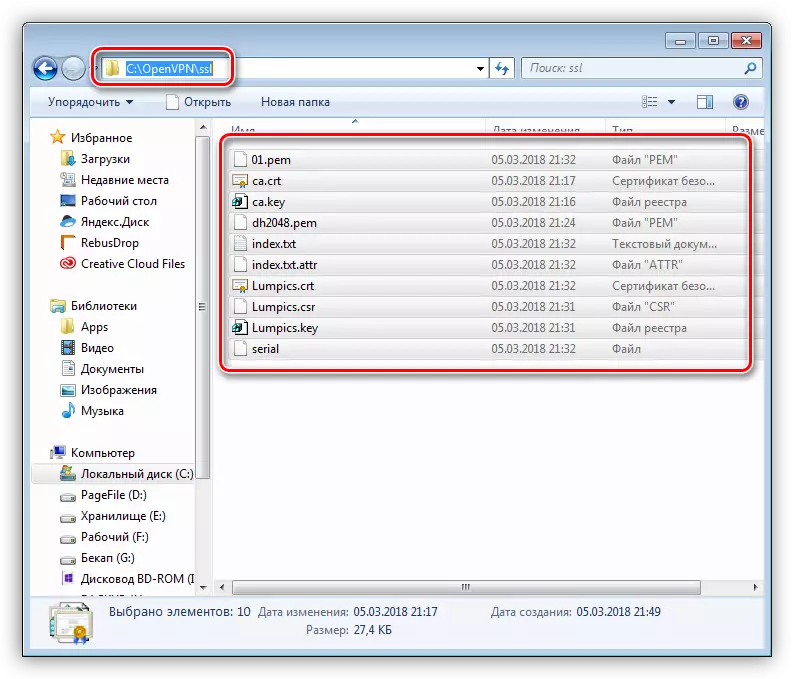
- Its content must be copied and pasted into the "SSL" folder, which you want to create in the root directory of the program.
View folder after inserting copied files:
- Now we go to the catalog
C: \ OpenVPN \ CONFIG
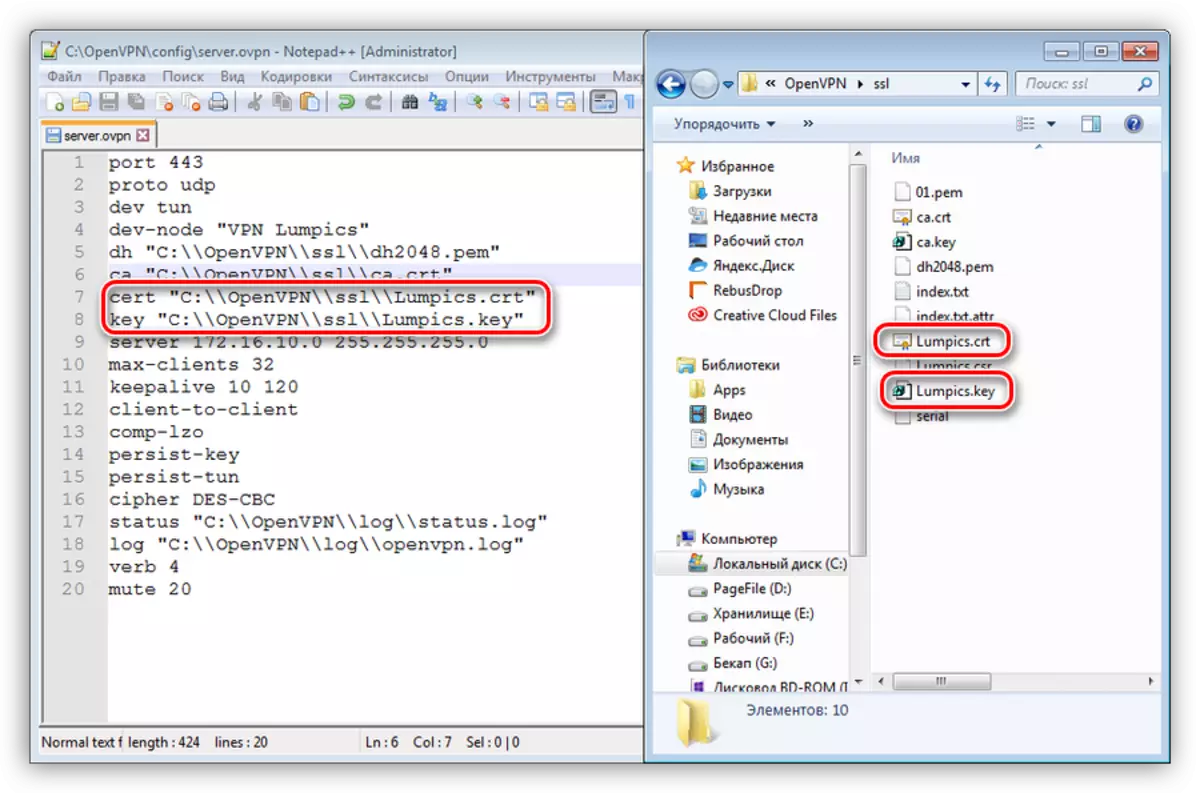
Create a text document here (PCM - Create - Text Document), rename it in Server.OVPN and open it in NotePad ++. We introduce the following code:
Port 443.
Proto UDP.
Dev Tun.
Dev-Node "VPN Lumpics"
DH C: \\ OpenVPN \\ SSL \\ DH2048.PEM
CA C: \\ OpenVPN \\ SSL \\ CA.CRT
CERT C: \\ OpenVPN \\ SSL \\ Lumpics.crt
KEY C: \\ OpenVPN \\ SSL \\ Lumpics.Key
Server 172.16.10.0 255.255.255.0
Max-clients 32
Keepalive 10 120.
Client-to-Client
COMP-LZO.
Persist-Key.
Persist-Tun.
Cipher Des-CBC
Status C: \\ OpenVPN \\ Log \\ Status.log
Log C: \\ OpenVPN \\ log \\ OpenVPN.log
Verb 4.
Mute 20.
Please note that the names of the certificates and keys must match the "SSL" folder.
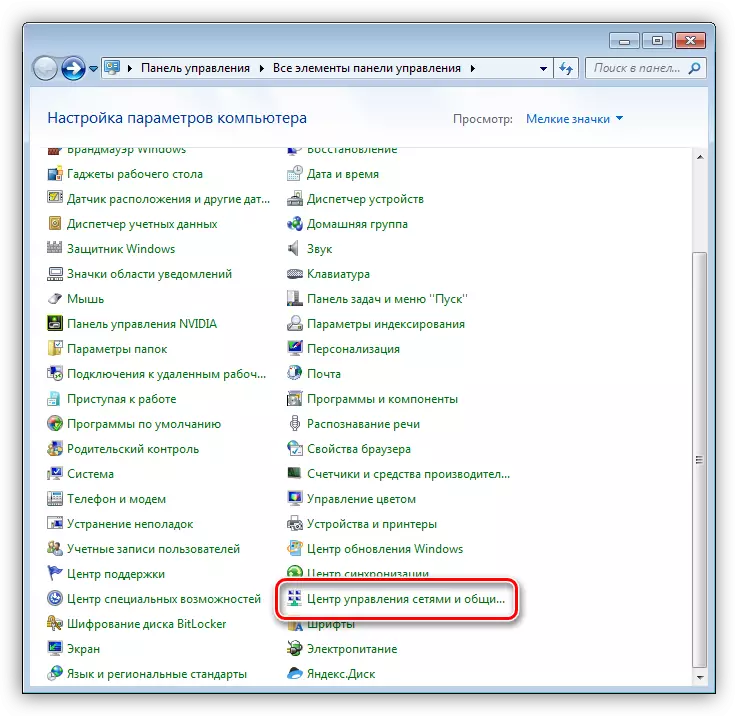
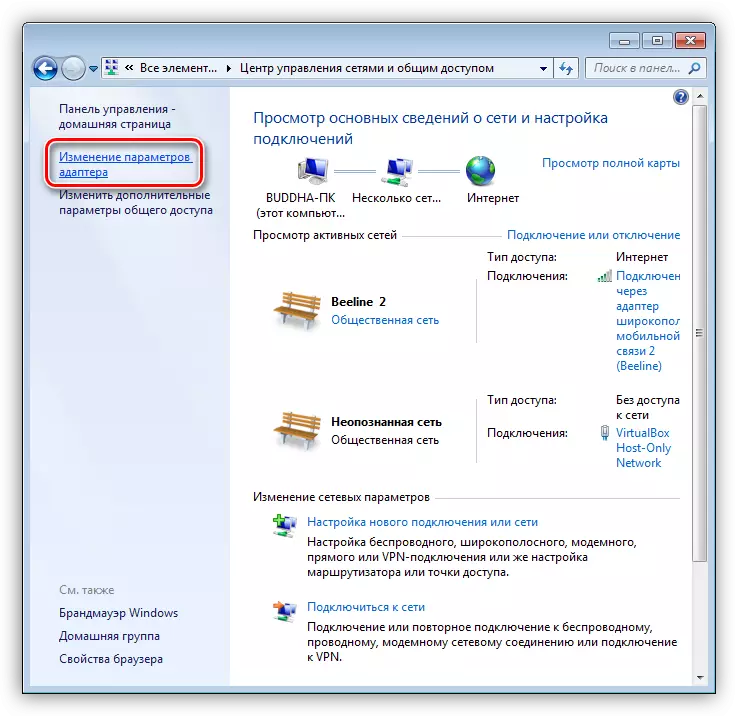
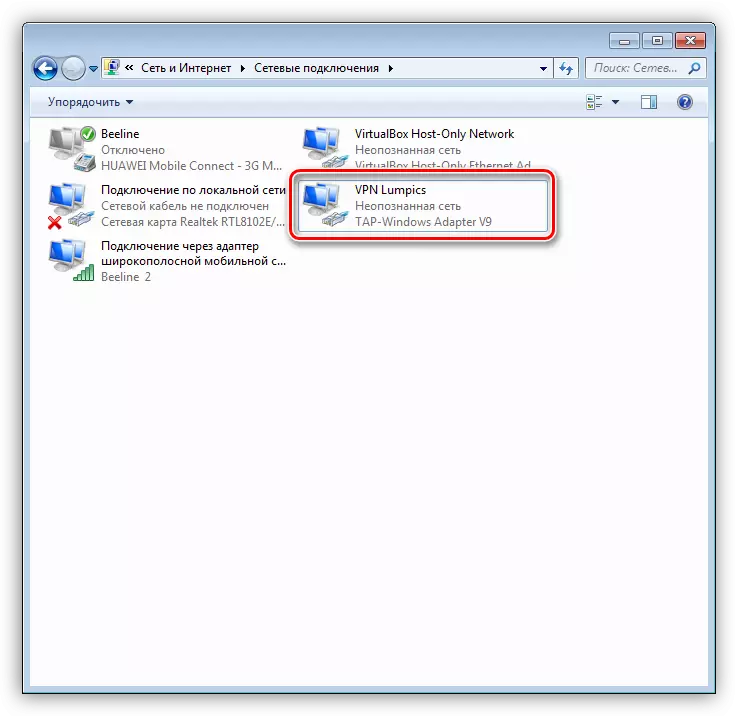
- Next, open the "Control Panel" and go to the "Network Management Center".
- Click on the "Changing Adapter Settings" link.
- Here we need to find a connection through "TAP-Windows Adapter V9". You can do this by clicking on the PCM connection and turning to its properties.
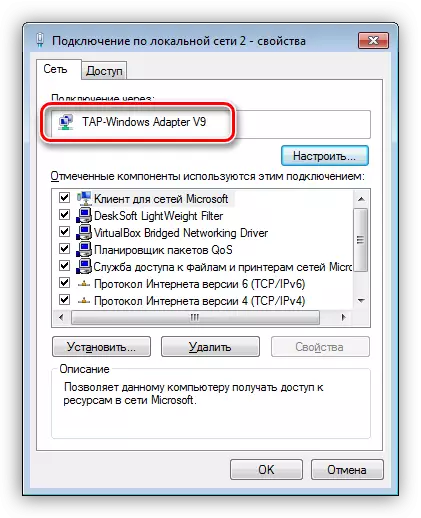
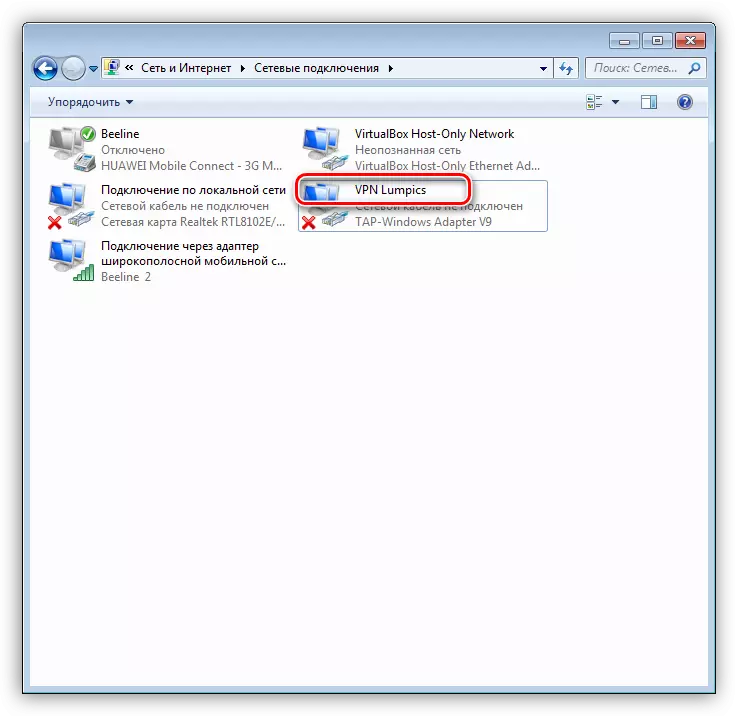
- Rename it to "VPN Lumpics" without quotes. This name must match the "Dev-Node" parameter in the Server.OVPN file.
- Final stage - launch service. Press the Win + R keys combination, enter the string specified below and click ENTER.
Services.msc.

- We find the service with the name "OpenVPNService", click PKM and go to its properties.
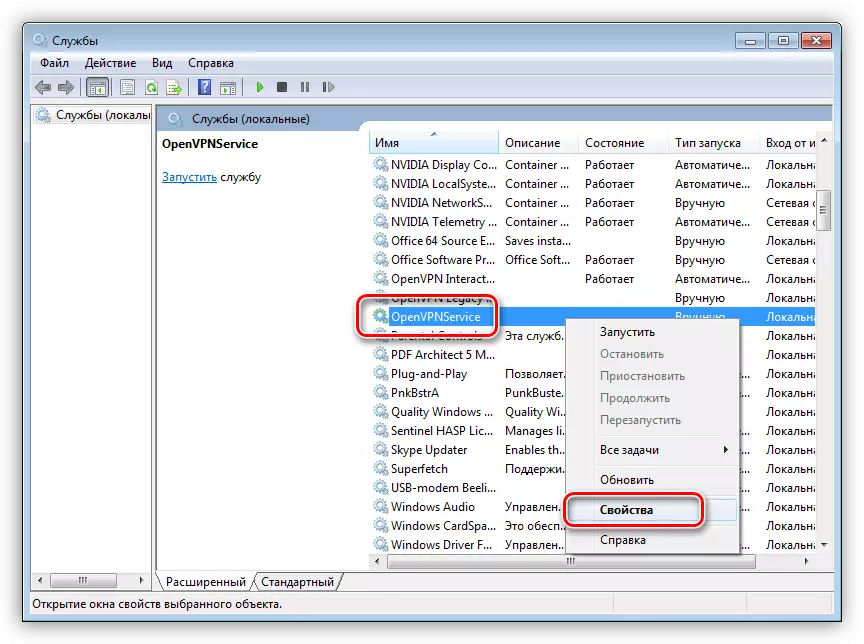
- Start type change to "automatically", run the service and click "Apply".
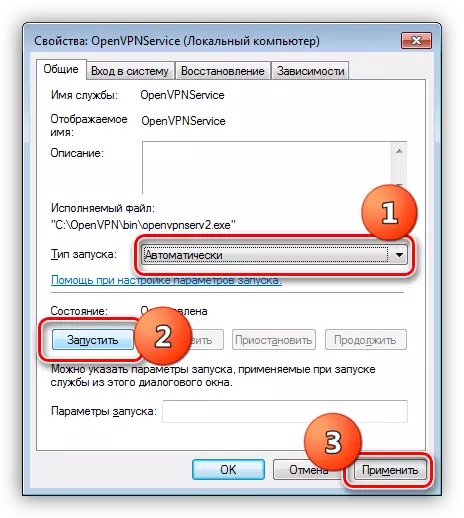
- If we are all done correctly, then the red cross is the abyss near the adapter. This means that the connection is ready to work.
Setting up a client part
Before starting the customer setup, you must make several steps on the server machine - to generate keys and certificate to configure the connection.
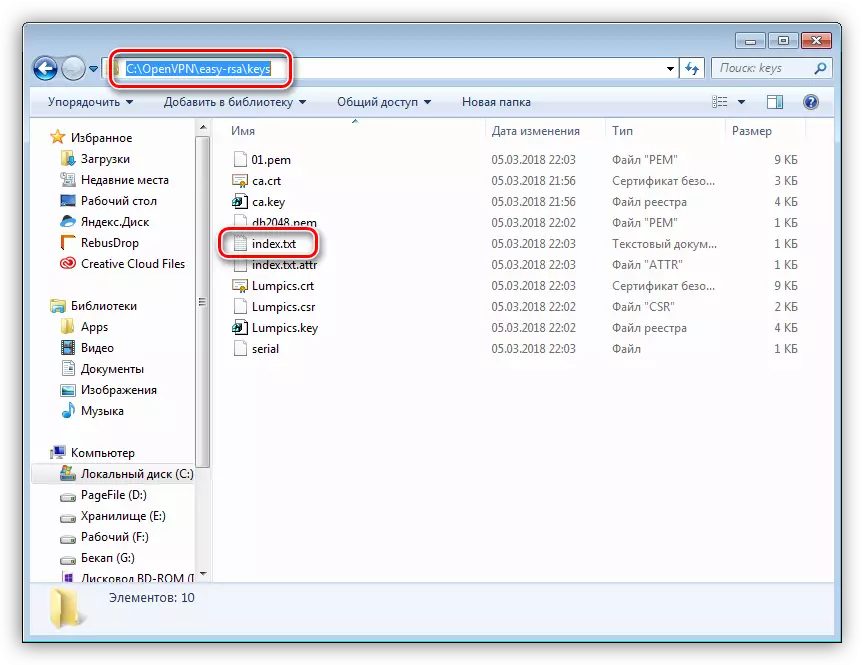
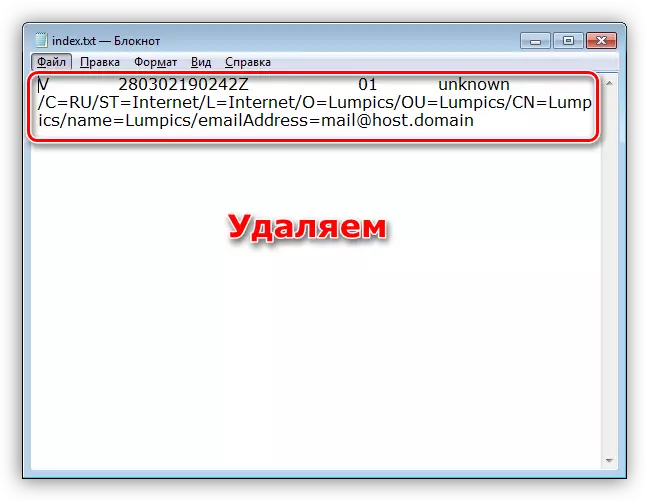
- We go to the "Easy-RSA" directory, then in the "Keys" folder and open the index.txt file.
- Open the file, delete all the contents and save.
- Go back to "Easy-RSA" and run a "command line" (SHIFT + PCM - Open the commands window).
- Next, launch Vars.Bat, and then create a client certificate.
Build-Key.Bat VPN-Client
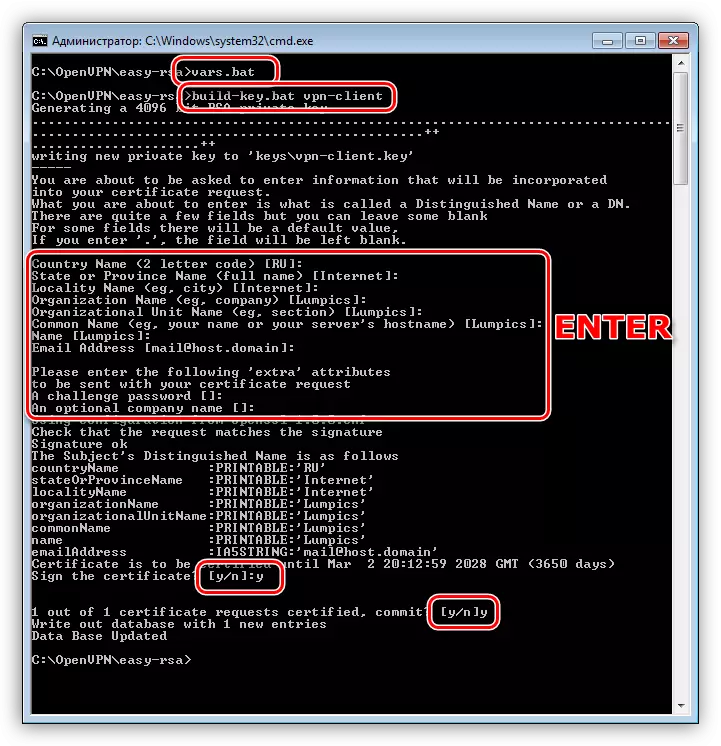
This is a general certificate for all machines on the network. To enhance security, you can generate your files for each computer, but call them differently (not "VPN-Client", but "VPN-Client1" and so on). In this case, it will be necessary to repeat all actions, starting with index.txt cleaning.
- Final action - transfer of vpn-client.crt files, VPN-Client.key, ca.CRT and DH2048.PEM to the client. You can do this in any convenient way, for example, write on the USB flash drive or transfer over the network.
Works that need to be performed on the client machine:
- Install OpenVPN in the usual way.
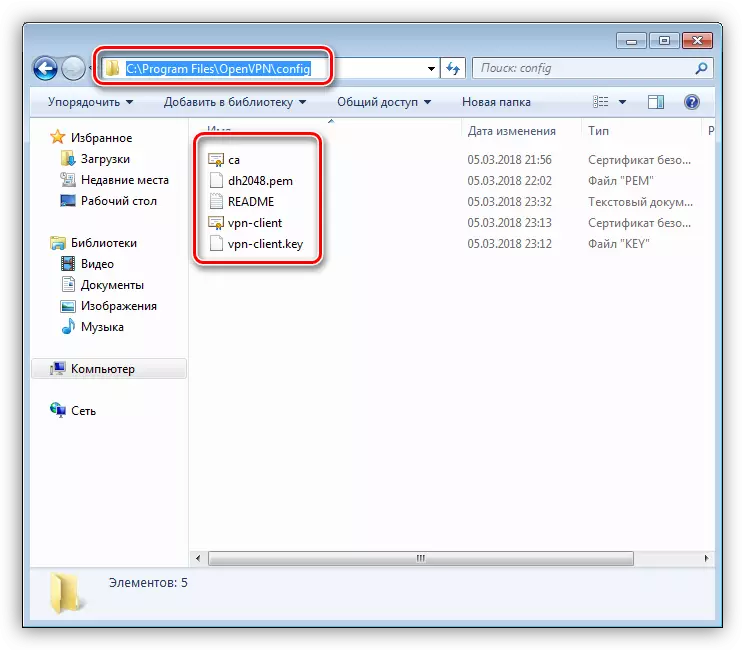
- Open the directory with the installed program and go to the "Config" folder. You need to insert our certificate and keys files.
- In the same folder, create a text file and rename it in config.ovpn.
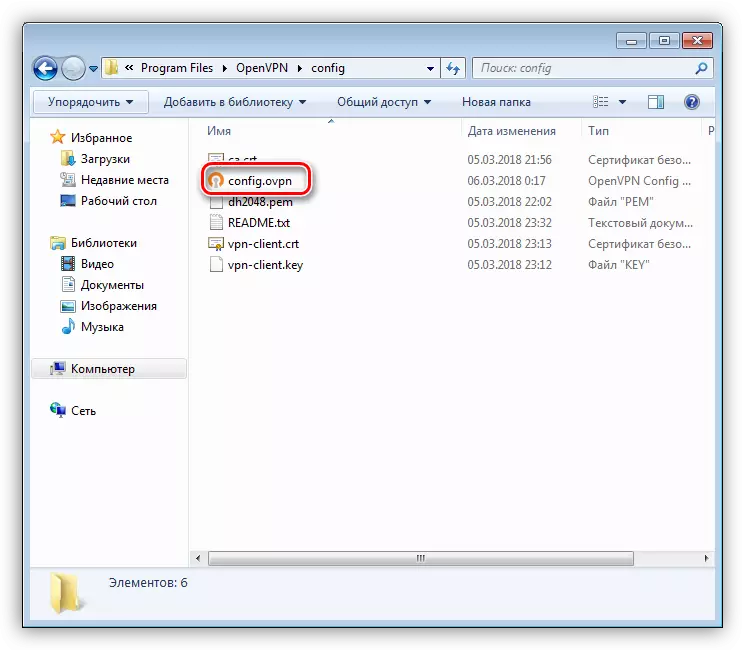
- Open the following code in the editor and prescribe:
Client.
RESOLV-RETRY INFINITE
Nobind.
Remote 192.168.0.15 443.
Proto UDP.
Dev Tun.
COMP-LZO.
CA CA.CRT.
CERT VPN-Client.crt
Key VPN-Client.Key
DH DH2048.PEM.
float
Cipher Des-CBC
Keepalive 10 120.
Persist-Key.
Persist-Tun.
Verb 0.
In the "Remote" row, you can register an external IP address of the server machine - so we will get access to the Internet. If you leave everything as it is, it will be possible only to connect to the server on the encrypted channel.
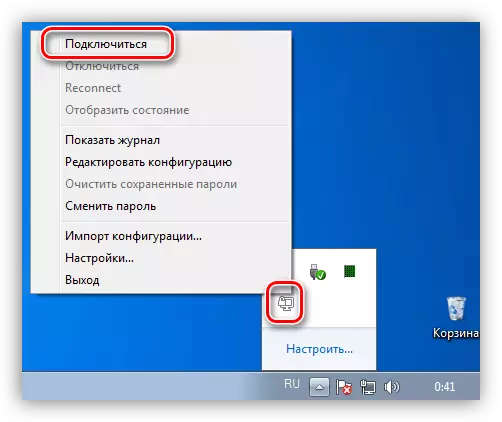
- We run OpenVPN GUI on behalf of the administrator using a shortcut on the desktop, then add the appropriate icon in the tray, press the PCM and select the first item with the name "Connect".
This is the configuration of the server and the OpenVPN client completed.
Conclusion
The organization of its own VPN network will allow you to maximize the transmitted information, as well as make Internet surfing more secure. The main thing is to be careful when configuring the server and client part, you can use all the advantages of a private virtual network.