

As part of the social network VKontakte, you may have questions about the removal of history. Next, we will consider in detail the removal process, affecting both visits sessions and an internal activity service.
Clean the sessions of VK visits
By affecting the subject of deleting information on sessions of visits to the site VKontakte, it is important to make a reservation that all actions can be divided into several sections. In this case, each method is unique and is suitable exclusively for users of any single version of the web browser.
In addition, it is important to know about the relationship between the history of visits to the site Vkontakte with the data, once preserved in the cache. Simply put, for the full cleansing of the session list, you will also need to delete cached records.
As part of the preface, it is important to mention a special software for the Windows operating system, created in order to perform automatic destruction of garbage. By resorting to help this kind of program, like CCleaner, it is possible to do without manual intervention in the work of the web browser, but sacrificing with a detailed setting.
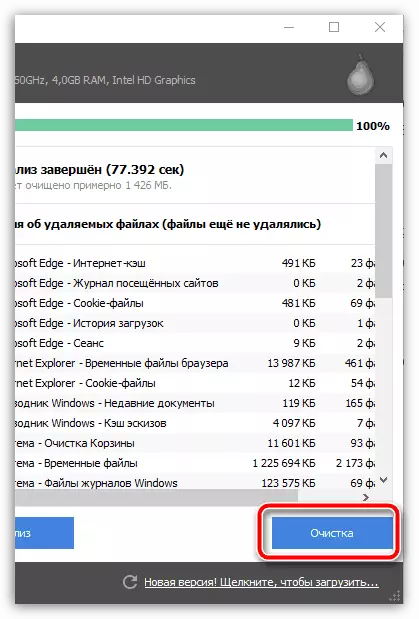
Read more: Cleaning a computer from garbage with CCleaner
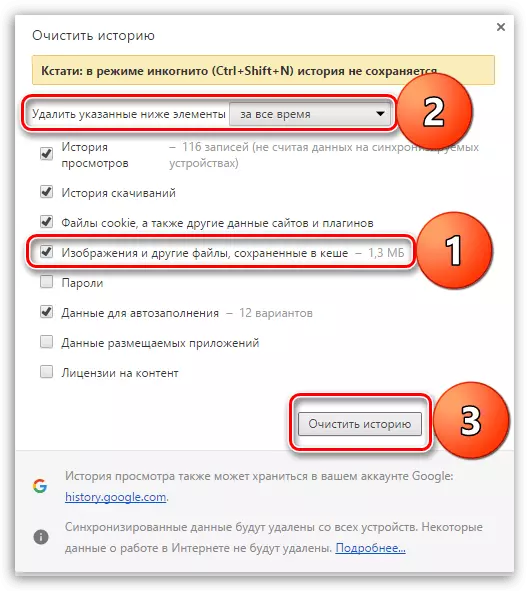
Method 1: Google Chrome
Google Chrome, developed by the company of the same name, is used by the largest number of people. As a consequence, the process of operation of the internal functional should not cause questions even at a novice user.
Data on the login sessions on the website of the VKontakte social network will disappear. But even so, we recommend additionally cleaning the cache, pushing out the instructions on our website.
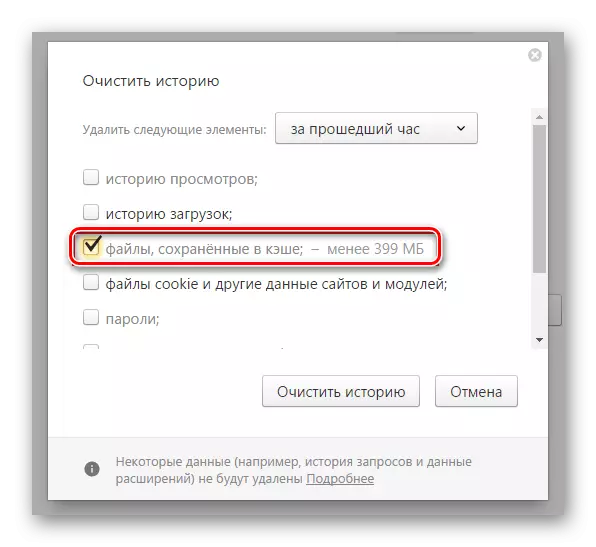
This is applicable not only within the Opera, but also in other observers.
As in Google Chrome, we recommend that you clean the browser cache from garbage, directly relating to the site of VKontakte.

Read more: How to remove cache in Opera
Method 3: Yandex.Browser
By analogy with previously voiced comments, Yandex.Bauzer users also have the opportunity to delete information about visits to the site of the VKontakte social network. Moreover, the required manipulations are almost identical to chrome and therefore should not cause some complications.
To avoid possible problems, it is best to perform the cleaning of data that is once saved to the cache.
Read more: How to remove cache in Yandex.Browser
Method 4: Mozilla Firefox
Mozilla Firefox is endowed with a different principle of work and remove information on sessions of visits to the site VKontakte.
Do not forget about the desired execution of cache cleaning at the Firefox browser.

Read more: How to remove cache in Mozilla Firefox
Remove the history of activity
By itself, VKontakte provides built-in functionality, allowing you to track any of the trial attempts to enter the account. Due to the concept of implementing this kind of possibilities, you should also carefully examine the process of completing active sessions through the "Settings" section.
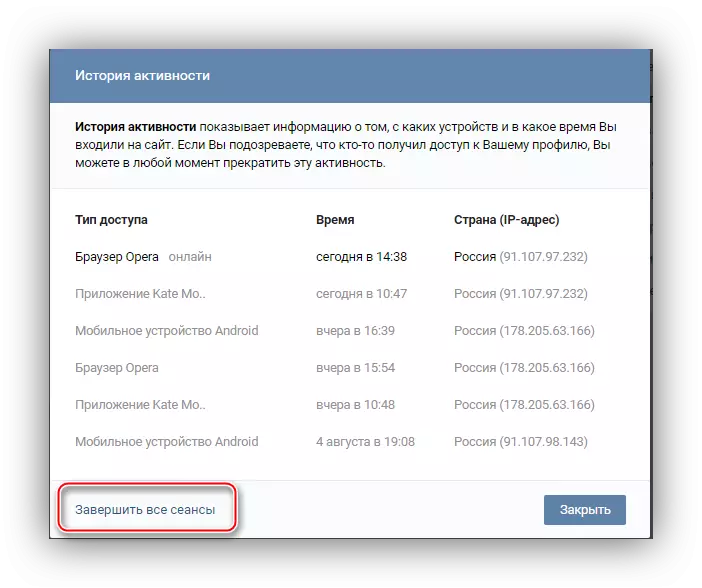
Read more: Completion of all VK sessions
We delete the "History of Friends" VK
As it was said in the preface of the article, in Vkontakte the story is not only the site visits sessions, but also special media files created through the internal service. This kind of records published by you or your friends can be deleted.Method 1: Mobile application
Since the initially considered service is created specifically for users of the VC application, it will be more correct to disassemble the process of deleting records on Android. At the same time, keep in mind that the continued recommendations are applied not only for the specified platform, but also other varieties of mobile devices.
Such media compresses can be created not only by users, but also by communities.
Thanks to this approach, you can get rid of literally from any record published by any of your friends. At the same time, the media file from the social network will not disappear and will be available for playing other people.
The life of this content is limited to 24 hours, after which the video will disappear by itself.
Unlike cases, when it is required to get rid of the history of another VC user, it is much easier to remove its own media file. Especially important is this for people who prefer to use a mobile application due to the possibility of instant erasing the failed recording and creating a new one.
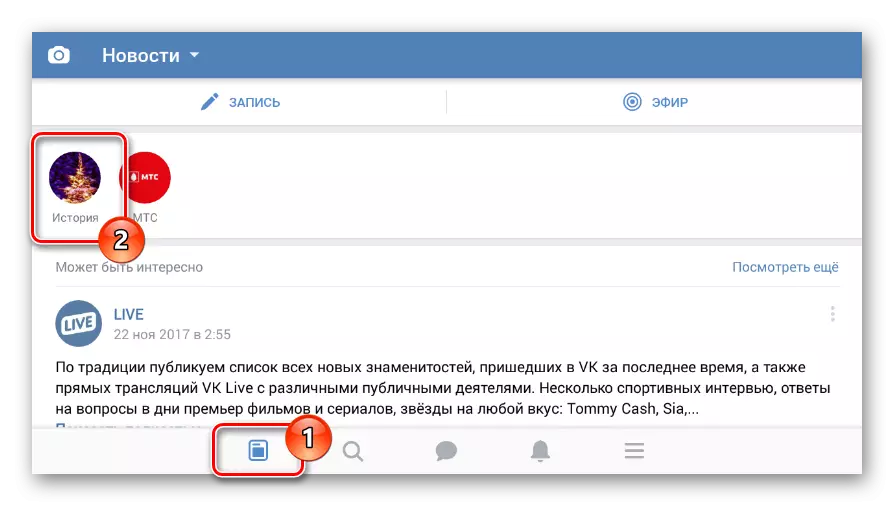
- Being on the News page in the appropriate section, run the file you created.
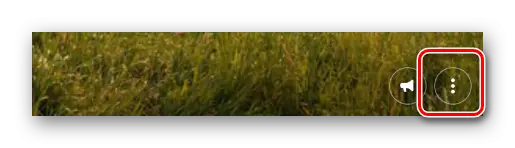
- During playback, open the recording management menu by clicking on the vertical dill icon.
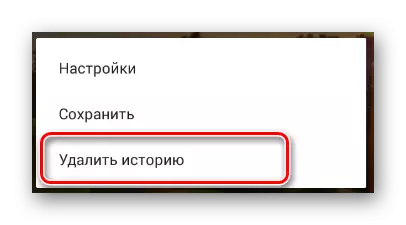
- Through the presented list of features, select the "Delete History" string.
- If you are all done correctly, the media file you created will disappear from the ribbon of friends and a special partition.
Please note that you can delete your own history countless times, as well as create this kind of roller re-on. Thus, the service life of the recording can be extended to an unlimited period, unless of course you are interested in this.
Method 2: full version
The official website of the social network VKontakte does not provide explicit opportunities to create new records of this kind, but the removal is still possible. It concerns that equally their own and other media files located in the relevant section.
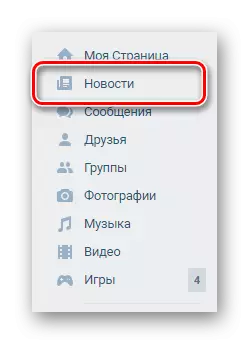
- Through the main resource menu, open the "News" section.
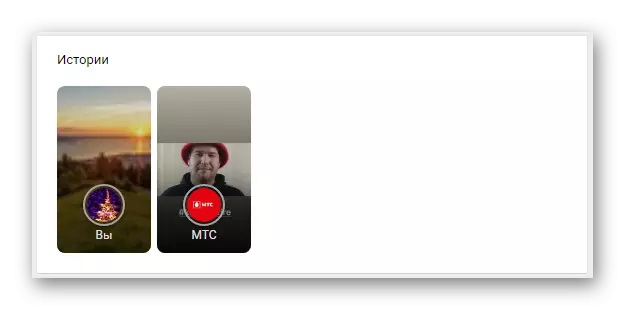
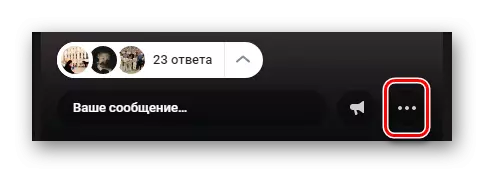
- At the beginning of this page, you will be presented to the "history" block, where you need to select the record you need.
- Opening a stranger media file, without waiting for its completion, hover the mouse over the "..." icon.
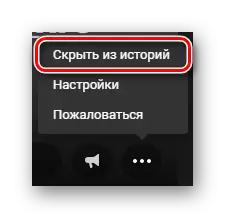
- From the list presented, select "Hide".
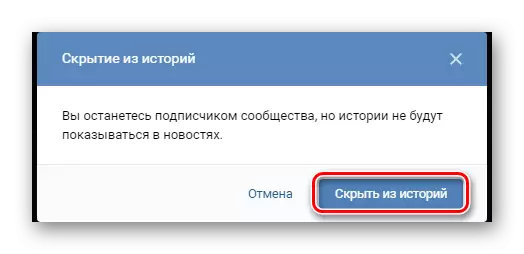
- Confirm the steps to hide file through the dialog box.

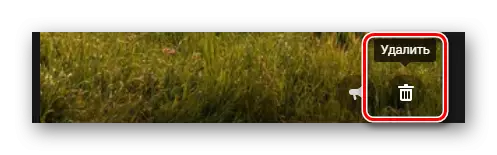
If you want to get rid of your record, you will need to perform similar actions, but with several other items.
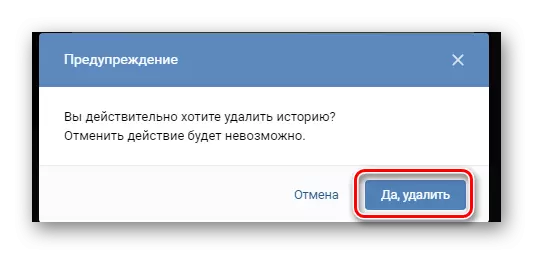
- After starting the history playback on the bottom panel, click on the Delete key.
- Perform acknowledgment through the corresponding window.
On this all the actions to remove files created by service, end. However, it concerns this only standard methods for solving the task.
Method 3: VK Helper
To date, many users are unhappy with the obvious imposition of various elements of the Inre File administration of VKontakte, which simply do not want or uncomfortable. Due to such a situation, independent developers have added new opportunities in the already familiar to many additions, allowing to manipulate the details of the site previously inaccessible.
Such measures are recommended only in extreme cases, since the performance of the method is preserved solely when the plug-in is running.
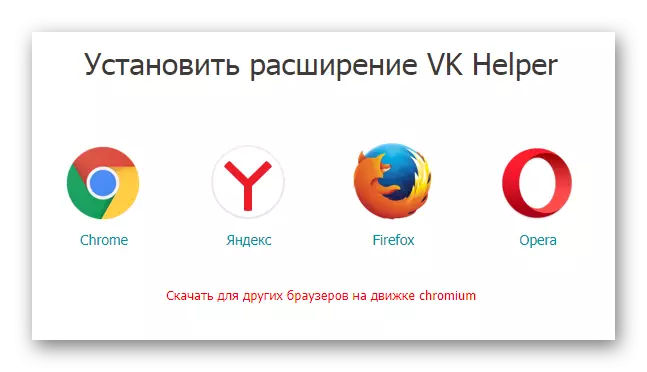
Based on the relevance, the most recommended VK Helper extension, working literally in any modern browser. Moreover, this supplement is in a state of active development, as a result of which it is often possible to observe the emergence of new opportunities.
Go to download VK Helper
- Open the official application site and select the browser you use.
- Check out the instructions, click on the extension link and install it in the usual way.
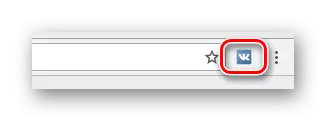
- Use the application icon on the browser toolbar to open the main menu.
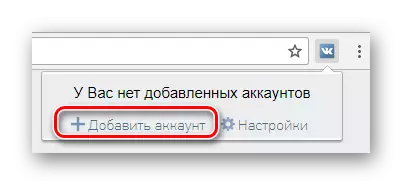
- From the presented features, select "Add Account".
- Complete the standard authorization procedure on the VKontakte website.


This is necessary even subject to the existence of an active session.
Further prescriptions are designed to hide the block under consideration within the site of this social network.
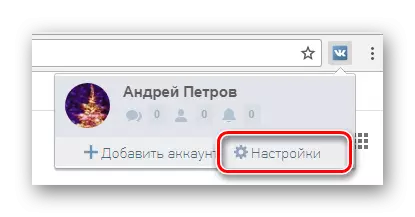
- By logging into account, reopen the main extension menu on the taskbar.
- Use the "Settings" link to open the page with the basic list of parameters.
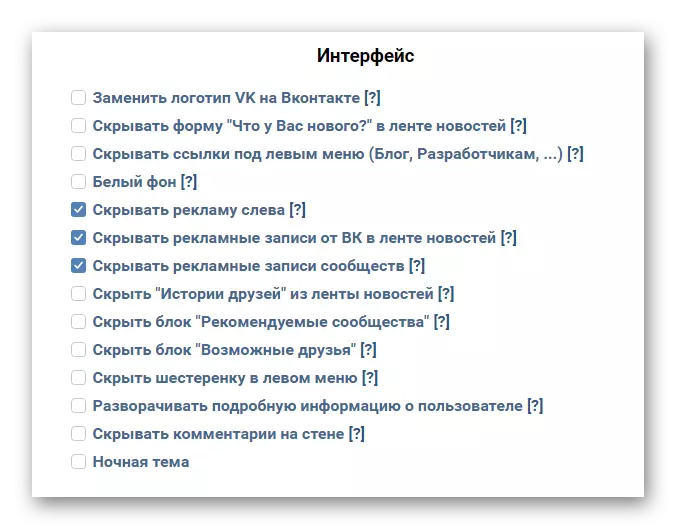
- Among the options provided, find the "Interface" block.
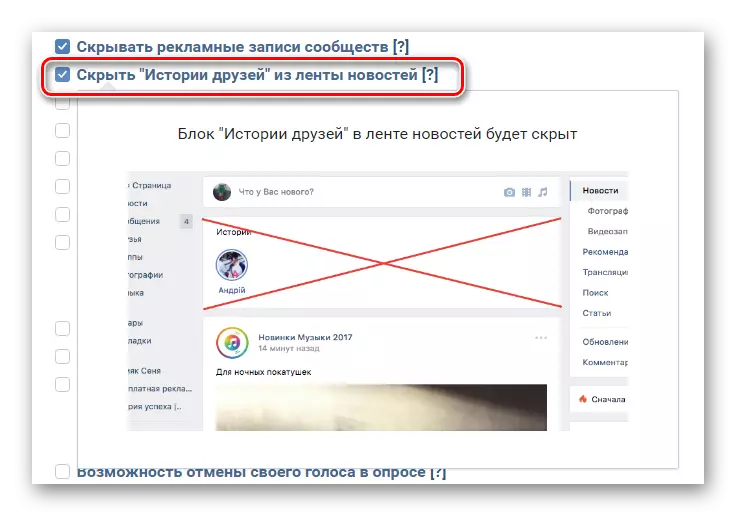
- Move the mouse over the item "Hide friends from feeding news feeds" for details and set a checkbox next to it, thereby activating.
- The extension does not require confirmation - just go to the "News" page and make sure that the section is not deleted.
And although this method allows without unnecessary problems to deactivate unused functionality, still not always the extension works properly. As a consequence, you can resort to another third-party browser application, more globally affecting the contents of the site VKontakte.
Method 4: Code Editing
A somewhat unusual, but still a fairly effective approach, can become editing the cosmetic code of VKontakte through the use of a special Stylish expansion for any modern browser. In this case, stories as such will not disappear from the resource, but will no longer appear in the "News" section.
We will consider actions to use on the example of Google Chrome.
The whole method is directly related to the use of themes and therefore is recommended only when additional extensions do not affect the convenience of using the site.
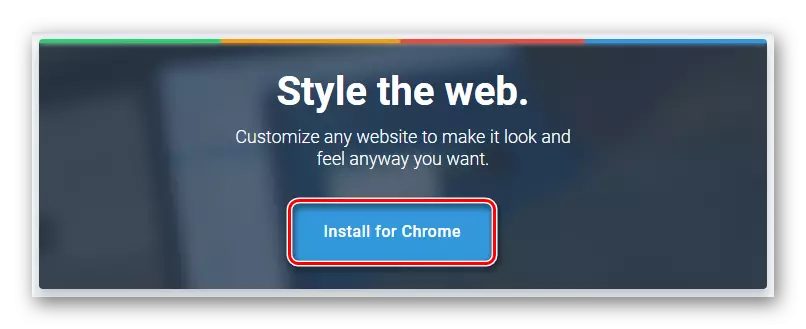
Go to the official site of Stylish
- Opening the link specified by us, you will find yourself on the main expansion page with the possibility of its installation.
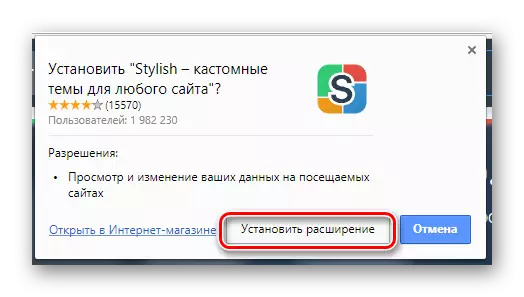
- Depending on the browser used in a special block, you will be presented with the "Install" button.
- Confirm the integration of the expansion into the browser.
- Go to News on VKontakte website.
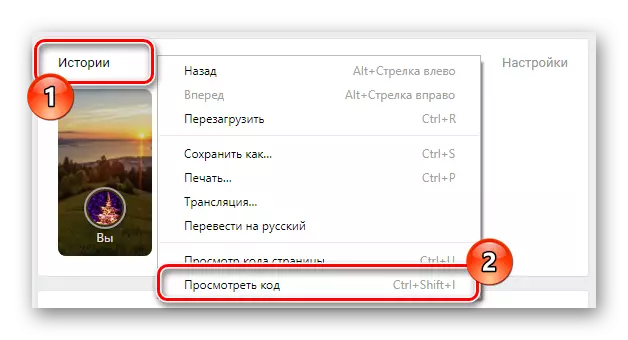
- Right-click on the History of the Block and select "View Code" through the menu.
- Now through the code research tools, switch to the Div element heading the hidden section.
- Having done this, click twice according to the contents of the class "Class".
- Copy the code represented there or take it from the example below.

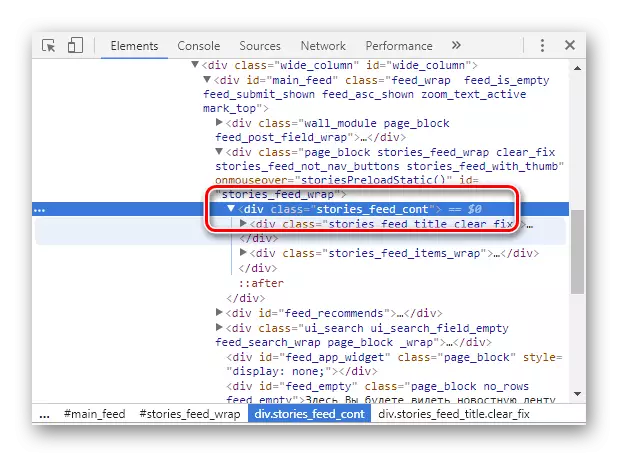
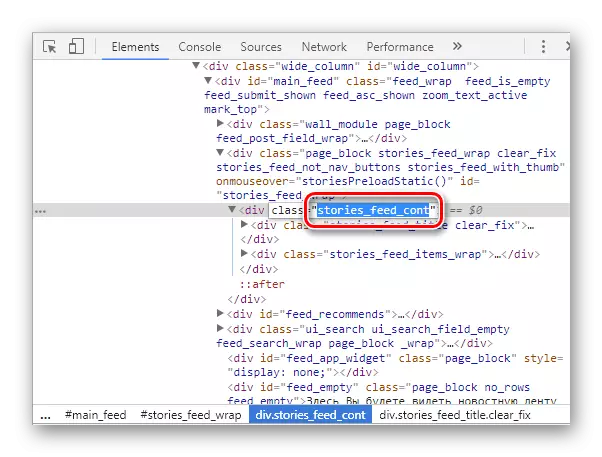
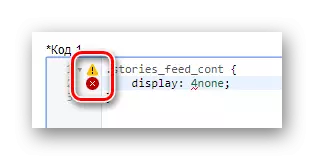
Stories_Feed_Cont.
Having understood with the preparations, you can proceed to edit.
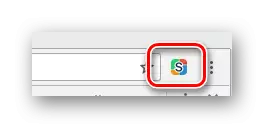
- In the upper right corner of the browser on its toolbar, click on the Stylish icon.
- Next, click on the vertical points icon and select the "Create Style" section.
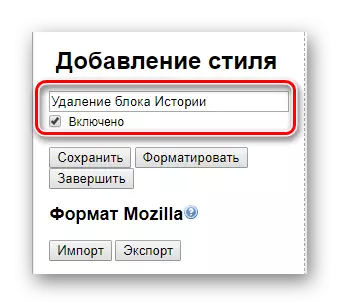
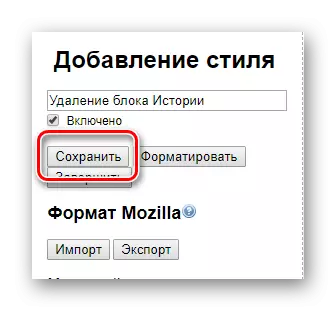
- Fill in the field "Enter the name" any convenient for you.
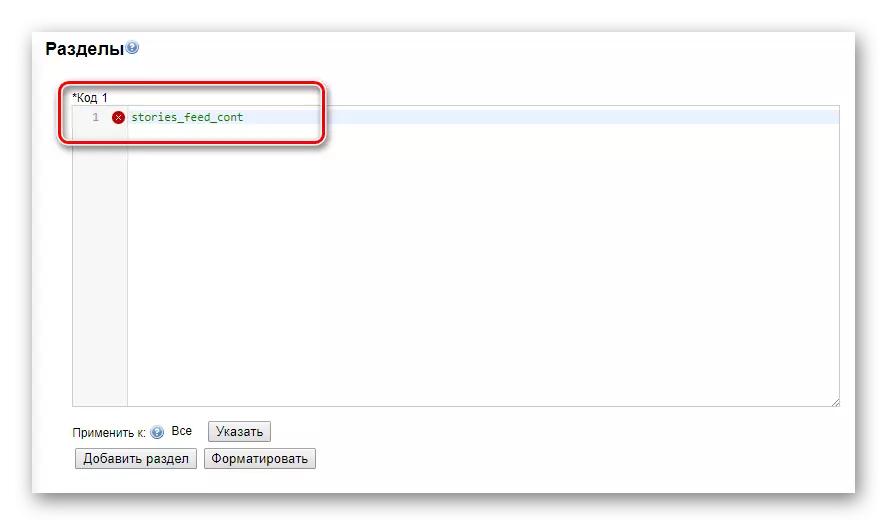
- In the "Sections" window, find the main text box "Code 1" and insert the previously copied set of characters.
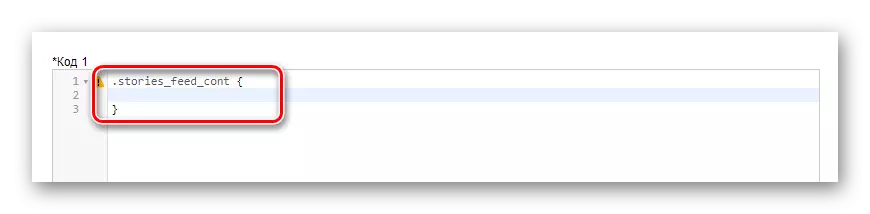
- Add a single point "." Before the inserted string.
- Immediately after the line, install double curly braces according to the example.
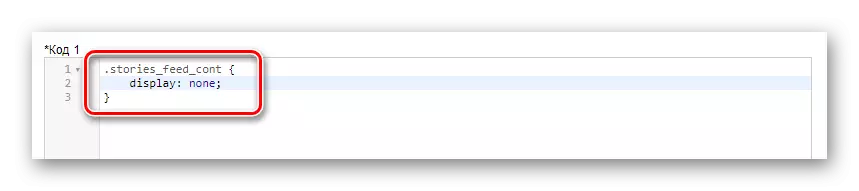
- On the new line, enter the code submitted by us.
- In the left part of the active window, use the Save button.
- Open the News VKontakte page and make sure that the unit has been completely excluded from the content.
- If this did not happen, try to update the page and additionally check the created code for errors.
- To complete, use the "Complete" button on the control page.
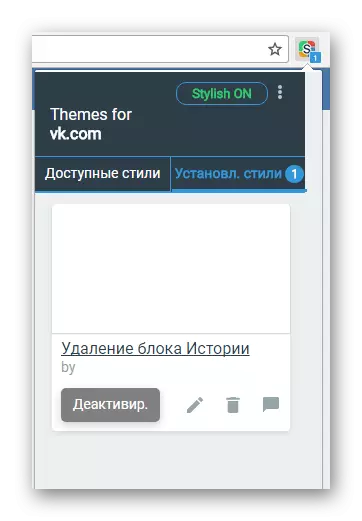
- At any time you can deactivate, delete or change the created style, open the main Stylish extension menu and switched to the "Installed Styles" tab.


In the CSS syntax, this mark allows you to determine the type of selector.
Display: None;
If error symbols did not disappear, you should double-check extended manipulations.

Recommendations apply not only to the considered block, but also literally to any other element of the site. Moreover, the extension properly interacts with any resource on the Internet.
See also: How to change the font VK
After executing the instructions, the "History" block will have to disappear from the "News" section. And on this we finish this method and this article.