

Raw is a format that hard disk receives if the system cannot determine the type of its file system. Such a situation may occur for various reasons, but the result is one: the hard drive cannot be used. Despite the fact that it will be displayed as connected, any actions will not be available.
The solution is to restore the former file system, and it can be done in several ways.
What is RAW format and why it appears
Our hard drives have the NTFS or FAT file system. As a result of certain events, it may change to RAW, it means that the system cannot determine which file system does the hard drive works in which file system. In essence, it looks like a lack of file system.This may happen in the following cases:
- Damage to the structure of the file system;
- The user did not format the section;
- It is impossible to access the contents of the volume.
Such problems appear as a result of system failures, improperly shutting down the computer, unstable power supply, or even due to viruses. In addition, with this error, the owners of new disks are not formatted before use.
If the volume is damaged to the operating system, then instead of its launch it will be possible to see the inscription "Operating System Not Found", or other similar notice. In other cases, when trying to make any action with a disk, you can see the following message: "Tom file system is not identified" or "To use the disk first format it."
RAW File System Recovery
The recovery procedure itself is not very complex, but many users are afraid to lose the information that is recorded on HDD. Therefore, we will consider several ways to change the RAW format - with the removal of all existing information on the disk and with the preservation of user files and data.
Method 1: PC reboot + HDD reconnect
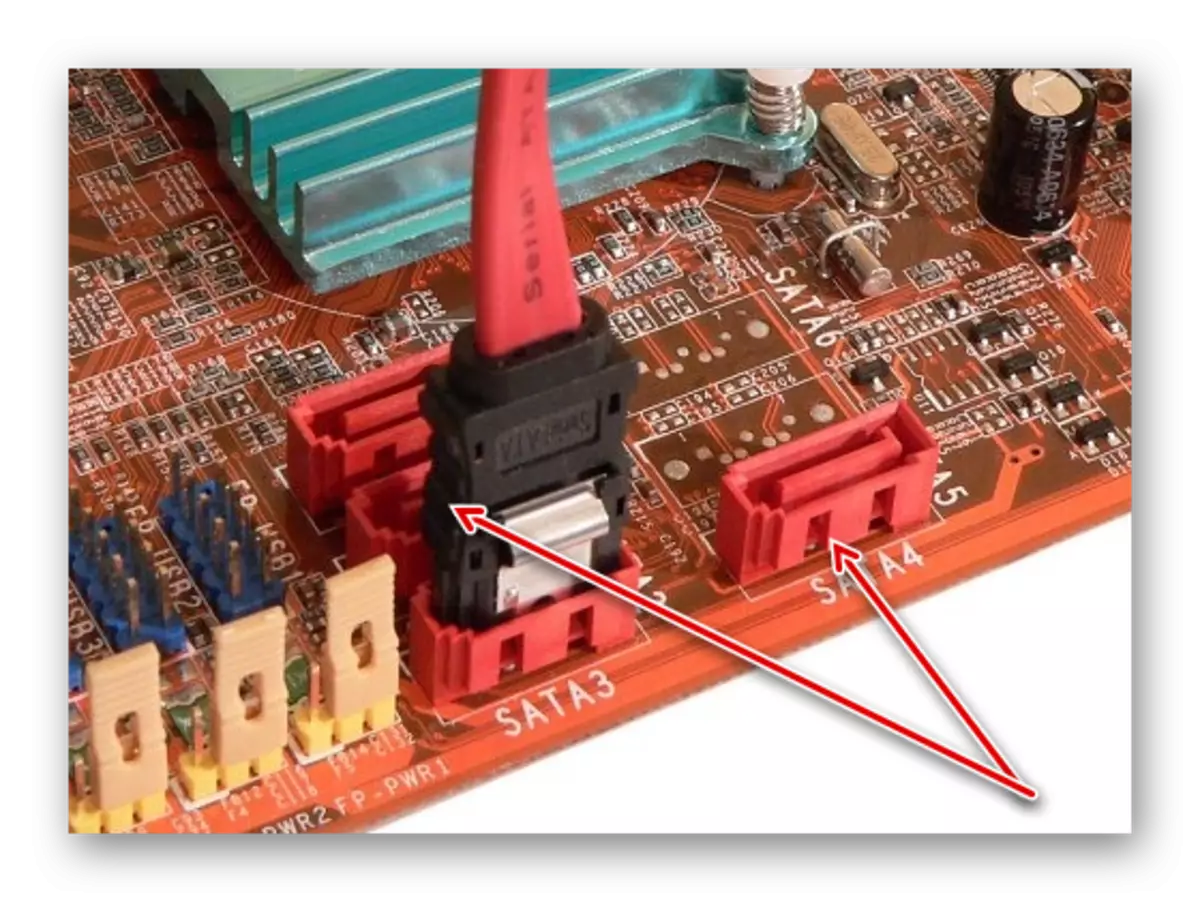
In some cases, the drive can get the RAW format erroneously. Before making further actions, try the following: Restart the computer, and, if it does not help, connect the HDD to another connector on the motherboard. For this:
- Fully de-energize PC.
- Remove the system block cover and check all cables and wires to integrity and adjustment density.
- Disconnect the wire connecting the hard disk with the motherboard and connect it to the next one. In almost all motherboards there are at least 2 outputs for SATA, so there should be no difficulties at this stage.
Method 2: Checking disk for errors
This method is what it is worth starting a change in the format if the previous actions were not crowned with success. Immediately it is worth a reservation - it helps it not in all cases, but simple and universal. It can be started with the operating system, or using the loading flash drive.
If you have a new empty disk in the RAW format or the appeared section with RAW does not contain files (or important files), then it is better to go to the method 2.
Run a disc check in Windows
If the operating system works, follow these steps:
- Open the command prompt on the administrator.
In Windows 7, click "Start", write cmd. Right-click on the result and select "Run on the administrator name".

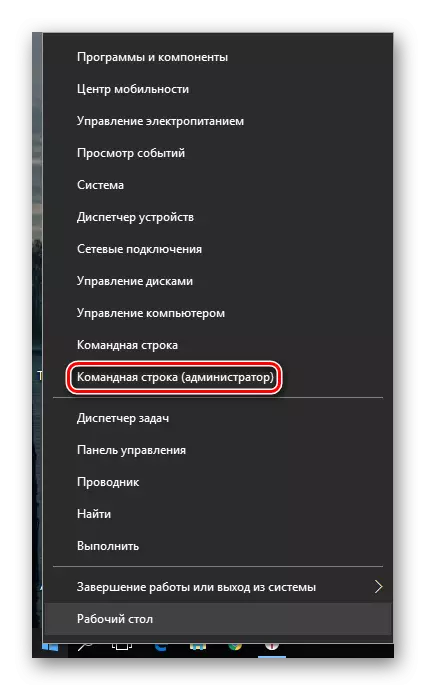
In Windows 8/10, click on "Start" with the right mouse button and select "Command Line (Administrator)".
- Enter the chkdsk x: / f command and press ENTER. Instead of X in this command you need to put the drive letter in the RAW format.

- If the HDD received the RAW format due to a small problem, for example, a file system failure, a check will be launched, which will most likely return the desired format (NTFS or FAT).
If it is impossible to check, you will receive an error message:
Type of RAW File System.
Chkdsk is unacceptable for RAW disks.
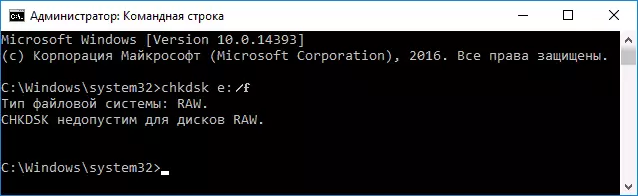
In this case, it is worth using other methods of recovery of the drive.
Checking the disc with the loading flash drive
If "flew" disk with the operating system, you must use the boot flash to start the CHKDSK scan tool.
Lessons on the topic: How to create a bootable USB flash drive 7
How to create a bootable USB flash drive 10
- Connect the USB flash drive to the computer and change the priority of the boot device in the BIOS settings.
In the old BIOS versions, go to the Advanced Bios Features / Bios Features Setup section, find the "First Boot Device" setting and set your flash drive.

In the new versions of the BIOS, go to the Boot section (or Advanced) and find the "1st boot priority" setting, where you select the name of your flash drive.

- Go to the command line.
In Windows 7, click on the "System Restore".
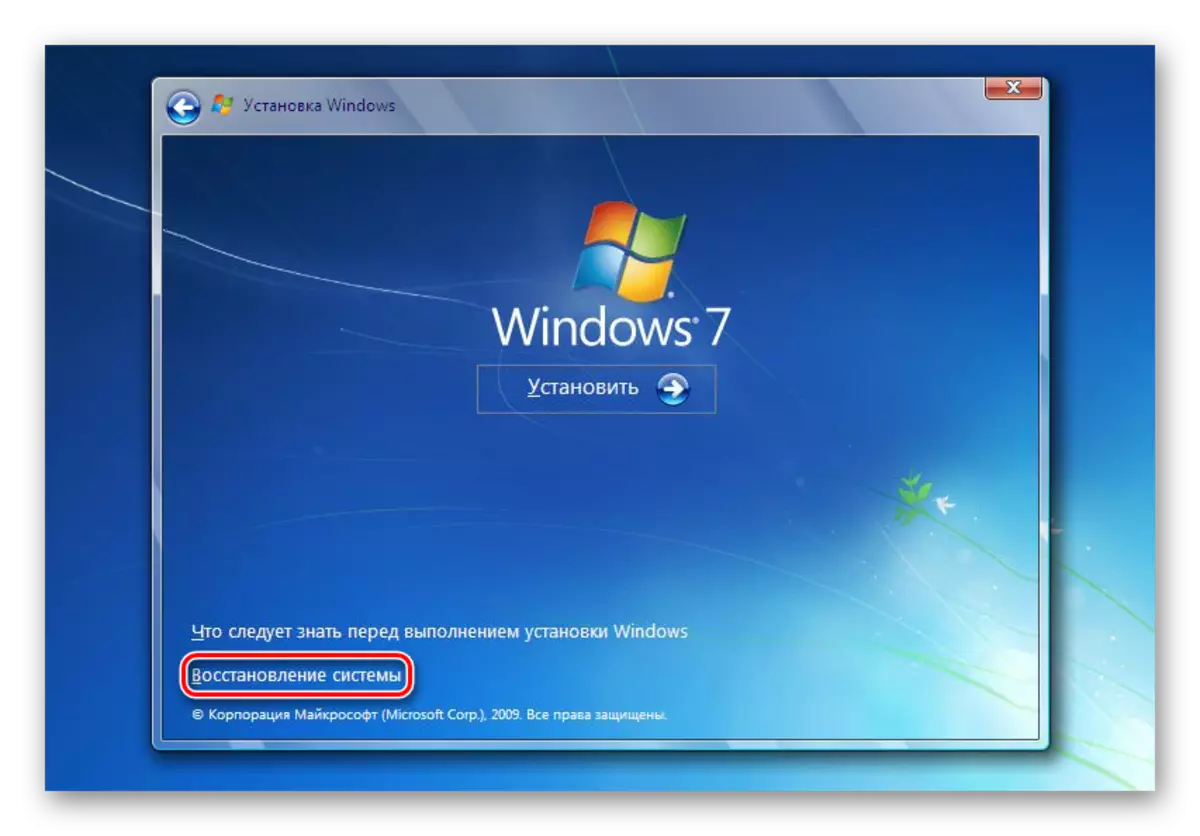
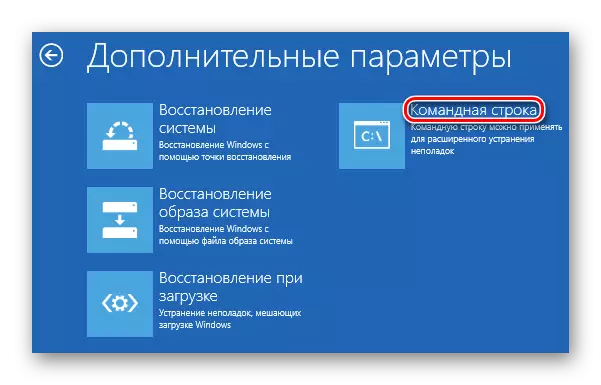
Among the parameters, select "Command Line".

In Windows 8/10, click on the "System Restore".

Select "Troubleshooting" and click on the "Command Line" item.
- Learn the real letter of your disk.
Because in the recovery environment, the letters of the disks may differ from those that we used to see in Windows, then you first write the DiskPart command, then List Volume.
Based on the issued information, find a problem section (in the FS column, find the RAW format, or determine the size through the Size column) and see its letter (LTR column).

After that, write the EXIT command.
- Push the chkdsk x: / f command and press ENTER (instead x, specify the disk name in RAW).
- With the successful event outcome, the NTFS or FAT file system will be restored.
If you are not possible to check, you will receive an error message:
Type of RAW File System.
Chkdsk is unacceptable for RAW disks.
In this case, go to other ways to restore.
Method 3: Restore the file system on an empty disk
If this problem happened to encounter when connecting a new disk, then this is normal. The newly acquired disk is usually not a file system and before first use it should be formatted.You already have an article on our site dedicated to the first connection of the hard disk to the computer.
Read more: The computer does not see the hard drive
The manual for the link above you need to use 1, 2 or 3 solution solutions depending on which function will be available in your case.
Method 4: Restore the file system with file saving
If there are any important data on the problem disk, then the formatting method will not work, and you will have to use third-party programs that will help return the file system.
Dmde.
DMDE is free and effective in restoring HDD with different problems, including RAW error. It does not require installation and can be run after unpacking the distribution.
Download DMDE from the official site
- After starting the program, select a disk with RAW format and click on "OK". Do not take a tick from the point "Show sections".

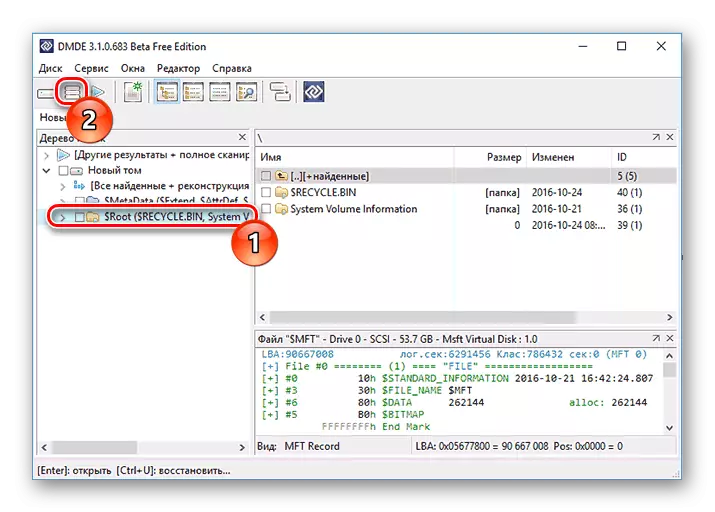
- The program displays a list of sections. You can find a problem in the specified parameters (file system, size and crossed out icon). If the section is present, select it with the mouse click and click on the "Open Tom" button.

- If the section was not found, click on the "Full Scan" button.
- Before further work, check the contents of the section. To do this, click on the "Show Sections" button, which is on the toolbar.
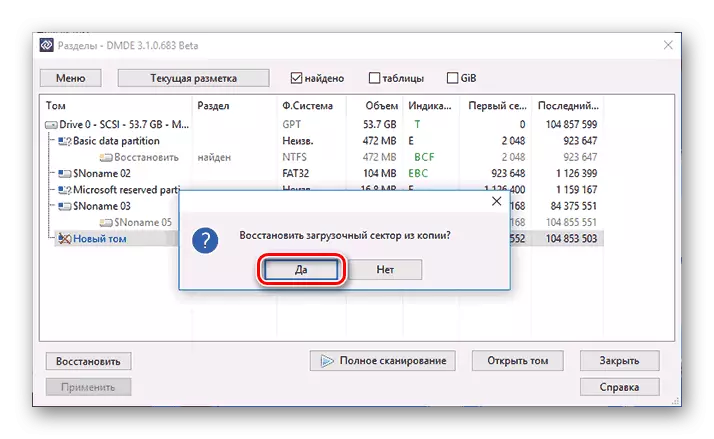
- If the section is correct, select it and click on the "Restore" button. In the confirmation window, click "Yes.
- Click on the Apply button below the window at the bottom, and save the data for recovery.
Important: Immediately after recovery, you can receive disk error notifications and a reboot offer. Perform this recommendation to eliminate possible problems, and with the next launch of the computer, the disc should work properly.
If you decide to restore this program with an installed operating system by connecting it to another PC, a small complexity may appear. After successful recovery when the disk is connected, the OS may not boot. If this happens, you need to recover Windows 7/10 bootloader.
Testdisk.
TestDisk is another free and non-installing program that is more complex in control, but more efficient than the first. It is not strongly recommended to use this program to inexperienced users who do not understand what needs to be performed, since if you have incorrect actions, you can lose all data on the disk.
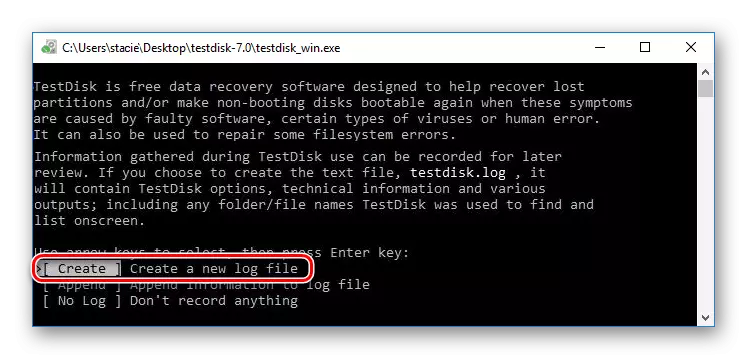
- After starting the program on behalf of the administrator (testdisk_win.exe), click "Create".
- Select a problem disk (you need to select the disc itself, not the section) and click "Proceed".

- Now you need to specify the style of the partitions of the disks, and, as a rule, it is determined automatically: Intel for MBR and EFI GPT for GPT. You can only press ENTER.

- Select "Analyze" and press the Enter key, then select "Quick Search" and press Enter again.
- After analysis, several sections will be found, among which will be Raw. It is possible to determine it in size - it is displayed at the bottom of the window each time the selection is selected.
- To view the contents of the partition and verify the correct choice, press the Latin letter P keypad, and to complete the view - Q.
- Green sections (marked P) will be restored and recorded. White sections (marked D) will be deleted. To change the mark, use the arrows on the "right-left" keyboard. If it fails to change it, it means that the recovery can disrupt the HDD structure, or the partition is incorrect.
- The following are the following - system sections are marked for removal (D). In this case, they need to be changed to P using keyboard arrows.
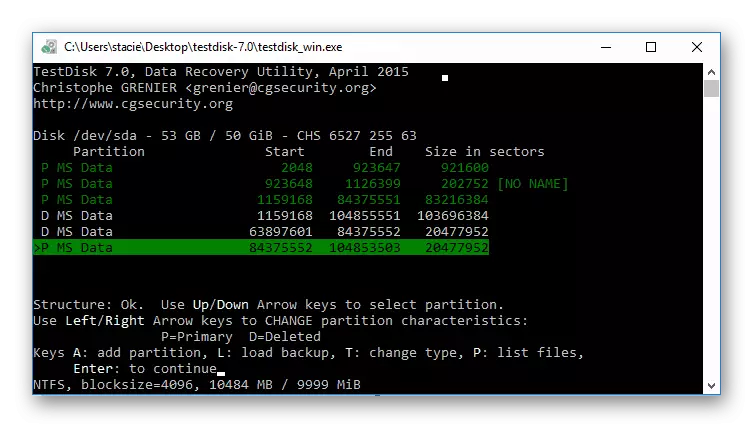
- When the disk structure looks like this (along with the EFI boot and the recovery medium), as must, press ENTER to continue.
- Check again if everything is done correctly - all sections you have chosen. Only in case of complete confidence, click "Write" and Enter, and then Latin Y to confirm.
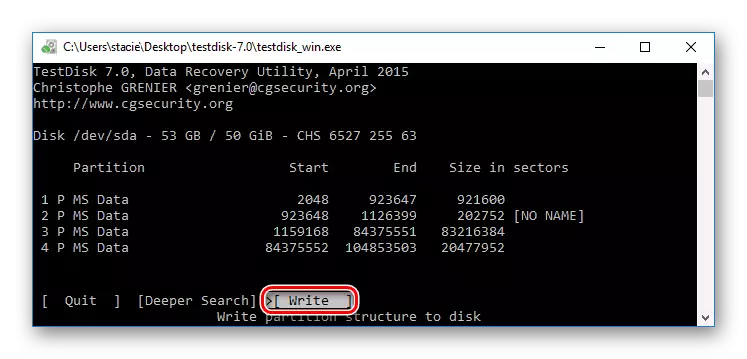
- After completing the work, you can close the program and restart the computer to check if the file system from RAW has recovered.
In case the disk structure is not the one that should be, use the "Deeper Search" function, which will help to make a deep search. Then you can repeat steps 6-10.

Important: If the operation is successful, the disc will receive a normal file system and will be available after rebooting. But, as in the case of the DMDE program, you may need to restore the bootloader.
If the disk structure is incorrectly restored, the operating system will not boot, so be extremely careful.
Method 5: Data recovery with subsequent formatting
This option will be salvation for all those users who do not understand or are afraid to use the programs from the previous method.
Upon receipt of the RAW disk, almost in all cases you can successfully restore the data using a special software. The principle is simple:
- Restore files to another disk or flash drive using the appropriate program.
- Format the disk to the desired file system.
Most likely, you have a modern PC or laptop, so it is necessary to format in NTFS.
- Transfer files back.
Read more: File Recovery Programs
Lesson: How to restore files
Read more: How to format the hard drive
We reviewed various options for fixing the HDD file system from the RAW format in NTFS or FAT. We hope that this guide helped you correct the problem with a hard disk.