

All laptops have about the same design and their disassembly process is not much different. However, each model of different manufacturers have their own nuances in the assembly, connections and fastening of components, so the dismantling process may cause difficulties with the owners of these devices. Next, we will consider in detail the process of dismantling the laptop model G500 from Lenovo.
We disassemble the Lenovo G500 laptop
You should not be afraid that during disassembly, you damage the components or then the device will not work. If everyone does strictly according to the instructions, each action is careful and carefully, then there will be no failures in the work after the reverse assembly.Before disassembling the laptop, make sure that the warranty period has already ended, otherwise the warranty service will not be provided. If the device is still under warranty, it is better to use the services of the service center in troubleshooting in the device.
Step 1: Preparatory work
To make disassembly, you will need only a small screwdriver, suitable for the size of the screws used in the laptop. However, we recommend pre-prepare color labels in advance or any other marks, thanks to which it would be possible not to get confused in the screws of different sizes. After all, if you screw the screw in the wrong place, you can damage the motherboard or other components.
Step 2: Turning off the power
The whole disassembly process must be carried out only with a laptop disconnected from the network, so it will be necessary to completely limit all the power supply. This can be done as follows:
- Turn off the laptop.
- Disconnect it from the network, close and turn up the bottom.
- Divide fasteners and remove the battery.

Only after all these actions can be started with a complete disassembly of the laptop.
Step 3: Rear Panel
You could already notice the missing visible screws on the rear panel of the Lenovo G500, as they are hidden not in completely obvious places. Follow these steps to remove the rear panel:
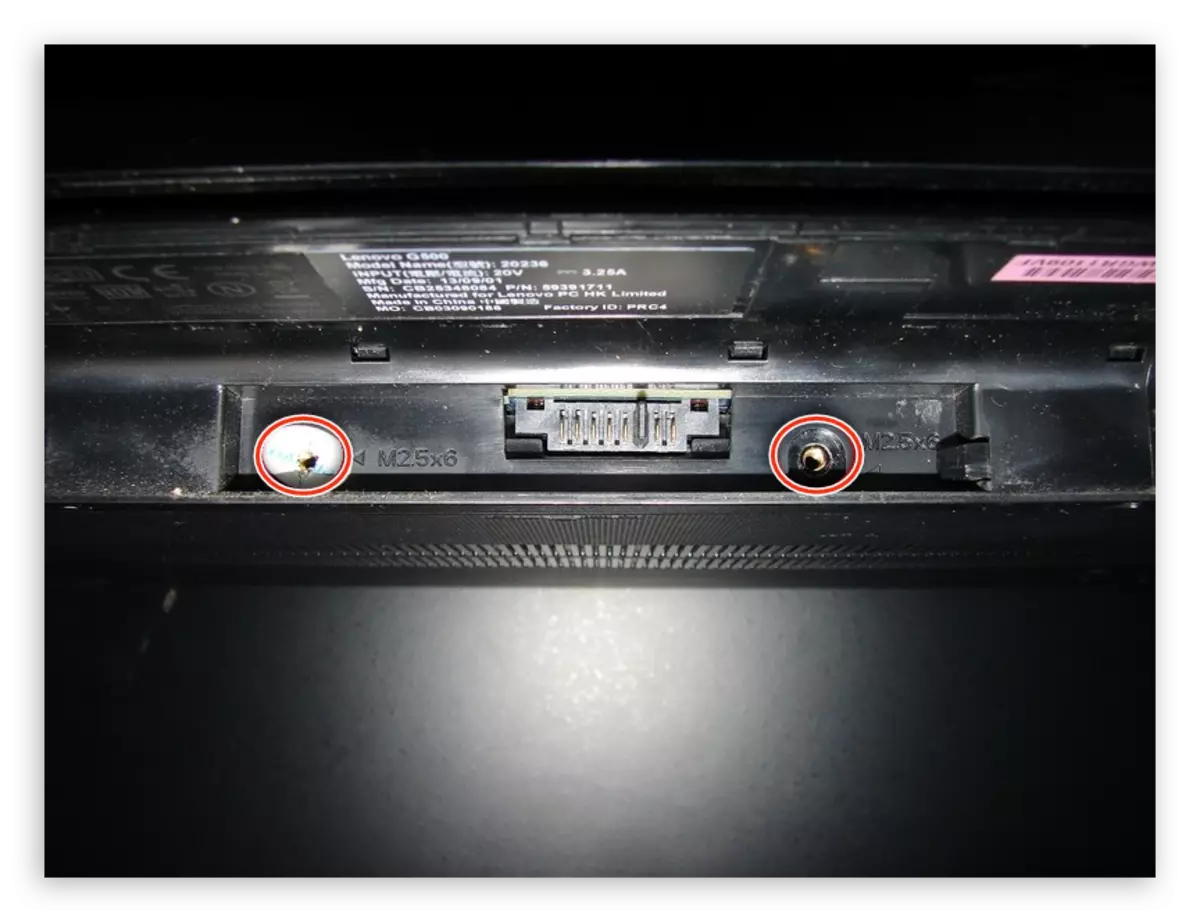
- Removing the battery is required not only for complete stopping of the device, the mounting screws also hide under it. After removing the battery, put the laptop vertically and unscrew the two screws near the connector. They have a unique size, therefore, marked "M2.5 × 6" marked.
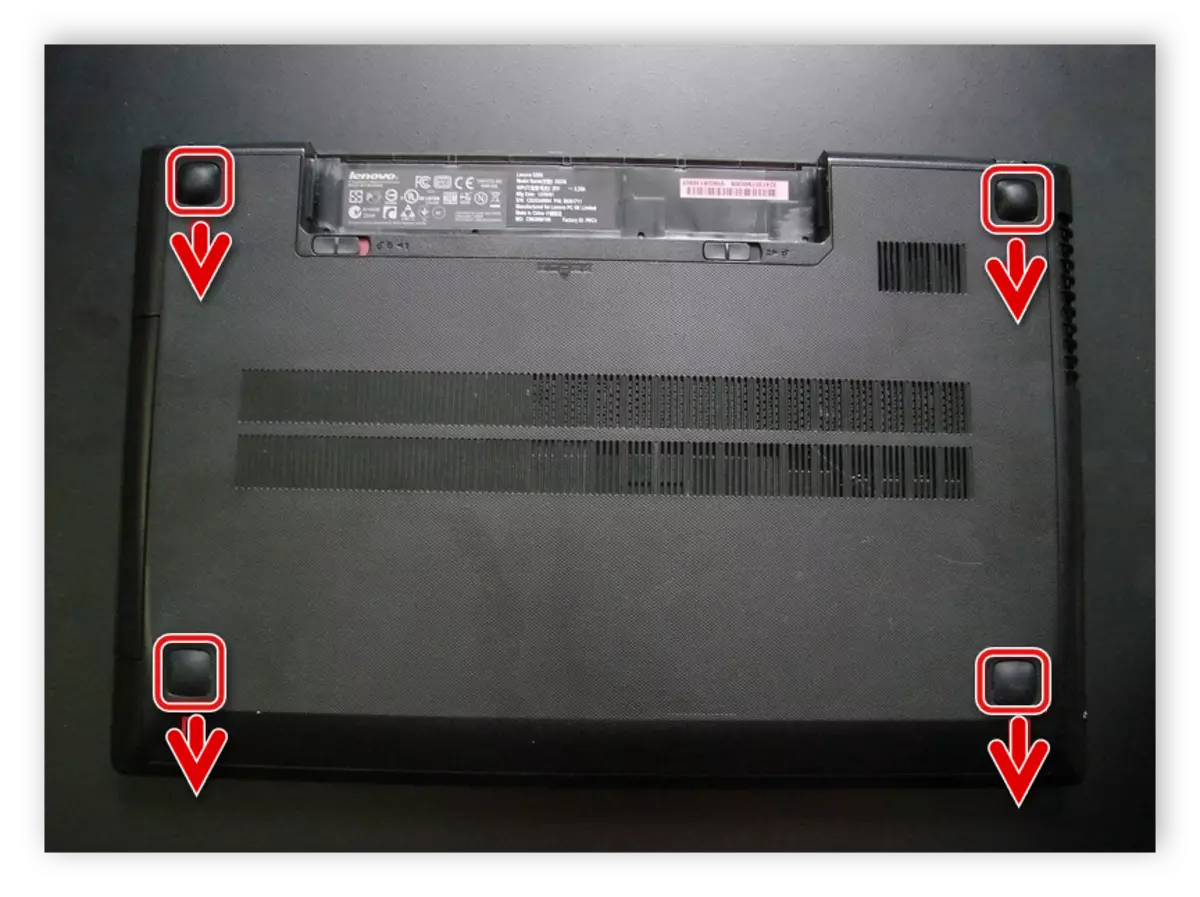
- The remaining four screw fastening screws are under the legs, so it will be necessary to remove them to access the fastening elements. If there is often a disassembly quite often, then in the future the legs can unreliable in their places and disappear. Unscrew the remaining screws and mark them with a separate label.
Now you have gained access to some components, however, there is another protective panel that will need to be disconnected if you need to remove the top panel. To do this, find five identical screws around the edges and unscrew them alternately. Do not forget to also mark them with a separate label to not get confused.

Step 4: Cooling System
Under the cooling system, the processor is hidden, so to clean the laptop or full disassembly, the fan with the radiator will need to be disconnected. It is possible to perform this as follows:
- Pull the fan power cable from the connector and unscrew the two main fan mounting screws.
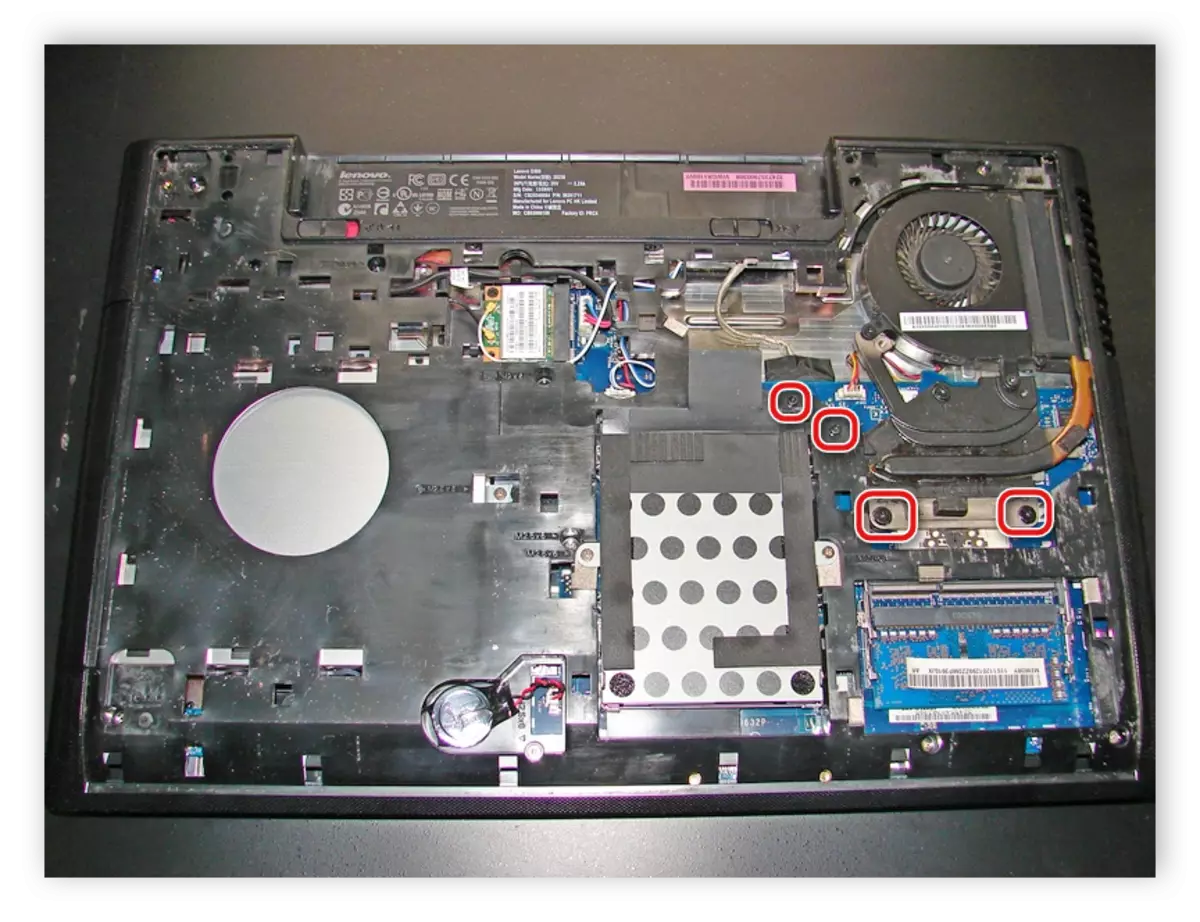
- Now it will be necessary to remove the entire cooling system, including the radiator. To do this, alternately loosen the four fastening screws, following the numbering specified on the housing, and then unscrew them in the same order.
- The radiator is attached to the sticky tape, so when removing it needs to be disconnected. Just attach a little effort, and she will disappear.

After performing data of manipulations, you get access to the entire cooling system and processor. If you just need to clean the laptop from dust and replace the thermal path, then you can not extend further disassembly. Perform the required actions and collect everything back. Read more about cleaning the laptop from dust and replace the processor thermal stas in our articles on the links below.
Read more:
We solve the problem with overheating laptop
Correct computer cleaning or dust laptop
How to choose a laptop thermal
Learning to apply the thermal power to the processor
Step 5: Hard disk and RAM
The simplest and rapid effect is to disconnect the hard disk and RAM. To pull the HDD, simply unscrew the two screws and gently remove it from the connector.

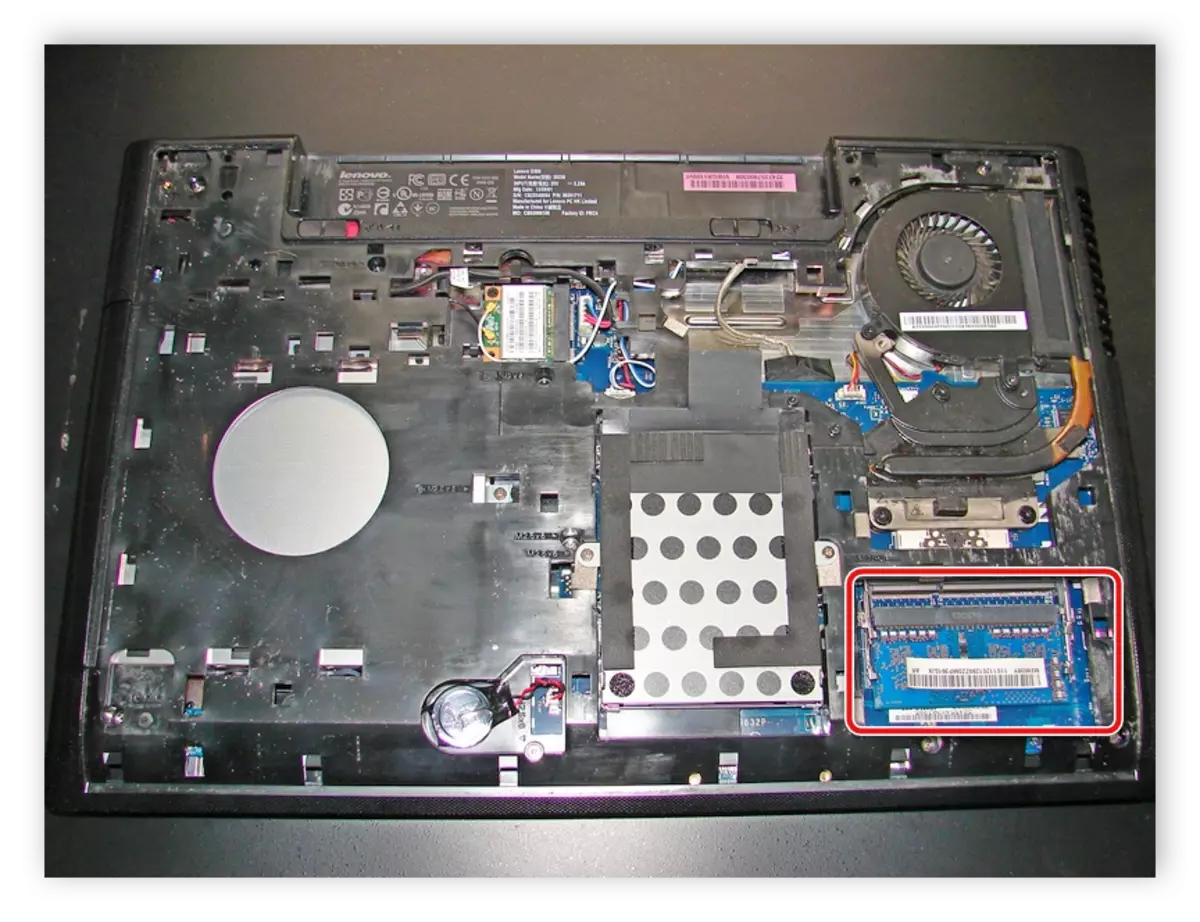
RAM is not fixed by anything, but simply connected to the connector, so just perform a shutdown according to the instructions on the case. Namely, you only need to raise the lid and get the bar.
Step 6: Keyboard
On the back of the laptop there are several more screws and loops, which also hold the keyboard. Therefore, look at the body carefully and make sure that all mounts were unscrew. Do not forget to mark the screws of different sizes and remember their location. After carrying out all manipulations, turn the laptop and follow these steps:
- Take a suitable flat object and on one side. Patty the keyboard. It is made in the form of a solid plate and keeps on latches. Do not apply too much effort, it is better to walk flat item around the perimeter in order to disconnect the mounts. If the keyboard is not amenable, make sure that all the screws on the back panel are unscrewed.
- Do not need to sharply pull the keyboard, as it rests on the loop. It must be disconnected by lifting the cover.
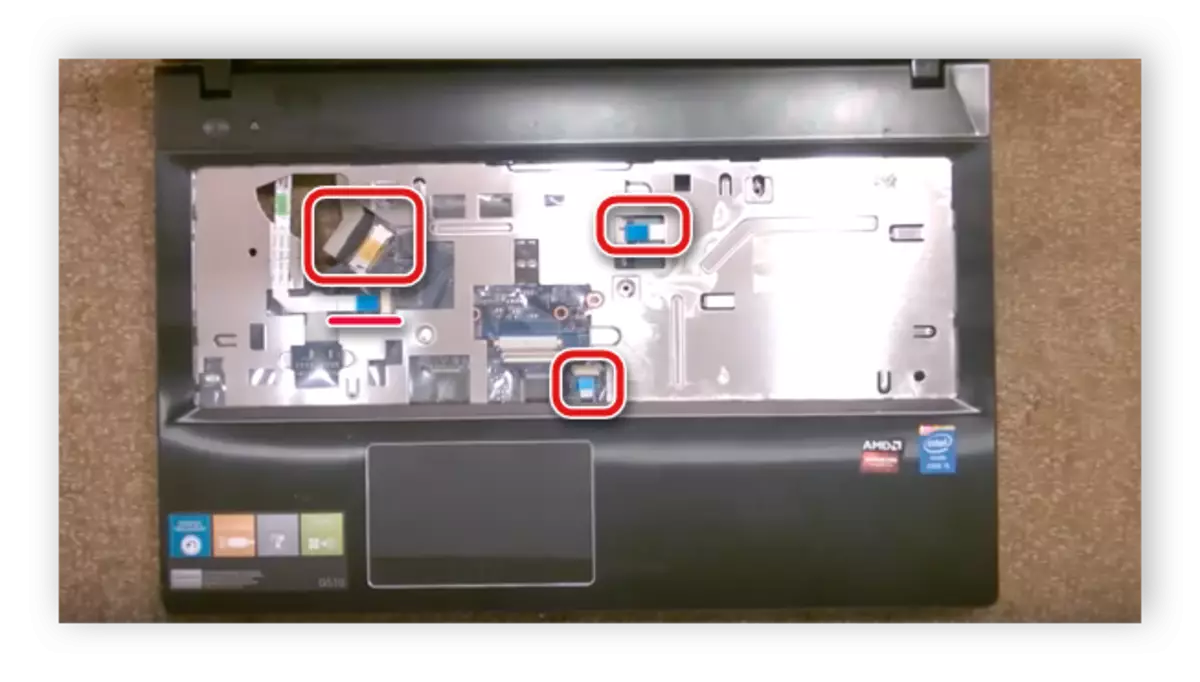
- The keyboard is removed, and under it there are several loops of the sound card, matrices and other components. To remove the front panel, all these loops will need to be disconnected. It is performed by the standard way. After that, the front panel is simply disconnected, if necessary, take a flat screwdriver and fastening.


On this process of disassembly, the Lenovo G500 laptop is over, you got access to all components, removed the back and front panel. Next, you can perform all the necessary manipulations, cleaning and repair work. The assembly is carried out in reverse order.
See also:
We disassemble the laptop at home
Download And install Drivers for Lenovo G500 laptop