

Call forwarding to another number is a rather requested service. Today we will tell you how to configure it on devices running Android.
Enable call forwarding on a smartphone
Install and configure call redirection to another number is very simple. However, before starting manipulations, make sure that the service operator's tariff plan, which is used on a custom phone, supports such a service.
On the tariff plans, it is impossible to include this option without the possibility of redirection!
You can check the tariff with the help of operator applications like my Beeline or my MTS. Making sure that the appropriate service is available, proceed to its activation.
Note! The instruction below is described below and is shown on the example of the device with the version of Android 8.1! For smartphones with an older version of the OS or add-in manufacturer, the algorithm is similar, but the location and name of some options may differ!
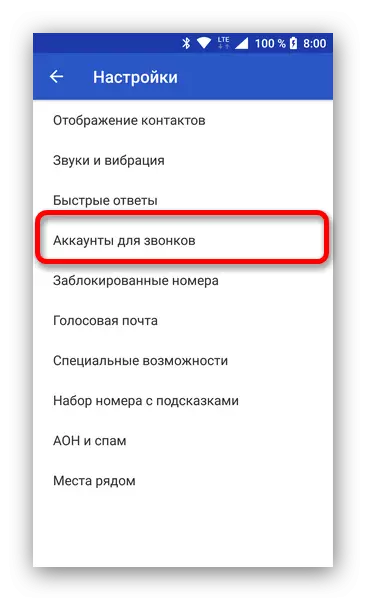
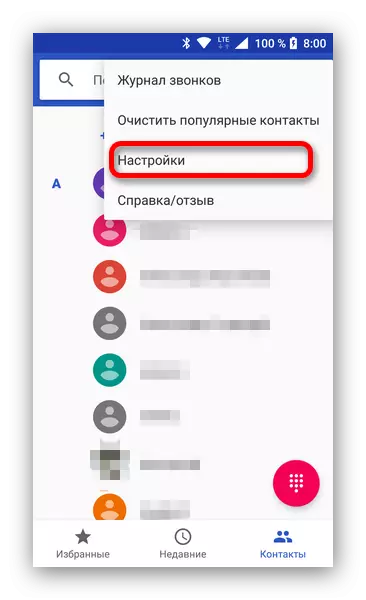
- Go to "Contacts" and tap on the button with three dots above the right. Select "Settings".
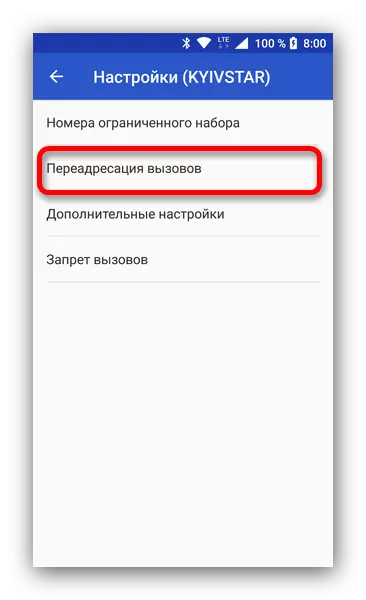
- In the devices with two SIM cards, you will need to select "Accounts for calls".
Then tap on the desired sim card.

In single-sided devices, the desired option is called "Calls".
- Find the call forwarding point and tap it.
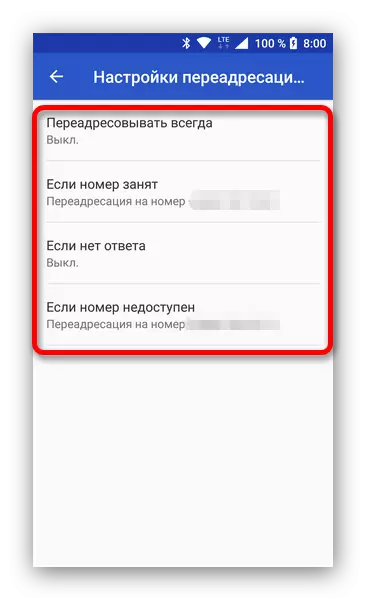
Then mark "Voice Calls".
- The call to other rooms will open the call to other numbers. Touch the conditions you need.
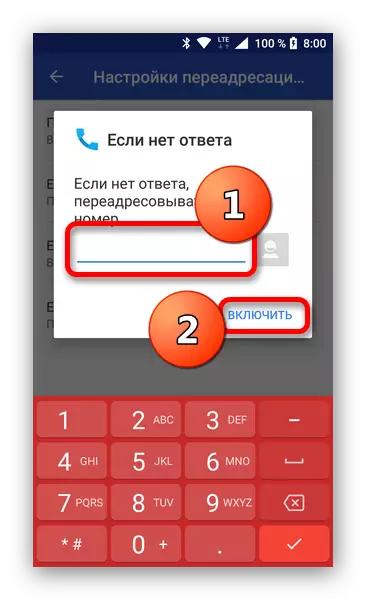
- Write in the input field the desired number and press "Enable" to activate the redirection.
- Ready - Now incoming calls to your device will be redirected to the specified number.

As you can see, the procedure is very simple and literally in a few taps on the screen. We hope that this instruction was useful for you.