

A huge number of people no longer represent everyday life without the Internet. But in order to use it, first it is necessary to connect to the World Wide Web. It is at this stage that some users periodically arise difficulties. In this article, we will tell about what to do if your device running Windows 10 does not connect to Wi-Fi network.
Troubleshooting Connection to Wi-Fi
Today we will tell about two main ways to help you solve the problem of connecting to a wireless network. In fact, there are much more such methods, but most often they are individual and will be suitable for not all users. Now let's analyze in detail both of the methods mentioned.Method 1: Check and enable Wi-Fi adapter
In any incomprehensible situation with a wireless network, first need to make sure that the adapter is correctly recognized by the system and access to the "gland" is enabled. It sounds trite, but many users forget about it, and seek the problem immediately too deep.
- Open the Windows 10 options using the Win + I key combination or any other known method.
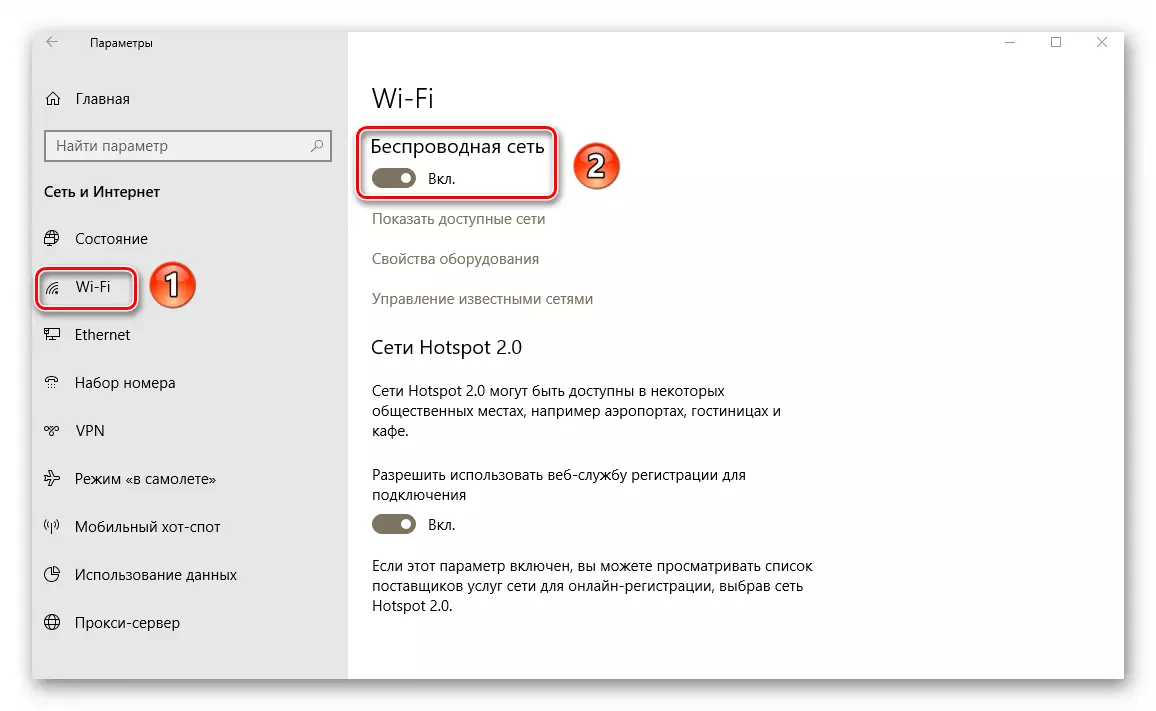
- Next, go to the "Network and Internet" section.
- Now you need to find a string with the name "Wi-Fi" on the left side of the window that opens. By default, it is the second on top. If it is present in the list, then go to this section and make sure the wireless network switch is set to ON.
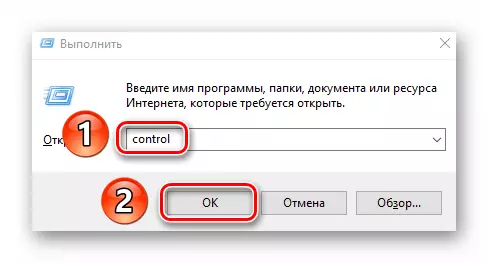
- If the "Wi-Fi" partition in the list it turned out, you should open the control panel. To do this, you can use the "Win + R" key combination, enter the CONTROL command in the opened window, and then press "ENTER".
About how you can still open the "control panel", you can learn from a special article.
Read more: 6 ways to start the control panel
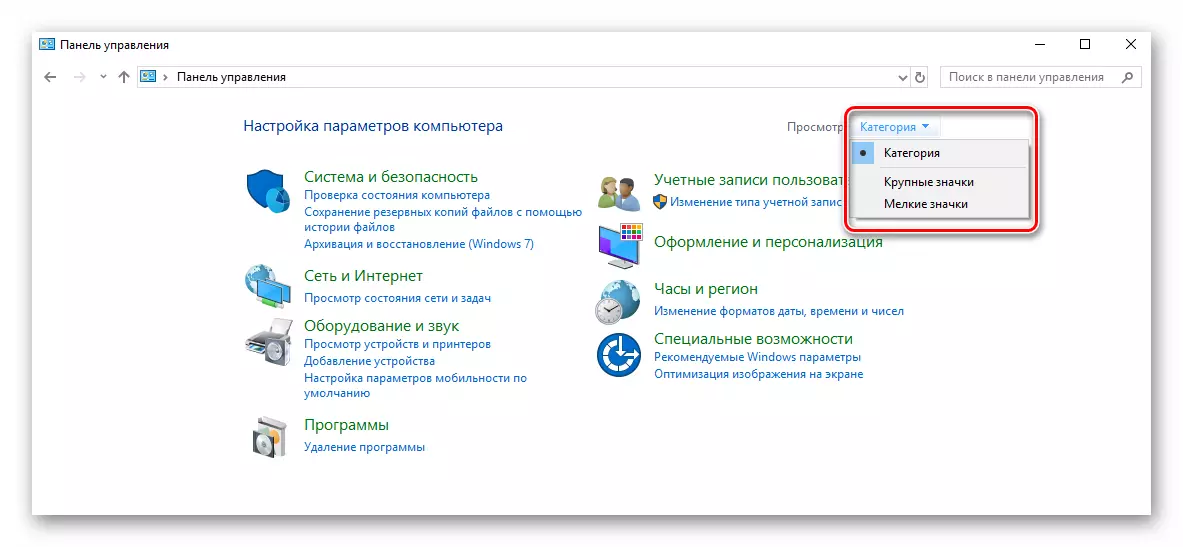
- A new window will appear. For convenience, you can switch the display mode of elements to "large icons". It is done in the upper right corner.
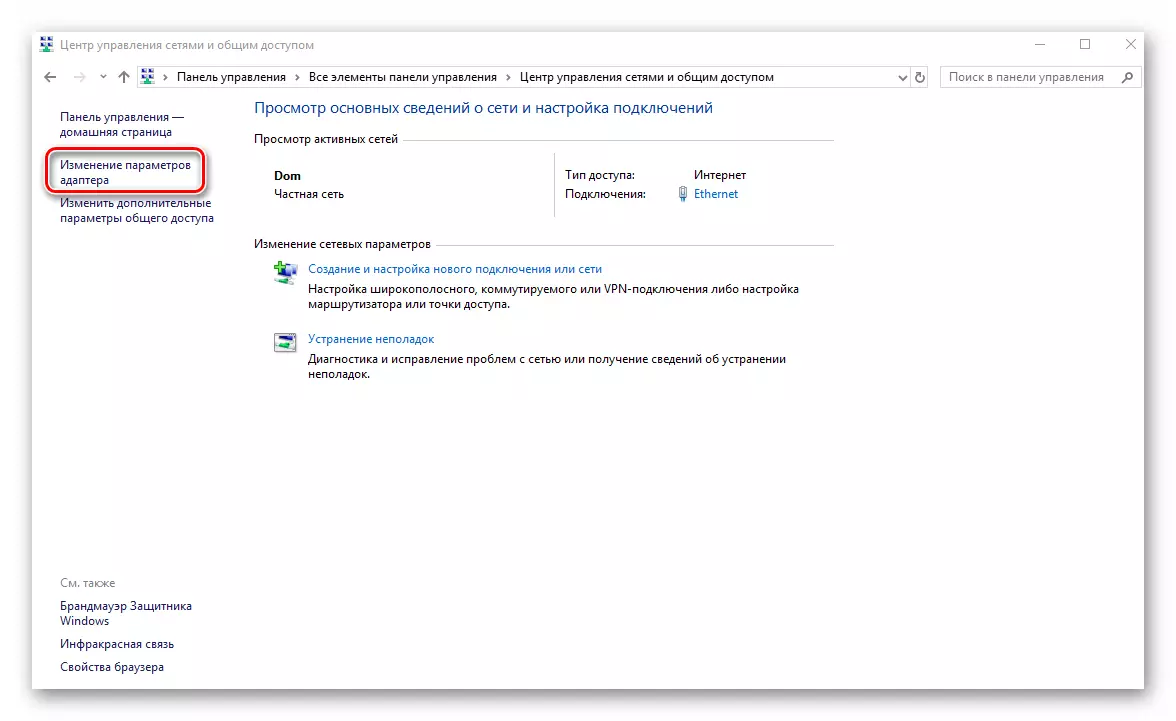
- Now you need to find an icon in the list with the name "Center for Network Management and Common Access". Go to this section.
- On the left side of the next window, click LKM on the "Changing Adapter Settings" line.
- In the next step, you will see a list of all adapters that are connected to a computer. Please note that additional devices are also displayed here, which were installed in the system with a virtual machine or VPN. Among all adapters, you need to find the one called "Wireless Network" or contains in the description of the word "Wireless" or "WLAN". Theoretically, the icon of the desired equipment will be gray. This means that it is turned off. In order to use the "iron", you must click on its named PCM and select the "Enable" string from the context menu.

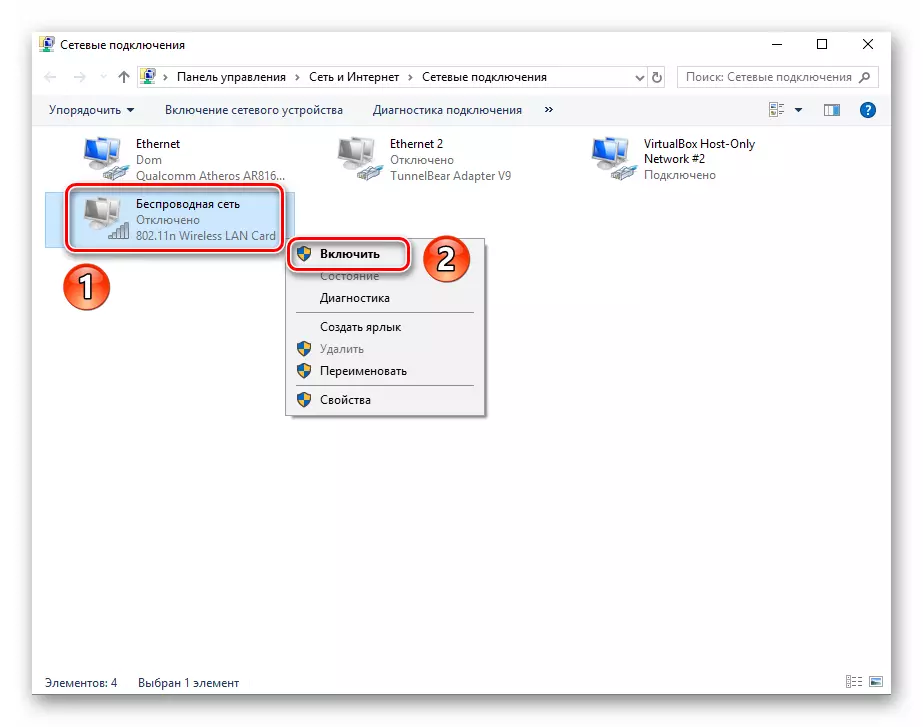
After executing the described actions, try again to start the search for available networks and connect to the desired one. If you did not find the desired adapter in the list, then you should try the second method, which we will tell further.
Method 2: Installing Drivers and Reset Connection
If the system cannot correctly define a wireless adapter or malfunctions are observed, then you should update the drivers for the device. Of course, Windows 10 is a very independent operating system, and often installs the necessary software. But there are situations where equipment for stable work is needed by software released by the developers themselves. To do this, we recommend doing the following:
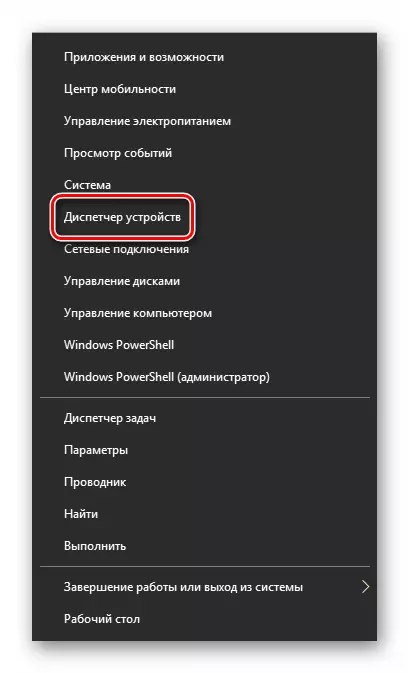
- Click on the PCM Start button and select Device Manager from the context menu.
- After that, in the tree of the devices, open the "Network Adapters" tab. By default, the desired equipment will be located here. But if the system has not recognized the device at all, then it may be in the "Unidentified devices" section and are accompanied by an intercession / exclamation mark next to the title.
- Your task is to make sure that the adapter (even unidentified) is present in the equipment list. Otherwise, the probability of physical malfunction of the device or the port to which it is connected. And this means that it will have to take "iron" to repair. But back to the drivers.
- The next step will be the definition of the adapter model for which you want to find software. With external devices, everything is simple - just look at the body, where the model with the manufacturer will be indicated. If you need to find a software for an adapter that is built into the laptop, then the model of the laptop itself should be defined. About how to do it, you can learn from a special article. In it, we examined this issue on the example of the Lappopa ASUS.
Read more: Find out the name of the ASUS laptop model
- Finding out all the necessary information, you should proceed directly to download and install software. This can be done not only with the help of official sites, but also specialized services or programs. We mentioned about all such methods earlier in a separate article.
Read more: download and install driver for Wi-Fi adapter
- After the adapter driver is installed, do not forget to restart the system to ensure that all configuration changes entered into force.

Restarting the computer, try connecting to Wi-Fi again. In most cases, the actions described decide the problems that have emerged earlier. If you are trying to connect to the network, the data about which is saved, then we recommend activating the "Forget" function. It will update the connection configuration that could simply change. Make it very simple:
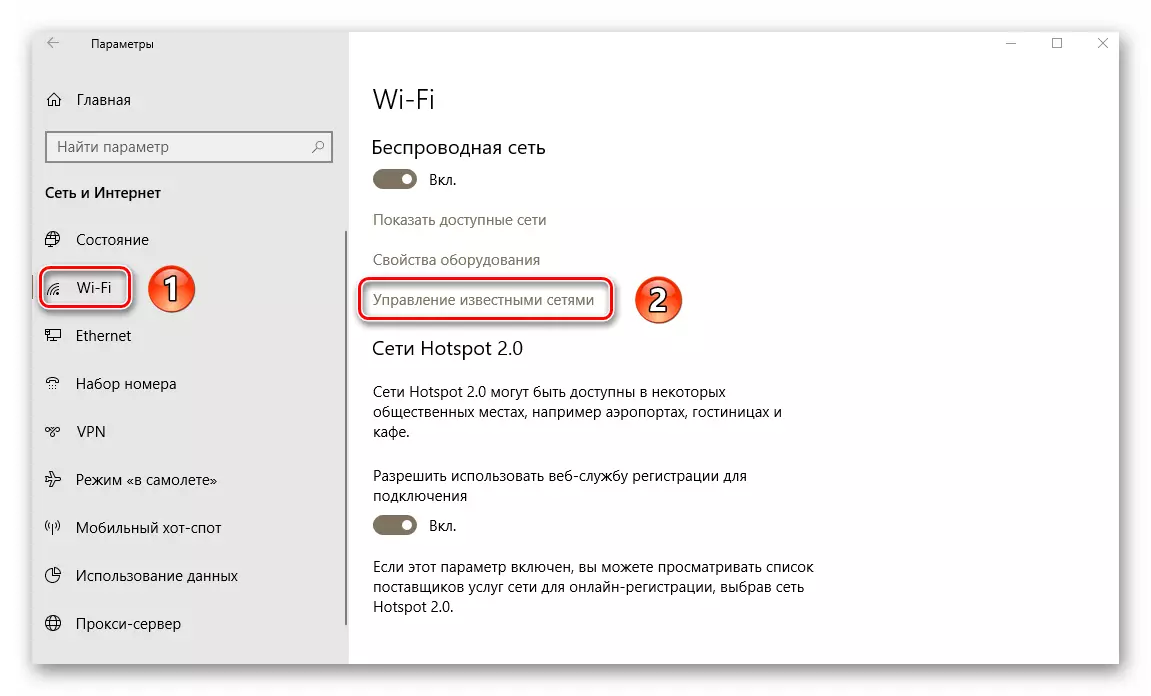
- Open the System Settings and go to the "Network and Internet" section.
- Now select the left "Wi-Fi" item and click on the "Manage Famous Network" string.
- Then in the list of saved networks, press LKM on the name of the one you want to forget. As a result, you will see the button below, which is called. Press it.
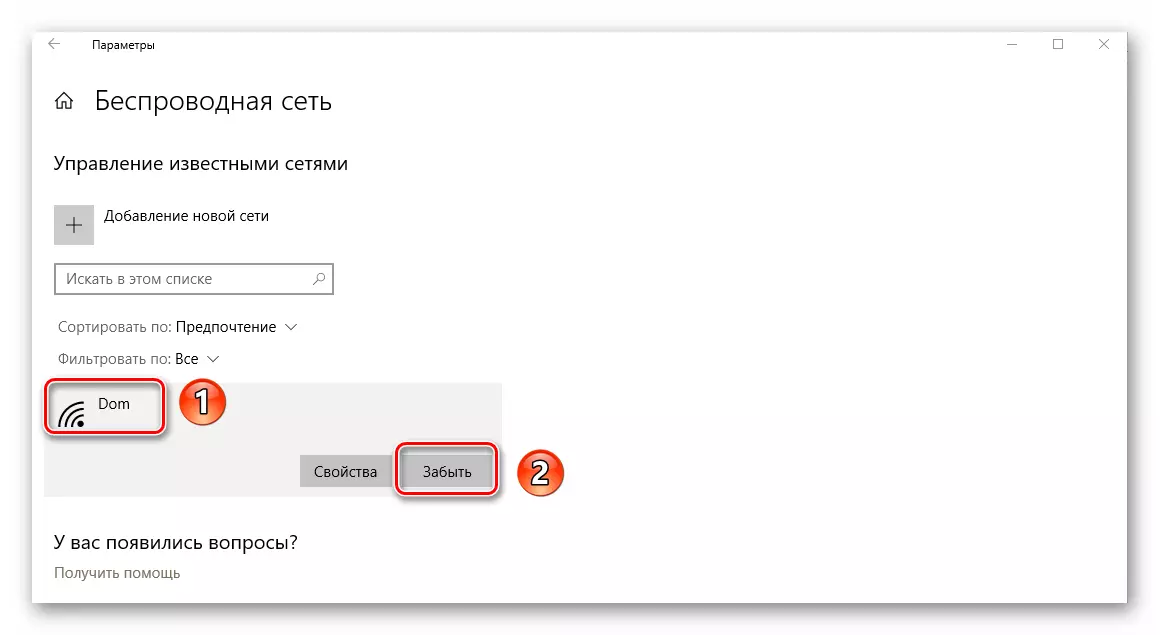
After that, start recording networks and connect to the necessary re-. As a result, everything should work out.
We hope to perform the actions described, you get rid of different errors and problems with Wi-Fi. If, after all manipulations, you failed to achieve a positive result, then you should try more radical methods. We talked about them in a separate article.
Read more: Correction of problems with the absence of the Internet in Windows 10