

Some Windows 10 users stop working "Search". Often it is accompanied by the inoperability of the "Start" menu. There are several effective methods that will help eliminate this error.
We solve the problem with "search" Windows 10
This article will consider solving problems using the "command line", PowerShell and other system instruments. Some of them can be difficult, so be careful.Method 1: System Scanning
Perhaps some kind of system file was damaged. Using the "command line" you can scan the integrity of the system. You can also scan an OS using portable antiviruses, because malware often becomes damage to the important components of Windows.
Read more: Checking a computer for viruses without antivirus
- Right-click on the Start icon.
- Go to "Command Line (Administrator)".
- Copy the following command:
SFC / SCANNOW.
And execute it by pressing ENTER.
- The system will be scanned for errors. After detecting, they will be corrected.


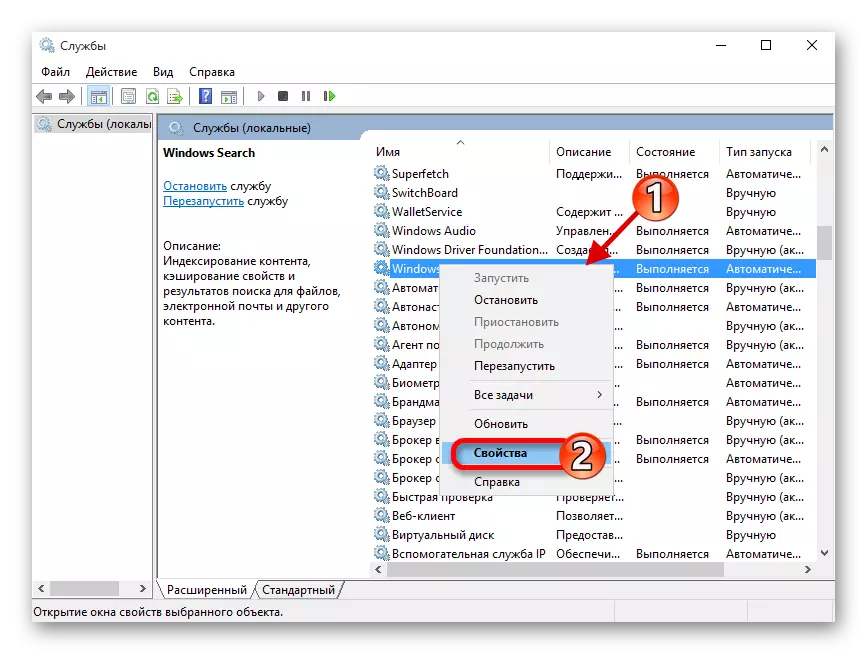
Method 2: Starting Windows Search service
Perhaps the service that is responsible for the WINDOVS 10 search function is disabled.
- Clamp win + r. Copy and paste the following in the input field:
Services.msc.
- Click OK.
- In the list of services, find the "Windows Search".
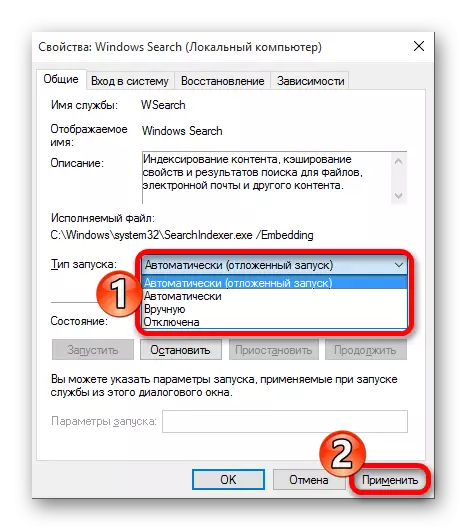
- In the context menu, select "Properties".
- Configure automatic startup type.
- Apply Changes.

Method 3: Using the "Registry Editor"
With the help of the registry editor, you can solve many problems, including the inoperability of the search. This method requires special care.
- Clamp Win + R and write:
regedit.
- Run by clicking "OK".
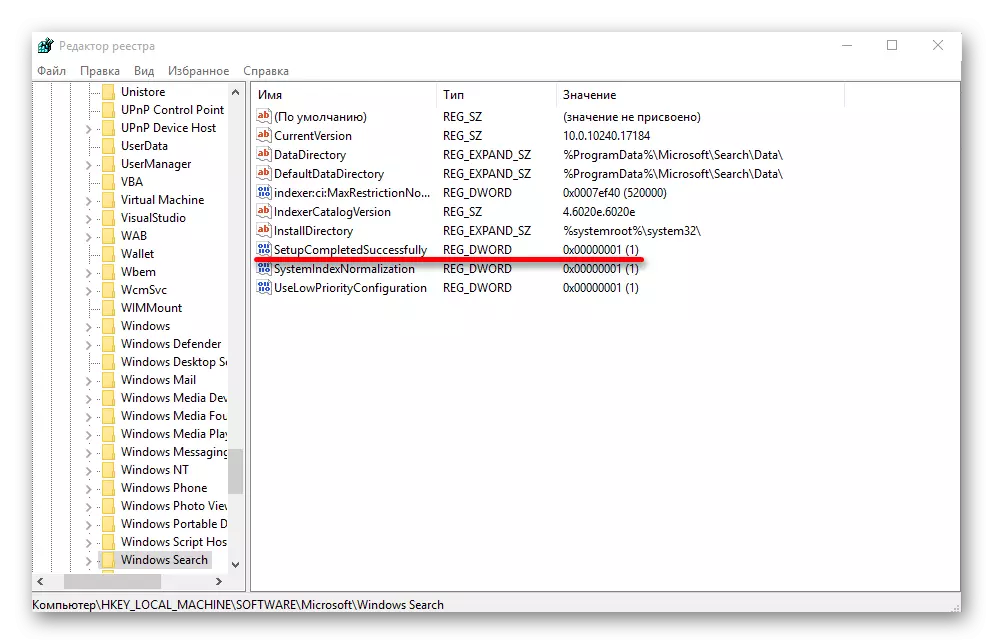
- Go along the way:
HKEY_LOCAL_MACHINE \ SOFTWARE \ Microsoft \ Windows Search
- Find the SetupCompletedSuccessFULY parameter.
- Open it with a double click and change the value "0" to "1". If there is a second meaning, you do not need to change anything.
- Now reveal the "Windows Search" section and find "FileChangeClientConfigs".
- Call the context menu on the directory and select "Rename".
- Enter the new name "FileChangeClientConfigsbak" and confirm.
- Restart the device.


Method 4: Reset Application Settings
Reset settings can solve the task, but be careful, because in some cases this method can cause other problems. For example, violate the performance of "Windows Store" and its applications.
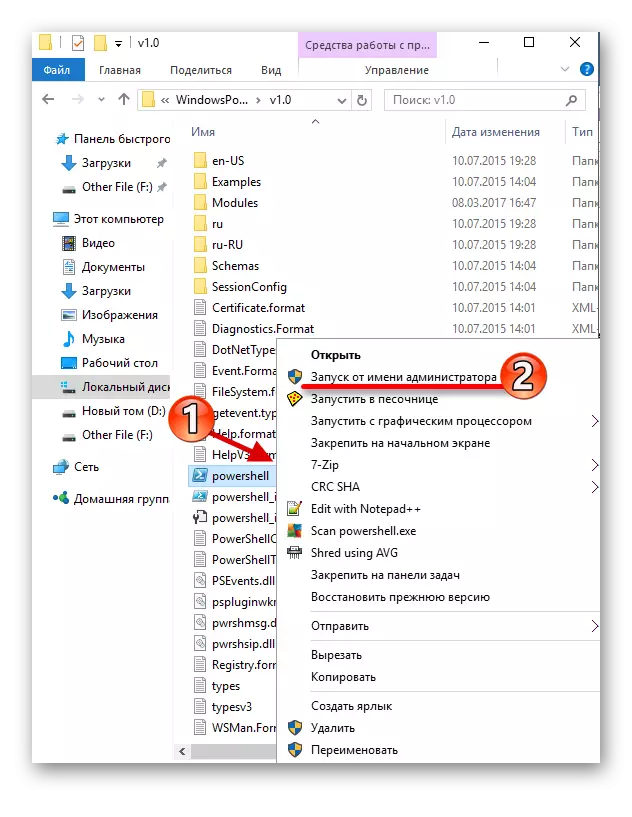
- On the way
C: \ Windows \ System32 \ WindowsPowerShell \ v1.0 \
Find PowerShell.
- Run it with administrator privileges.
- Copy and paste the following lines:
Get-AppXPackage -allusers | Foreach {Add-AppXPackage -DisableDevelopmentMode -Register "$ ($ _. InstallLocation) \ APPXMANIFEST.XML"}
- Run the Enter key by pressing.

Windows 10 still has shortcomings and disadvantages. The problem with "search" is not new and sometimes still makes itself felt. Some of the described methods are somewhat complex, others are easier, but all of them are quite effective.