
Overheating and its consequences - the eternal problem of users of laptops. Increased temperatures lead to the unstable operation of the entire system, which is usually expressed in reducing operating frequencies, hangs and even spontaneous disabling devices. In this article we will talk about how to reduce the heating by replacing the thermal paste on the laptop cooling system.
Replacement Thermal Paste on Laptop
By itself, the process of replacing paste on laptops is not something difficult, but it is preceded by a disassembly of the device and dismantling the cooling system. That is what causes some difficulties, especially in inexperienced users. Below we will look at a couple of options for this operation on the example of two laptops. Our experimental today will be Samsung NP355E5X-S01RU and Acer Aspire 5253. Working with other laptops will be somewhat different, but the basic principles remain unchanged, so in the presence of direct hands you can cope with any model.Please note that any actions to violate the housing integrity will necessarily lead to the impossibility of obtaining warranty service. If your laptop is still under warranty, then this work must be made exclusively in an authorized service center.
Example 2.
- Remove the battery.
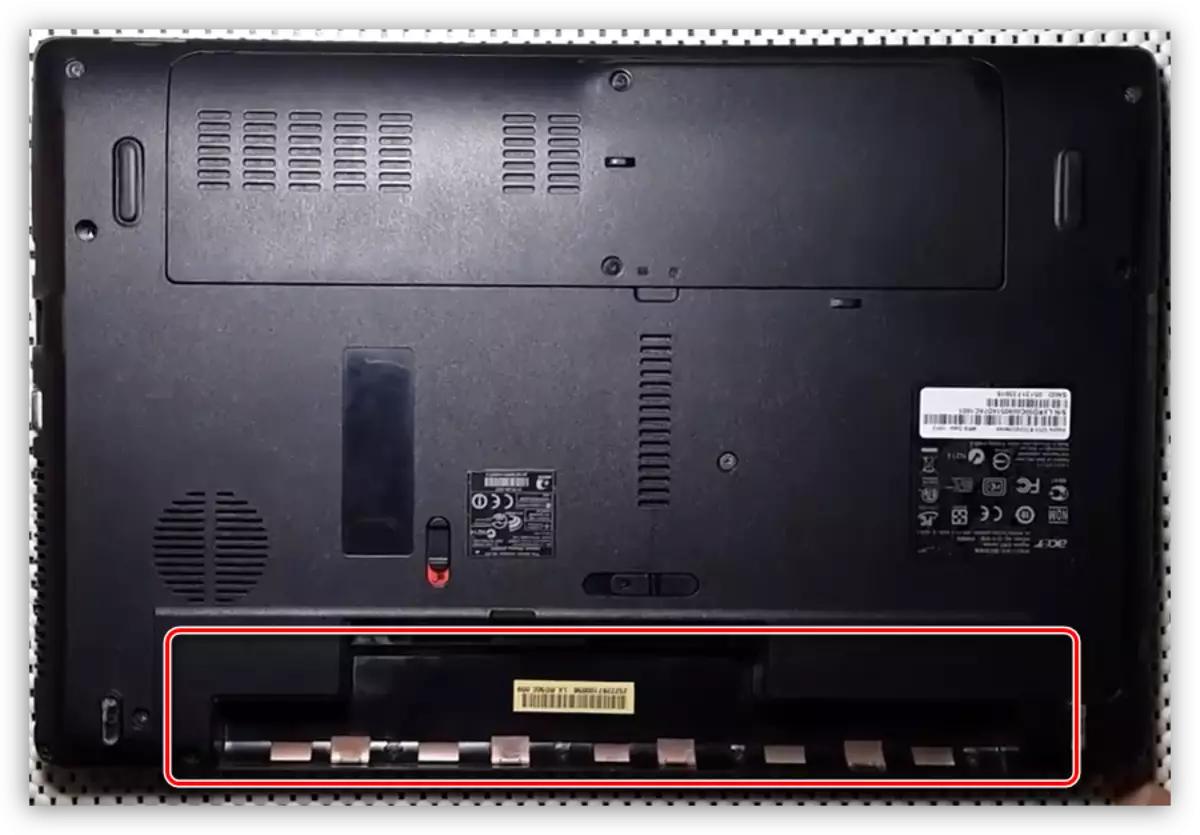
- We unscrew the screws that hold the disc compartment cover, RAM and Wi-Fi adapter.

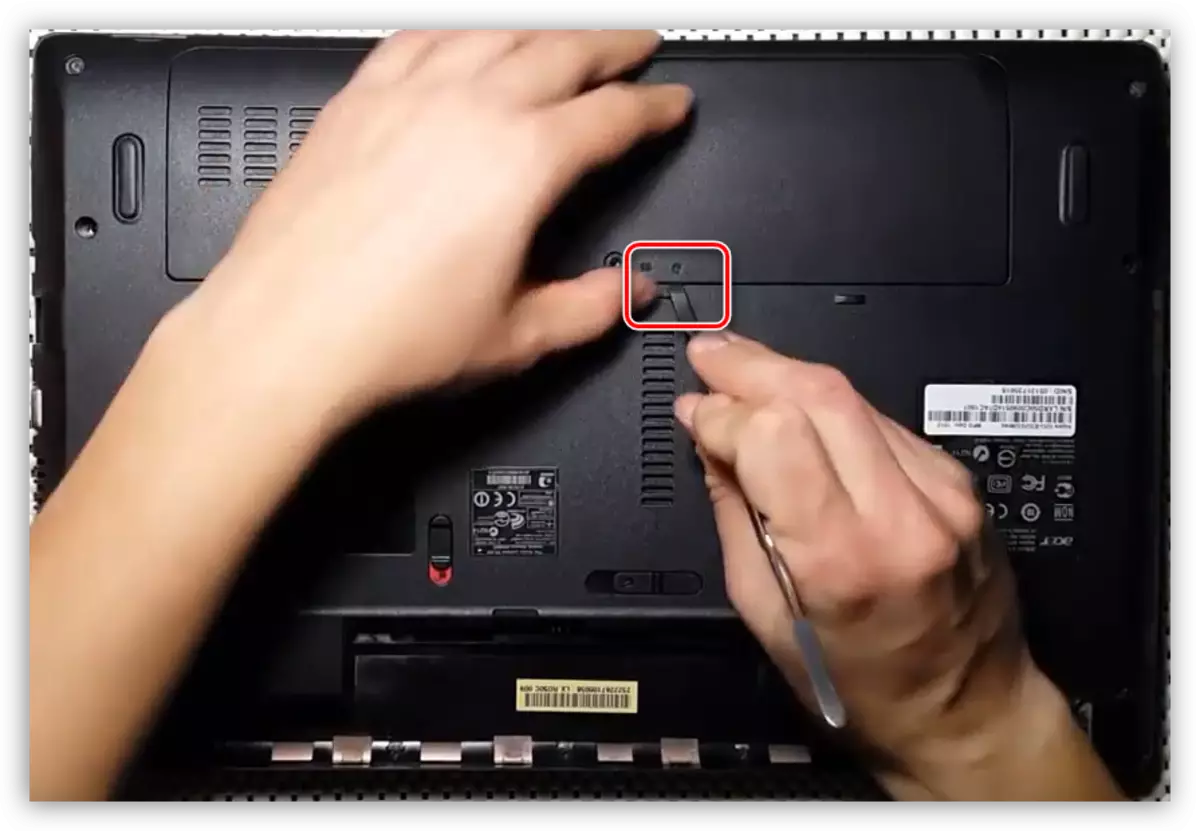
- Remove the cover, going down using a suitable tool.
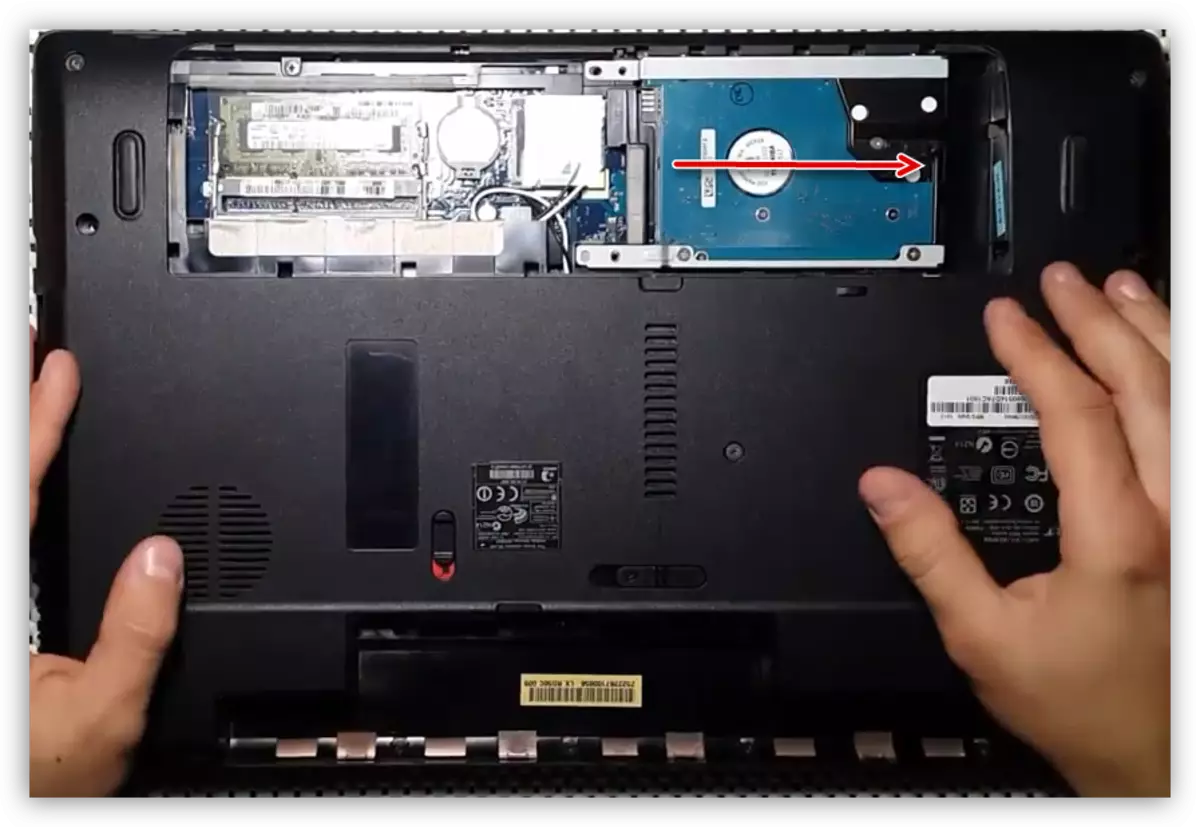
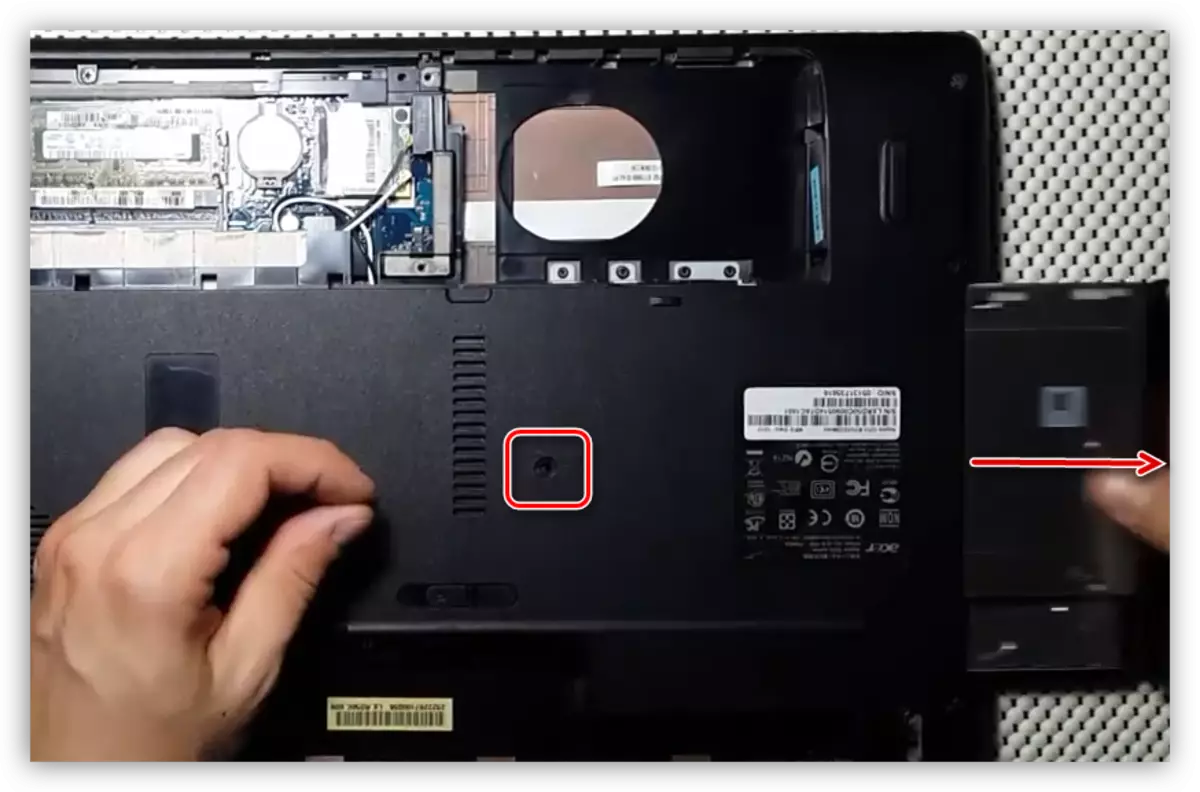
- Give the hard drive for which I pull it left. If the HDD is original, then for convenience there is a special tongue.
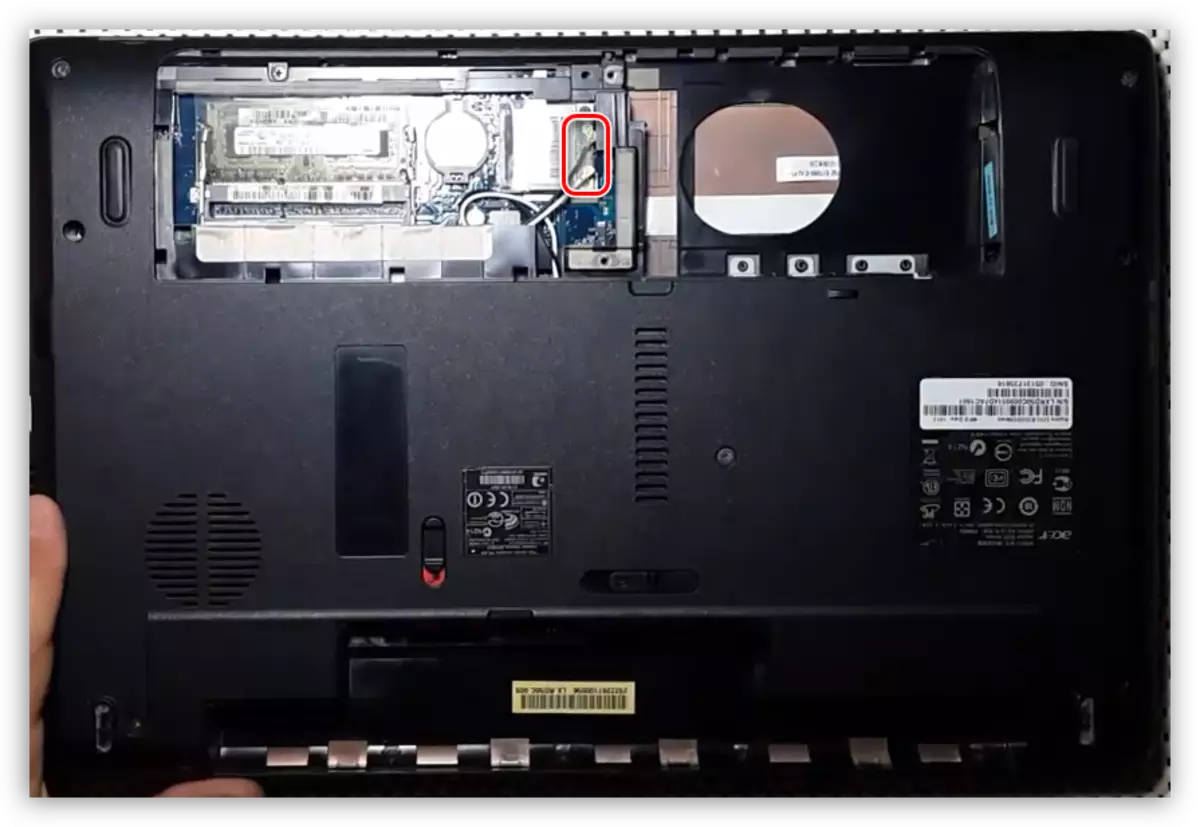
- Disconnect wiring from a Wi-Fi adapter.
- We dismantle the drive by unscrewing the screw and stretching it out of the housing.
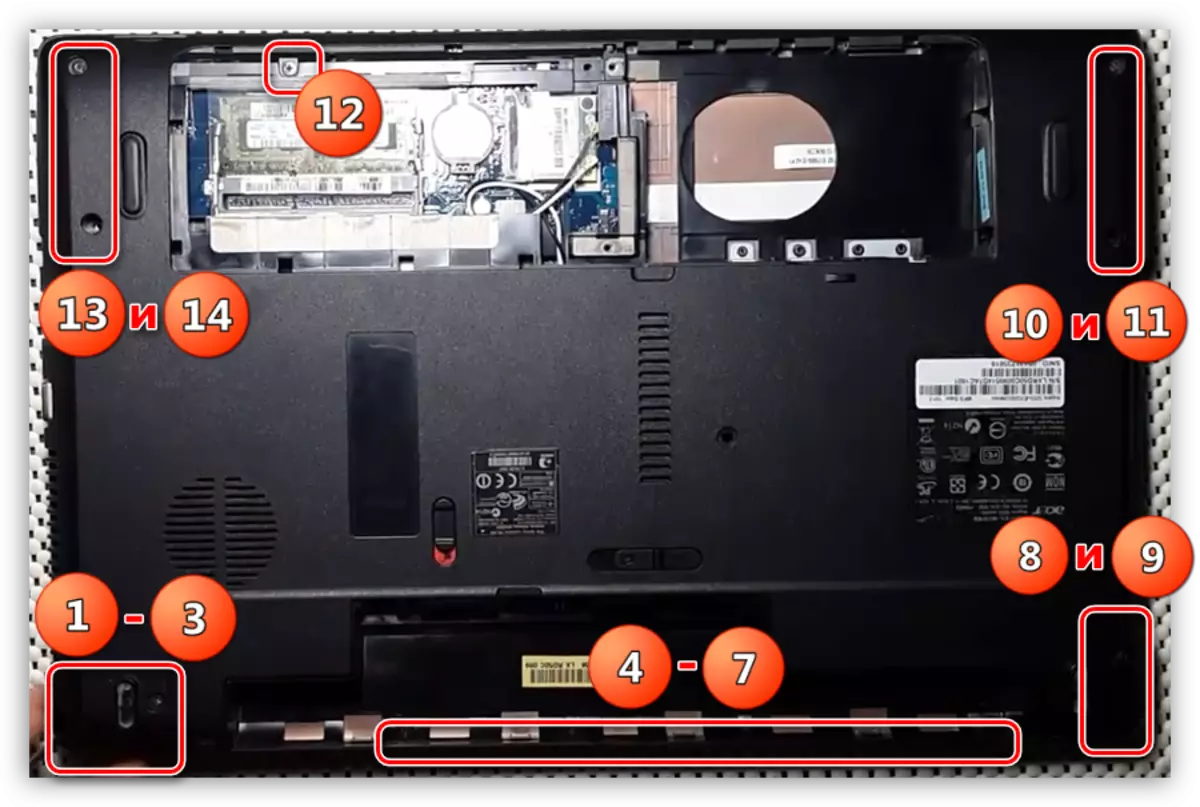
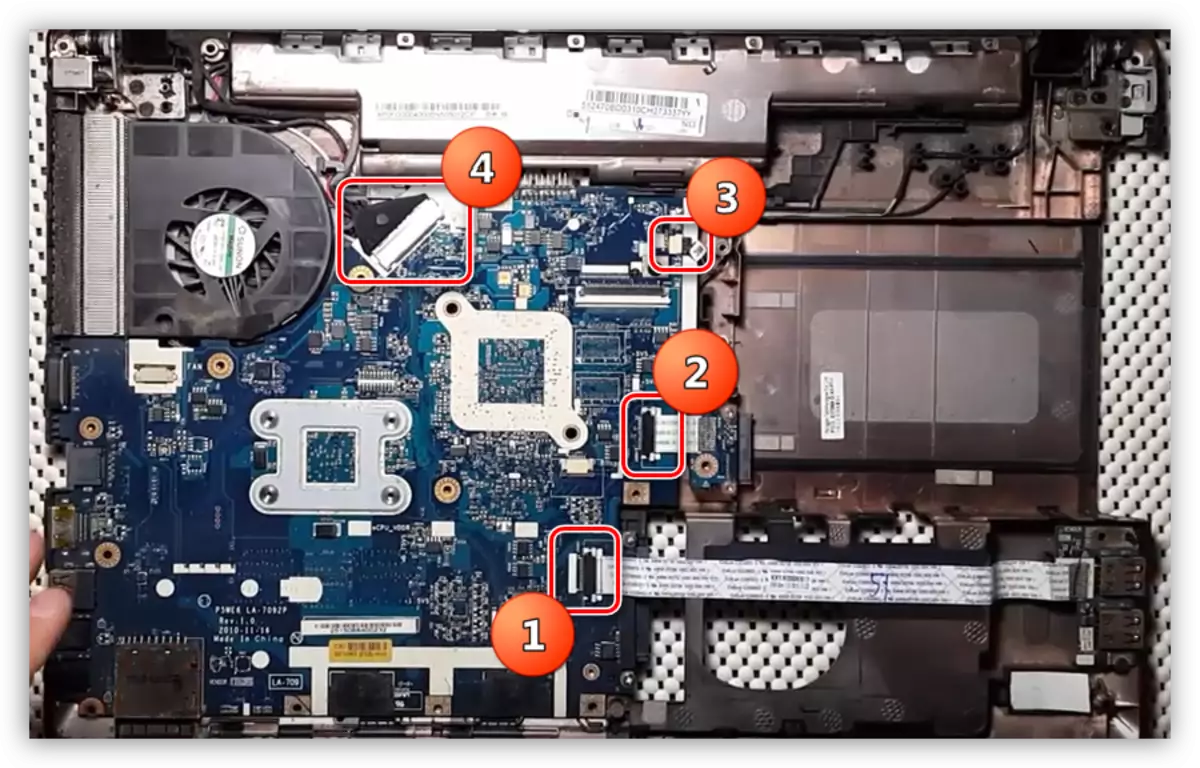
- Now unscrew the entire fastener, which is shown in the screenshot.
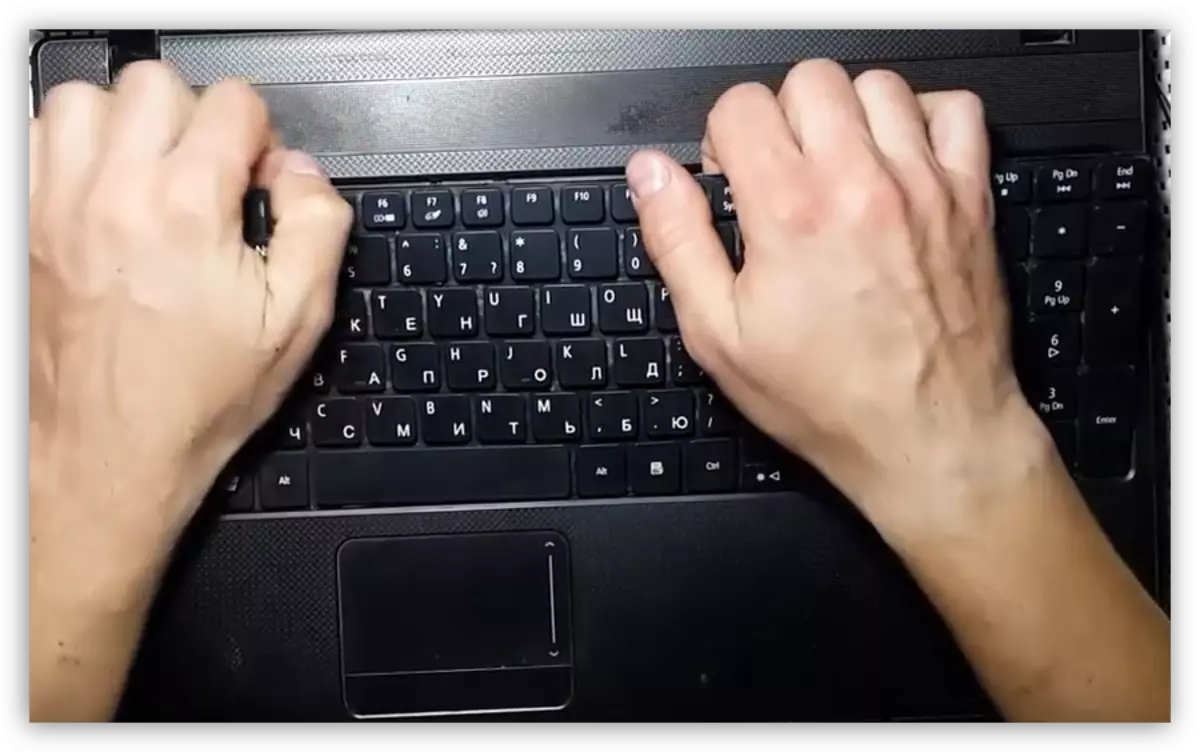
- We turn over the laptop and release the keyboard, carefully moving the latch.
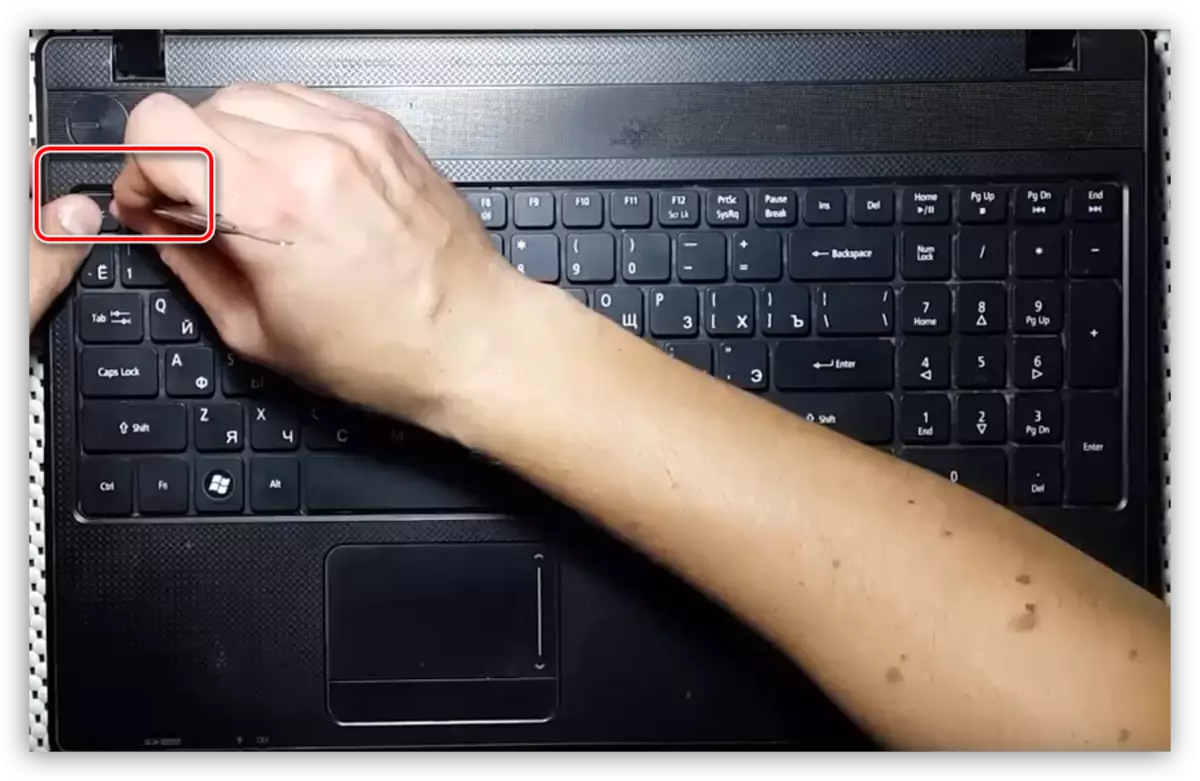
- We take out the "clave" from the compartment.
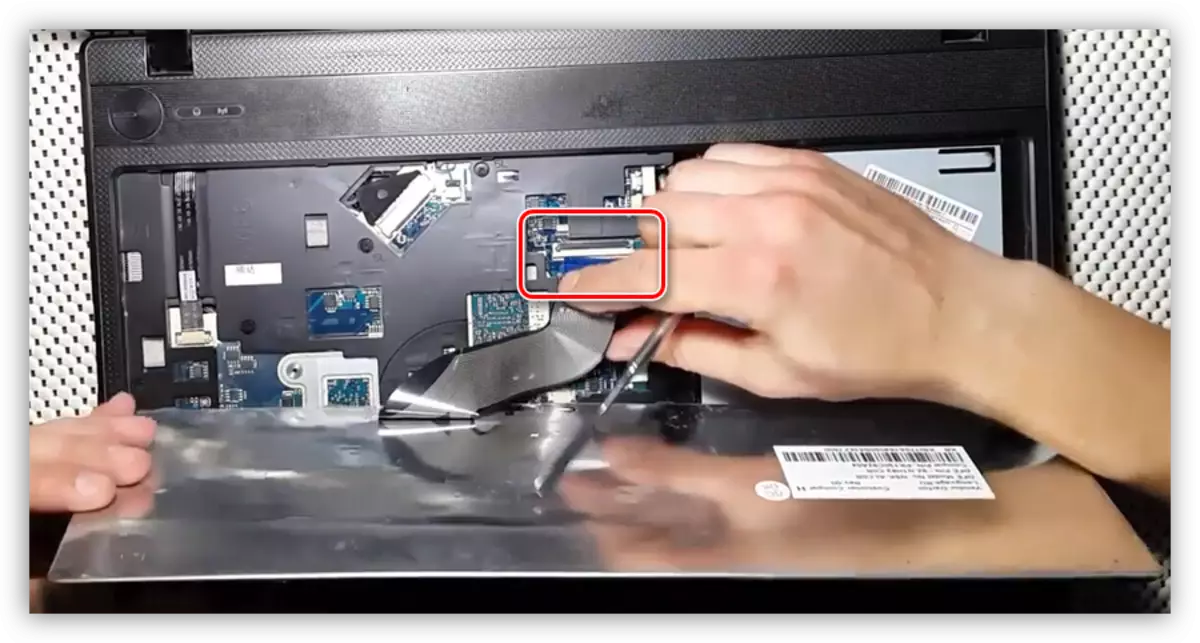
- Turn off the loop, weakening the plastic lock. As you remember, in the previous example, we disconnected this wire after removing the lid and the Wi-Fi module on the reverse side of the housing.
- There are still a few more screws in the niche
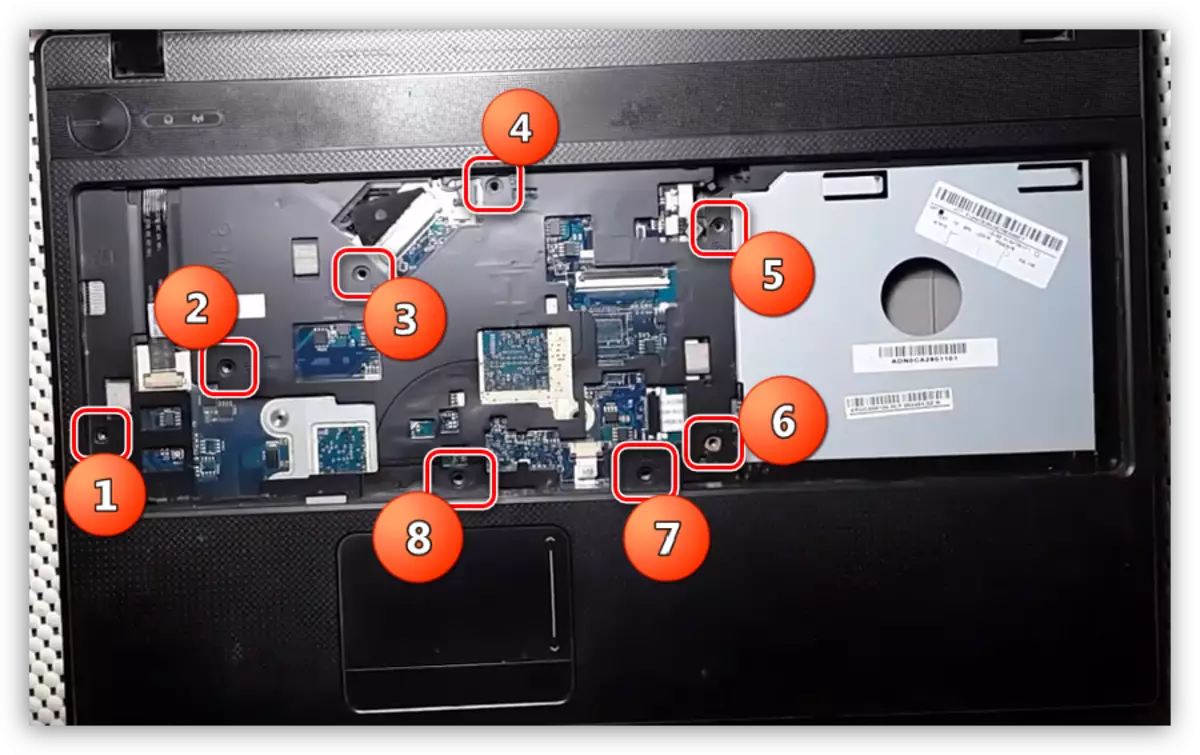
and loops.
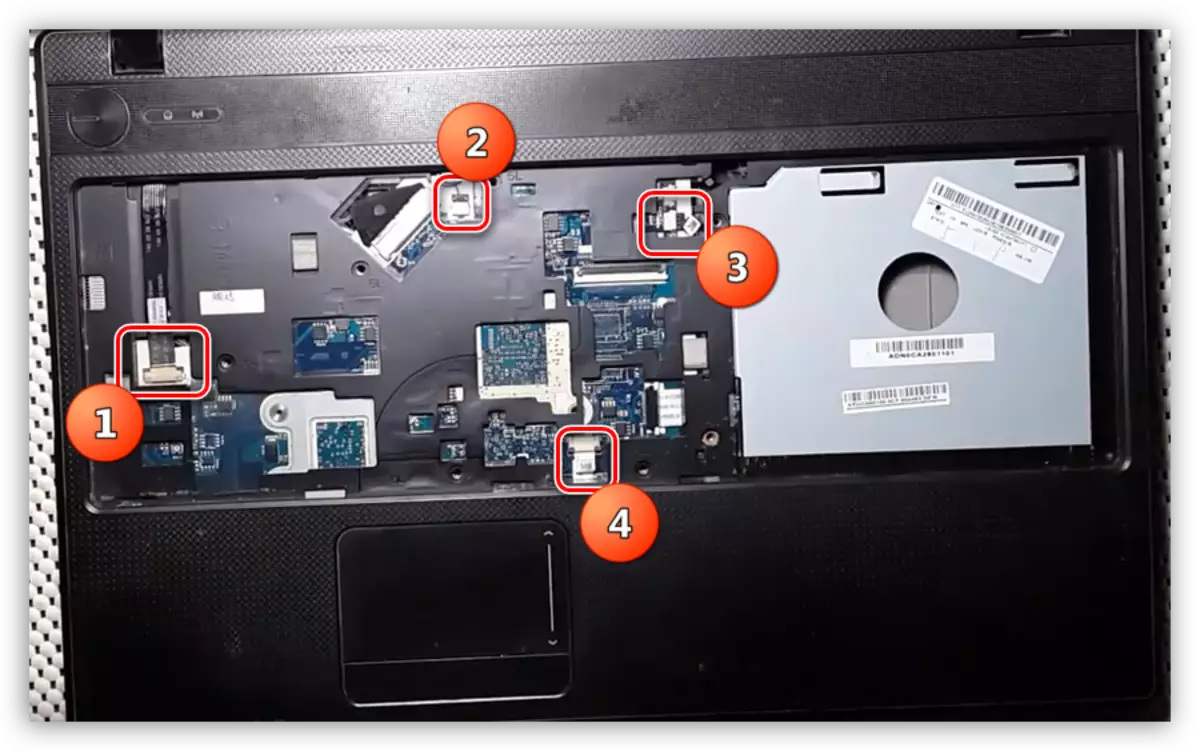
- Remove the top cap nouta and disable the remaining loops, said screenshot.
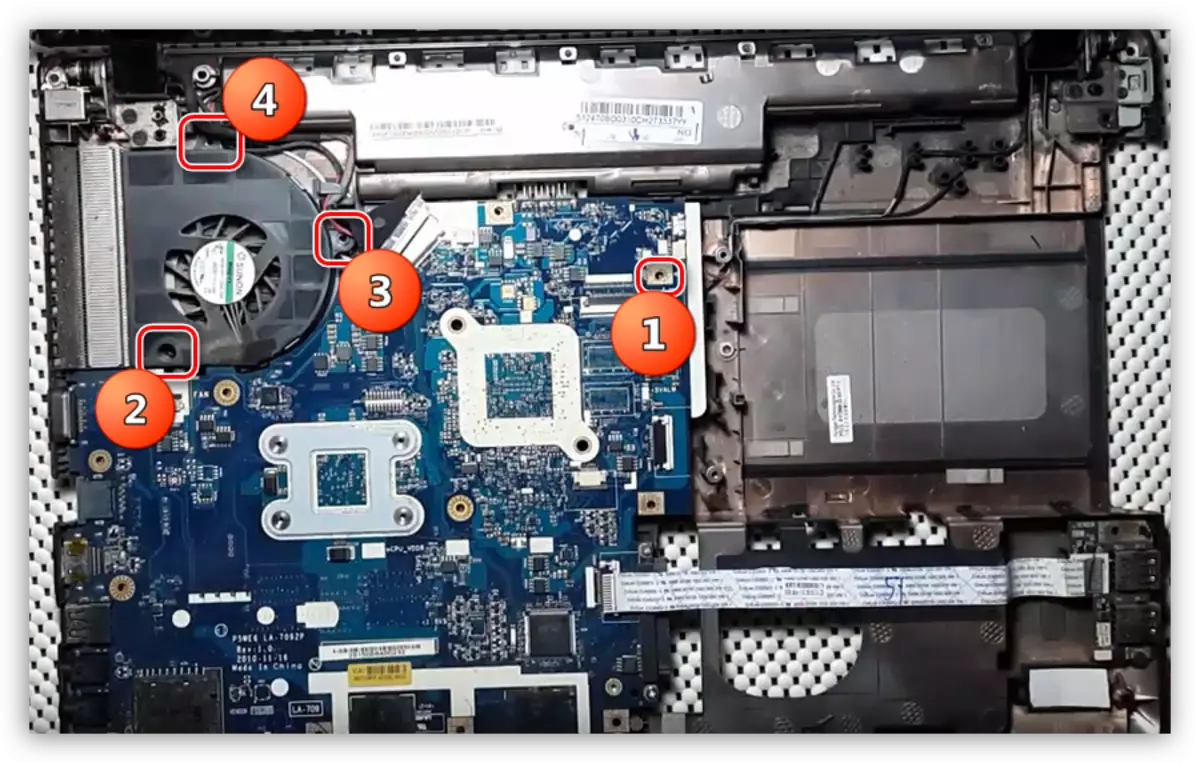
- Disassemble the motherboard and cooling fan. To do this, turn away, in this case, four screws instead of the previous model.
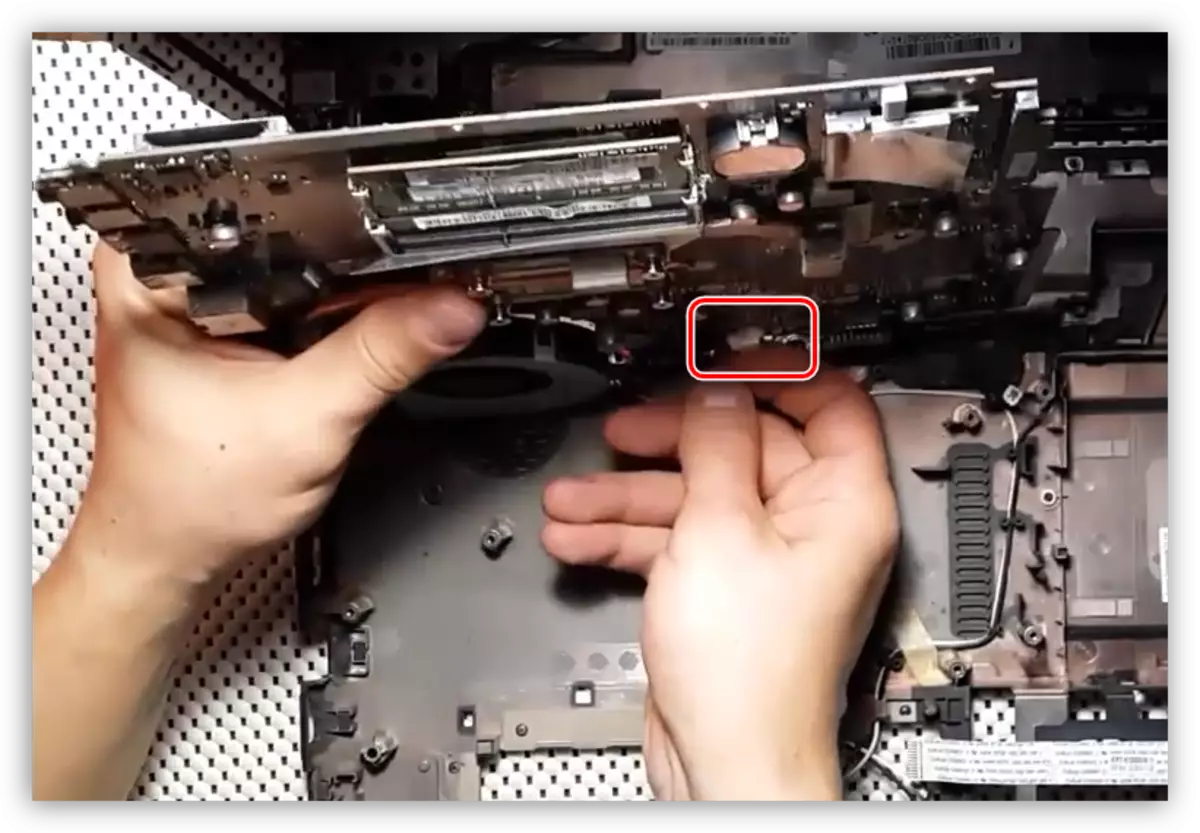
- Next, you need as carefully as possible to remove the power cable "mother", which is located between it and the bottom cover. This arrangement of the loop can be observed in other laptops, so be careful not to damage the cable and connector.
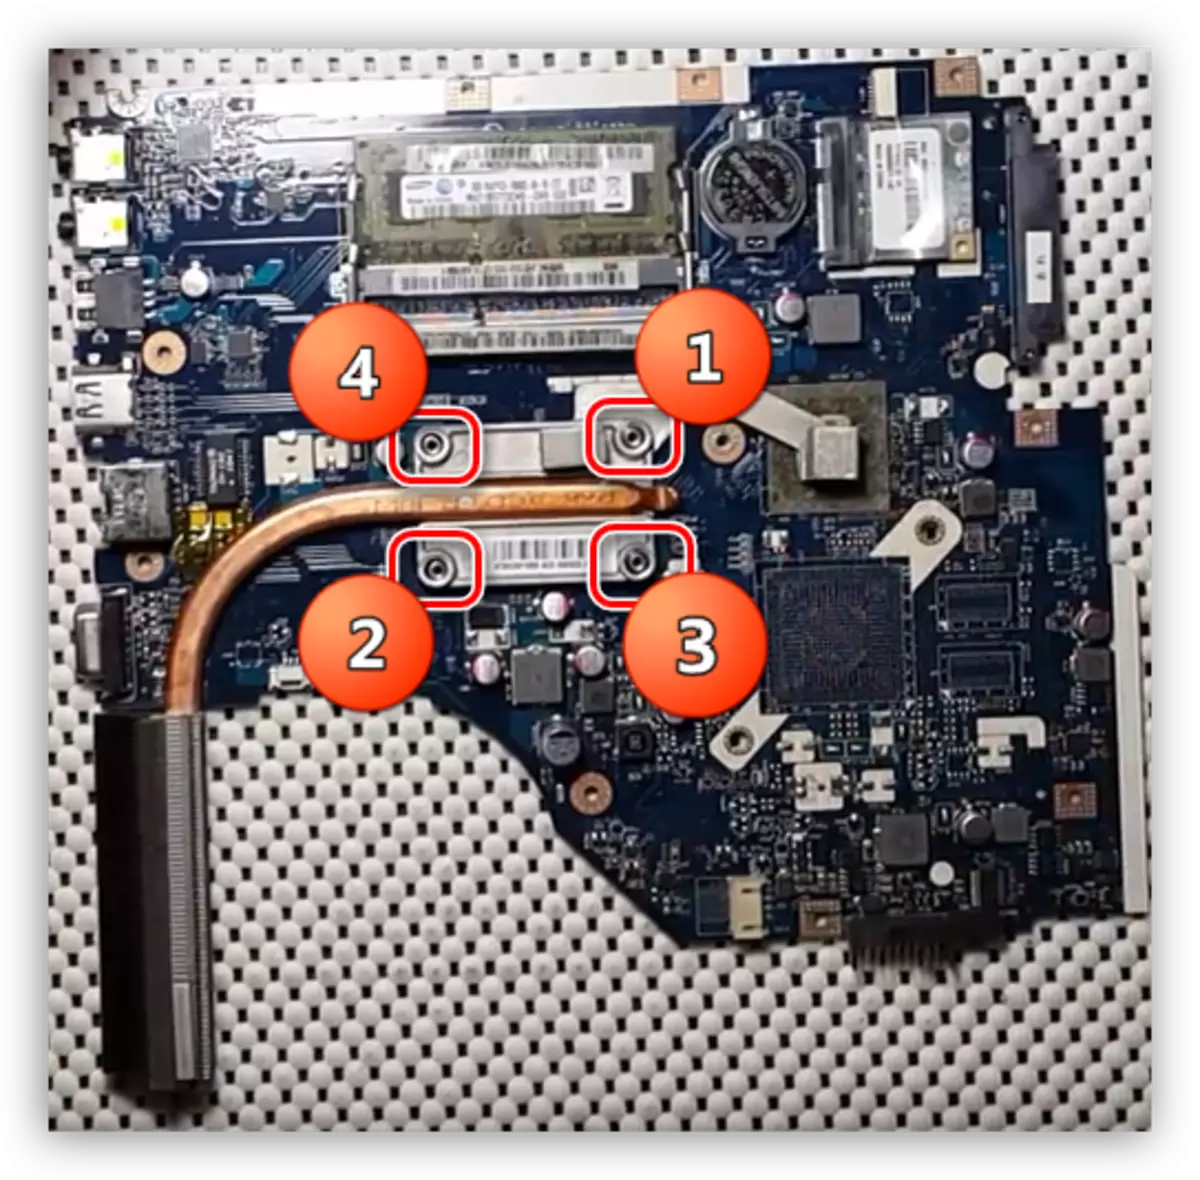
- Remove the radiator by unscrewing the four screws which at Samsung was five.
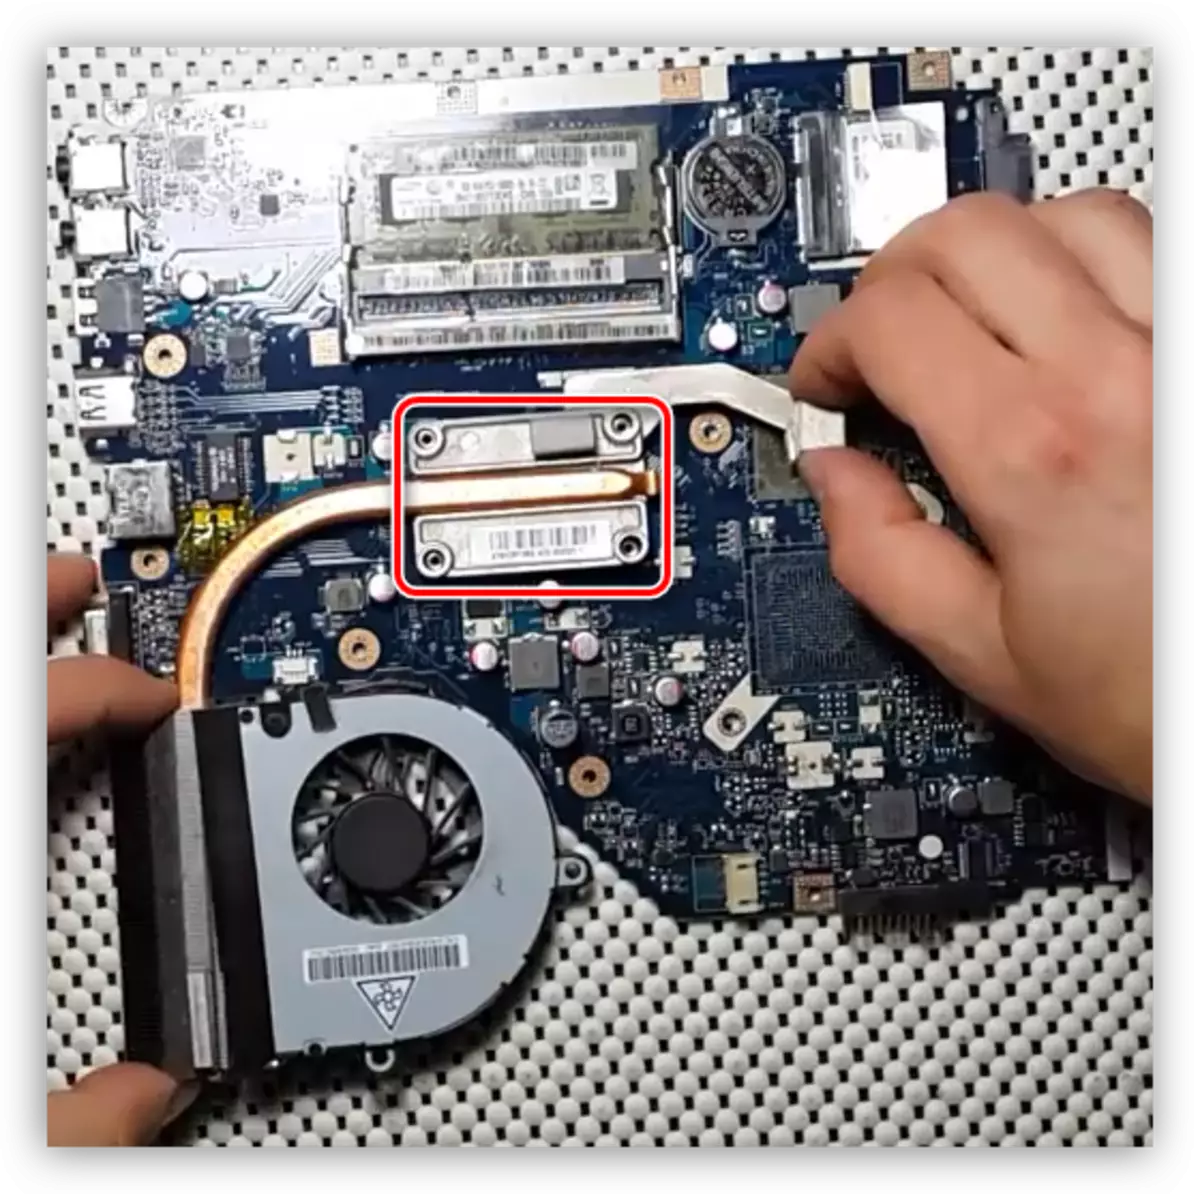
- Then everything should be done according to the usual scenario: remove the old paste to put the new one and put in place the radiator, observing the order of tightening fasteners.
- We are putting the laptop in the reverse sequence.
Conclusion
In this article we have given only two examples of disassembly and replacement of thermal paste. The goal - to bring to you the basic principles, as models noutom great variety and talk about all will not work. The main rule here - accuracy, as many elements that have to deal with very small or are so flimsy that they are very easy to damage. In second place carefully since forgotten fasteners may damage the housing plastic parts, breakage or damage to the loops of their sockets.