
The problem at which the hard disk is not determined by the computer is quite common. This can happen with a new or already used, external and built-in HDD. Before trying to eliminate the problem, you need to figure out what has become its reason. Usually, users themselves can correct the difficulties associated with a hard disk - for this it is enough to follow the instructions and act neatly.
The reasons for which the computer does not see the hard disk
There are several common situations, due to which the hard disk refuses to perform its function. This concerns not only the disk connected to the computer for the first time - once the main HDD can stop working, which is why the operating system boot will be impossible. These causes can be:- The first connection of the new disk;
- Problems with loop or wires;
- Incorrect settings / BIOS failure;
- Weak power supply or cooling system;
- Physical breakage of the hard drive.
In certain cases, it is possible to encounter the fact that the BIOS sees a hard disk, and the system is not. Accordingly, a very experienced user may have difficulty diagnosing and eliminating the problem. Next, we will analyze the manifestation and solution of each of them.
Cause 1: First Disk Connection
When the user first connects an external or internal hard disk, then the system may not see it. It will not be displayed among other local disks, but it is physically fully working. It is easy to fix, and this is necessary as follows:
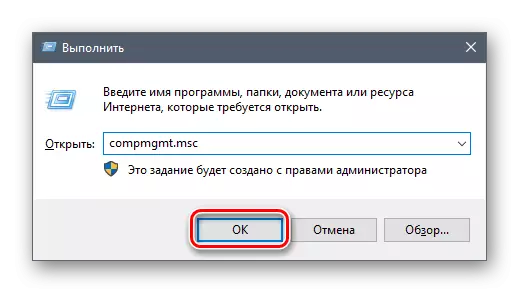
- Press the keyboard with a combination of Win + R, write in the COMPMGMT.MSC field and click OK.
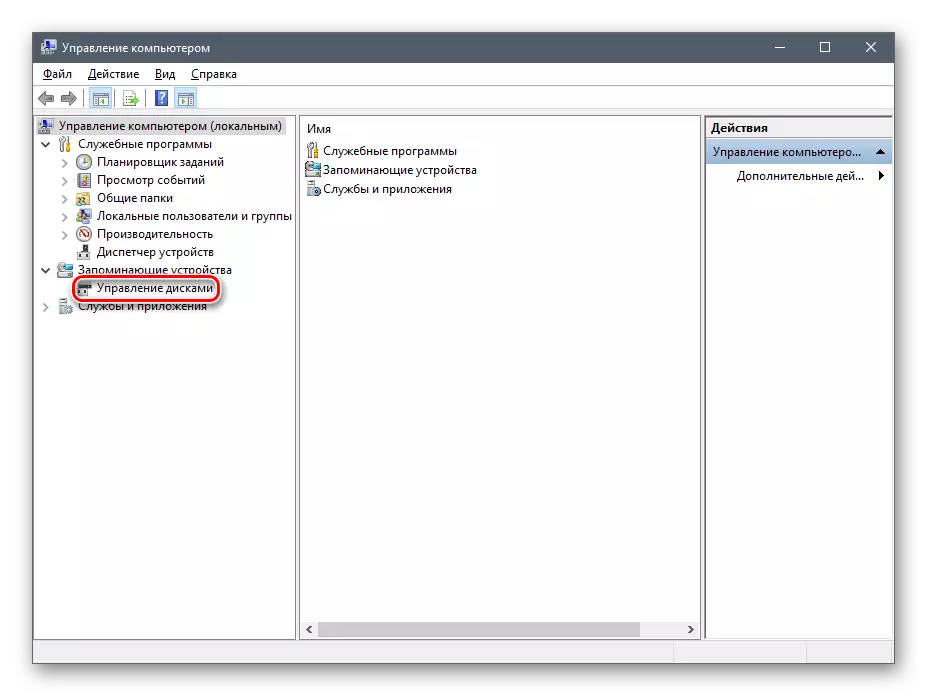
- In the left column, click on the menu item "Disks".
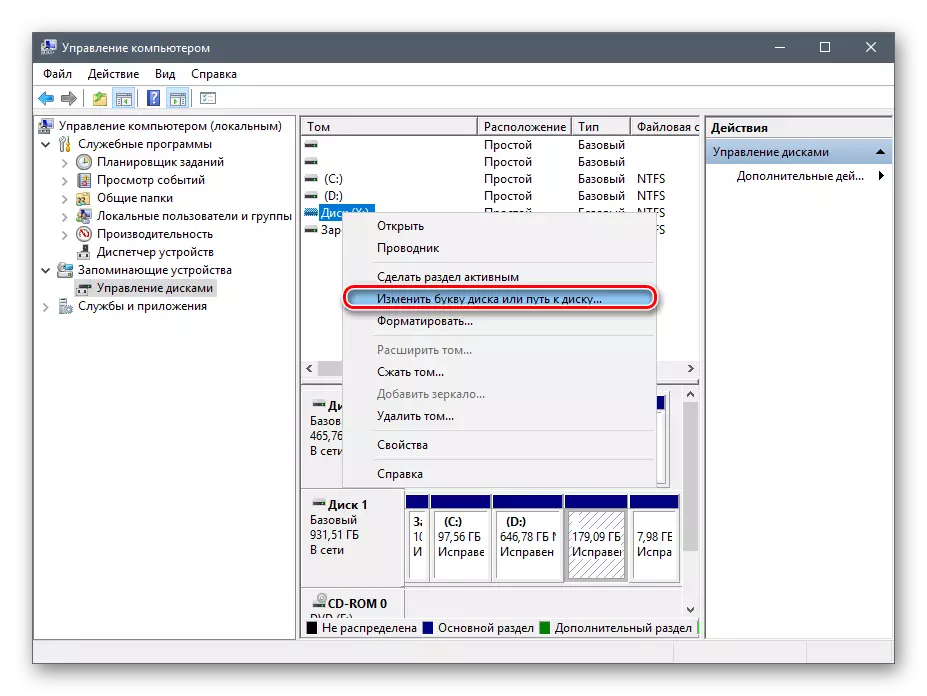
- In the column in the middle, all discs connected to the computer will be displayed, including the problem. And so it is usually due to the fact that he is incorrectly appointed letter.
- Find the disc that is not displayed, right-click on it and select "Change the drive letter or path to the disk ...".
- In the window that opens, click on the "Edit" button.
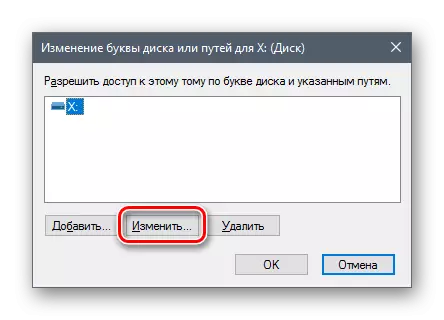
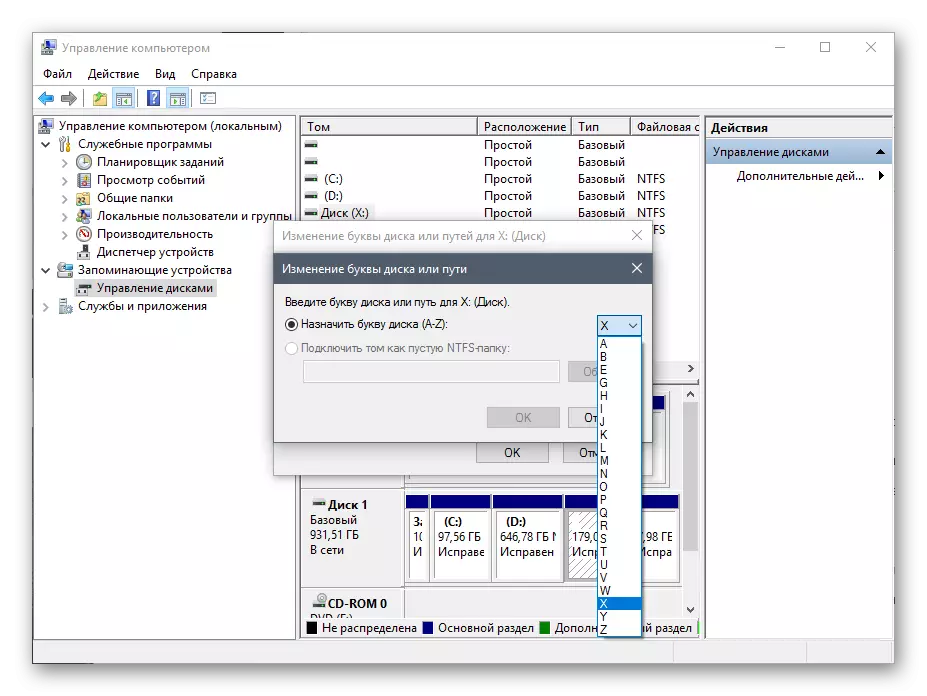
- In a new window from the drop-down list, select the desired letter and click OK.
If even the "Disk Management" utility does not see the equipment, take advantage of alternative programs from third-party developers. In another article, the reference is described below how to format special applications designed for advanced work with HDD. Use method 1 in which work with different software is considered.
Read more: Hard disk formatting methods
Cause 2: Invalid Format
Sometimes the disc has no item "Change the letter of the disk or the path to the disk ...". For example, due to inconsistencies in the file system. To work normally in Windows, it must be in NTFS format.
In this case, it needs to be reformatted so that it becomes available. This method is suitable only if HDD does not contain information, or the data on it does not provide importance, because all the data will be deleted.
- Repeat steps 1-2 from the instructions above.
- Right-click on the disk and select "Format".
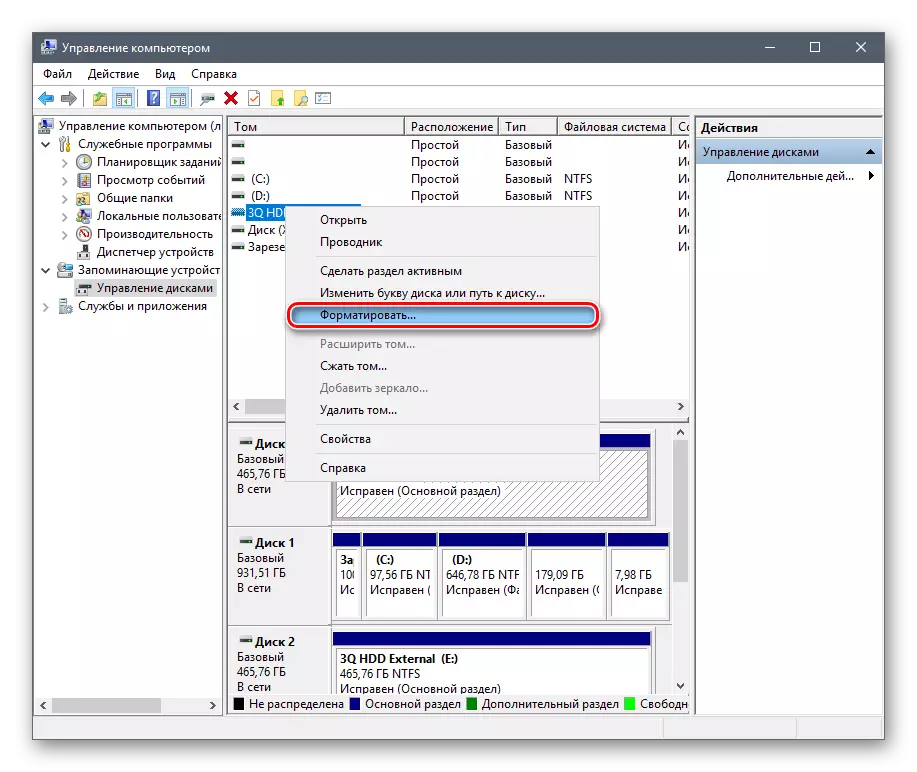
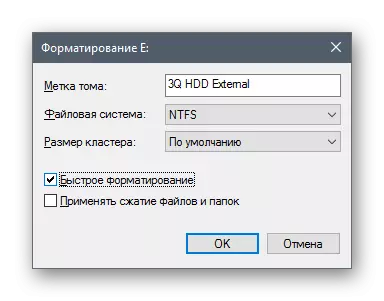
- In the window that opens, select the NTFS file system and click OK.
- After formatting the disk should be displayed.
Cause 3: Uninitialized HDD
The new and unused hard drive may not work immediately when connected. Alone, the hard disk is not initialized, and this process should be done manually.
- Repeat steps 1-2 from the instructions above.
- Select the desired disc, click on it right-click and select "Initialize Disk".
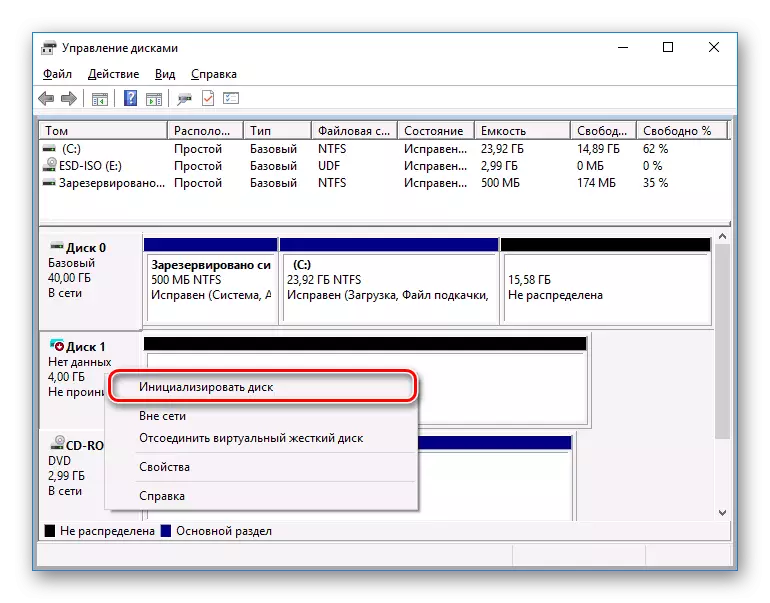
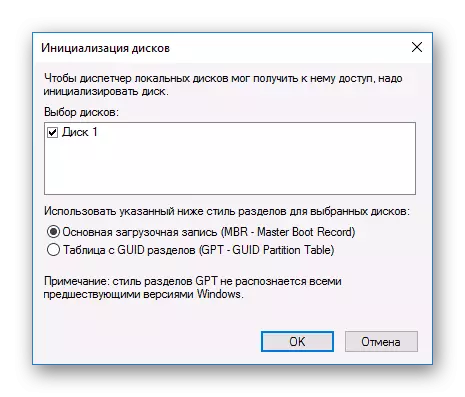
- In a new window, place a tick on a new disk, select the MBR or GBT style (for hard drives it is recommended to choose "MBR - Master Boot Record") and click OK.
- Right-click on the initialized disk and select "Create a Simple Tom".
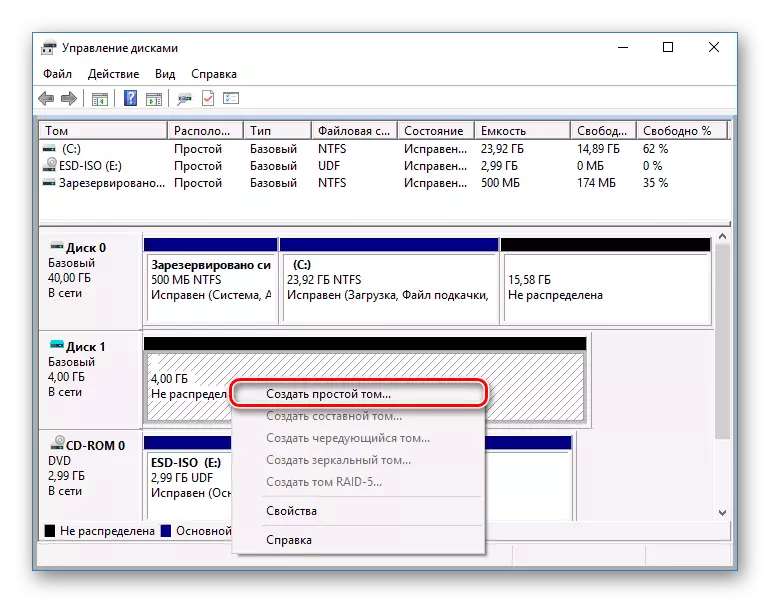
- A simple volume creation wizard will open, click "Next".
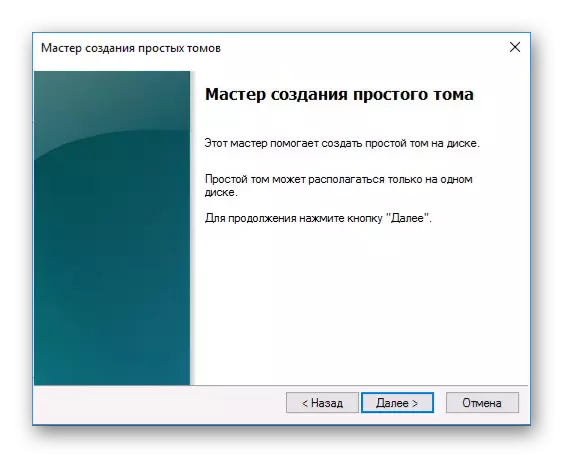
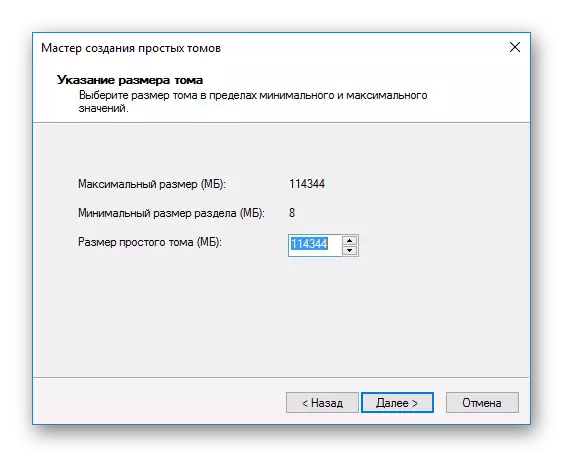
- The next step is to indicate the size of the volume. By default, the maximum size of a simple volume is specified, we recommend not to change this digit. Click "Next".
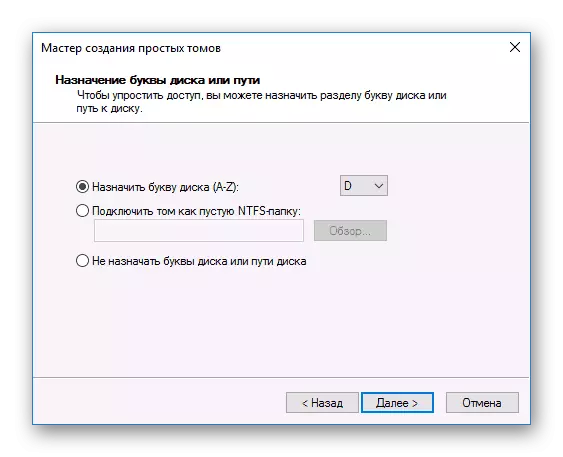
- In another window, select the drive letter and click "Next".
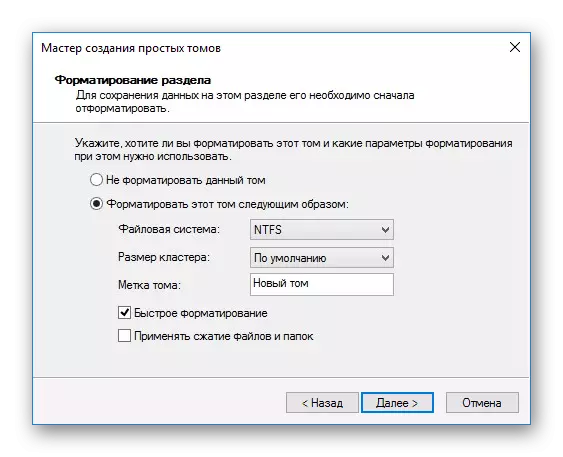
- After that, select the parameter "Format this volume as follows:" and in the File System field, select "NTFS". Leave the other fields as it is and click "Next".
- In the last window, the wizard will display all selected parameters, and if you agree with them, then click "Finish".
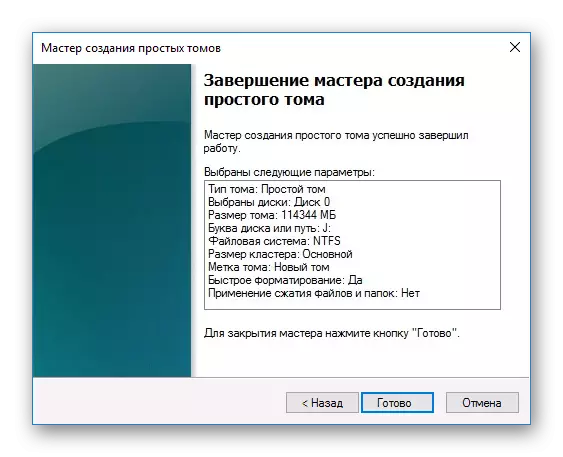
The disk will be initialized and ready to work.
Cause 4: Damaged connectors, contacts or loops
When connecting an external and internal hard drive, you need to take care. External HDD may not function due to a damaged USB wire. Therefore, if there is no visible reasons due to which it does not work, there is no, then you should take a similar wire with the same connectors and connect the disk to the computer. The inner hard drive can also have this problem - cables failed and need to be replaced to work.
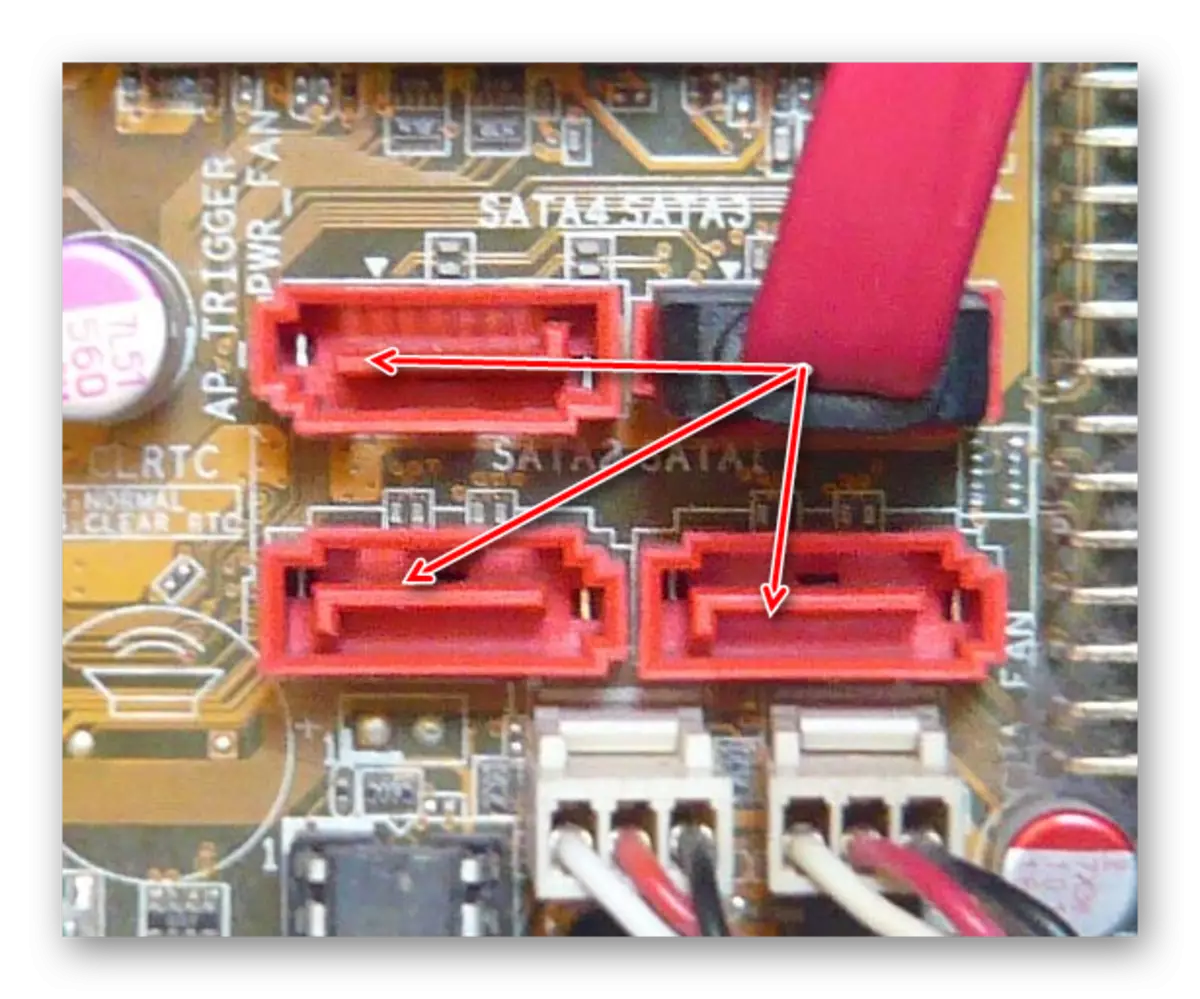
Still often helps the simple reconnection of the SATA cable in another connector of the motherboard. Since they are usually sufficient, you will need to connect the SATA cable to another free port.
Due to inattention or insufficient experience, the user can incorrectly connect the hard drive inside the system unit. Check the connection and make sure that the contacts do not depart.
Cause 5: Invalid BIOS Settings
The computer does not see the system disk
- Download priority
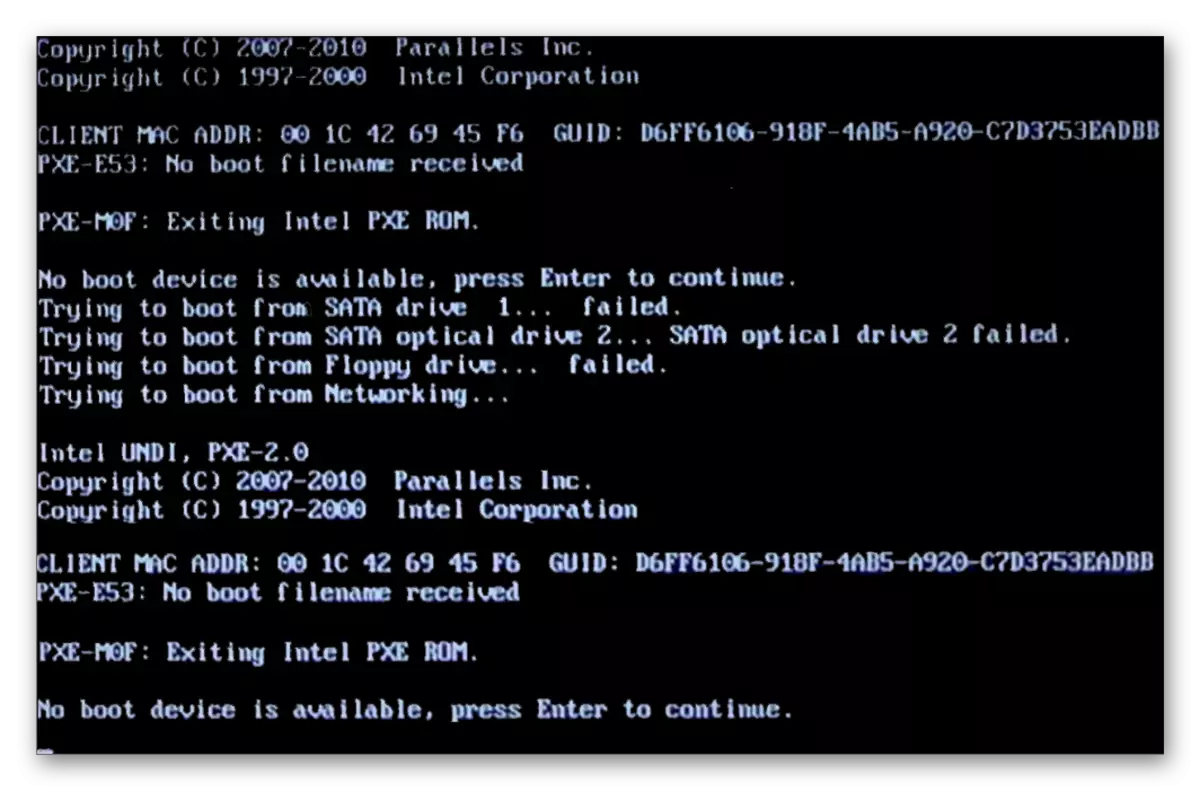
In some cases, the BIOS may be set by the incorrect priority of devices for download. For example, this happens after changing the settings to download from the flash drive. After that, when you try to start the computer in the usual way, the message "Disk Boot Failure. INSERT SYSTEM DISK AND PESS ENTER, or other similar messages related to "Boot Disk", "Hard Disk".
Consequently, the user needs to set an HDD to first place in the BIOS settings.
- When the computer is loaded, press the F2 key (either DEL, or the other key, which is written when starting the PC) to go to the BIOS.
Read more: How to get to the BIOS on the computer
- Depending on the type of BIOS, the interface may vary. Find the "BOOT" tab (in the old versions of Advanced Bios Features / Bios Features Setup). Use arrows to manage.
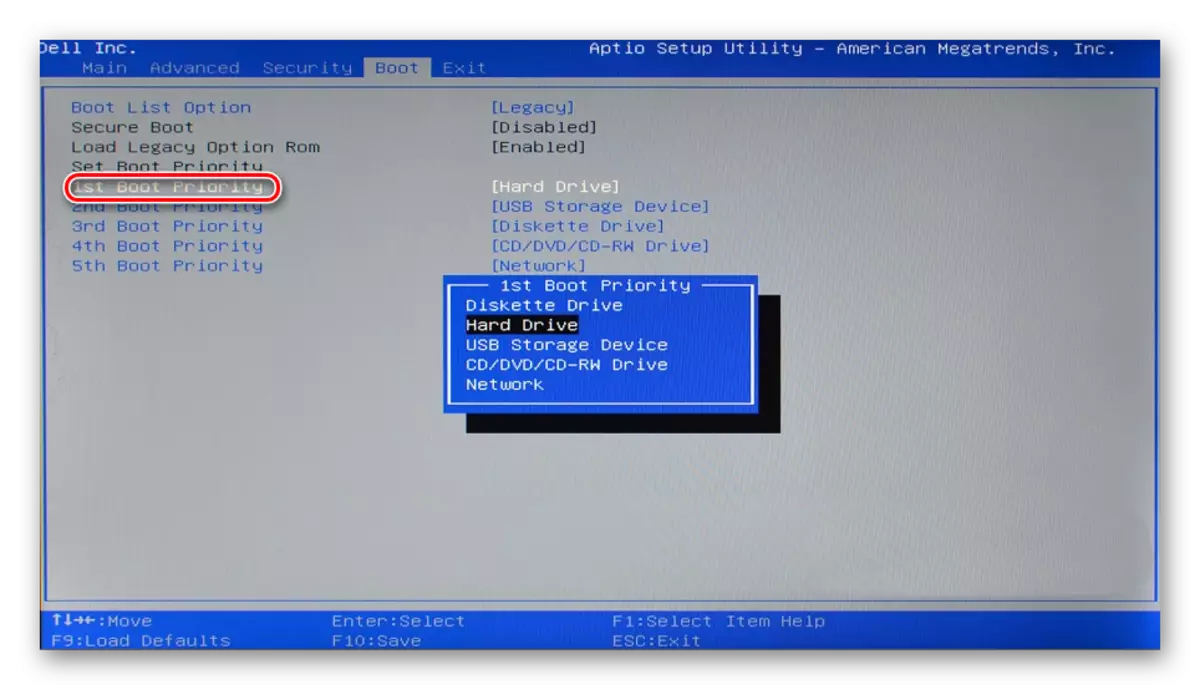
- In the list of download devices in the first place ("1st boot priority" / "First boot device") Put your HDD. Example for AMI BIOS:
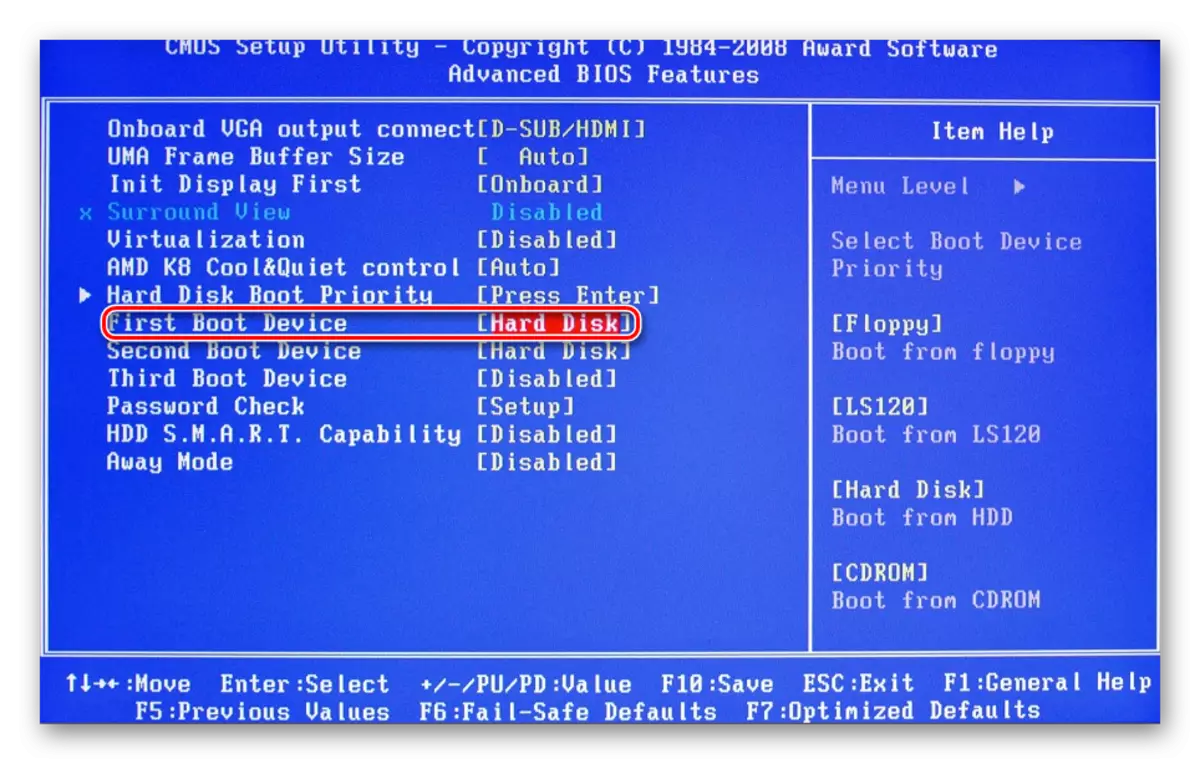
Example for Award BIOS:
- Press F10 to save and exit and press Y to confirm. After that, the PC will be downloaded from the device you exhibited.
Please note that due to differences in the Versions of the BIOS, the names of the menu items here and then may differ. If your BIOS does not have the specified parameter, then look for the most suitable name for logic.
Perhaps the BIOS is not set up the IDE compatible mode.
- To change, go to the BIOS method specified above.
- Depending on the BIOS interface, go to "Main", "Advanced" or "Intefated Peripherals". In the menu, find the "SATA OPERATION", "Configure SATA AS" or "Onchip Sata Type". AMI BIOS:
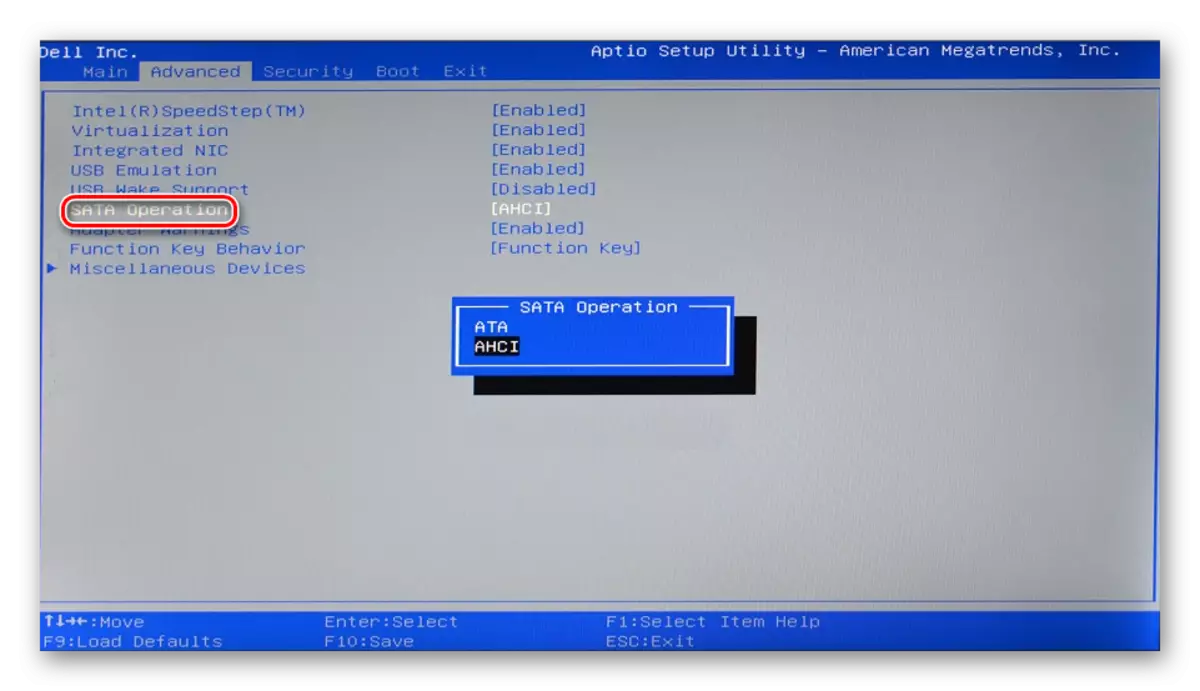
In Award BIOS:
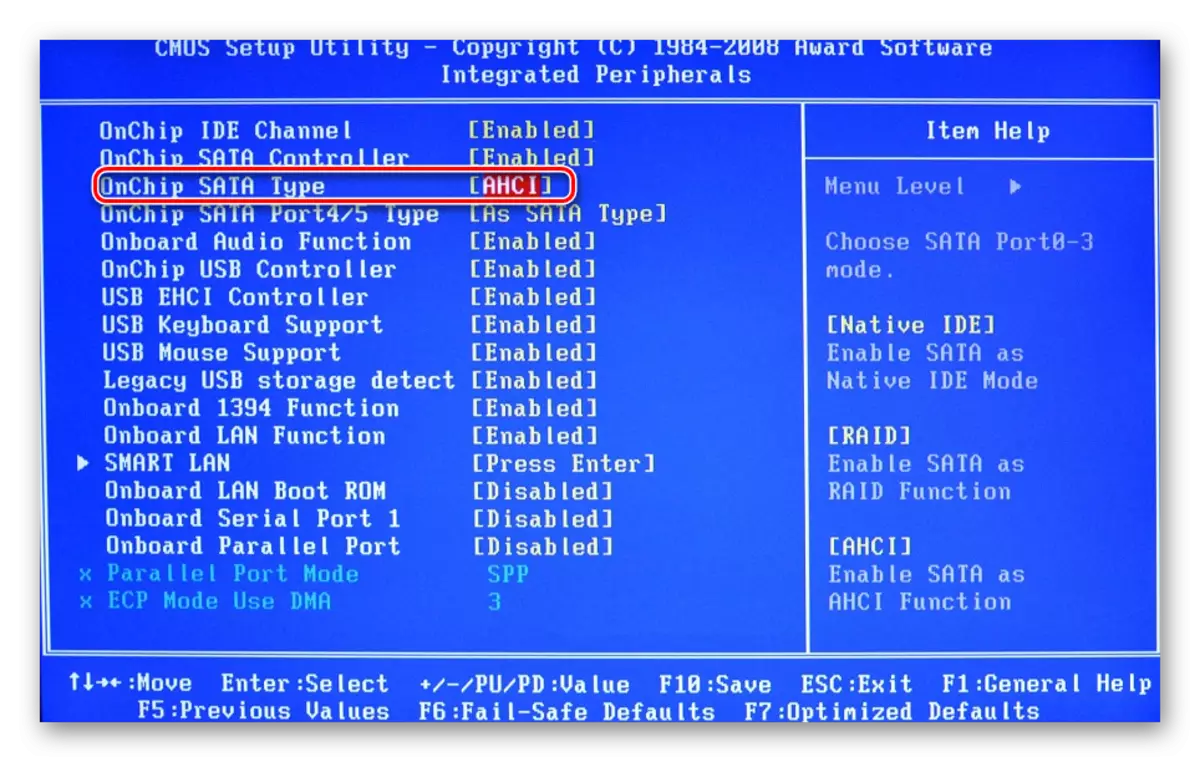
- From the list of options, select "IDE" or "Native IDE", press F10 and in the confirmation window Press Y.
- After that, check whether the system sees the hard drive.
BIOS does not see hard drive
Usually, even the BIOS does not define the hard disk, then the wrong settings or a failure of them. Incorrect settings appear as a result of the user's actions, and failure can occur for various reasons, ranging from nutrition interruptions and ending with viruses in the system. This may indicate the system date - if it is not accurate, then this is a direct failure indicator. It requires a complete reset of settings and return to factory settings.
- De-in computer. Next there are two ways.
- Find the Clear CMOS jumper on the motherboard - it is located next to the battery.
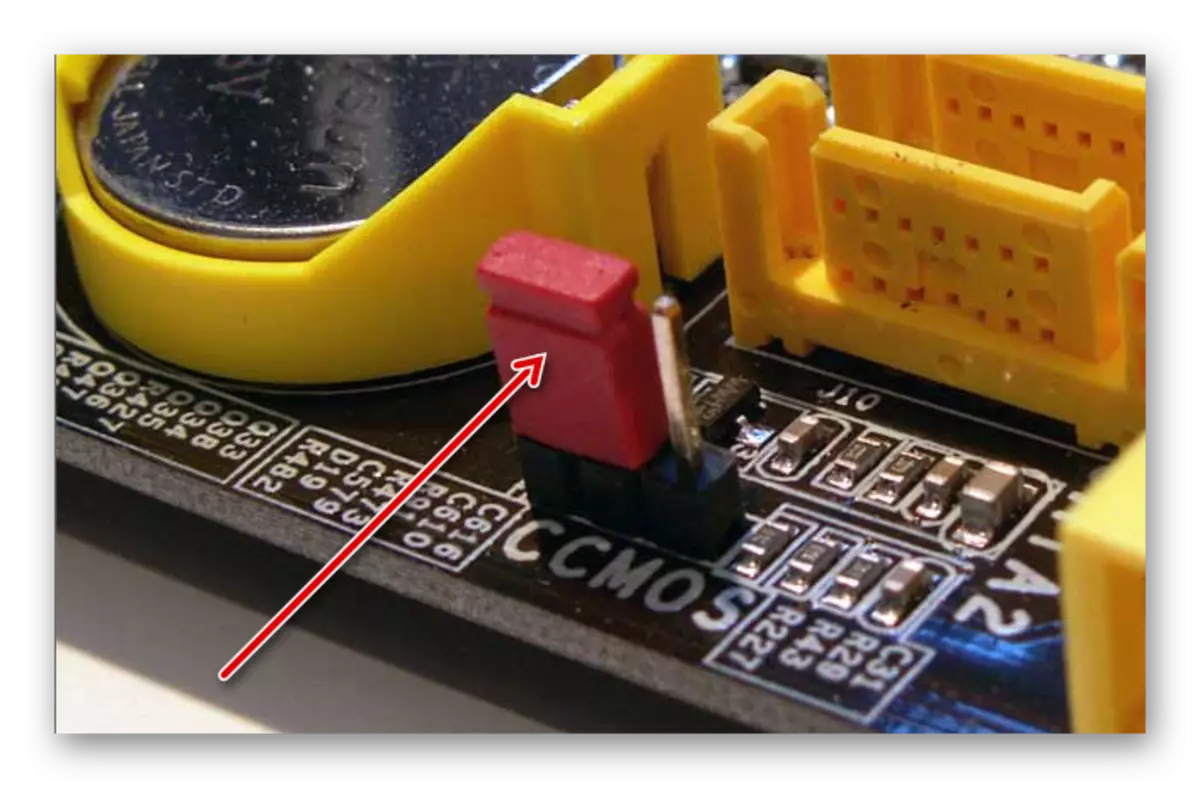
- Change the jumper from the contacts 1-2 by 2-3.
- Seconds after 20-30 return it to its original position, after which the BIOS settings are reset.
- In the system block, find the motherboard and remove the battery from it. It looks like an ordinary battery - round and silver.
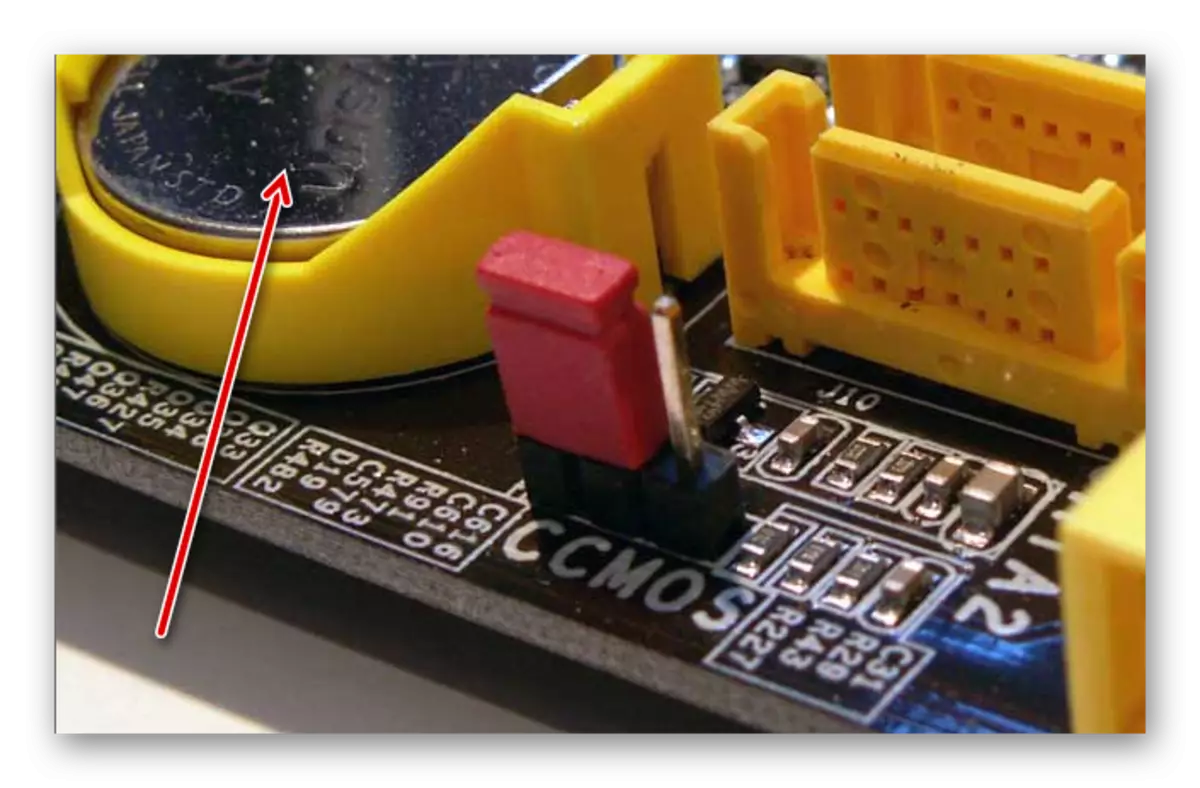
- After 25-30 minutes, install it back and check whether the BIOS is sees.
- In both options, it may also be necessary to change the prioritization of the download according to the instructions above.
OR
Outdated BIOS.
When you try to connect a new drive to a too old computer with the same BIOS periodically fails to avoid problems. This is explained by software incompatibility and irrelevant control files. You can try to update the BIOS firmware manually, and then check the visibility of HDD.
Attention! This method is intended exclusively for experienced users. The whole process you will perform at your own risk, because in case of incorrect actions, you can lose the performance of the PC and spend a lot of time to restore its functioning.
Read more:
BIOS update on computer
Instructions for updating BIOS C flash drive
Cause 6: Not enough nutrition or cooling
Listen to the sounds that are distributed from the system unit. If the buzzing sounds of the change of cycles are heard, then it is likely to be a weak power supply. Act in circumstances: Replace the power supply to a more powerful one or disconnect the device's secondary importance.If the cooling system is not well running well, then due to overheating, the disc can be periodically permissible to determine the system. Most often this happens when a laptop is used, which is usually weak coolers that do not cope with their task properly. The solution to the problem is obvious - the acquisition of more powerful cooling.
Reason 7: Physical breakage
As a result of various reasons, a hard disk may fail: shake, fall, blow, etc. If the above methods did not help, then you should try to connect an HDD to another computer. If it is not defined by them, then most likely, it is not possible to fix it on the program level, and you will have to find a service center for repair.
We looked at the main reasons for which the hard disk does not start. In fact, they may be greater because it all depends on the specific situation and configuration. If your problem has not been solved, then ask questions in the comment, we will try to help you.