

For a Russian-language user, it is natural to work in a program with a Russified interface, and the Skype application provides such an opportunity. You can choose a language in the process of installing this program, but when installing you can allow an error, the language settings could be knocked out after a while, after installing the program, or they could intentionally change someone else. Let's find out how to change the Skype application interface language into Russian.
Changing language in Russian in Skype 8 and above
You can enable Russian in Skype 8 by following changes in the program settings after it is installed. When installing the program, it is impossible to do this, since the language of the installer window is determined according to the system settings of the operating system. But it is not always that the user needs, and sometimes because of various failures, the wrong language is activated, which is registered in the OS parameters. Since it most often has to change the language using the English-speaking interface of the messenger, then we will consider the procedure for its example. This algorithm can also be used when changing other languages, focusing on icons in the settings window.
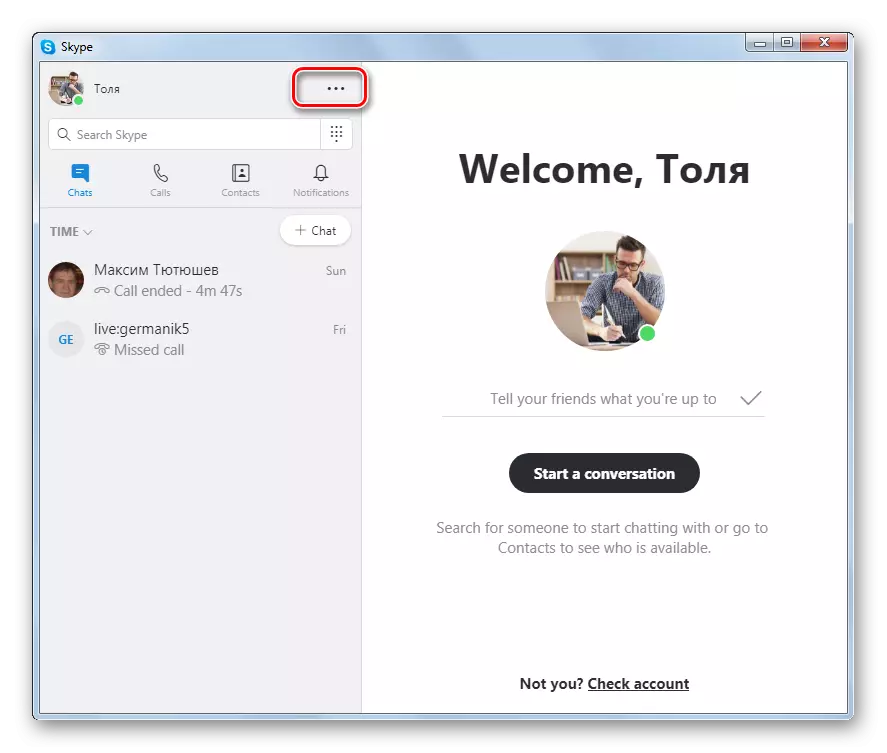
- Click on the "More" element ("More") in the form of dots in the skype left region.
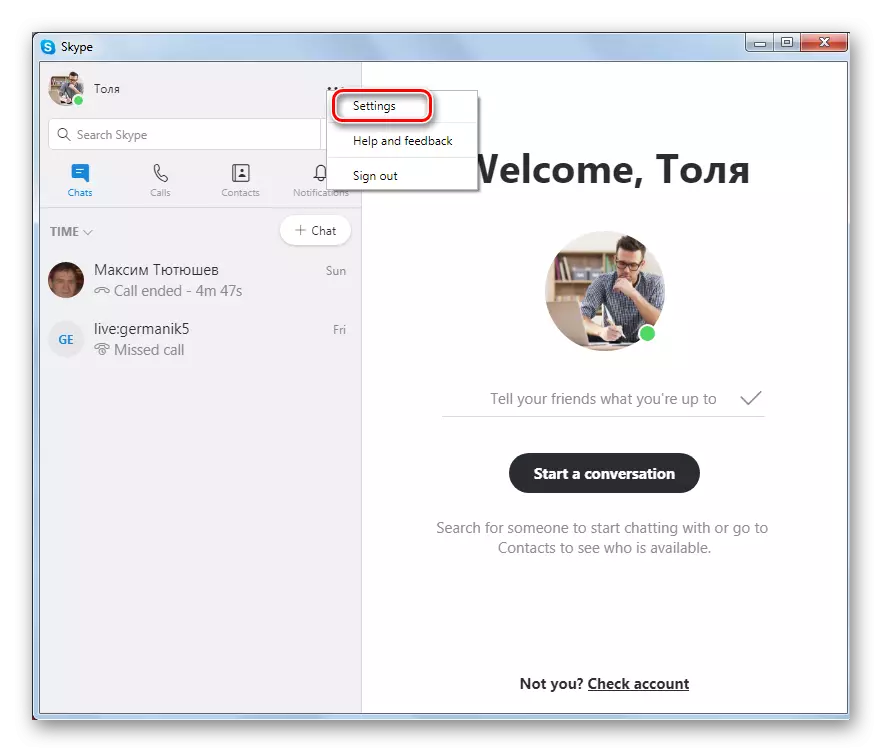
- In the open list, select "Settings" ("Settings") or simply apply the Ctrl +,.
- Next, go to the section "General" ("General").
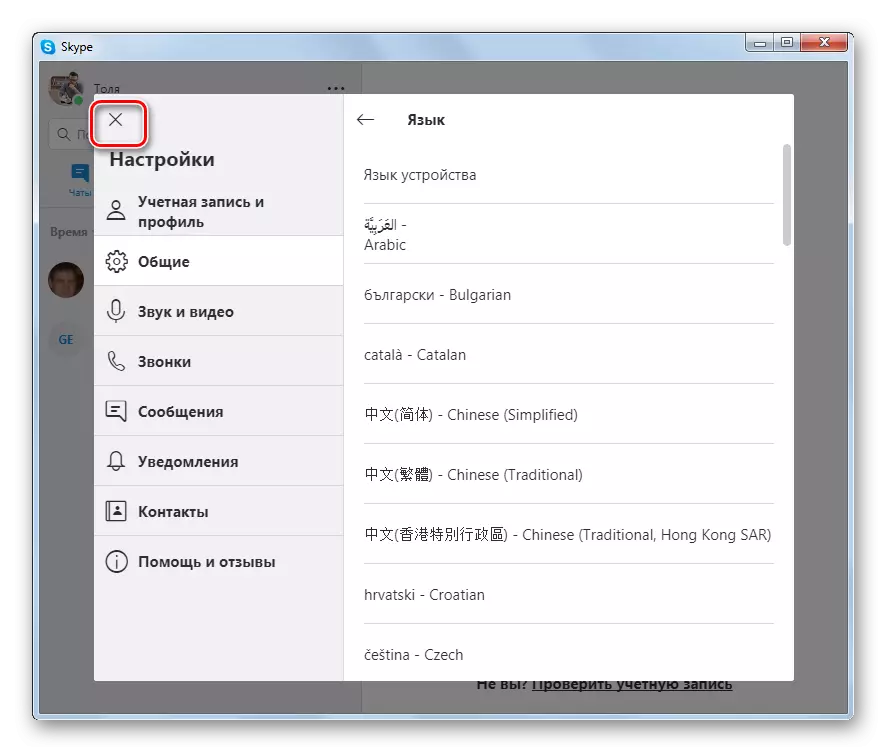
- Click on the list "Language" ("Language").
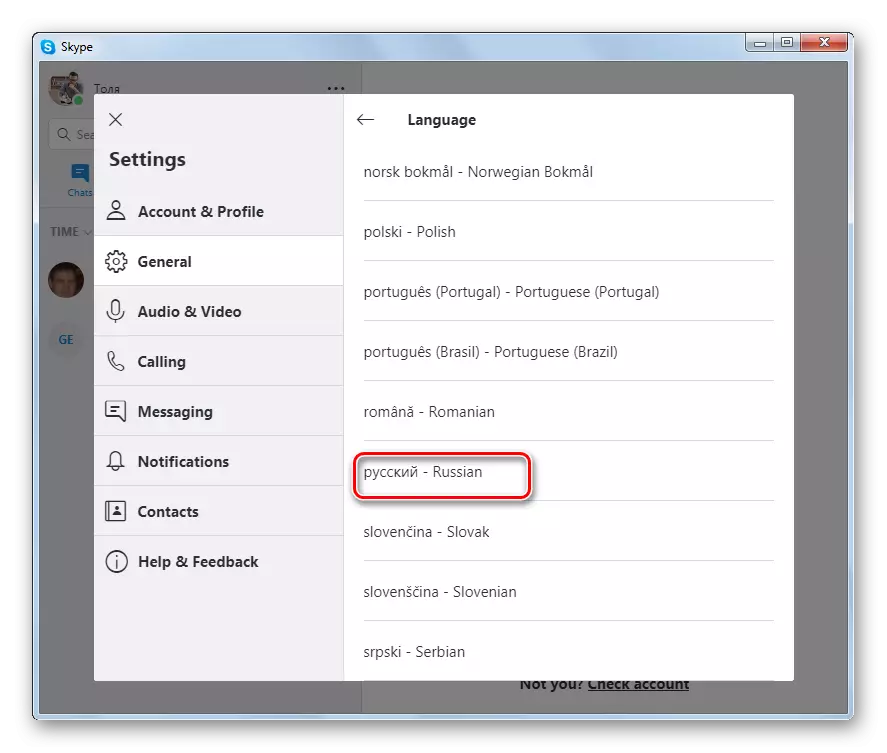
- A list of where you must choose the "Russian - Russian" option.
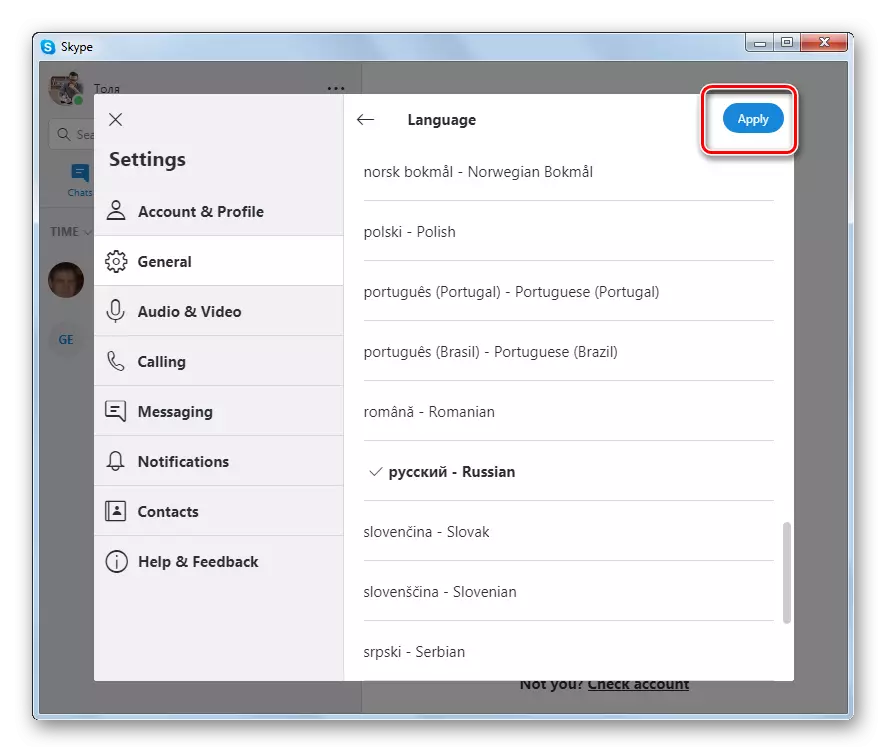
- To confirm the change of language, press "Apply" ("Apply").
- After that, the program interface will be replaced by Russian-speaking. You can close the settings window.


Change of tongue into Russian in Skype 7 and below
In Skype 7, you can not only include the Russian-speaking interface of the messenger after installation, but also select a language when installing the program installer.Installing the Russian language when installing the program
First of all, let's find out how to install the Russian language when installing Skype. The installation program is automatically launched in the operating system language installed on your computer. But even if your OS is not in Russian, or some unforeseen failure occurred, the language can be changed into Russian immediately after launching the installation file.
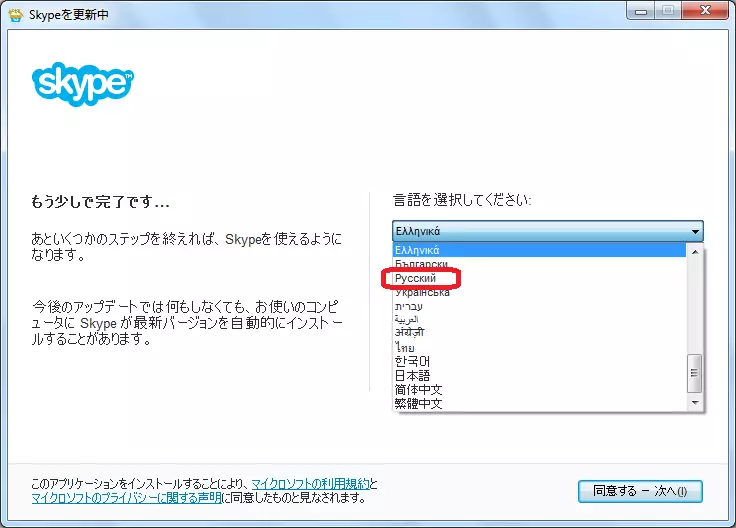
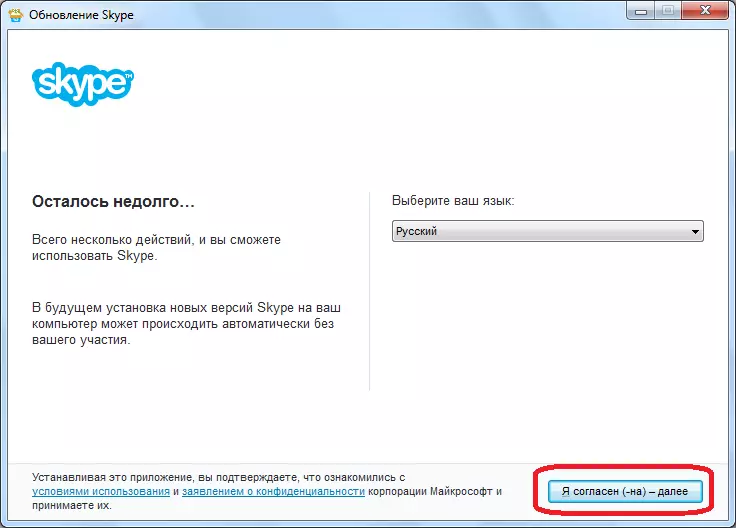
- In the first window that opens, after starting the installation program, open the form with the list. She is there alone, so you do not confuse, even if the installation application opens on a very unknown language. In the drop-down list we are looking for the value "Russian". It will be on Cyrillic, so you will find it without problems. Choose this value.
- After selecting, the interface of the installation program window will immediately be changed to the Russian-language. Next, we click on the "I agree" button, and continue the installation of Skype in standard mode.
Language change in Skype tincture
There are cases when the Skype program interface should be changed already in the process of its operation. This is done in the application settings. We will show an example of changing the language into Russian in the English-speaking program interface, as in most cases the change of language is made by users from English. But, you can produce a similar procedure from any other language, since the order of the location of navigation elements in Skype does not change. Therefore, by comparing the elements of the English-speaking screenshots interface below, with the elements of your Skype instance, you can change the language into Russian without problems.
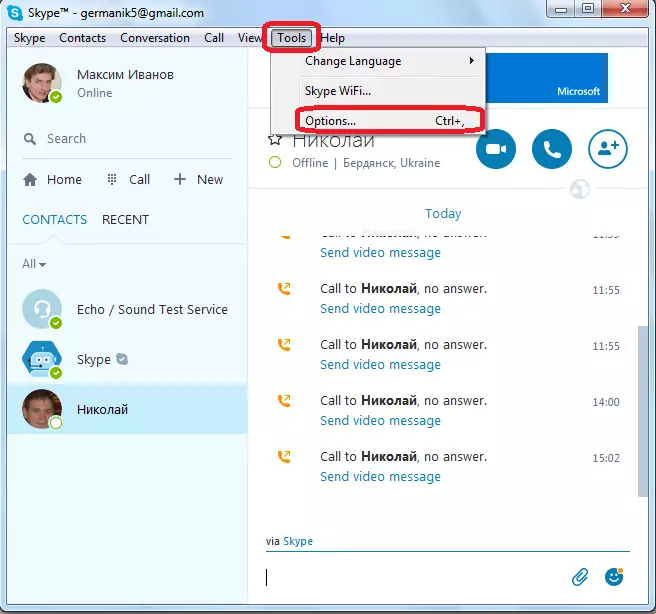
You can switch the language in two methods. When using the first option, select "Tools" ("Tools") on the Skype menu panel. In the list that appears, click on "Change Language" ("Language Selection"). In the list that opens, choose the name "Russian (Russian)".
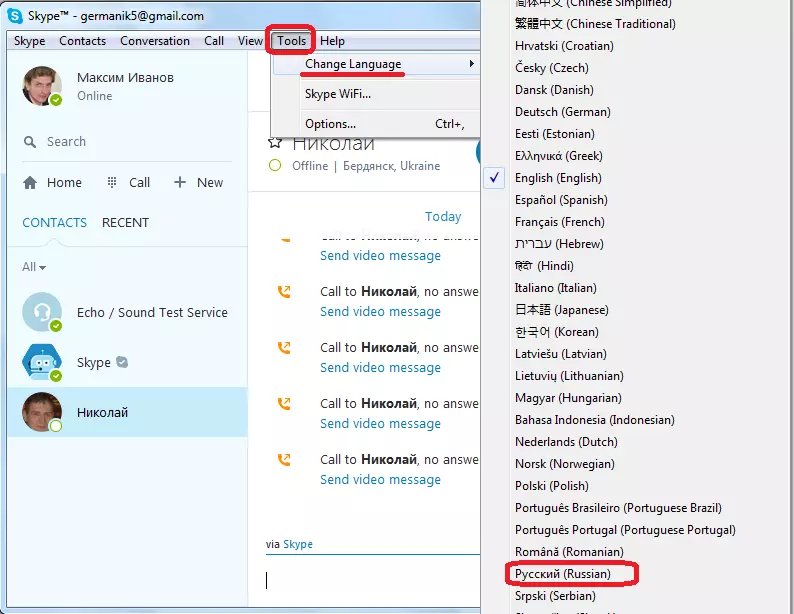
After that, the application interface will change to Russian.
- When using the second method, again, click on the "Tools" ("Tools"), then in the dropout list, go to the name "Options ..." ("Settings ..."). Also, you can simply press the Ctrl + key key.
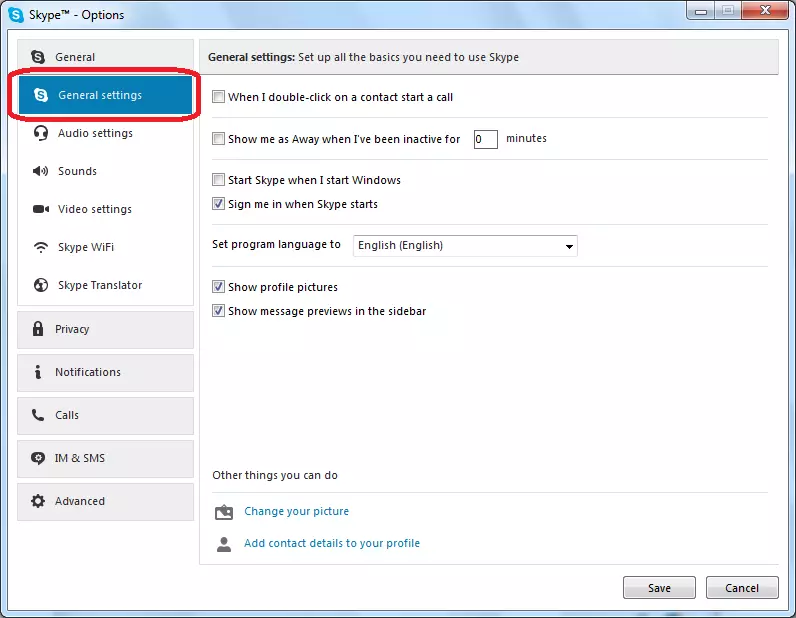
- The settings window opens. By default, you must get to the General Setting section, but if you for some reason got into another section, then go to the above.
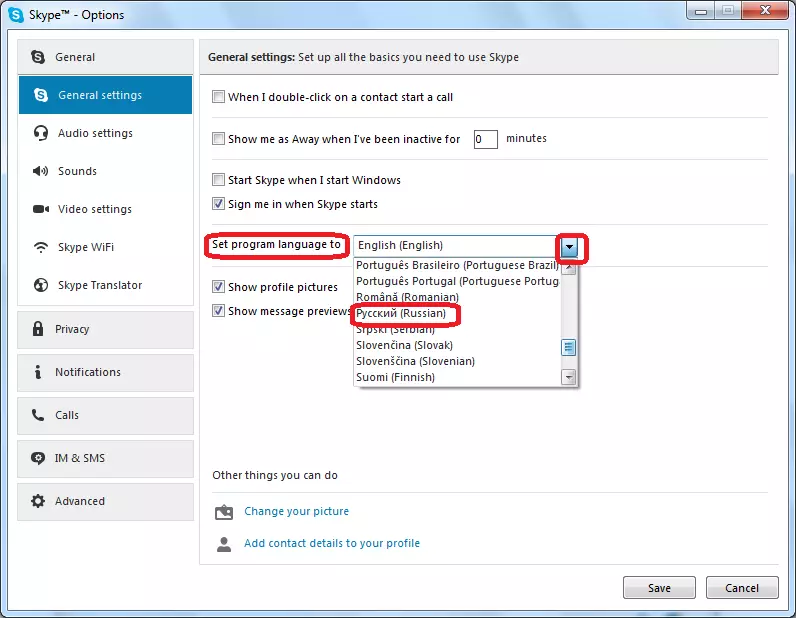
- Next, near the lettering "SET Program Language To" ("Selecting the Language of the Interface") open the drop-down list, and select the "Russian (Russian) parameter".
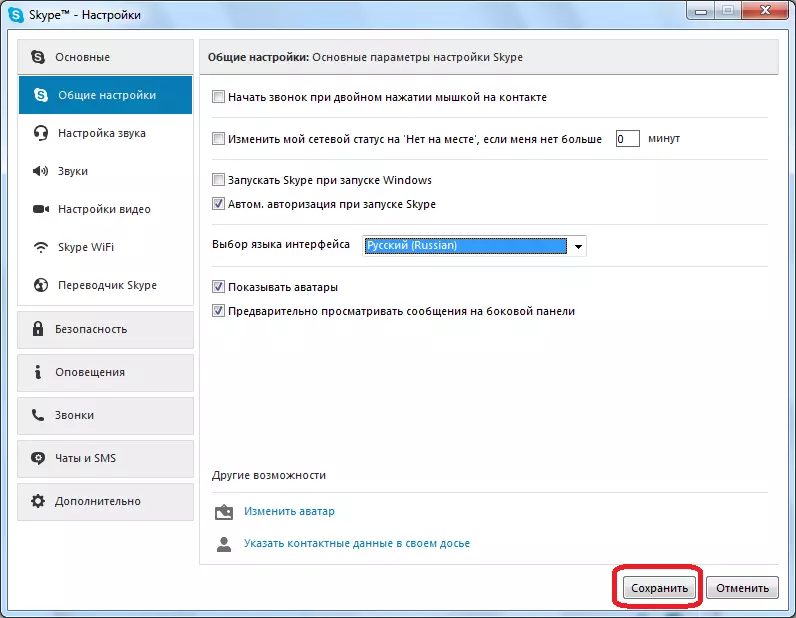
- As you can see, immediately after that, the program interface changes to the Russian-language. But so that the settings come into force, and do not return to the same, do not forget to click on the "Save" button.
- After that, the procedure for changing the Skype program interface language can be considered completed.
The procedure for changing the Skype program interface in Russian was described above. As we see, even with the minimum knowledge of the English language, the change in the English-language design of the application to the Russian-speaking, in general, intuitively understandable. But, when using the interface in Chinese, Japanese, and other exotic languages, changing the appearance of the program to understand it is very difficult. In this case, you just need to compare the navigation elements presented on the screenshots above, or simply use the CTRL + key combination to go to the settings section.