
For drivers and travelers it is no secret that the roads in cities and countries often change. Without timely update of software cards, the navigator can make you in a dead end, because of what you lose time, resources and nerves. Owners of Garmin navigators to perform an update is offered in two ways, and both of them will look below.
We update the cards on the Garmin navigator
The download of new maps into the navigator's memory is a fairly simple procedure that should be performed more often than in half a year, and ideally every month. Consider that global cards have a sufficiently large size, so the download speed directly depends on the bandwidth of your Internet. In addition to this internal memory, the device may not always be enough. When going to the path, purchase an SD card where you can download the file with the terrain of any size.To perform the process itself, it will be necessary:
- Garmin navigator or memory card;
- Computer with internet connection;
- USB cable or card reader.
Method 1: Official Application
This is a completely safe and easy way to update cards. However, this is not a free procedure, and for providing fully workable, actual cards and the possibility of contacting technical support will have to pay.
I would like to note that there are 2 types of purchase: lifelong membership in Garmin and one-time fee. In the first case, you get regular free updates, and in the second you just acquire one update, and every subsequent need to buy in exactly the same way. Naturally, to update the map, it must be installed at first.
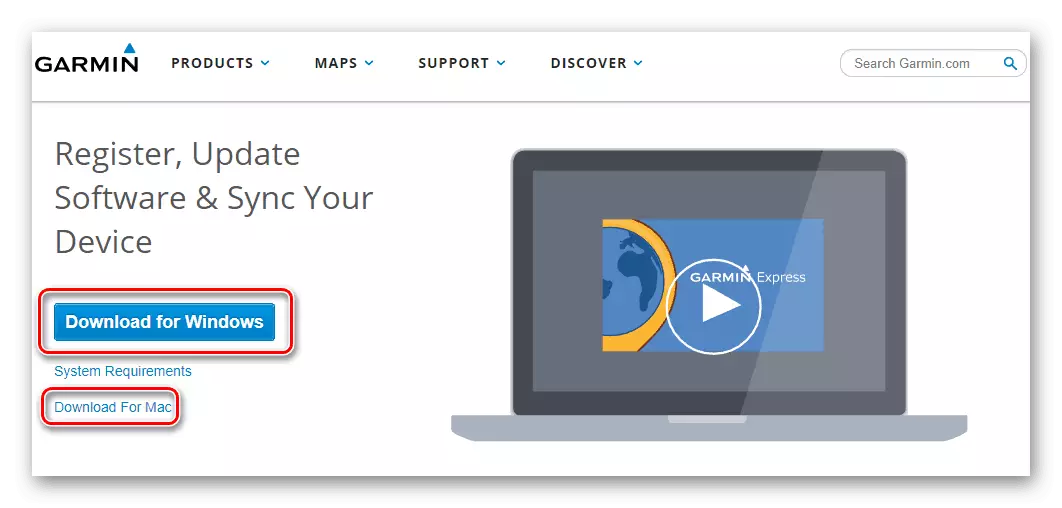
Go to the official site of Garmin
- Go to the manufacturer's official website to establish a program through which further actions will occur. You can use the link above for this.
- Download the Garmin Express program. On the main page, select the "Download for Windows" or "Download for Mac" option, depending on the OS of your computer.
- Upon completion of the Distribution's download, you open it and install the application. First you need to accept custom agreements.
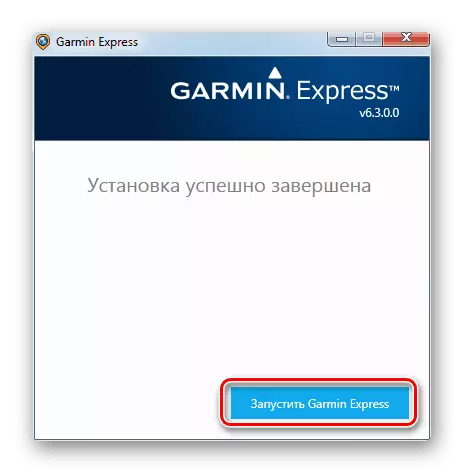
- Expect an end to the installation process.
- Run the application.
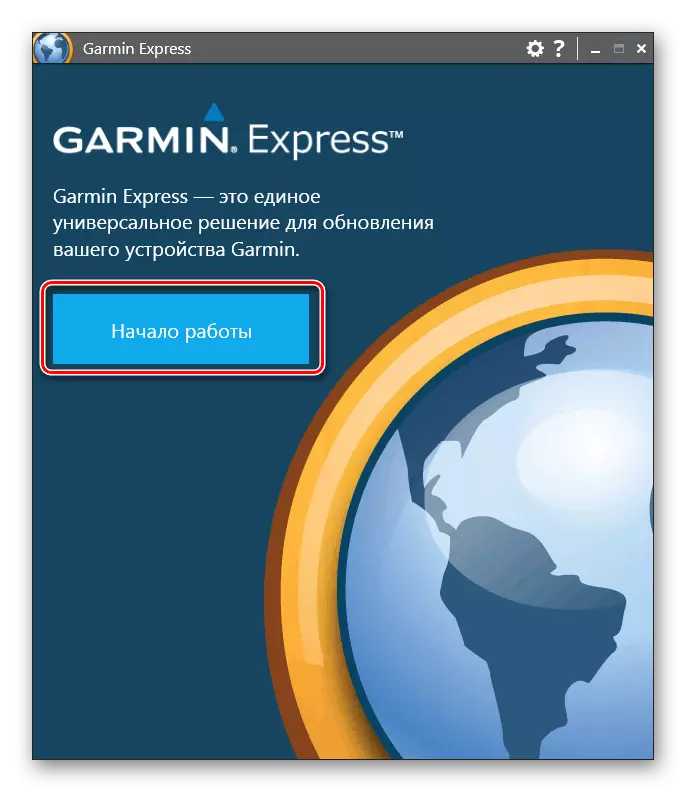
- On the starting window, click "Getting Started".
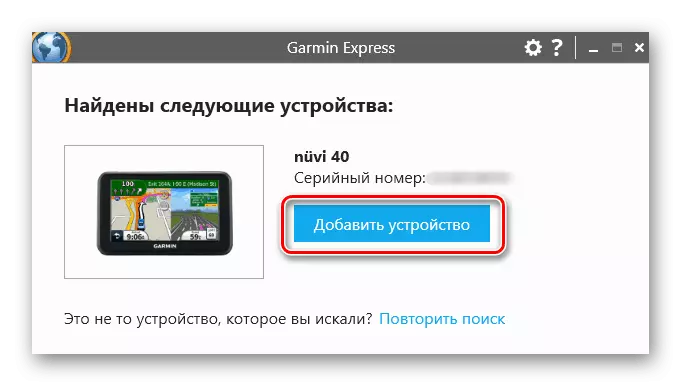
- In a new application window, select the "Add Device" option.
- Connect the navigator or memory card to the PC.
- When you first connect the navigator, you will need to register it. After detection of the GPS, click "Add Device".
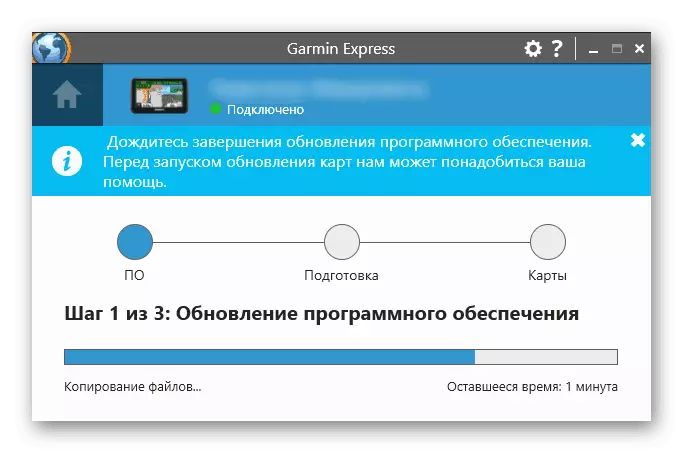
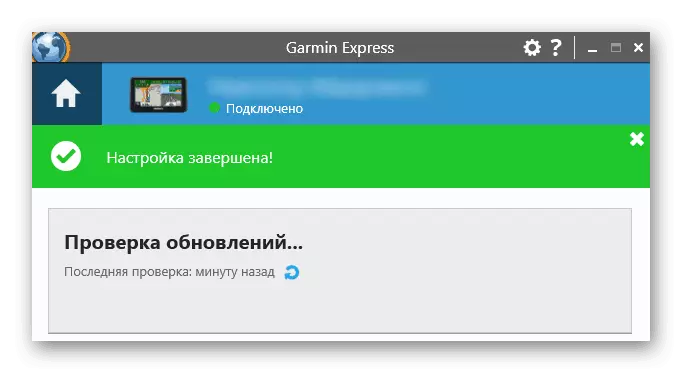
- Checking updates will begin, wait for it.
- Together with the update of maps, you may be asked to go to the new version of the software. We recommend clicking "install everything".
- Before installing the installation, see important rules.
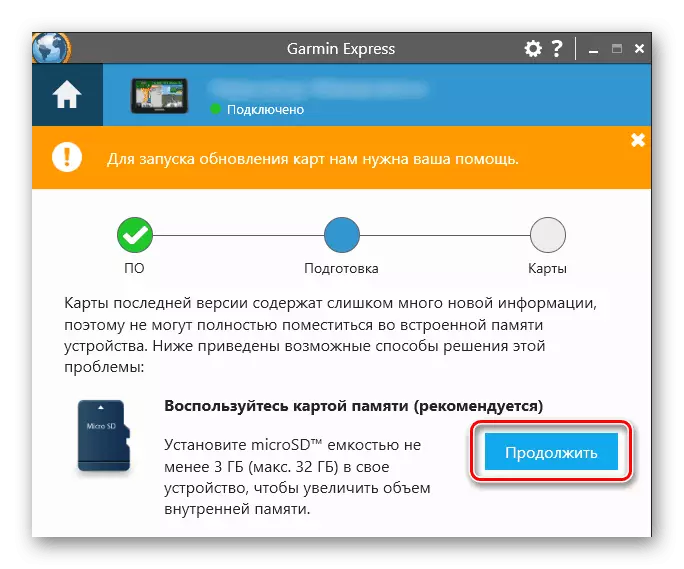
- The first thing will be installed for the navigator.
Then the same happens with the card. However, if there is not enough space on the internal memory of the device, you will be prompted to connect a memory card.
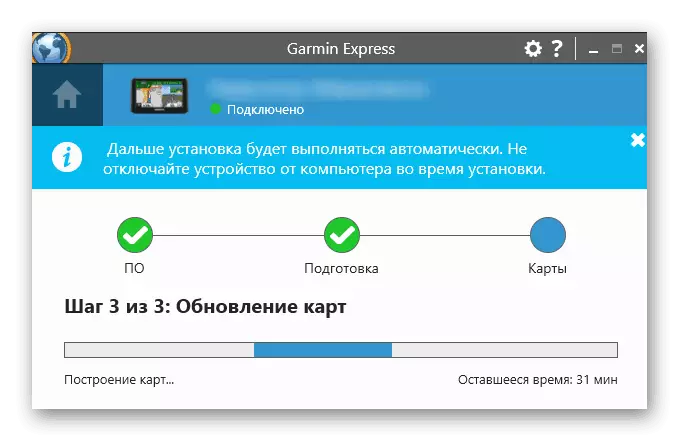
- After connecting the installation will be proposed to resume.
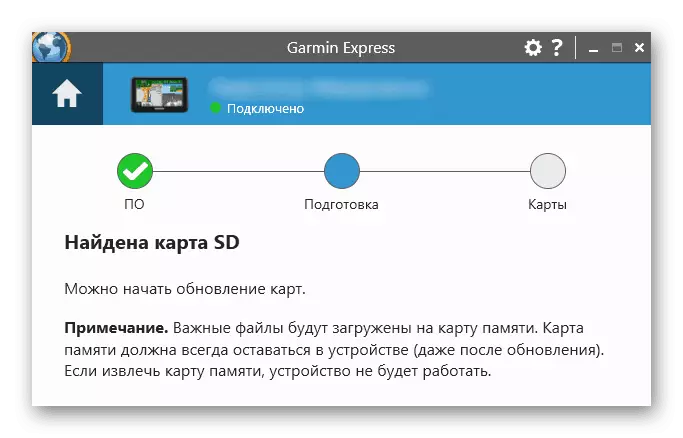
Wait for it.


Once Garmin Express notifies the absence of new files for installation, disconnect the GPS or SD drive. This is considered to be completed.
Method 2: Third Sources
Using informal resources, you can import custom and own street cards for free. It should be noted that this option does not guarantee per 100% security, proper functioning and relevance - everything is built for the most part on the enthusiasm and once the card you selected may be obsolete and stop being developed. In addition, technical support does not do such files, therefore it will be necessary to handle the creator, but it is hardly possible to wait for a response from it. One of the popular services is OpenStreetMap, in its example and consider the whole process.
Go to OpenStreetMap
For a complete understanding, knowledge of English will be required, because All information on OpenStreetMap is presented on it.
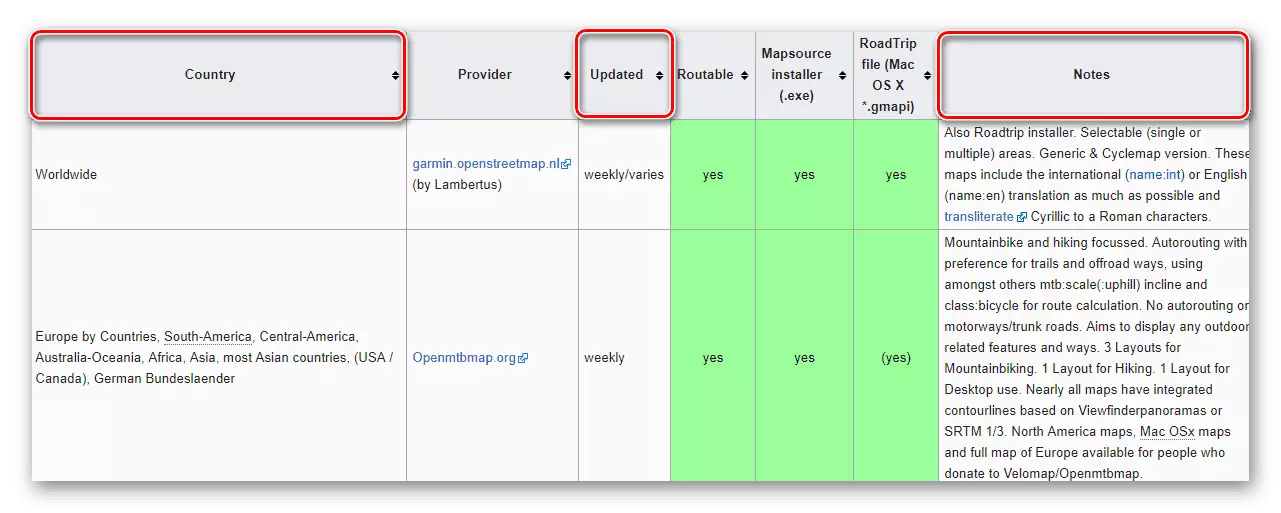
- Open the link above and view the list of maps created by other people. Sorting here is carried out in the area, immediately read the description and frequency of the update.
- Select the option of interest and click the link specified in the second column. If there are several versions, download the last one.
- After saving, rename the file in Gmapsupp, the .img extension does not change. Please note that most GPS Garmin may not be more than one files. Only some new models support the storage of several IMG.
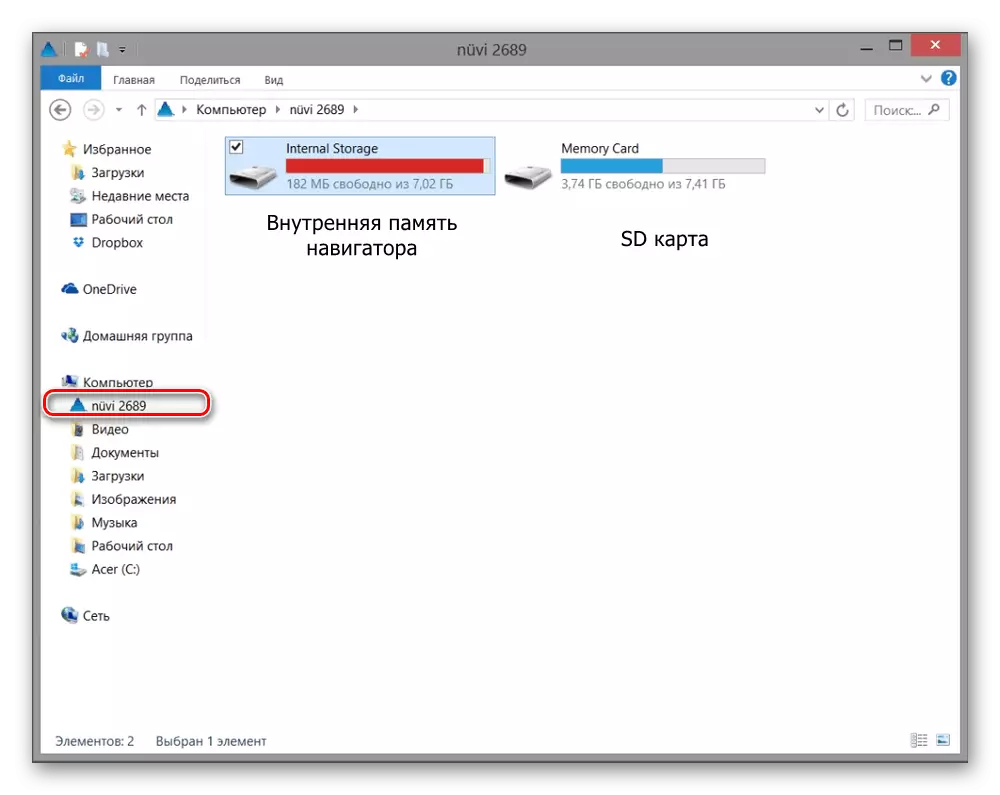
- Connect the navigator to the PC via USB. If you have an Express application installed, which automatically started when the device is detected, close it.
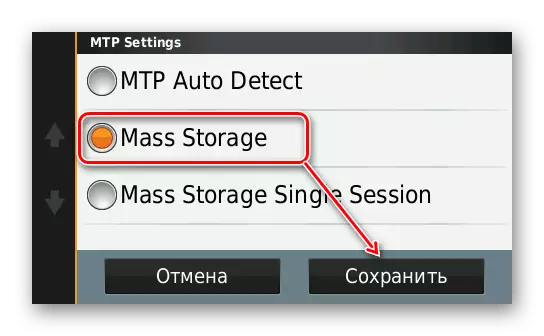
- Move the navigator to the "USB Mass Storage" mode, allowing you to exchange files with a computer. Depending on the model, this mode can be activated automatically. If this did not happen, open the GPS menu, select "Settings"> "Interface"> USB Mass Storage.
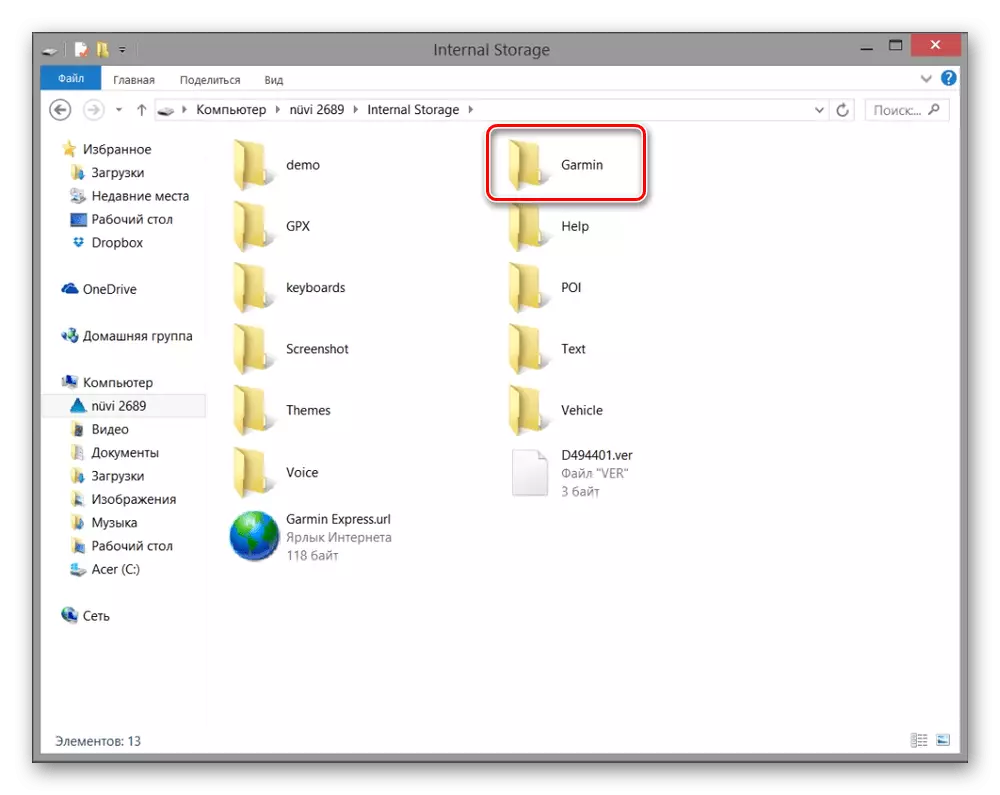
- Through "My Computer", open the connected device and go to the "Garmin" or "Map" folder. If there are no such folders (relevant for 1xxx models), create a "MAP" folder manually.
- Copy the file with the card to one of the two folders specified in the previous step.
- Upon completion of the copy, turn off the navigator or memory card.
- When GPS turns on, reconnect the card. To do this, go to "Service"> "Settings"> "Map"> "Advanced". Install a tick near the new card. If the old card remains active, remove the checkbox from it.
If there is an SD card, use it to download files by connecting the drive through the adapter in the card reader.
OSM has a separate dedicated server provided by the domestic Garmin distributor to storing cards with CIS countries. The principle of their installation is similar to what is described above.
Go to download OSM CIS cards
Using the readme.txt file, you will find the name of the archive with the desired country of the former USSR or the Russian Federal District, and then download and install it.
It is recommended to immediately charge the device battery and check the updated navigation in the case. Have a nice trip!