

One of the main features of the Skype program is the possibility of video calls. But there are situations where the user wants to record video negotiations through Skype. There may be a lot of reasons for this: the desire can always be able to update valuable information in the memory (this primarily concerns webinars and lessons); Using a video as evidence of the words spoken by the interlocutor if he suddenly starts to give up them, etc. Let's find out how to record a video from Skype on a computer.
Methods of recording
Despite the unconditional demand of users on the specified function, the built-in toolkit for writing a video of the conversation itself The Skype application itself has not provided for a long time. The task was solved by applying specialized third-party programs. But in the fall of 2018, an update was updated for Skype 8, which allows you to record video conferencing. We will talk about algorithms of various ways to write video in Skype.Method 1: Screen Recorder
One of the most convenient programs for capturing video from the screen, including when conducting a conversation through Skype, is the Screen Recorder application from the Russian company Movavi.
Download Screen Recorder
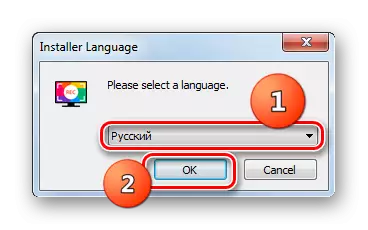
- After downloading the installer from the official site, run it to install the program. The language selection window immediately appears immediately. The system should be displayed by default, so it is often necessary to change anything here, but simply you need to press "OK".
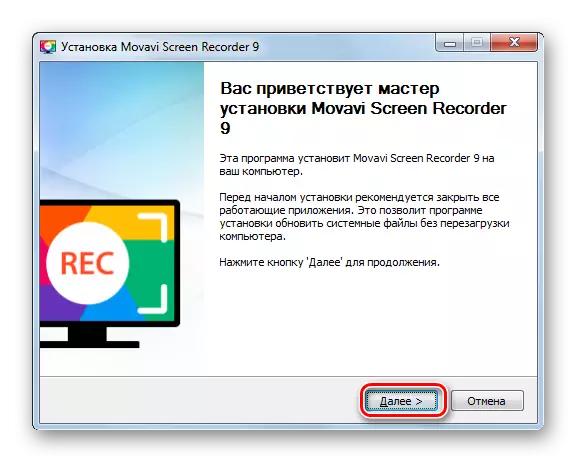
- The starting window "Installation Wizard" opens. Click "Next".
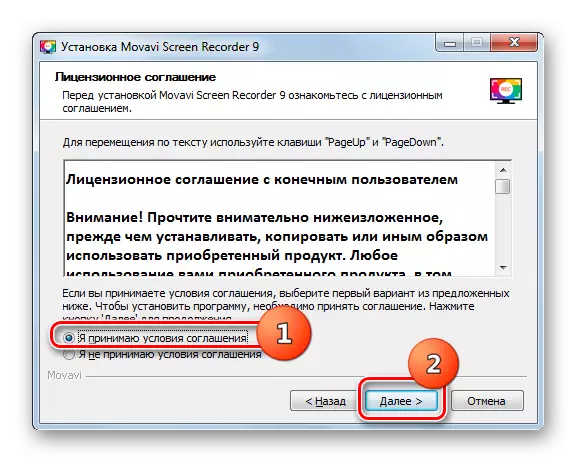
- Then it will be necessary to confirm its consent to license conditions. To execute this operation, put the radio button to the "I accept ..." position and click "Next".
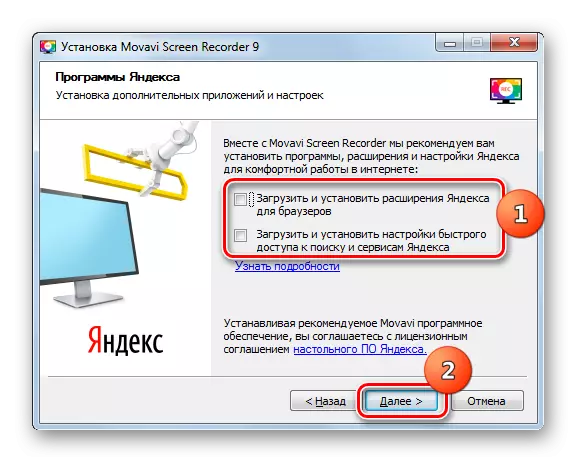
- A proposal will be displayed to establish an auxiliary software from Yandex. But you don't need to do this at all, if you do not think otherwise. To abandon the installation of unnecessary programs, simply remove all the checkboxes in the current window and click Next.
- The Screen Recorder Installation Selection window will be launched. According to default settings, the folder with the application will be posted in the Program Files directory on the C drive. Of course, you can change this address by simply entering the other path in the field, but we do not advise this to do without good reason. Often, in this window, you do not need to make any additional actions, except for pressing the "Next" button.
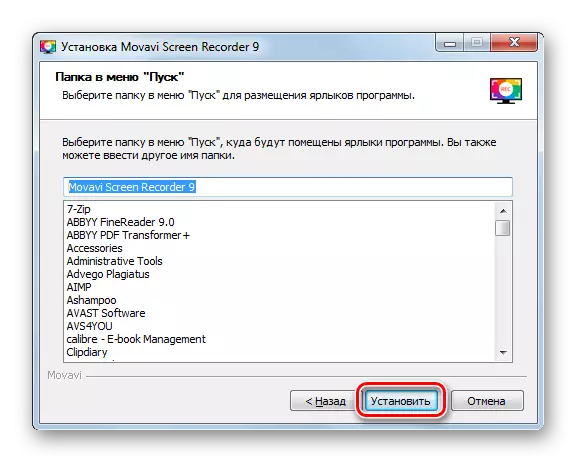
- In the next window, you can select the directory in the Start menu, where the program icons will be placed. But here it is also not necessary to change the default settings. To activate the installation, click "Set".
- The application installation procedure will be launched, the dynamics of which will be displayed using the green indicator.
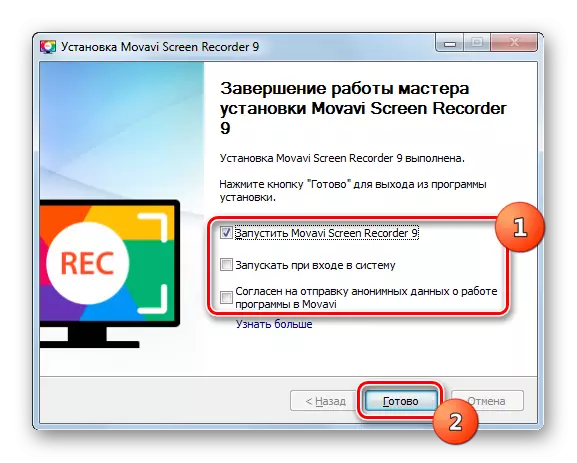
- Upon completion of the application, the window will open the completion window in the "Installation Wizard". By placing the checkbox, you can automatically start the Screen Recorder after closing the active window, configure the program to start the program when starting the system, as well as allow sending anonymous data of Movavi. We advise you to choose only the first item from three. By the way, he is activated by default. Next click "Ready."
- After that, the "Installation Wizard" will be closed, and if you have selected the "Run ..." item in the last window, then the Screen Recorder work enclosure will immediately appear.
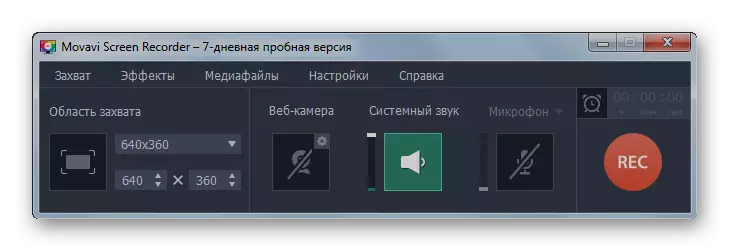
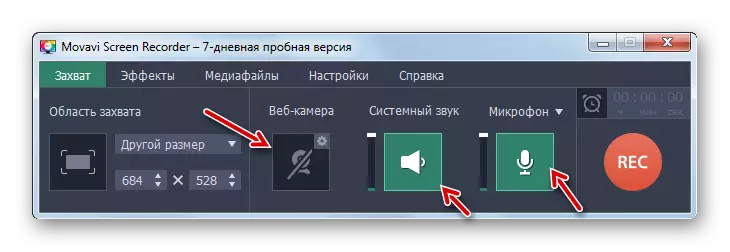
- Immediately you need to specify the capture settings. The program works with three elements:
- Webcam;
- System sound;
- Microphone.
Active elements are highlighted in green. To solve the target set in this article, it is necessary that the system sound and microphone are turned on, and the webcam is disabled, as we will capture the image directly from the monitor. Therefore, if the settings are set in the way, as described above, you just need to click on the relevant buttons to bring them into the proper look.
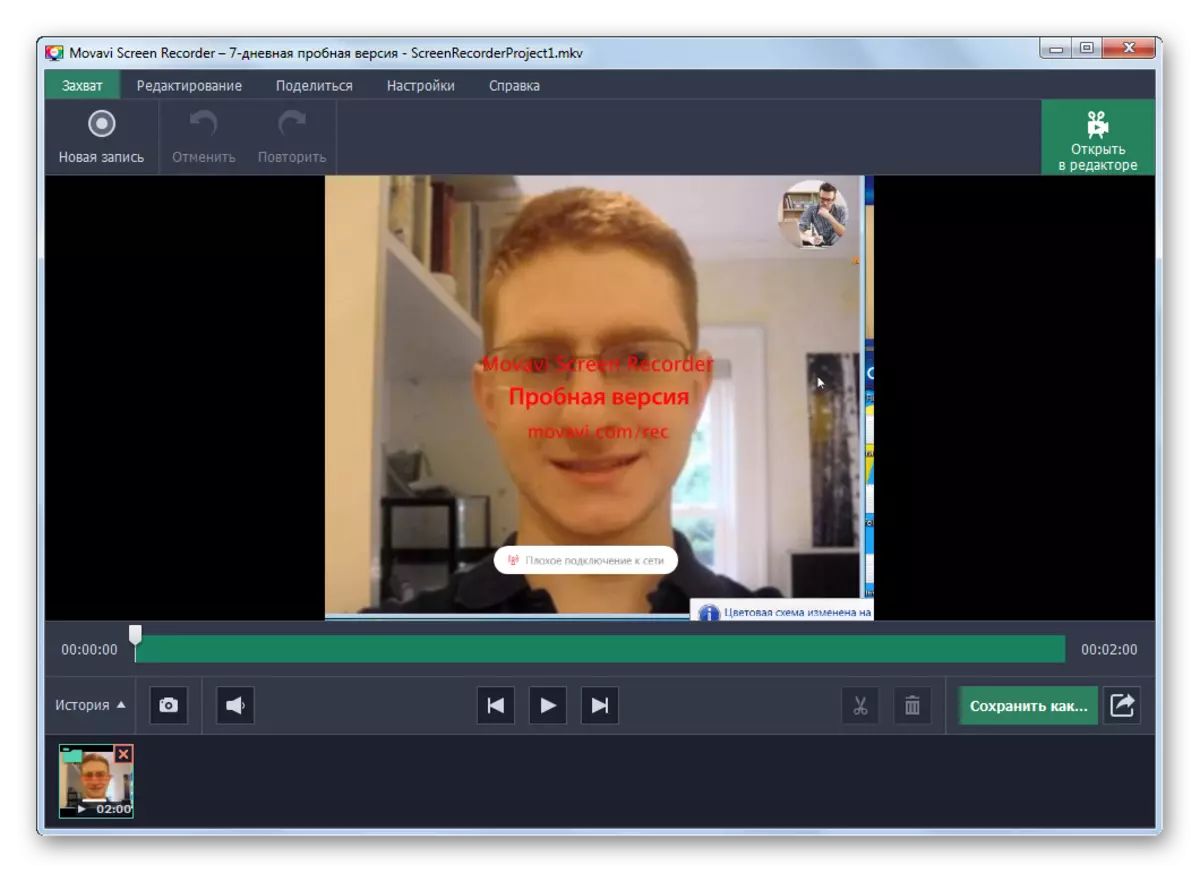
- As a result, the Screen Recorder panel should look like on the screenshot at the bottom: the webcam is disabled, and the microphone and system sound are turned on. Microphone activation allows you to record your speech, and system sounds are a question of the interlocutor.
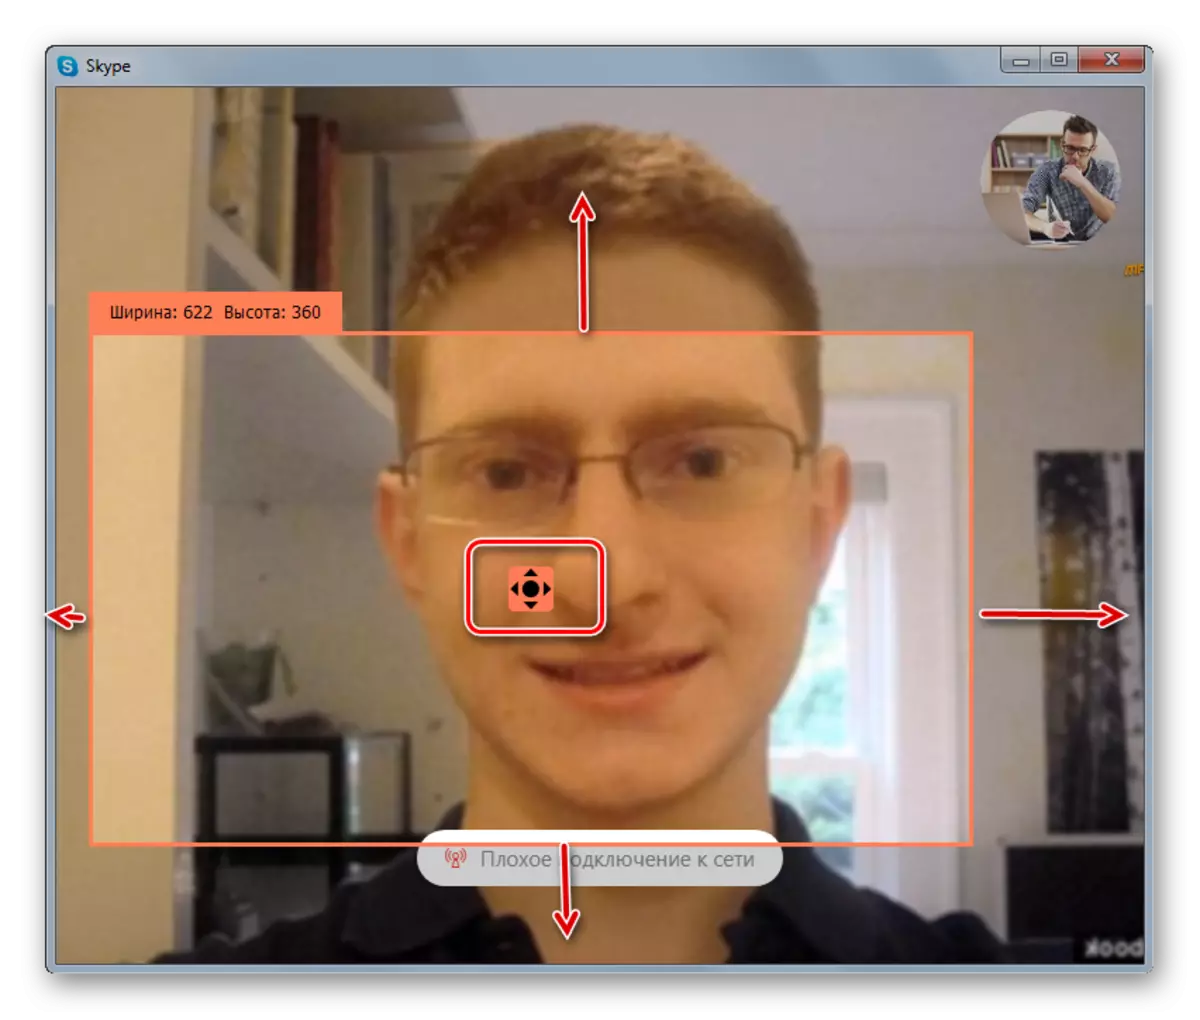
- Now you need to capture video in Skype. Therefore, you need to run this messenger if you have not yet done it earlier. After that, it is necessary to stretch the Screen Recorder capture frame to the Skype window of the Skype window from which to record. Either, on the contrary, it will be necessary to narrow it if the size is greater than the size of the Skype shell. To do this, set the cursor to the border of the frame by holding the left mouse button (LKM), and pull it in the desired direction to resize the spell space. If you need to move the frame on the screen plane, then in this case, set the cursor to its center, which is marked with triangles outgoing in different directions, make the LKM clamp and drag the object in the desired direction.
- As a result, the result should turn out in the form of a framed frame of the Skype program shell site from which a video will be made.
- Now you can start, actually record. To do this, return to the Screen Recorder panel and click on the "REC" button.
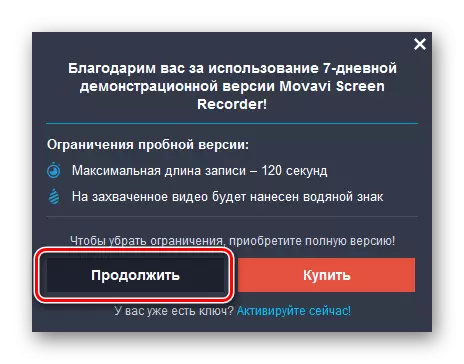
- When using a trial version of the program, a dialog box with a warning will open, that the recording time will be limited to 120 seconds. If you wish to take this restriction, you will have to purchase a paid version of the program by clicking the "Buy" button. In the case when you do not intend to do this, press "continue." After purchasing a license, this window will not appear in the future.
- Then another dialog box will appear with the effects of disabling effects to increase the performance of the system during recording. The options will be offered to do it manually or automatically. We advise you to use the second way by clicking on the "Continue" button.
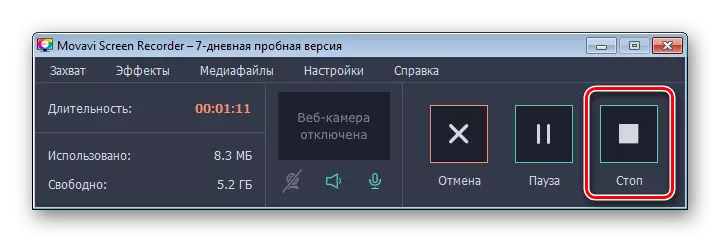
- After that, the video will start directly. For users of the trial version, it will automatically turn around 2 minutes, and license holders will be able to record as much time as needed. If necessary, you can cancel the procedure at any time by clicking on the "Cancel" button, or to suspend it temporarily by clicking the Pause element. To complete the record you need to click "Stop".
- After the procedure is completed, the built-in Screen Recorder Player will automatically open, in which you can view the resulting video. Immediately, if necessary, it is possible to trim the roller or convert it to the desired format.
- By default, the video is saved in MKV format on the next way:
C: \ Users \ user_name \ videos \ Movavi Screen Recorder
But it is possible in the settings to assign any other directory to save the recorded rollers.


The Screen Recorder program has a simplicity when writing video in Skype and at the same time rather developed functionality that allows you to edit the resulting roller. But, unfortunately, for the full use of this product, you need to purchase a paid version, as the trial has a number of serious restrictions: the ability to use is limited to 7 days; The duration of one roller cannot exceed 2 minutes; Displays background lettering on video.
Method 2: "Screen Camera"
The following program that can be used to record video in Skype is called "Screen Camera". Like the previous one, it also extends a paid basis and has a free trial. But unlike the Screen Recorder restrictions are not so tough and actually consist only in the ability to use the program for free 10 days. By functionality, the trial version is not inferior to the licensed.
Download "Screen Camera"
- After downloading the distribution, run it. The installation wizard window opens. Click "Next".
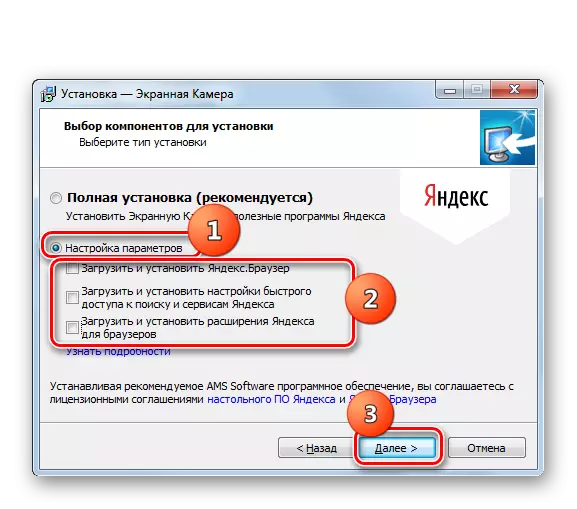
- Then you should act very carefully so that with the "screen camera" do not install a bunch of unnecessary software. To do this, rearrange the radio button to the "Settings" position and remove the checkboxes from all checkboxes. Then click "Next".
- At the next stage, accept the license agreement by activating the corresponding radio button and press "Next".
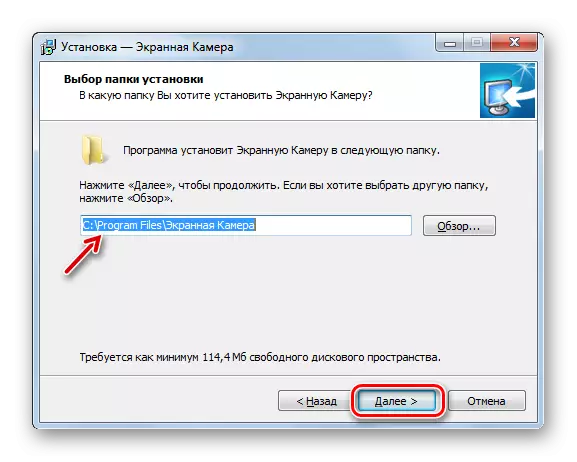
- Then you need to select the program placement folder for the same principle as it was done for Screen Recorder. After click "Next".
- In the next window, you can create a program icon on the "desktop" and consolidate the application on the "taskbar". The task is performed by placing the checkboxes in the appropriate checkboxes. By default, both functions are activated. After specifying the parameters, click "Next".
- To start the installation, press "Set".
- The process of installing the "Screen Camera" is activated.
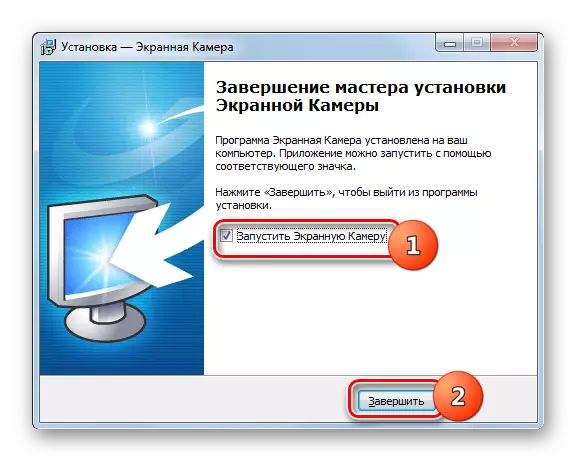
- After successful installation, the final window of the installer will be displayed. If you want to activate the program immediately, then place the checkbox in the checkbox "Run the screen chamber". After that, click "Complete".
- When using a trial version, not licensed, the window will open, where you can enter a license key (if you have already purchased it), go to buy a key or continue to use the trial version for 10 days. In the latter case, click "Continue".
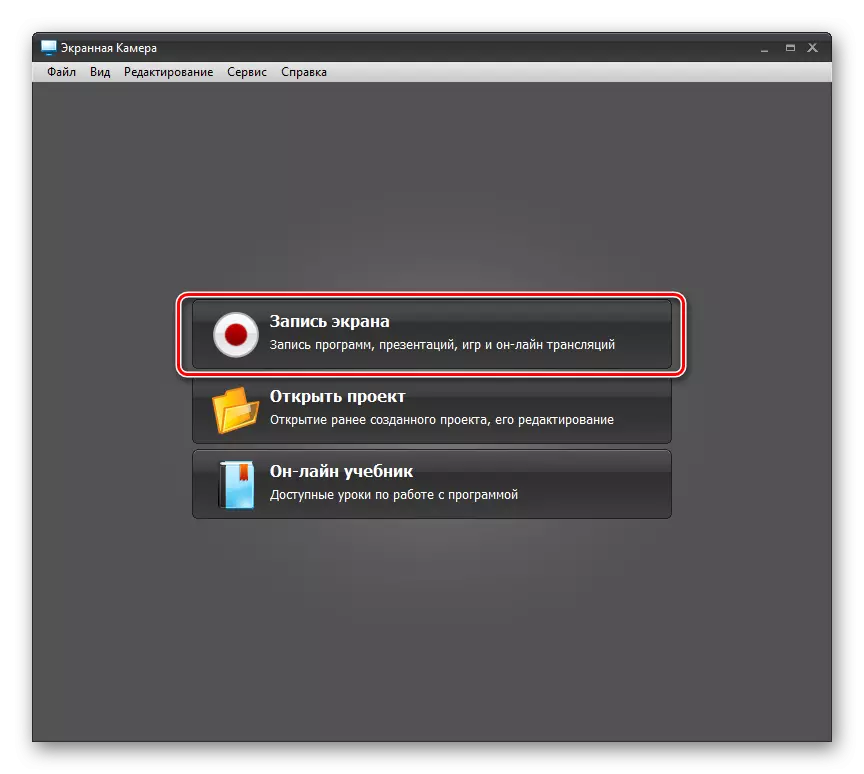
- The main window of the "Screen Camera" program will open. Run Skype, if you have not done this earlier, and click Screen Record.
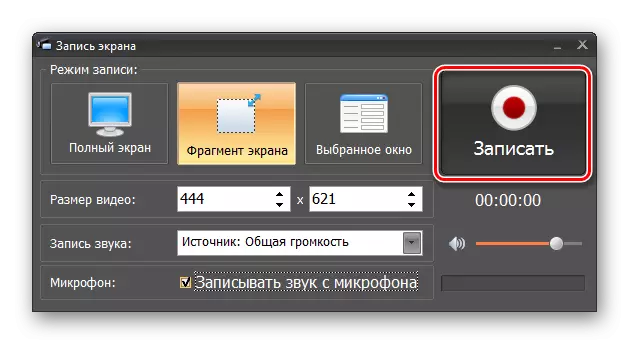
- Next, you need to configure the recording and select the capture type. Be sure to check the checkbox "write sound from the microphone". Also note that the correct source is selected in the "sound recording" drop-down list, that is, the device through which you will listen to the interlocutor. Immediately you can adjust the volume level.
- When choosing a type of capture for Skype, one of the following two options will suit:
- Selected window;
- Screen fragment.
In the first case, you need to simply click on the Skype window, press ENTER and the entire messenger shell will be captured.
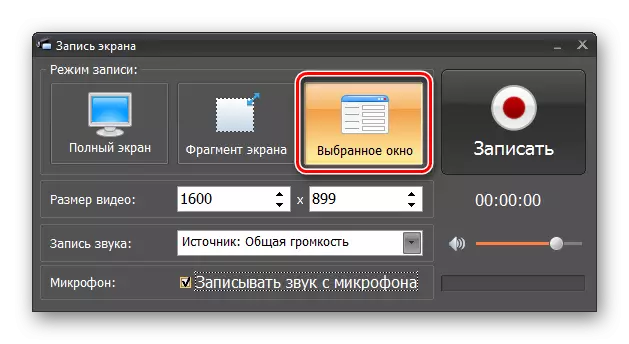
In the second, the procedure will be about the same as when using Screen Recorder.

That is, it will be necessary to select the area of the screen from which the record will be made by dragging the boundaries of this area.
- After the screen grip settings and sound are manufactured and are ready for communication in Skype, press "write down".
- The procedure will start recording video from Skype. After you finish the conversation, it is enough to complete the record to click the F10 button or click on the "Stop" element on the "Screen Camera" panel.
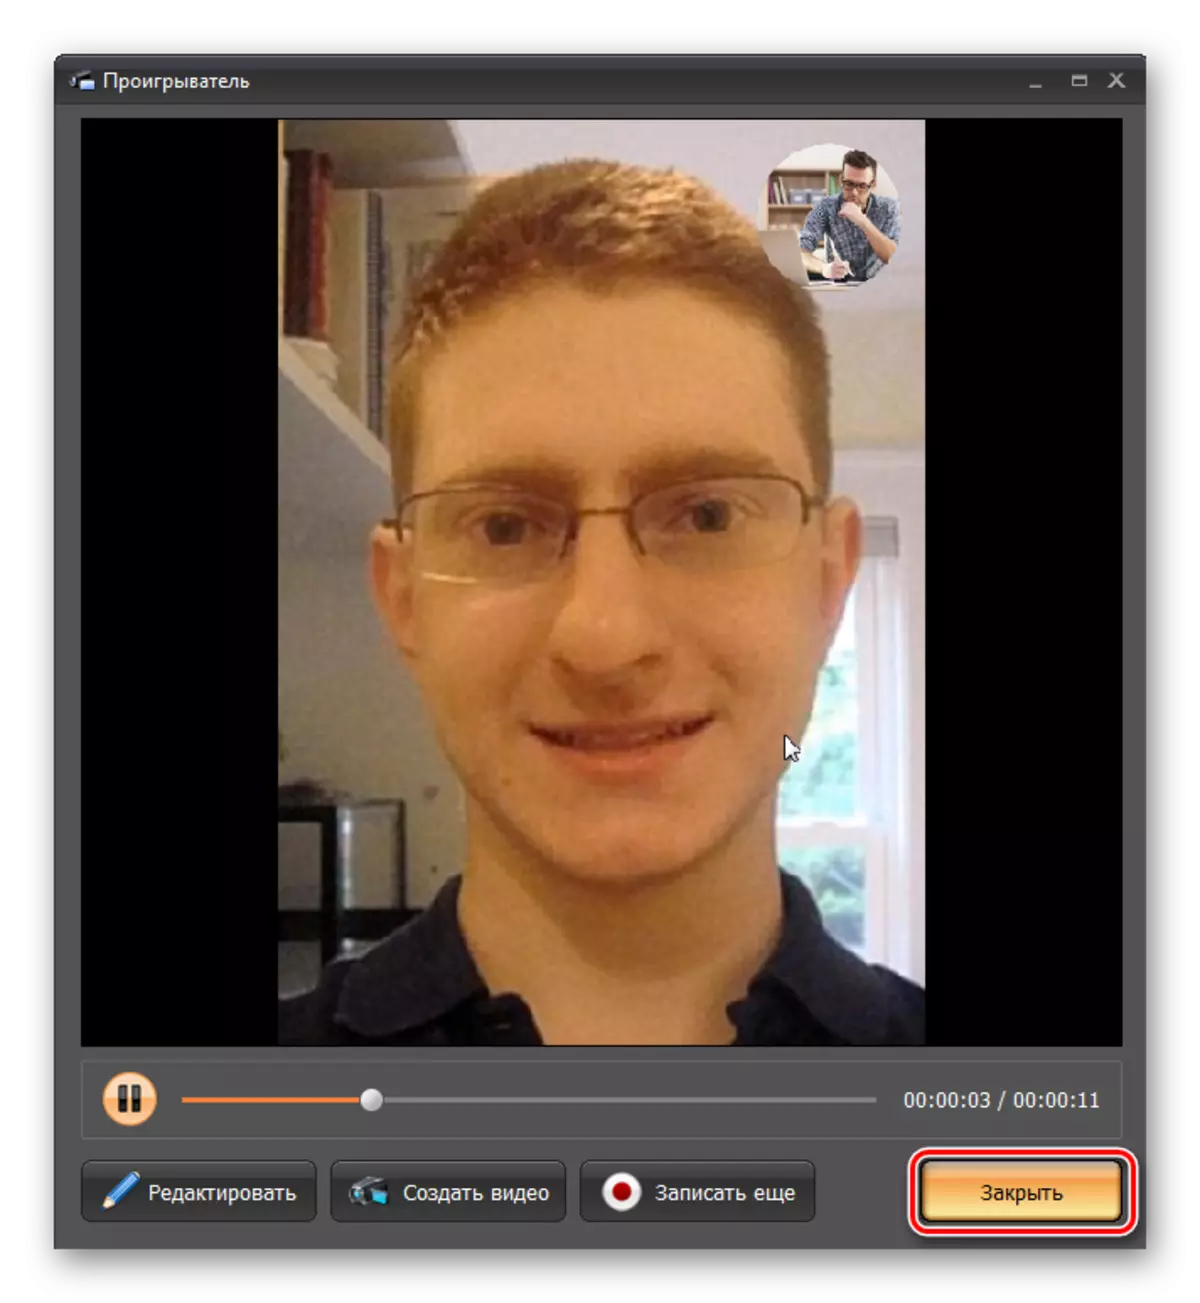
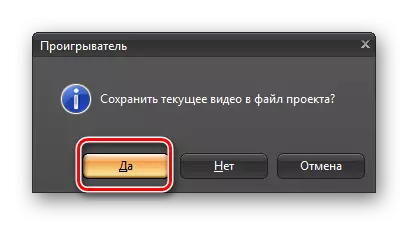
- The built-in screen player opens. In it you can watch the resulting video or edit it. Then press "close".
- Next, you will be prompted to save the current video to the project file. To do this, click "Yes."
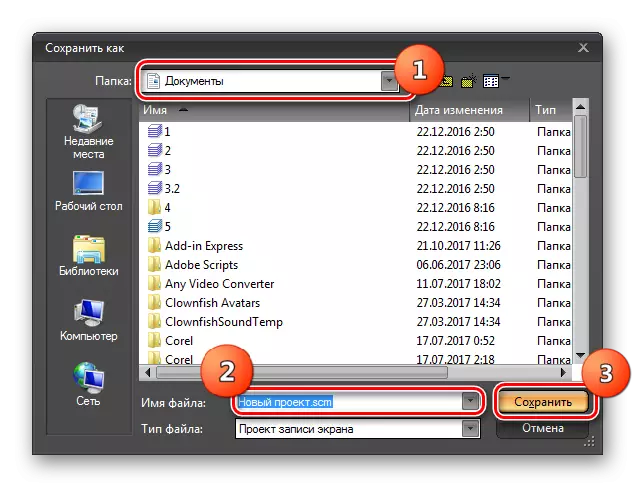
- A window will open, where you need to go to the directory where you want to store video. In the File Name field, it is necessary to register its name. Next click "Save".
- But in standard video players the resulting file will not be played. Now, in order to view the video again, you need to open the "Screen Camera" program and click on the "Open Project" block.
- A window will open where you need to go to the directory in which you saved the video, select the desired file and click "Open".
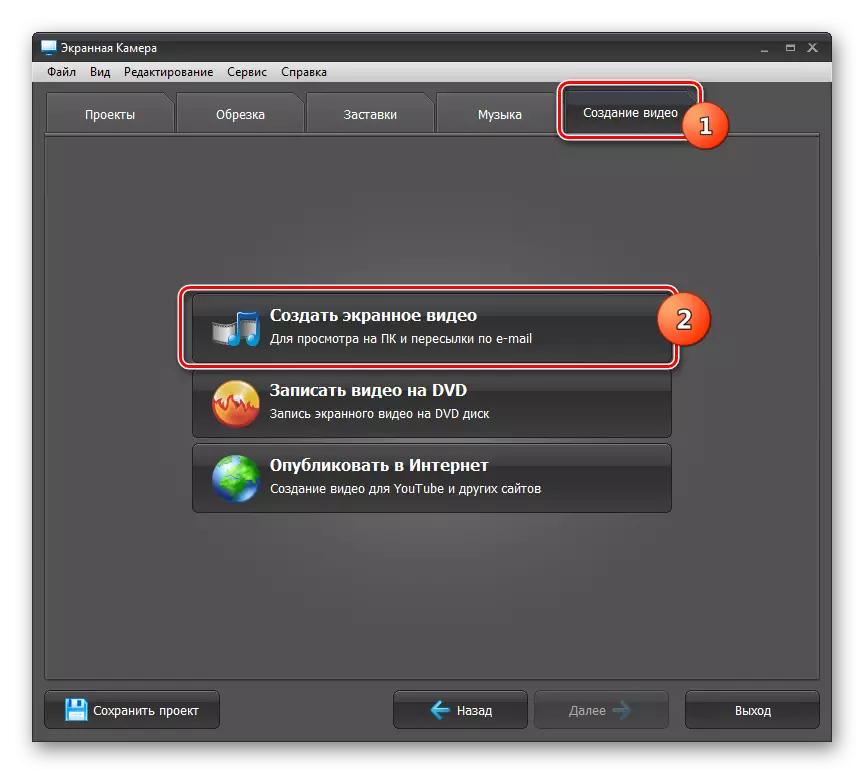
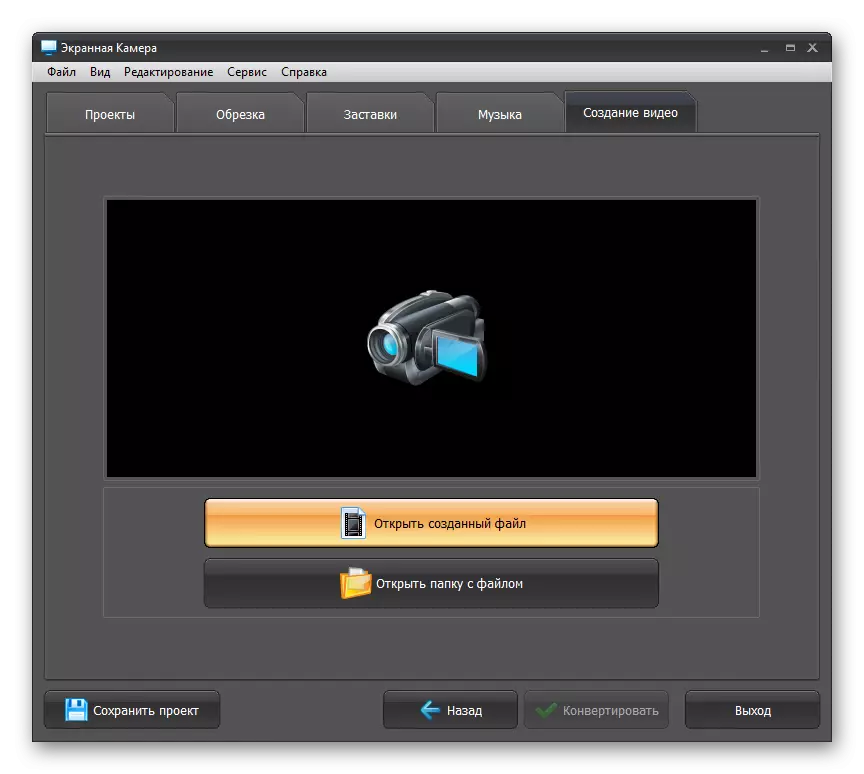
- The video will be launched in the built-in screen player. To save it in the usual format, to be able to open in other players, go to the "Create Video" tab. Next click on the "Create On-Screen Video" block.
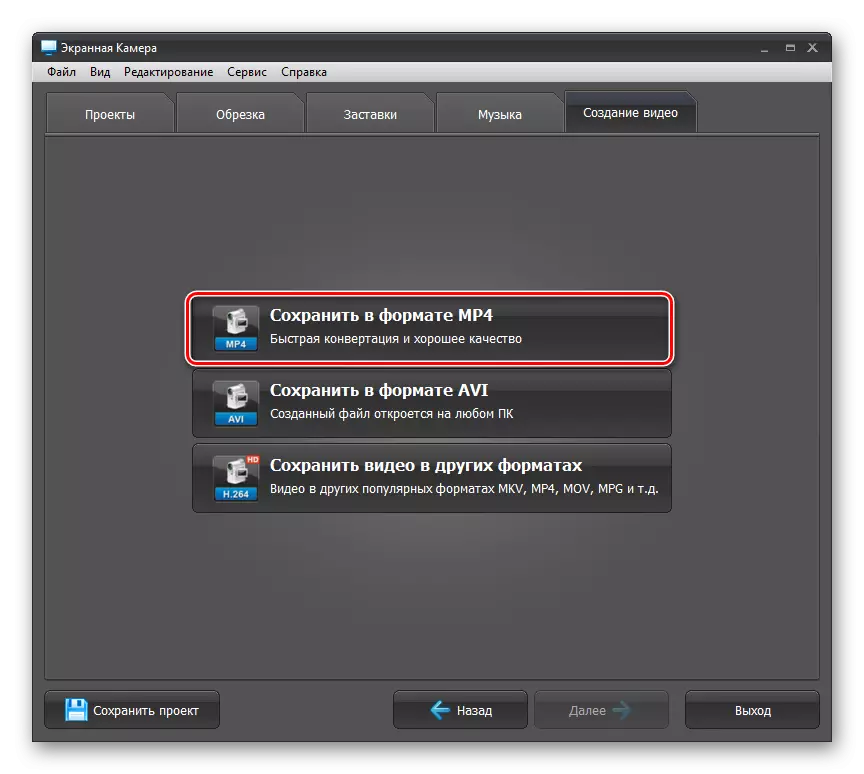
- In the next window, click on the name of the format in which you prefer to save.
- After that, if necessary, you can change the video quality settings. To start the conversion, press "convert".
- A conservation window will open in which you need to go to the directory where you intend to store video and click "Save".
- A video conversion procedure will be taken. By completing it, you will receive a roller with a record of the conversation in Skype, which can be viewed using almost any video player.


Method 3: Built-in tools
The described recording options will be suitable for all versions of Skype. Now we will talk about the method that is available for the updated version of Skype 8 and, unlike previous methods, is based only on the application of the internal instrument of this program.
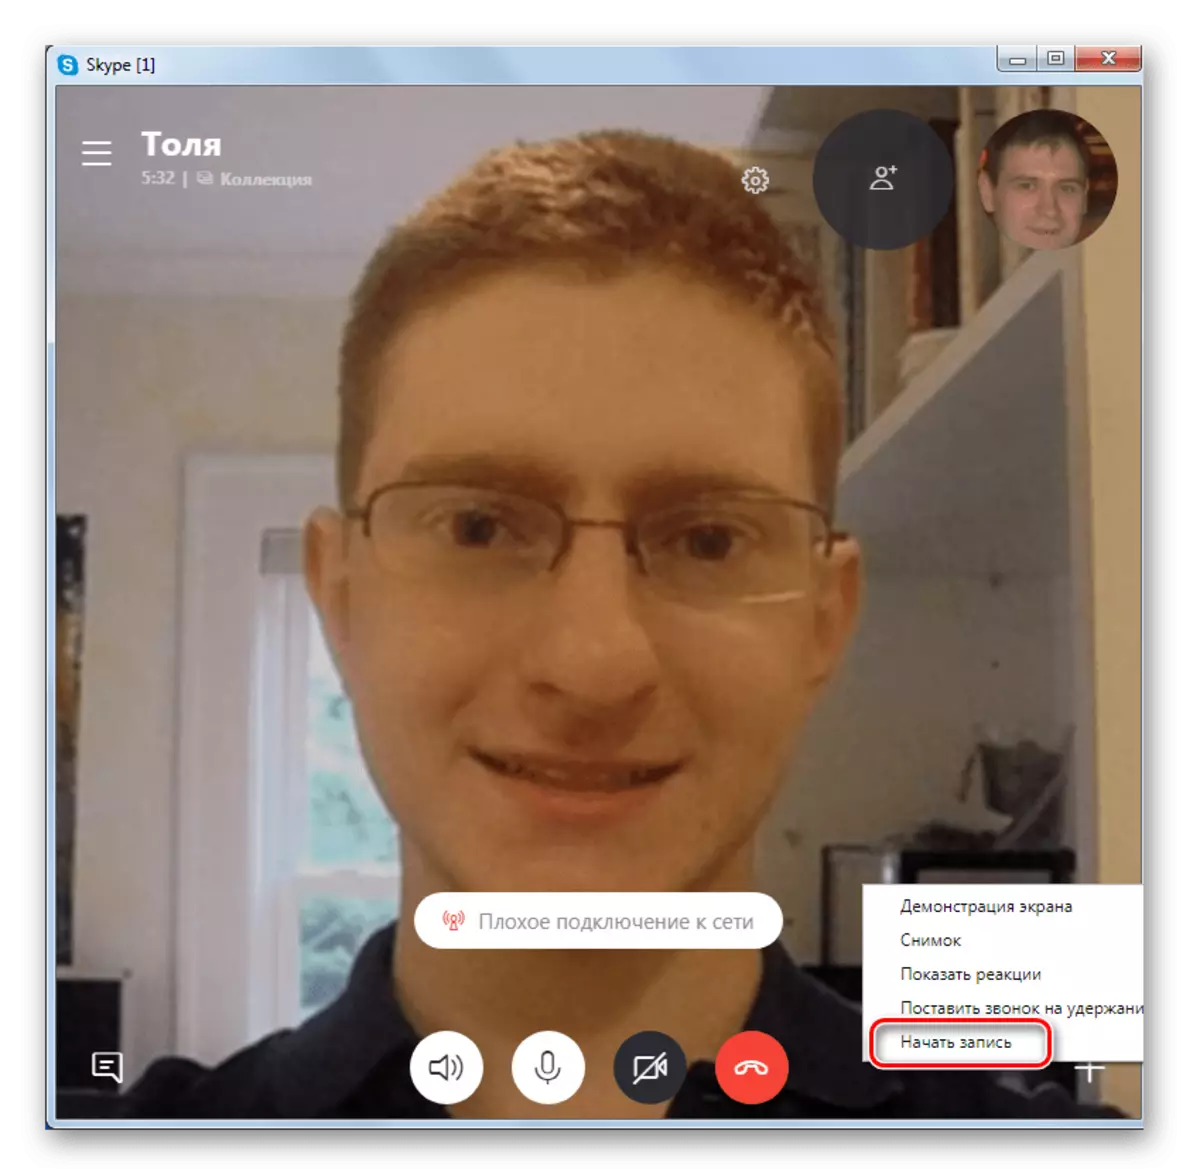
- After starting the video call, Mouse over to the bottom right corner of the Skype window and click on the "Other Parameters" element in the form of a plus game.
- In the context menu, select "Start Record".
- After that, the program will start the video, after having notified all the participants in the conference with a text message. The duration of the recordable session can be observed in the upper part of the window where the timer is located.
- To complete the specified procedure, you must click on the "Stop Record" item, which is located near the timer.
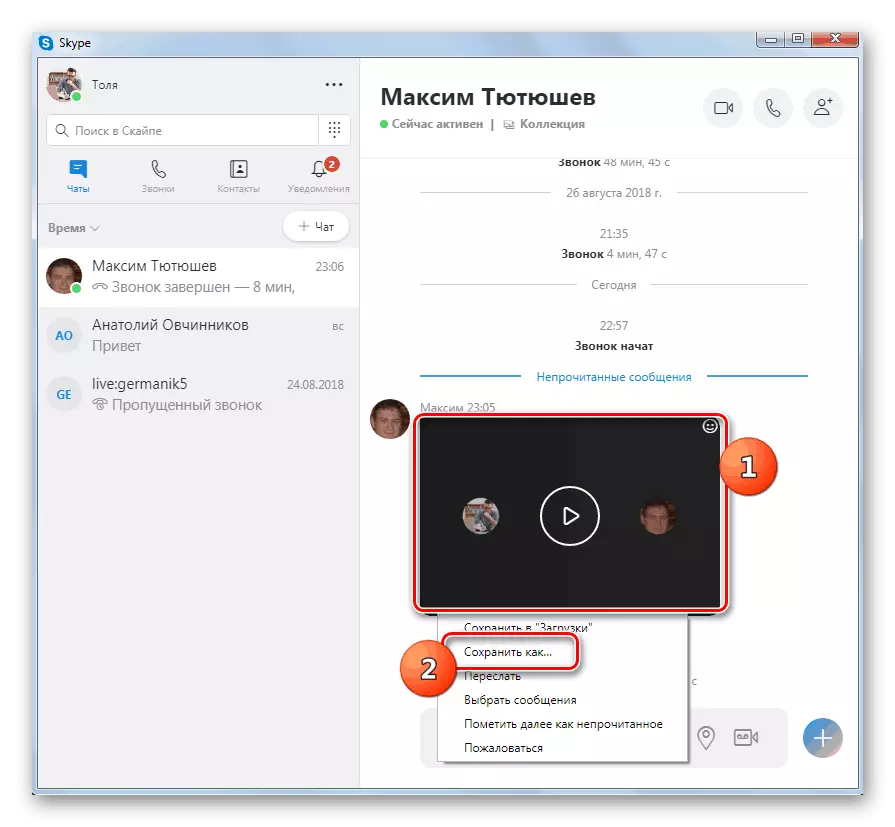
- The video will be saved directly in the current chat. All conference participants will have access to it. You can start viewing the roller by simple click on it.
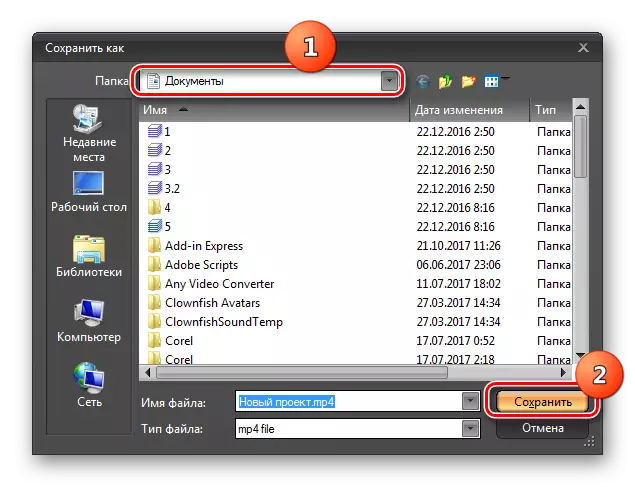
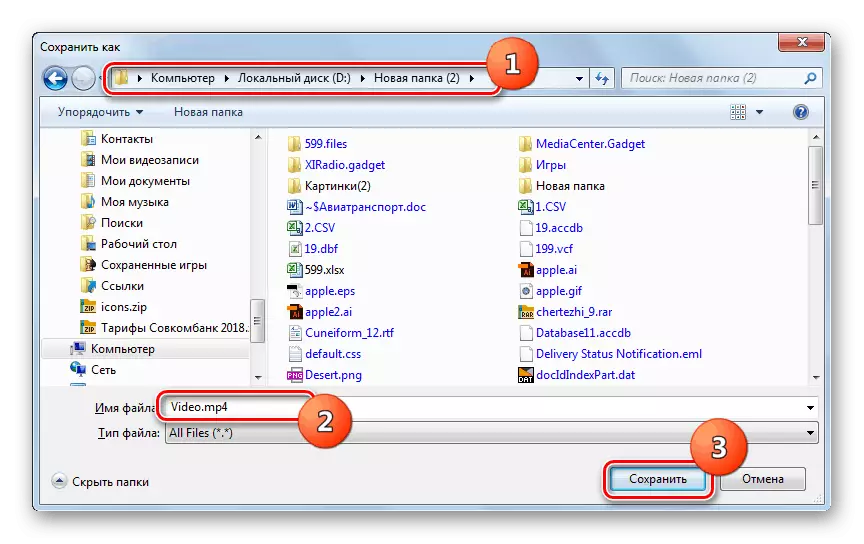
- But in the chat, the video is stored only 30 days, and then it will be removed. If necessary, you can save the video to the hard disk of the computer so that even after the specified period has expired to access it. To do this, click on the roller in the skype chat with the right mouse button and select the "Save As ..." option.
- In the standard saving window, move to the directory where you want to place a video. In the "File Name" field, enter the desired video name or leave the default displayed. Then click "Save". The video will be saved in MP4 format in the selected folder.


Mobile version of Skype.
Recently, Microsoft is trying to develop the desktop and mobile version of Skype in parallel, equipping them with identical functions and tools. It is not surprising that in the application for Android and iOS also the possibility of recording calls. About how to use it, let's tell later.
- By contacting voice or video link with the interlocutor, communication with whom you want to record,
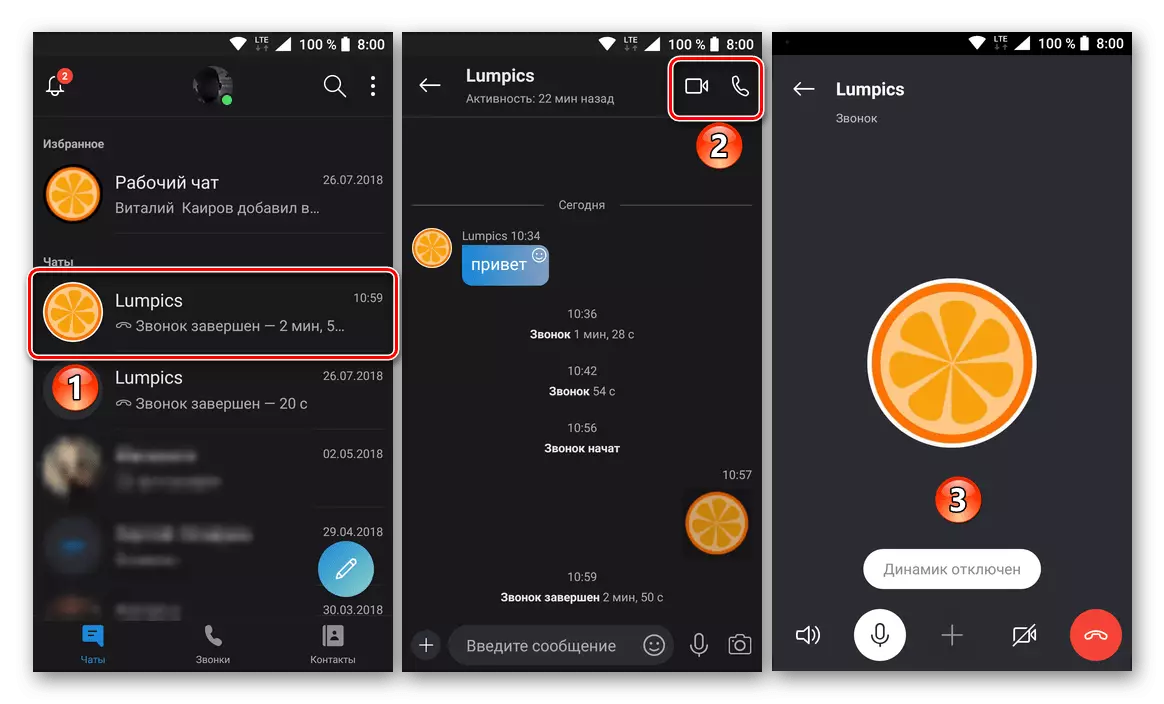
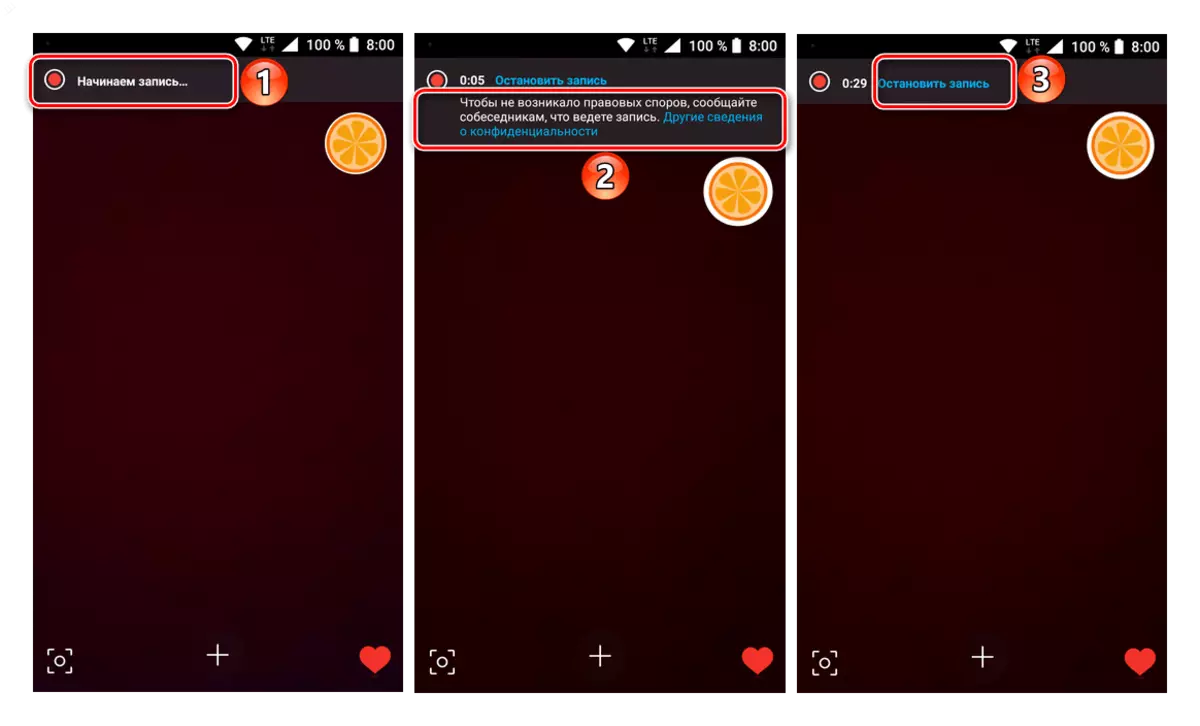
Open the conversation menu, twice taping the button in the form of the plus at the bottom of the screen. In the list of possible actions that appears, select "Start Record".
- Immediately after this, a call recording, both audio and video (if it was a video call), and your interlocutor will receive a corresponding notice. Upon completion of the conversation or when the need for recording will disappear, tap the "Stop recording" to the right of the timer.
- Video recording of your conversation will appear in the chat, where it will be stored for 30 days.

Directly from the mobile video application can be open to view in the built-in player. In addition, it can be downloaded to the device memory, send to the application or contact ("Share" function) and, if necessary, delete.


This is how easily you can record the call in the mobile version of Skype. This is done on the same algorithm as in the updated desktop program, endowed with similar functionality.
Conclusion
If you use the updated version of Skype 8, you can write video calls using the built-in toolkit of this program, a similar possibility is present in the mobile application for Android and iOS. But users of earlier versions of the messenger can solve this task only through specialized software from third-party developers. True, it should be noted that almost all such applications are paid, and their trial versions have significant limitations.