

The add-on wizard allows you to manually use the built-in Windows features to set a new printer to the computer. However, sometimes it is started with certain errors, indicating the inoperability of the instrument. There may be several reasons for such a problem, each of which has its own solution. Today we will look at the most popular problems and we will analyze the ways to eliminate them.
We solve problems with opening the Wizard Adding Printers
The most common is the system service malfunction, which is just responsible for the "Print Manager". Call it specific changes in the operating system, infection with malicious files or randomly resetting settings. Let's consider all popular correction methods for such an error.Method 1: PC Scan Antivirus Program
As you know, malware can bring different damage to the OS, including it removes system files and interferes with the components to interact correctly. Scanning a PC anti-virus program is a simple procedure that requires a user of a minimum number of actions, so we delivered this option to first place. Read about the fight against viruses, read in another article by reference below.
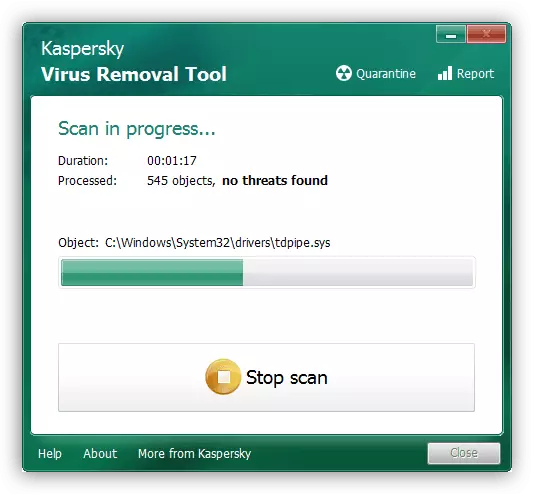
Read more: Fighting computer viruses
Method 2: Registry Cleaning
Periodically, the registry is overwhelmed by temporary files, sometimes a random change is subject to system data. Therefore, we strongly recommend cleaning the registry and restore it with the help of special funds. Manuals on this topic can be found in the following materials:

Read more:
How to Clean Windows Registry from Errors
Registry Cleaning with CCleaner
Registry recovery in Windows 7
Method 3: System Restore
If you are faced with the fact that the add-on wizard stopped responding only at a certain point, and before that functioned normally, most likely, the problem is some changes in the system. You can roll back them literally for several actions. However, along with this, your information can be removed from the computer, so we advise it to copy it in advance to the removable media or another logical partition of the hard disk.

Read more: Windows restore options
Method 4: Scanning system for errors
The appearance of various failures in the operating system provokes a violation of the robots of embedded and installed components, including this and to the master of adding printers. We advise you to seek help to the standard Windows utility, which runs through the "Command Line". It is intended to scan data and correct errors found. It is enough for you to run "execute" a combination of the Win + R keys, enter there cmd and click on "OK". In the "Command Line" type the following line and activate it:
SFC / SCANNOW.
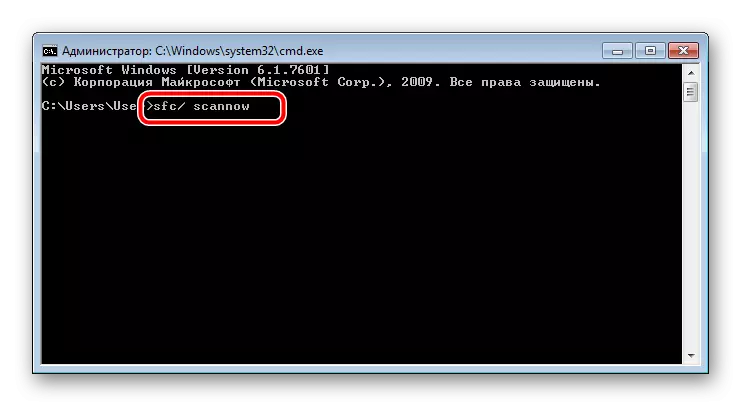
Wait for scanning, restart the computer and check the performance of the print service in the "command line" by entering Net Start Spooler and pressing ENTER.

Method 5: Activation of printing components
Services of documents and seals consist of several components, each of which works separately. If one of them is in a disconnected state, it can provoke failures in the functioning of the wizard under consideration. Therefore, first of all, we recommend checking these components and to launch them when necessary. The whole procedure is as follows:
- Through the "Start" menu, go to the control panel.
- Select the category "Programs and Components".
- In the Left menu, move to the "Enable or Disable Windows Components" section.
- Wait until all the tools are loaded. In the list, find the directory of the "Print and Document Service" directory, then deploy it.
- Tick the checkboxes each opened directory.
- Click on "OK" to apply the settings.
- Wait until the parameters take effect, after which you should restart the computer. You will display the appropriate notification.

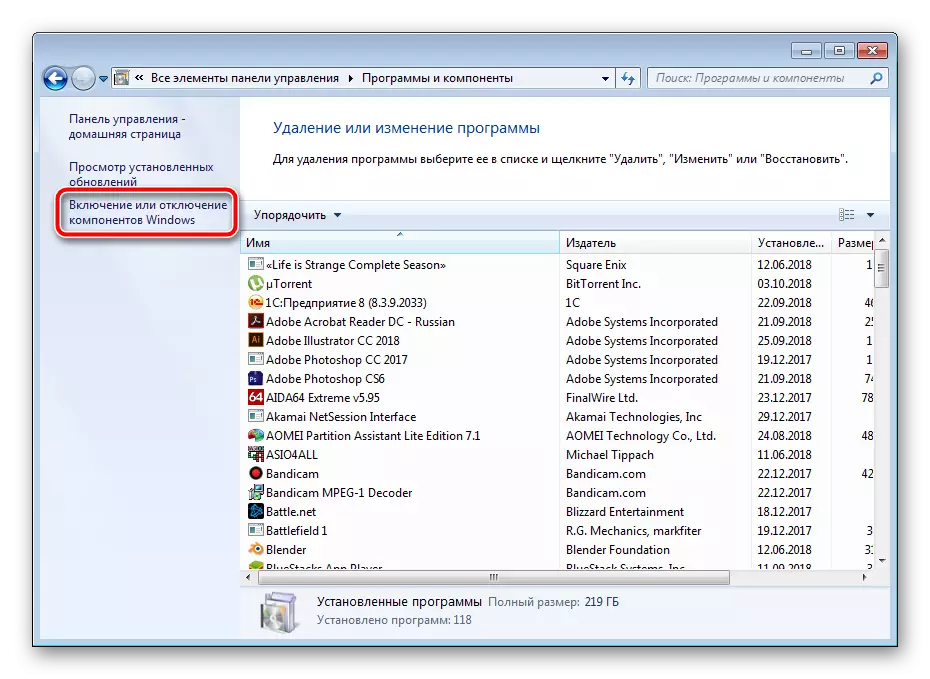


After restarting, check the performance of the printer add wizard again. If this method did not bring any results, go to the next.
Method 6: Checking the Print Manager service
The "Print Manager" service built in WINTOVS is responsible for all actions with printers and auxiliary utilities. It must be running to cope correctly with its task. We recommend checking out and configure it if it is necessary. You need to do the following:
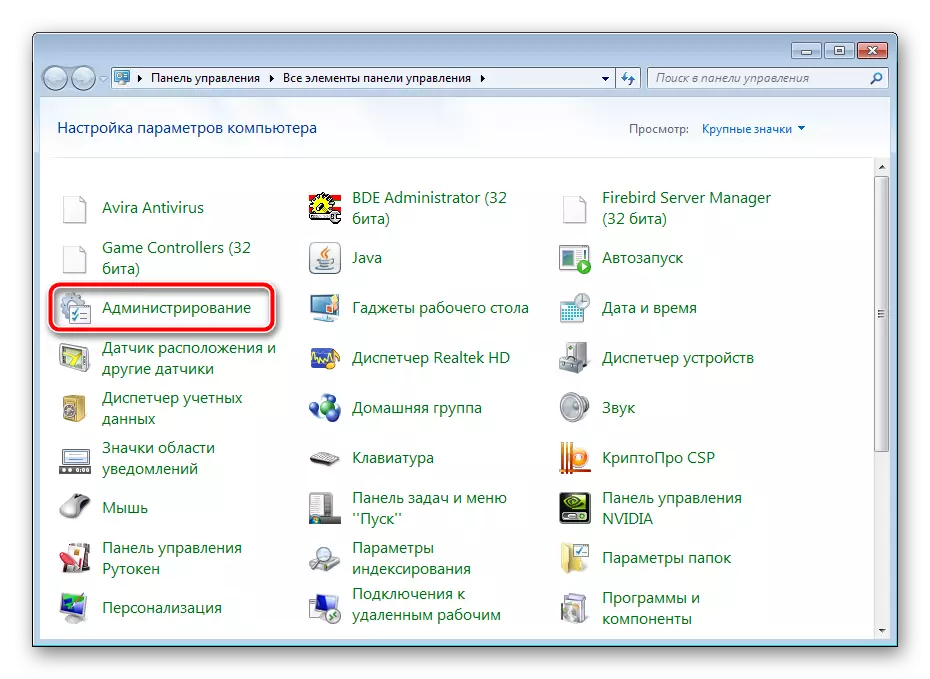
- Open the Start menu and go to the control panel.
- Select the category "Administration".
- In it, open the "Services".
- Run a little down the list to find the "Print Manager". Click twice with the left mouse button on this line.
- In the General tab, check that the service be launched automatically, at the moment it was included. If the parameters do not match, change them and apply the settings.
- In addition, we advise you to go "Restore" and set a "restart service" for the case of the first and second failure in the service.


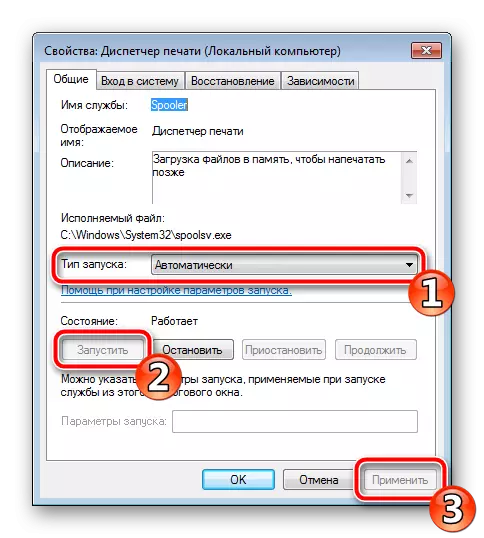
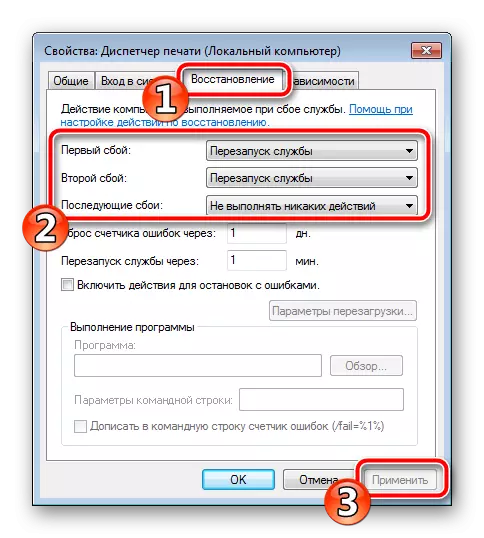
Before going out, do not forget to apply all changes, and it is also recommended to restart the PC.
As you can see, there are six different methods, how can I solve the problem with the launch of the printer adding wizard. All of them differ and require the implementation of certain manipulations. In turn, do each method until one that helps solve the task.