

D-Link network equipment firmly occupied a niche of reliable and inexpensive home-use devices. The DIR-100 router is one of these solutions. Its functionality is not so rich - there is no Wi-Fi - but it all depends on the firmware: the device under consideration can work as a regular home router, the Triple Play router or as a VLAN switch with an appropriate firmware, which is without much difficulty is replaced if necessary. Naturally, all this requires configuration, what will be discussed later.
Preparation of the router to configuration
All routers, regardless of the manufacturer and model, require preparatory measures before setting up. Do you need to do the following:
- Select a suitable location. Since the router in question does not have the capabilities of wireless networks, its special role plays does not play - only the absence of obstacles on the connection cable paths, as well as providing free access to the service device.
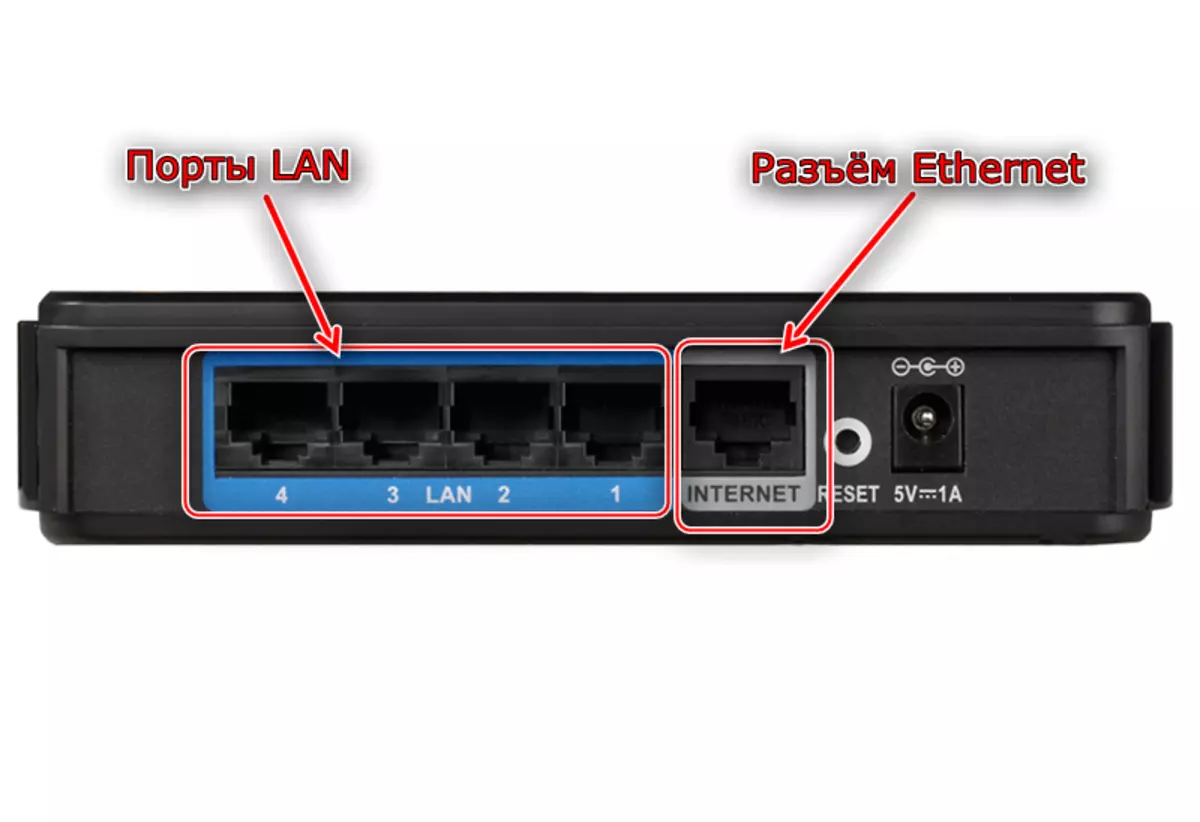
- Connect the router to power, a provider cable and a target computer. To do this, use the appropriate connectors on the rear panel of the device - the connection ports and controls are marked with different colors and are signed, so it is difficult to confuse.
- Check the TCP / IPv4 protocol settings. Access to this option can be obtained through the properties of the network connection of the computer operating system. Make sure the address settings are set to automatic. They must be in such a default position, but if it is not so, change the necessary parameters manually.

Read more: Connecting and configuring a local network on Windows 7
This preparatory stage is over, and we can proceed to actually configuring the device.
Set the parameters of the router
All without exception, network devices are configured in a special web application. Access to it can be obtained through a browser in which the specific address should be entered. For D-Link DIR-100, it looks like http://192.168.0.1. In addition to the addresses, it will also be necessary to find data for authorization. By default, it is enough to enter the Admin word in the login field and press ENTER, but we recommend to watch the sticker on the bottom of the router and get acquainted with the exact data for the specifically of your instance.

After entering the web configurator, you can go to configure the connection to the Internet. In the gadget firmware, a quick setting is provided, however, it is non-functional on the router version of the firmware, because all parameters for the Internet must be installed in hand.
Configure Internet
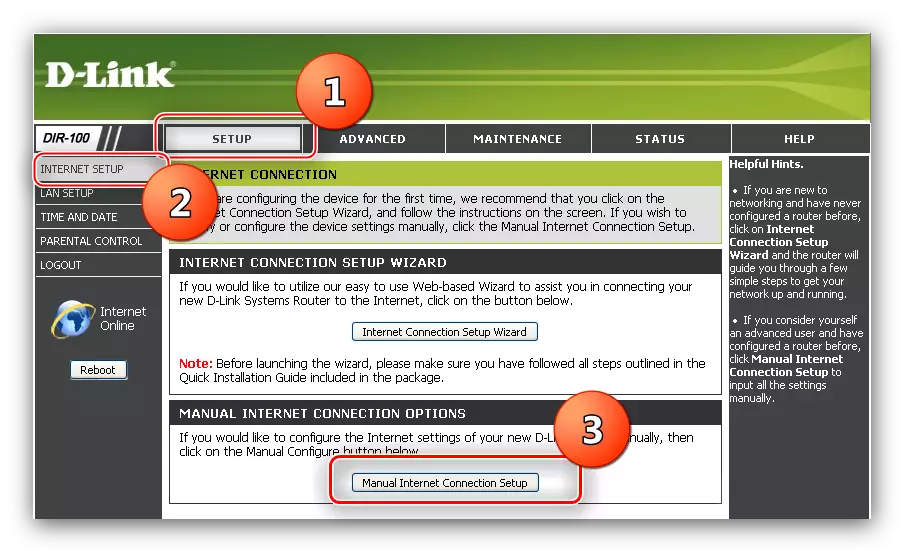
On the Setup tab, there are options for configuring an Internet connection. Next, click on the "Internet Setup" item located in the left menu, then click on the "Manual Internet Connection Setup" button.
The device allows you to configure connections according to PPPOE standards (static and dynamic IP addresses), L2TP, as well as PPTP type VPN. Consider everyone.
PPPOE configuration
PPPoE connection on the viewed router is configured as follows:
- In the "My Internet Connection IS" drop-down menu, select PPPOE.

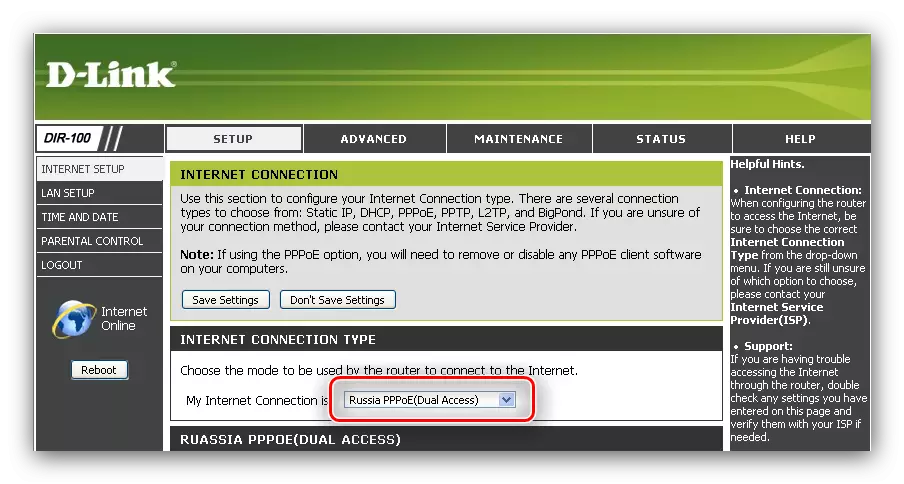
Users from Russia need to choose the item "Russian PPPOE (Dual Access)".
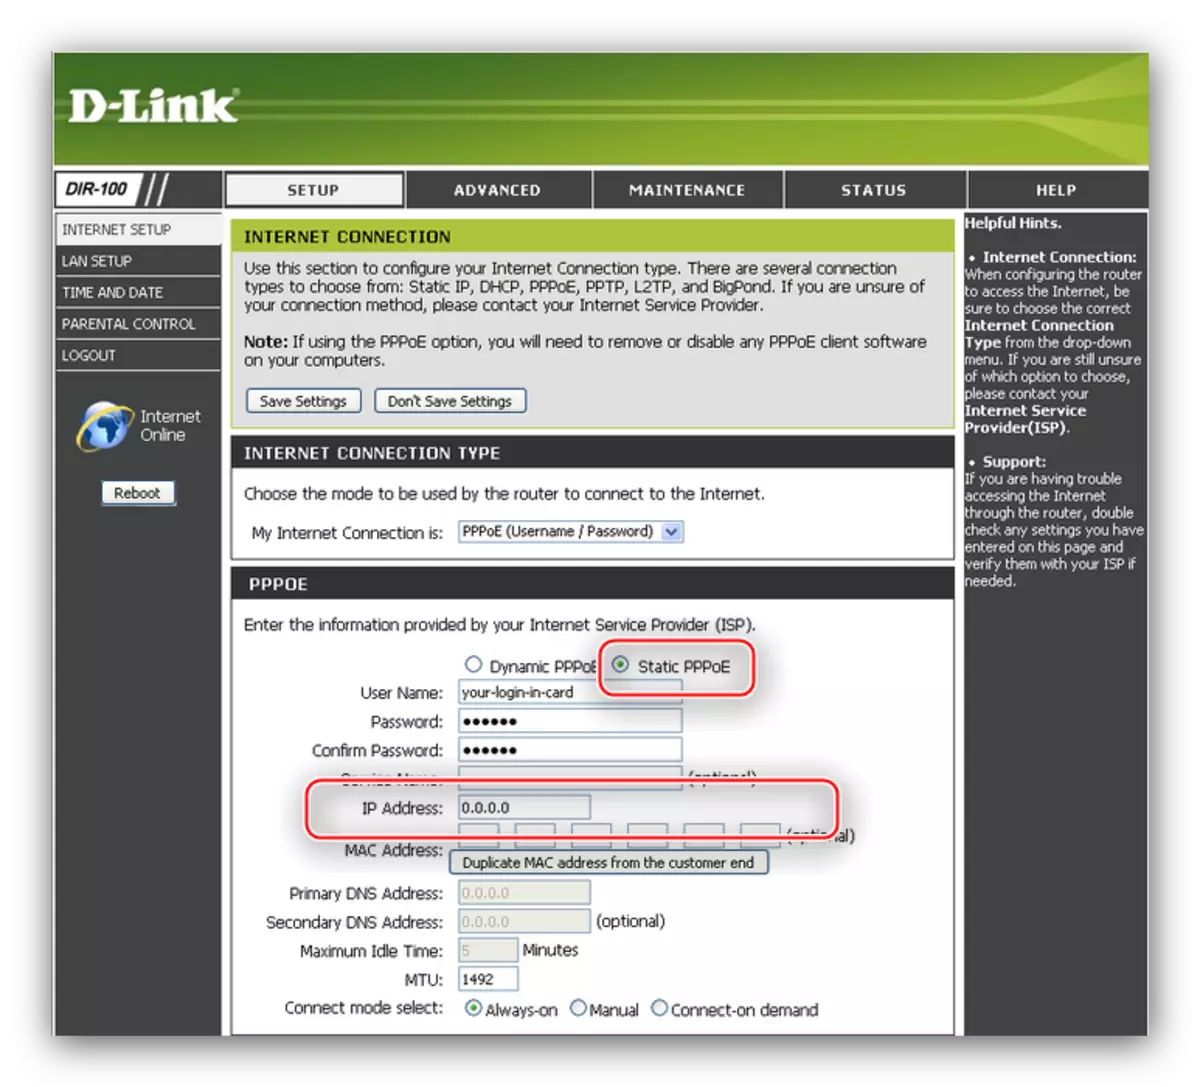
- The "ADRESS MODE" option. Leave in the "Dynamic PPPoe" position - the second option is selected only if you are connected to the static service (otherwise "white" IP).
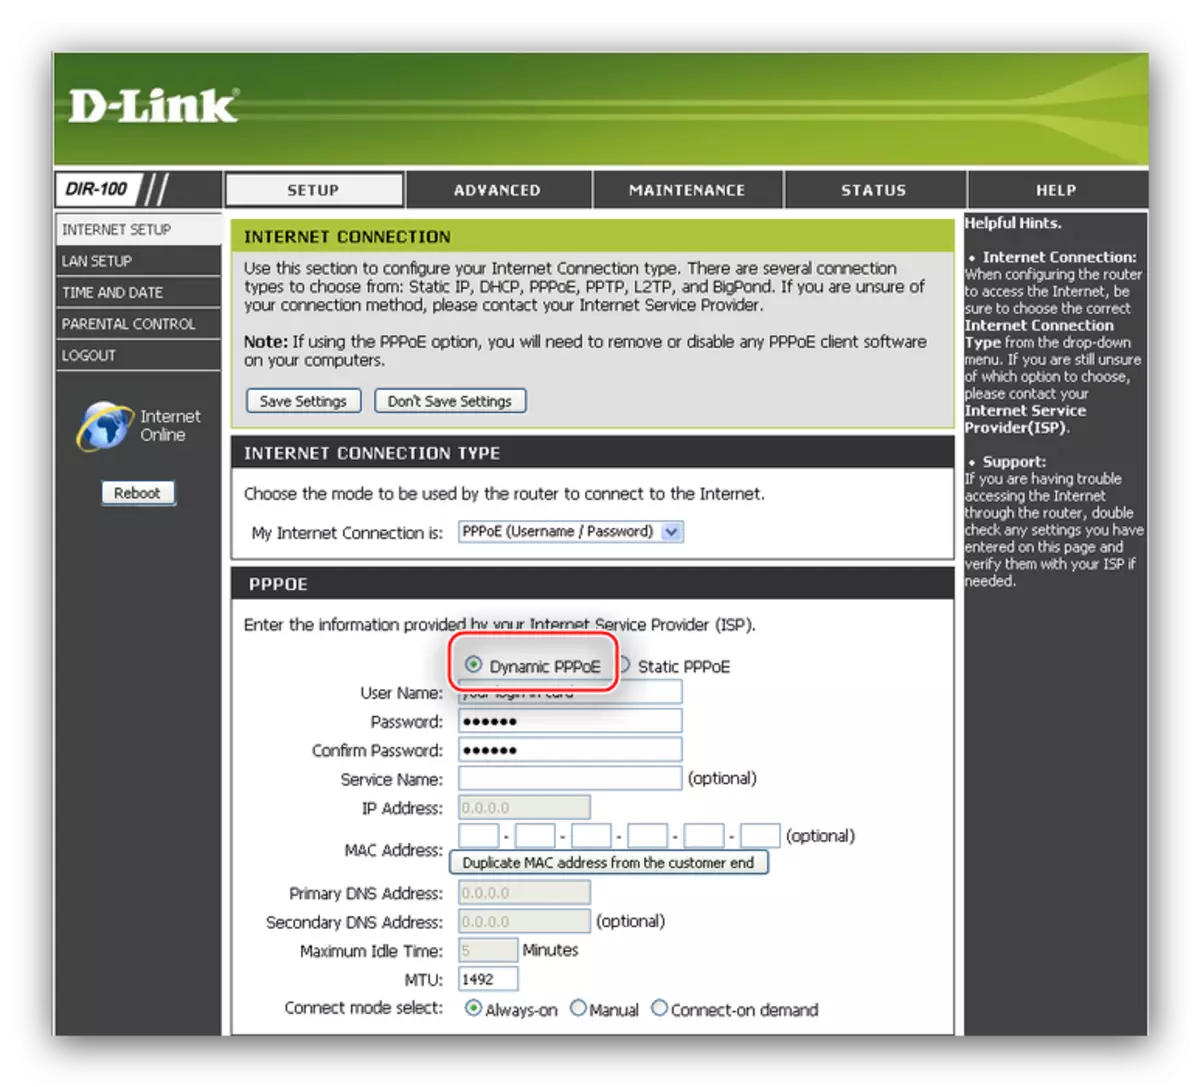
If there is static IP, it should be prescribed in the "IP Adress" line.
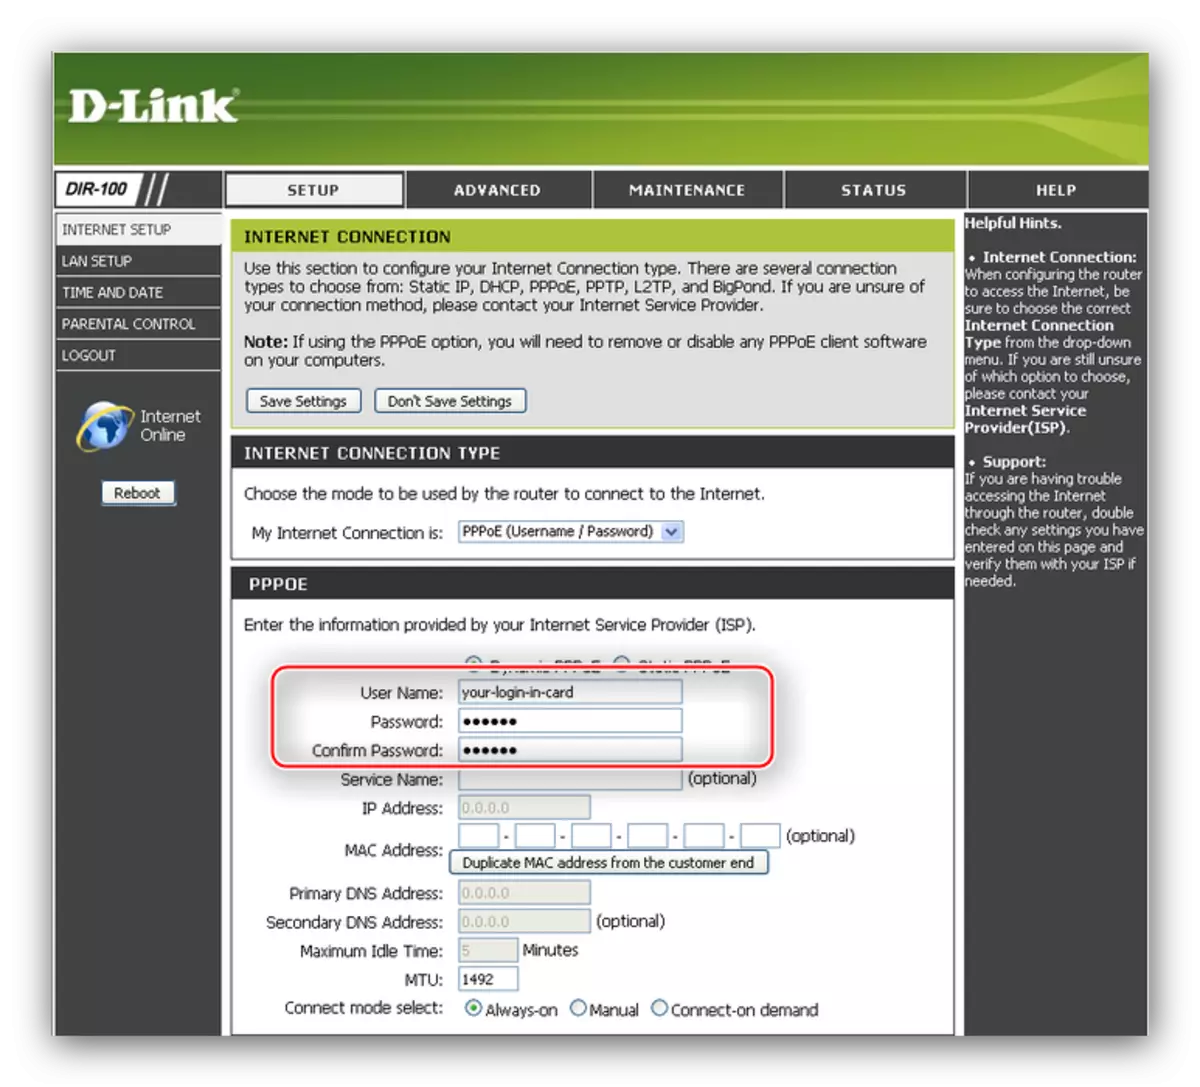
- In the "User Name" and "Password" strings, we enter the data required for the connection - you can find them in the text of the contract with the provider. Do not forget to re-write a password in the Confirm Password string.
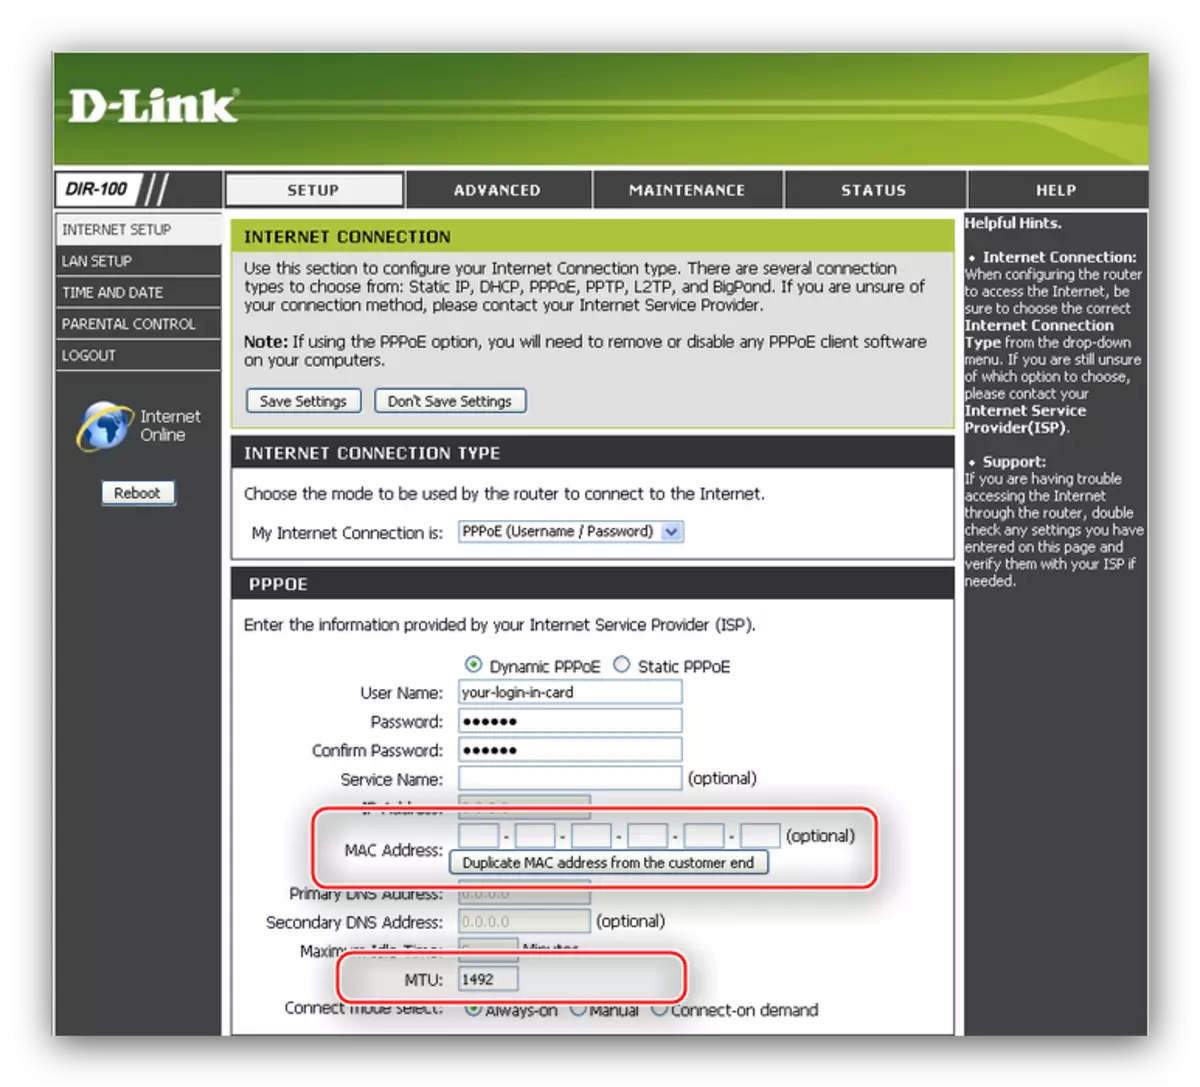
- The MTU value depends on the provider - most of them use 1472 and 1492 in the post-Soviet space. Many providers also require cloning MAC addresses - you can do it by pressing the "Duplicate Mac" button.
- Press "Save Settings" and restart the router with the "reboot" button on the left.

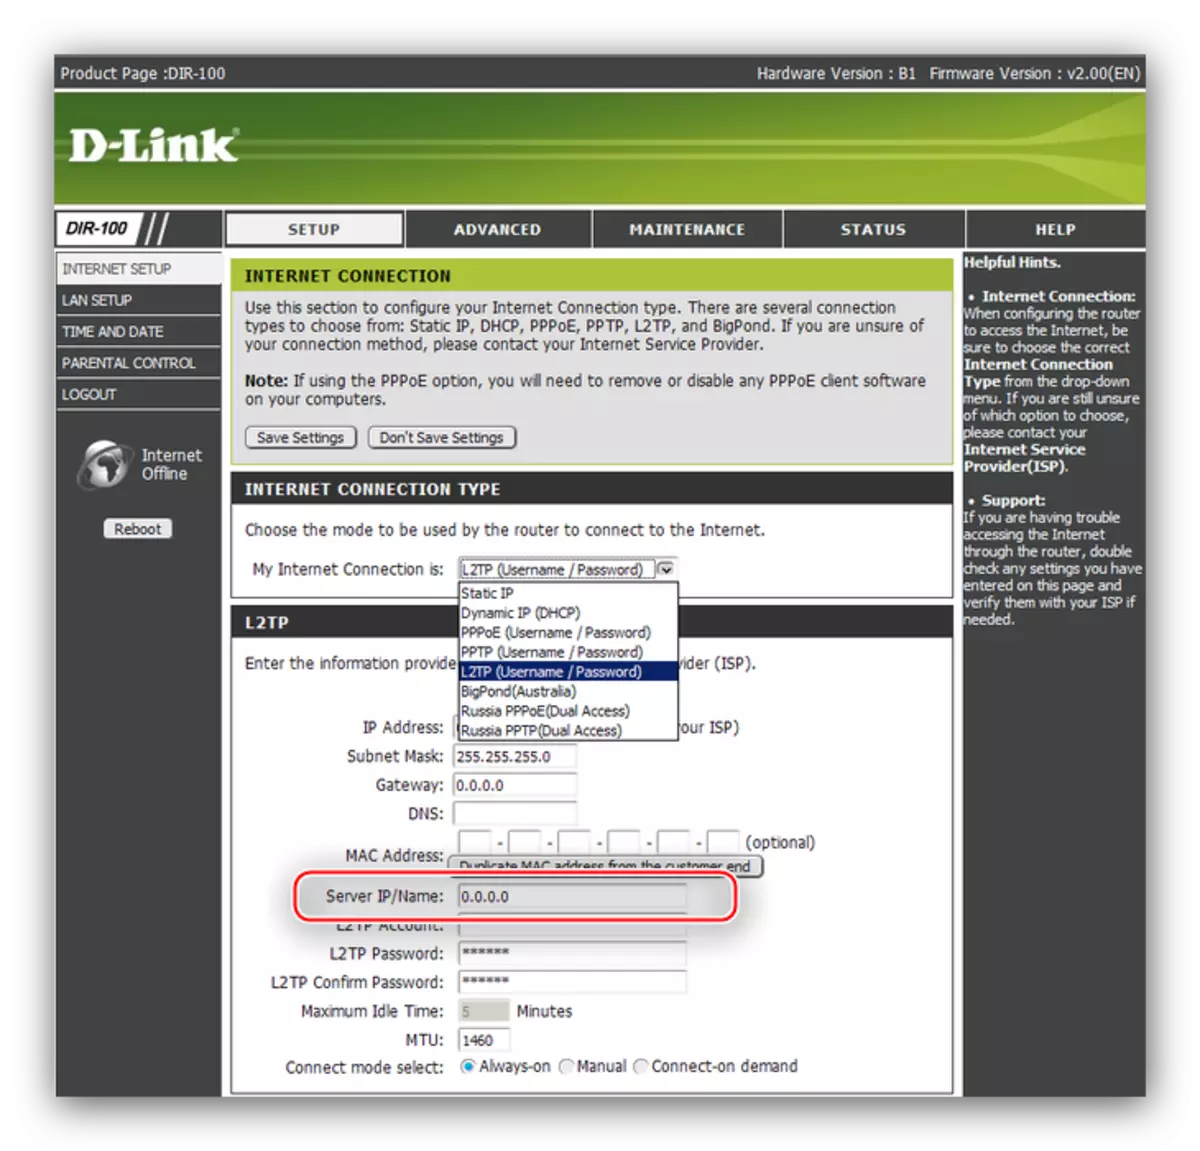
L2TP
To connect L2TP, do the following:
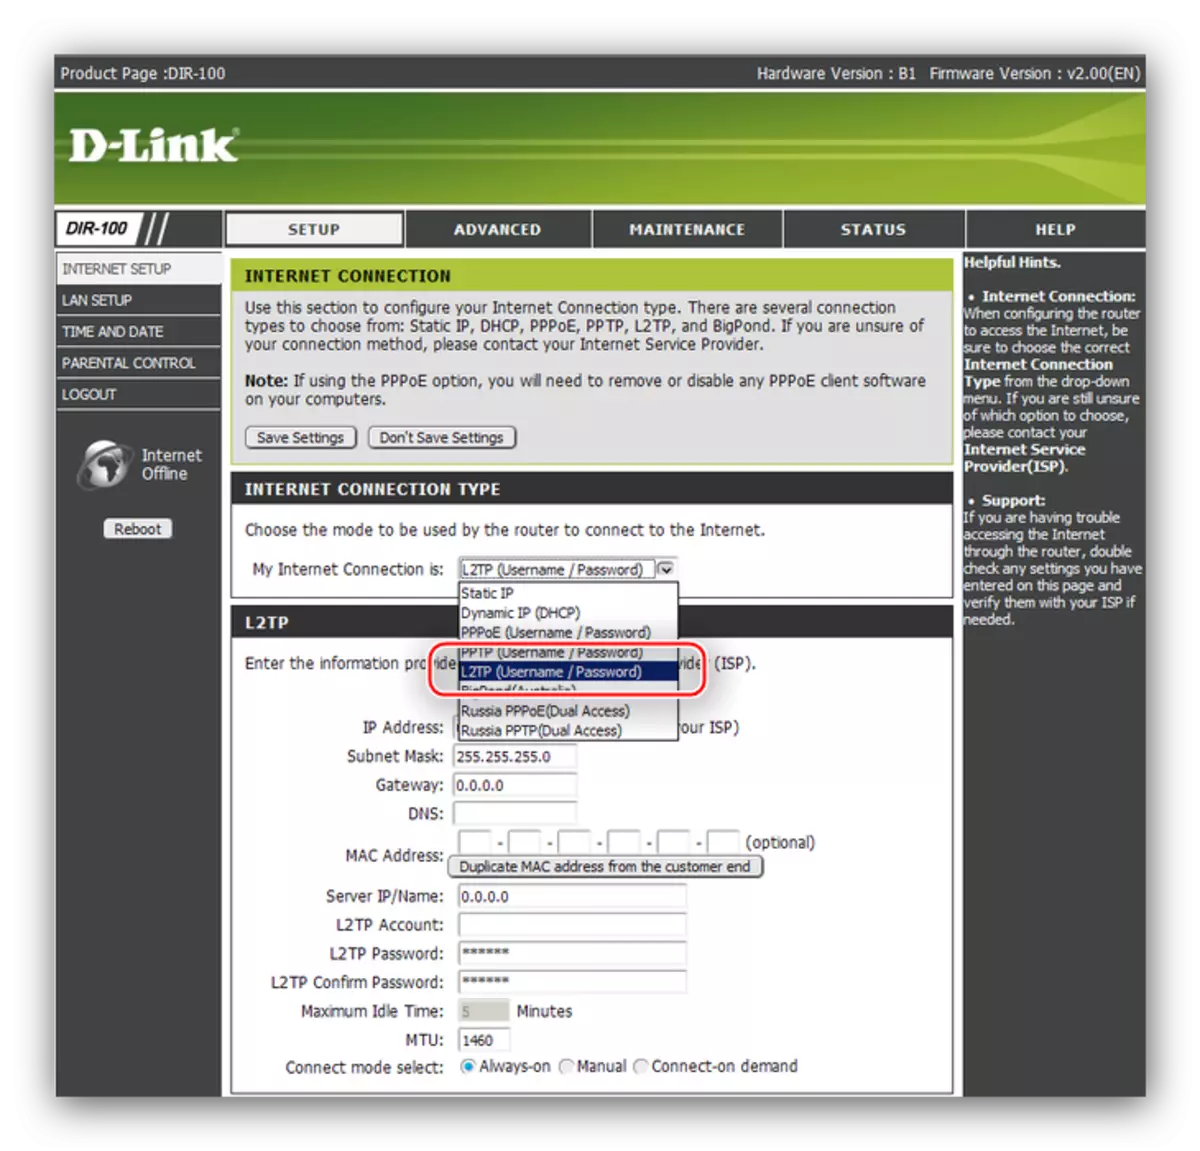
- Item "MY Internet Connection IS" Set as "L2TP".
- In the "Server / IP Name" string, we register the VPN server provided by the provider.
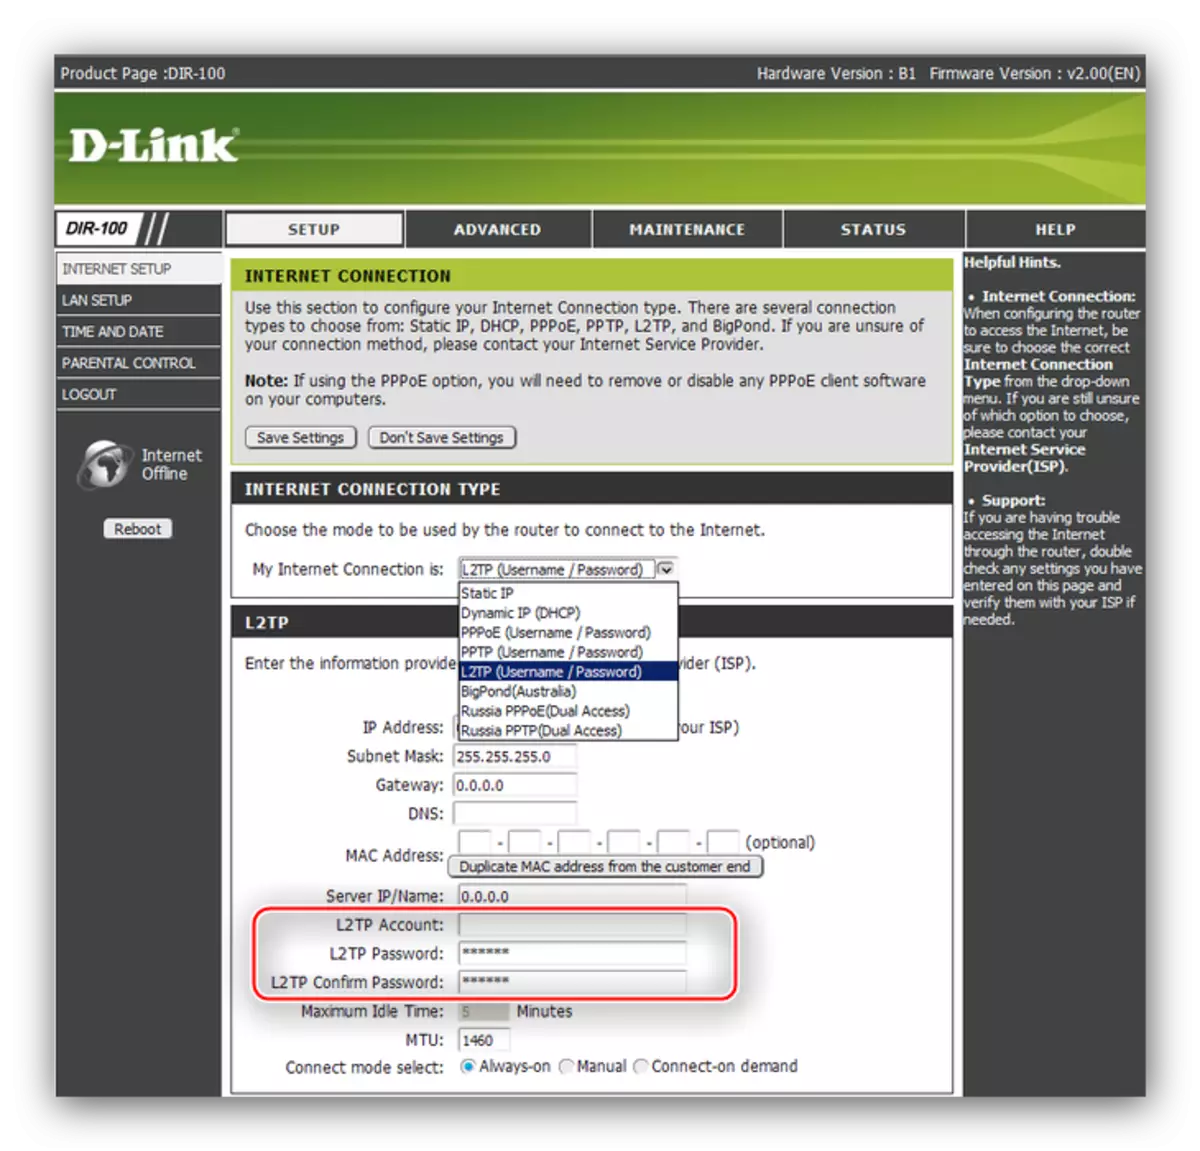
- Next, enter the login and password in the appropriate strings - the last is repeated in the "L2TP Confirm Password" field.
- MTU value Set as 1460, after which save the settings and restart the router.

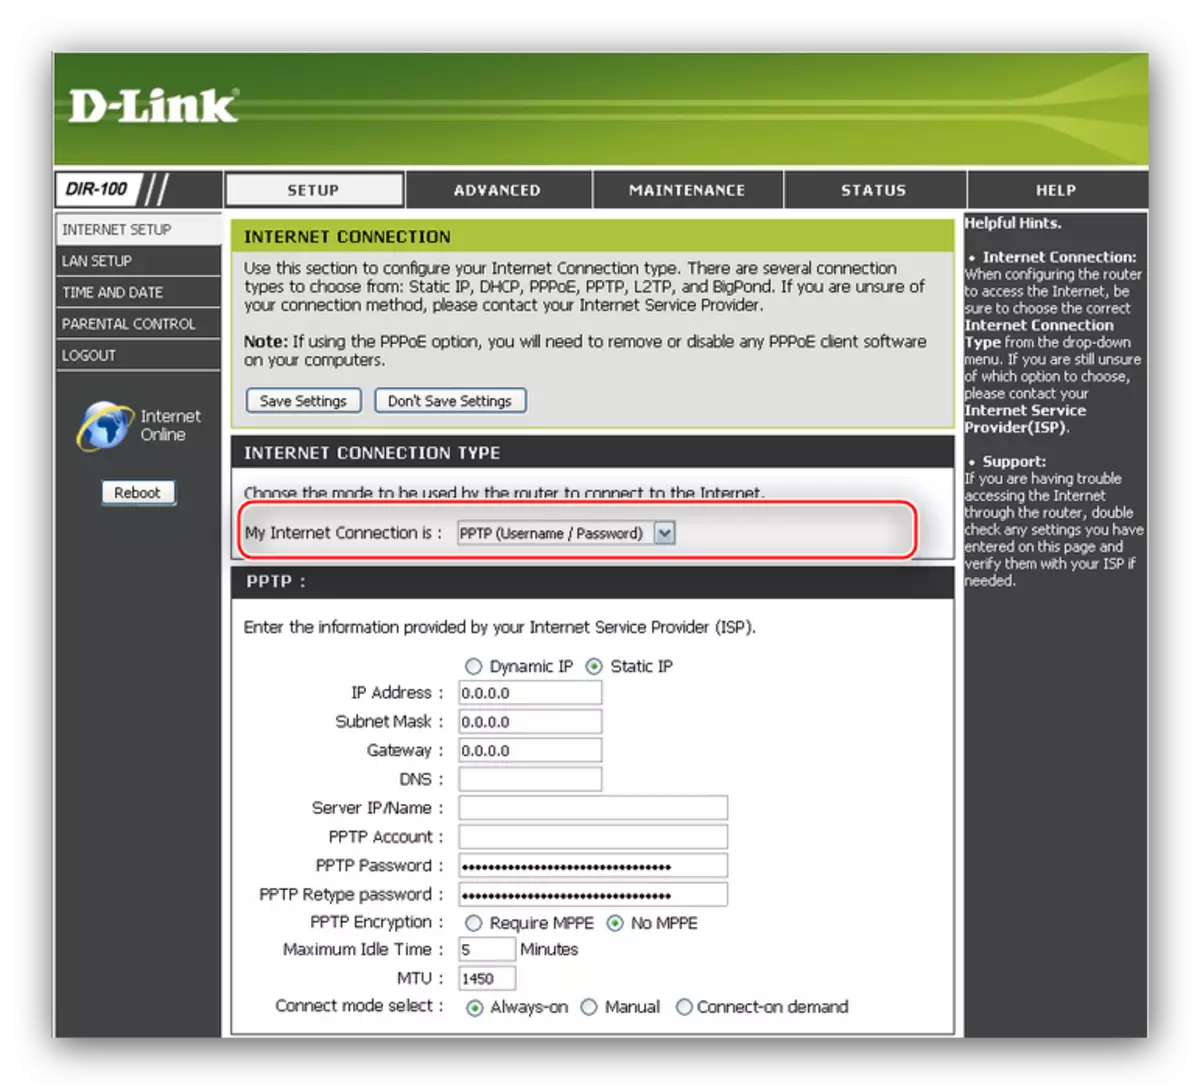
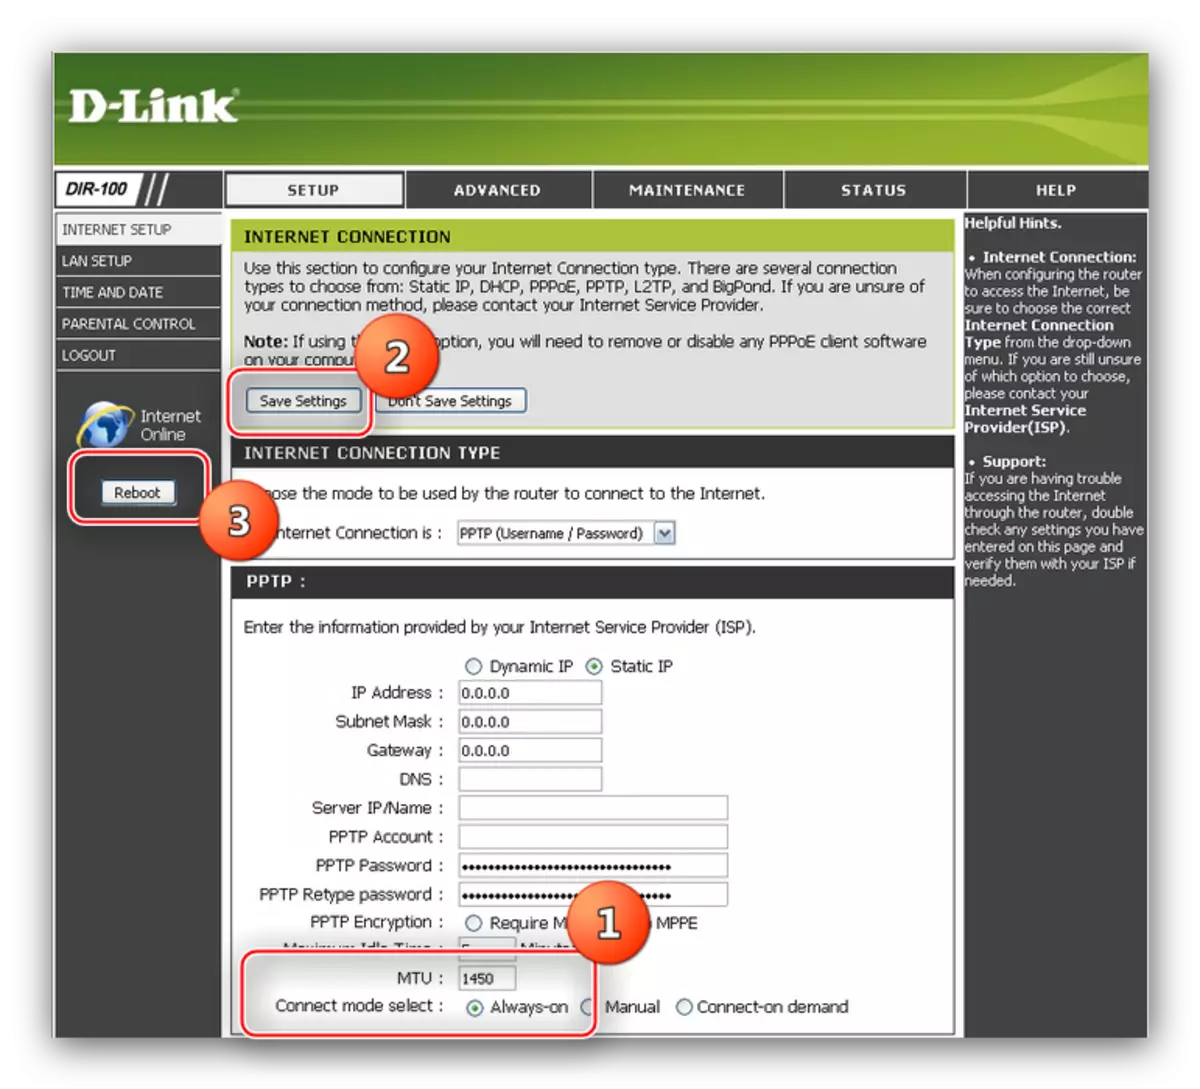
PPTP.
PPTP connection is configured by such an algorithm:
- Select the "PPTP" connection in the "My Internet Connection IS:" menu.
- PPTP connections in the CIS countries are only with a static address, so select "Static IP". Next, in the "IP Address" field, "Subnet Mask", "Gateway", and "DNS", enter the address, subnet mask, gateway and DNS server, respectively - this information should be present in the text of the contract or issued by the provider on request.
- In the Server IP / Name string, enter your provider's VPN server.
- As in the case of other types of connections, enter data for authorization on the provider server in the appropriate lines. Password again need to repeat.
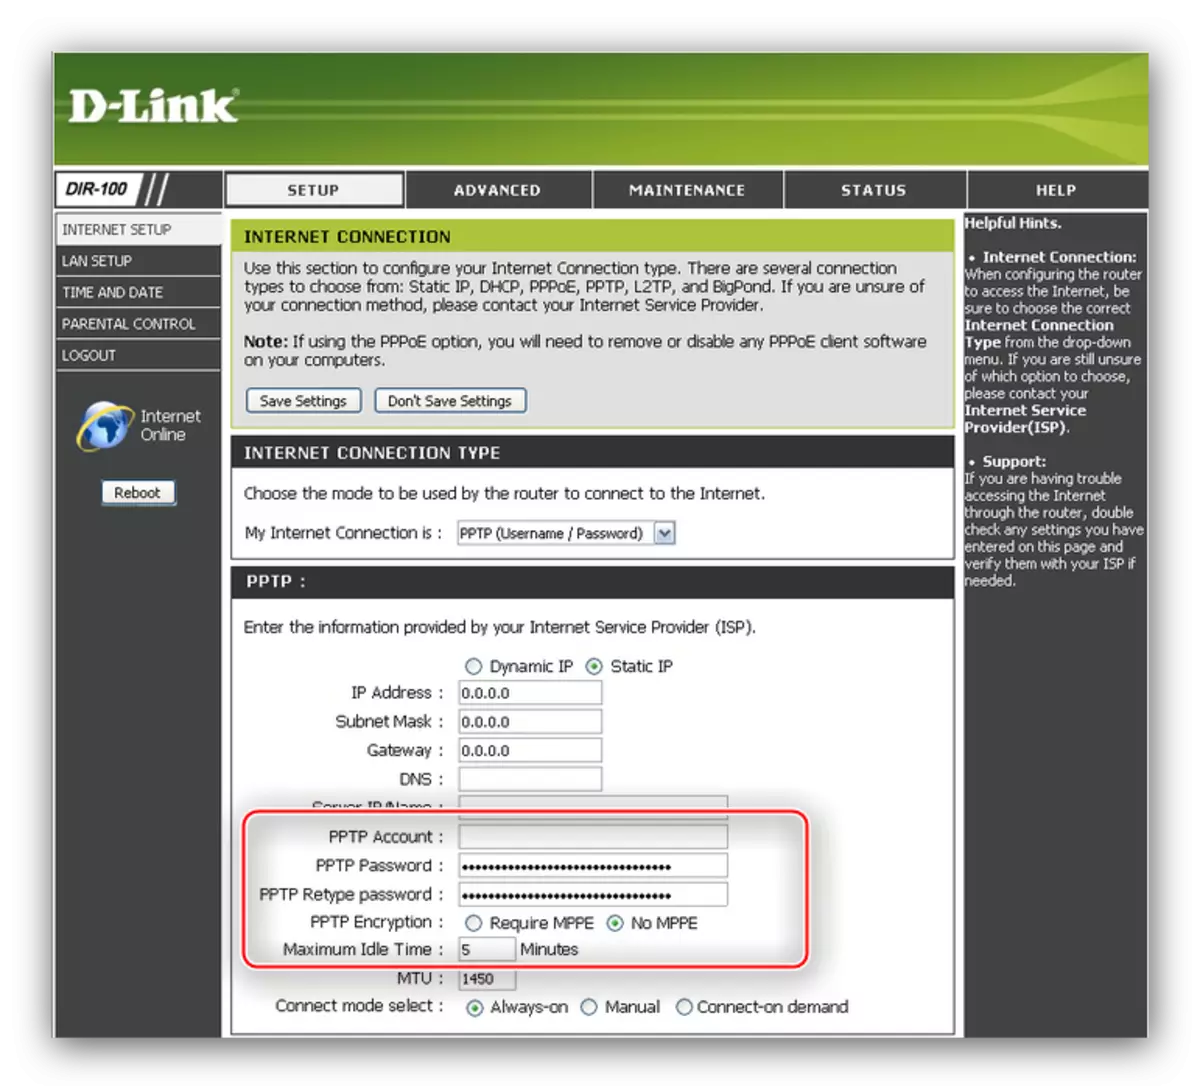
Options "Encryption" and "Maximum IDle Time" better leave the default.
- MTU data depend on the provider, and the "Connect Mode" option set to the Always-ON position. Save the entered parameters and restart the router.


On this setting the main features of the D-Link DIR-100 completed - now the router must easily connect to the Internet.
Setting up a local network
By virtue of the features of the router under consideration, additional setting will be required to work correctly. Act the algorithm:
- Click the "SETUP" tab and click on the "LAN Setup" option.
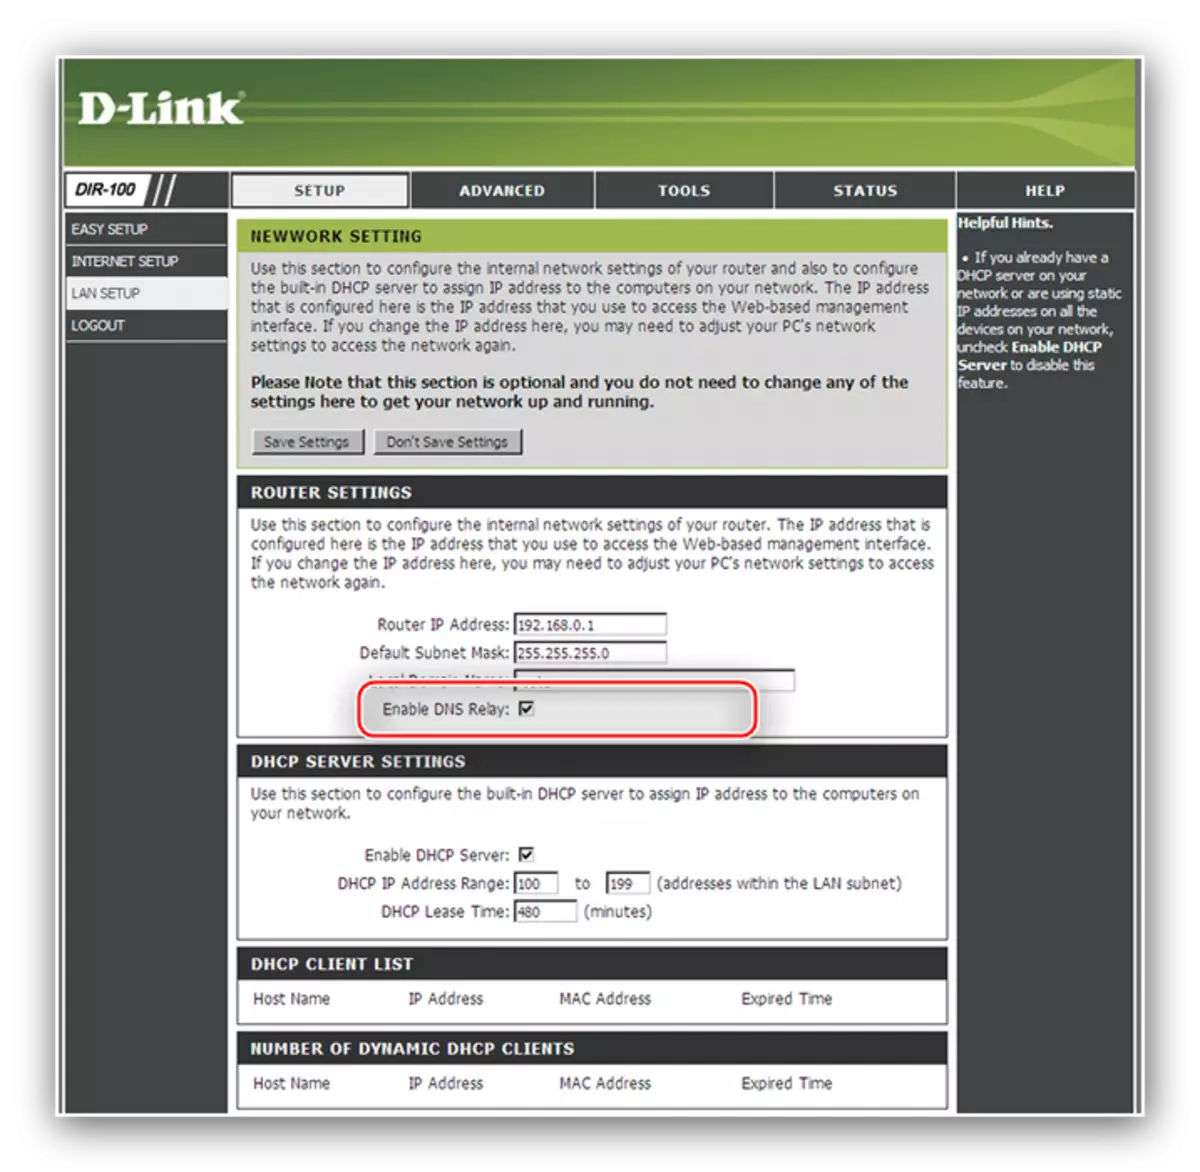
- In the "Router Settings" block, check the box next to the "Enable DNS Relay" option.
- Next, find and activate the Enable DHCP Server parameter in the same way.
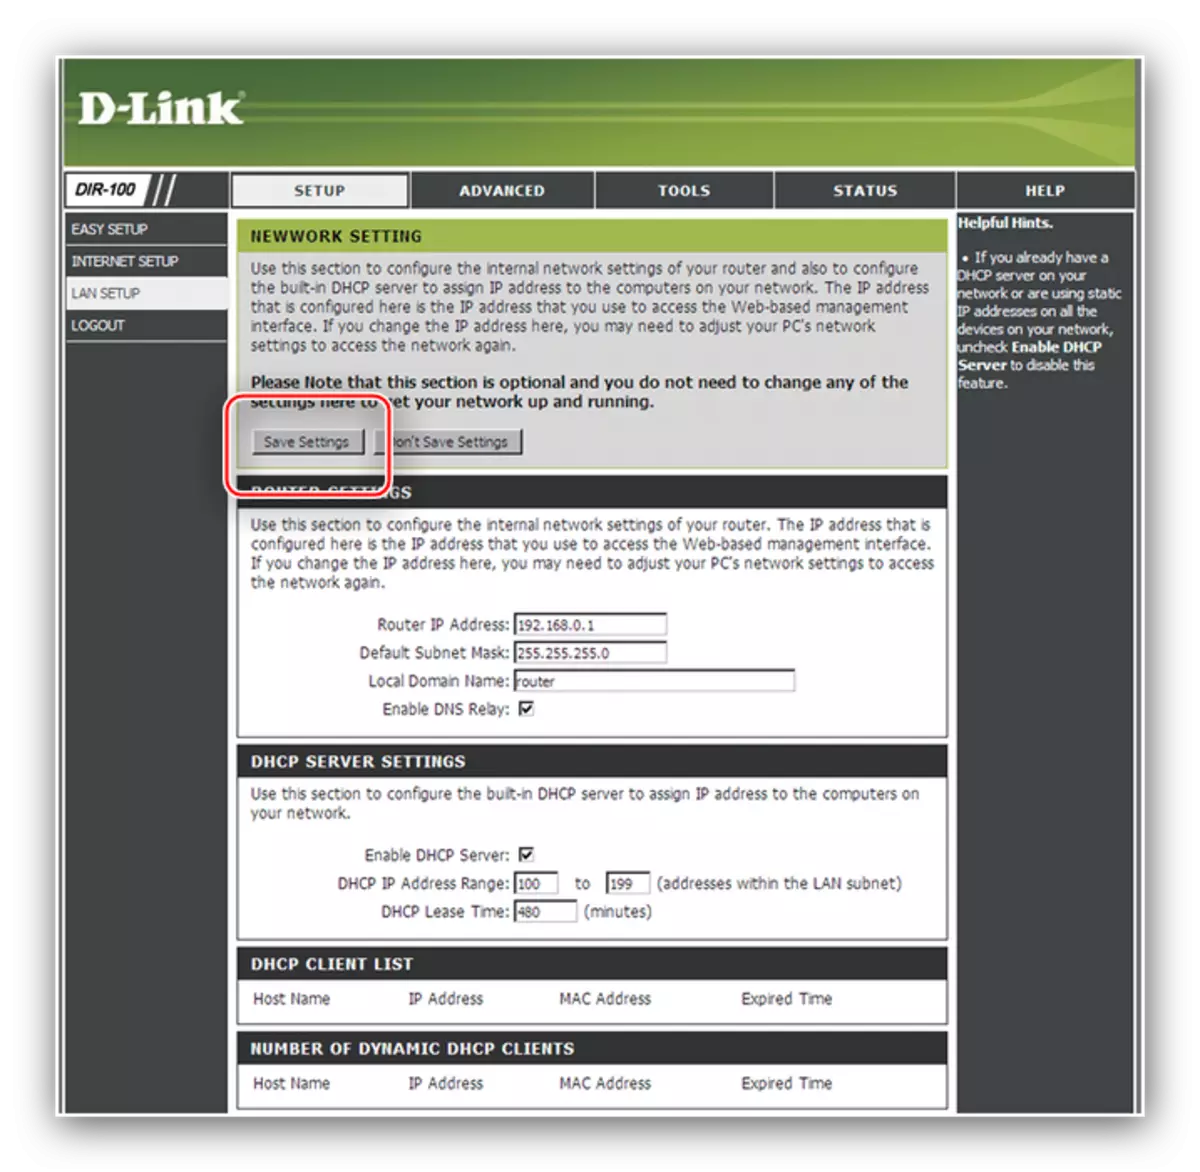
- Click "Save Settings" to save the parameters.
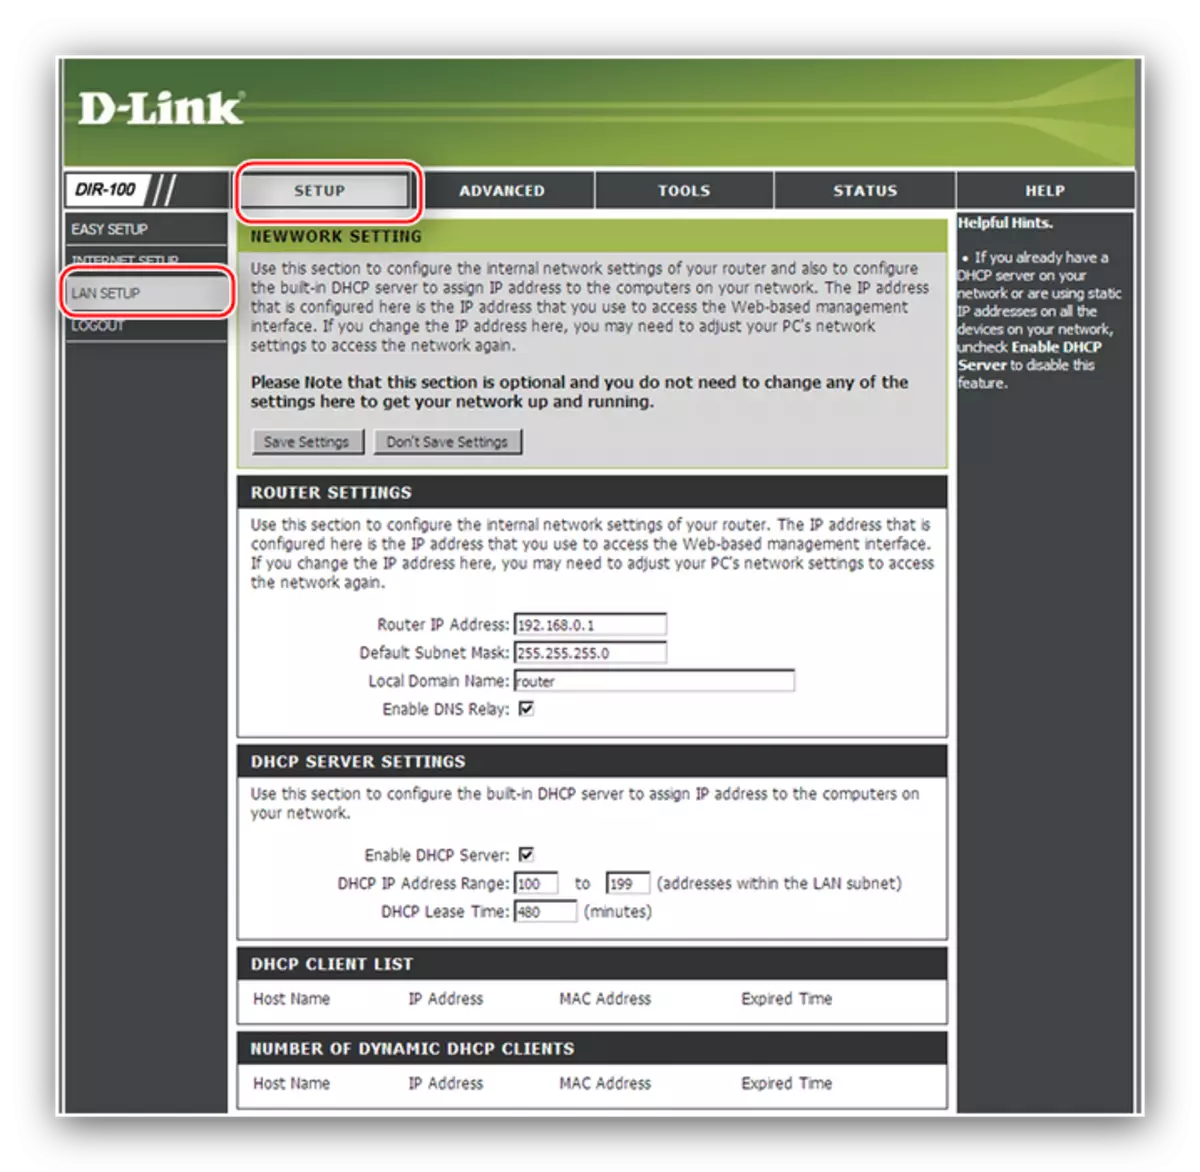

After these actions, the LAN network will function in normal mode.
Setup IPTV.
All options for the firmware of the device under consideration "from the box" support the option of Internet television - it is necessary to simply activate this method:
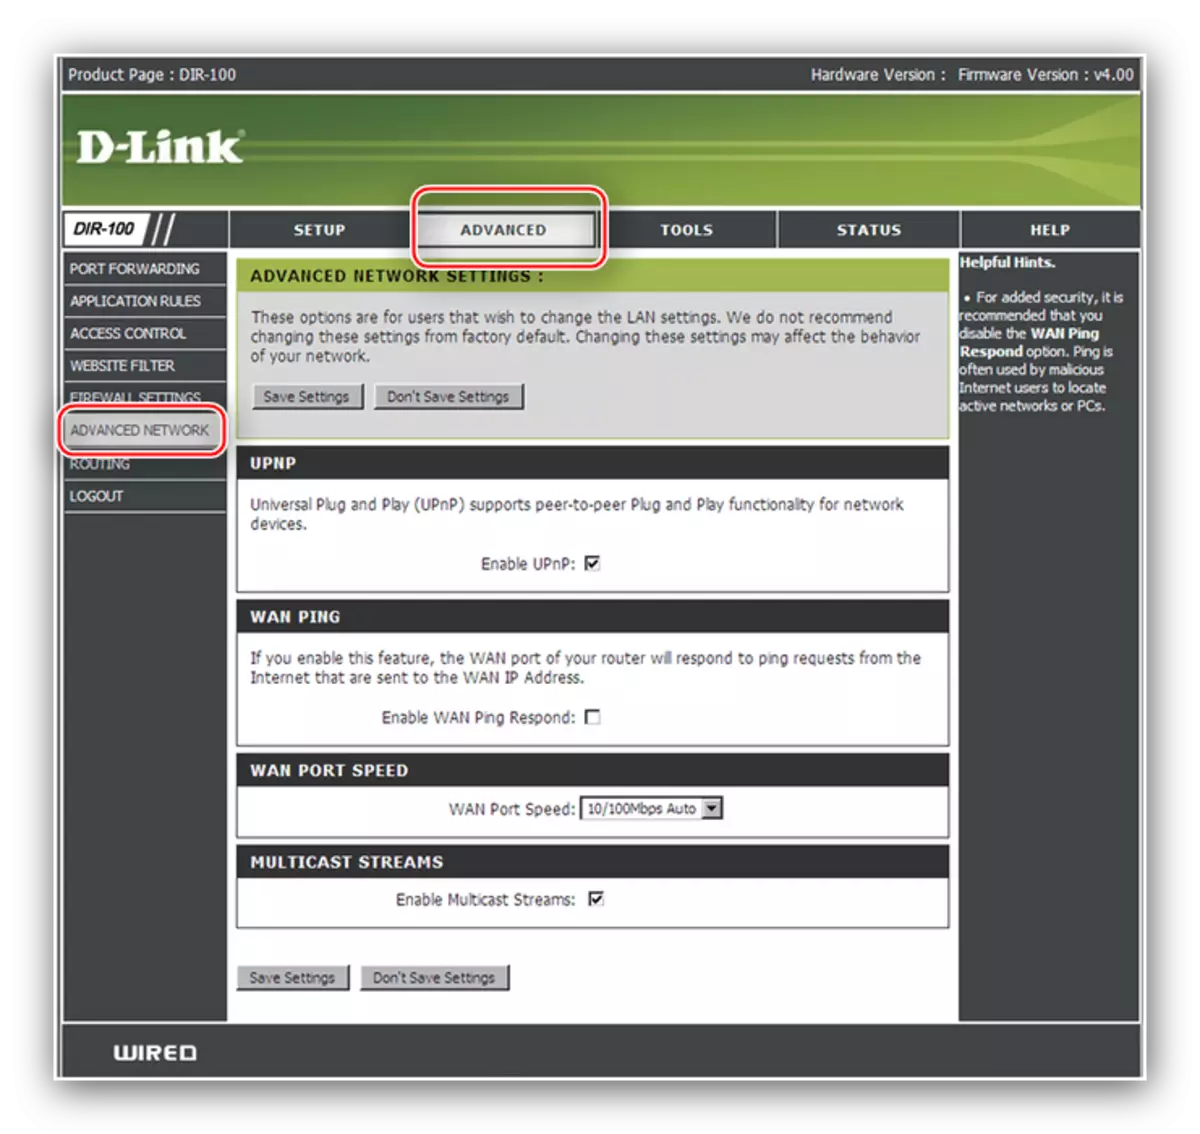
- Open the Advanced tab and click on the "Advanced Network" option.
- Mark the "Enable Multicast Streams" item and save the entered parameters.

After this manipulation of IPTV should function without problems.
Triple Play Setup
Triple Play is a function that allows you to transmit Internet data, Internet television and IP telephony through one cable. In this mode, the device simultaneously works as a router and a switch: the consoles of IP television and the Voip station must be connected to the LAN ports 1 and 2, and adjust the routing - through ports 3 and 4.
To use Triple Play, the corresponding firmware must be installed in the DIR-100 (about how it can be installed, we will tell another time). This feature is configured as follows:
- Open the configurator web interface and configure the Internet connection to the PPPoE type - about how this is done, is mentioned above.
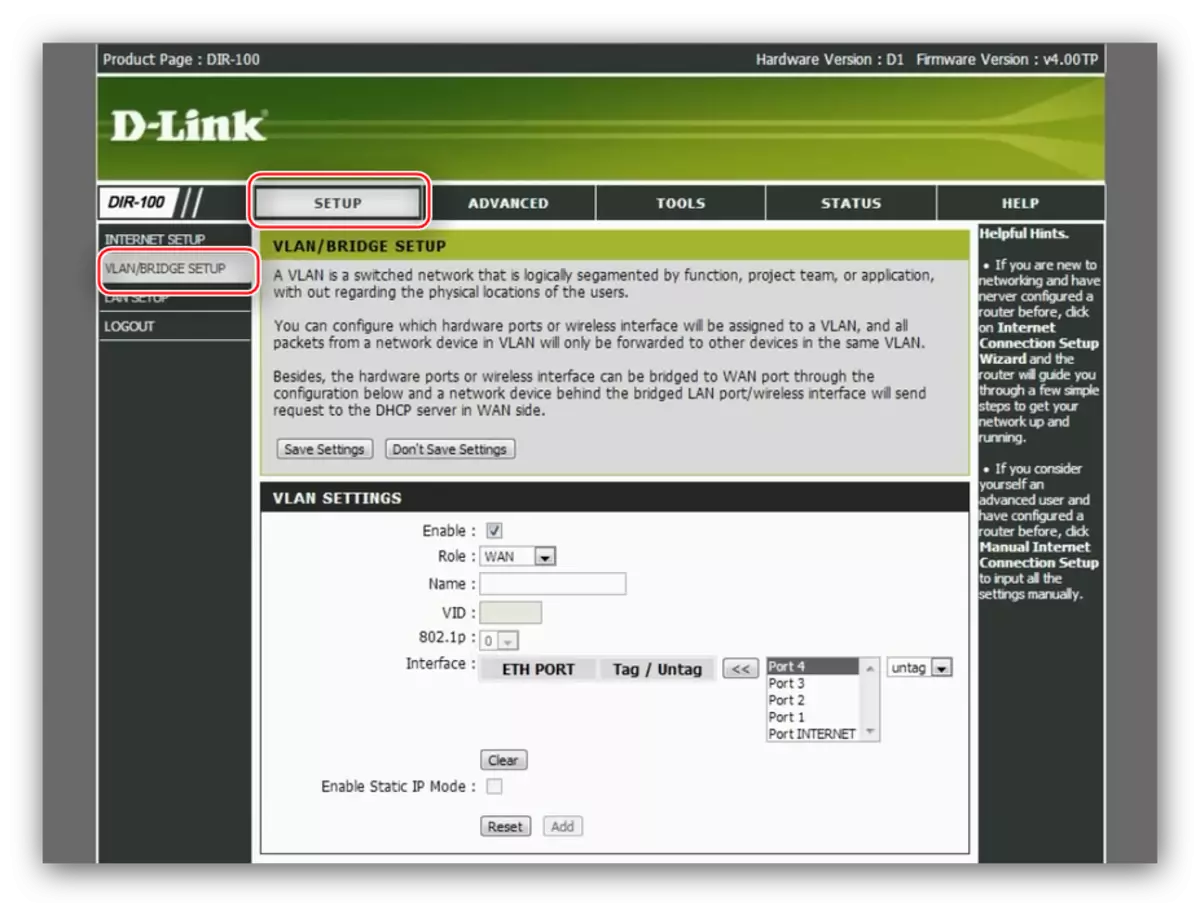
- Click the "Setup" tab and click on the "VLAN / BRIDGE SETUP" menu item.
- First notify the option "Enable" in the "VLAN Settings" block.
- Scroll down the page down to the "VLAN LIST" block. In the "Profile" menu, select any different from "Default".

Return to the VLAN settings. In the "Role" menu, leave the value "WAN". Similarly, name the configuration. Next, check the extreme right list - make sure that it is in the "Untag" position, after which in the next menu, select "Port Internet" and press the button with the image of the two arrows to the left of it.

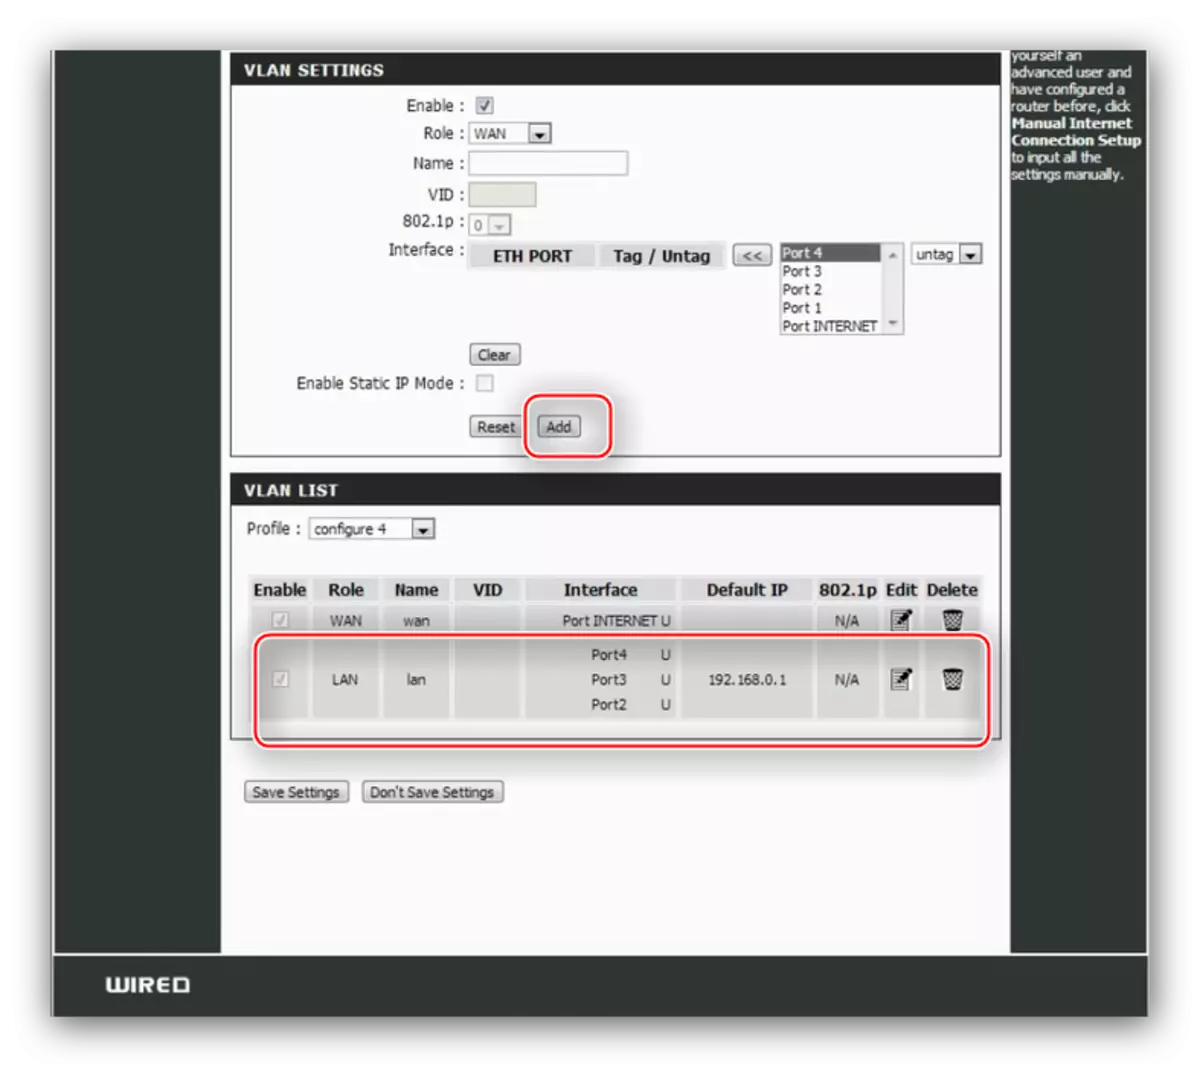
Click on the "Add" button at the bottom of the block - in the connection information section there should be a new entry.
- Now "Role" set to the "LAN" position and give the same recording name. Make sure that the "Untag" option is installed and add ports from 4 to 2, as in the previous step.
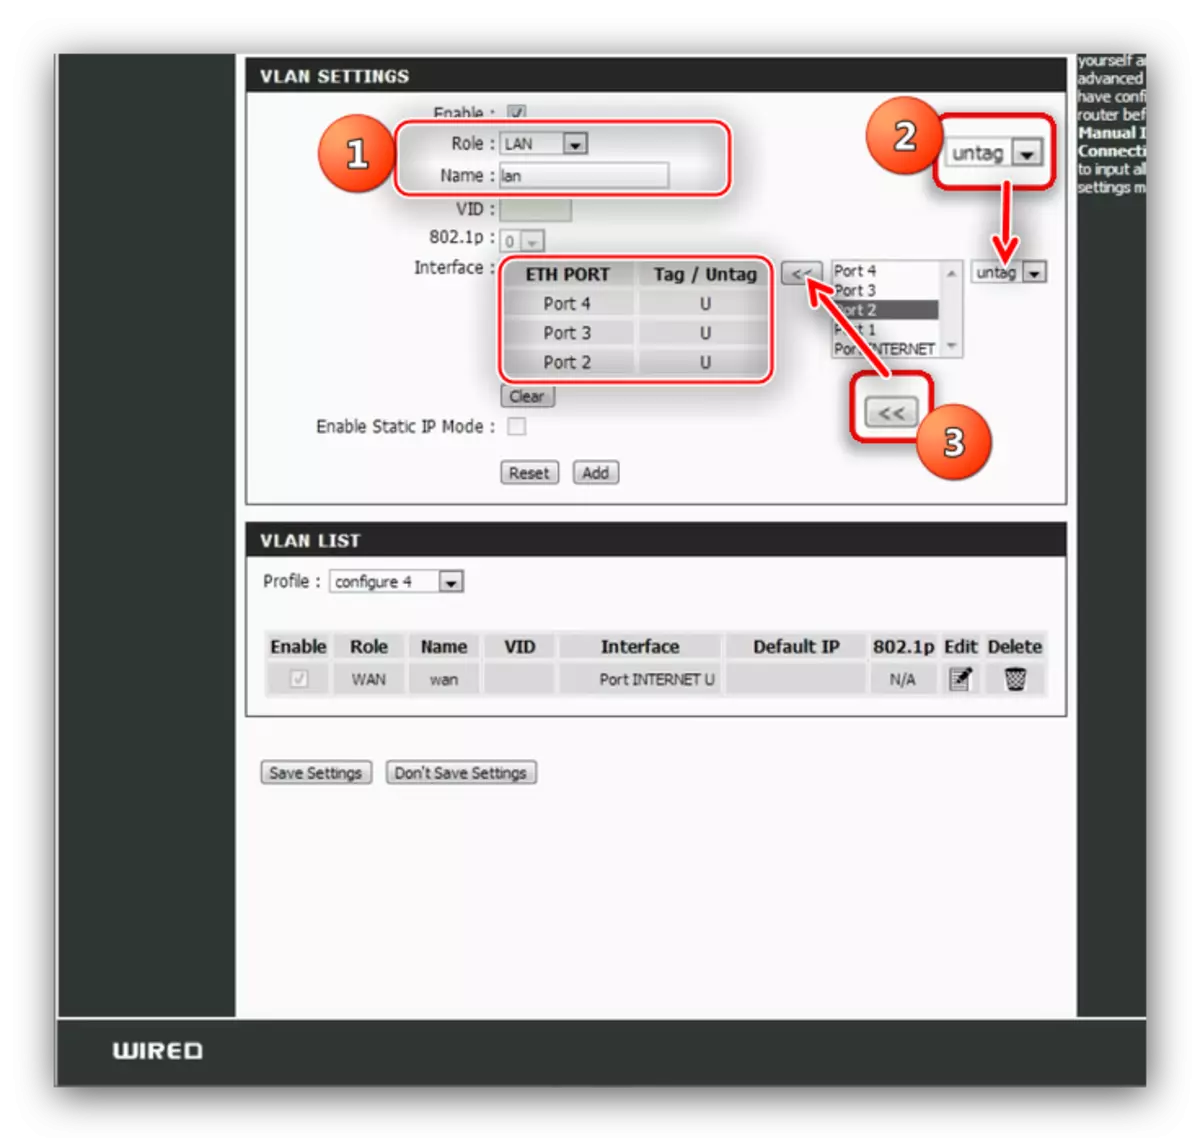
Press the "Add" button again and observe the next entry.
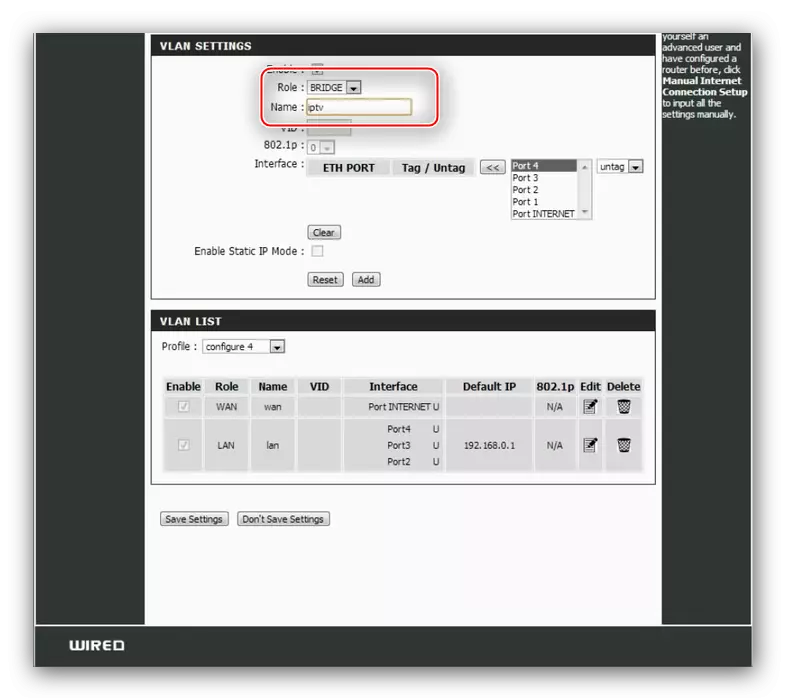
- Now the most important part. In the "Role" list, set "Bridge", and name the "IPTV" or "VoIP" entry, depending on which device you want to connect.
- Further actions depend on whether you connect only Internet telephony or cable TV, or both together. For some one option, you will need to add "port_internet" with the "TAG" attribute, then install "VID" as "397" and "802.1p" as "4". After that, add "port_1" or "port_2" with the attribute "Untag" and turn on the record to the profile sheet.

To connect two additional features at once, repeat the operation described above for each of them, but use different ports - for example, for cable TV port 1, and for the VoIP station port 2.
- Click "Save Settings" and wait until the router reboots.


If you follow the instructions exactly, the device must function normally.
Conclusion
Summing up Description of the D-Link DIR-100 setting, we note that this device can be turned into a wireless way to connect to it a suitable access point, but this is already the topic for a separate manual.