

Equipment from the Taiwan Corporation ASUS deservedly enjoys the glory of reliable devices at a democratic price. This statement is fairly related to network routers of the company, in particular, the RT-N11P models. Setting this router may seem a difficult task among beginners and even experienced users, since the router is equipped with the latest firmware, which is significantly different from old options. In fact, ASUS RT-N11P configuration is not too complex lesson.
Preparatory stage
The router under consideration refers to the category of medium-class devices, which connects to the provider by means of the Ethernet cable connection. Of the additional features, it should be noted the presence of two reinforcing antennas and repeater functions, so that the coating zone increases significantly, as well as support for WPS and connect via VPN. Such characteristics make the router under review by an excellent solution for home use or connecting to the Internet of a small office. Read further to find out how to configure all the functions mentioned. The first thing to be done before setting is to choose the location of the router and connect it to the computer. The algorithm is the same for all similar instances of the equipment and is as follows:
- Place the device approximately in the center of the intended coverage zone - this will allow the Wi-Fi signal to get even to the farthest points of the room. Pay attention to the presence of metal barriers - they shield the signal, which is why the reception can deteriorate significantly. A reasonable solution will keep the router away from sources of electromagnetic vendor or bluetooth devices.
- After placing the device, connect it to the power source. Next, connect the computer and the LAN-cable router is one end to insert into one of the corresponding ports on the device housing, and the second is connected to the Ethernet connector on the network card or laptop. Nests are marked with different icons, but the manufacturer did not bother to march them with different colors. In case of difficulties, you can use the image below.
- When the connection procedure is completed, proceed to the computer. Call the connection center and open the connection properties over the local network - again, open the TCP / IPv4 parameter properties and set addresses as "automatic".

Read more: Connecting and configuring a local network on Windows 7

Next, go to the configuration of the router.
Configuring ASUS RT-N11P
Most modern network routers are configured through a special web application, which can be accessed by any browser. This is done like this:
- Open the Internet browser, type in the input line 192.168.1.1 and press ENTER to go. A window will appear asking you to enter a login and password. By default, the login and password for entering the web interface is admin. However, in some options, deliveries this data may differ, so we recommend turning your router and carefully examine the information on the sticker.
- Enter the login and password received, then the router web interface should be downloaded.

After that, you can start setting the parameters.
On all ASUS devices from this class, two options are available - fast or manual. In most cases, it is enough to use the Quick Setup option, however, some providers require manual configuration, so we will introduce you to both methods.
Fast setting
When you first connect the router, the simplified configurator utility will start automatically. On a pre-configured device, access to it can be obtained by clicking on the "Fast Settings" item of the main menu.

- In the starting window utilities, click "Next" or "Go."
- You will need to set a new password for the router administrator. It is advisable to come up with a complicated, but easily memorable combination. If nothing suitable comes to mind, then the password generator is at your service. After installing and repetition code dialing, press "Next".
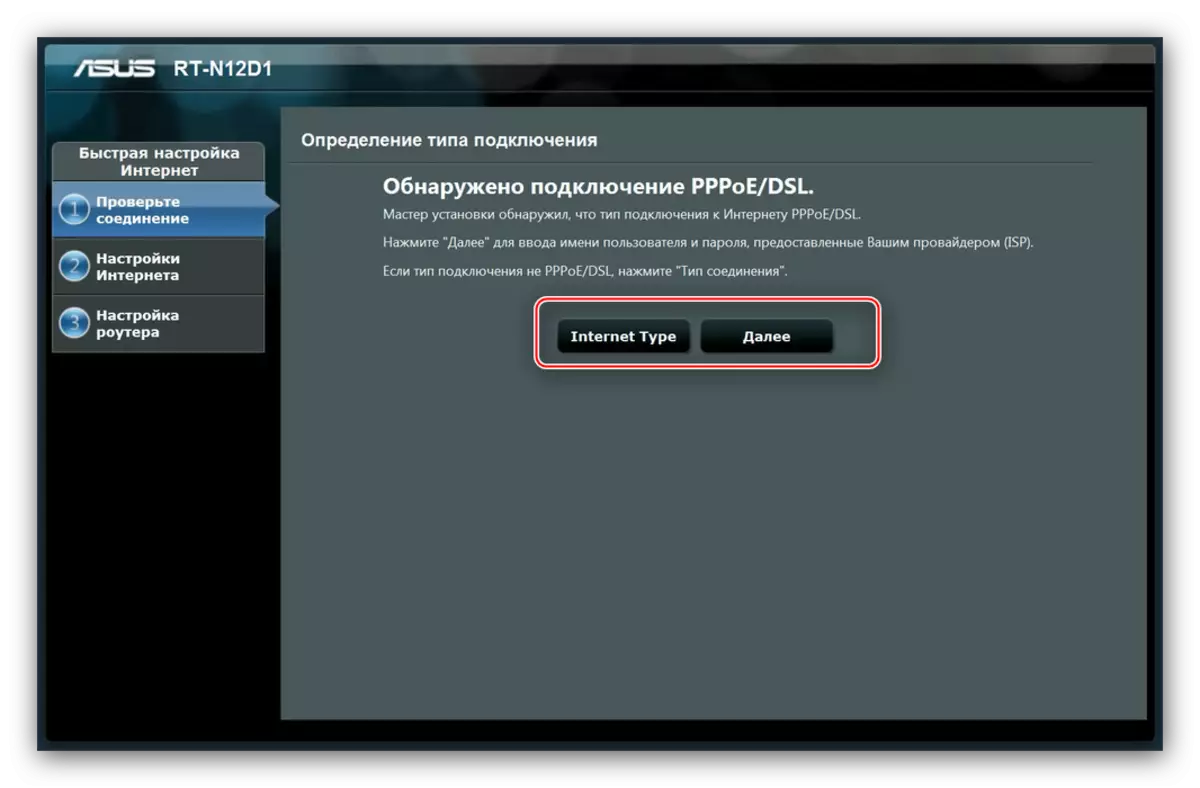
- Here there is an automatic definition of the Internet connection protocol. If the algorithm worked incorrectly, select the desired type after clicking the "Internet Type" button. Click "Next" to continue.
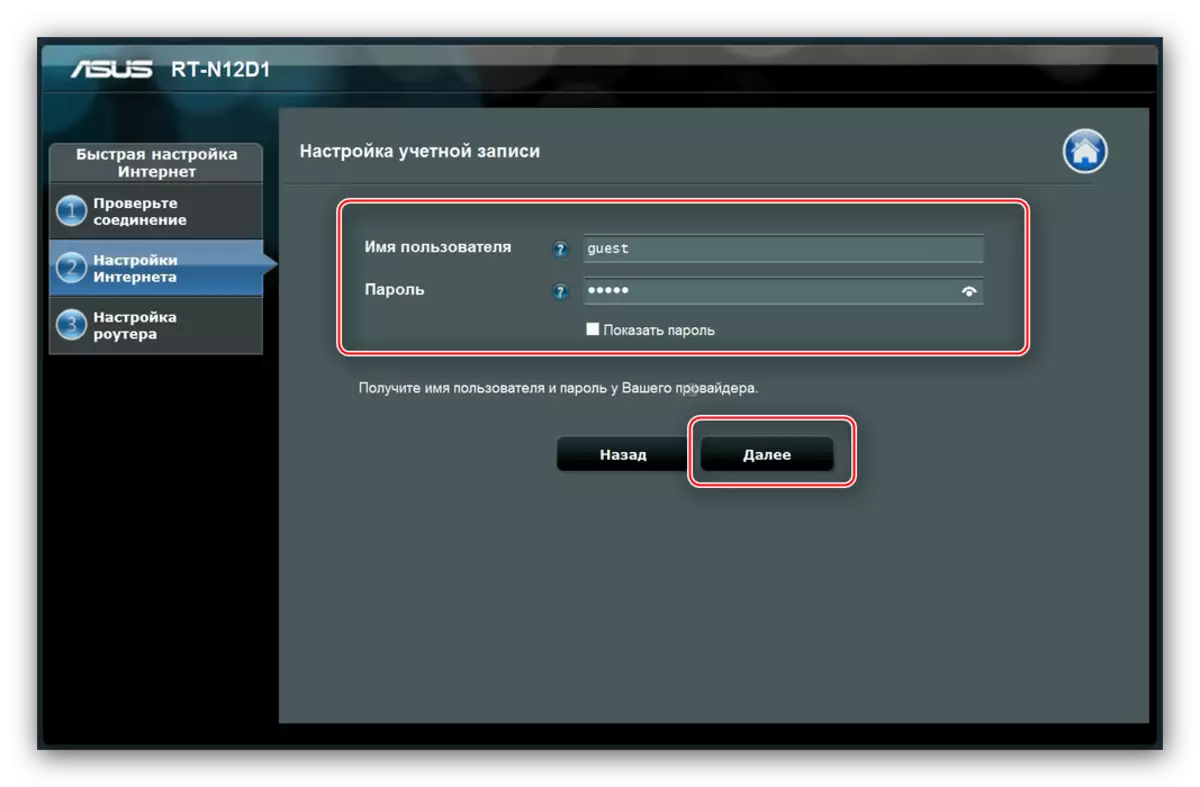
- In the Enter the authorization data on the provider server. This information must necessarily be issued by the operator or on request or in the text of the Service Treaty. Enter the parameters and continue working with the utility.
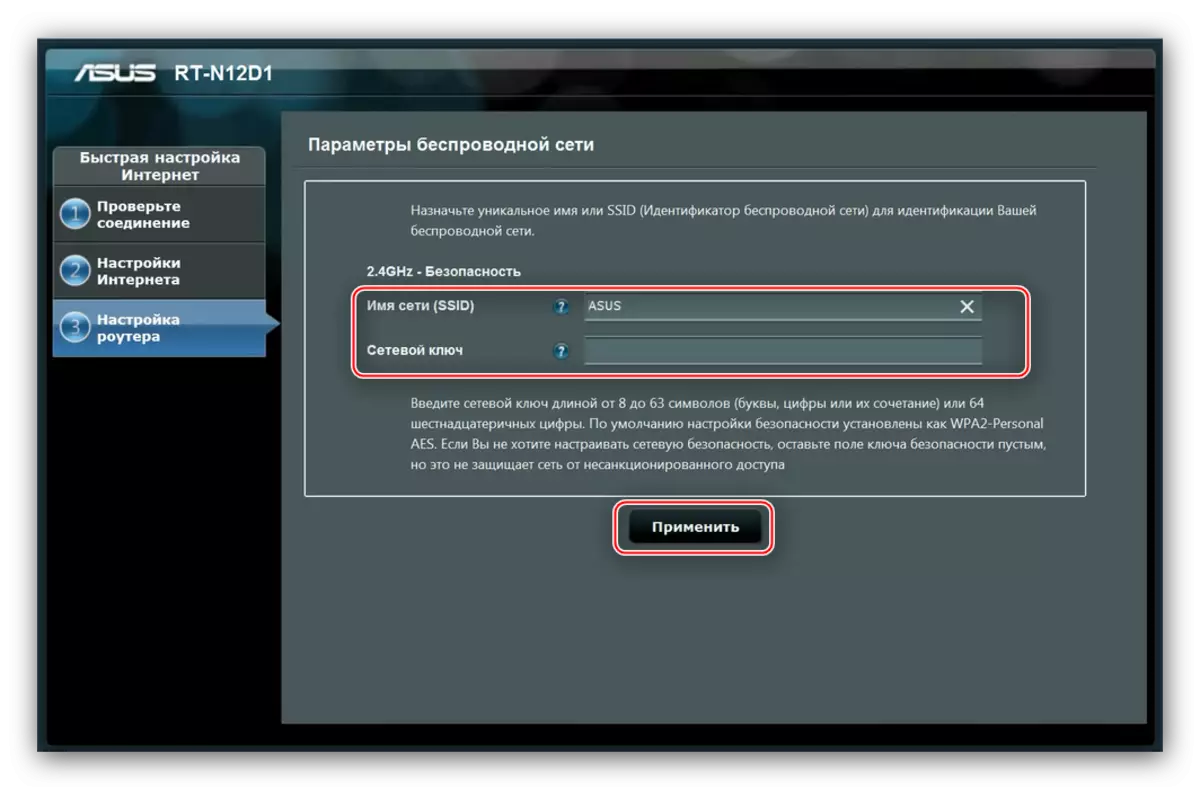
- And finally, the last stage is to enter the name and password of the wireless network. Come up with suitable values, enter them and click "Apply".


After this manipulation, the router will be fully configured.
Manual way setting
To access the connection parameters manually, select the "Internet" option in the Main menu, then go to the "Connection" tab.
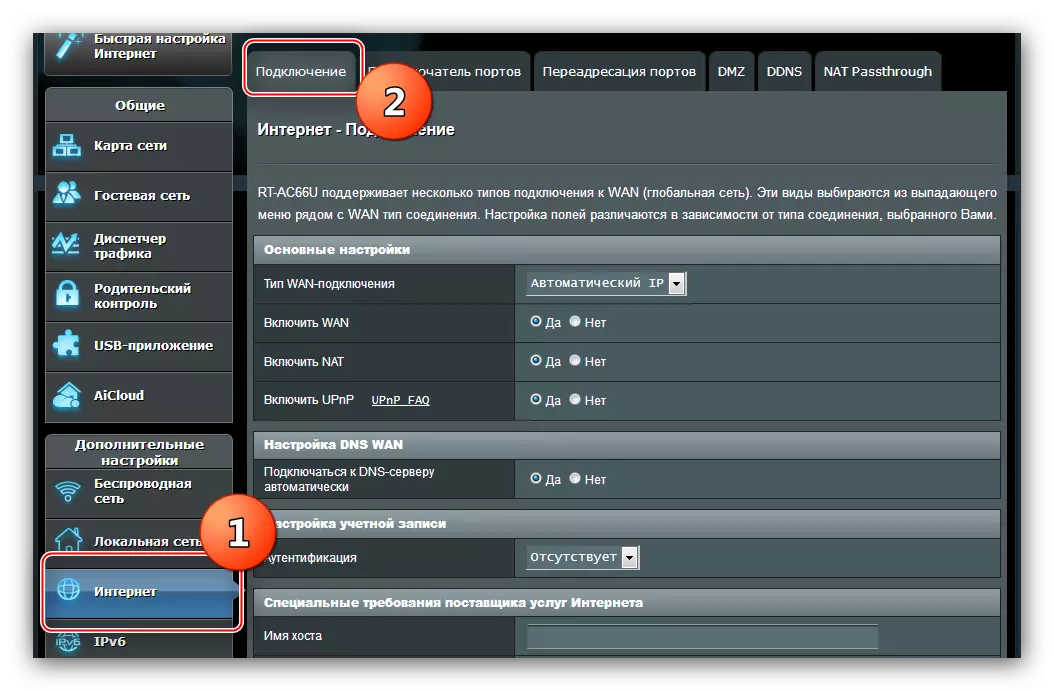
ASUS RT-N11P supports multiple internet connection options. Consider the main.
PPPoe
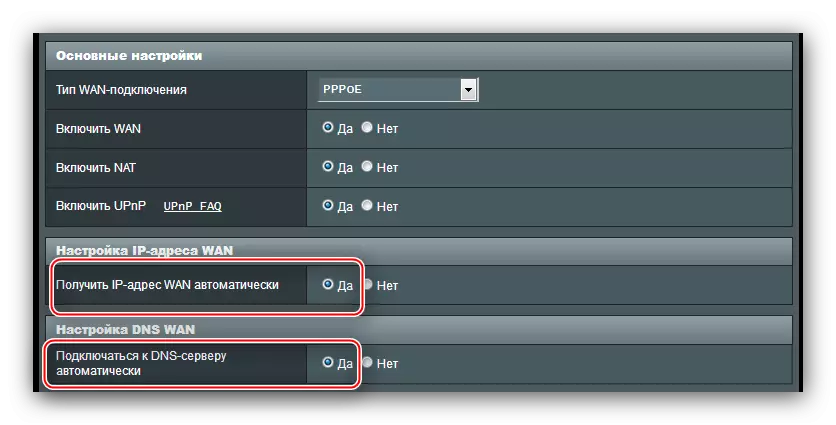
- Find the WAN-Connection Type drop-down menu in the "Basic Settings" block in which you want to select "PPPOE". At the same time, activate "WAN", "NAT" and "UPNP", noting the options "Yes" opposite each of the options.
- Next, install the IP and DNS addresses automatically, again, notice the point "Yes".
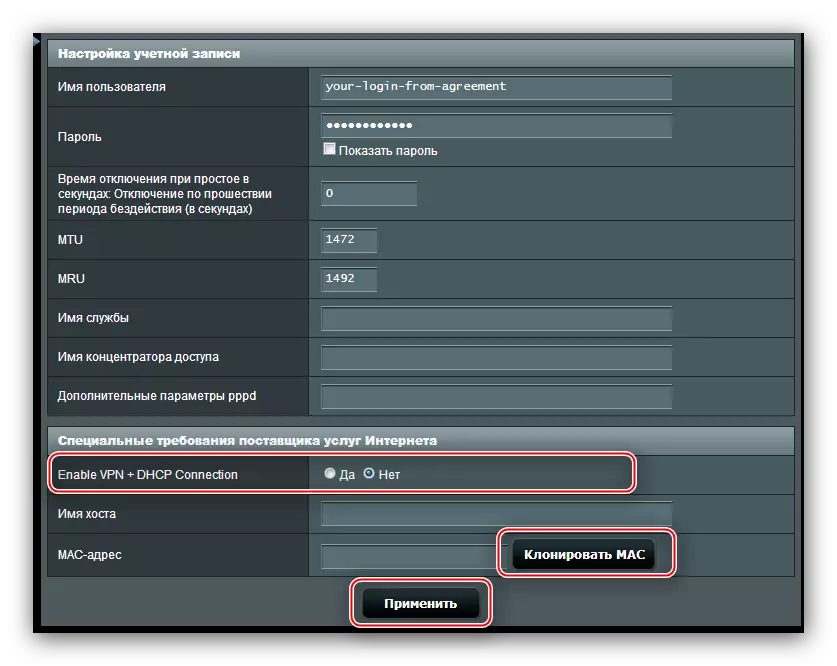
- The name of the Account Setup block speaks for itself - here you need to enter authorization data obtained from the provider, as well as the MTU value, which for this type of connection is 1472.
- The "Enable VPN + DHCP Connection" option is not used by most providers, because you select no option. Check the entered parameters and click "Apply".


PPTP.
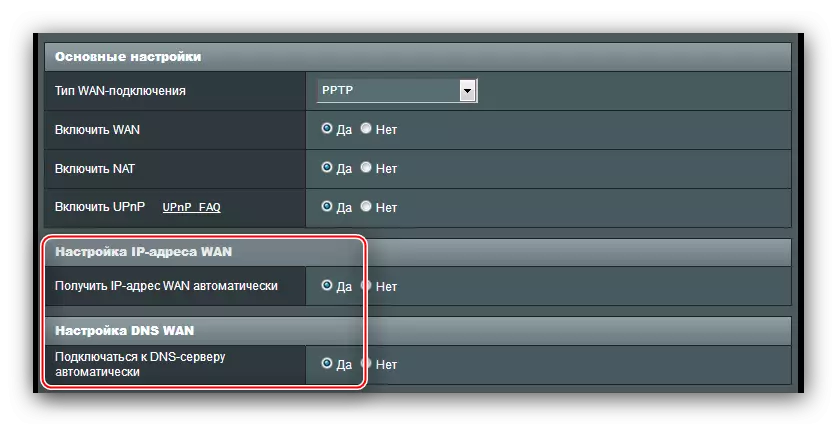
- Set "WAN-Connection Type" as "PPTP" by selecting the appropriate option in the drop-down menu. At the same time, as in the case of PPPoE, enable all the options in the basic settings block.
- IP-WAN and DNS addresses in this case are also automatically coming, therefore, mark the option "Yes."
- In the "Account Settings", enter only the login and password to access the Internet.
- Since the PPTP protocol implies a connection via a VPN server, in the "Special Internet Service Provider" section you need to enter the address of this server - it can be found in the text of the contract with the operator. The router firmware also requires to set the host name - enter several arbitrary characters on the latin to the corresponding field. Check the correctness of the entered data and click "Apply" to end the setting.


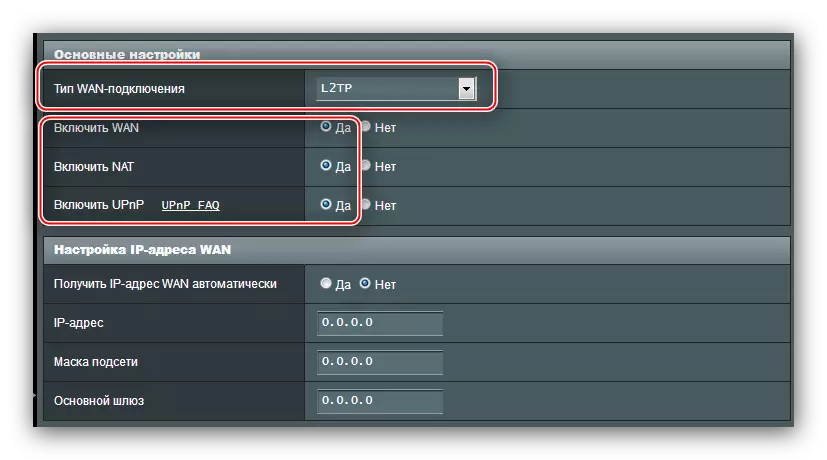
L2TP
- The WAN-Connection Type parameter is set to "L2TP". Confirm the inclusion of "WAN", "NAT" and "UPNP".
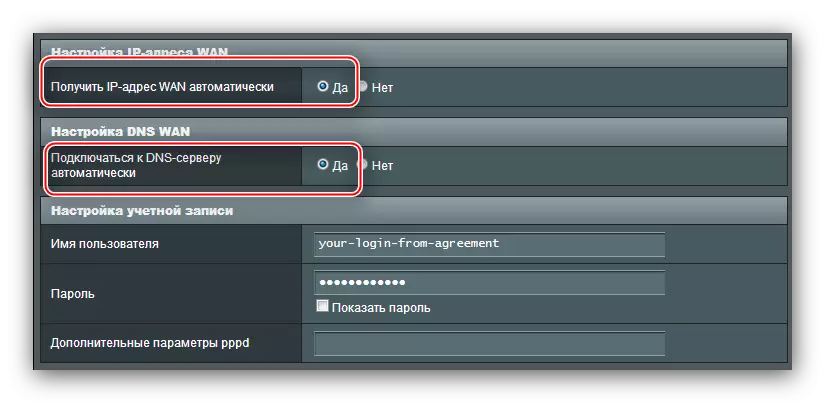
- Include automatic receipt of all you need to connect addresses.
- We enter a login and password received from the service provider to the appropriate fields of the Account Settings block.
- The L2TP connection also occurs through communication with the external server - its address or name is registering in the "VPN server" line of the "Special Requirements of the Internet Service Provider" section. At the same time, due to the features of the router, set the host name from any sequence of English letters. Having done this, check with the settings entered and press "Apply".


Wi-Fi Setup
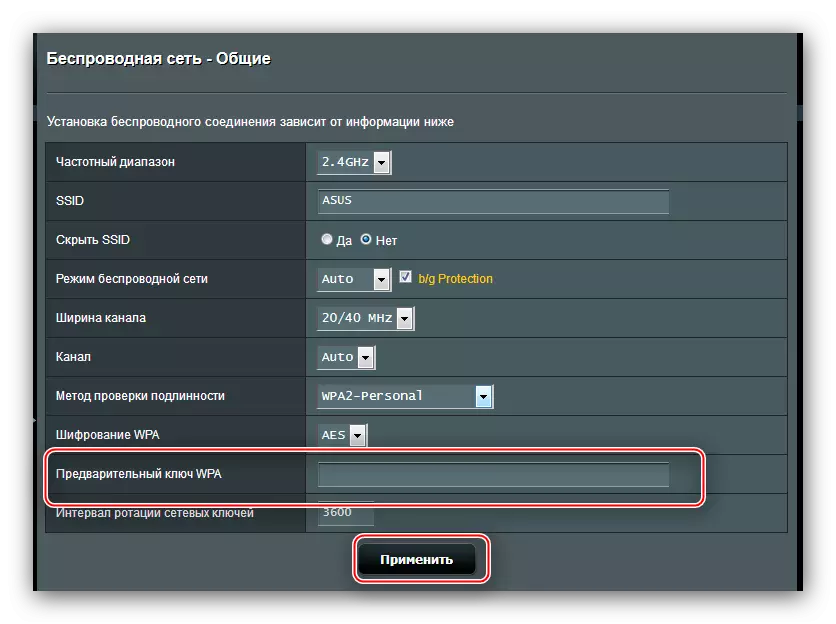
Configure the wireless network on the router is very simple. The Wi-Fi distribution configuration is in the "Wireless Network" section, the General tab.
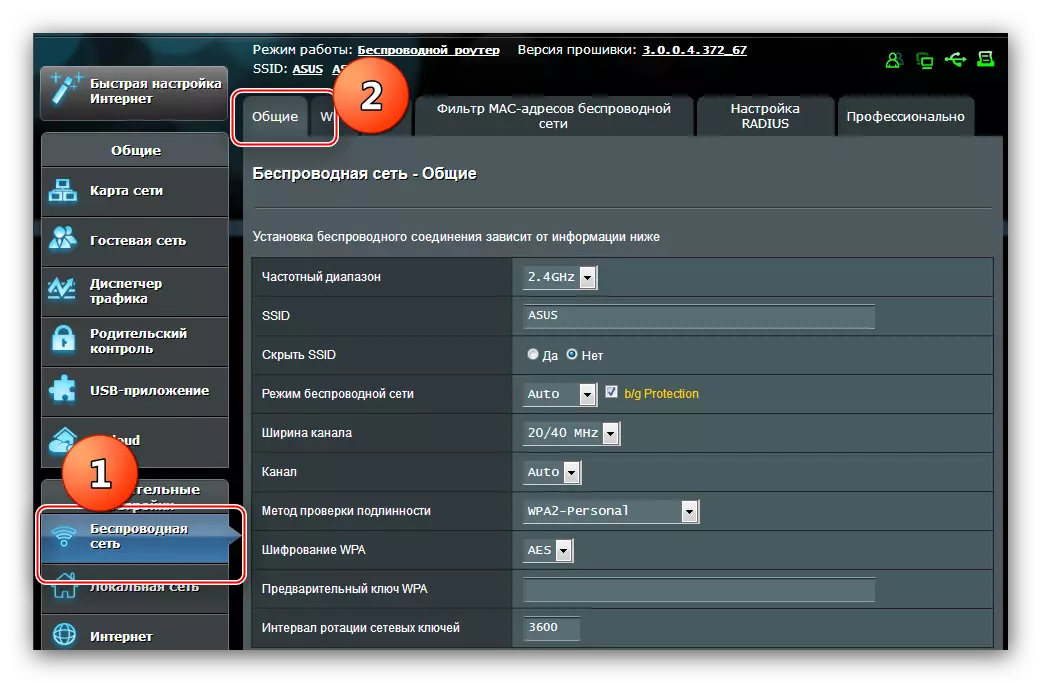
- The first parameter we need is called "SSID". In it, you must enter the name of the wireless router. The name is required to enter Latin letters, the use of numbers and some additional characters is allowed. Immediately check the "Hide SSID" parameter - it must be in the no position.
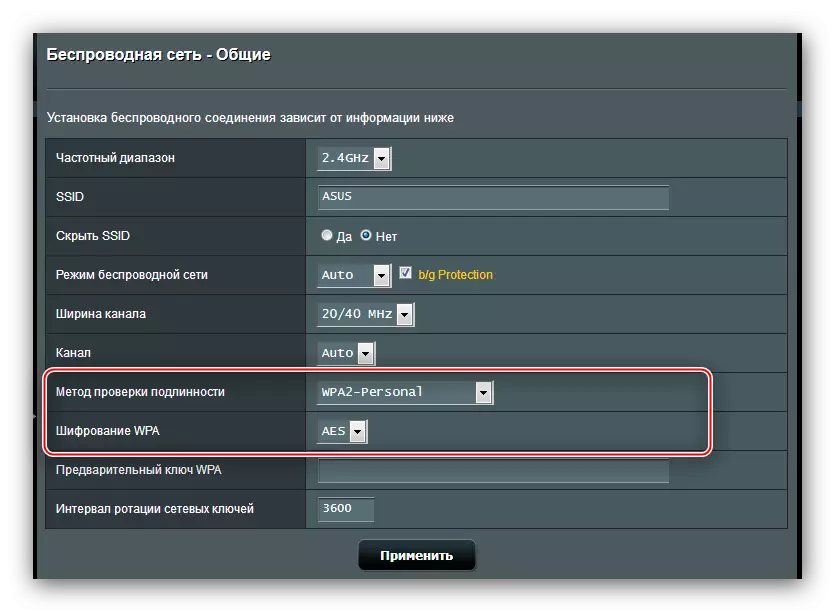
- The following option to be configured is the "Authentication method". We recommend choosing the option "WPA2-PERSONAL", providing an optimal level of protection. Encryption method Set "AES".
- Password, which is entered while connecting to a wireless network, enter the "WPA Preview" string. The remaining options for this section do not need to be configured - make sure that you are set correctly, and use the Apply button to save the parameters.

At this setting of the main possibilities of the router can be considered complete.
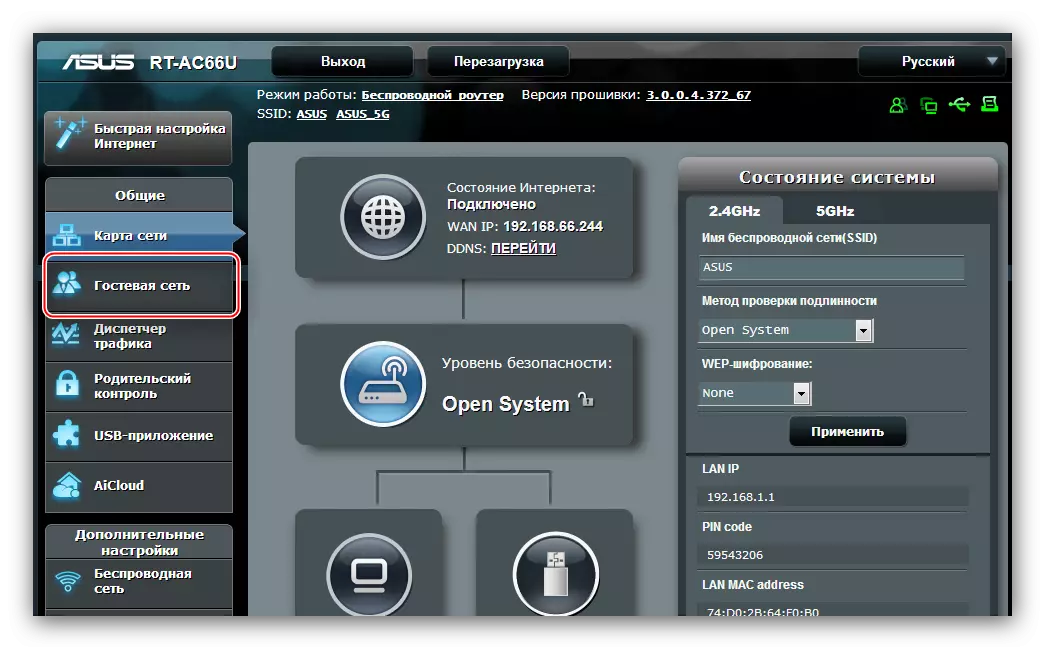
Guest network
A rather curious additional option that allows you to create up to 3 networks inside the main LAN with the time limits for connecting and accessing the local network. This feature settings can be seen by clicking the Guest Network item in the main menu of the web interface.
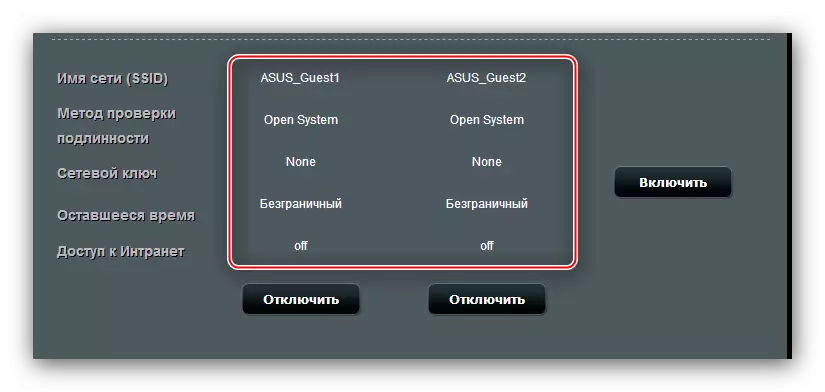
To add a new guest network, act as follows:
- In the main mode tab, click on one of the available "Enable" buttons.
- The status of the connection parameters is an active link - click on it to access the settings.
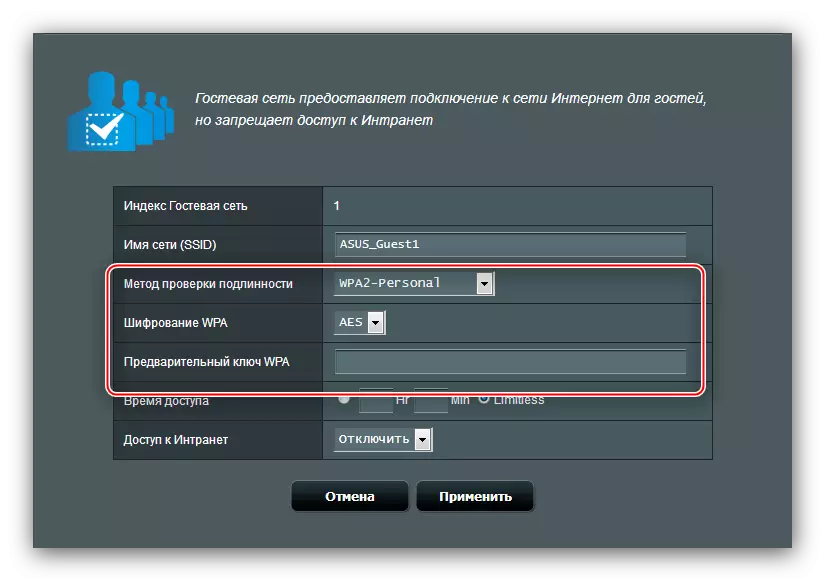
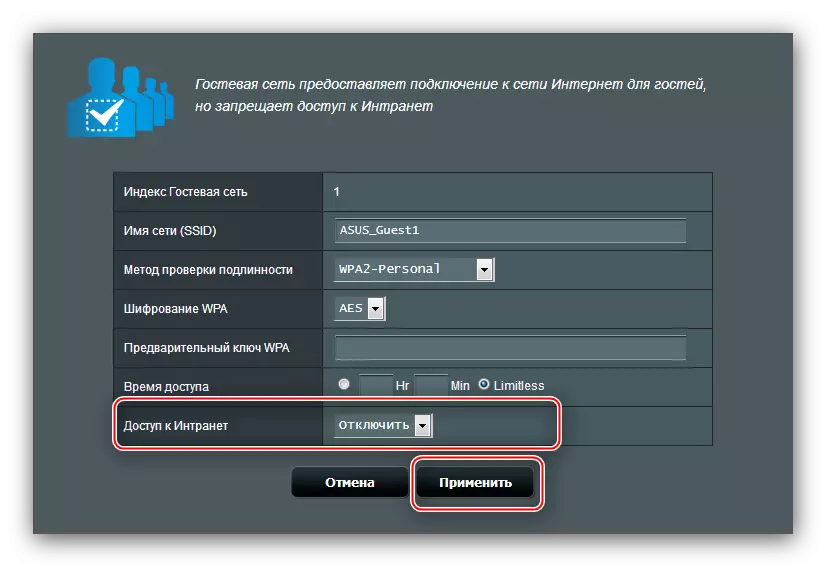
- Everything is quite simple here. The option "Network Name" options are obvious - enter the name in the string.
- The "Authentication Method" item is responsible for turning on password connectivity. Since this is not the main network, you can leave an open connection that is called "Open System", or choose the "WPA2-Personal" mentioned above. If you enable protection, you also need to enter a password in the "WPA Preview" row.
- The "Access Time" option is also quite obvious - the user who connects to the configurable network will be disabled from it after the specified period. In the "HR" field, the clock is indicated, and in the "Min" field, respectively, minutes. The option "Limitless" removes this restriction.
- Last setting - "Access to Intranet", in other words, to the local network. For guest versions, the option should be set to "Disable". After that, click "Apply".


Conclusion
As you can see, configuring the ASUS RT-N11P router is not actually more difficult than such devices from other manufacturers.