
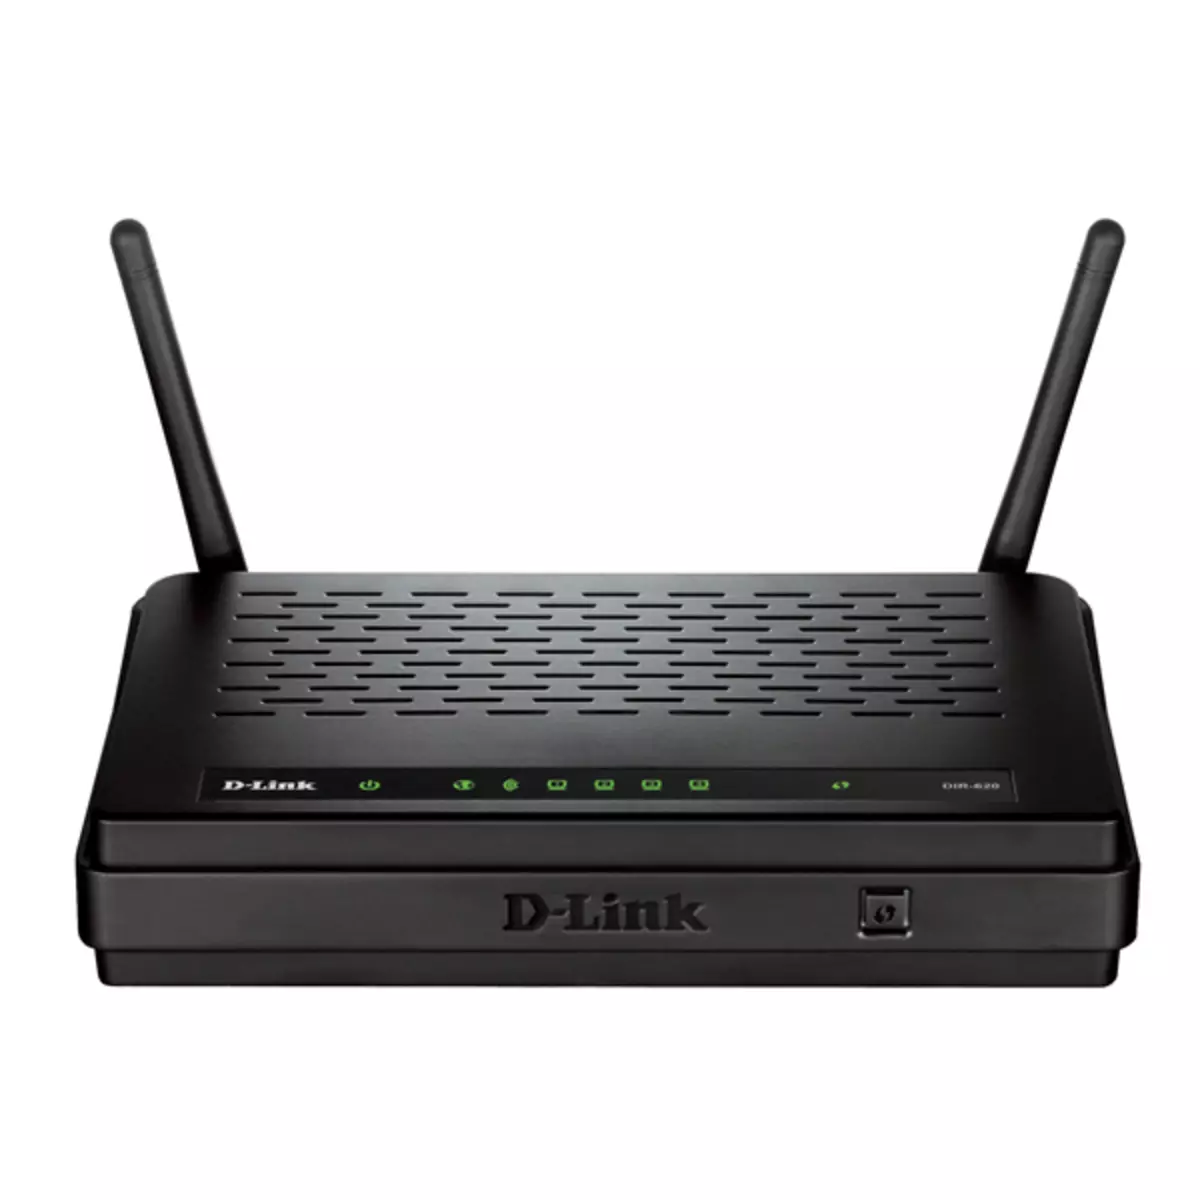
D-Link DR-620 model router is prepared for work almost the same way as other representatives of this series. However, the peculiarity of the router under consideration consists in the presence of several additional functions that provide a more flexible configuration of their own network and the use of special tools. Today we will try to describe the setting of this equipment as much as possible, affect all the necessary parameters.
Preparatory actions
After purchasing, unpack the device and put it in an optimal place. The passage of the signal is hampered by concrete walls and operating electrical appliances, such as microwave. Take these factors when choosing location. The length of the network cable should also be enough to spend it from the router to the PC.
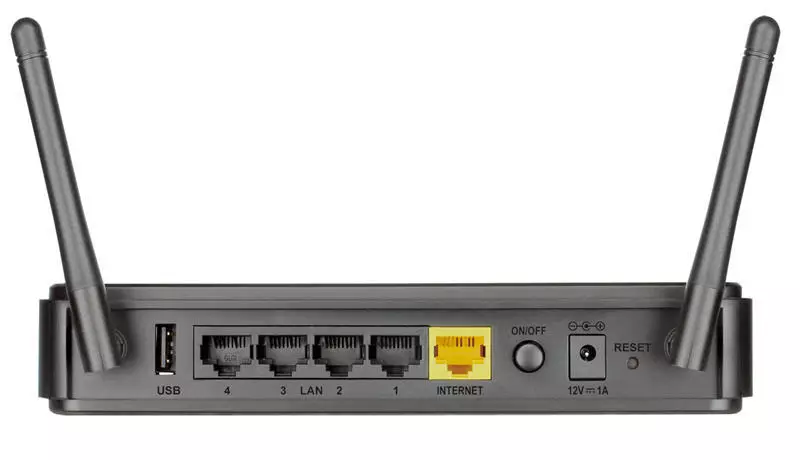
Pay attention to the rear instrument panel. It contains all the connectors present, each has its inscription, facilitating the connection. There you will find four LAN ports, one WAN, which is marked with yellow, USB and connector for connecting the power supply wire.
The router will be used TCP / IPv4 data transmission protocol, the parameters of which are required to be checked through the operating system to obtain IP and DNS was performed automatically.
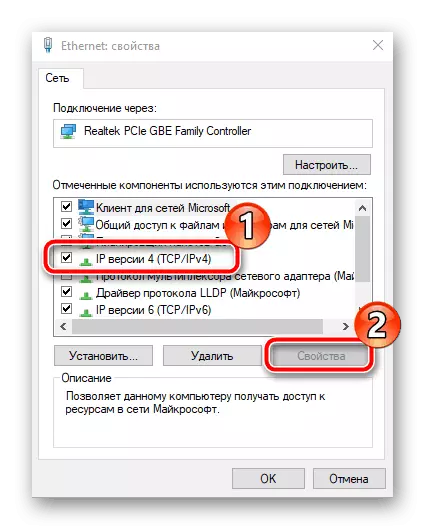
We suggest familiarizing yourself with the article on the link below to understand how to independently check and change the values of this protocol in Windows.
Read more: Windows 7 network settings
Now the device is ready for configuration and then we will tell about how to do it correctly.
Customize D-Link DIR-620 router
D-Link DIR-620 has two versions of the web interface, which depends on the installed firmware. Almost only their differences can be called appearance. We will edit through the current version, and if you are installed another, you just need to find similar items and set their values by repeating our instructions.
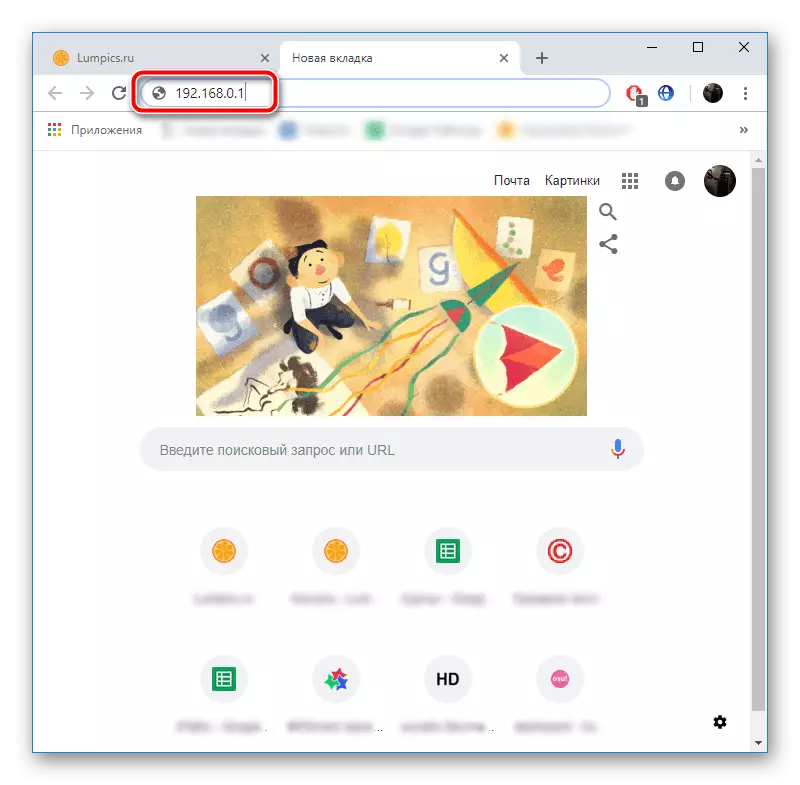
Originally log in to the web interface. This is done as follows:
- Run the web browser, where in the address bar, type 192.168.0.1 and press the ENTER key. In the displayed form, asking you to enter a login and password in both lines, specify Admin and confirm the action.
- Change the main language of the interface to the desired button using the appropriate button at the top of the window.
Now you have selection of one of two types of settings. The first will be more optimal for novice users who do not need to adjust something for themselves and they are satisfied with the standard network parameters. The second method is manual, allows you to adjust the value in each item, making the process as detailed as possible. Select the appropriate option and go to familiarization with the manual.
Fast configuration
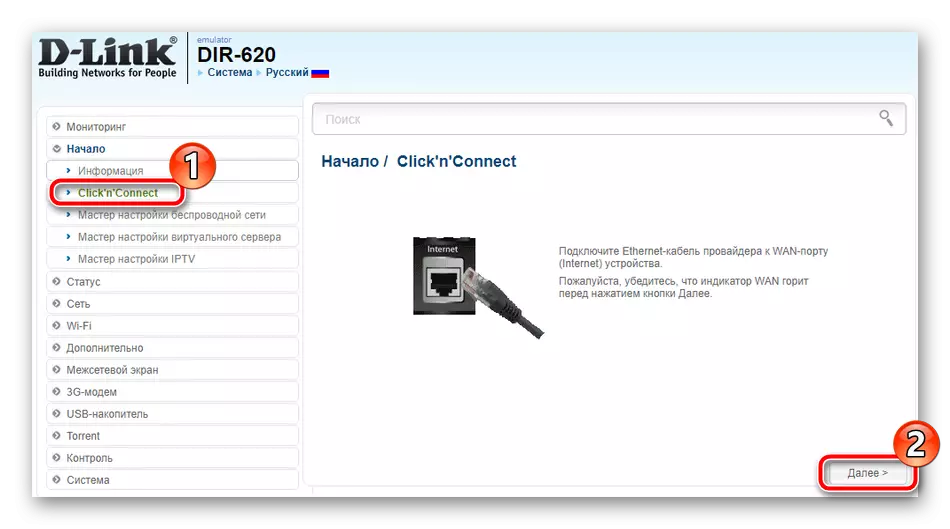
The Click'n'Connect tool is designed specifically to perform quick preparations for work. It displays only the main items on the screen, and you only need to specify the required parameters. The whole procedure is divided into three steps, with each of which we offer to familiarize yourself in order:
- All begins with what you need to click on "Click`N`Connect", connect the network cable to the appropriate connector and click on "Next".
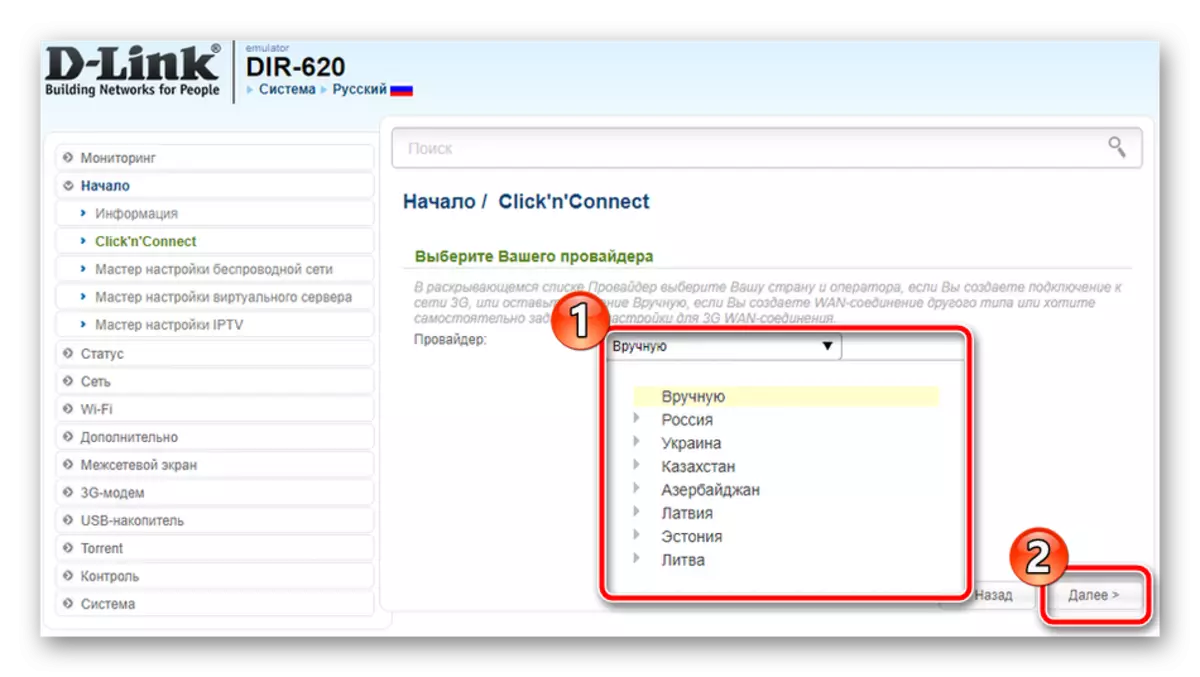
- D-Link DIR-620 supports 3G network, and it is edited only by choosing a provider. You can immediately specify the country or select the connection option yourself, leaving the "manual" value and clicking on "Next".
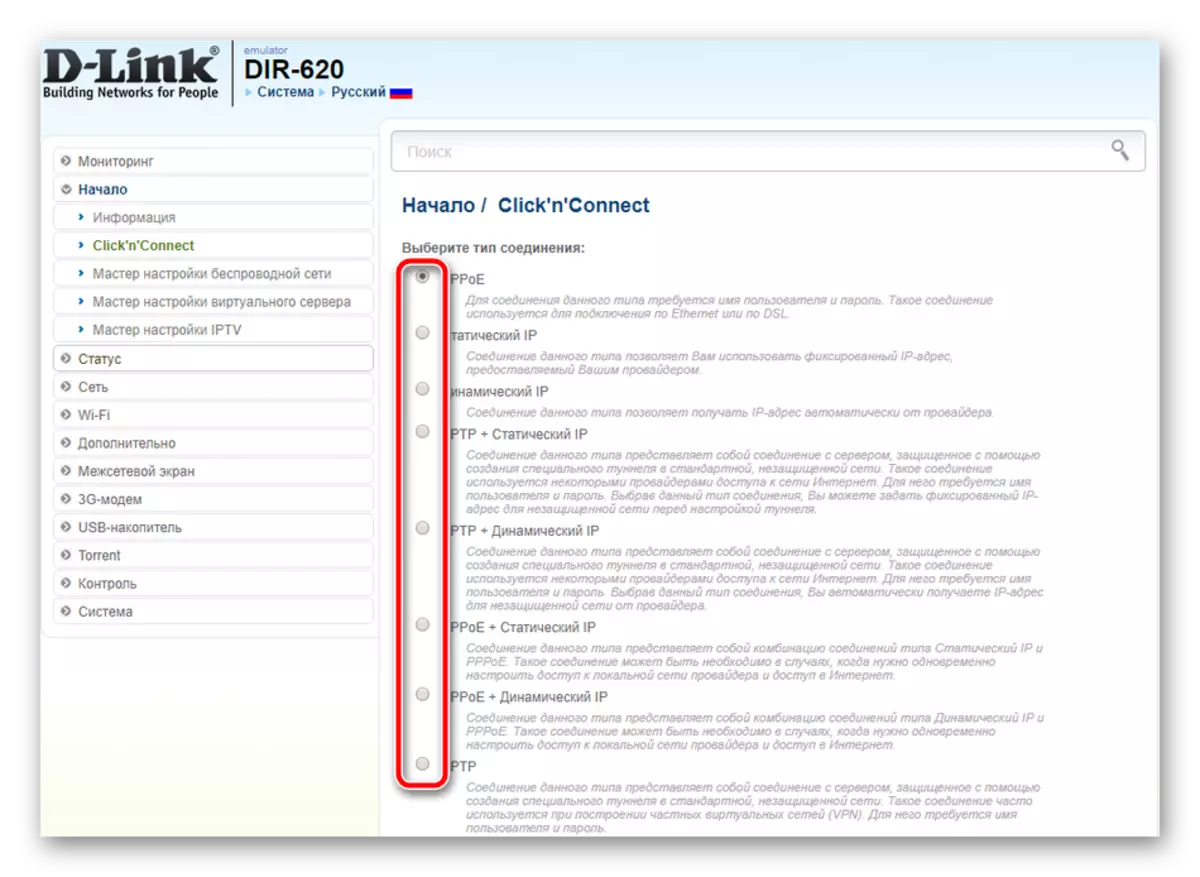
- Mark the WAN connection type used by your provider. It is recognized through the documentation provided when signing the contract. If you do not have it, refer to the company's support service that sells you Internet services.
- After installing the marker, go down and go to the next window.
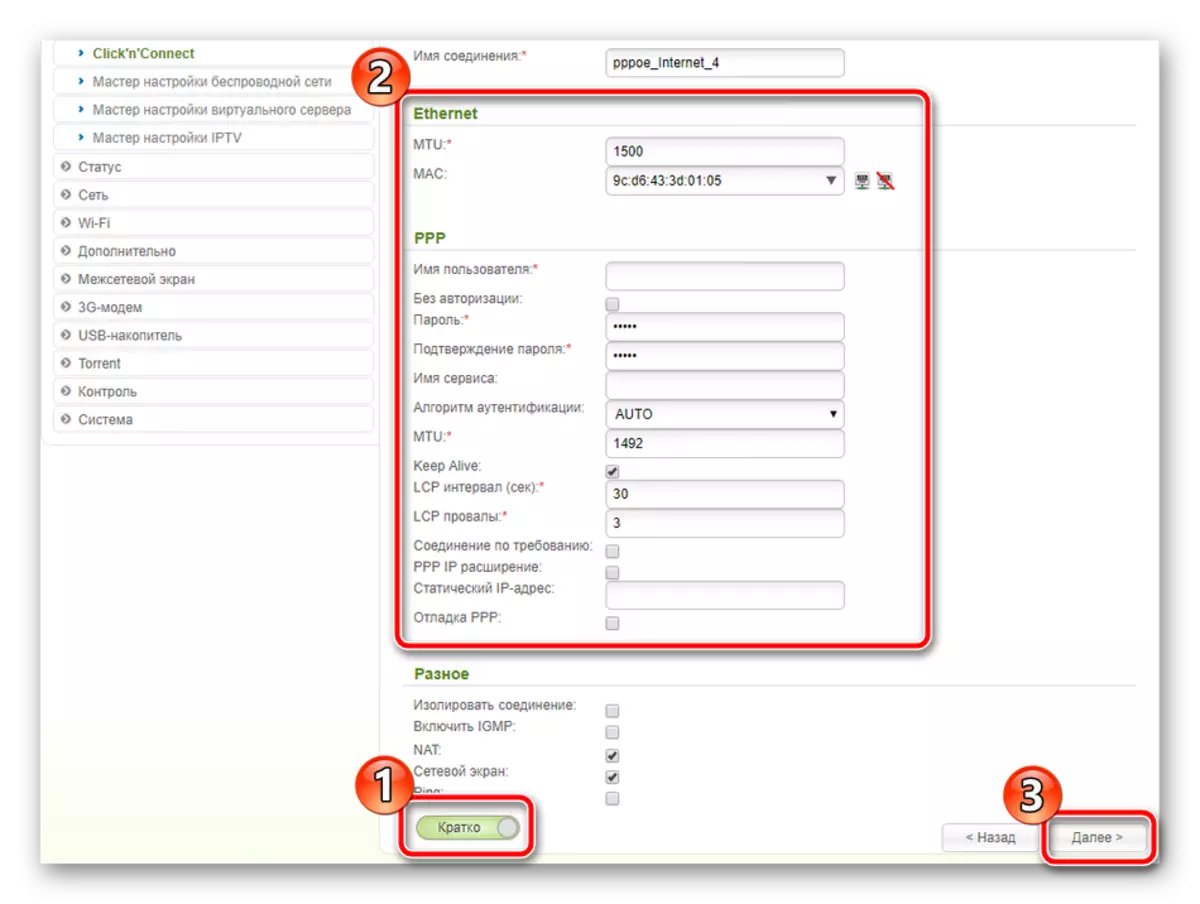
- The connection name, user and password are also available in the documentation. Fill in the fields according to it.
- Press the "Details" button if the provider requires the installation of additional parameters. After completion, click on "Next".
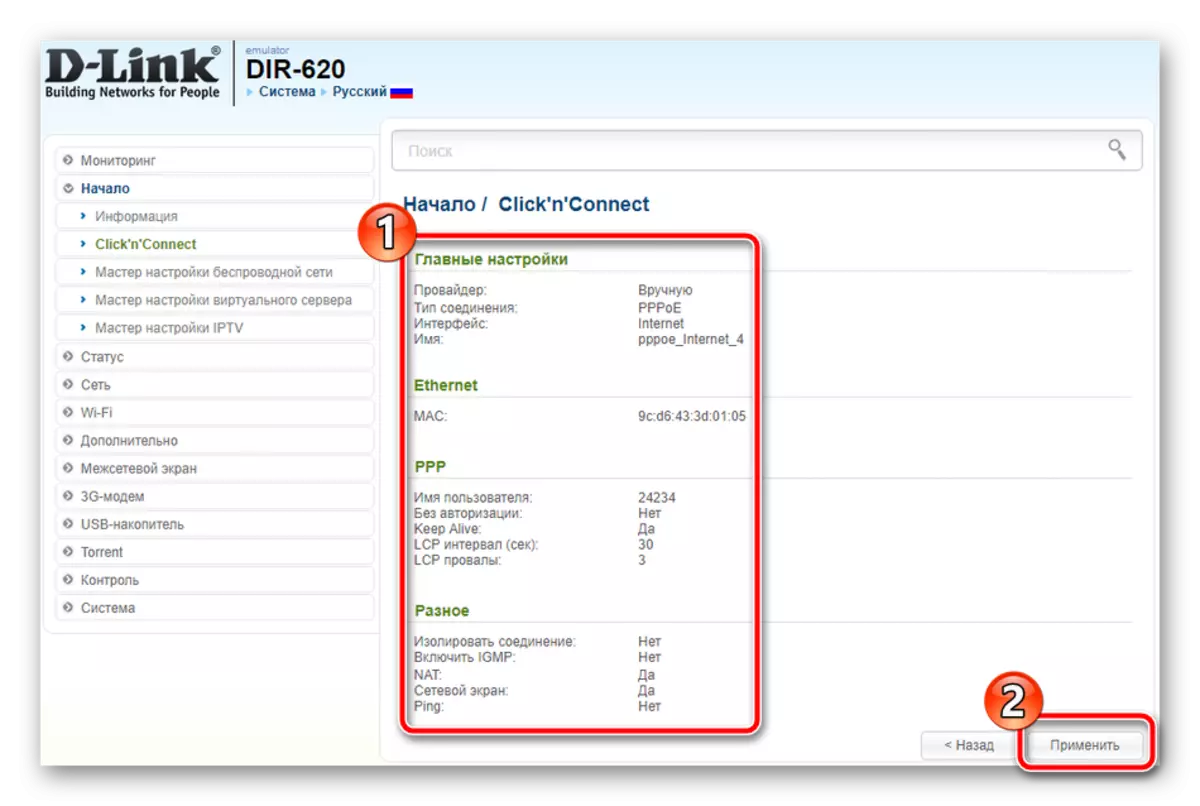
- The configuration you selected are displayed, read it, apply changes or return to correct incorrect items.


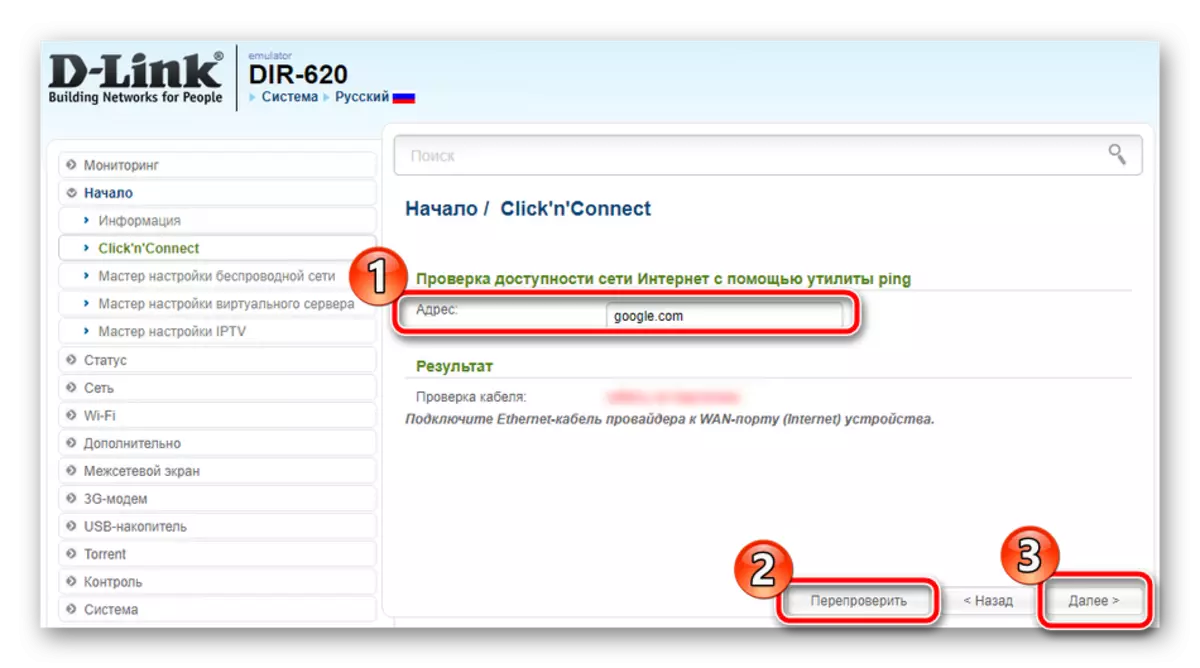
This is the first step over. Now the utility will hold a pressure drop, checking the availability of Internet access. You yourself can change the site being checked, run repeated analysis or immediately go to the next step.
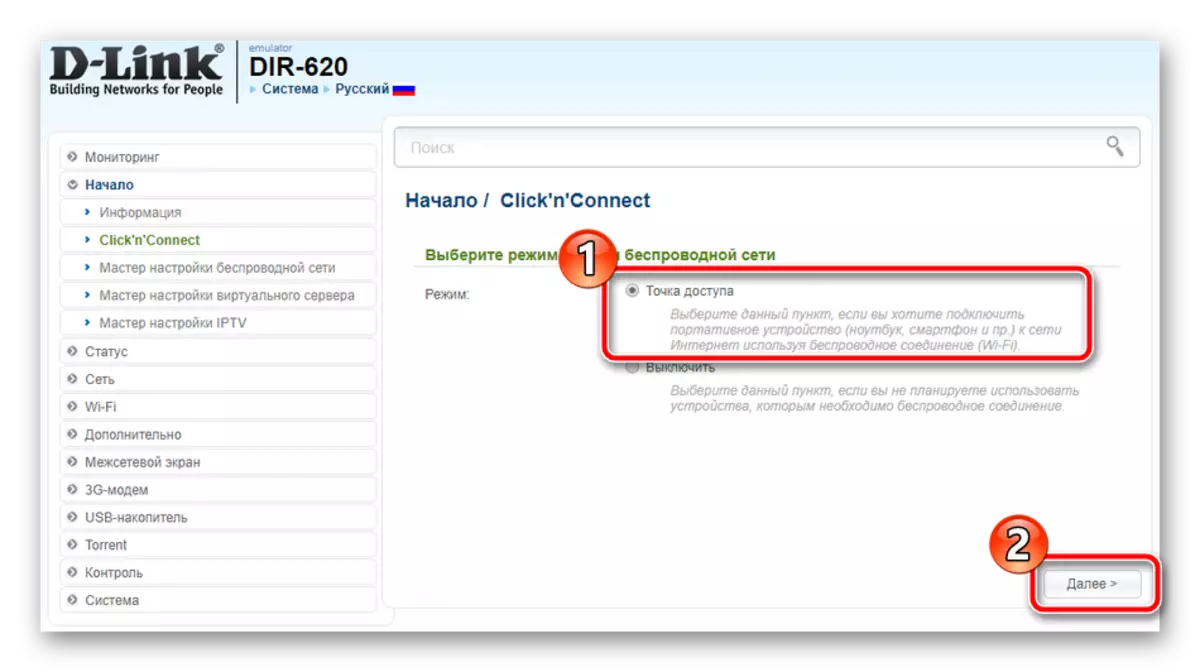
Many users have home mobile devices or laptops. They are connected to the home network via Wi-Fi, so the process of creating an access point through the Click'n'Connect tool should also be disassembled.
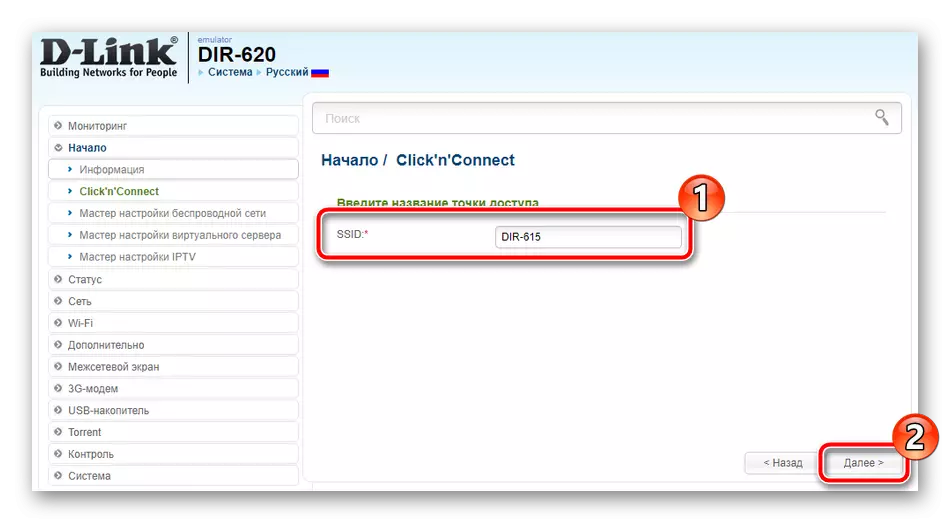
- Put the marker near the "Access Point" and move forward.
- Specify SSID. This name is responsible for your wireless network. It will be seen in the list of available connections. Set the name convenient to you and remember it.
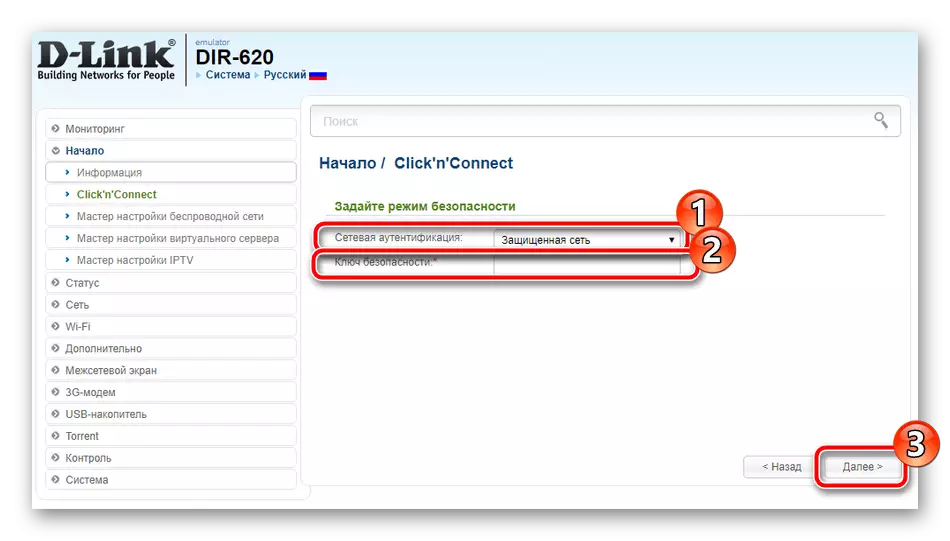
- The best authentication option to specify the "secure network" and enter a reliable password in the security key field. Conducting such editing will help protect the access point from external connections.
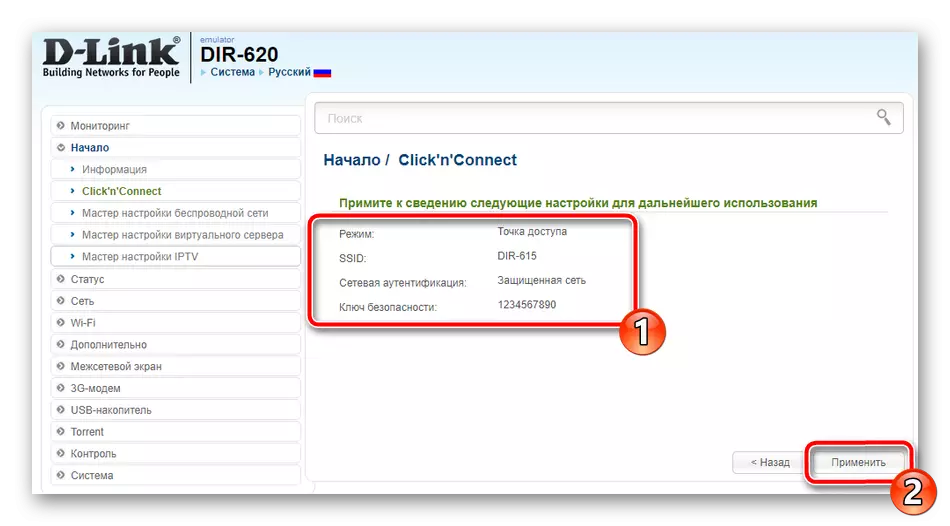
- As in the first step, check out the selected parameters and apply the changes.
Sometimes providers provide IPTV service. A TV prefix connects to the router and provides access to television. If you are supported by such a service, insert the cable into the LAN free connector, specify it in the web interface and click on "Next". If there is no console, just skip the step.

Manual setting
Some users do not fit "Click'n'Connect" due to the fact that it is required to independently set additional parameters that are missing in this tool. In this case, all values are set manually through the partitions of the web interface. Let's consider the process completely, but let's start with WAN:
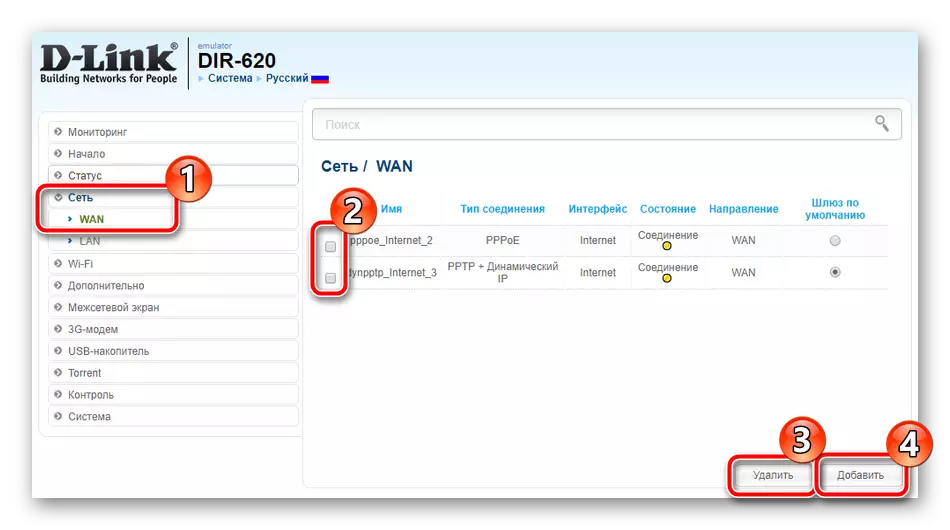
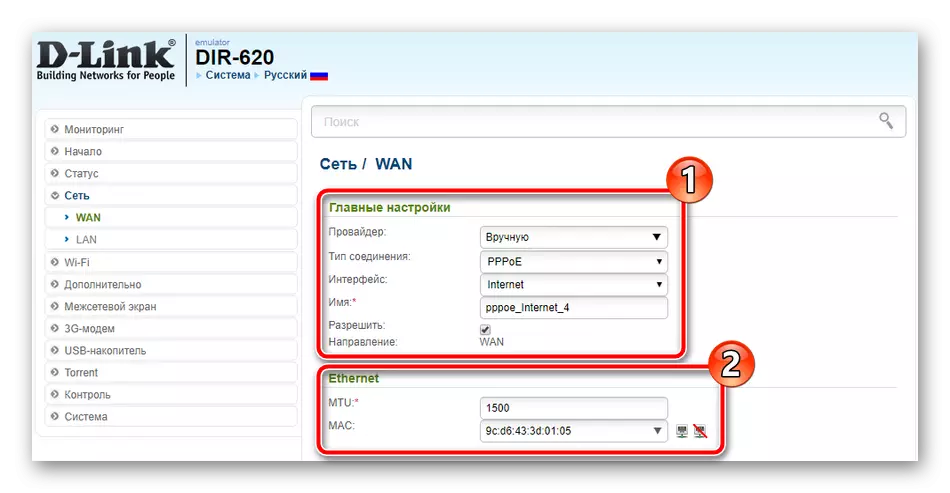
- Move to the "Network" category - "WAN". In the window that opens, allocate all the connections present and delete them, then go to the creation of a new one.
- The first step is to select the connection protocol, interface, name and replacement of the MAC address, if required. Fill all fields in accordance with the instructions in the Provider's documentation.
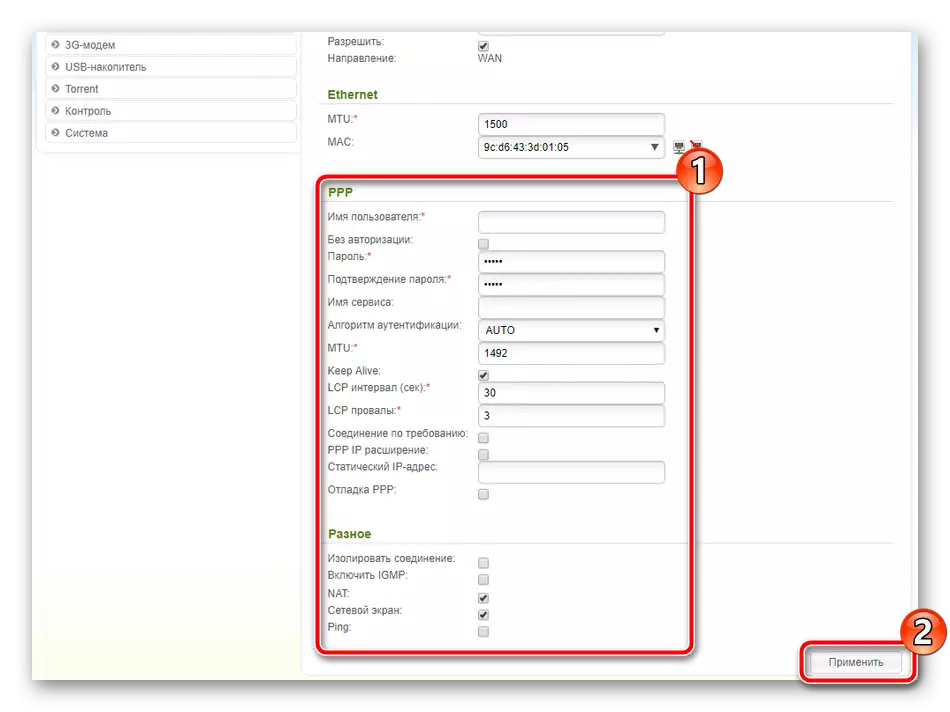
- Next, go down and find "PPP". Enter the data, also using the contract with the Internet provider, and upon completion, click on "Apply".
As you can see, the procedure is performed quite easily, literally in a few minutes. No difficulty and adjustment of the wireless network. You need to make the following actions:
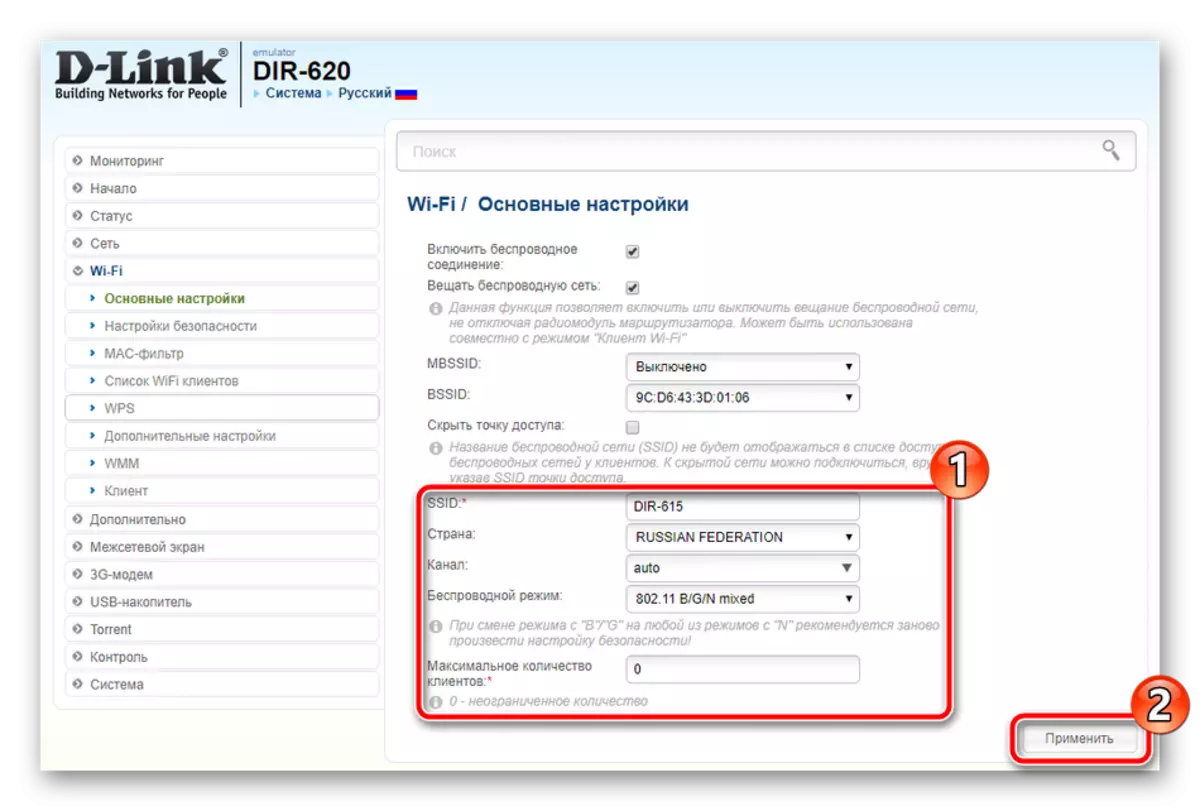
- Open the "Basic Settings" section by deploying "Wi-Fi" on the left pane. Turn on the wireless network and need to activate broadcasting.
- Set the network name in the first line, then specify the country used by the channel and the type of wireless mode.
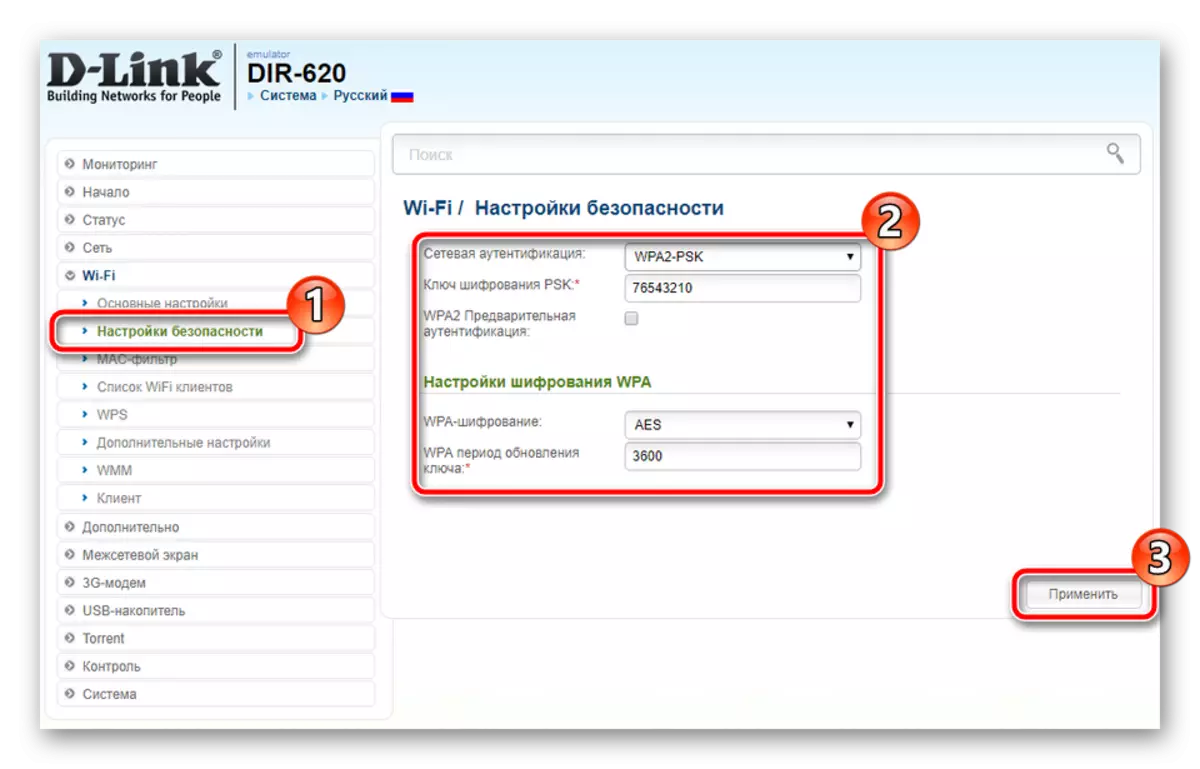
- In the "Security Settings", select one of the encryption protocols and set the password to protect your access point from external connections. Do not forget to apply changes.
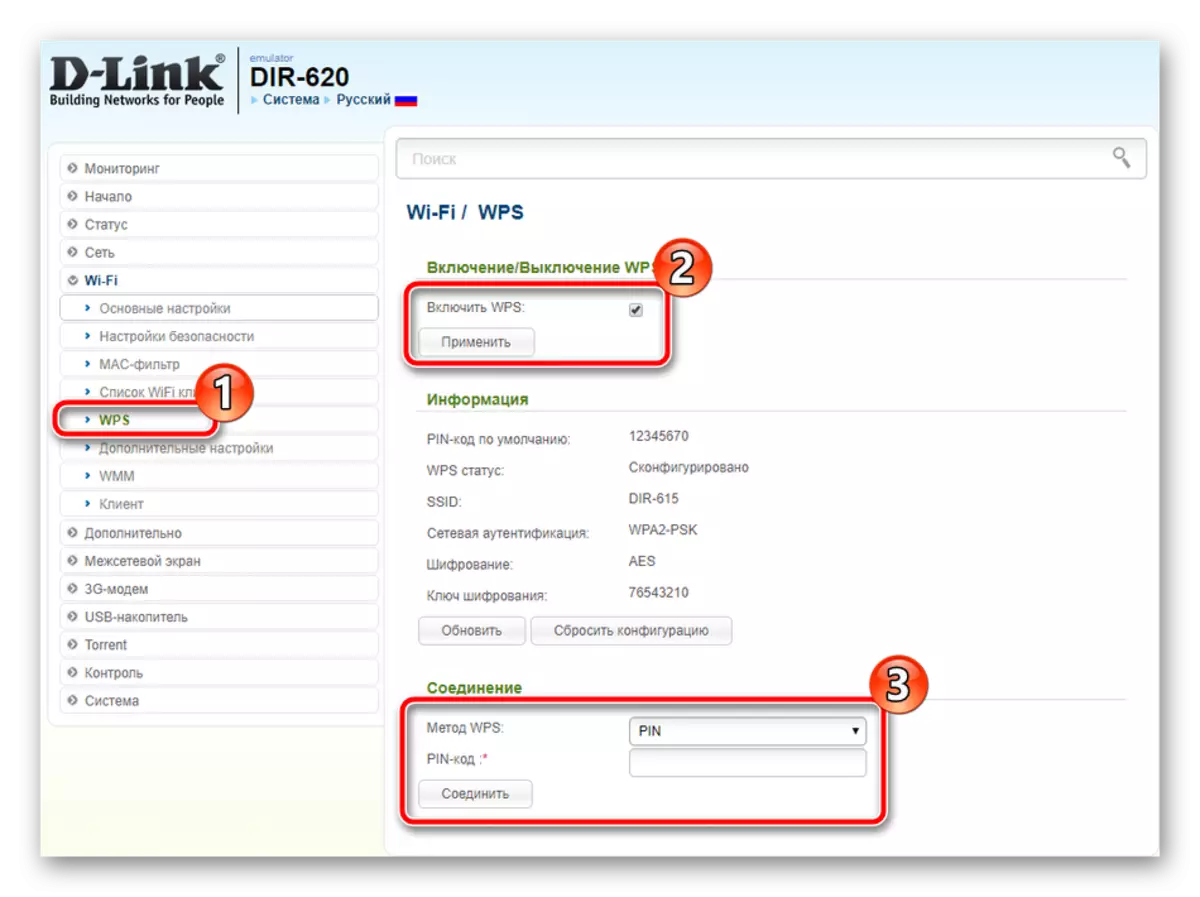
- In addition, the WPS function is provided on the D-Link DIR-620, turn it on and install the connection by entering the PIN code.
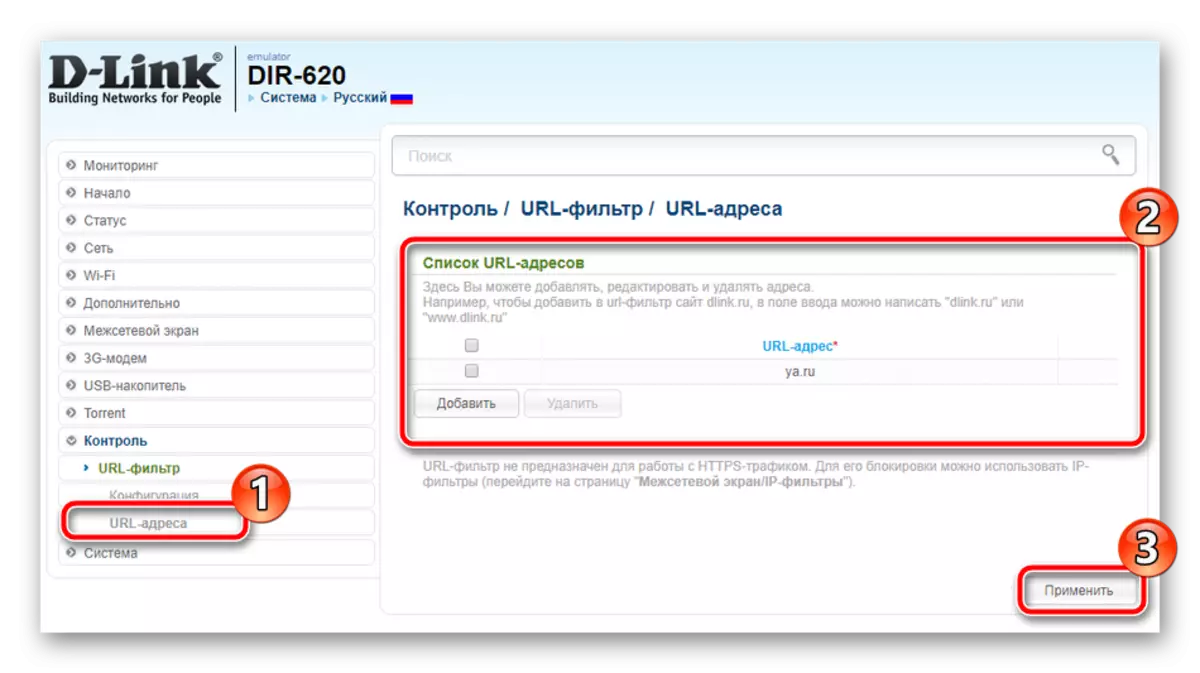
- In the "Control" category, find "URL filter". Here, specify the fact that the program needs to be done with added addresses.
- Go to the URL subsection, where you can add an unlimited number of links to which the previously specified action will be applied. Upon completion, do not forget to click on "Apply".
- In the category "Firewall" there is a "IP filters" feature, which allows you to block certain connections. To go to add addresses, press the appropriate button.
- Specify the main rules by entering the protocol and the appropriate action, specify IP addresses and ports. The last step is the click on "Apply".
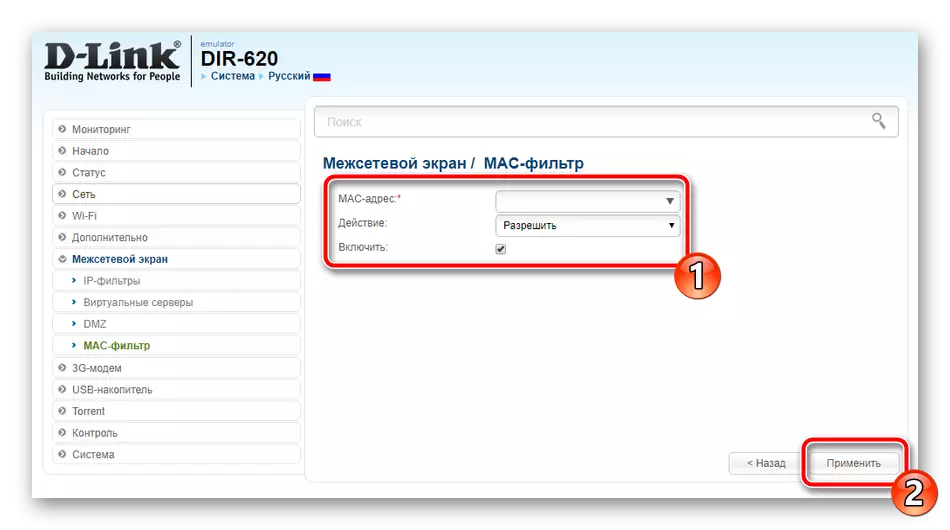
- Such a procedure is done with Mac addresses.
- Type the address in the line and select the desired action for it.
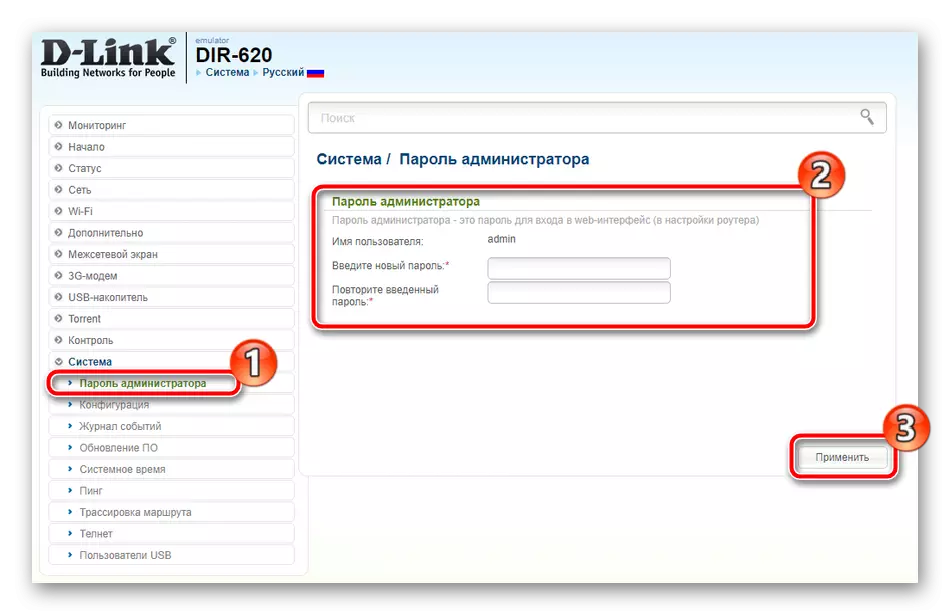
- From the menu on the left, select "System" - "Administrator Password". Change the access key to a more reliable, protecting the login to the web interface from strangers. If you have forgotten the password, to restore its default value will help reset the router settings. Detailed instructions on this topic can be found in the other article by reference below.
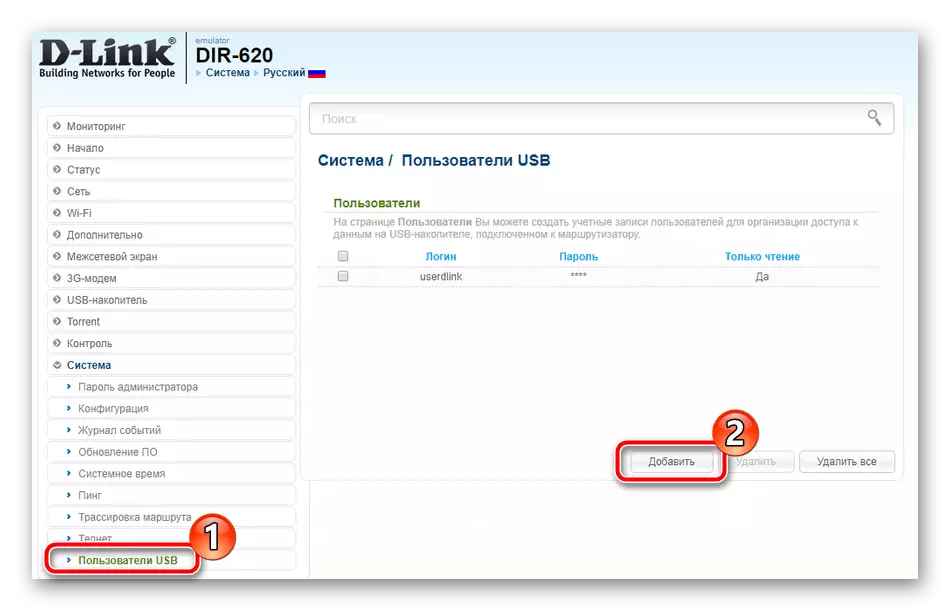
- The model under consideration supports connecting one USB drive. You can limit access to files on this device by creating special accounts. To begin with, go to the "USB Users" section and click Add.
- Add a login, password and easily check the box near "read only."

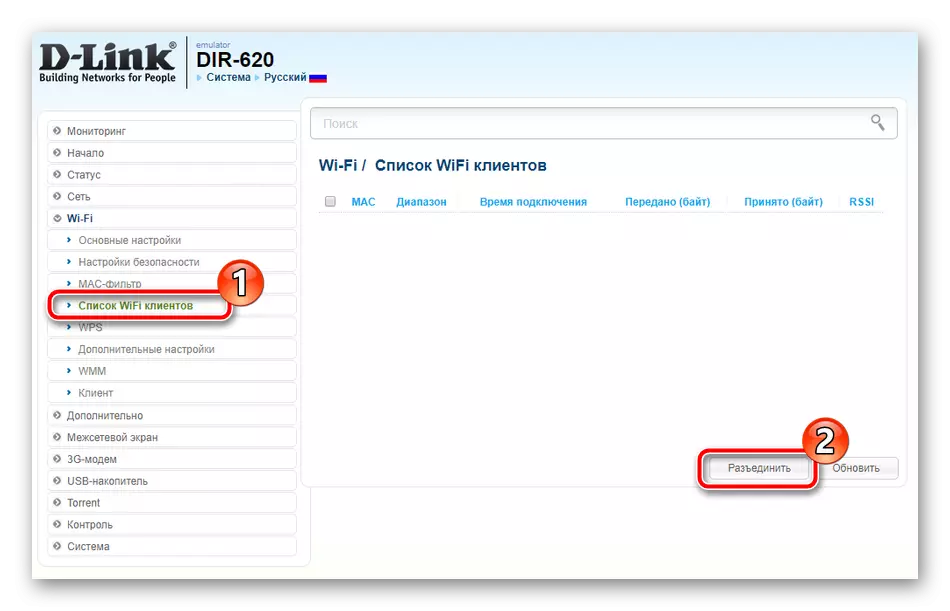
After a successful configuration, users will be available to your connection point. In the "List of Wi-Fi Clients", all devices are displayed, and the disconnect function is present.
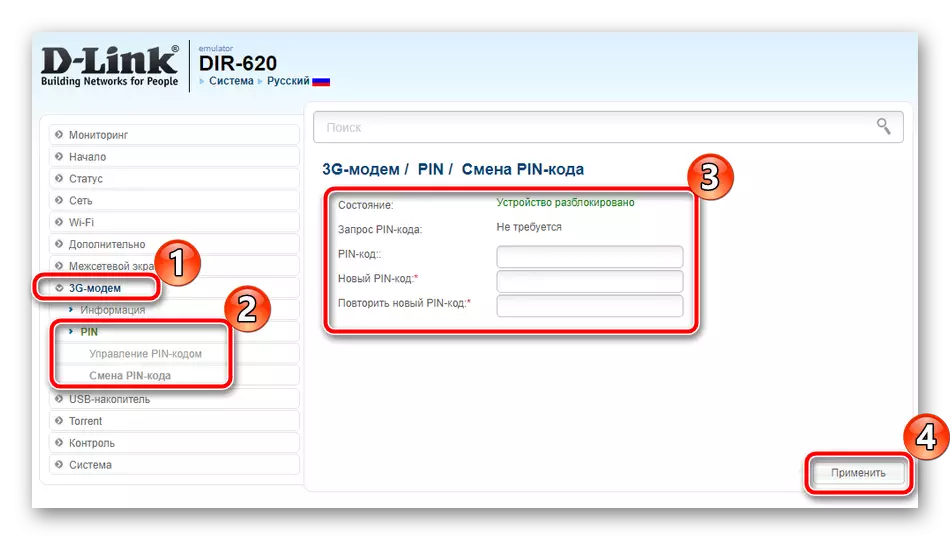
In the "Click'n'Connect" section, we have already mentioned that the router in question supports 3G. Authentication is configured through a separate menu. You will only need to enter any convenient PIN code in the appropriate lines and preserve.
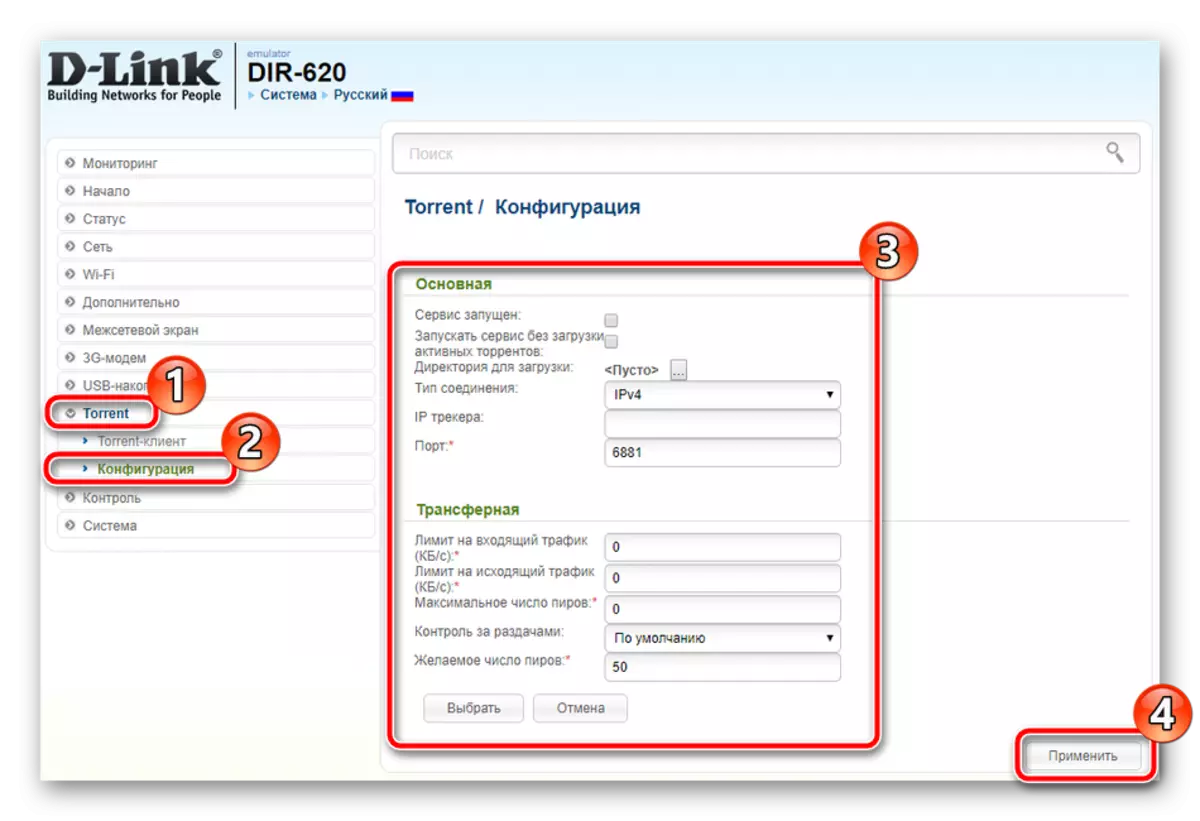
The router is built into the Torrent client, which allows you to download to the drive connected via USB connector. Sometimes users need to adjust this function. It is carried out in a separate section "Torrent" - "Configuration". Here the folder is selected for download, the service is activated, ports and type of connection are added. In addition, you can set limits to the outgoing and incoming traffic.
On this process of the main setting is completed, the Internet must function correctly. It remains to complete the completion of the optional actions, which will be discussed below.
Security Setup
In addition to the normal network, it is important to ensure its safety. This will help the rules embedded in the web interface. Each of them is exhibited individually, based on the user's needs. You have a change in the following parameters:


Completion setting
Editing the following parameters completes the D-Link DIR-620 router configuration process. We will analyze in order each:
Read more: Password reset on router

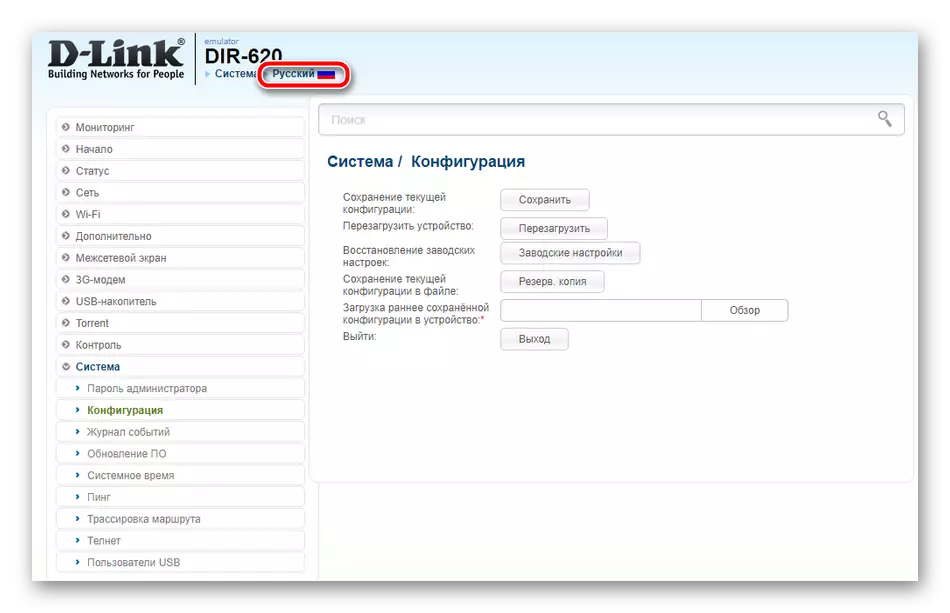
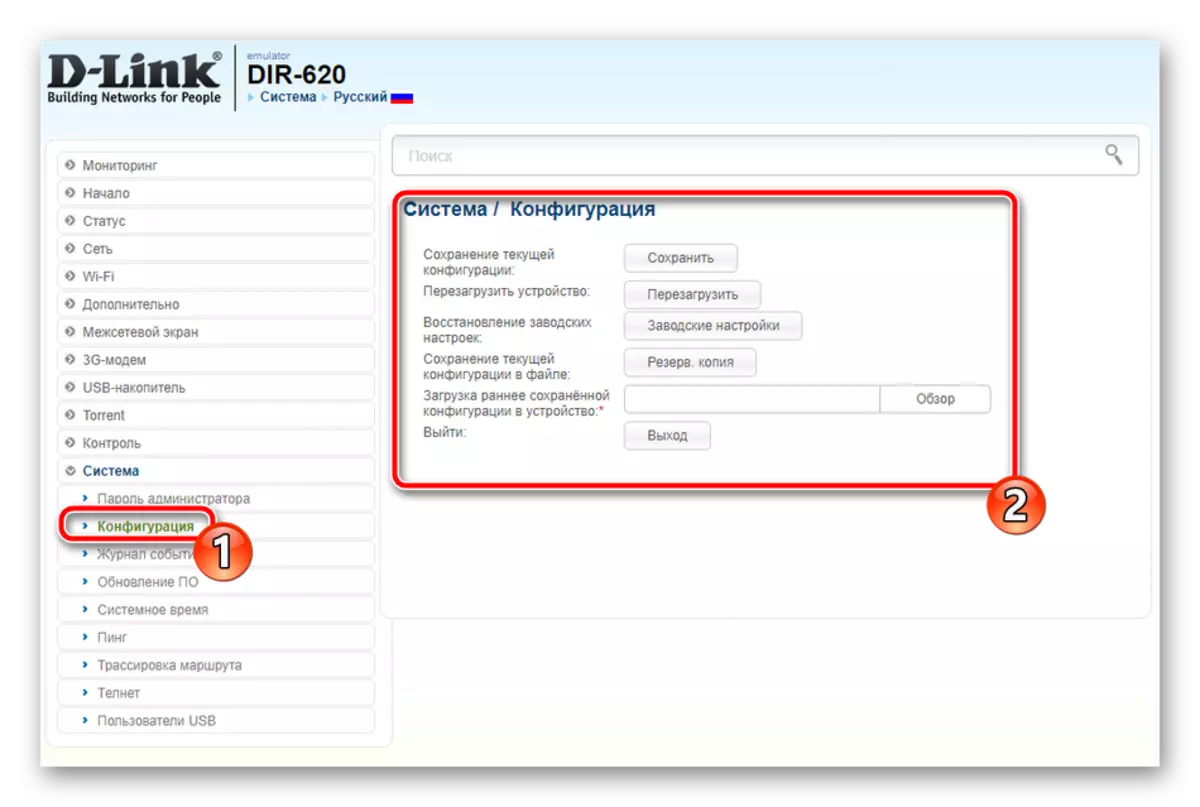
After the preparation procedure, it is recommended to save the current configuration and restart the router. In addition, it is available to create a backup and restoring factory settings. All this is done through the "Configuration" section.
The procedure for the complete adjustment of the router after the acquisition or reset may take quite a long time, especially in inexperienced users. However, there is nothing difficult in it, and the above instructions should help you independently deal with this task.