
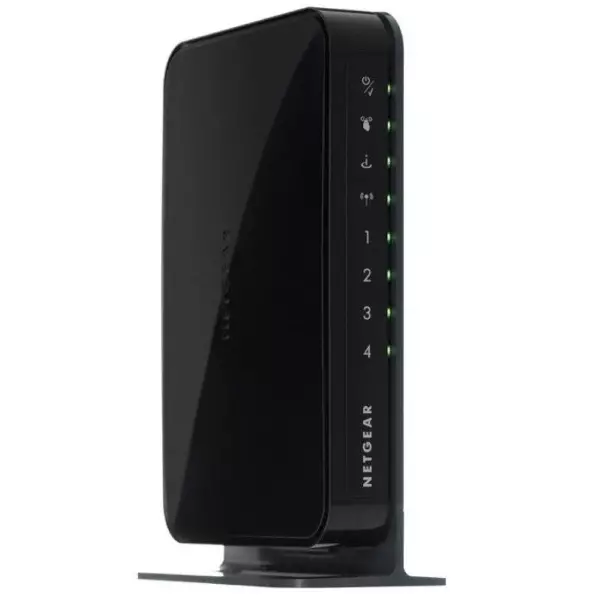
Netgear routers are still rarely found in post-Soviet expanses, but managed to prove themselves as reliable devices. Most routers of this manufacturer who are in our market belong to budgetary and medium-budget classes. One of the most popular are the N300 series routers - about setting up these devices and will be discussed.
Preset routers N300.
To begin with, it is worth clarifying an important point - the N300 index is not a model number or designation of the model range. This index indicates the maximum speed of the 802.11n Wi-Fi adapter router. Accordingly, gadgets with such an index there are more than a dozen. The interfaces of these devices almost do not differ from each other, so the example below can be successfully used to configure all possible variations of the model.
Before starting the configuration, the router must be prepared accordingly. This stage includes such actions:
- Select the location of the router. Such devices should be installed away from sources of possible interference and metal barriers, and it is also important to choose a place approximately in the middle of the possible coating zone.
- Connecting a power supply device with the subsequent connection of the Internet service provider cable and connecting to a computer to configure. All ports are located on the back of the housing, get confused in them, as they are signed and marked with different colors.
- After connecting the router, go to a PC or laptop. You need to open the LAN properties and set the automatic receipt of TCP / IPv4 parameters.

Read more: Setting up a local network on Windows 7

After these manipulations, we turn to the configuration of NetGear N300.
Configuring routers of the N300 family
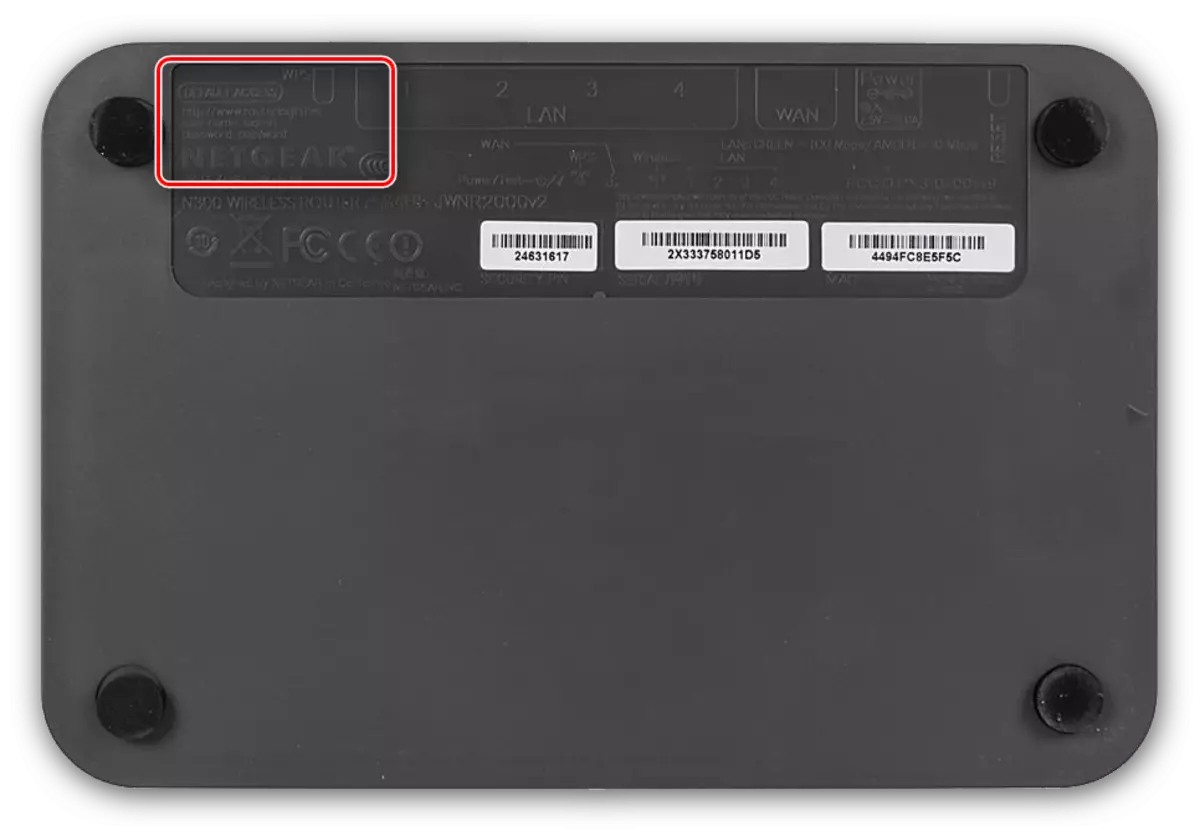
To open the settings interface, start any modern Internet browser, enter the address 192.168.1.1 and go to it. If the address entered is not suitable, try routerlogin.com or routerlogin.net. The input combination will be a combination of Admin as a login and password as a password. The exact information for your model can be found on the back of the housing.
You will appear the main page of the web interface of the router - you can start configuring.
Configure Internet
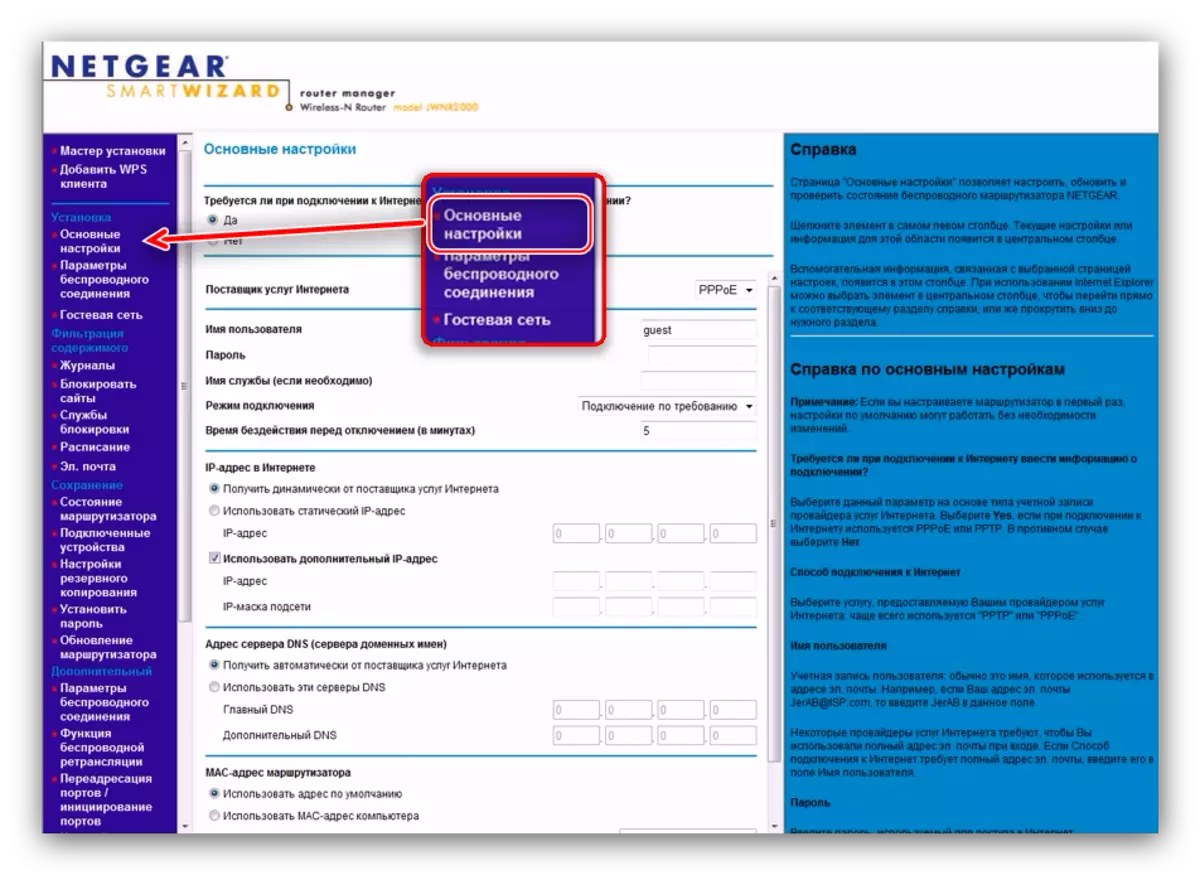
The routers of this model range support the entire basic range of connections - from PPPoE to PPTP. We will show you the settings of each option. Settings are located in the "Settings" items - "Basic Settings".
On the latest versions of firmware known as NetGear Genie, these parameters are located in the "Extras" section. Settings ", tabs" Settings "-" Configuring the Internet ".
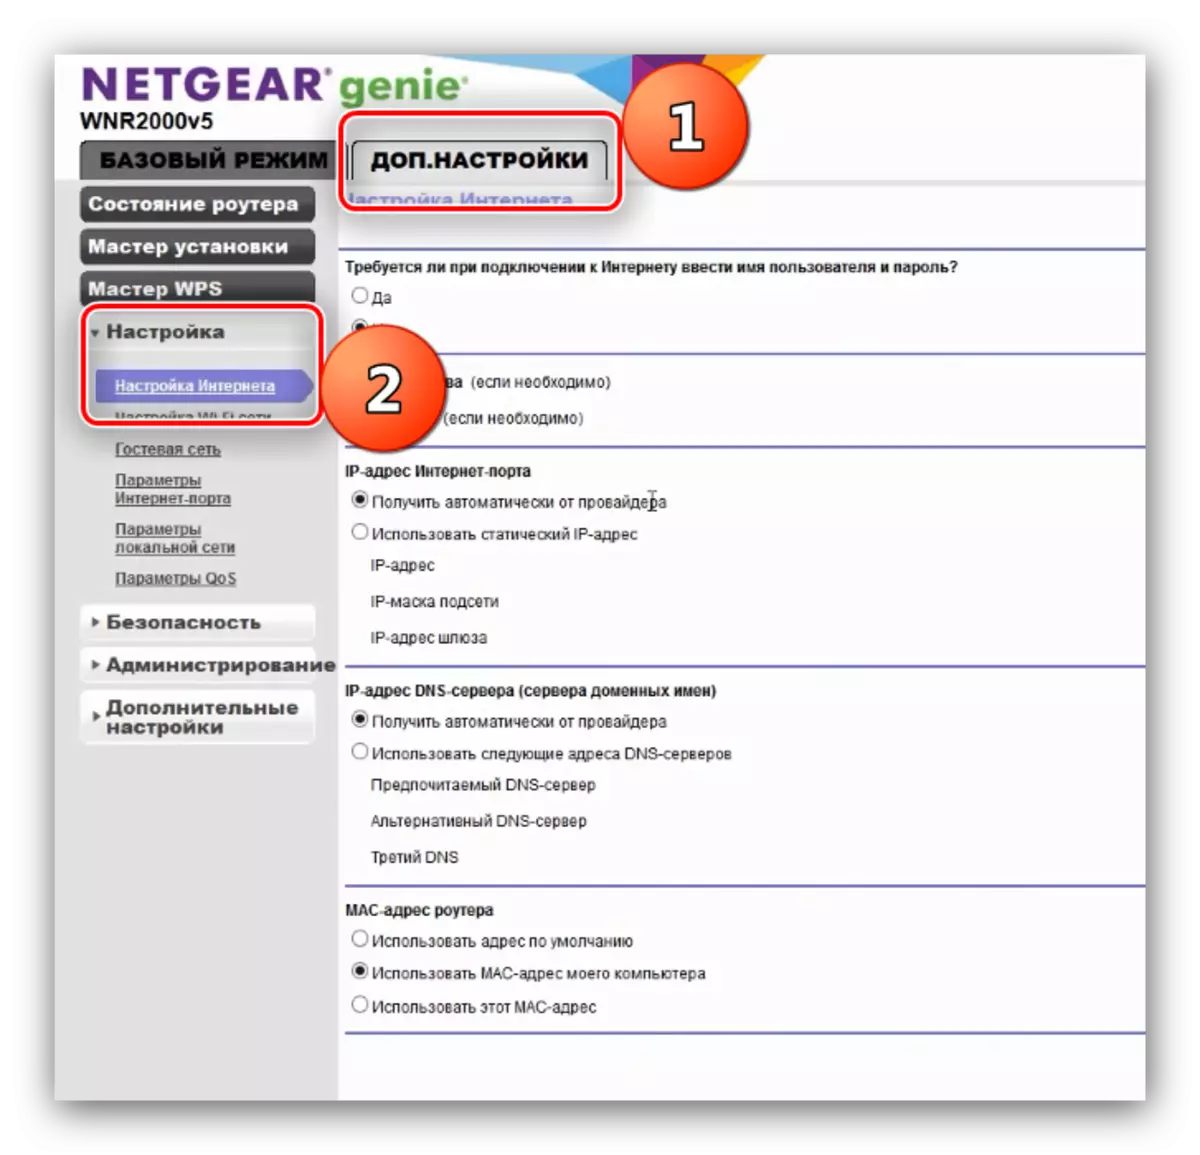
The location and name of the desired options is identical on both firmware.
PPPoe
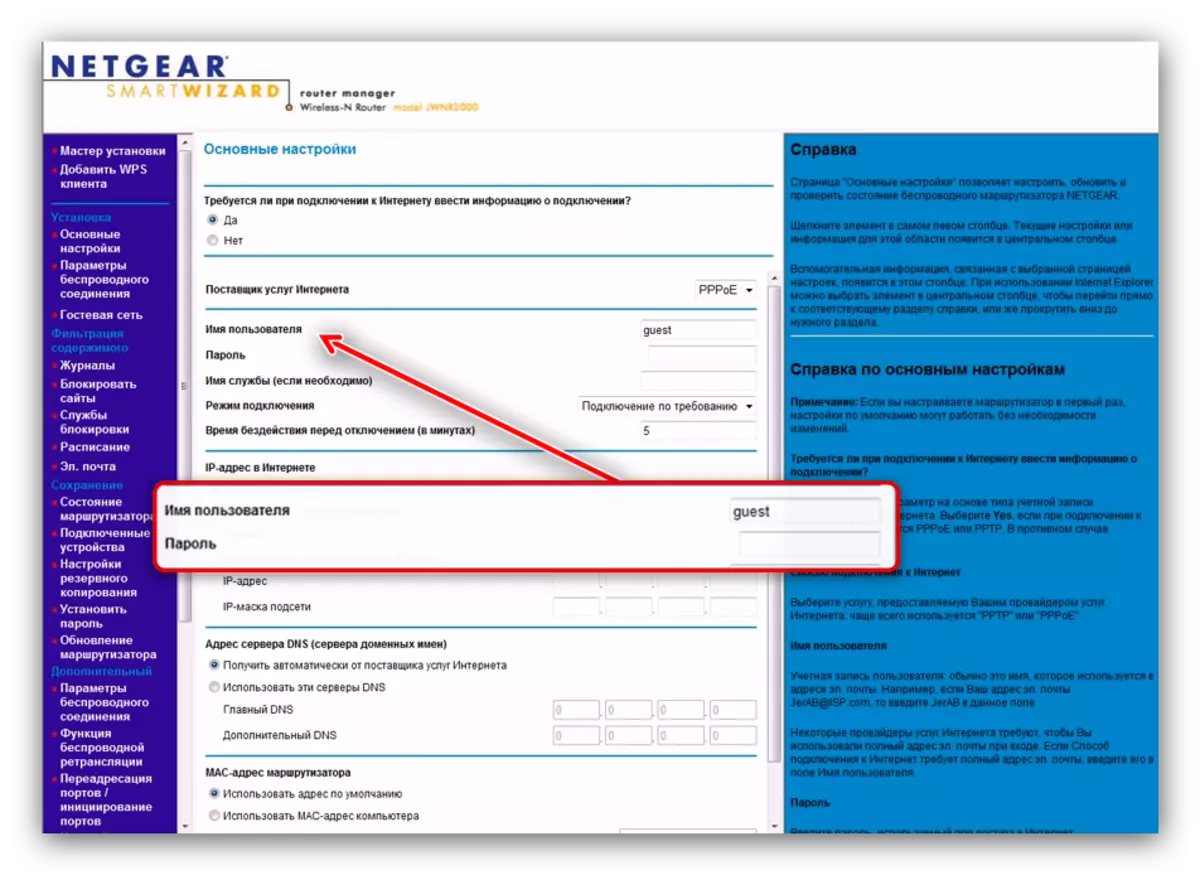
The PPPoE connection to Netgear N300 is configured as:
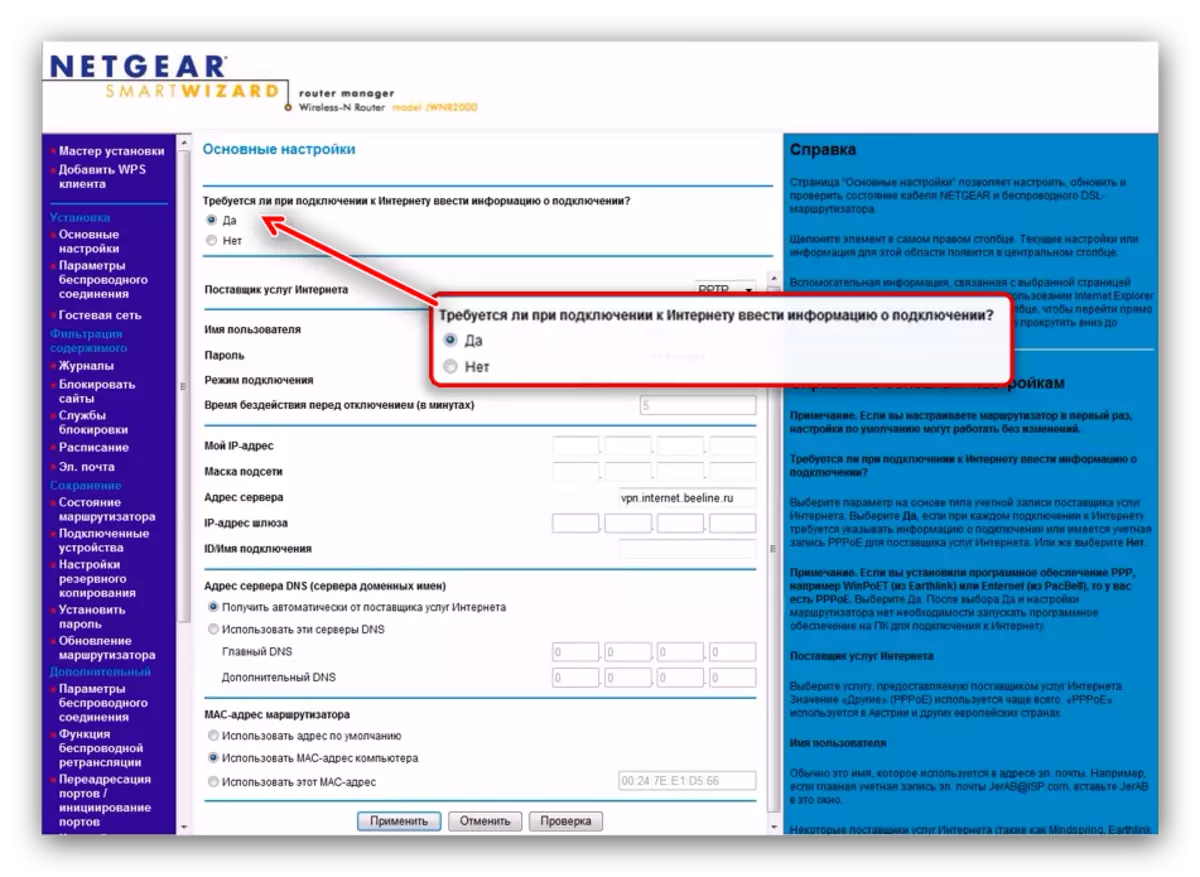
- Mark "Yes" in the upper block, since the PPPoE connection requires data entry for authorization.
- Connection type Set as "PPPOE".
- Enter the authorization name and code word - this data is obliged to provide the operator in the "Username" and "Password" graphs.
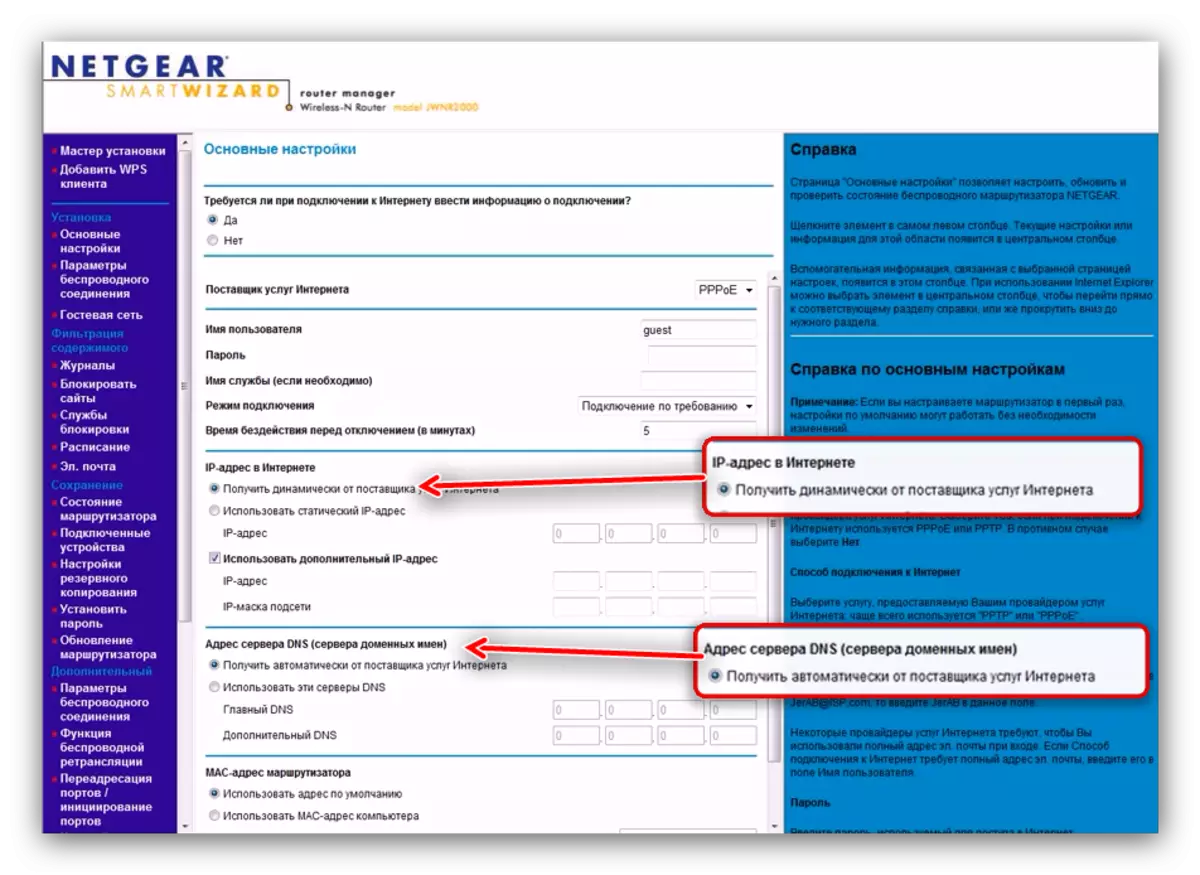
- Select a dynamic receipt of the addresses of the computer and the domain name server.
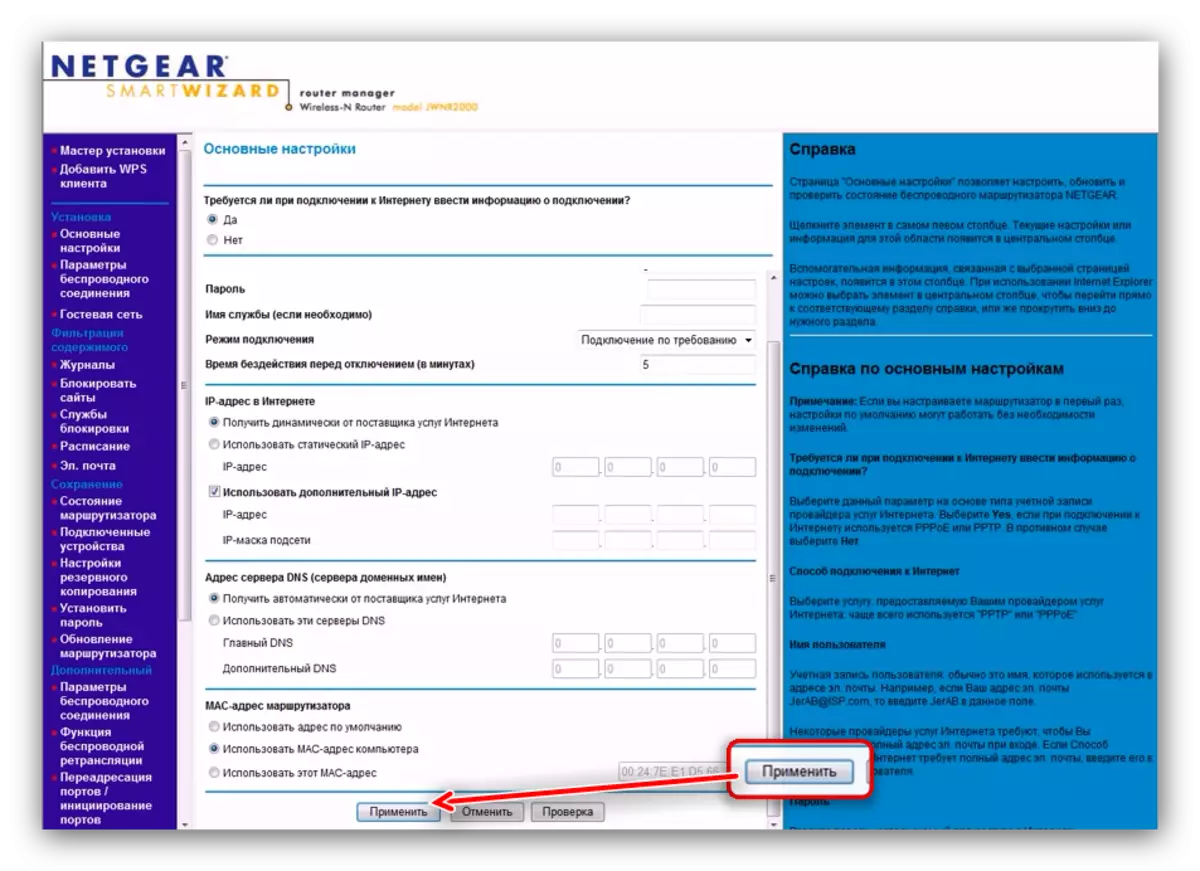
- Click "Apply" and wait until the router saves the settings.


Connection via PPPoE is configured.
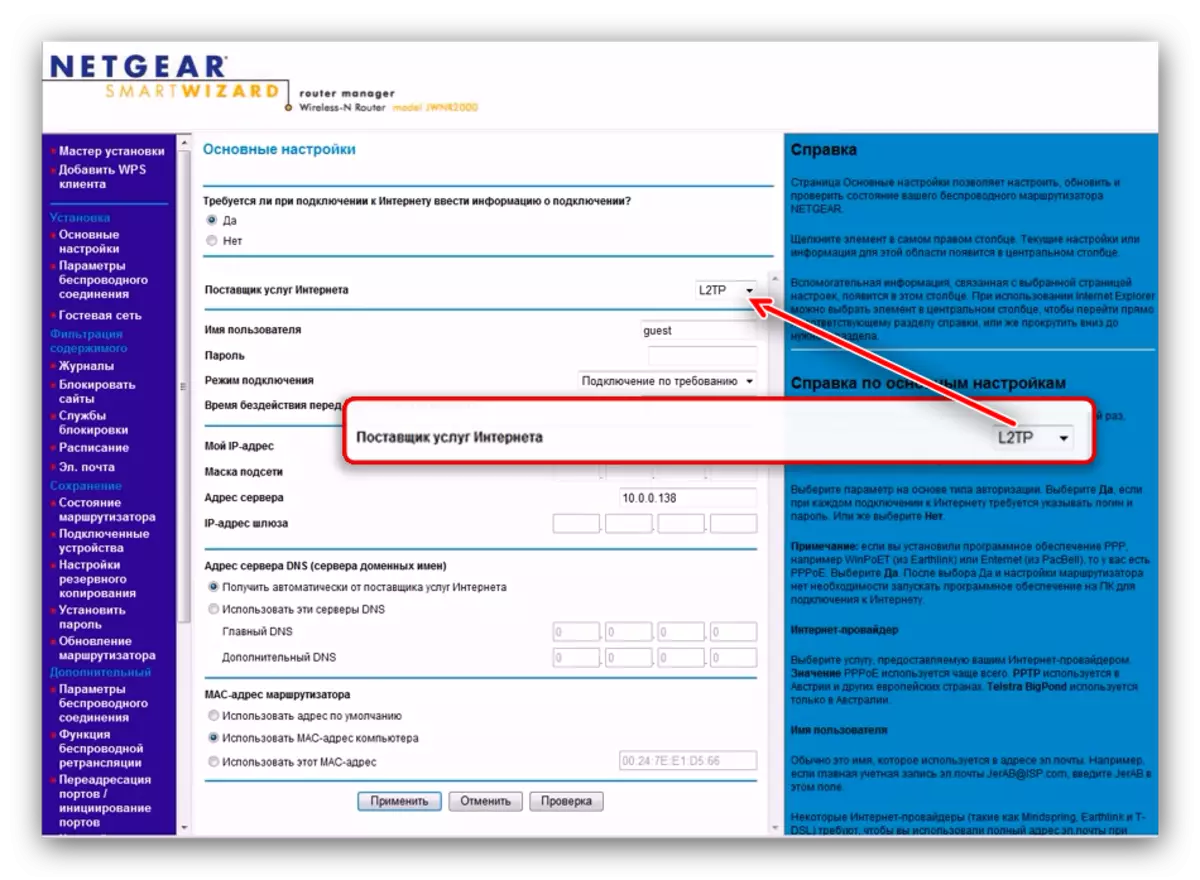
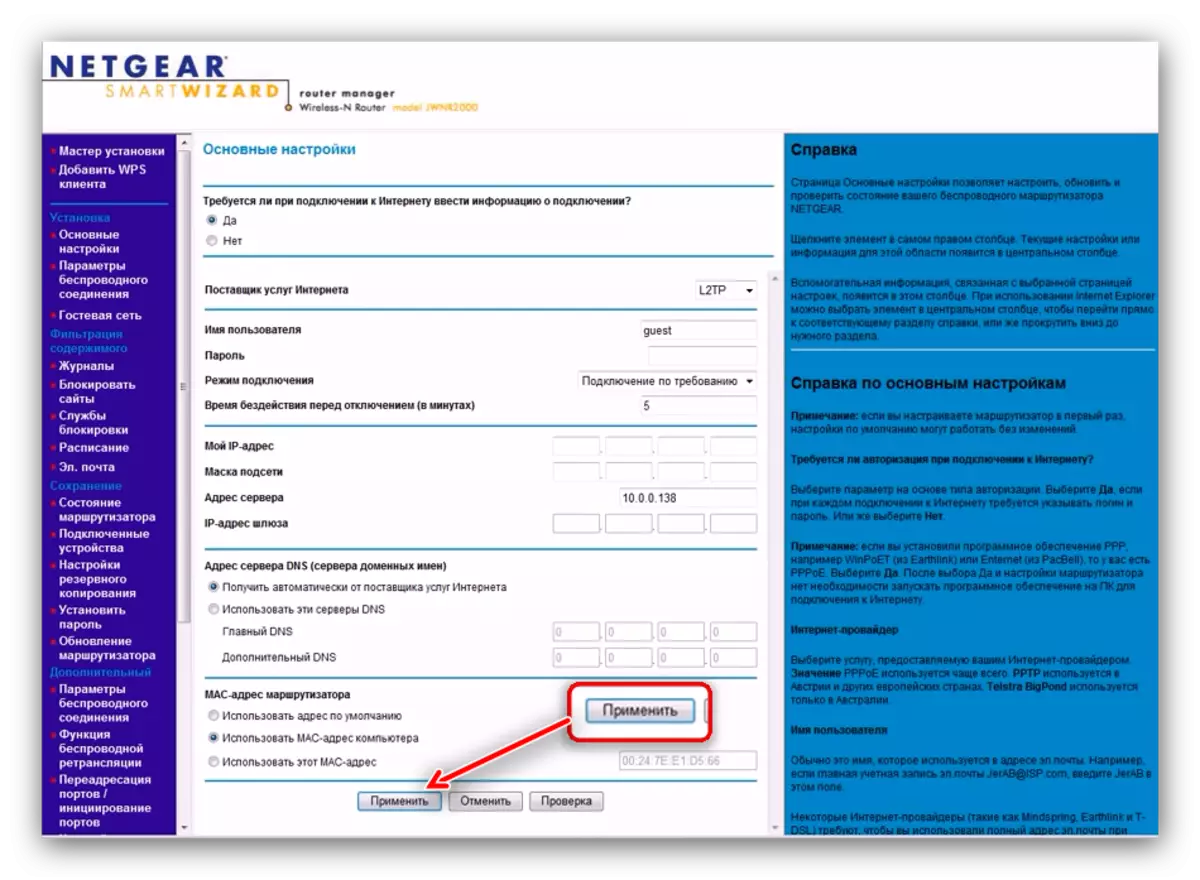
L2TP
The connection to the specified protocol is a VPN connection, so the procedure is somewhat different from PPPoE.
Note! In some old variants, NETGEAR N300, the L2TP connection is not supported, you may need to update the firmware!
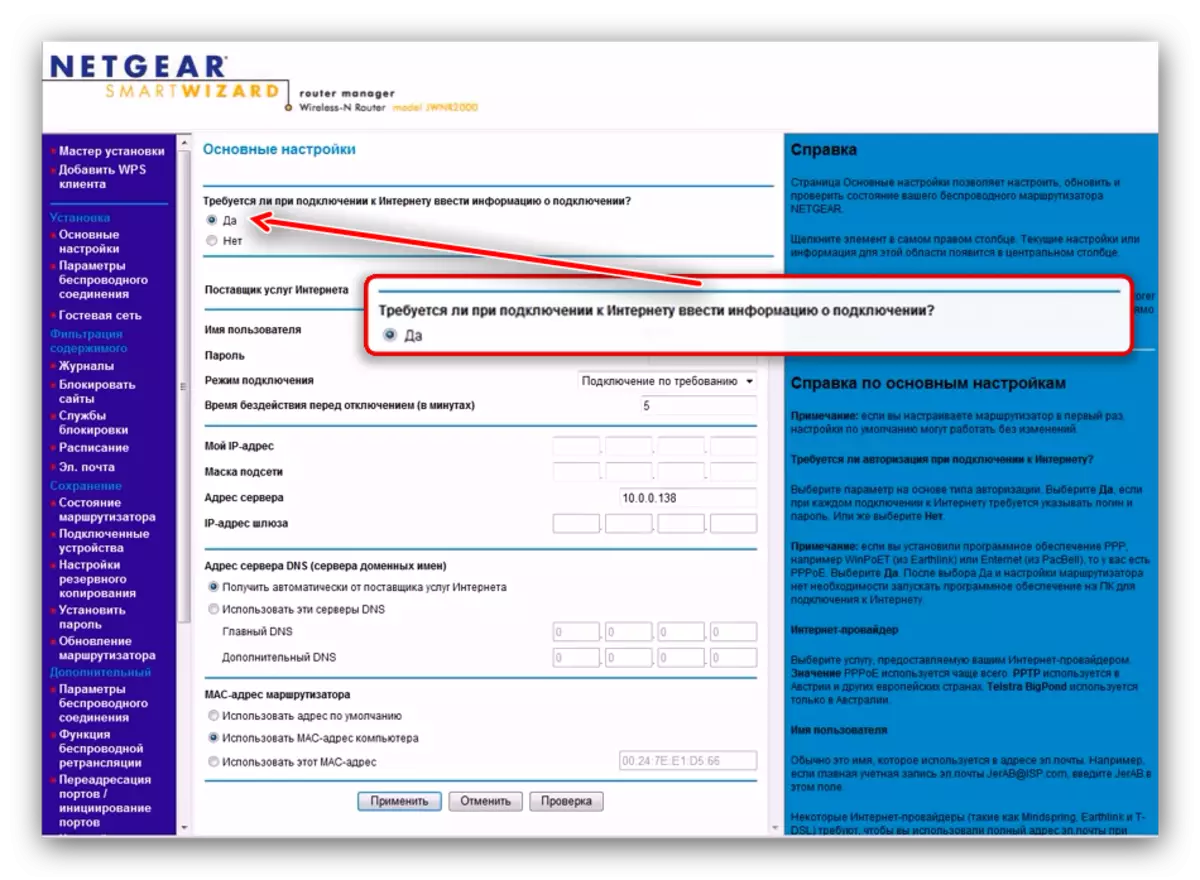
- Check the "Yes" position in the options input options for connecting.
- Activate the "L2TP" option in the connection type block.
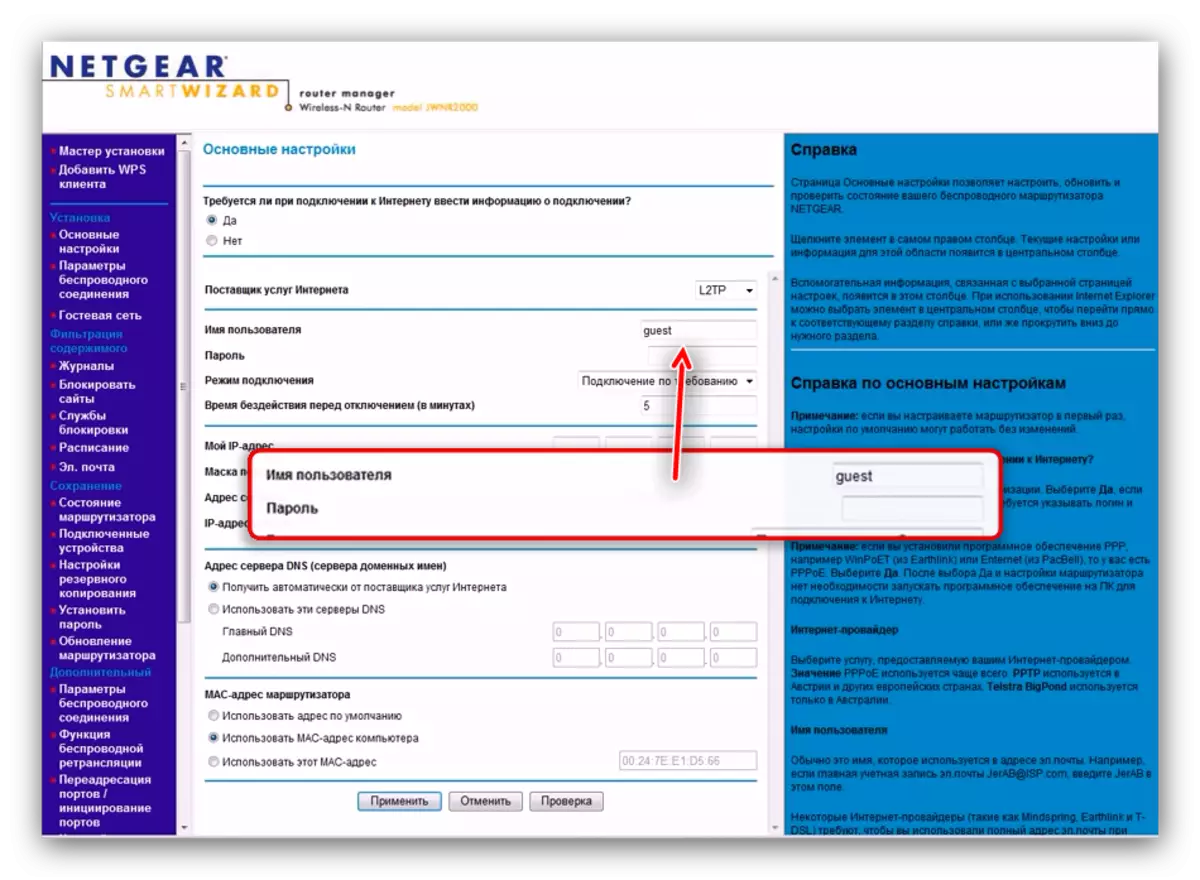
- Enter the authorization data received from the operator.
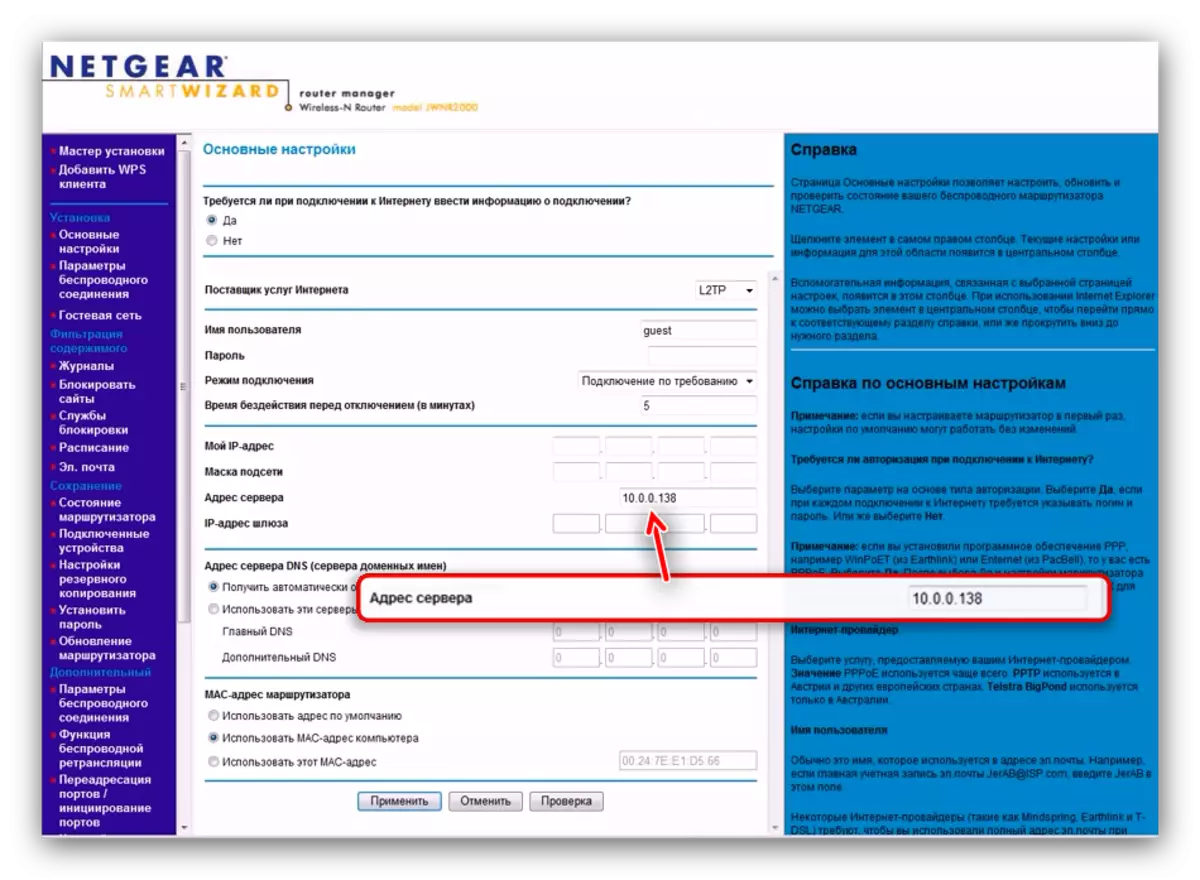
- Next, in the "Server Address" field, specify the VPN server of the Internet operator - the value can be in digital format or as a web address.
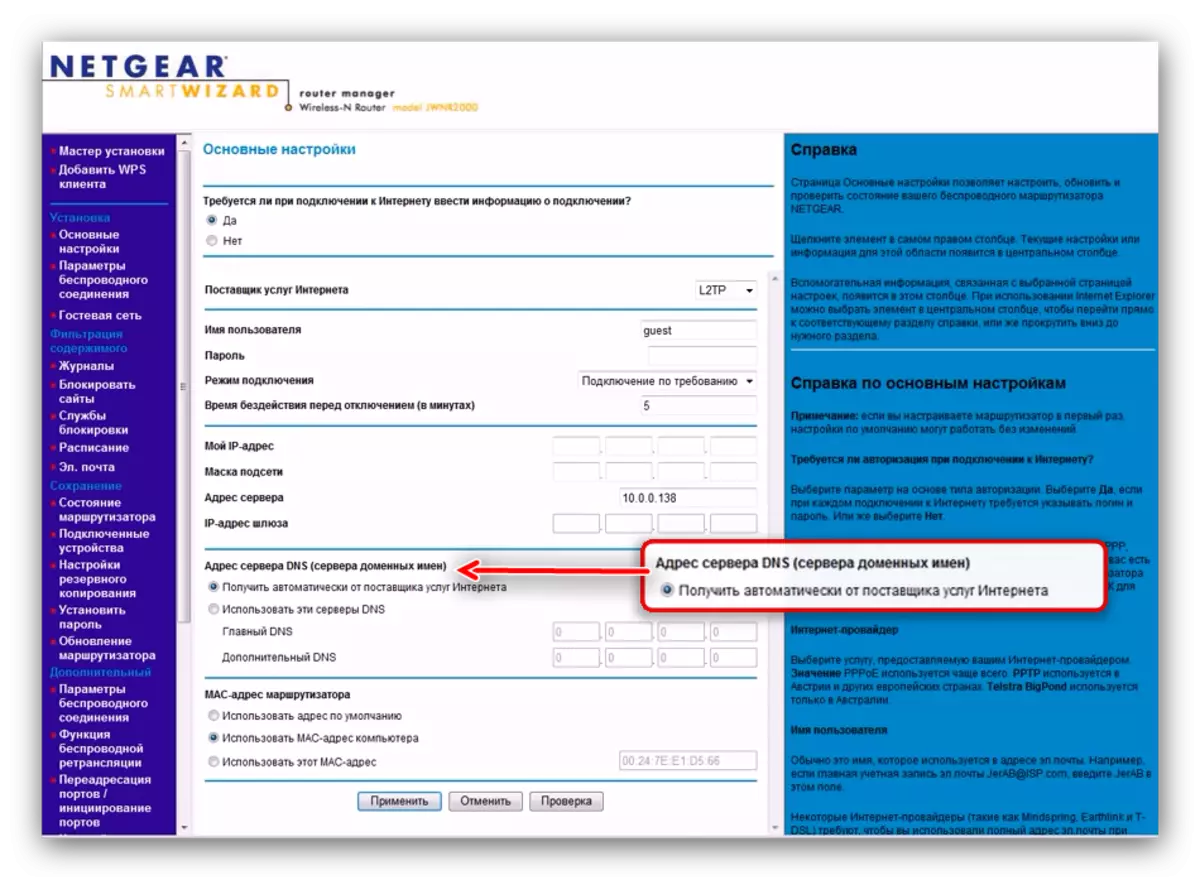
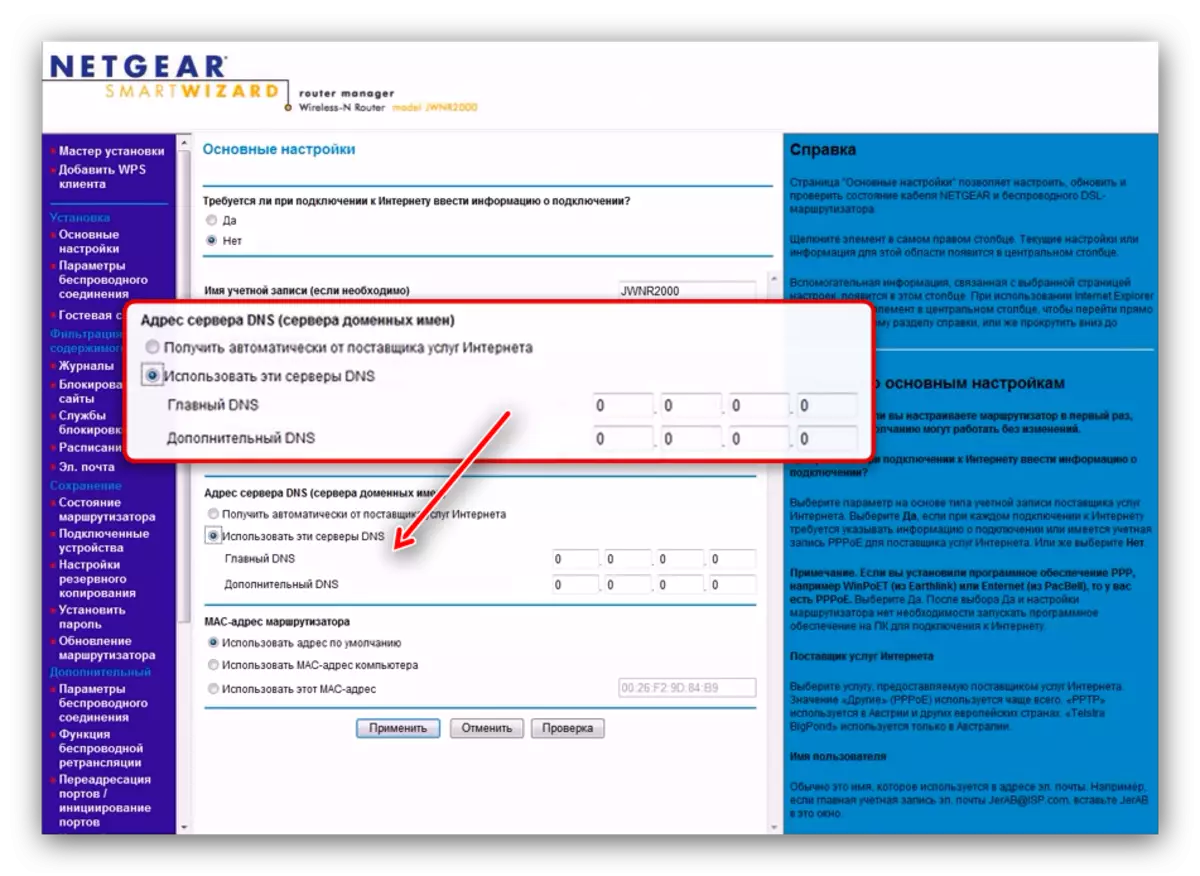
- Getting DNS Set how to "get automatically from the provider".
- Use "Apply" to end the setting.
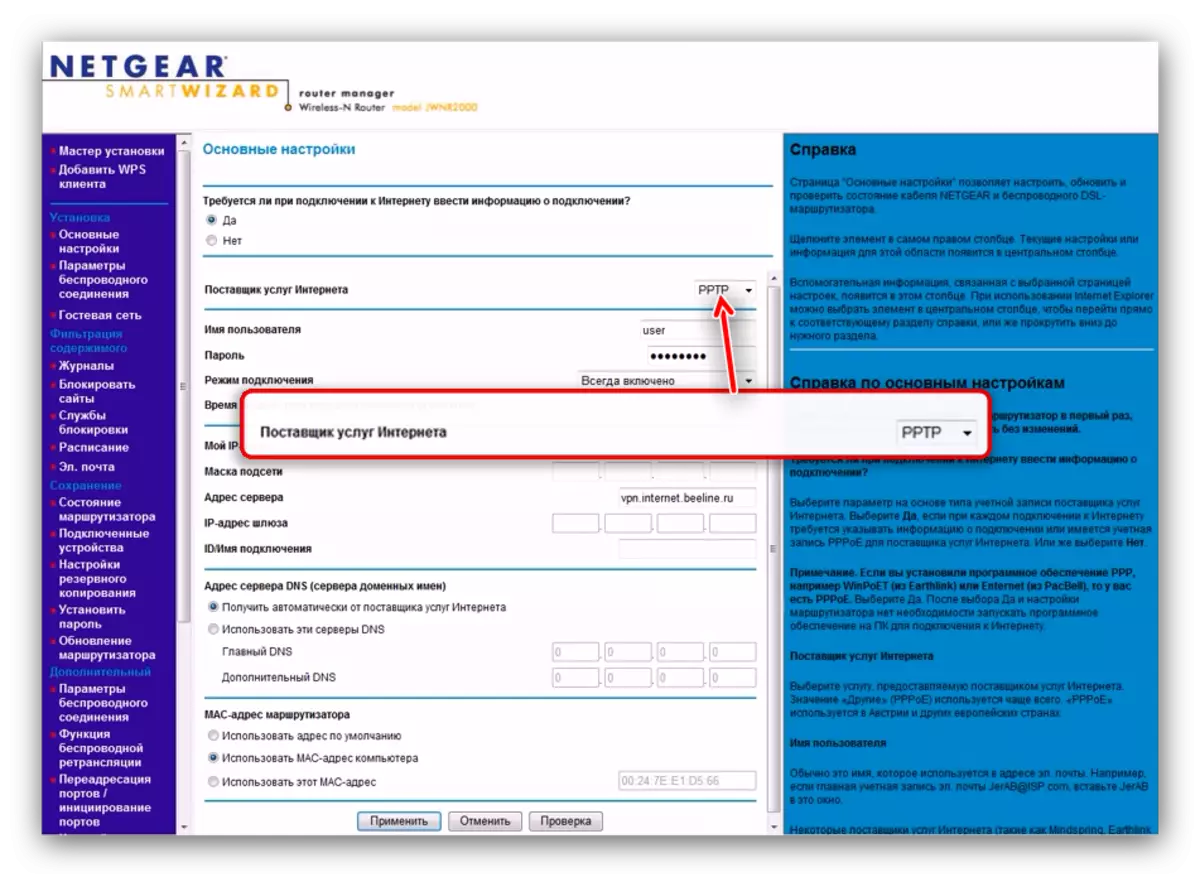
PPTP.
PPTP, the second version of the VPN connection is configured as follows:
- As with other types of connection, mark the option "Yes" in the upper block.
- Internet provider in our case PPTP - Mark this option in the appropriate menu.
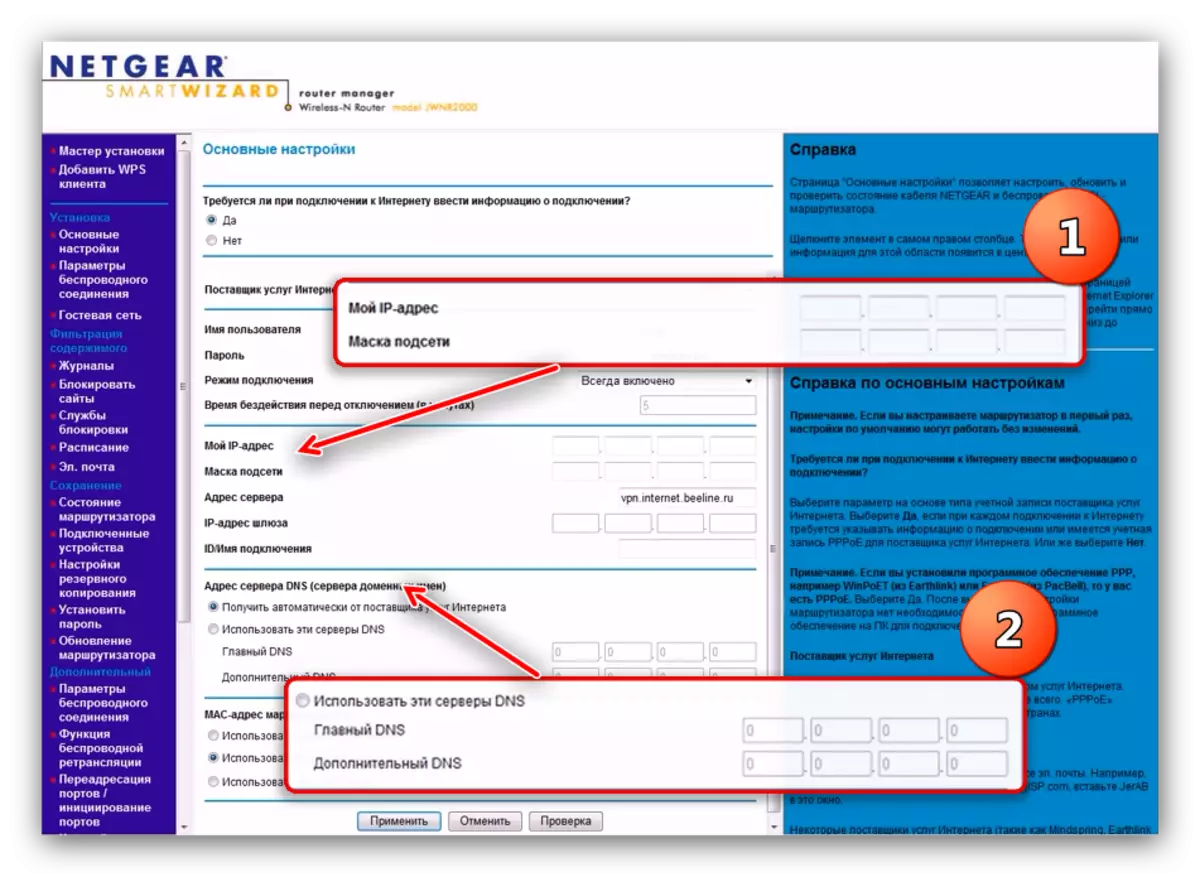
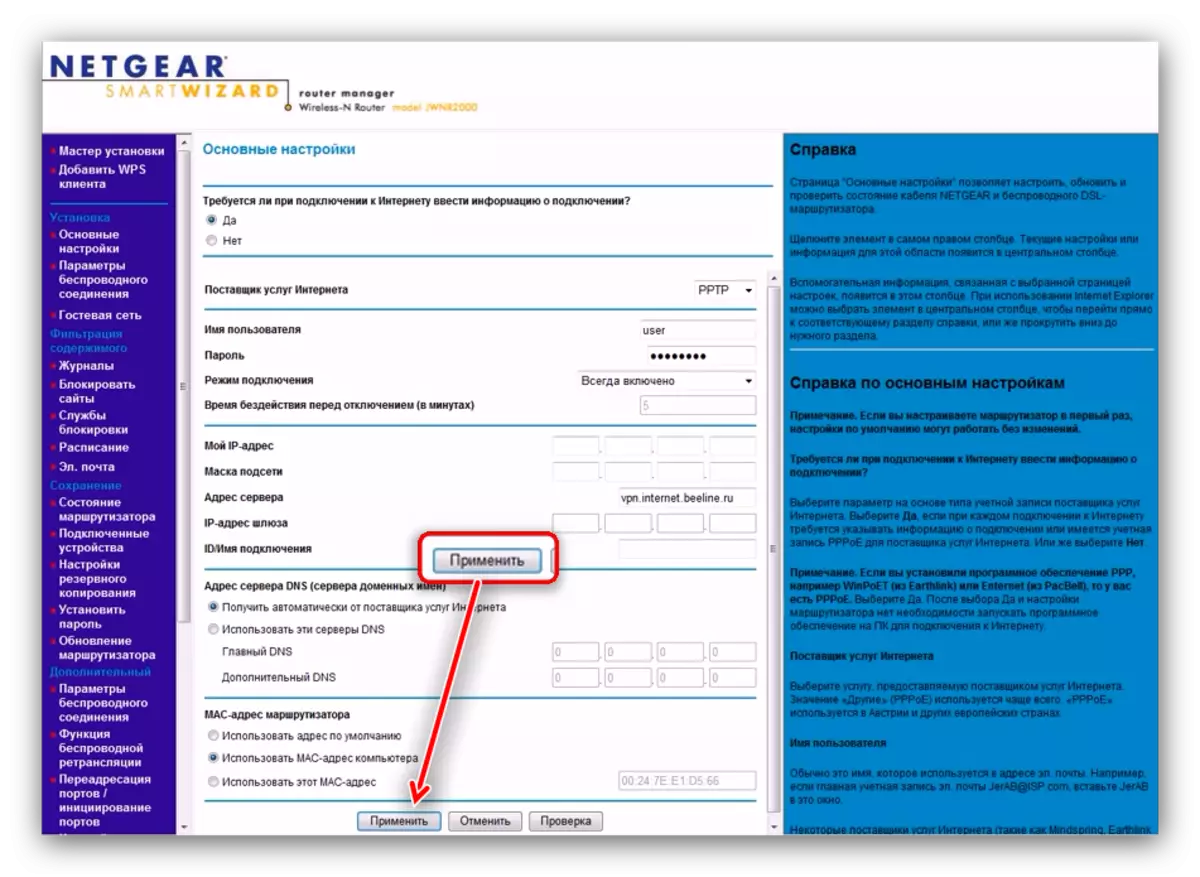
- Enter the authorization data that the provider issued is the first thing the username and phrase password, then the VPN server.
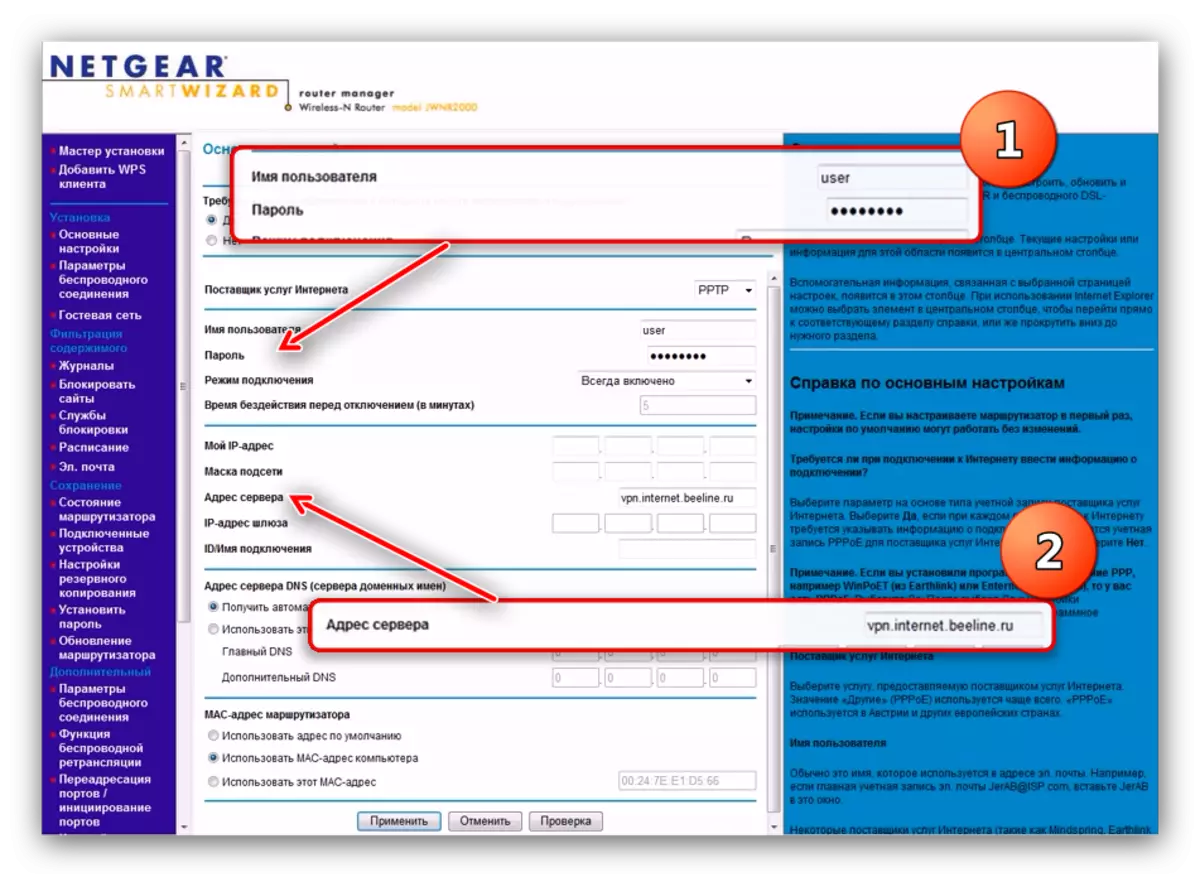
Next, actions differ for options with external or built-in IP. In the first, specify the desired IP and subnet in the marked fields. You can also select the manual DNS server entry option, after which you specify their addresses in the "Main" and "optional" fields.
When connected to the dynamic address of other changes is not required - just make sure that the username, password and virtual server correctly entered correctly.
- To save the parameters, press "Apply".
Dynamic IP.
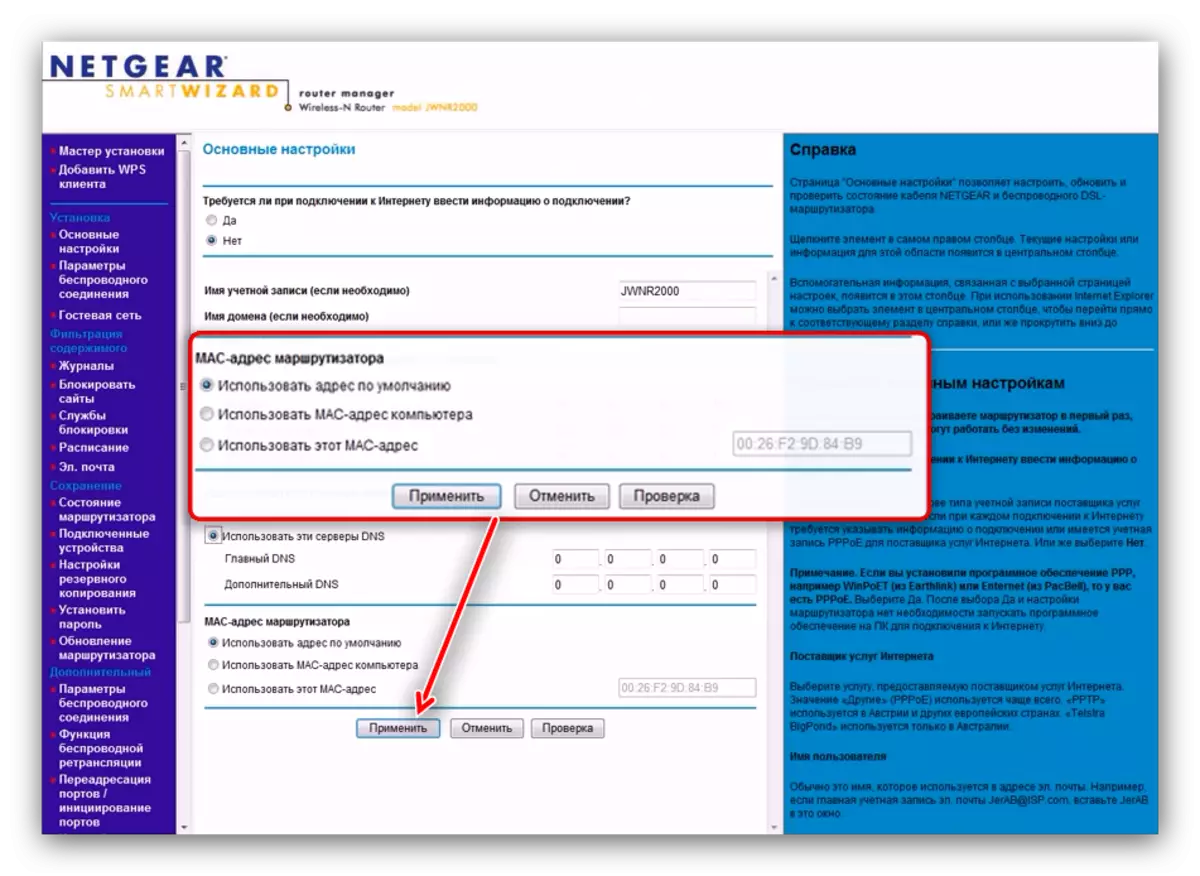
In the CIS countries, the connection type for a dynamic address is gaining popularity. On Netgear N300 routers it is configured as follows:
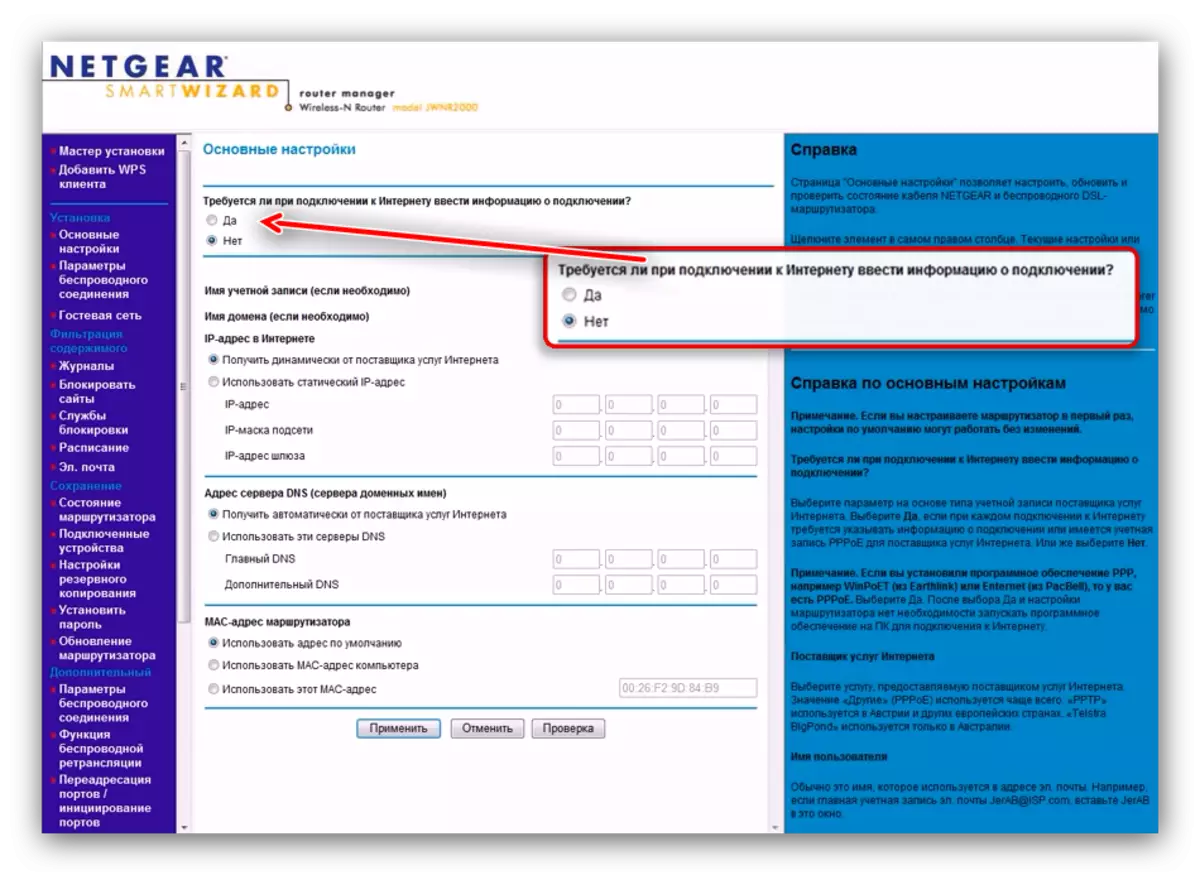
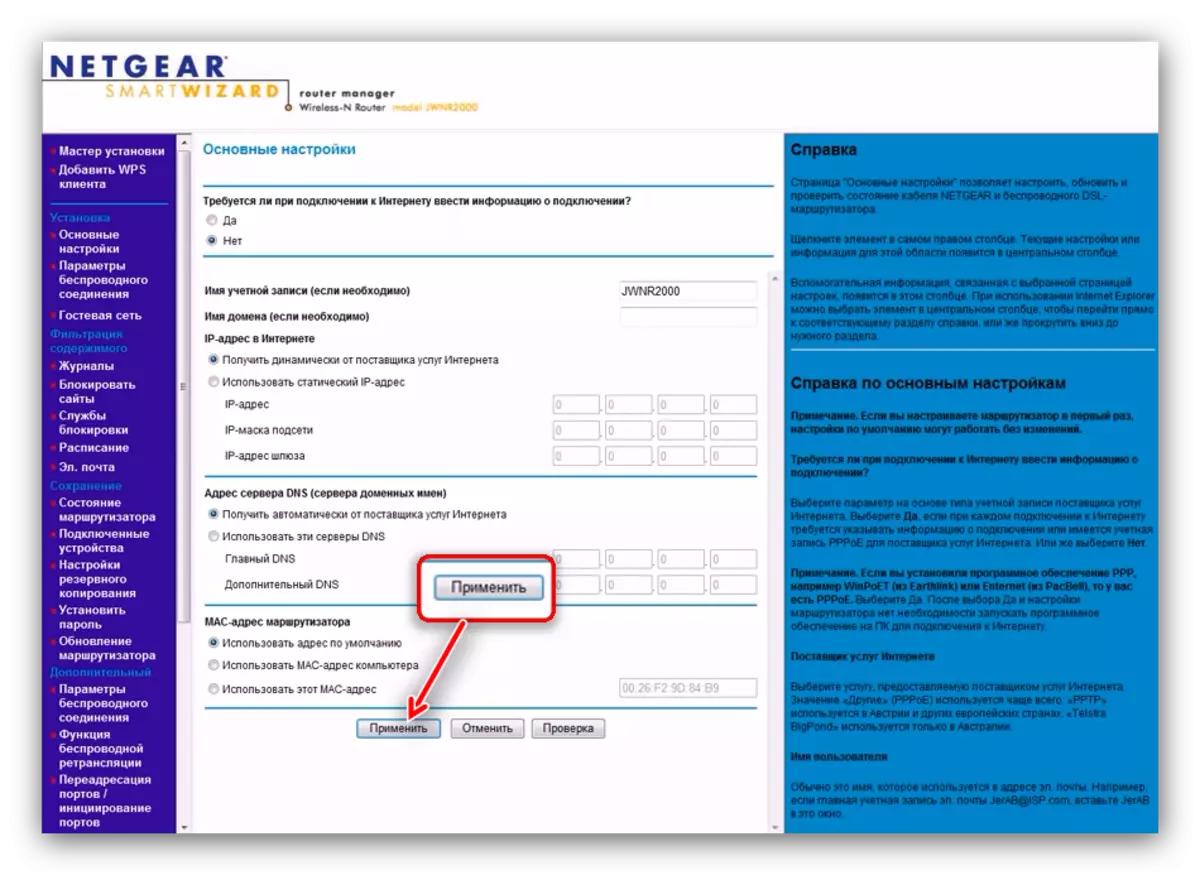
- In the Input Connection Information Point, select "No".
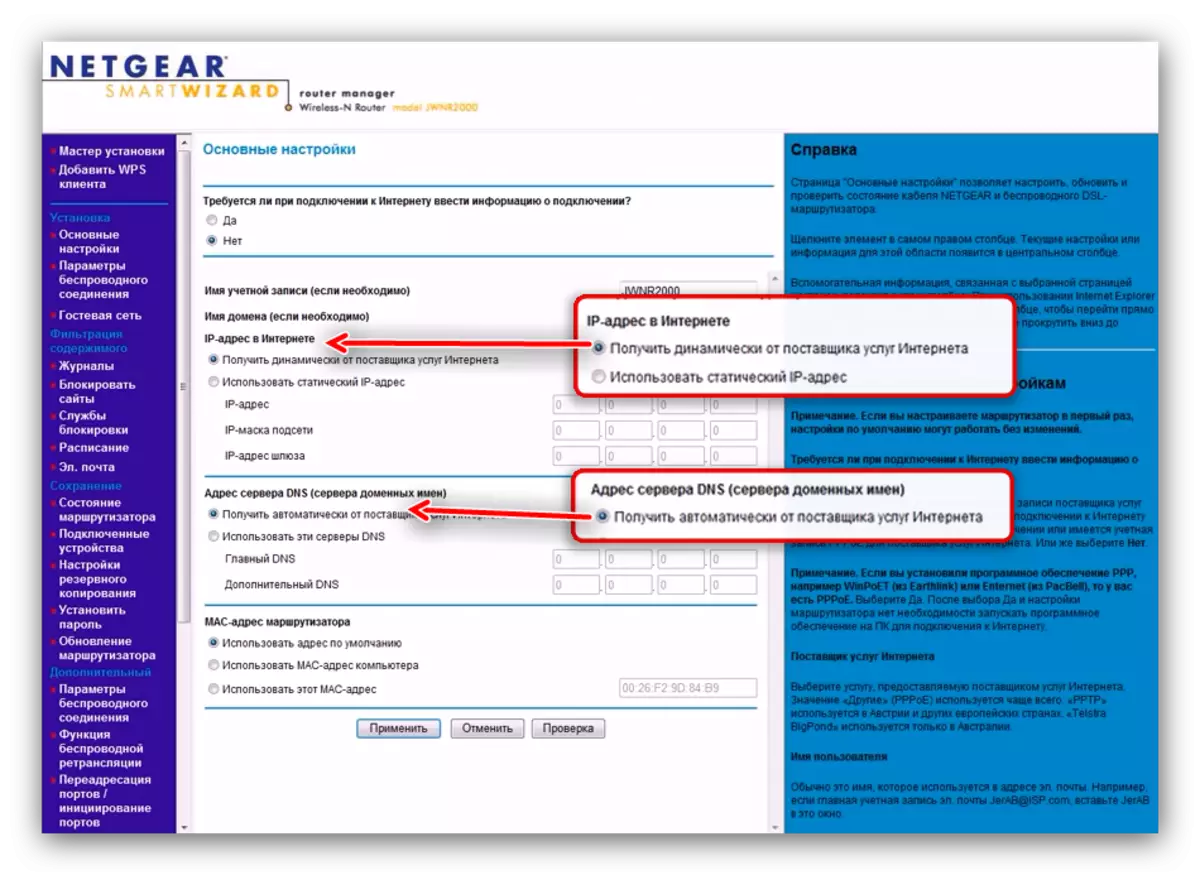
- With this type of receipt, all the necessary data comes from the operator, so make sure the address options are set in the "Get dynamically / automatically" position.
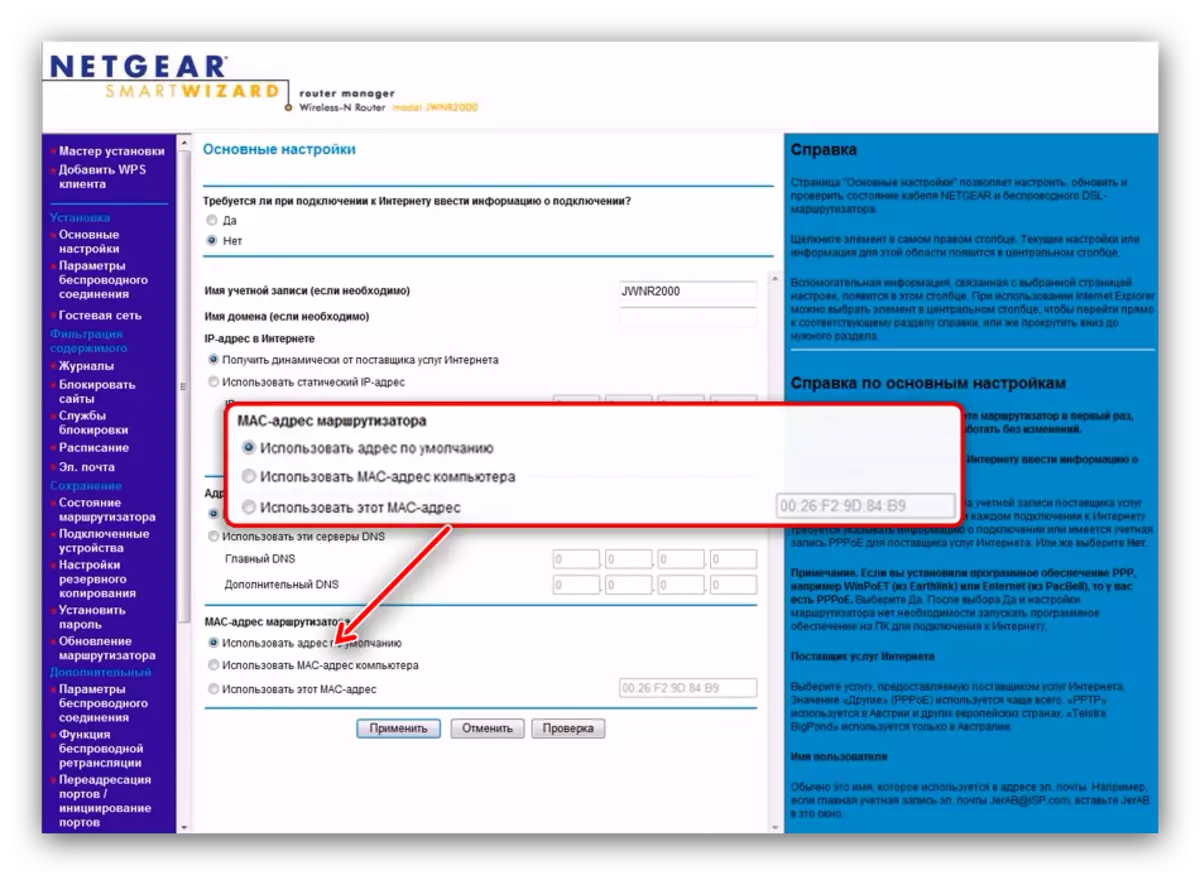
- DHCP connection authentication often occurs by reconciliation of the MAC address of the equipment. To work correctly, this option you need to select "Use the MAC address of the computer" or "Use this MAC address" in the MAC address of the router. When choosing the last parameter, you will need to manually register the desired address.
- Use the "Apply" button to complete the configuration process.
Static IP.
The router configuration procedure for connecting to static IP almost coincides with the procedure for a dynamic address.
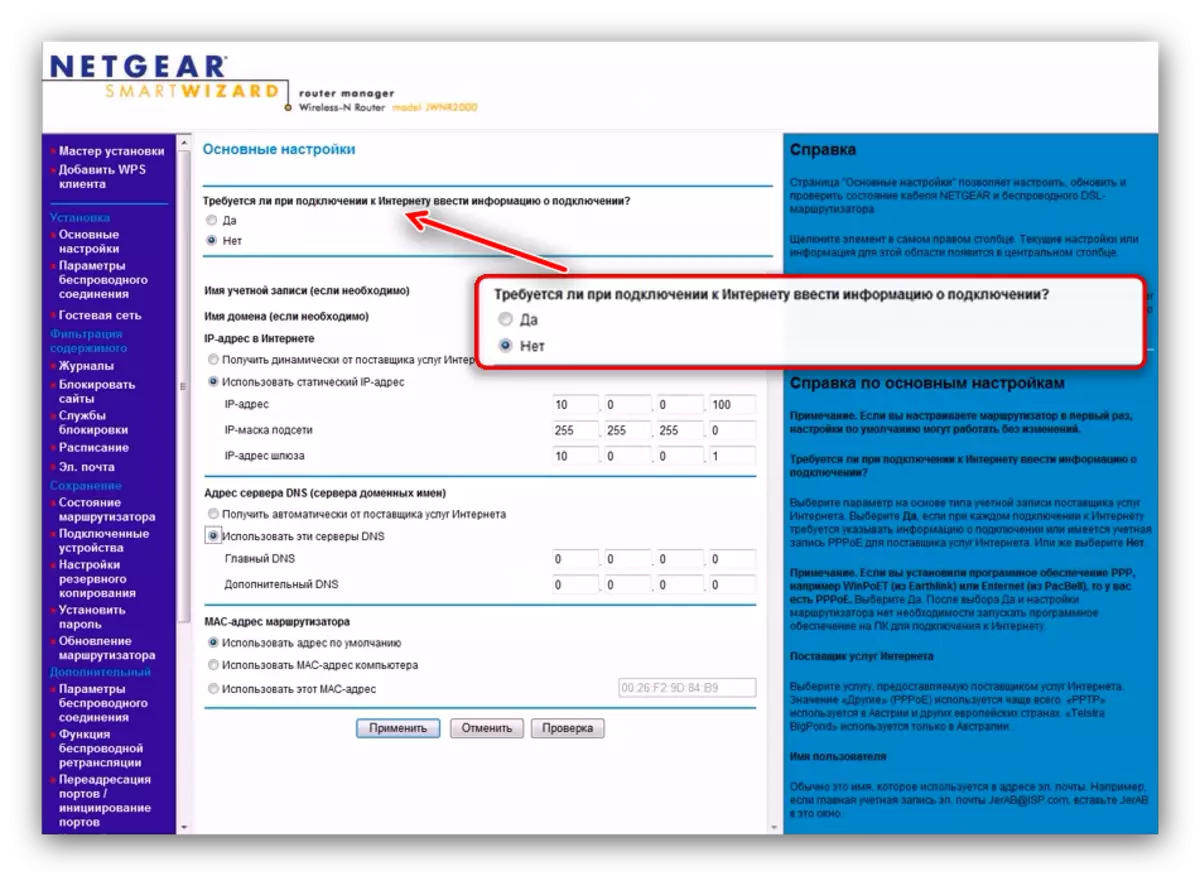
- In the top block of options, tick the item "No".
- Next, select "Use a static IP address" and register the desired values in the marked fields.
- In the domain name server block, specify "use these DNS servers" and enter the address provided by the operator.
- If required, set the binding to the MAC address (we spoke about it in a dynamic IP item), and click "Apply" to complete the manipulation.

As you can see, setting up and static, and the dynamic address is incredibly simple.
Wi-Fi Setup
For full-fledged wireless connection on the router under consideration, it is necessary to produce a number of settings. The required parameters are located in "Setting" - "Wireless Connection Settings".
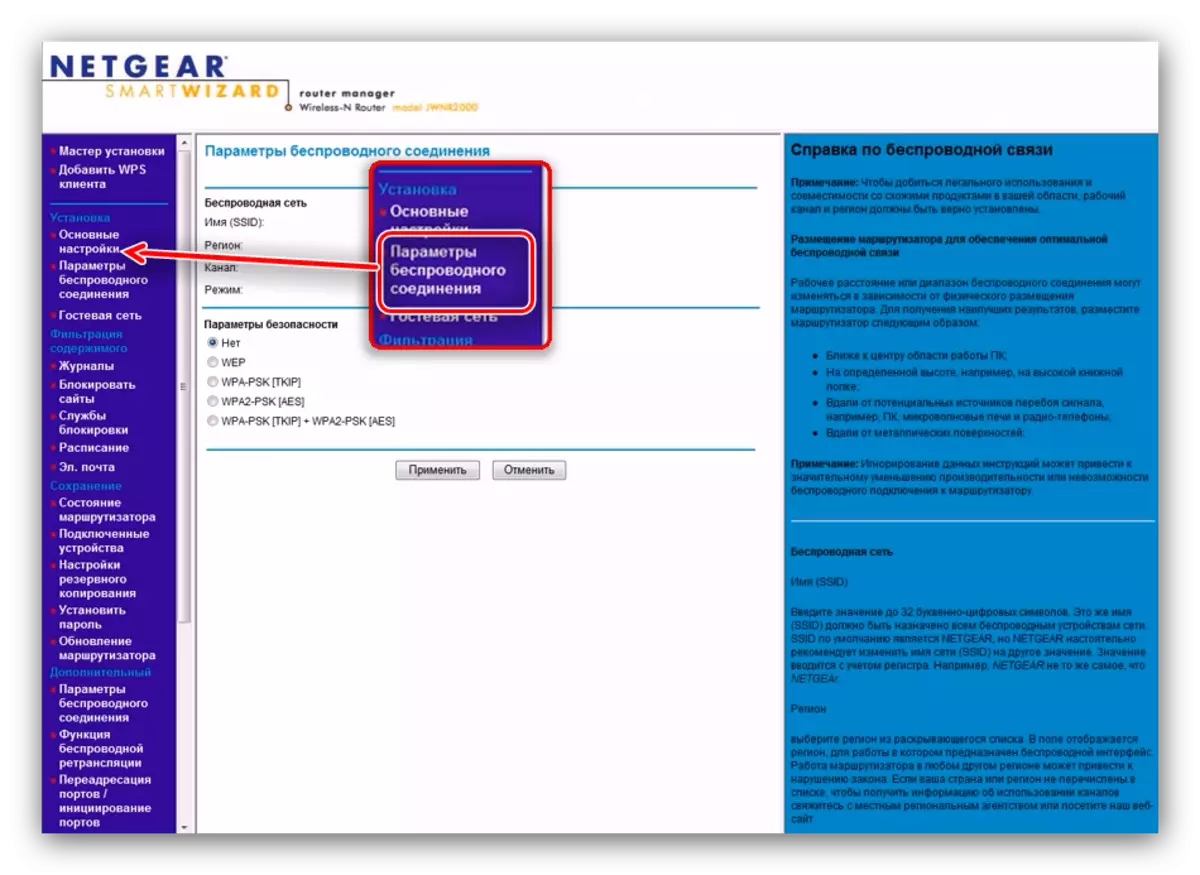
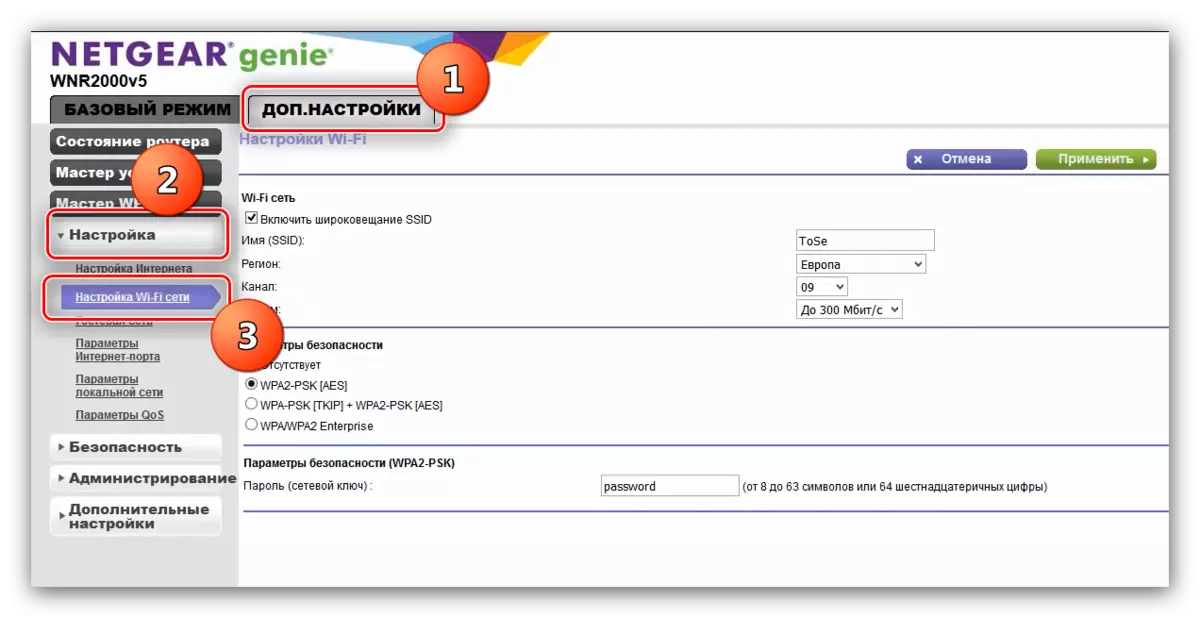
On the firmware NetGear Genie, the options are located at the address "Extras. Settings "-" Setup "-" Setting up Wi-Fi network. "
To configure the wireless connection, you need to make the following:
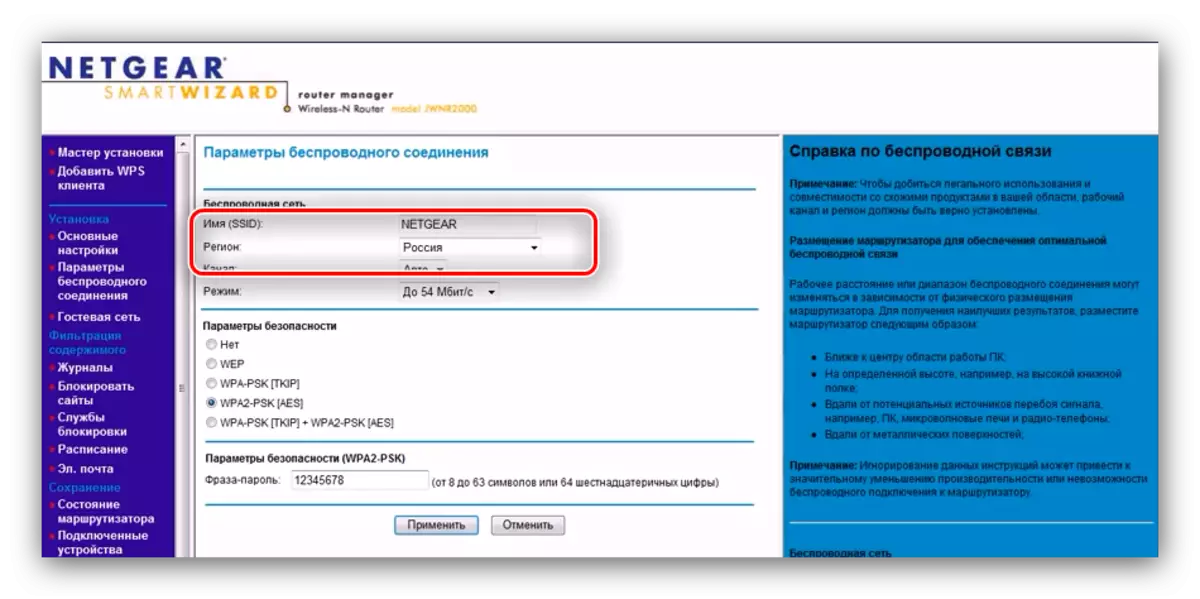
- In the SSID Name field, set the desired name Wi-fi.
- Region Indicate "Russia" (Users from the Russian Federation) or "Europe" (Ukraine, RB, Kazakhstan).
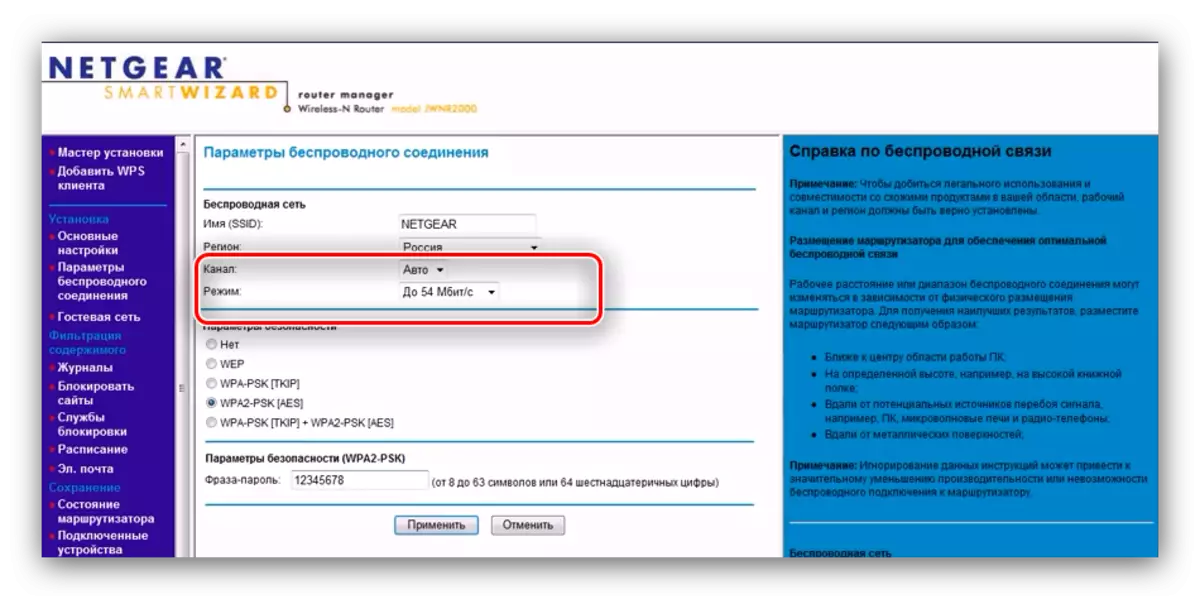
- The position "Mode" option depends on the speed of your internet connection - set the value corresponding to the maximum bandwidth of the connection.
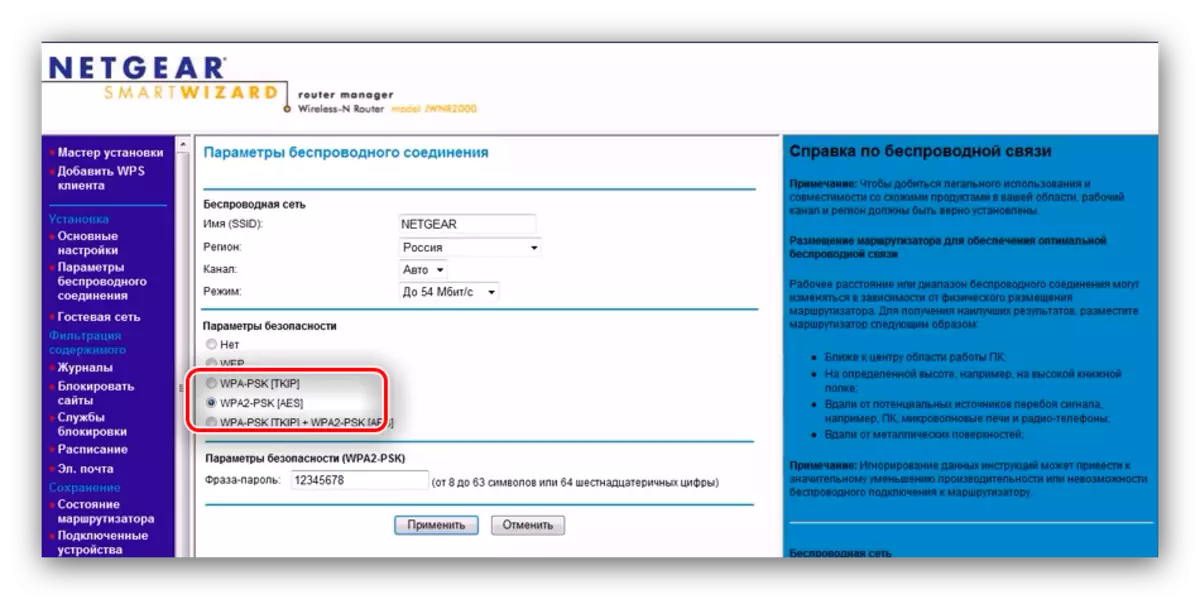
- Security options are recommended to choose as "WPA2-PSK".
- Latest in the "phrase password" column, enter a password to connect to Wi-Fi, and then click "Apply".
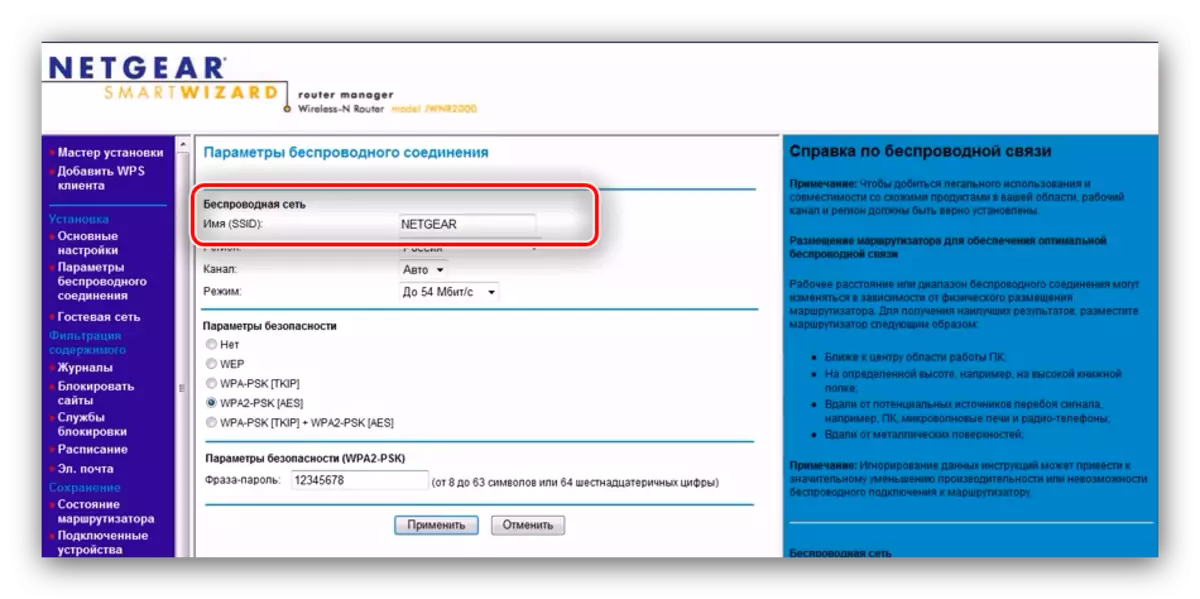
If all settings are written correctly, the Wi-Fi connection will be connected to the previously selected name.
WPS.
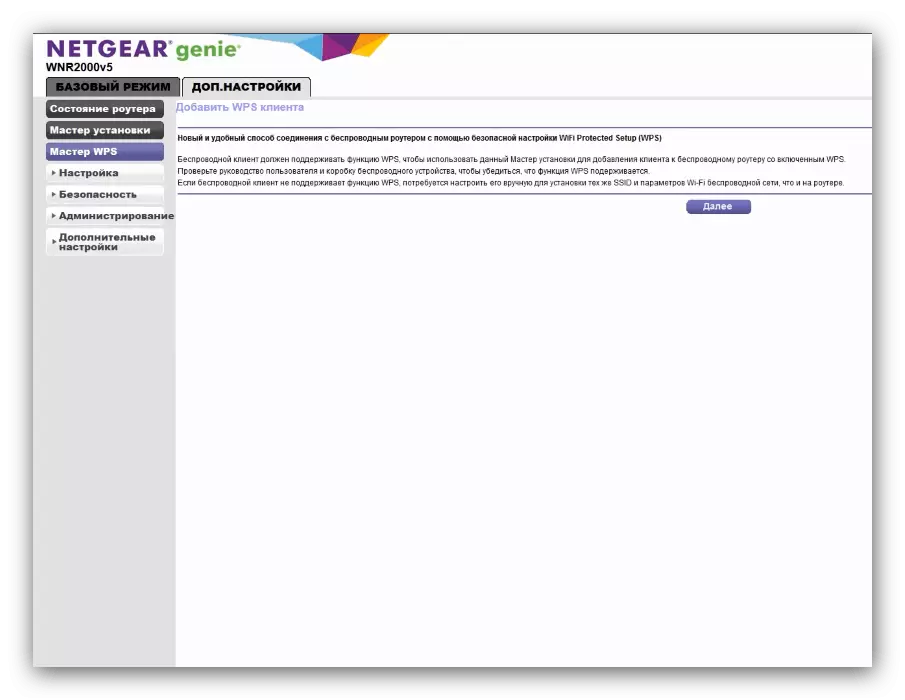
NetGear N300 routers support the "Wi-Fi Protected Setup" option, abbreviated WPS, which allows you to connect to a wireless network by pressing a special button on the router. More information about this feature and its configuration you will find in the appropriate material.
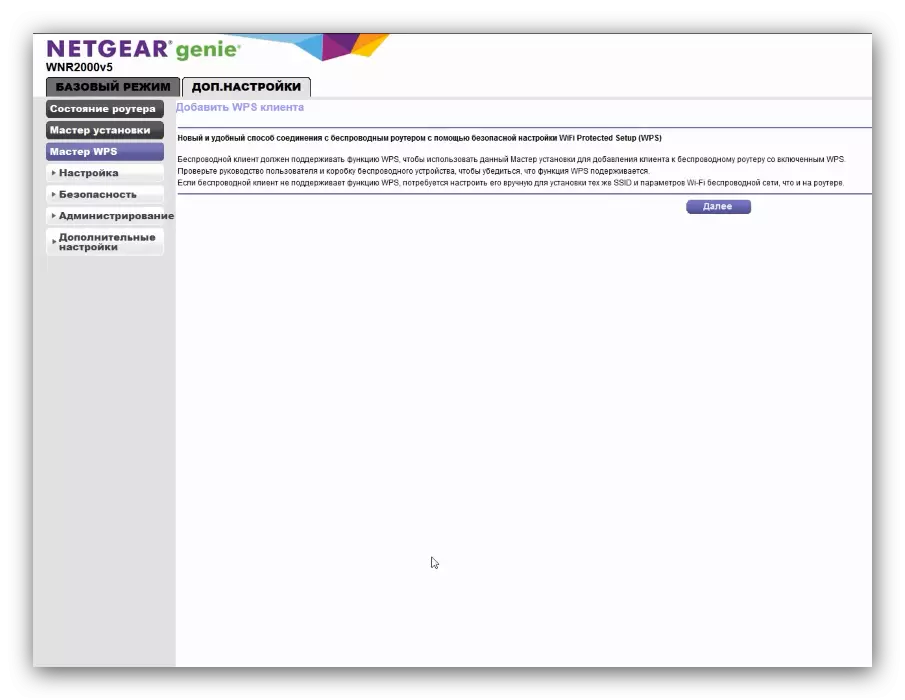
Read more: What is WPS and how to configure it
On this, Netgear N300 router configuration guide comes to an end. As you could make sure the procedure is quite simple and does not require any specific skills from the end user.