
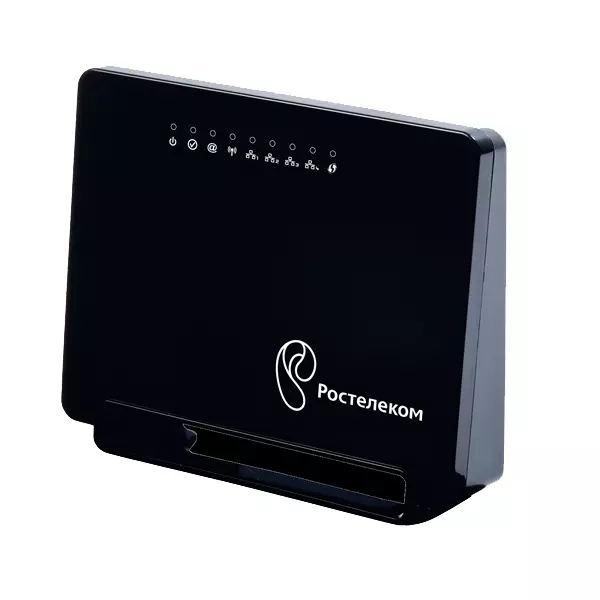
At the moment, Rostelecom is one of the largest Internet service providers in Russia. It provides its users with branded network equipment of different models. At the current time, the ADSL router Sagemcom F @ ST 1744 V4 is relevant. It is about its configuration and will be discussed further, and the owners of other versions or models need to find the same items in their web interface and set them as it will be shown below.
Preparatory work
Regardless of the router brand, the installation takes place according to the same rules - it is important to avoid the presence of a number of electrical appliances, and also to take into account that walls and partitions between rooms can cause a not enough high-quality wireless signal signal.
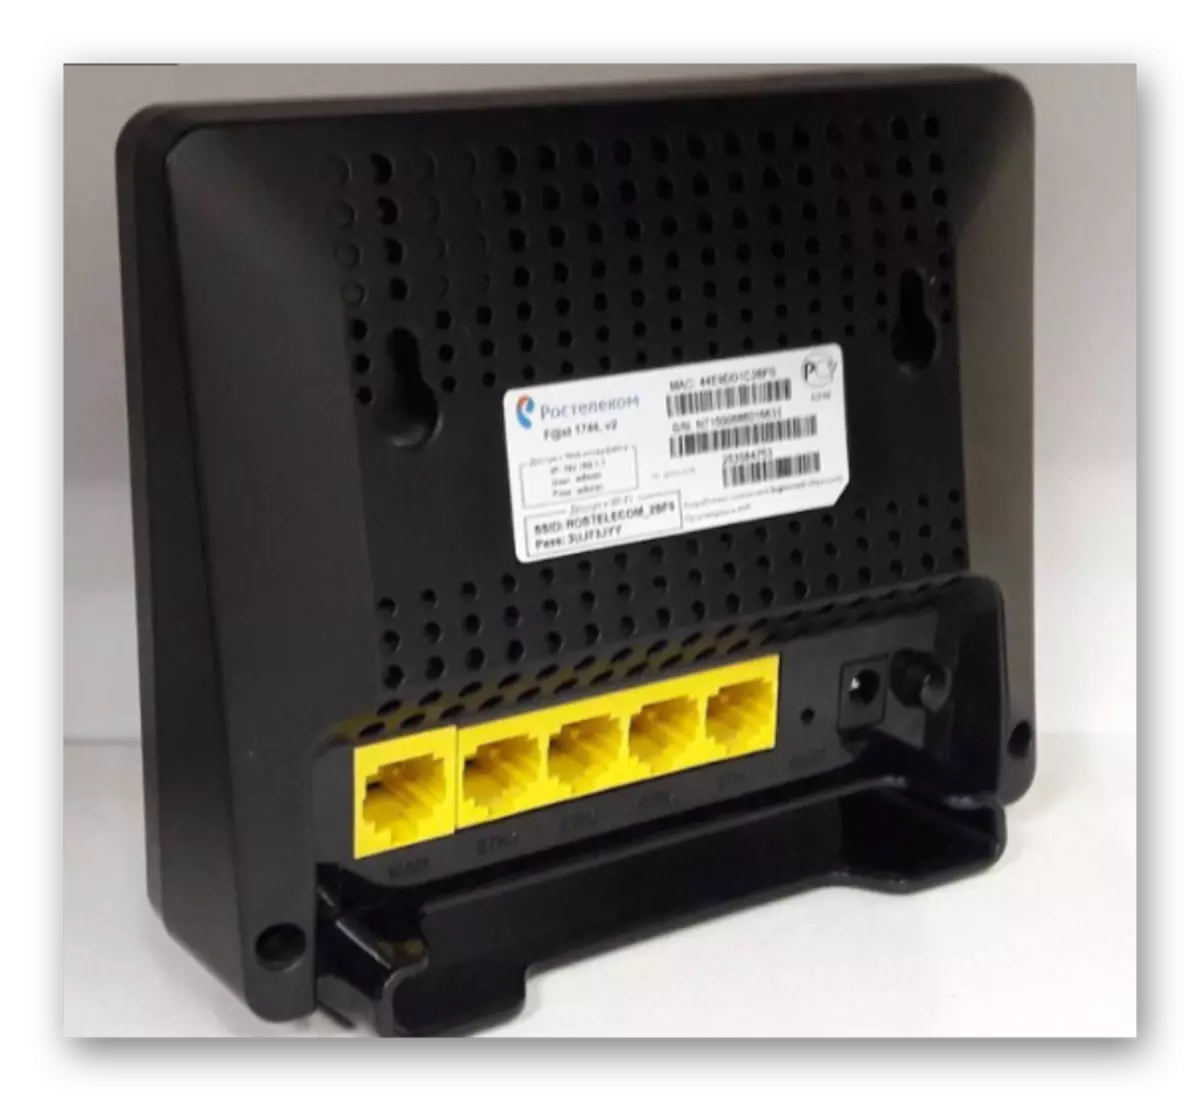
Look at the rear panel of the device. All available connectors with the exception of USB 3.0 are displayed on it, which is located on the side part. Connecting to the operator network occurs through the WAN port, and local equipment is connected via Ethernet 1-4. Here are the reset and inclusion buttons.
Check the IP and DNS protocols in your operating system before starting the network hardware configuration. Markers must stand opposite items to "receive automatically". About how to check and change these parameters, read in another our material on the link below.
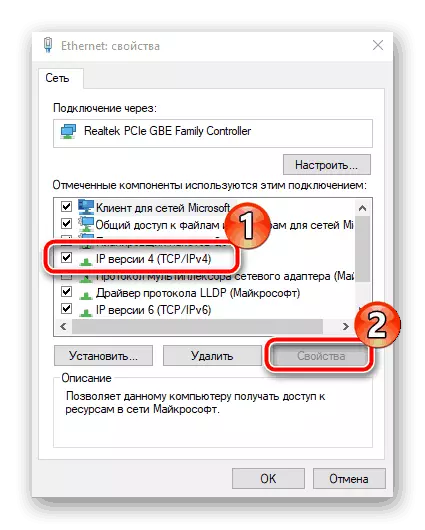
Read more: Windows network settings
Customize Router Rostelecom
Now we go directly to the Sagemcom F @ ST 1744 V4 software part. We will repeat that in other versions or models, this procedure is practically no different, it is important only to figure out the features of the web interface. Let's talk about how to enter the settings:
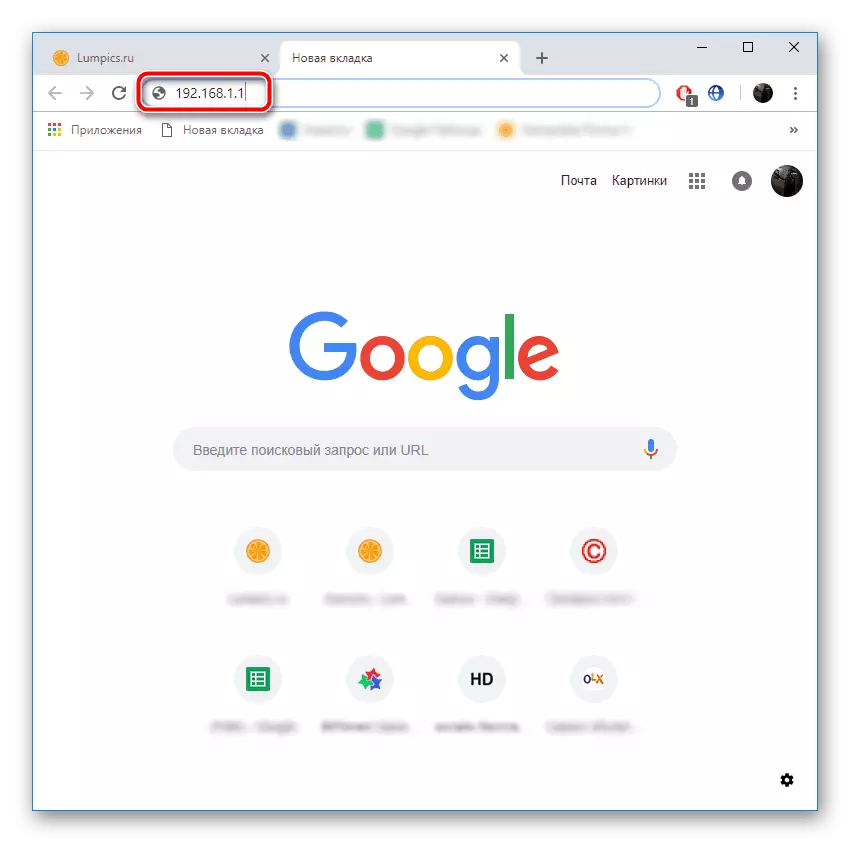
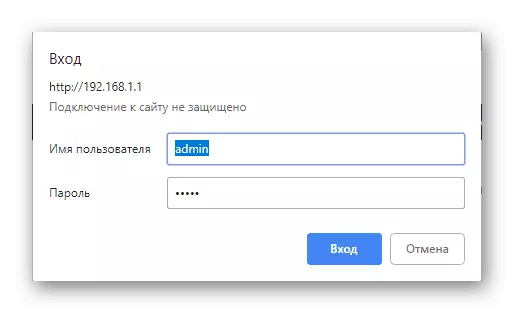
- In any convenient web browser, click the left mouse button on the address bar and type 192.168.1.1, then go to this address.
- A form with two lines will appear, where you should enter Admin - this is a username and password installed by default.
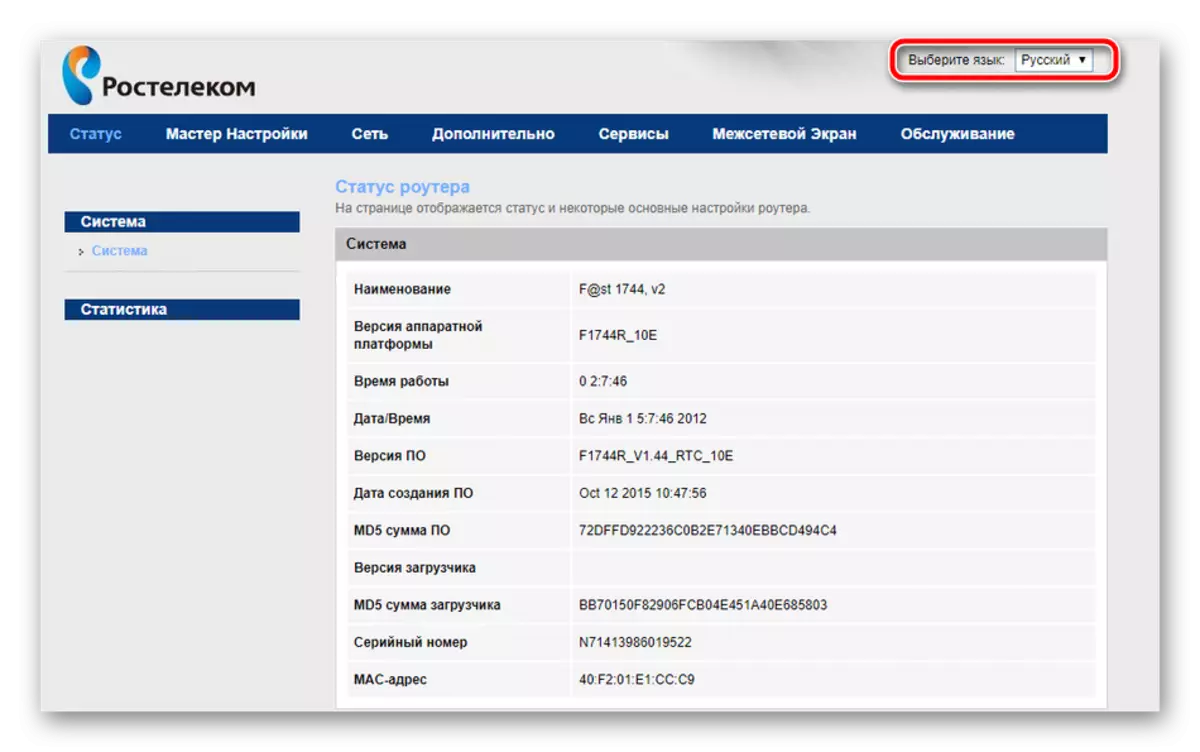
- You fall into the web interface window, where it is better to immediately change the language to the optimal, selecting it from the pop-up menu above the right.
Fast setting
Developers offer fast setup feature that allows you to set the basic WAN parameters and wireless networks. To enter Internet connection data, you will need a contract with the provider, where all the necessary information is specified. The wizard opening is carried out through the "Settings Wizard" tab, select the section with the same name and click on the "Setup Wizard".
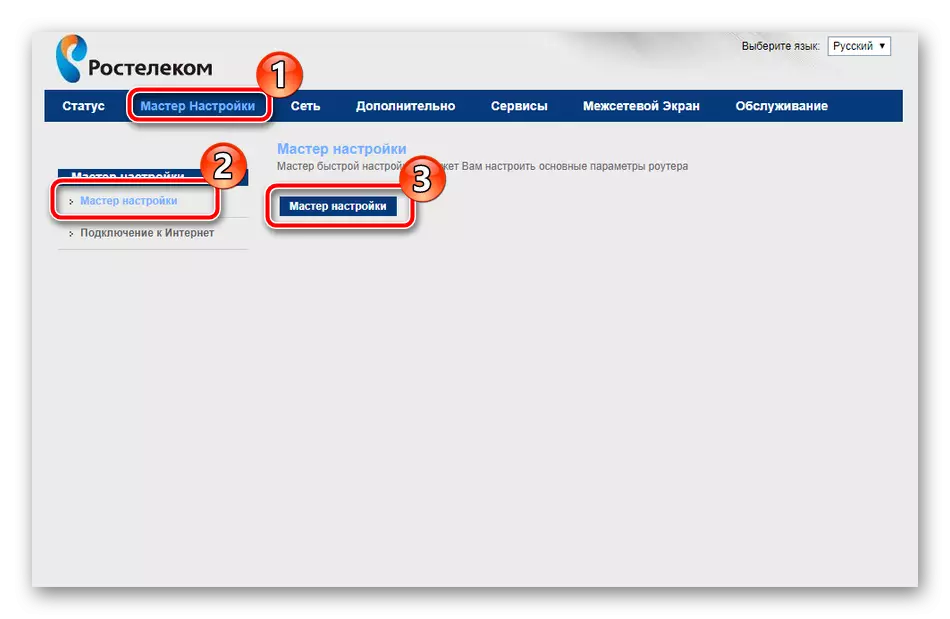
Lines will appear in front of you, as well as instructions for filling them. Follow them, then save the changes and the Internet should work correctly.
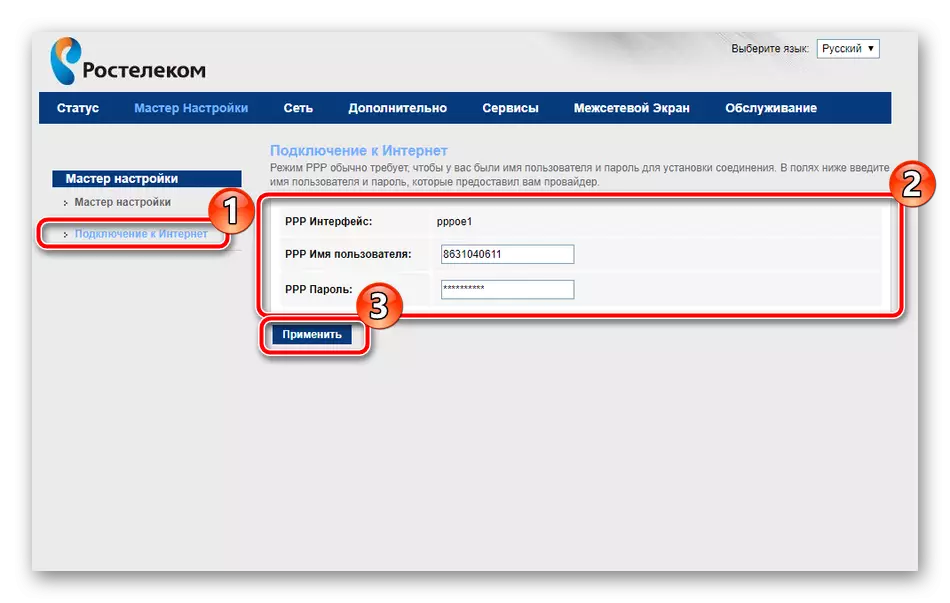
In the same tab, there is a "Internet connection" tool. Here the PPPOE1 interface is selected by default, so you will only have to enter the username and password, which is provided by the service provider, after that you can enter the Internet when connecting via the LAN cable.
However, such surface settings are not suitable for all users, as they do not provide the ability to independently configure the desired parameters. In this case, everything needs to be done manually, this will be discussed.
Manual setting
Let's start the debugging procedure with the WAN adjustment. The whole process will not take much time, and it looks as follows:
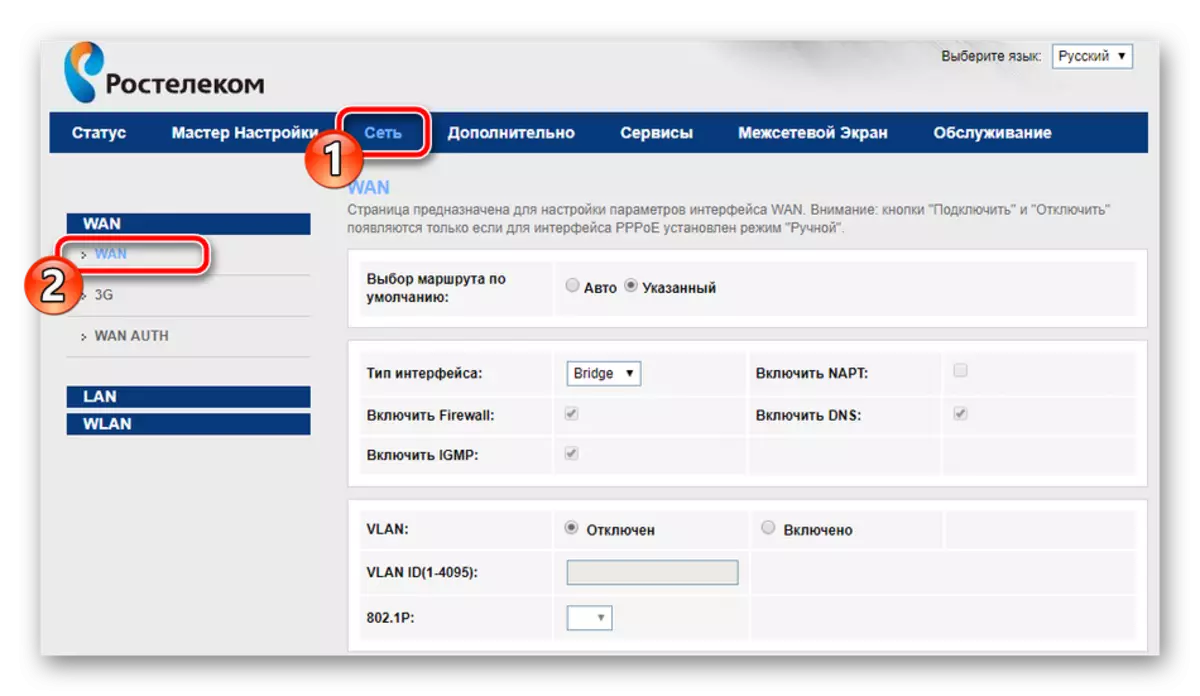
- Go to the "Network" tab and select the WAN section.
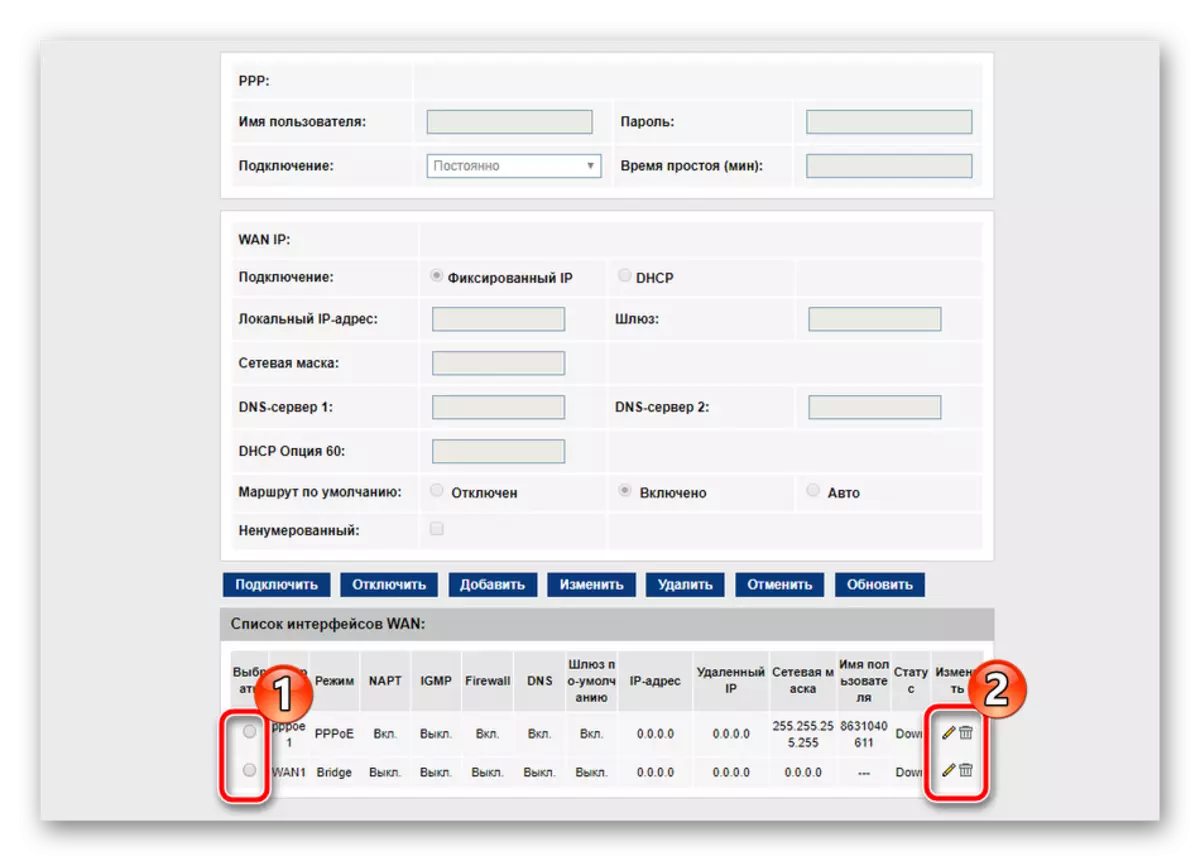
- Immediately drop down the menu and a name of the WAN interfaces. All items present should be marked with a marker and delete that with further change no problems arise.
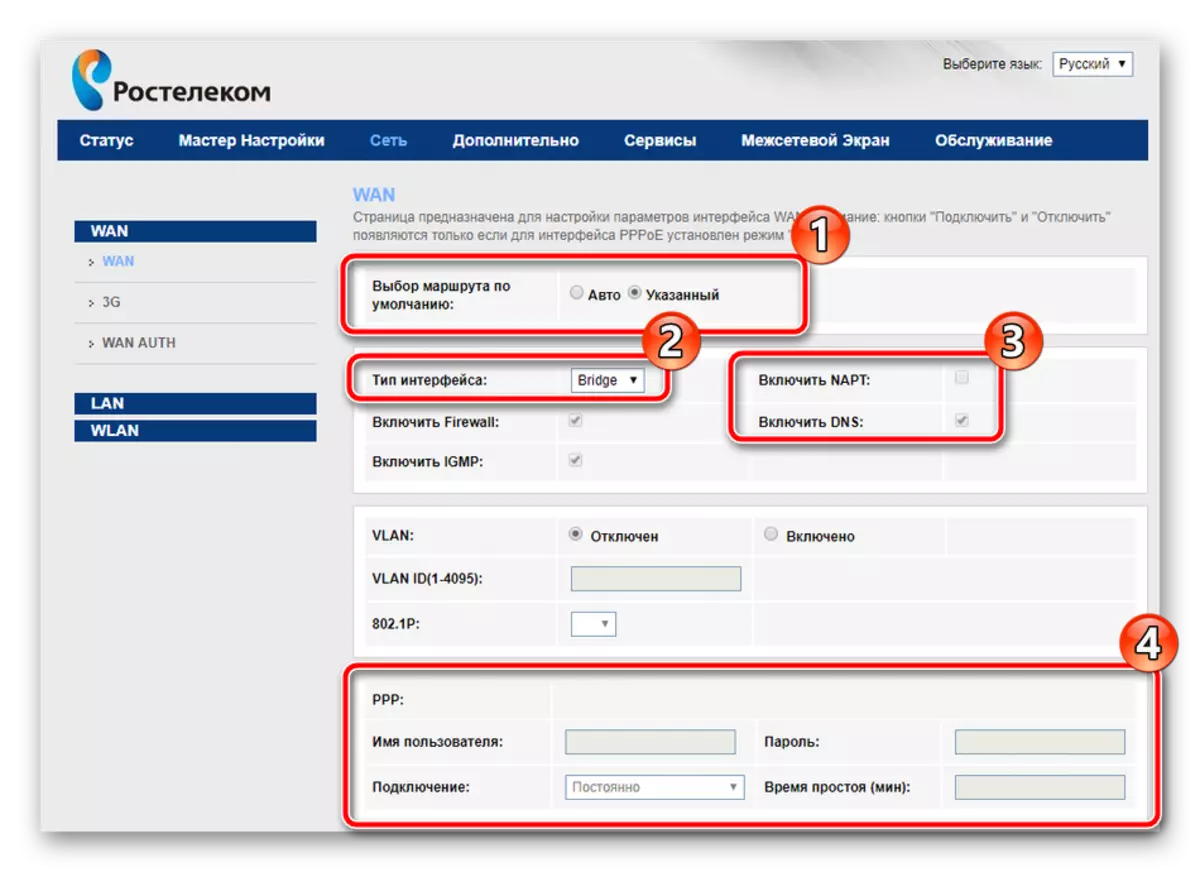
- Next, climb back up and put a point near the "Default route selection" to the "specified". Set the interface type and check the "Enable NAPT" checkboxes and "Enable DNS". Below you will need to enter the username and password for the PPPoE protocol. As already mentioned in the game About quick setup, all information for the connection is in the documentation.
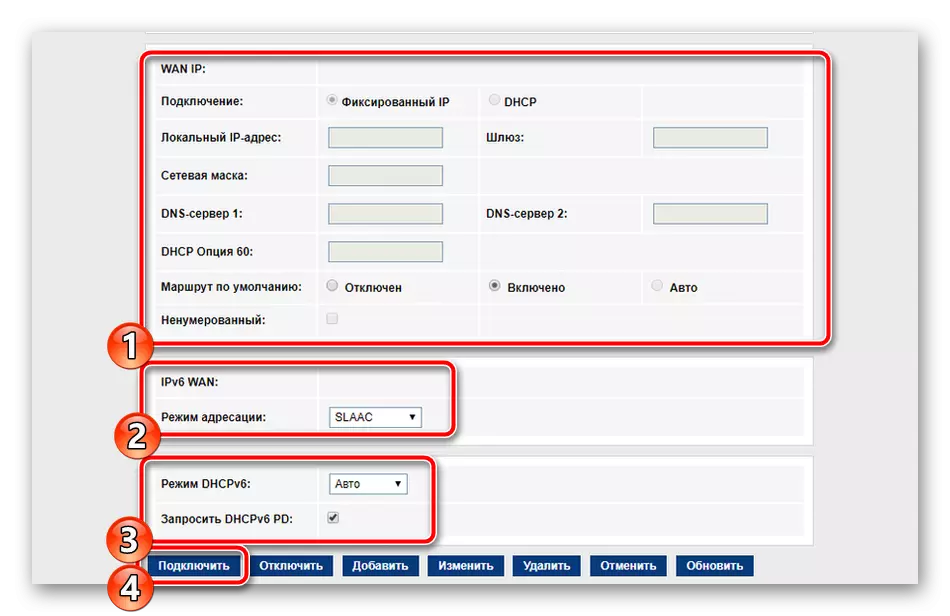
- Run down slightly lower, where to find other rules, most of them are also established in accordance with the Treaty. Upon completion, click on "Connect", in order to save the current configuration.
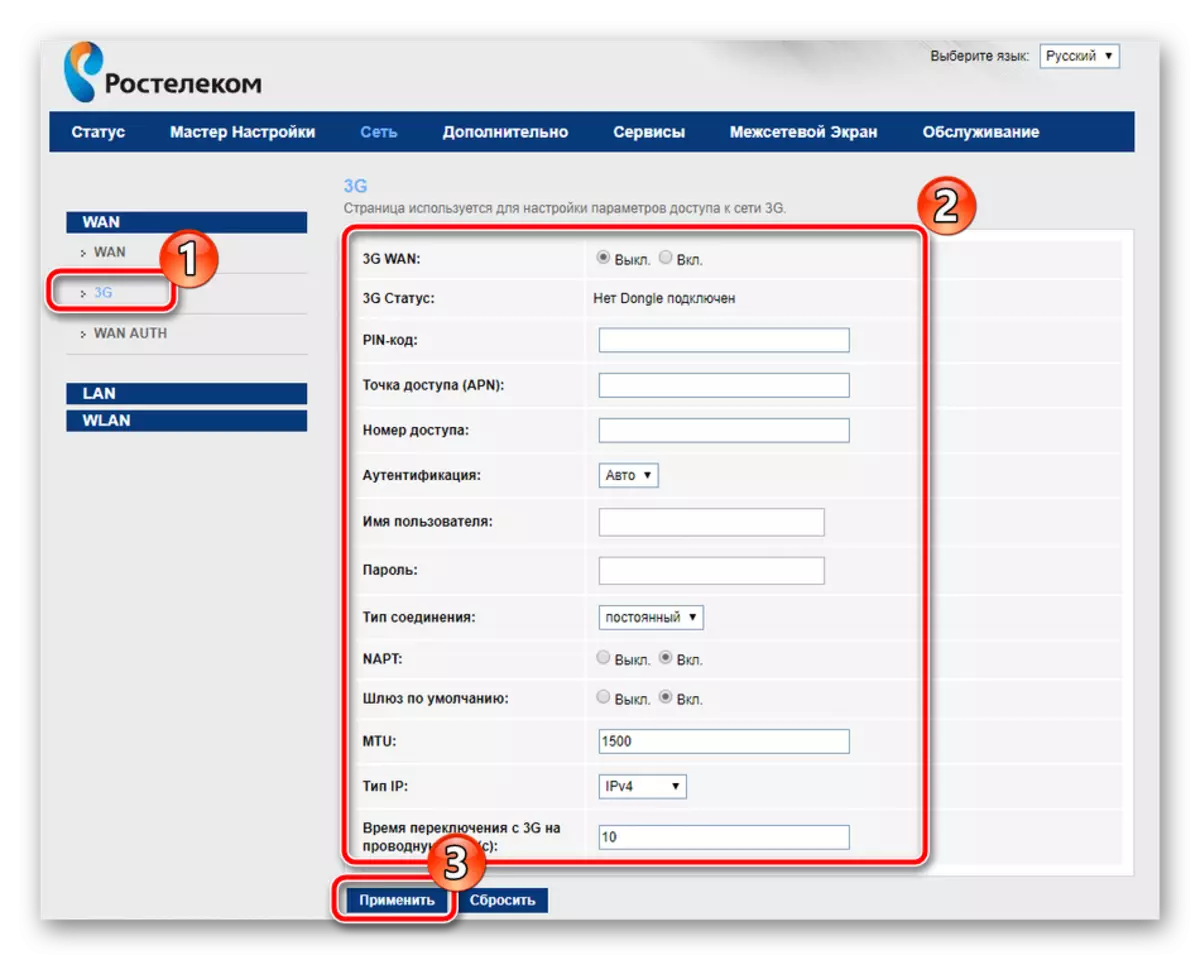
Sagemcom F @ ST 1744 V4 allows you to use a 3G modem, which is edited in a separate section "WAN" category. Here, only the "3G WAN" status is required from the user, fill in lines with account information and connection type, which is reported when purchasing a service.
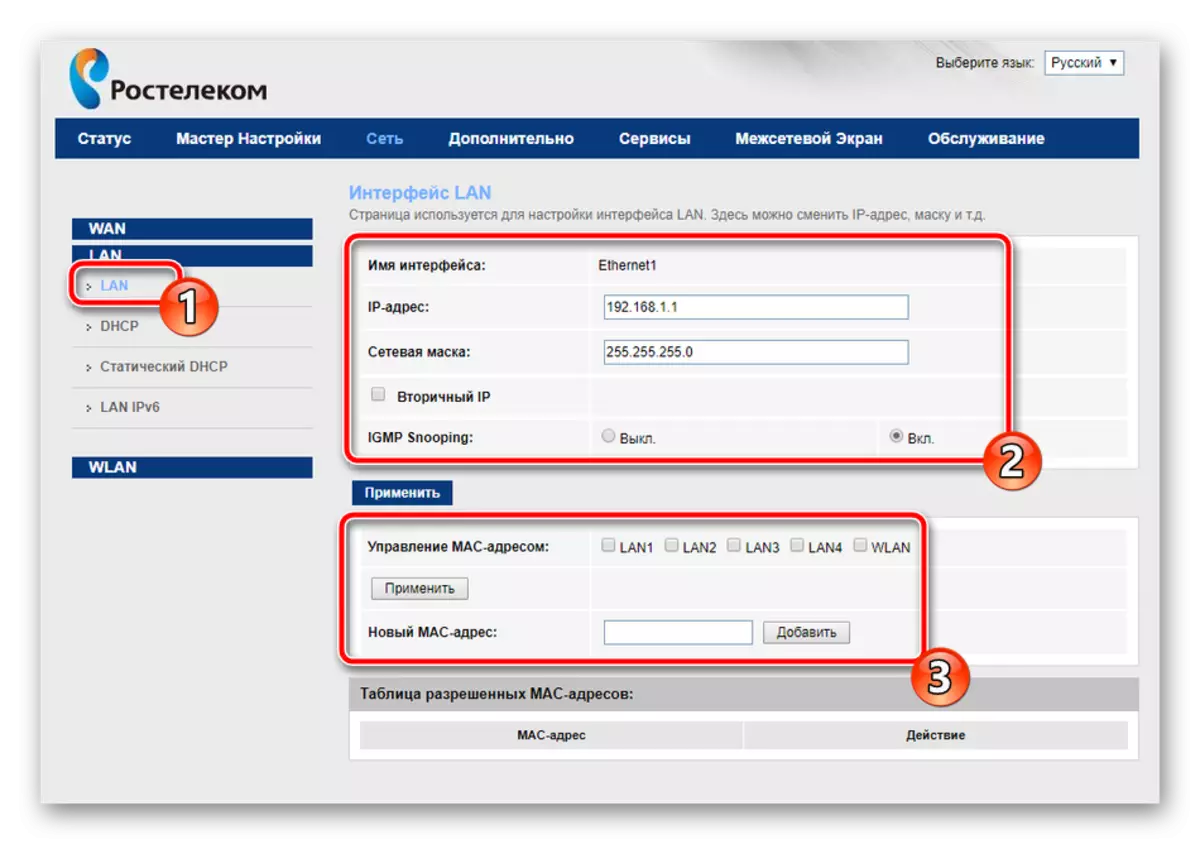
Gradually, we turn to the next section "LAN" in the "Network" tab. Here each available interface is edited, its IP address and network mask are specified. In addition, cloning of the MAC address may occur if it was a coordinated with the provider. A regular user has a very rare need for a change in the IP address of one of the Ethernet.
Retronowing the other section, namely, "DHCP". In the window that opens, you will immediately be provided with recommendations for activating this mode. Check out the three most common situations when you should include DHCP, and then set the configuration individually for yourself in case of need.

To configure the wireless network, we highlight a separate instruction, since the parameters here are quite large quantity and you need to tell about each of them in the most detailed as possible so that you do not have any difficulties with adjustment:
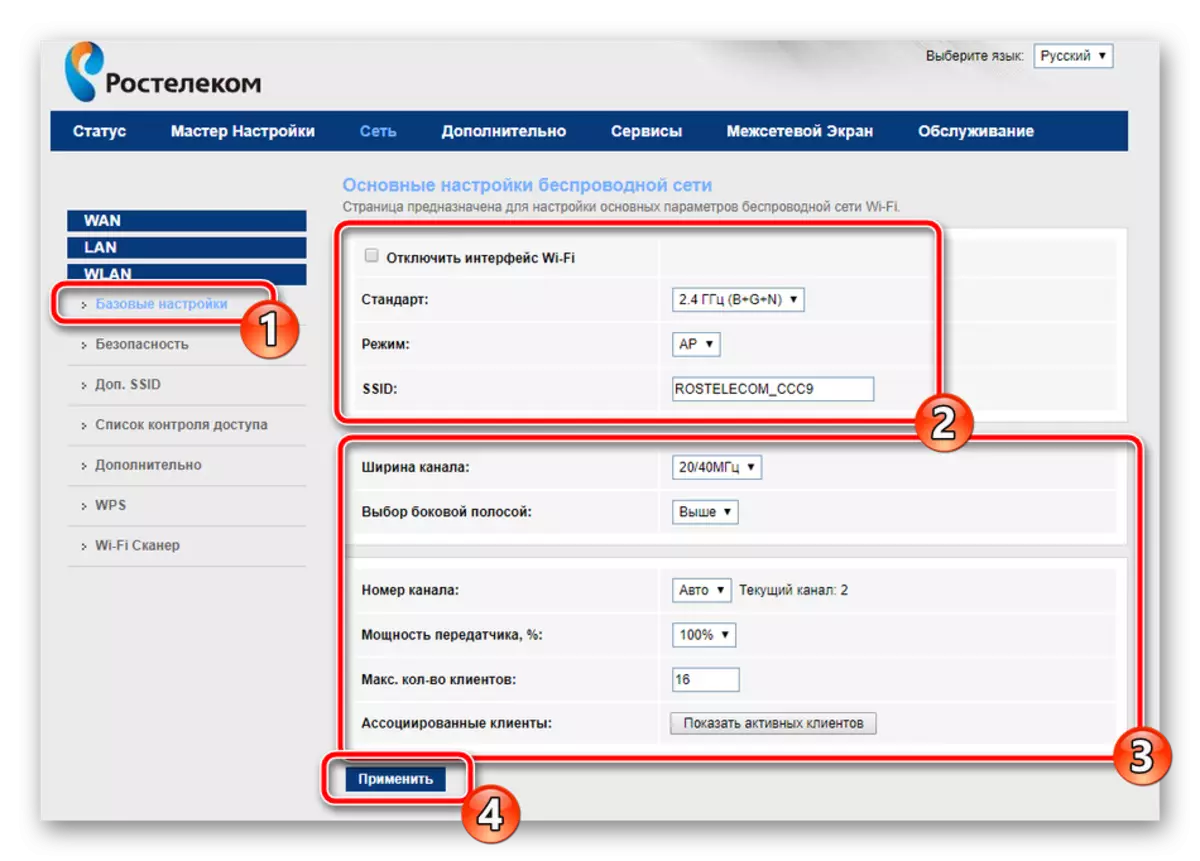
- First look at the "Basic Settings", the most basic is set here. Make sure that there is no check mark near "Disable Wi-Fi interface", as well as select one of the modes of operation, for example, "AP", which allows you to create up to four access point, as we talk a little later. In the SSID string, specify any convenient name, the network will be displayed with it in the list while searching for connections. Other items Leave by default and click on "apply".
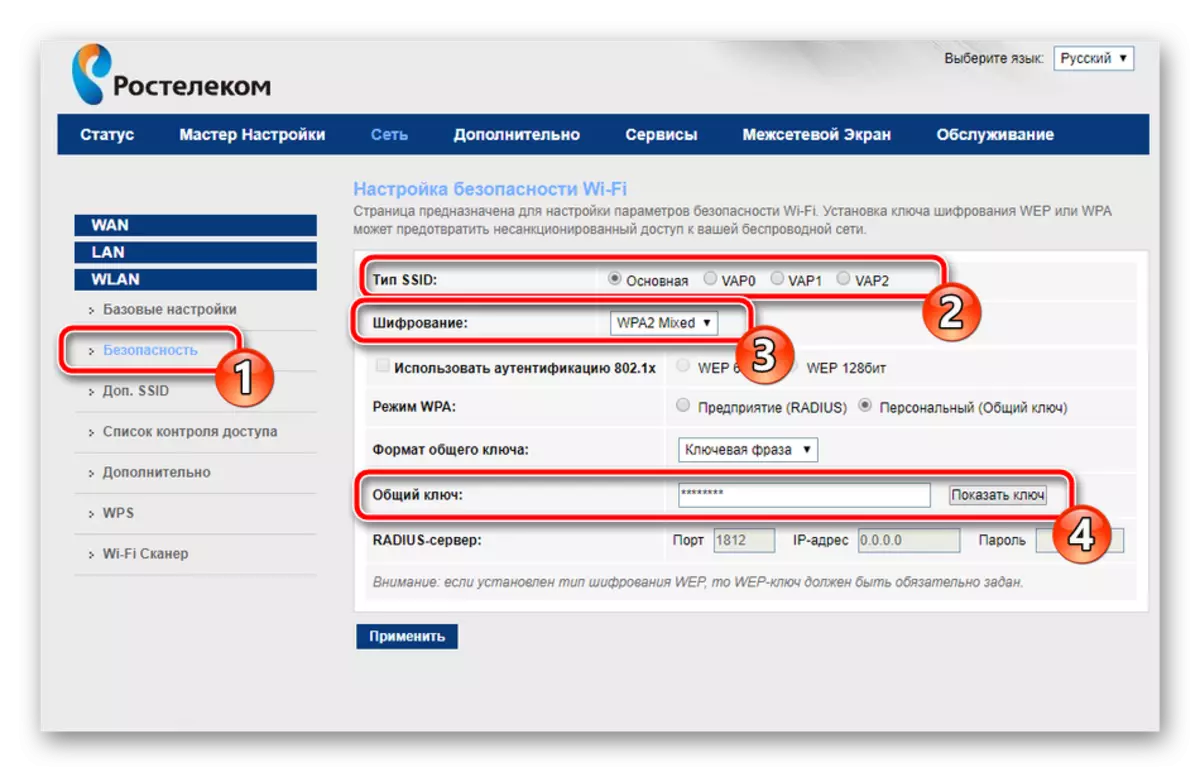
- In the "Security" section, mark the SSID type point for which the creation of the rules is made, it is usually "basic". Encryption mode is recommended to install "WPA2 Mixed", it is the most reliable. Change the overall key to more complex. Only after it is administered when connected to a point, authentication will be successful.
- Now back to the additional SSID. They are edited in a separate category and are available four different points. Tick the checkbox those that wish to activate, and you can also configure their names, the type of protection, the rate of return and reception.
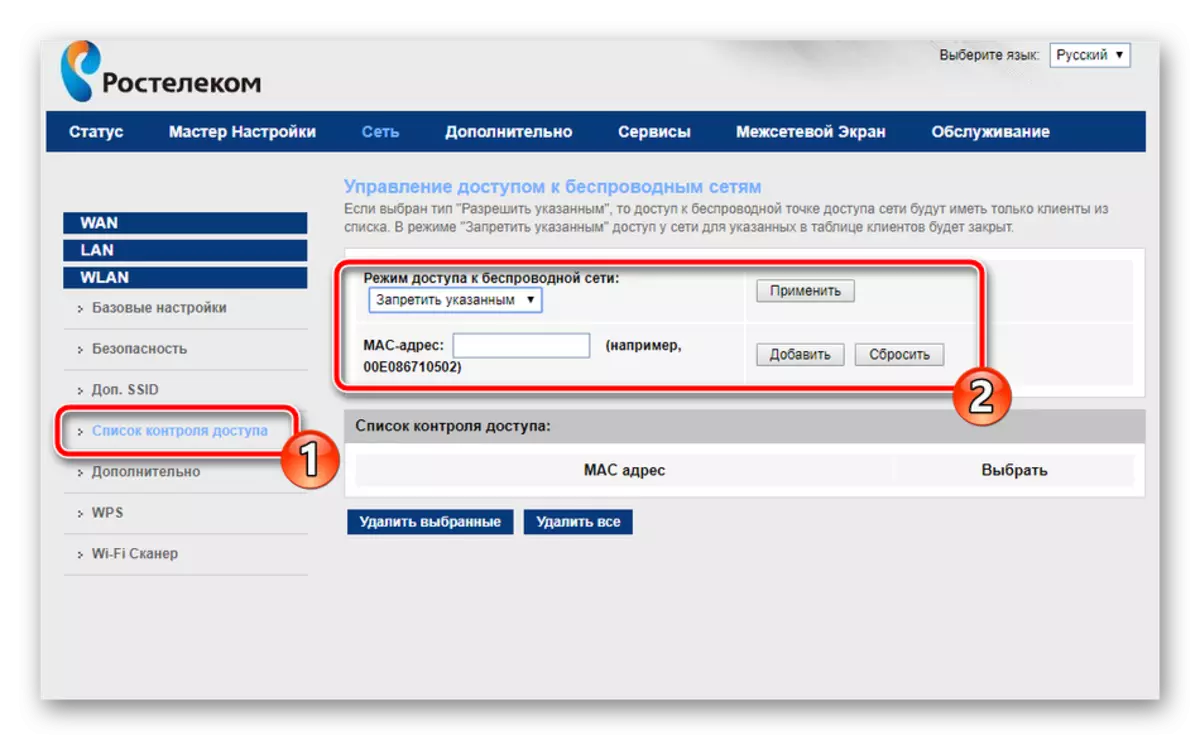
- Go to the Access Control List. Here are the limit rules for connecting to your wireless networks by introducing devices MAC addresses. First select the mode - "Prohibit the specified" or "Allow the specified", and then type the necessary addresses in the string. Below, you will see a list of already added customers.
- The easier connection process with the access point makes the WPS function. Working with it is carried out in a separate menu, where you can enable or disable it, as well as track the key information. With more detailed information about WPS Meet another article on the link below.
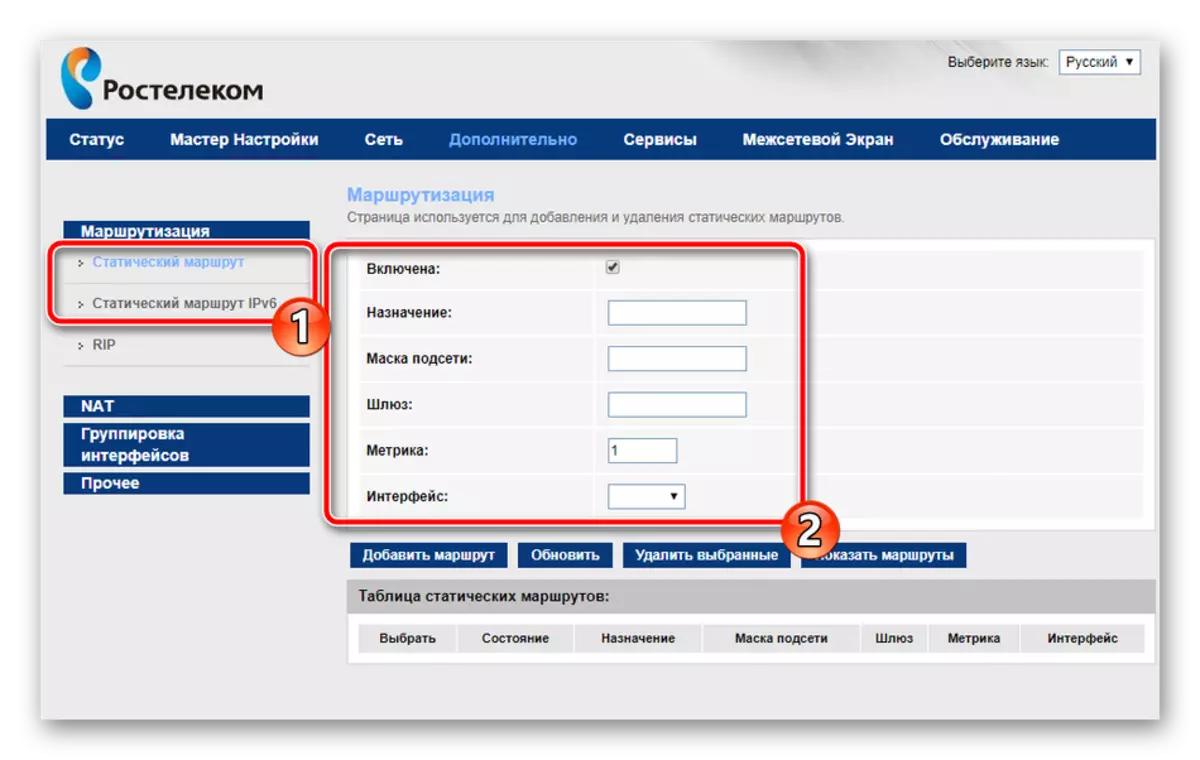
- In the "Advanced" tab, there are two sections with static routes. If here you specify the purpose, for example, the site address or IP, then access to it will be provided directly bypassing the tunnel present in some networks. An ordinary user, such a function may never come in handy, but when climbing during the use of VPN, it is recommended to add one route that allows you to remove breaks.
- In addition, we advise you to pay attention to the subsection "Virtual Server". Through this window there is a port of ports. On how to do this on the router under consideration under Rostelecom, read in another material below.
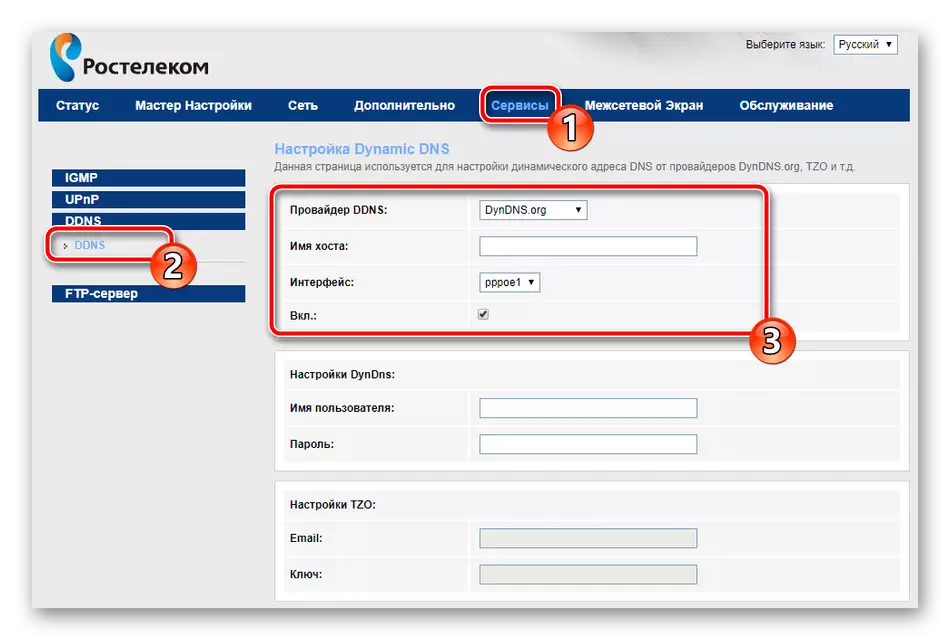
- Rostelecom for a fee provides a dynamic DNS service. It is used mainly in working with its own servers or FTP. After connecting the dynamic address, you need to enter the information specified by the provider to the corresponding lines, then everything will work correctly.
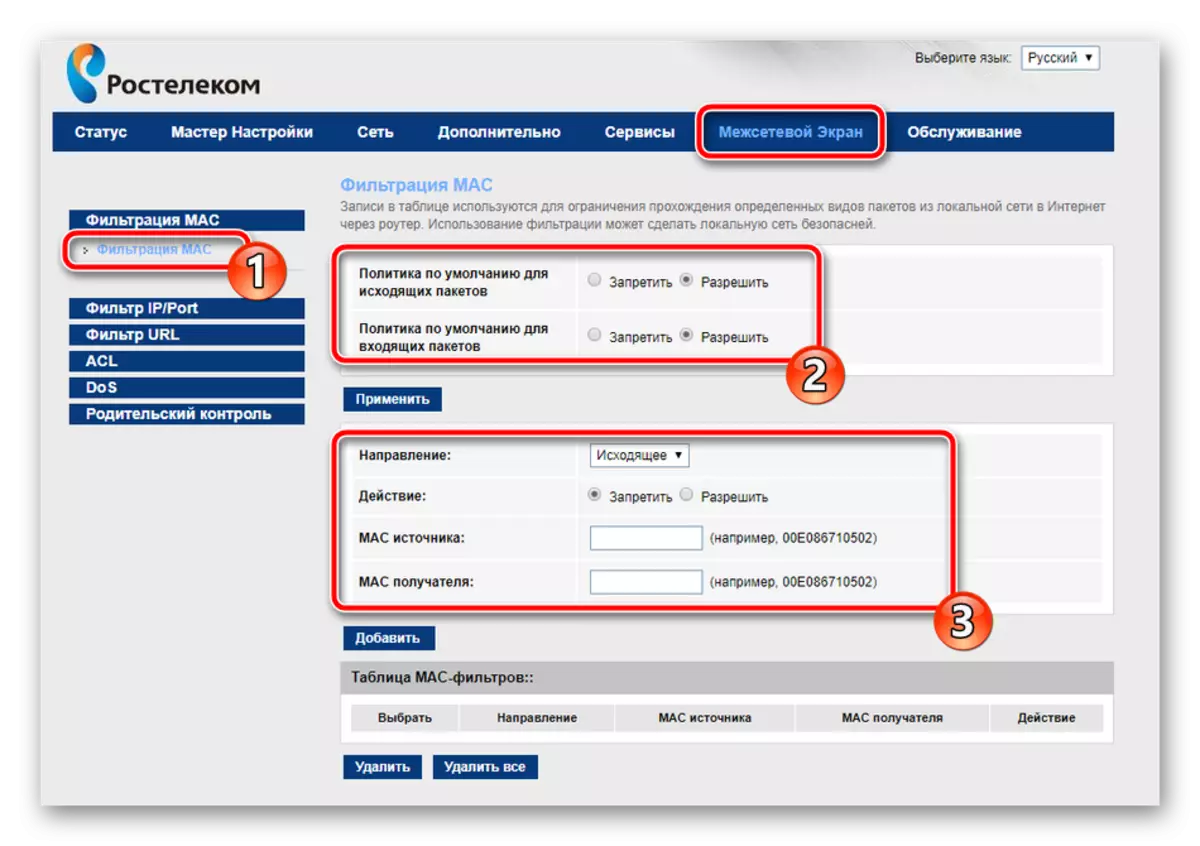
- Let's start with filtering MAC addresses. It is necessary to limit the transfer of certain data packets within your system. For a start, go to the "Firewall" tab and select the Mac Filter section there. Here you can ask policies by installing the marker for the appropriate value, as well as add addresses and apply to them actions.
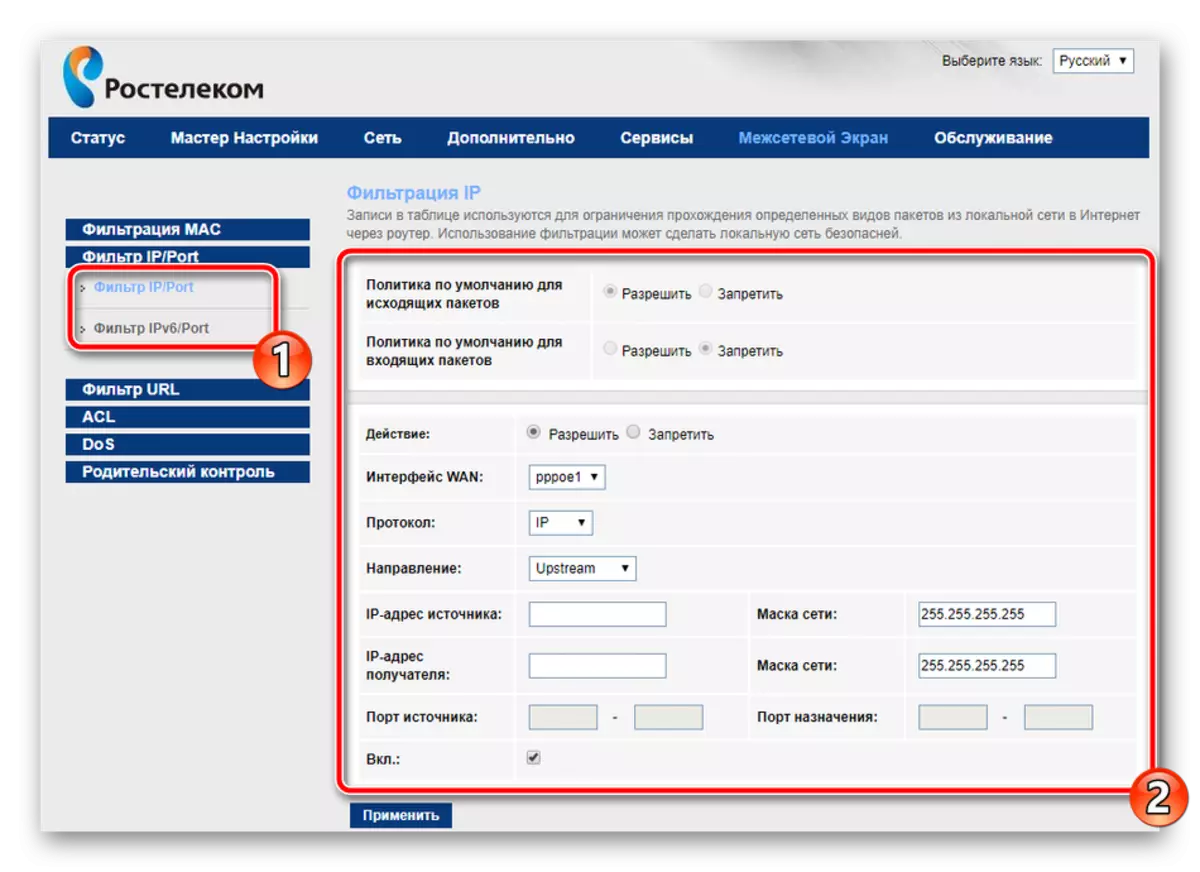
- Almost the same themes are performed with IP addresses and ports. The corresponding categories also indicate the policy, an active WAN interface and directly IP.
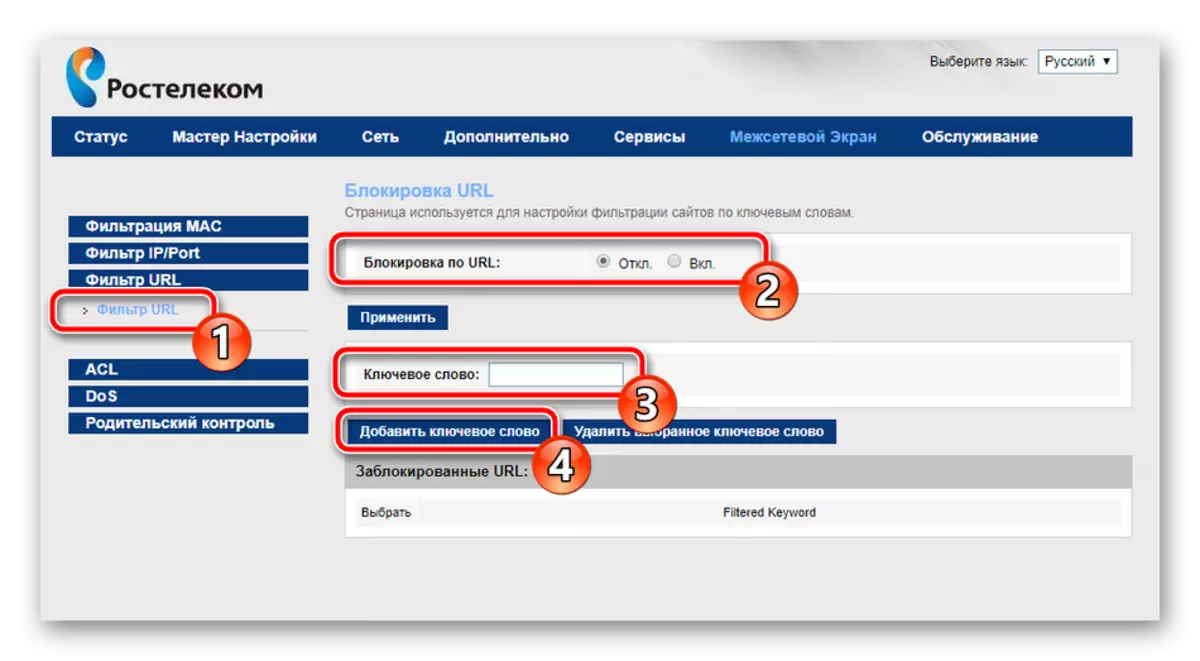
- The URL filter will allow you to block access to the links, in the title of which you have the keyword you specify. First activate the lock, and then create a list of keywords and apply changes, after which they will take effect.
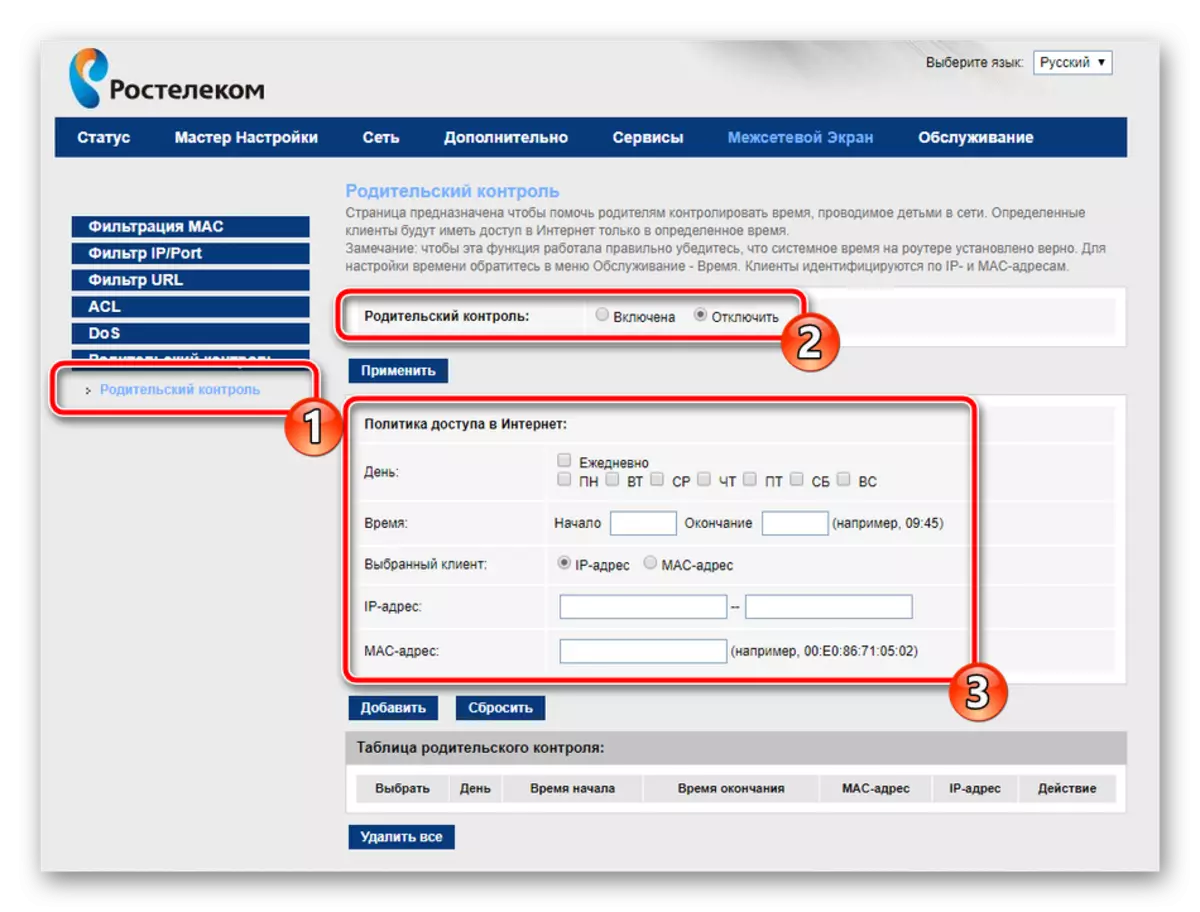
- The last thing I would like to mention in the "Firewall" tab - "Parental Control". By activating this feature, you can customize the time spent by children on the Internet. It is enough to choose the days of the week, the clock and add addresses of devices for which the current policy will be applied.


Let us dwell on the additional parameters, and then you can safely complete the main configuration of the Sagemcom F @ ST 1744 V4 router. Consider the most important and useful points:
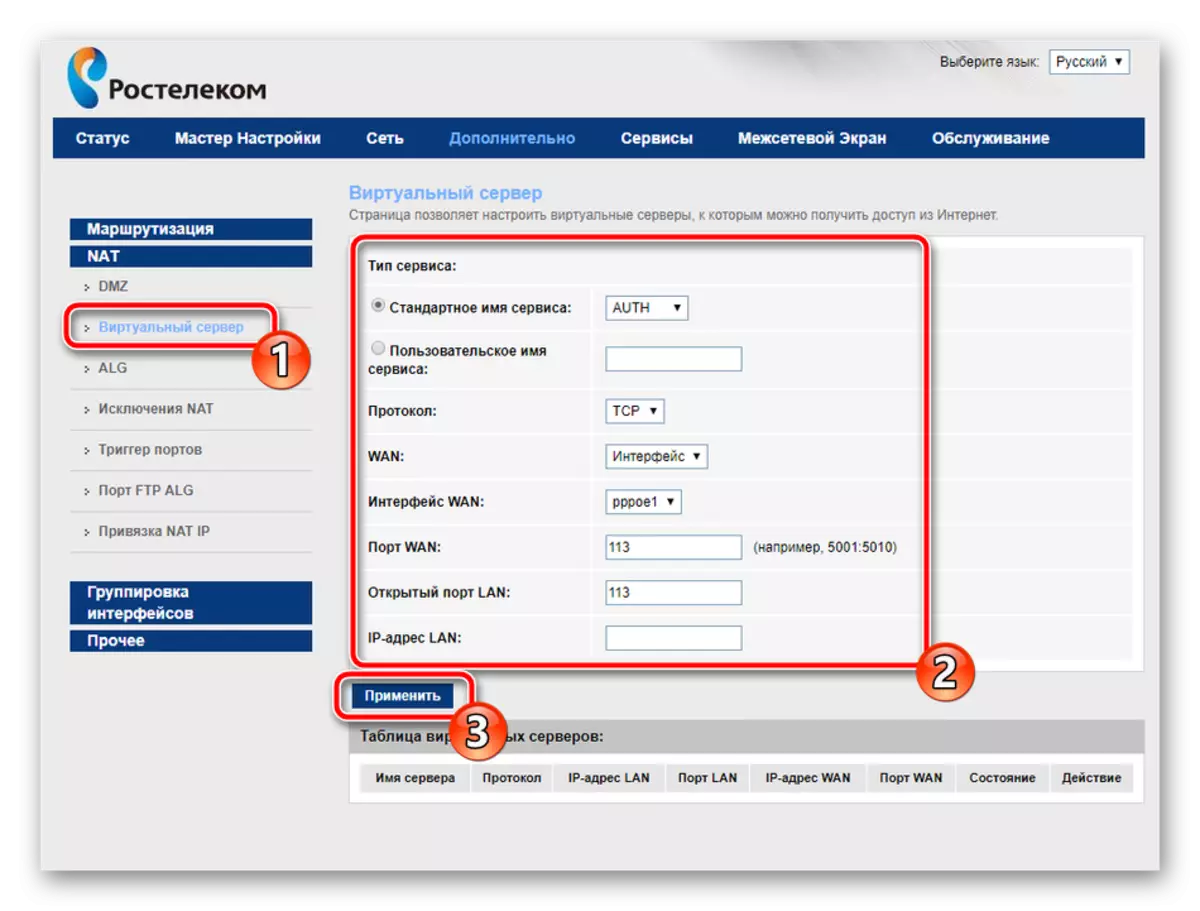
Read more: Opening ports on Rostelecom router
Security Setup
Special attention should be paid to the rules of security. They allow you to maximize themselves from intrusion of unwanted external connections, and also provide the ability to block and restrict some items that we will talk further:
On this, the procedure for adjusting the safety rules is completed. It remains only to configure multiple items and the entire process of working with the router will be over.
Completion setting
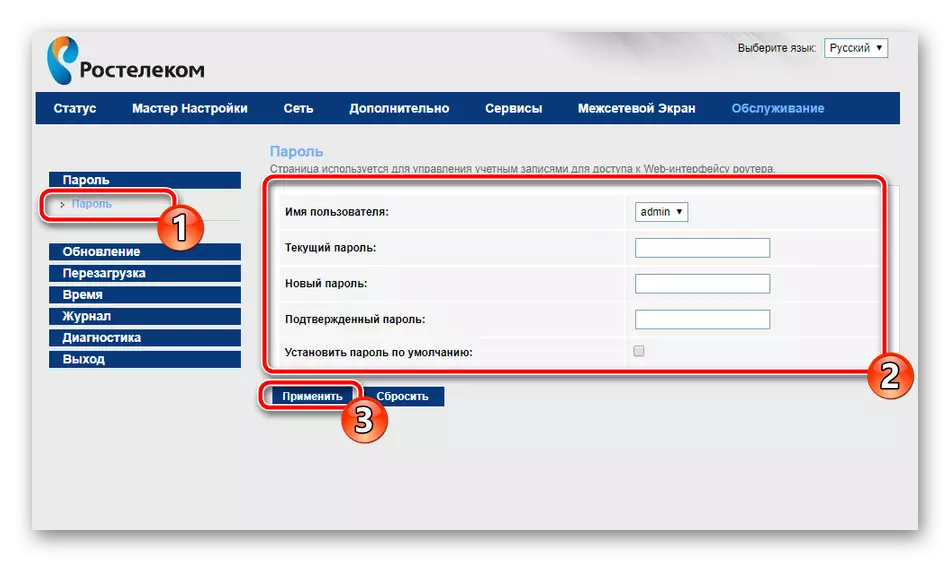
In the "Maintenance" tab, it is recommended to change the password of the administrator account. Make it is necessary for the obstacle to unauthorized connections of the device could not enter the web interface and change the values on their own. When you finish the changes, do not forget to click on the "Apply" button.
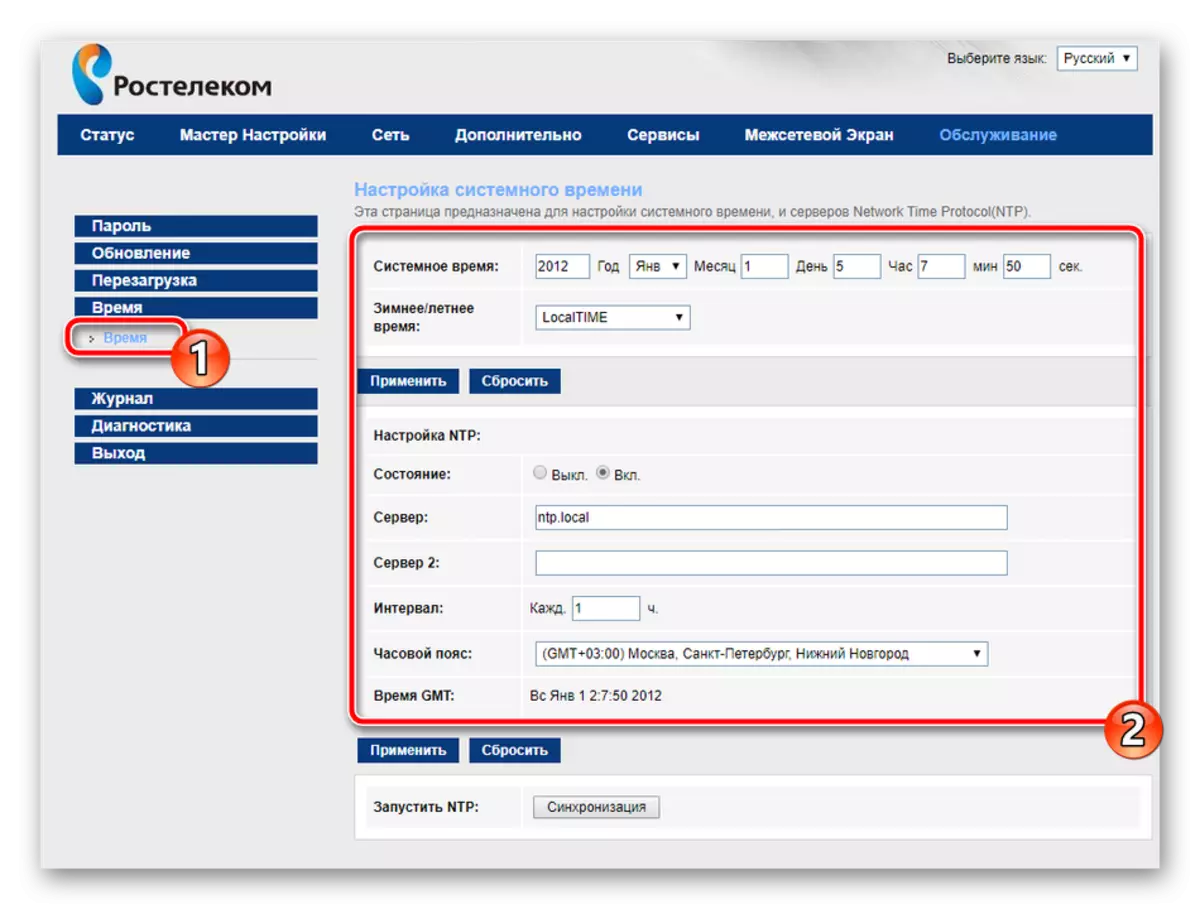
We advise you to set the right date and clock in the "Time" section. So the router will work correctly with the function of parental control and will ensure the correct collection of network information.
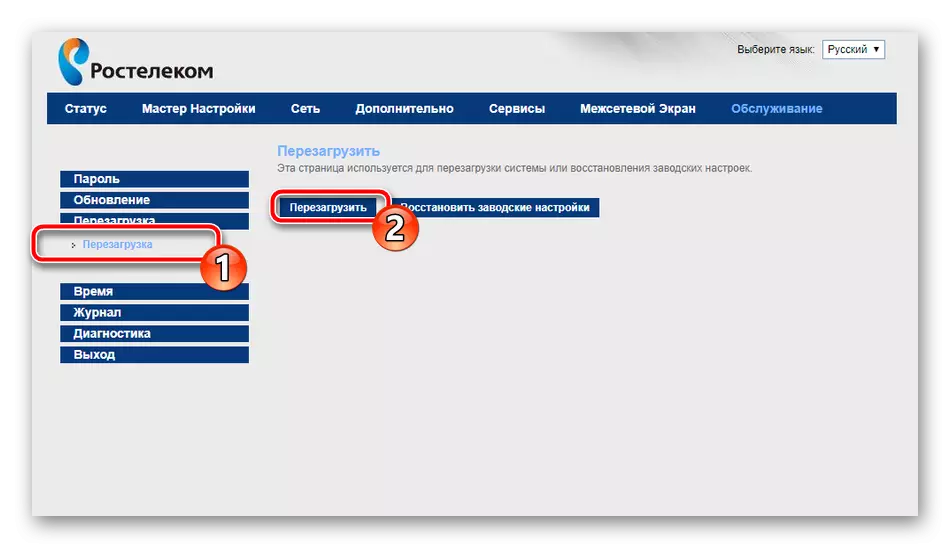
After graduating the configuration, restart the router to change the changes. This is done by pressing the corresponding button in the "Maintenance" menu.
Today we studied in detail the question of setting up one of the relevant branded models of Rostelecom routers. We hope our instructions were helpful and you easily deal with the entire editing procedure necessary parameters.