

VPN technology (Virtual Private Network) provides the ability to safely and anonymous surfing on the Internet by encrypting the connection, additionally allow you to bypass sites and various regional limitations. Options for using this protocol on a computer quite a lot (a variety of programs, browser extensions, own networks), but on devices with Android the situation is somewhat more complicated. Nevertheless, configure and use VPN in the environment of this mobile OS, it is possible to select several ways to choose from several ways.
Configure VPN on Android
In order to configure and provide a normal VPN operation on a smartphone or tablet with Android, you can go one of two ways: install a third-party application from Google Play Market or set the necessary parameters manually. In the first case, the entire process of connecting to a virtual private network, as well as its use, will be automated. In the second case, things are experiencing more difficult, but the user is provided with complete control over the process. We will tell you more about each of the solutions of this task.
Method 1: third-party applications
An actively growing desire of users to surf through the Internet without any restrictions is extremely high demand for applications that provide the ability to connect to VPN. That is why there are so many in the play markete that the choice of suitable sometimes becomes extremely difficult. Most of these solutions apply to subscription, which is a characteristic feature of only this segment. There are also free, but most often not inspired by the confidence of the application. And yet, one normally working, conditionally free VPN client we found, about him and tell me further. But first we note the following:

We strongly recommend not to use free VPN clients, especially if their developer is an unknown company with a dubious rating. If access to a virtual private network is provided free of charge, most likely, pay for it your personal data. With this information, application creators can dispose of anyone, for example, without your knowledge to sell or simply "merge" to its third parties.
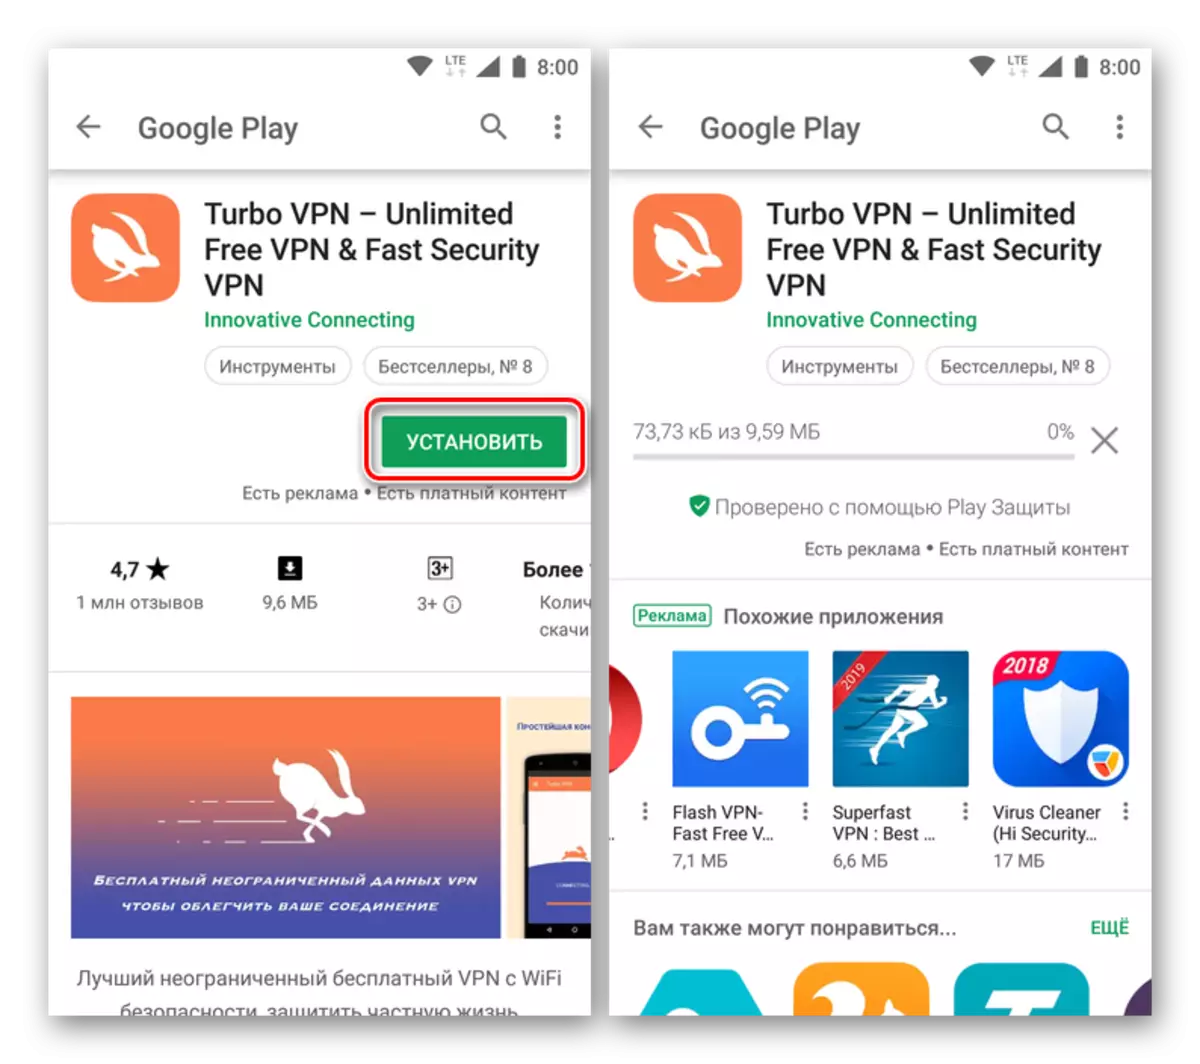
Download Turbo VPN on Google Play Market
- By clicking on the link above, install the TURBO VPN application, taping the corresponding button on the page with its description.
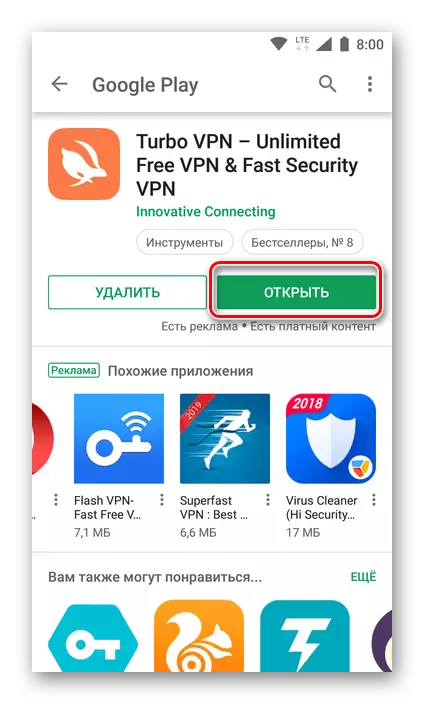
- Wait for the installation of the VPN client and click "Open" or run it later, using the created shortcut.
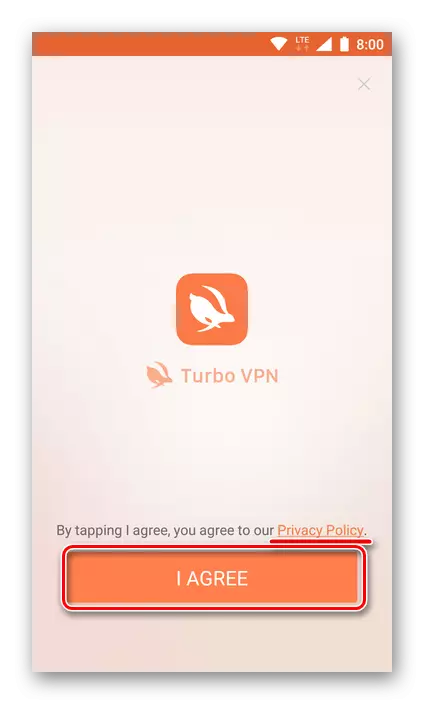
- If desired (and it is better to do), familiarize yourself with the privacy policy conditions, while moving in the image below the link below, and then tap the "I AGREE" button.
- In the next window, you can subscribe to the use of a trial 7-day version of the application or refuse this and go to the free option by clicking "No, thank you."

Note: In the case of selecting the first option (trial) after the expiration of the seven-day period from the account you specified, the amount will be written to the cost of a subscription to the services of this VPN service in your country.
- In order to connect to a virtual private network using the TURBO VPN application, click on the round button with the image of the carrot on its main screen (the server will be selected automatically) or on the globe in the upper right corner.

Just the second option and provides the ability to independently select a server for connecting, however, you first need to go to the "FREE" tab. Actually, only Germany and the Netherlands are available for free, as well as the automatic selection of the fastest server (but it is obviously carried out between two designated).

Deciding with the choice, tap on the name of the server, and then click "OK" in the "Connection request" window, which will appear at the first attempt to use VPN through the application.
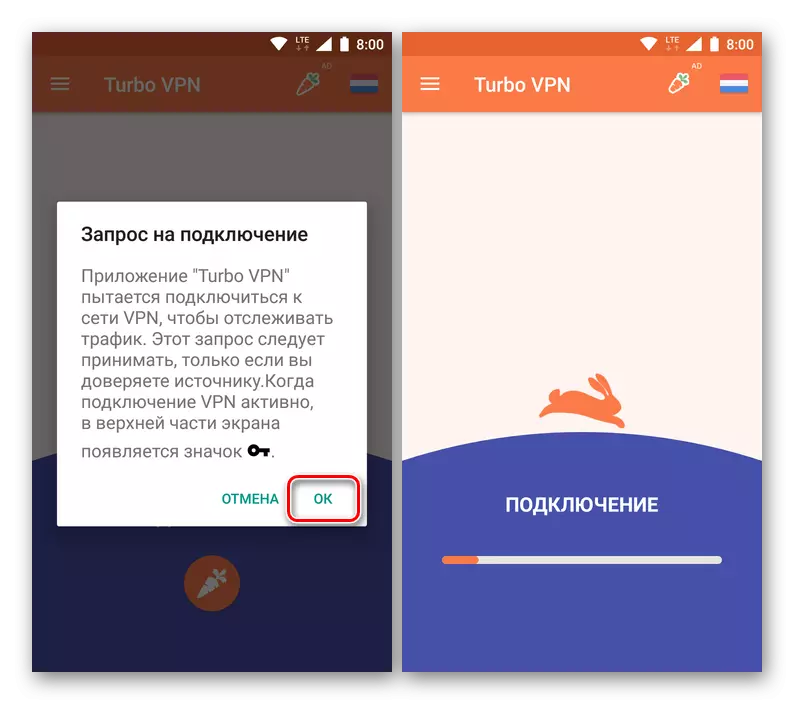
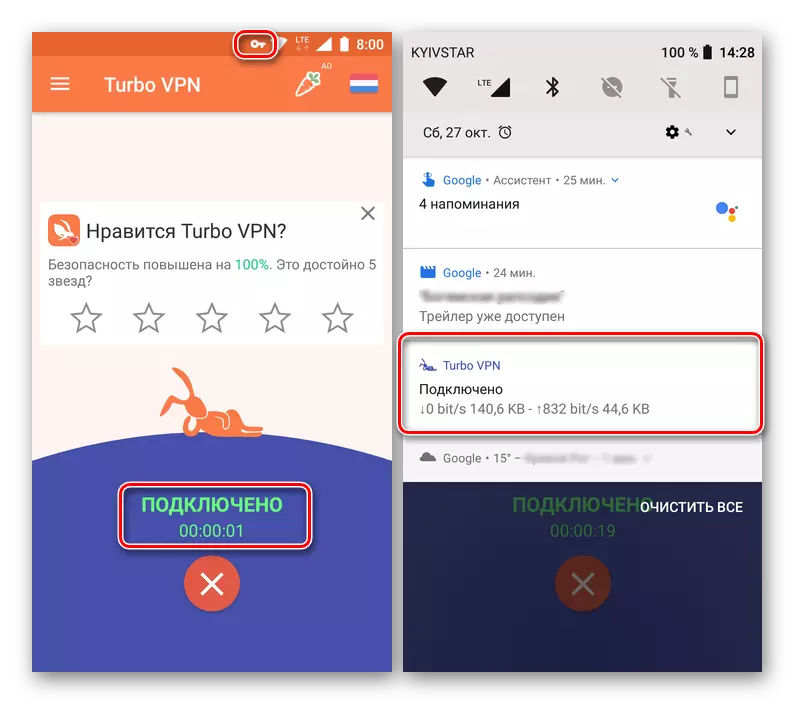
Wait for the connection to be completed, after which you can freely use VPN. The icon that signals the activity of the virtual private network will appear in the notification string, and the connection status can be monitored both in the main window TURBO VPN (its duration) and in the curtain (the transfer rate of incoming and outgoing data).
- As soon as you do all the actions for which VPN needed, disable it (at least in order not to spend the battery charge). To do this, run the application, click the button with the image of the cross and in the window with a pop-up advertisement tap on the inscription "Disconnect".

If you need to re-connect to the virtual private network, start the Turbo VPN and click on the carrot or pre-select the appropriate server in the Free offer menu.
As you can see, there is nothing complicated to set up, or rather, connect to VPN for Android through a mobile application. The Turbo VPN client considered by us is very simple and easy to use, it is free, but it is in this that his key deficiency is. Only two servers are available to the choice, although if desired, you can make a subscription and access to a wider list of them.
Method 2: Standard System Tools
Configure, and then start using VPN on smartphones and tablets with Android, you can and without third-party applications, it is enough to resort to standard tools for the operating system. True, all parameters will have to be set manually, plus it will also need to find the network data necessary for its operation (server address). Just about obtaining this information, we will tell first.

How to find out the server address to configure VPN
One of the possible options for receiving the information you will be quite simple. True, it will work only if earlier you independently organized an encrypted connection within its home (or working) network, that is, the one with which will be connected. In addition, some Internet providers give relevant addresses to their users when entering into an agreement on the provision of Internet services.
In any of the above cases, you can learn the server address using a computer.
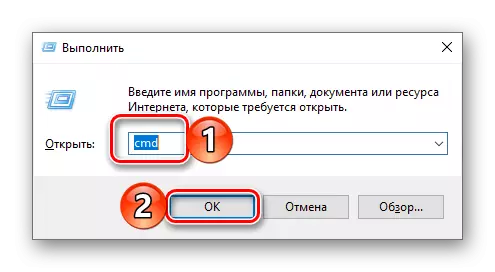
- On the keyboard, press "Win + R" to call the "Run" window. Enter the CMD command there and click OK or ENTER.
- In the opened command line interface, enter the command below and press "ENTER" to execute it.
ipconfig
- Rewrite somewhere, located opposite the inscription "Main Gateway" (or just do not close the "Command Line" window) - this is the server address you need.

There is another option of obtaining the address of the server, it is to use the information provided by the paid VPN service. If you already use the services of this, contact support for this information (if it is not specified in the Personal Account). Otherwise, you will have to first organize your own VPN server by contacting the specialized service, and only then use the information received to configure the virtual private network on the mobile device with Android.
Creating an encrypted connection
As soon as you learn (or get) the necessary address, you can start manual configuration of the VPN on your smartphone or tablet. This is done as follows:
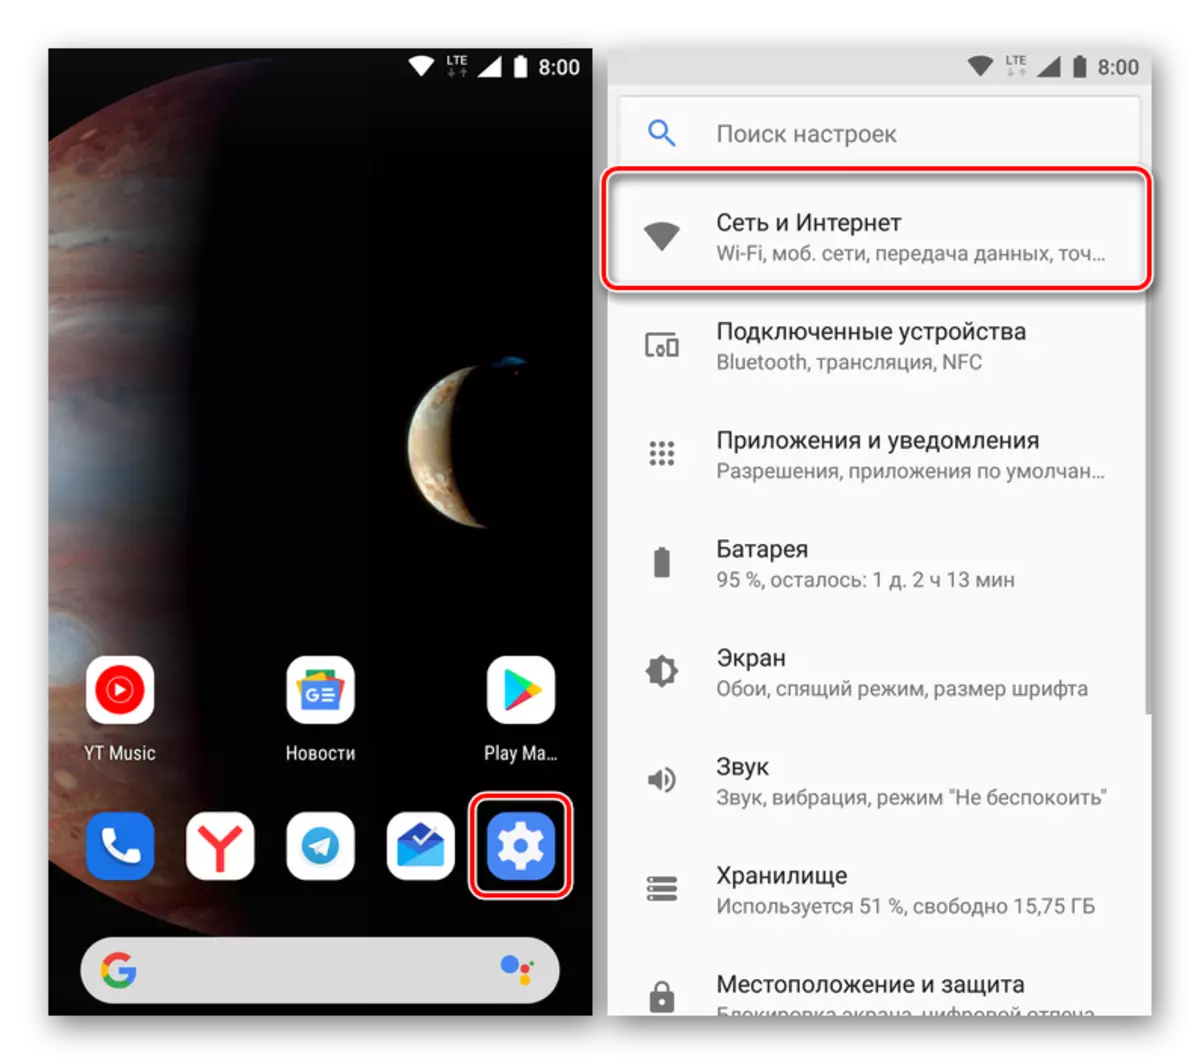
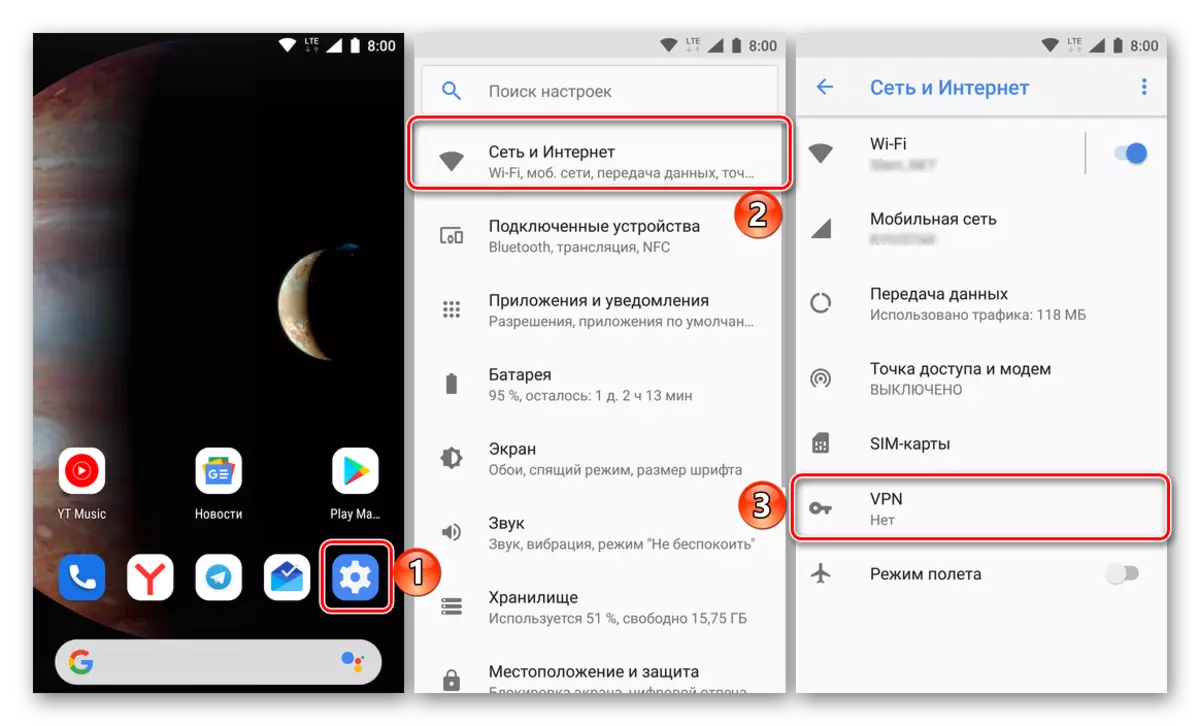
- Open the "Settings" of the device and go to the "Network and Internet" section (most often it is first in the list).
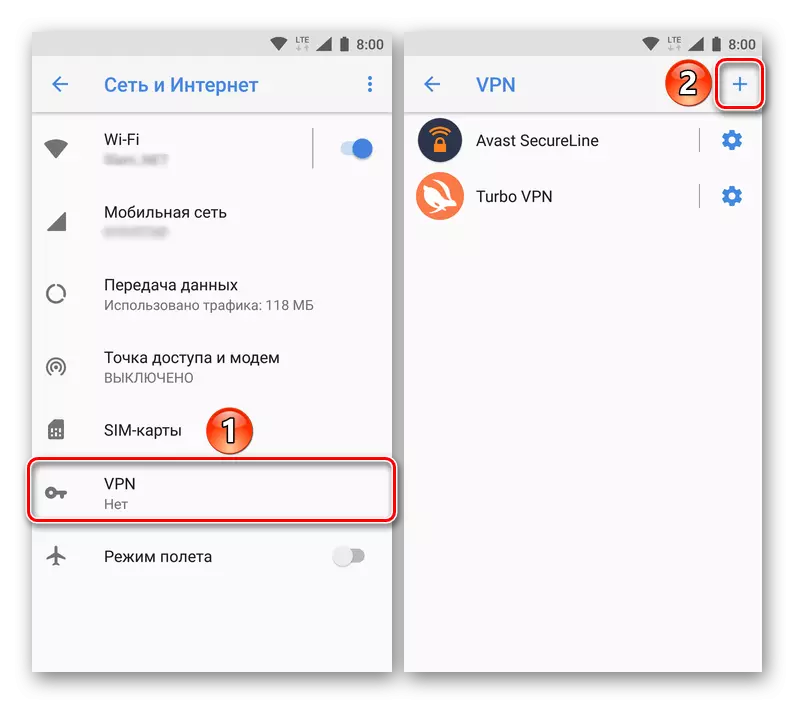
- Select "VPN", and finding it in it, tap on the plot image in the right corner of the top panel.
Note: On some versions of the Android for displaying the VPN item, you must first click "Yet" , When switching to its settings, you may need to enter a PIN code (four arbitrary figures that need to be remembered, and it is better to write somewhere).
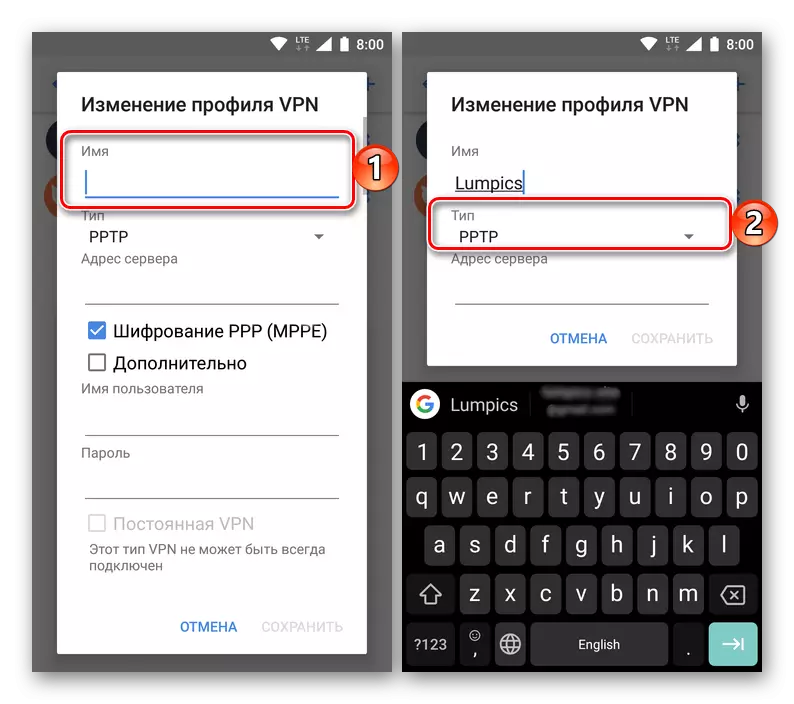
- In the VPN connection settings window that opens, give a future network name. In the quality of the protocol used, install PPTP if another value was set by default.
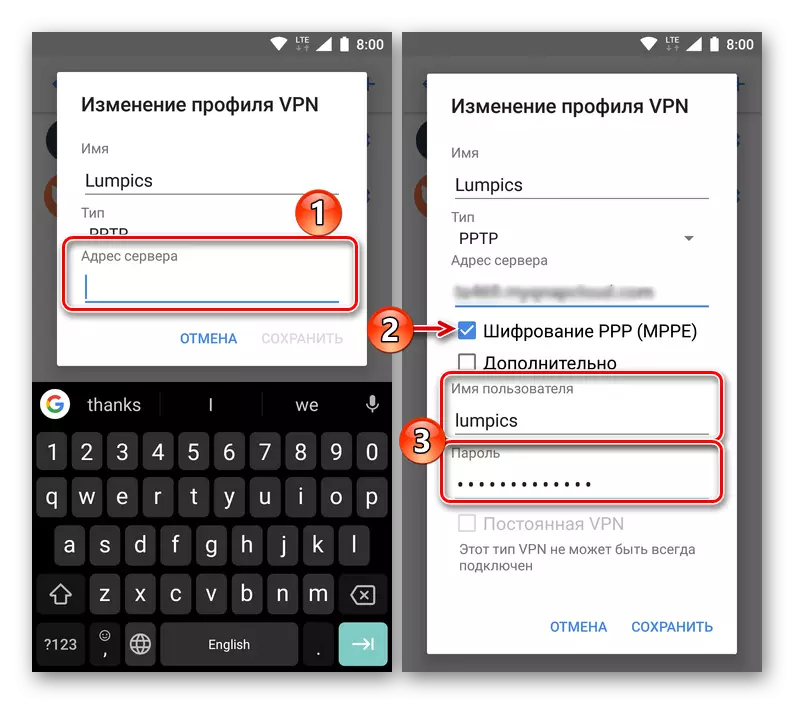
- Specify the address of the server to the box intended for this, mark the checkbox "Encryption". In the "Username" and "Password" strings, enter the relevant information. The first may be arbitrary (but convenient for you), the second is the most complex corresponding to the generally accepted security rules.
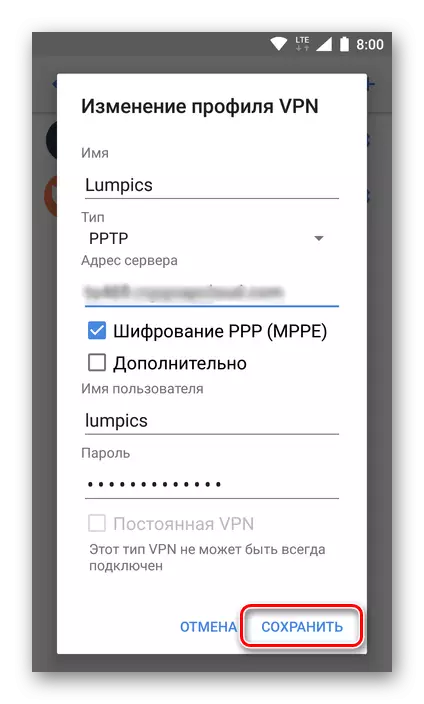
- By setting all the necessary information, tap "Save" inscriptions located in the lower right corner of the NPN profile settings window.
Connect to the created VPN
By creating a connection, you can safely switch to secure web surfing. This is done as follows.
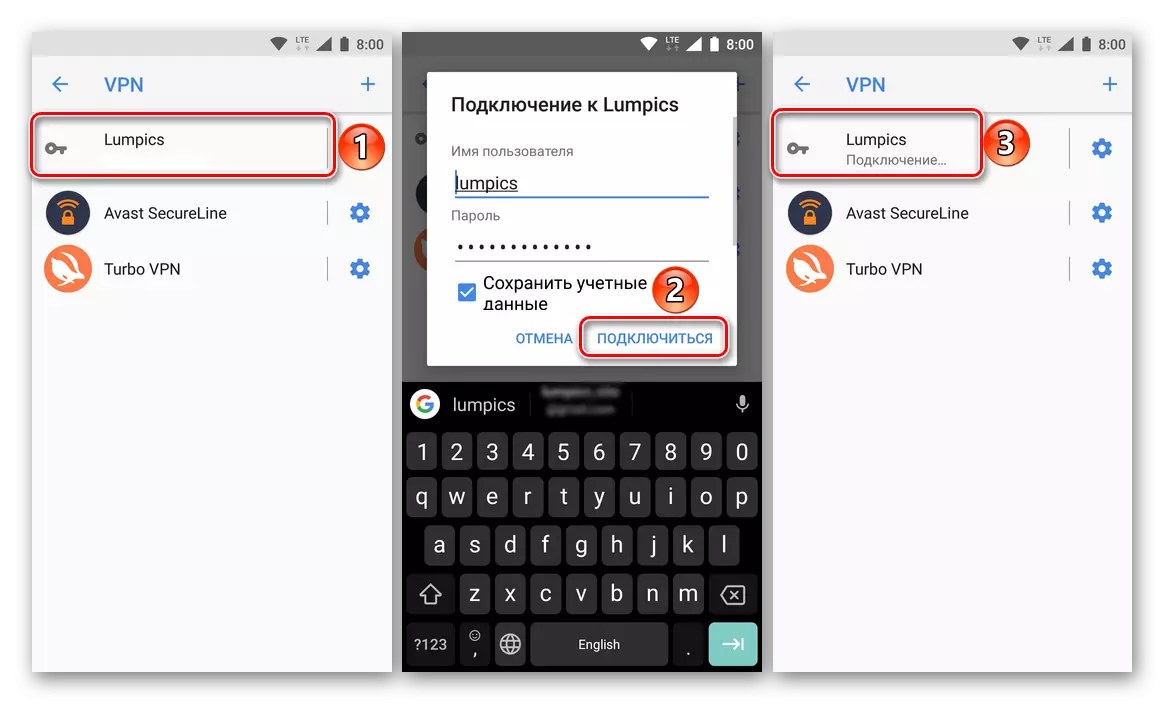
- In the "Settings" of the smartphone or tablet, open the "Network and Internet" section, followed by the VPN item.
- Click on the created connection, focusing on the name you have invented, and, if necessary, enter the previously specified login and password. Checkbox opposite the "Save credentials" item, then tap "Connect".
- You will be connected to your own VPN connection, which flashes the key image in the status bar. General information about connecting (speed and amount of accepted and received data, duration of use) are displayed in the curtain. Pressing the message allows you to go to the settings, you can also disable the virtual private network.

Now you know how to independently configure VPN on your mobile device with Android. The main thing is to have the appropriate server address, without which the network use is impossible.
Conclusion
In this article, we reviewed two options for using VPN on Android devices. The first of them exactly does not cause any problems and difficulties, as it works in automatic mode. The second is much more complicated and implies that it is an independent setting, and not the usual launch of the application. If you want not only to control the entire process of connecting to a virtual private network, but also feel comfortable and safely in the course of web surfing, we strongly recommend either to buy a proven application from a well-known developer, or configure everything yourself, finding or, again by purchasing the necessary For this information. We hope this material was useful for you.