
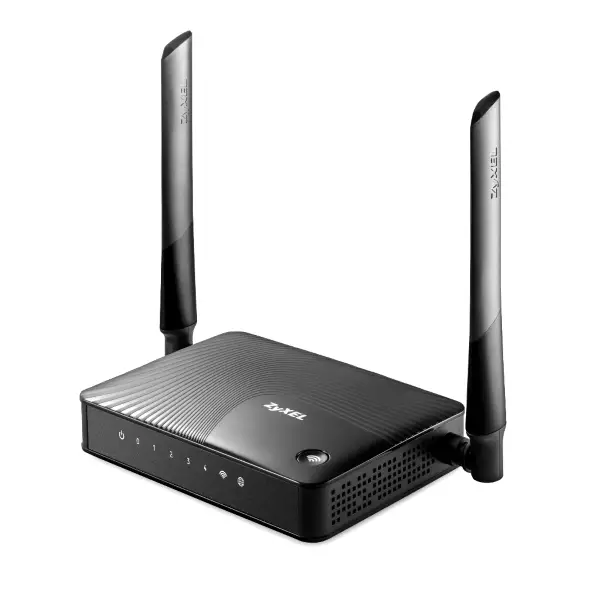
ZyXEL's products are known primarily for IT specialists, since it specializes in server equipment. This company and consumer devices have: in particular, it was Ziksel who was the first to come to the technocular of the post-Soviet space with Dial-Up modems. The current range of this manufacturer includes advanced wireless routers as, for example, the Keenetic series. The device from this line with the name Lite 3 is the newest version of the budget Internet centers ZyXEL - Below we will tell you how to prepare it for work and set up.
Primary preparation stage
The first steps to be done are to prepare it for work. The procedure is simple and lies in the following:
- Choosing a router installation location. At the same time, try to keep the device away from the sources of interference in the form, for example, Bluetooth gadgets or radio readeries, as well as metal barriers that can significantly worsen the passage of the signal.
- Connecting to the provider cable router and the connection of the device with a computer by means of a patchcord. On the back of the case there is a block with connectors - the Internet provider cable should be attached to the WAN-connector, and both ends of the patchcord insert the router and computer LAN connector. All connectors are signed and marked with color marks, so there should be no problems with the connection.
- The final stage of the preset is the preparation of the computer. Open the TCP / IPv4 protocol properties and make sure that the network card is automatically received.

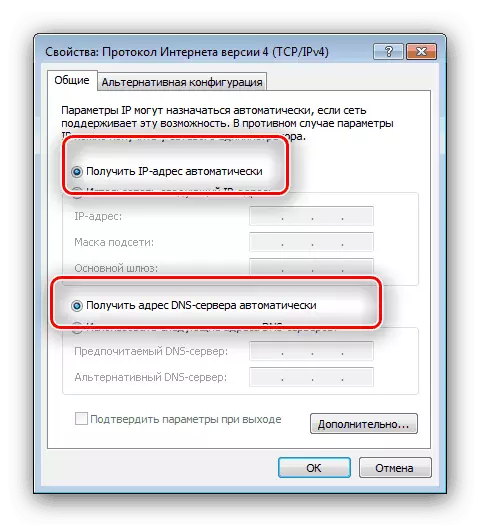
Read more: Setting up the LAN Windows 7
Connect the router to the power grid and proceed to configuration.
Zyxel Keenetic Lite 3 setup options
Configuring the router under consideration is performed through a web application that this manufacturer is a miniature OS. To access it, you will need to use the browser: Open it, enter the address 192.168.1.1 or my.kenetic.net and press ENTER. In the authorization data entry window, write the name Admin and password 1234. It will not be superfluous to take a look at the bottom of the device - there is a sticker with the exact data of the transition to the configurator interface.

Actually, the setting can be made in two in two different ways: using the quick configuration utility or an independent setting of parameters. Each method has its advantages, so we consider both.
Fast setting
During the first connection of the router to the computer, the system will offer to use quick setup or immediately go to a web configurator. Select the first.

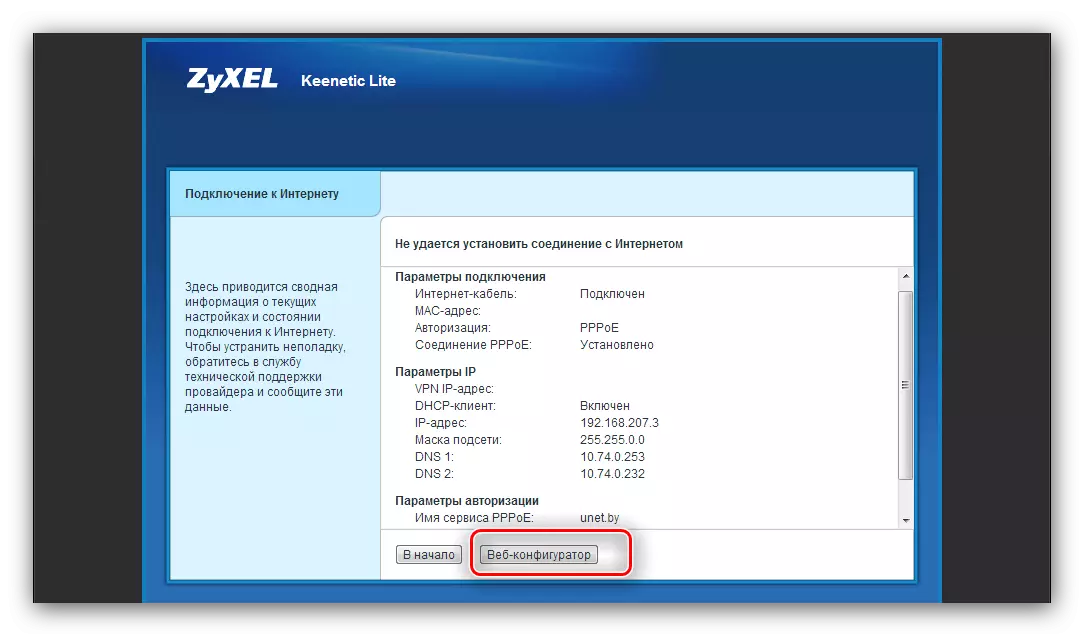
If the provider's cable is not connected to the device, you will see the following message:

It appears and in case of malfunction with a wire provider or a router connector. If this notice does not appear, the procedure will go like this:
- First, decide on the MAC address parameters. The names of the available options speak for themselves - set the desired and press "Next".
- Next, set the IP Address Receive: Specify the appropriate option from the list and continue configuration.
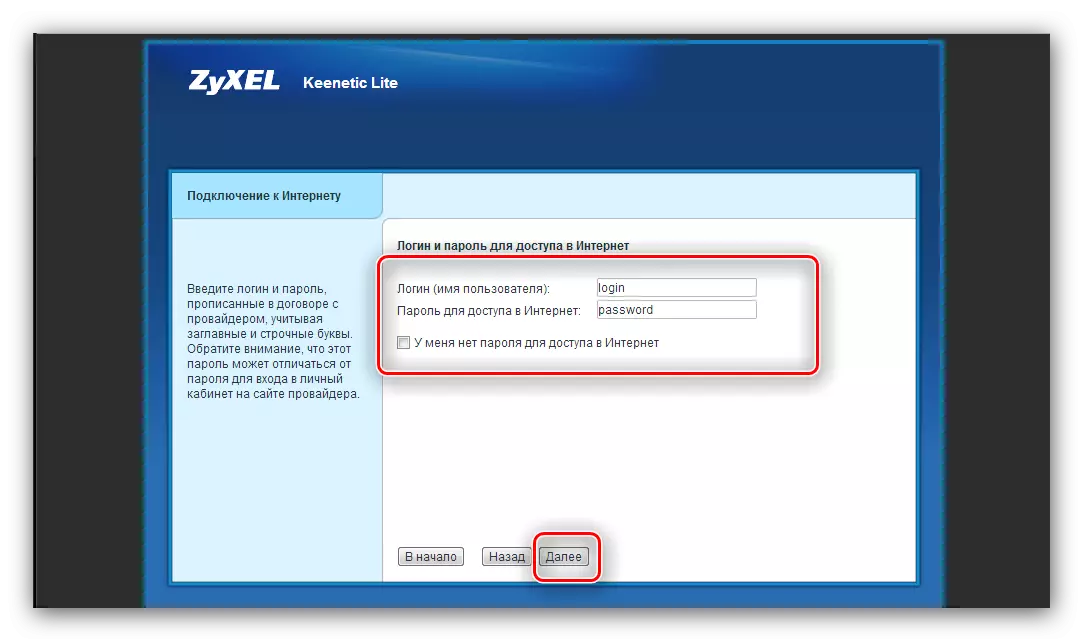
- The following window will have to enter the authentication data that you must provide the Internet service provider.
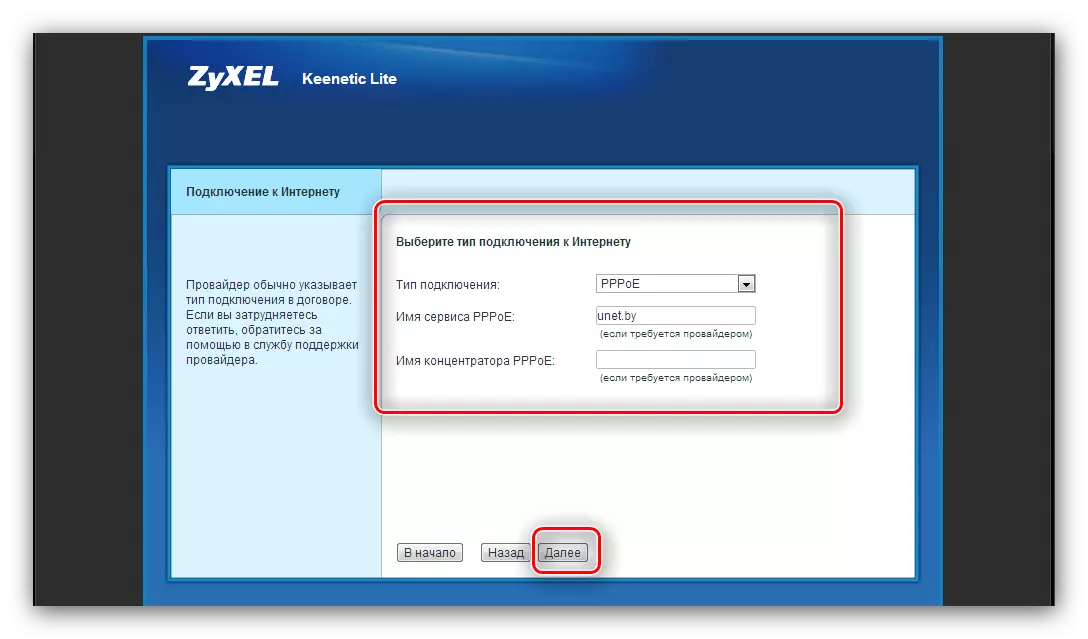
- Here, specify the connection protocol and enter additional parameters if required.
- The procedure is completed by pressing the "Web Configurator" button.


Wait 10-15 seconds until the parameters take effect. After this time, an Internet connection must be connected. Please note that simplified mode does not allow you to configure the wireless network - it can be done only manually.
Self-configuration
A manual version of the configuration of the router provides the ability to more accurately adjust the Internet connection parameters, and this is the only way to organize the Wi-Fi connection.
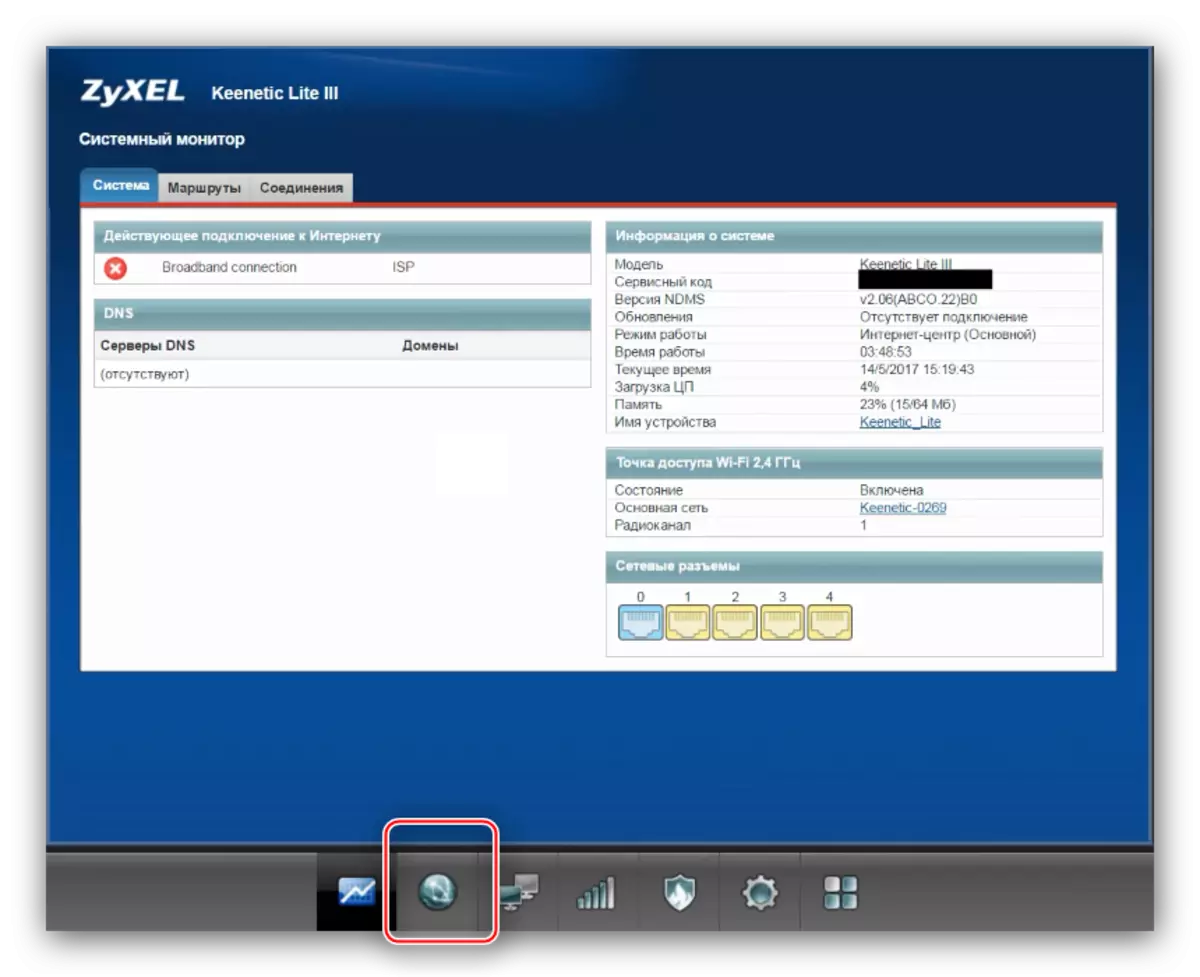
To do this, in the welcome window, click the "Web Configurator" button.

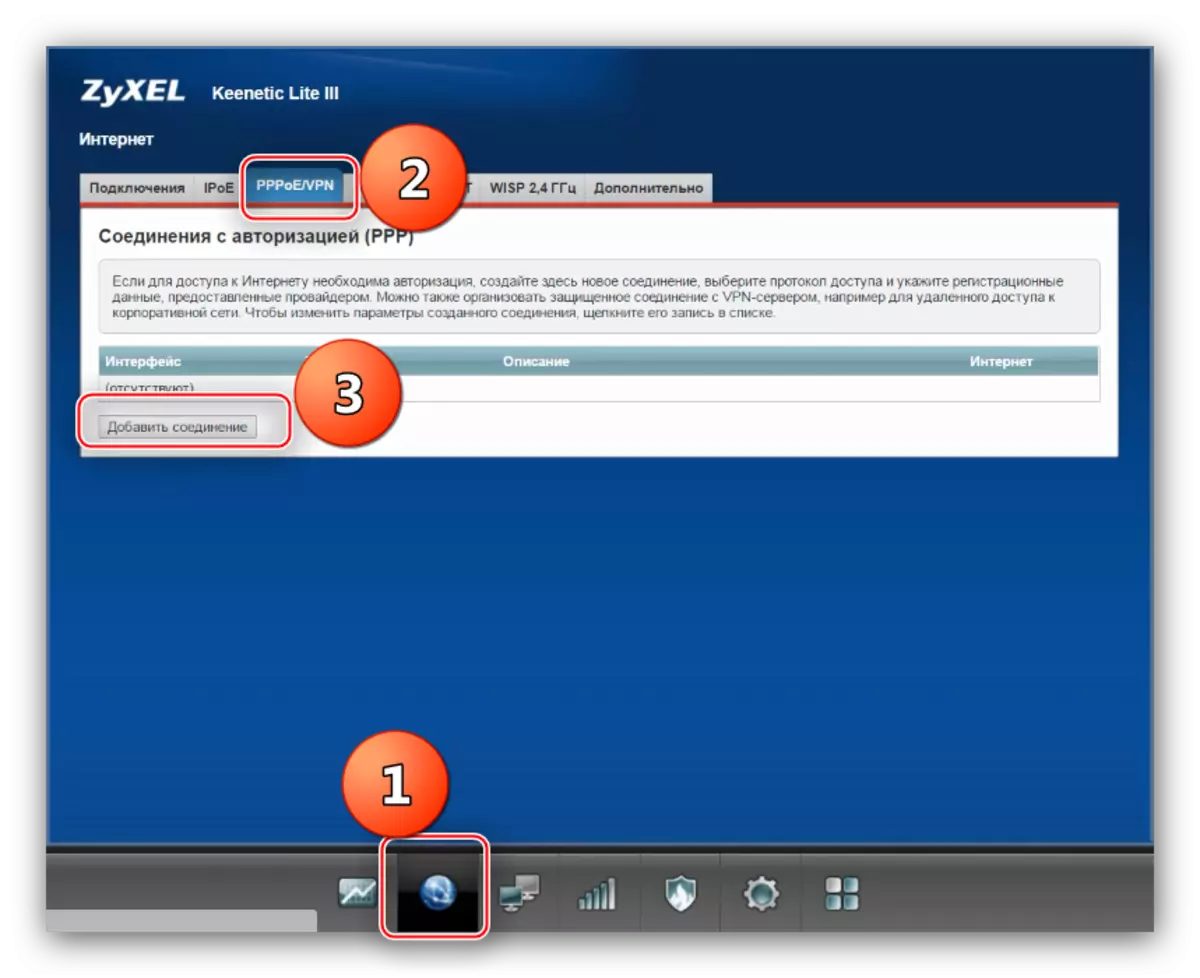
To get to the Internet configuration, take a look at the button at the bottom of the button at the bottom and click on the image of the globe.
Further actions depend on the type of connection.
PPPOE, L2TP, PPTP
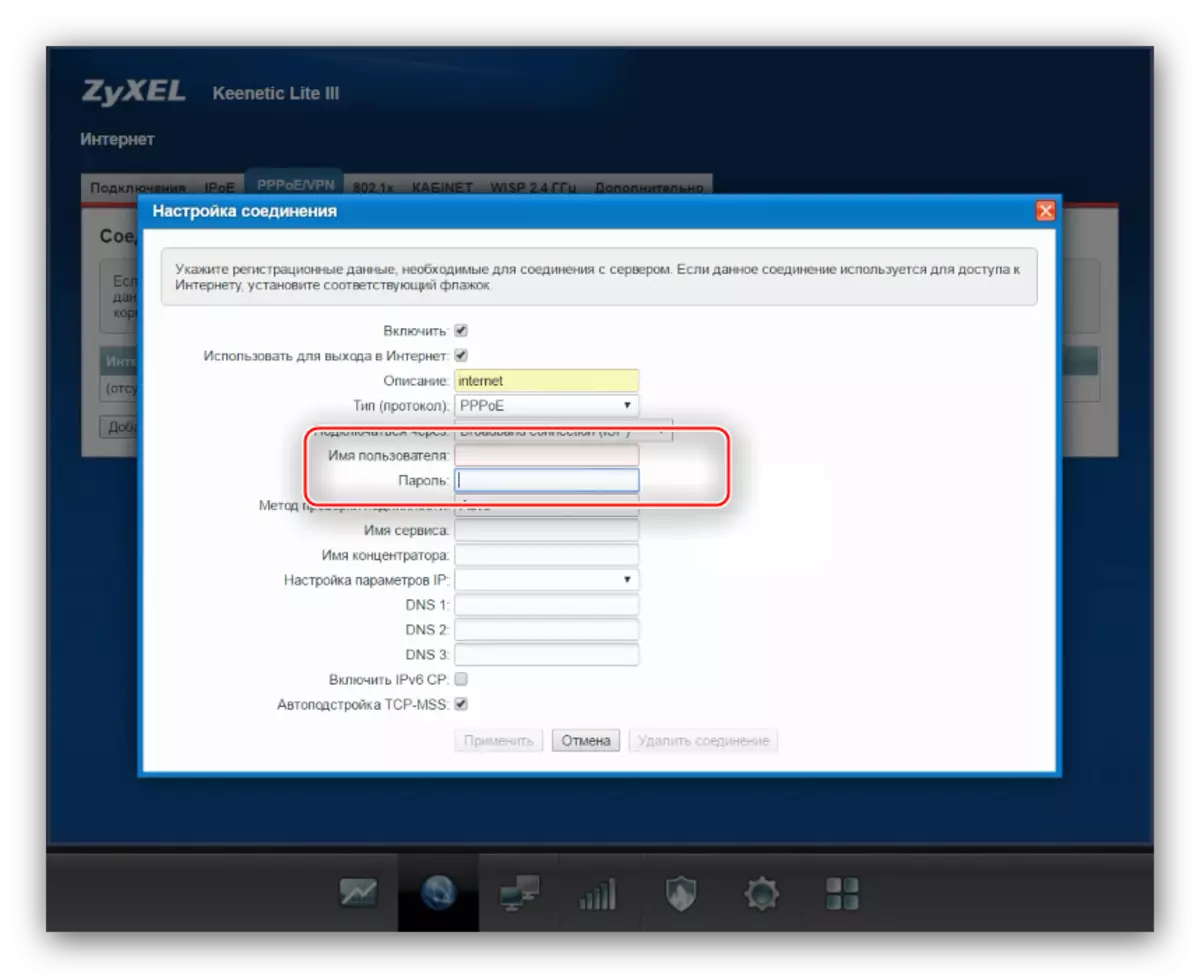
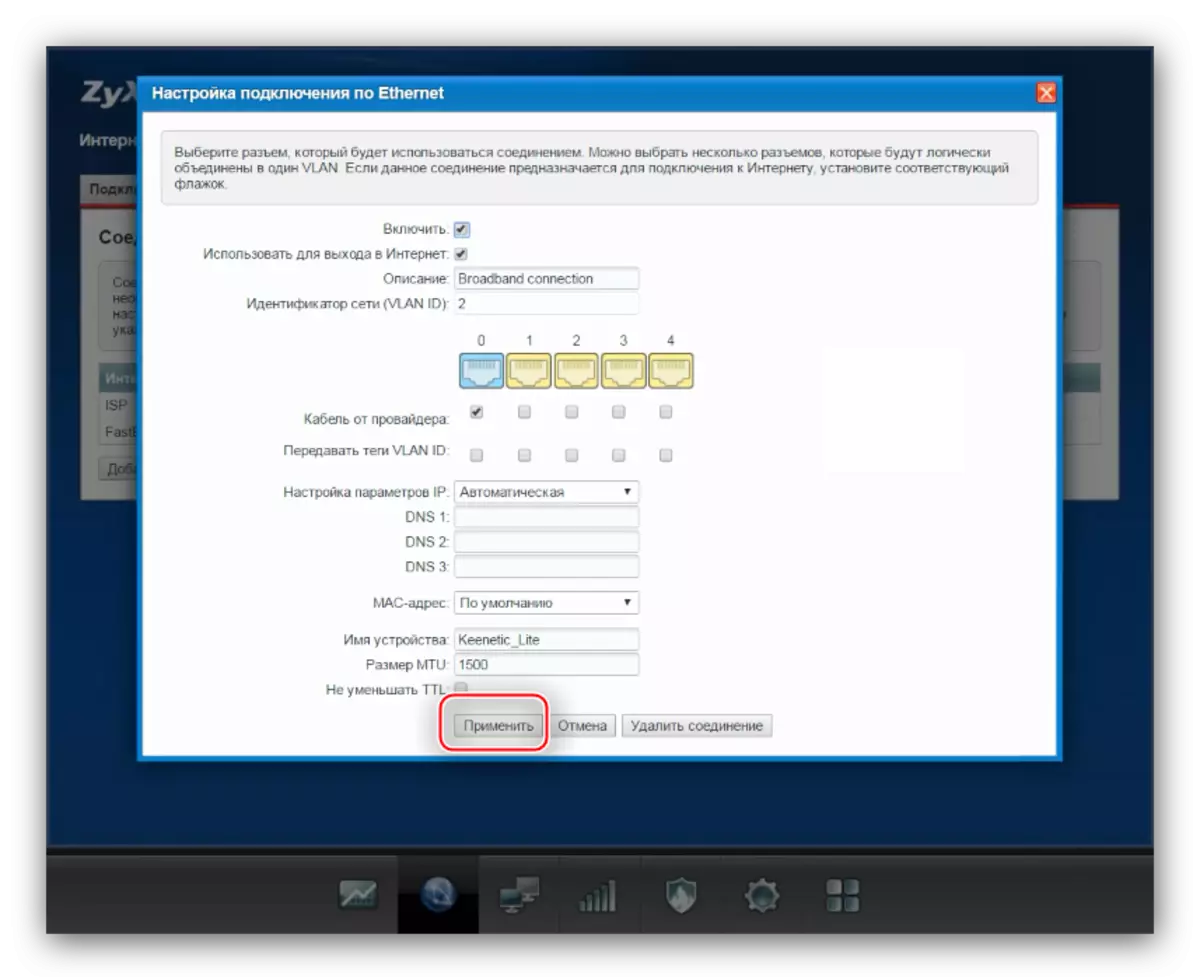
- Click the tab with the name "PPPOE / VPN".
- Click option "Add Connection".
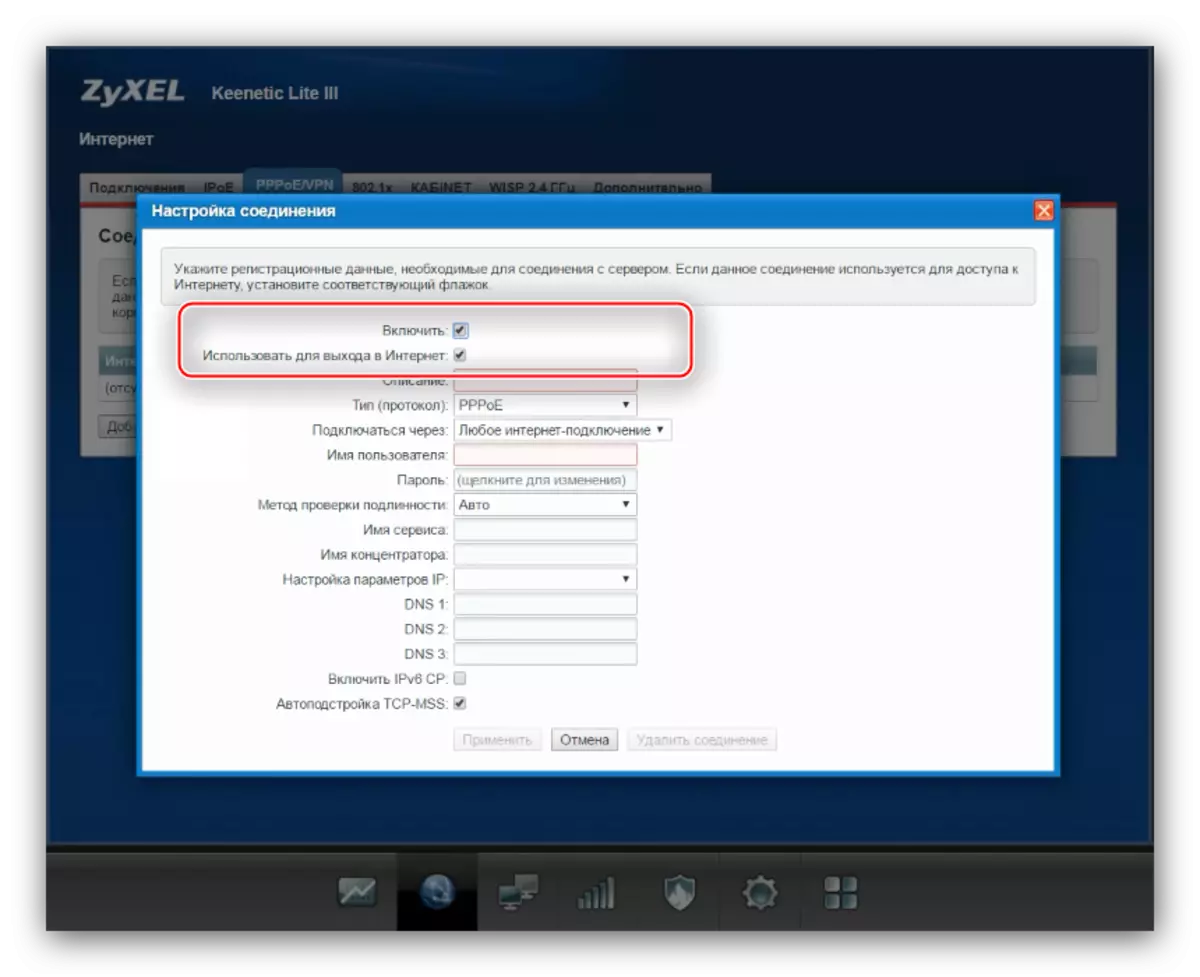
- A window with parameters will appear. First, make sure that there are ticks opposite two top options.
- Next, you need to fill in the description - you can call as you like, but it is advisable to specify the type of connection.
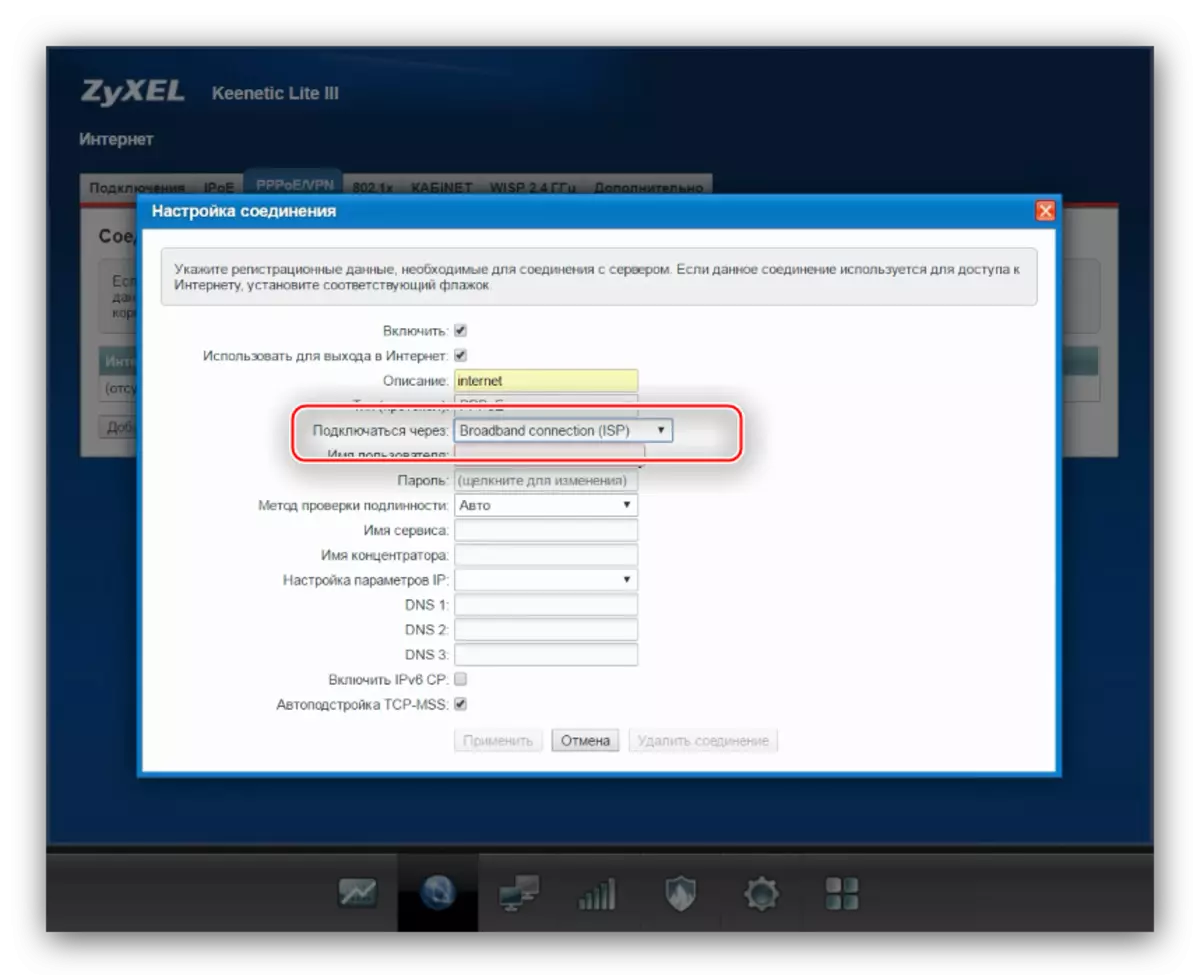
- Now pick up the protocol - expand the list and select the desired option.
- In the "Connect via" point, check "Broadband Connection (ISP)".
- In the case of PPPOE connections, you need to enter data for authentication on the provider server.
For L2TP and PPTP, you should also specify the address of the VPN service provider.
- In addition, you will need to select the type of receiving addresses - fixed or dynamic.
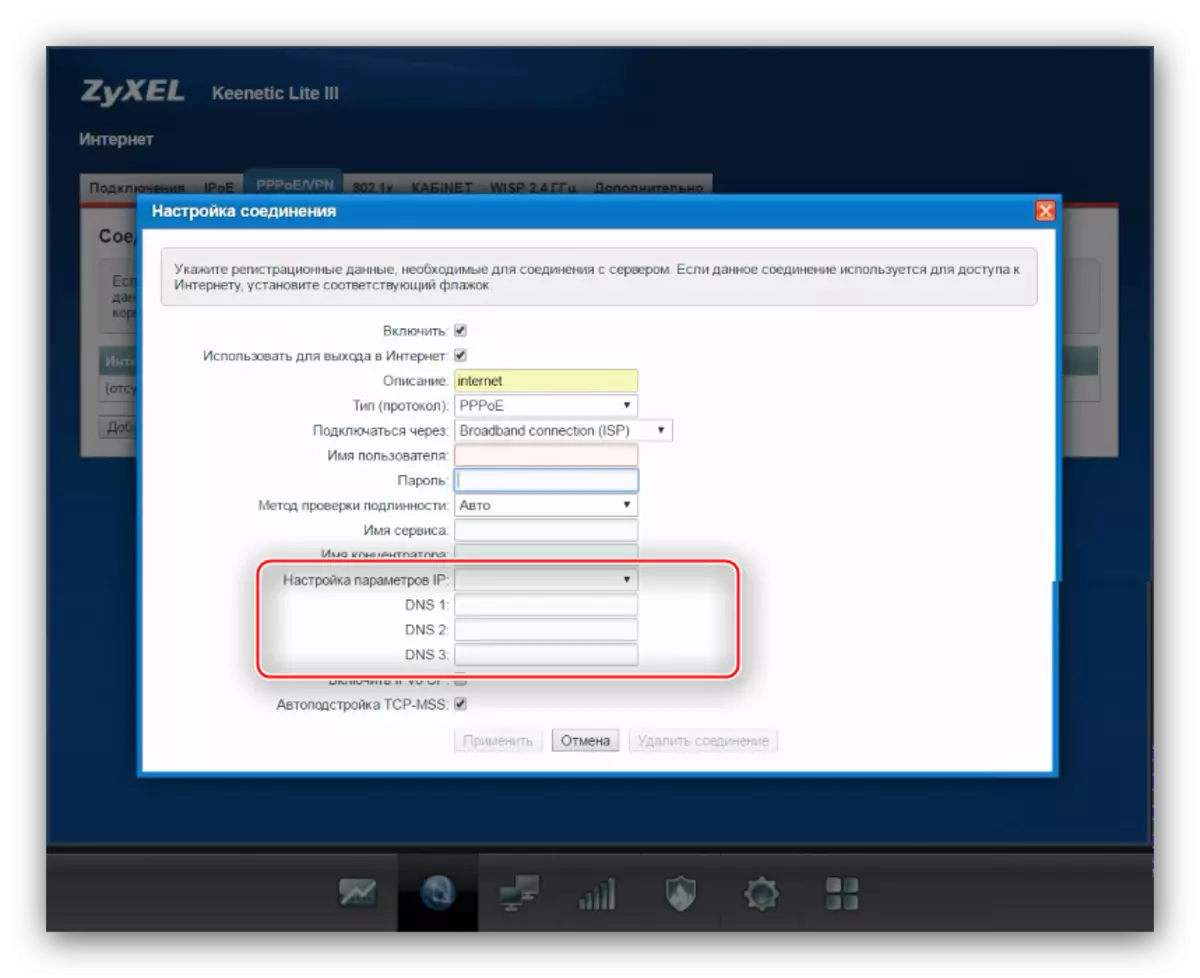
In the case of a static address, you will need to enter the working value, as well as the codes assigned by the operator of the domain name servers.
- Use the Apply button to save the parameters.
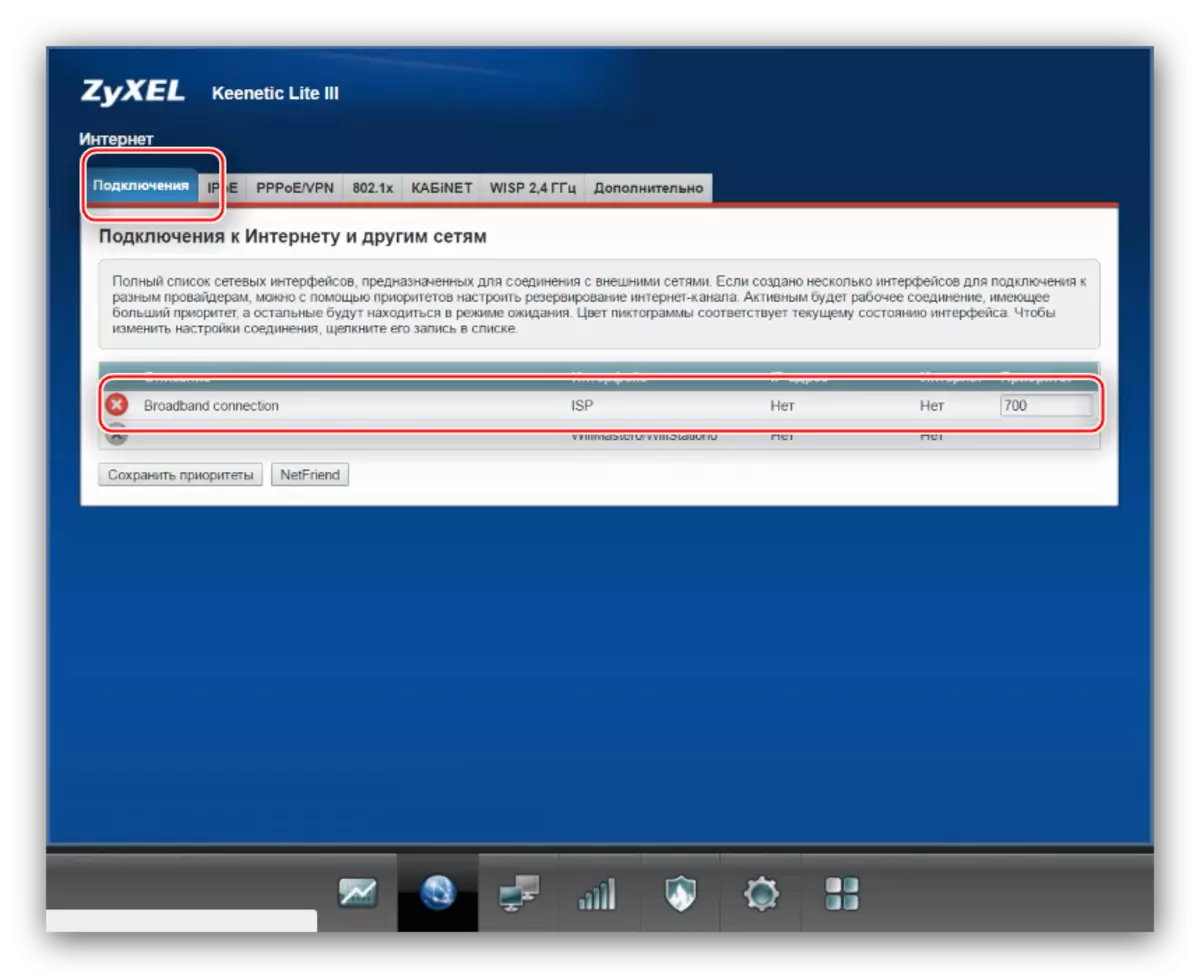
- Go to the "Connection" tab and click on Broadband Connection.
- Here specify whether the connections ports are active, check the MAC address, as well as the MTU value (for PPPOE only). After that, click "Apply".


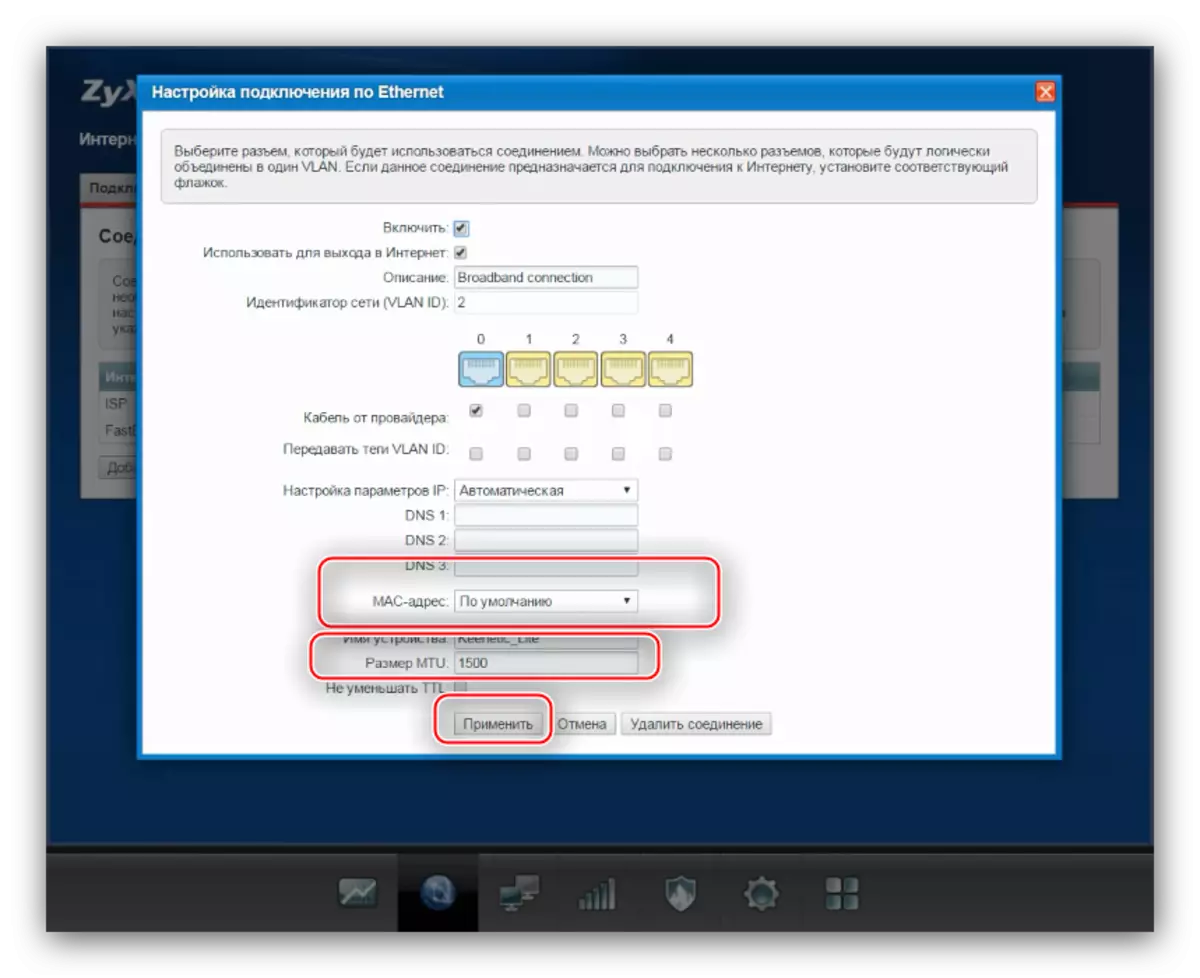
As in the case of a quick setting, it will take some time to use entered parameters. If everything is installed correctly and according to the instructions, the connection will appear.
DHCP configuration or static IP
The connection configuration procedure for the IP address is somewhat different from PPPOE and VPN.
- Open the "Connections" tab. IP connections are installed in connection with the name "Broadband": it is present by default, but is not initially optimized. Click on his name for configuration.
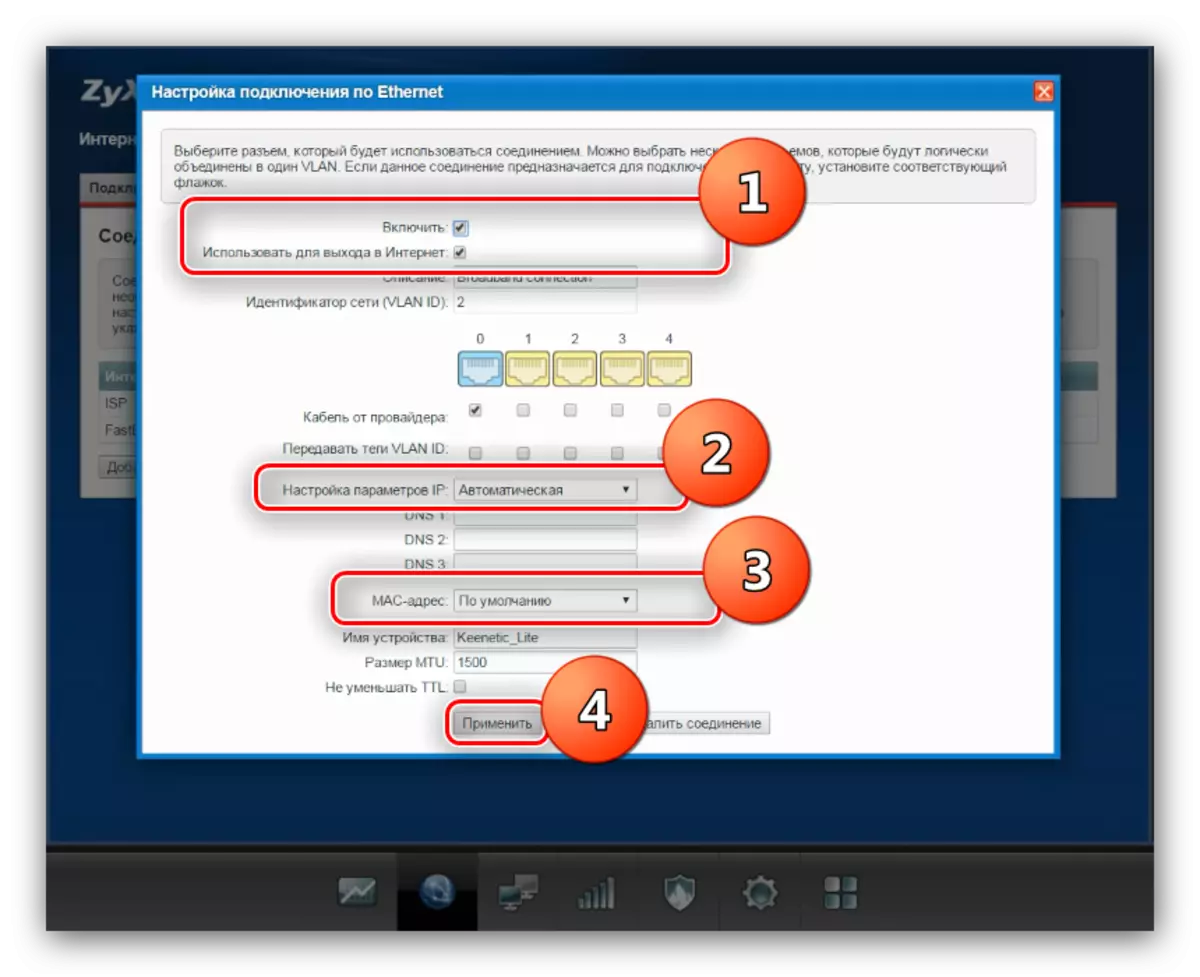
- In the case of dynamic IP, it is enough to make sure that the checkboxes are in front of the "Enable" and "use to use" items, then enter the MAC address parameters if the provider requires. Click "Apply" to save the configuration.
- In the case of a fixed IP in the "Setting IP Settings" menu, select Manual.
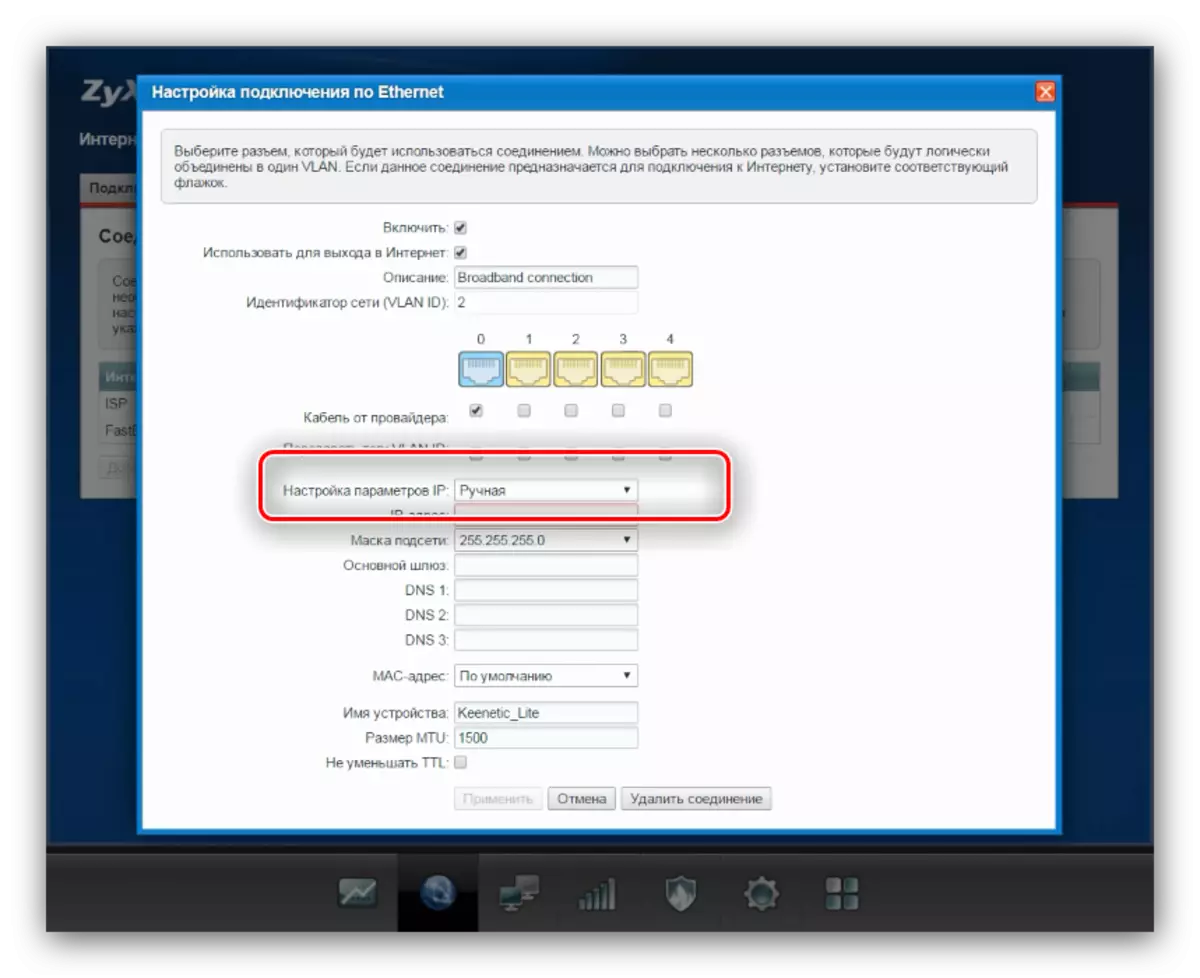
Next, specify in the appropriate lines of the connection address, gateway and domain name servers. Leave the subnet mask by default.
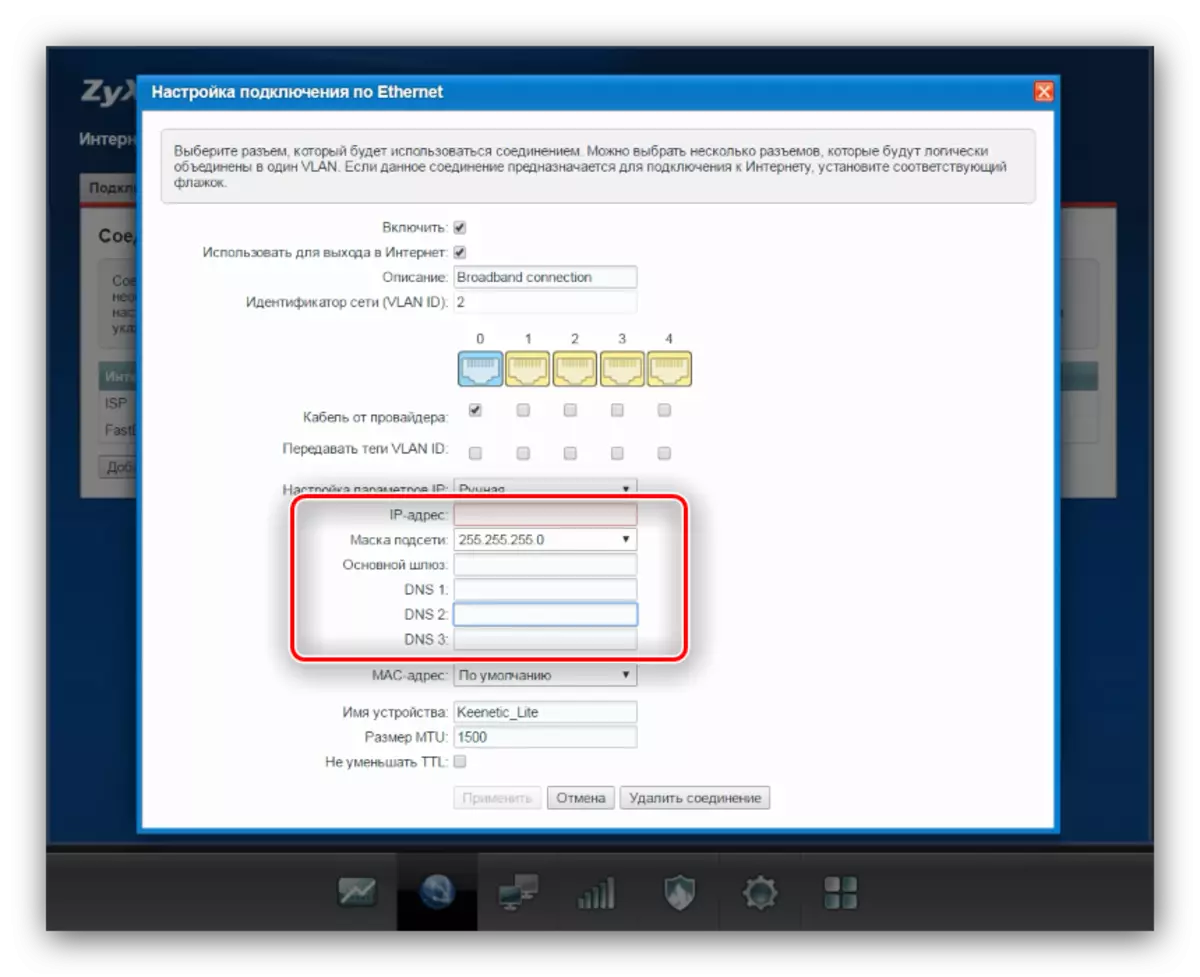
If necessary, change the parameters of the hardware address of the network card and press "Apply".


We introduced you to the principle of configuring the Internet on the Keenetic Lite 3. Router 3. Go to the Wi-Faya configuration.
Keenetic Lite 3 Wireless Connection Parameters
The Wi-Fi settings on the device under consideration are located in a separate section "Wi-Fi network", which is indicated by the button as a wireless connection icon in the lower block of the buttons.
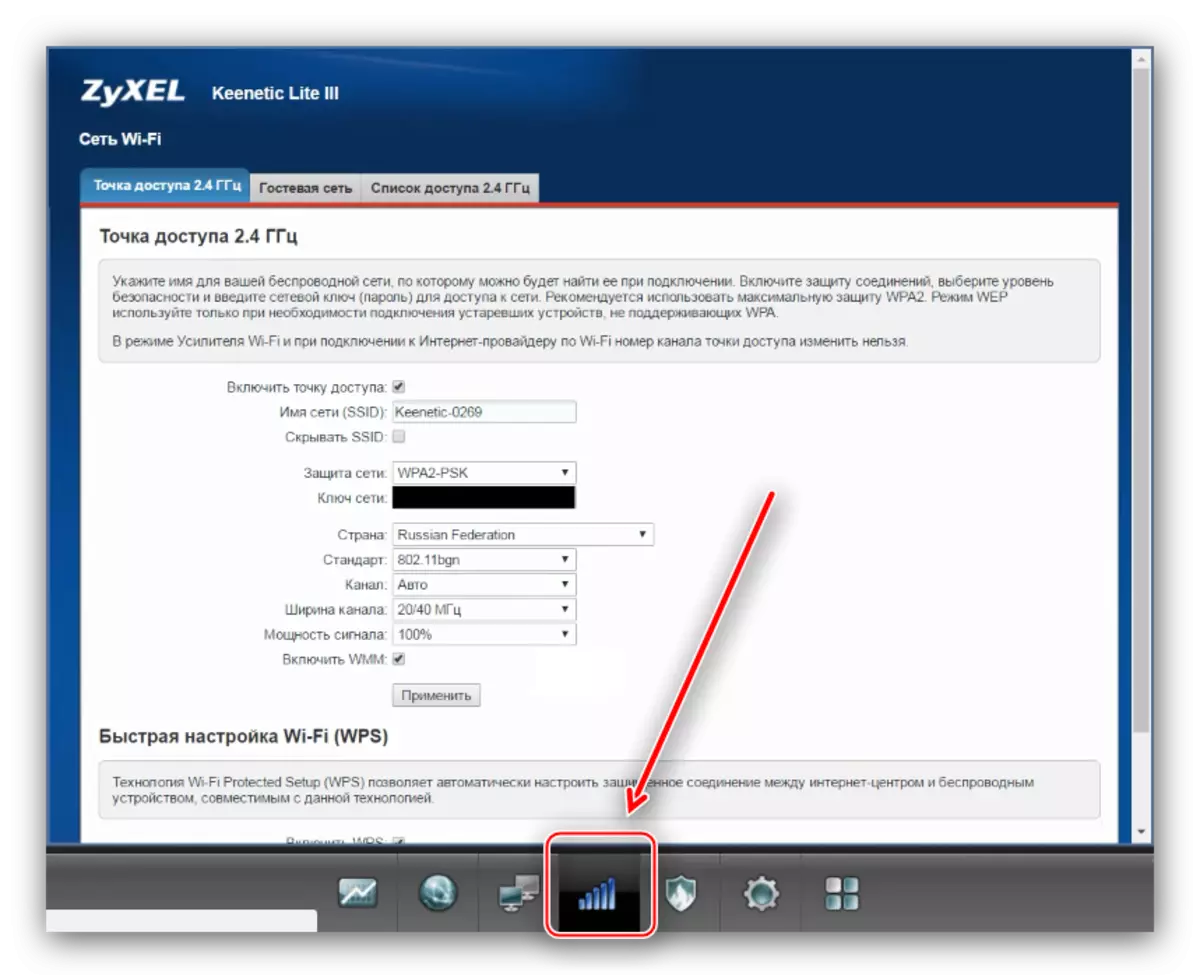
The configuration of the wireless mode occurs as follows:
- Make sure the "Access Point 2.4 GHz" tab is open. Next specifies SSID - the name of the future Wi-Fi network. In the "Network Name (SSID) line, specify the desired name. Option "Hide SSID" leave in a disconnected state.
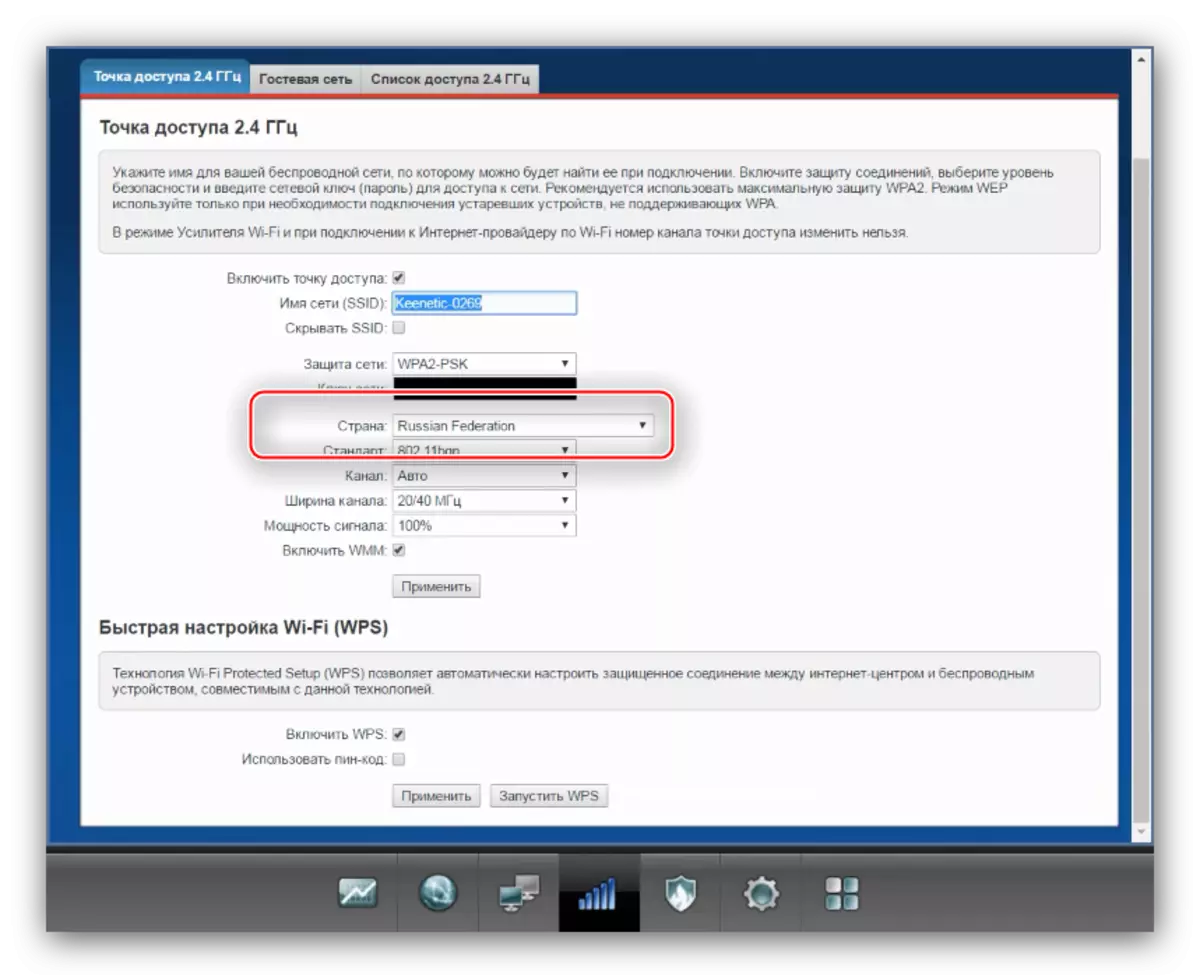
- In the "Network Protection" drop-down list, select "WPA2-PSK", the most secure current connection type. In the "Network Key" field, you need to set a password to connect to Wi Fai. We resemble - at least 8 characters. If you have had difficulty inventing a password, we recommend using our generator.
- Specify yours from the country's list - this is required for security purposes, since different countries use different Wi-Fi frequencies.
- Leave the remaining parameters as it is and press "Apply" to complete.


WPS.
In the Wireless Settings section, the WPS features are also located, which is a simplified pairing mode with devices using Wi-Fi.
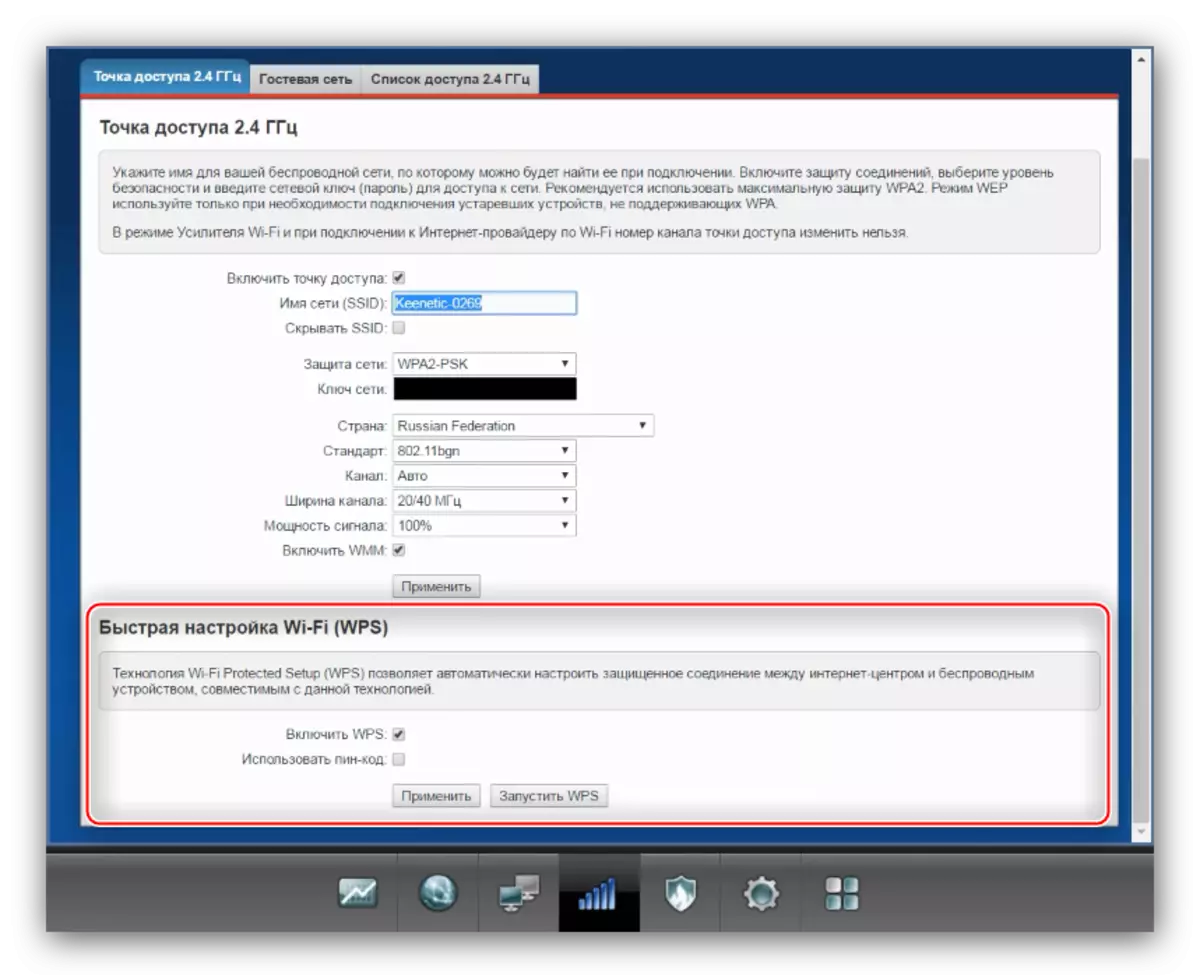
You can learn more about the configuration of this feature, as well as more information about its features from a separate article.
Read more: What is WPS and why it is needed
IPTV settings
Setting up Internet television through the console on the router under consideration is incredibly simple.
- Open the "Connections" section of the wired network and click on the "Broadband Connection" section.
- In the cable from the provider, please check the LAN port to which the prefix is planned.
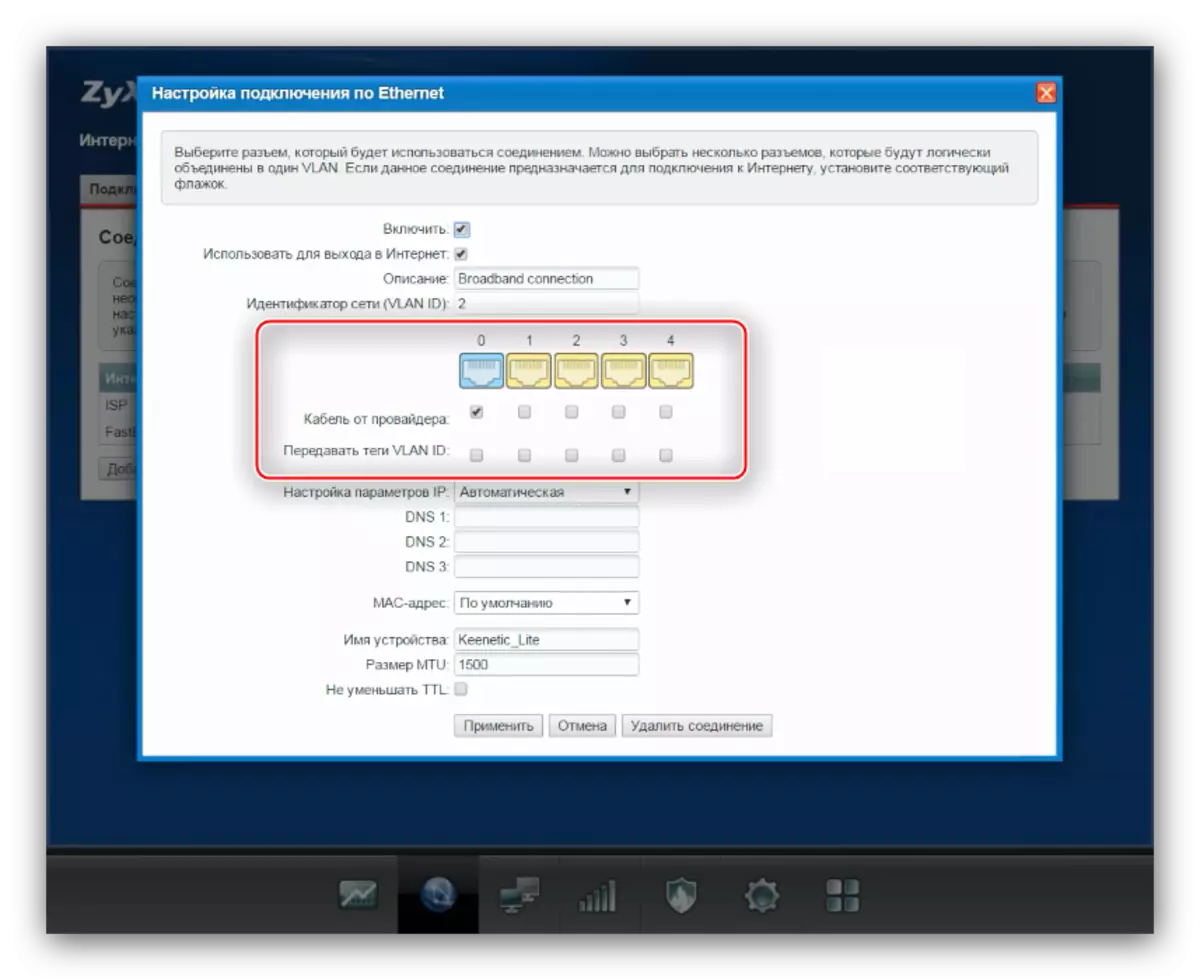
In the "Transmit VLAN ID" section checking should not be.
- Click "Apply", then connect the IPTV console to the router and adjust it already.
Conclusion
As you can see, the Zyxel Keenetic Lite 3 is not so difficult to adjust the Zyxel Keenetic Lite 3. If you have additional questions - write them in the comments.