
Now many users have a printer home. With it, you can print the necessary color or black and white documents without any difficulties. Running and configuring this process is usually done through the operating system. The built-in tool lines the queue that adjusts the receipt of files to print. Sometimes there are failures or random sending of documents, so there is no need to clear this queue. This task is performed by two methods.
Clean the print queue in Windows 10
As part of this article, two methods for cleaning the print queue will be considered. The first is universal and allows you to delete all documents or only selected. The second is useful when the system failure occurred and the files are not deleted, respectively, and the connected equipment cannot start function normally. Let's deal with these options in more detail.Method 1: Printer Properties
Interaction with the printing device in the Windows 10 operating system occurs using the standard "Devices and Printers" application. It contains many useful utilities and tools. One of them is responsible for forming and work with the queue of elements. To remove them from there will not be difficult:
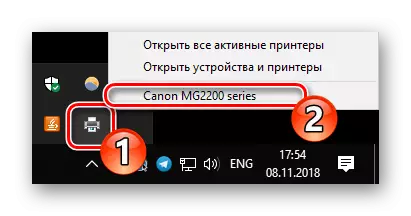
- Find the printer icon on the taskbar, click on it right-click and select the device used in the list.
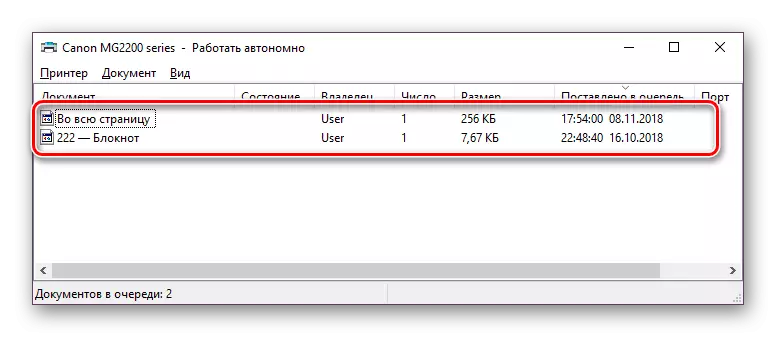
- The parameter window opens. Here you will immediately see a list of all documents. If you want to delete only one, click on it PCM and select "Cancel".
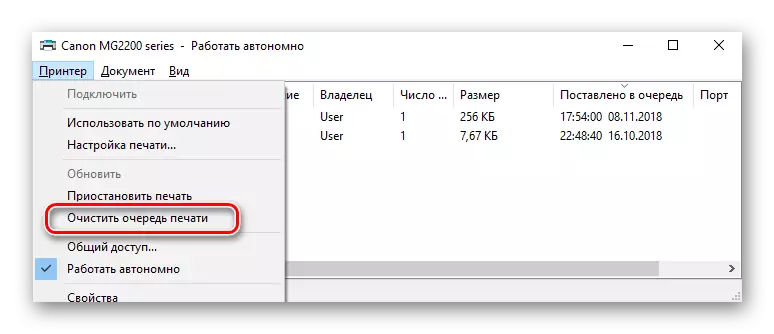
- In the case when there are many files and individually clean them are not quite convenient, expand the "Printer" tab and activate the "Clear Print Queue" command.
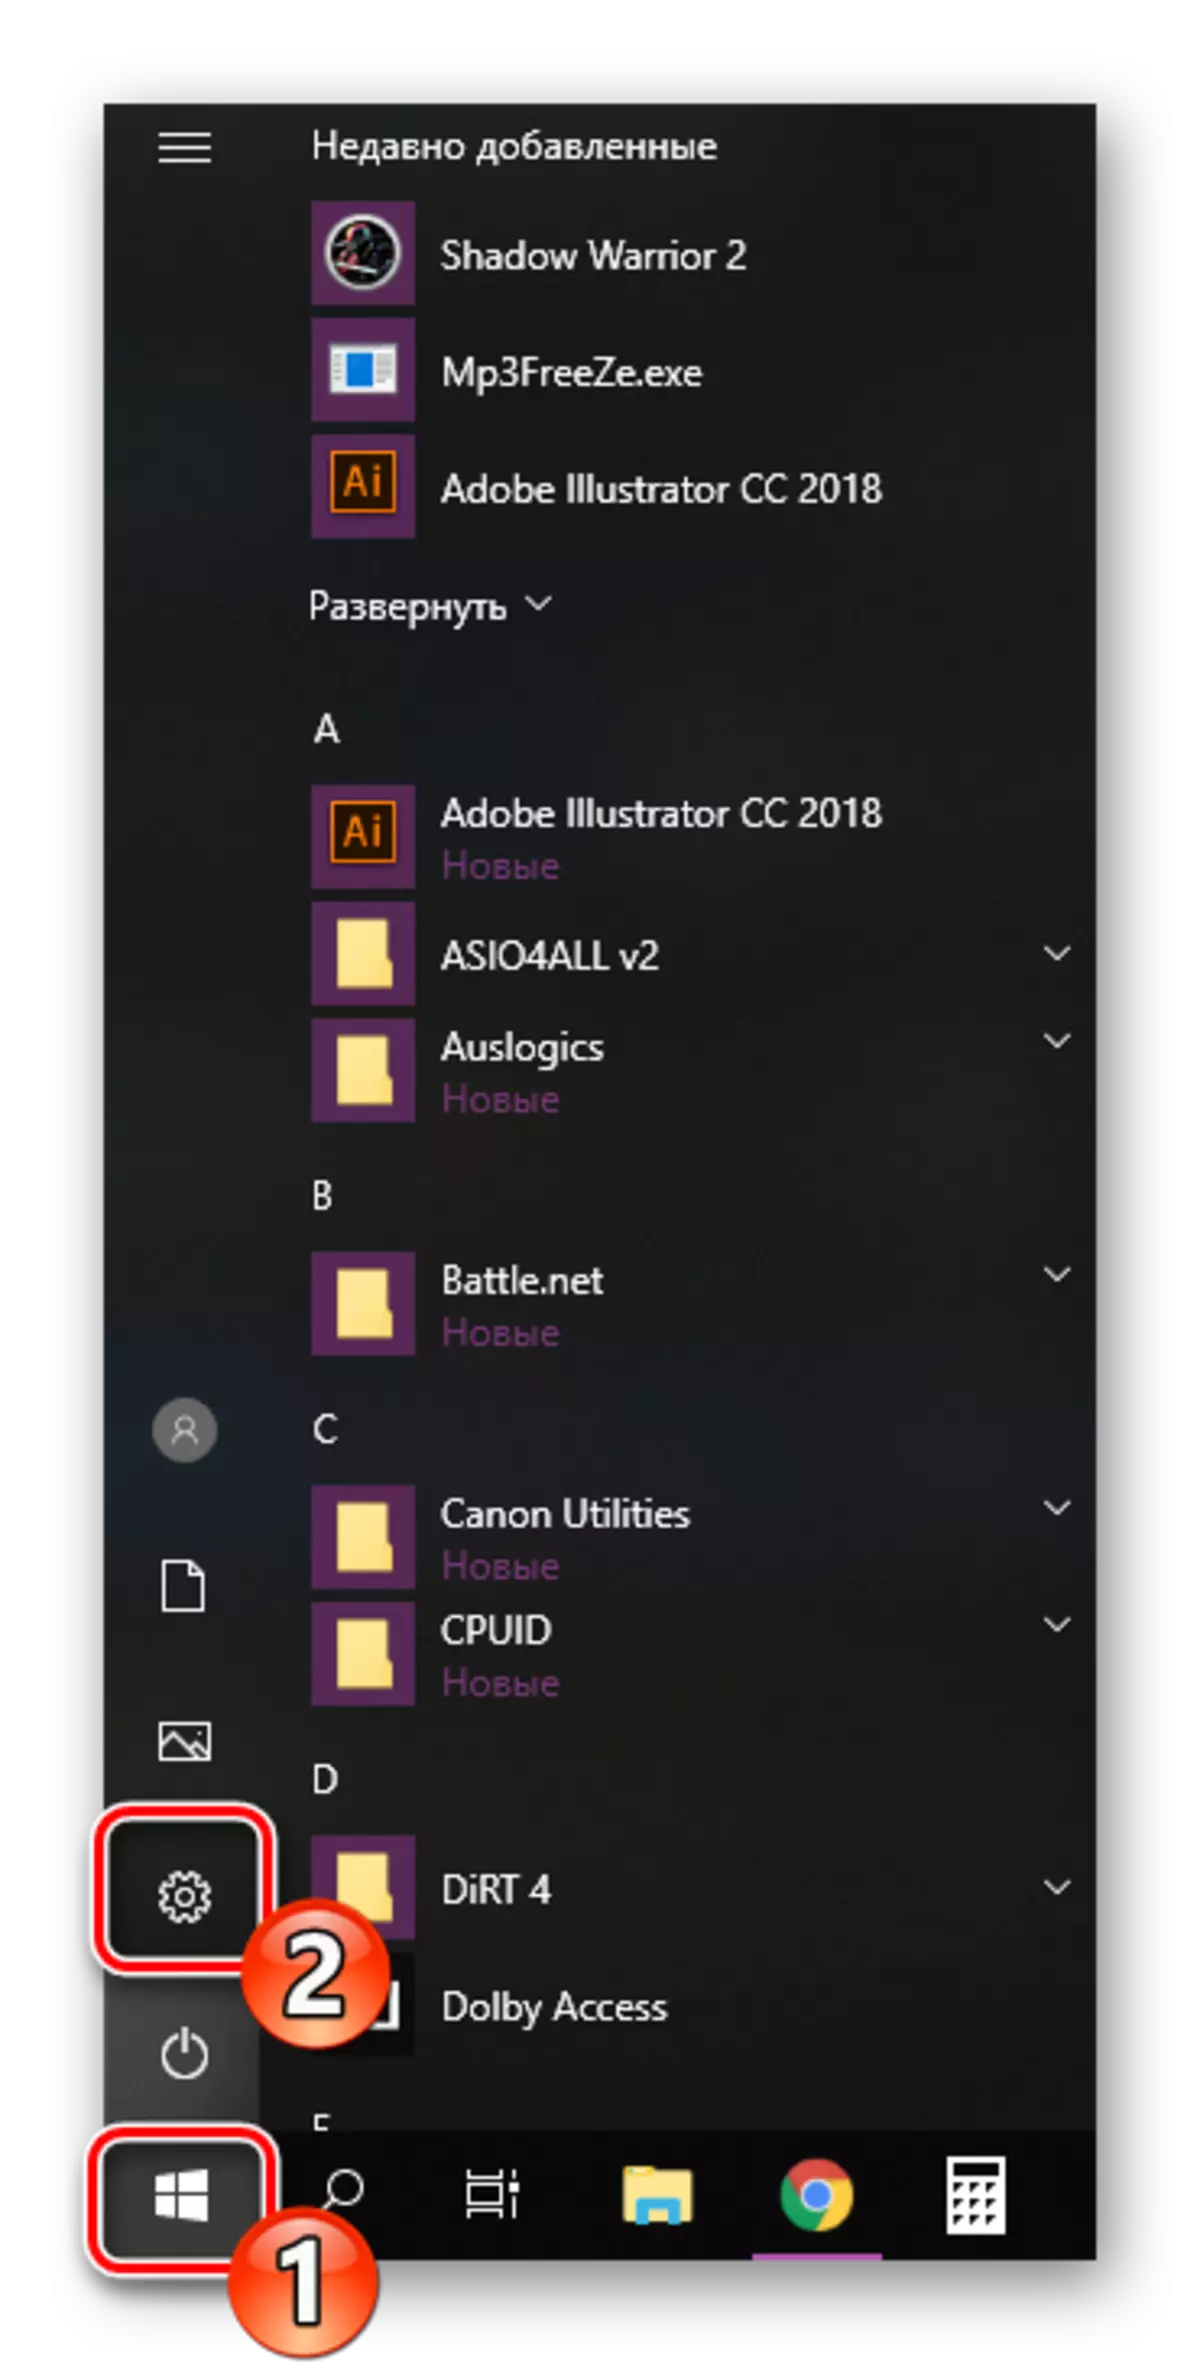
Unfortunately, the icon not always mentioned above is displayed on the taskbar. In this situation, open the peripheral control menu and clear the queue through it as possible:
- Go to "Start" and open the "Parameters" by clicking on the button in the form of a gear.
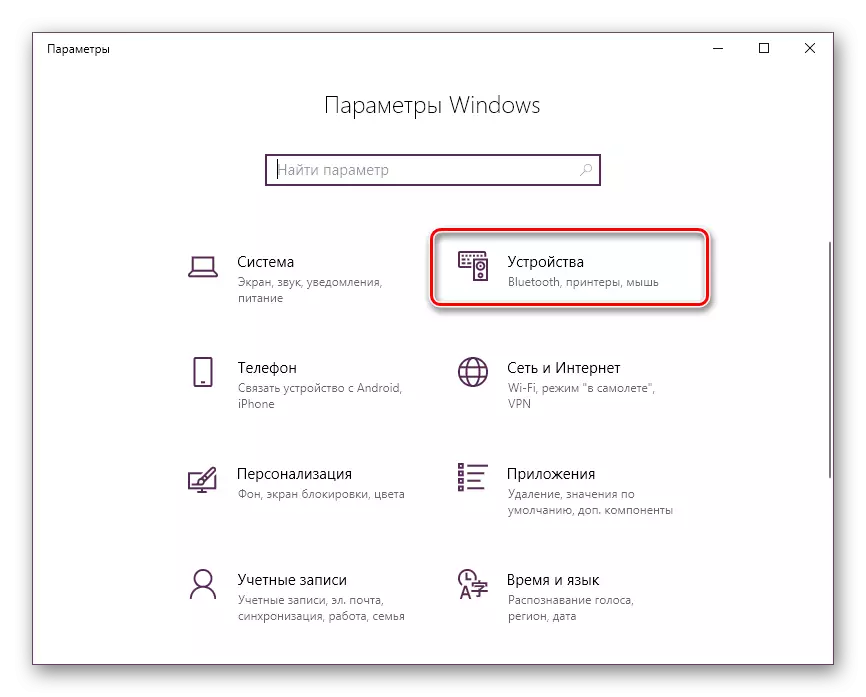
- A list of Windows parameters will appear. Here you are interested in the section "Devices".
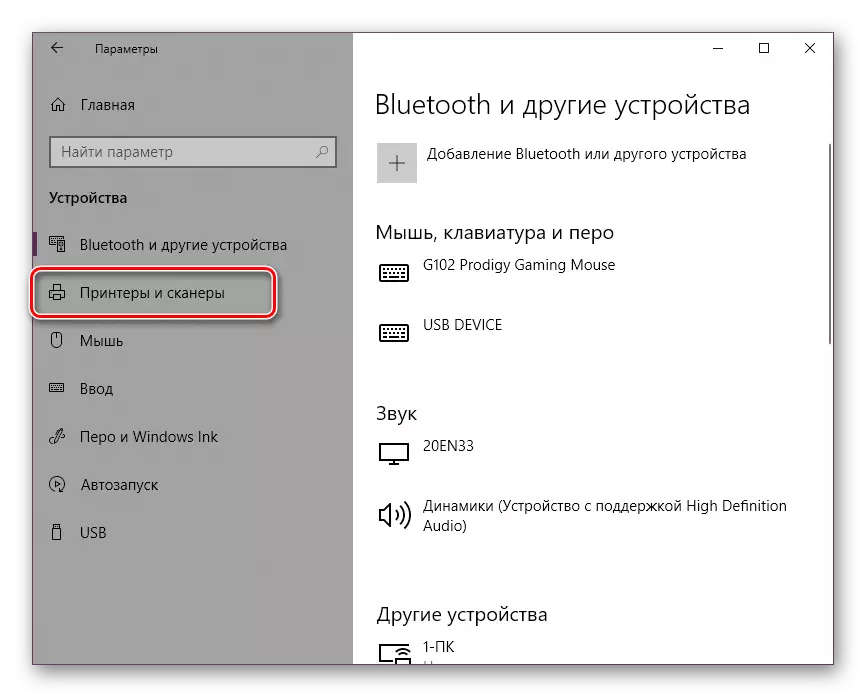
- On the left panel, go to the category "Printers and Scanners".
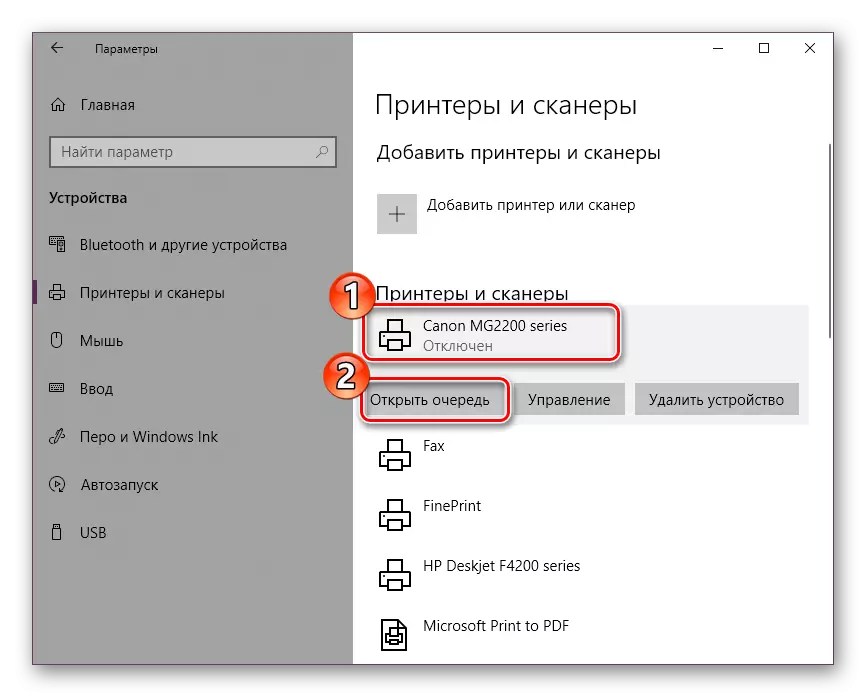
- In the menu, find the equipment for which you want to clear the queue. Click on its LKM title and select "Open Queue".
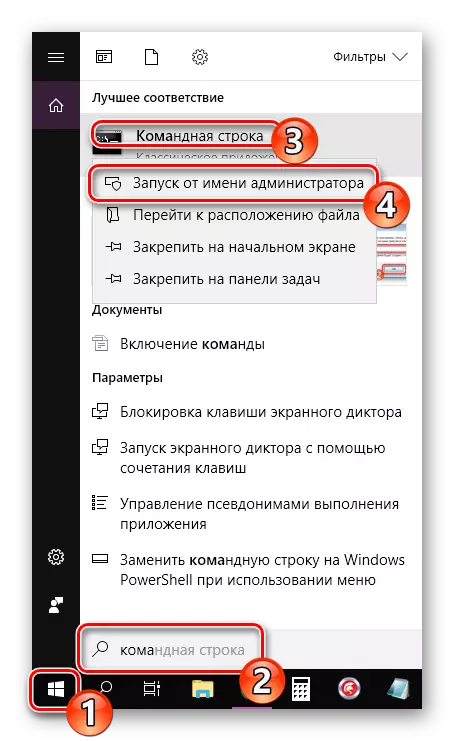
- Open the "Start" in the search bar type "Command Line", click on the resulting mouse button that appears with the right button and run the application on behalf of the administrator.
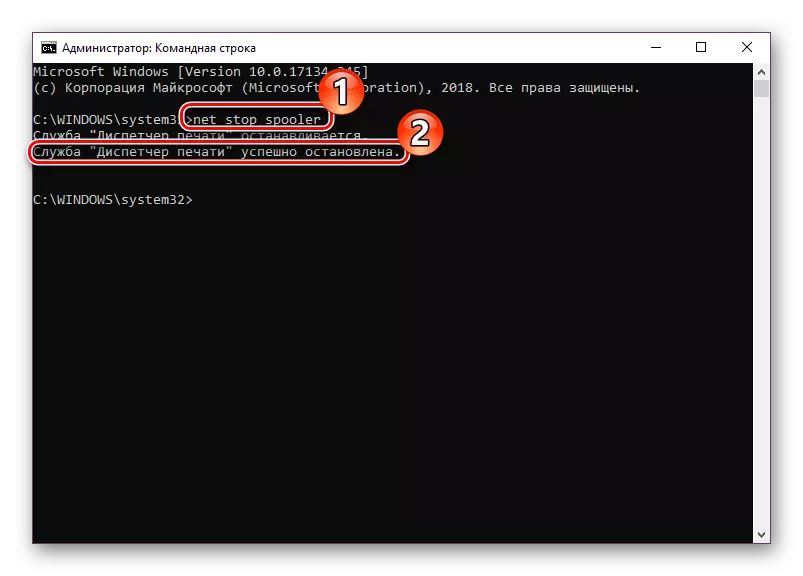
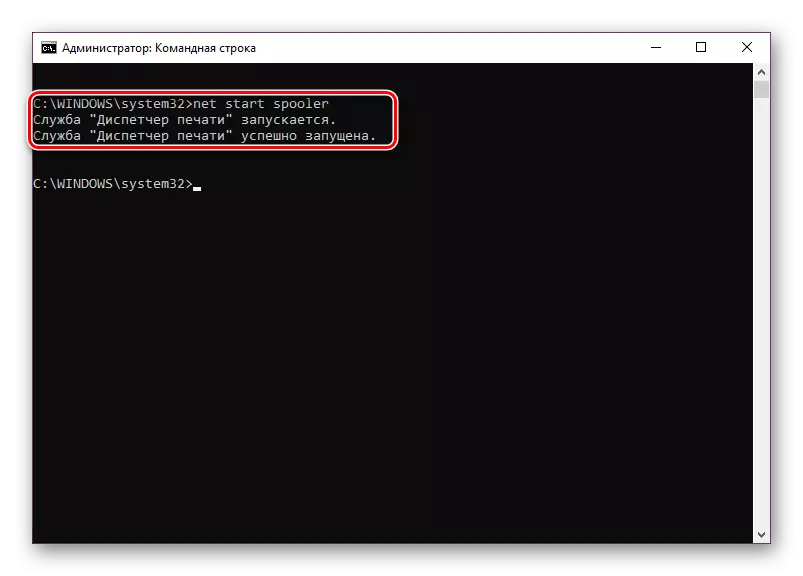
- First of all, you stop the Print Manager itself. For this, the Net Stop Spooler team is responsible. Enter it and press the ENTER key.
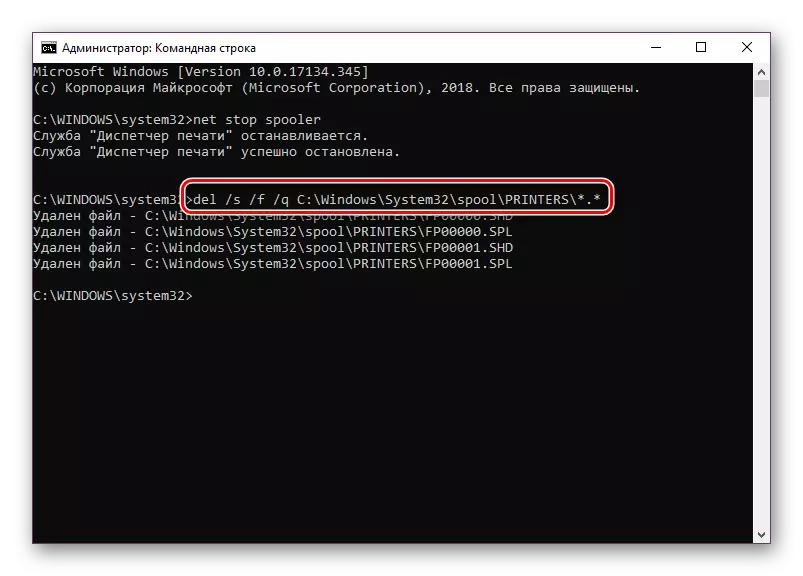
- After a successful stop, you will be useful to the Del / S / F / Q C: \ Windows \ System32 \ Spool \ Printers \ *. * - It is responsible for deleting all temporary files.
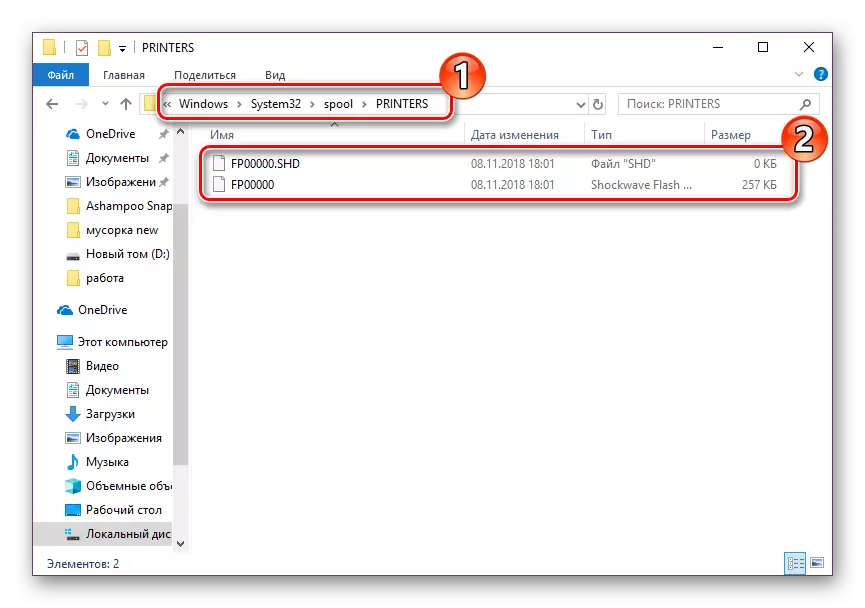
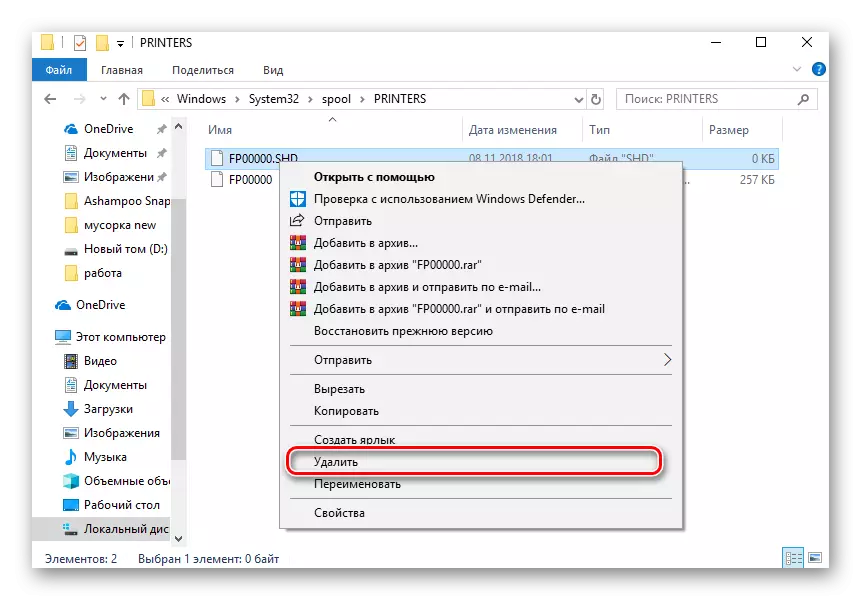
- Upon completion of the uninstall process, you need to manually check the storage folder of this data. Do not close the "Command Line", open the Explorer and find all the time items on the path C: \ Windows \ System32 \ Spool \ Printers
- Select all them, right-click and select Delete.
- After that, go back to the "Command Line" and start the print service with the NET Start Spooler command
As you can see, the first way is quite simple in execution and does not require much time, cleansing occurs literally for several actions. However, sometimes it happens that the records are simply not deleted. Then we recommend paying attention to the following manual.
Method 2: manual cleaning of the print queue
The printer service manager is responsible for the correct operation of the printer. Thanks to it, the queue is created, the documents are sent to the printout, and additional operations occur. Various systemic or software malfunctions in the device itself provoke the hang of the entire algorithm, which is why temporary files do not go anywhere and only interfere with the further functioning of the equipment. If you have any problems, you need to manually deal with their removal, and this can be done as follows:
Such a procedure allows you to clear the print queue even in cases where the items in it depended. Reconnect the device and re-start working with documents.
See also:
How to print a document from a computer on the printer
How to print a page from the Internet on the printer
Print books on the printer
Print photo 3 × 4 on the printer
With the need to clean the print queue facing almost every winner of printers or multifunctional devices. As you might notice, it is not difficult to fulfill this task, even inexperienced users, and the second alternative method will help cope with the dependent elements literally for several actions.
See also:
Proper Calibration of Printer
Connecting and configuring a printer for a local network