
Modern computers are able to solve a huge range of tasks. If we talk about ordinary users, the most popular functions are recording and (or) reproduction of multimedia content, voice and visual communication with various messengers, as well as games and broadcast to the network. For the full use of these capabilities, the presence of a microphone is required, the quality of the sound transmitted by your PC (voice) directly depends on the correct operation of which. If the device catches extraneous noises, tipping and interference, the end result may be unacceptable. In this article we will talk about how to get rid of background noise when recording or communicating.
Elimination of microphone noise
To begin with, we will understand where noises come from. There are several reasons for here: poor-quality or not intended for use on a PC microphone, possible damage to cables or connectors, interference caused by versions or faulty electrical equipment, incorrect system sound settings, noisy room. Most often there is a combination of several factors, and it is necessary to solve the problem comprehensively. Next, we will analyze in detail each of the reasons and give ways to eliminate them.Cause 1: Microphone Type
Microphones are divided by type on condenser, electret and dynamic. The first two can be used to work with a PC without additional equipment, and the third requires connecting through a preamp. If the dynamic device is included directly into the sound card, the output will be very poor quality. It is determined by the fact that the voice has a rather low level in comparison with unauthorized interference and it is required to strengthen.

Read more: Connect the karaoke microphone to the computer
Condenser and electret microphones due to phantom nutrition have high sensitivity. Here, a plus can become a minus, as not only the voice, but also the sounds of the surroundings, which, in turn, hear how the common hum. You can solve the problem by reducing the recording level in the system settings and transfer the device closer to the source. If the room is very noisy, it makes sense to use the software suppressor, which we will talk a little later.
Read more:
How to configure sound on your computer
Turning on the microphone on a computer with Windows 7
How to set up a microphone on a laptop
Reason 2: Quality Audio Equipment
You can speak infinitely about the quality of the equipment and its cost, but everything is always reduced to the size of the budget and the needs of the user. In any case, if voice recording is planned, you should replace a cheap device to another, higher class. You can find the golden middle price and functionality by reading reviews about a specific model on the Internet. This approach will eliminate the factor of the "bad" microphone, but, of course, will not solve other possible problems.
The reason for the occurrence of interference can be cheap (built into the motherboard) sound card. If this is your case, you need to look in the direction of more expensive devices.
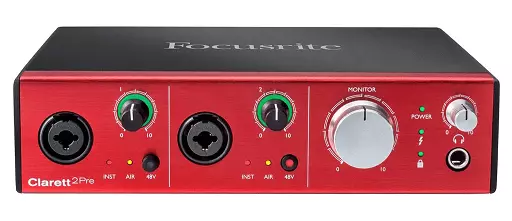
Read more: How to choose a sound card for a computer
Cause 3: Cables and connectors
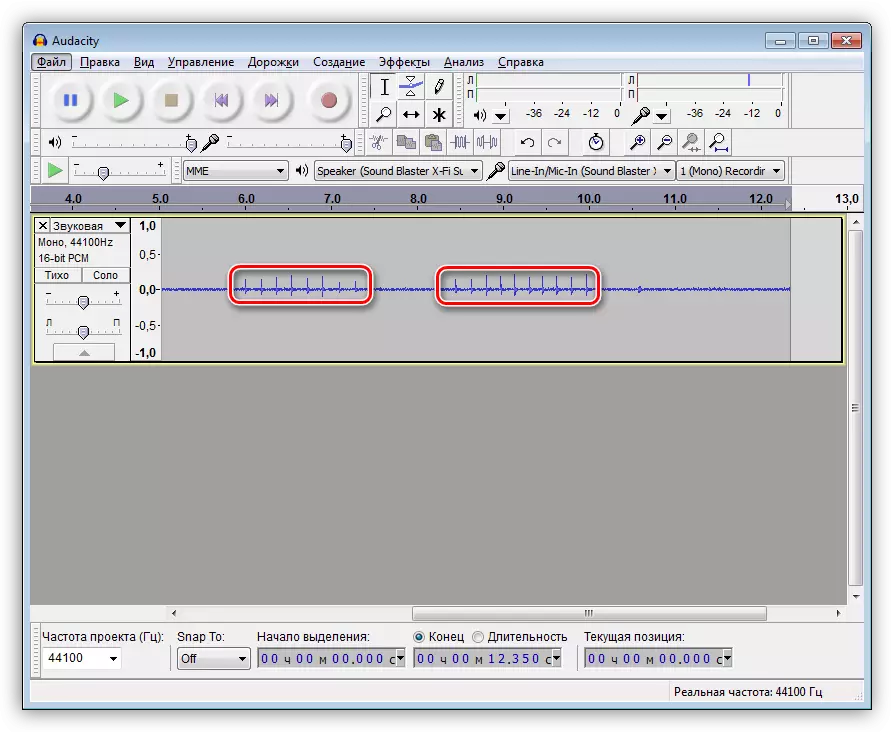
In the context of today's problem, the quality of the connection means directly affects the level of noise. Complete cables are fully coping with the tasks. But the fault of the wires (mostly "fractures") and connectors on a sound card or other device (spaling, bad contact) can cause a cod and overload. The easiest way to identify problems is manual check of cables, nests and plugs. Just move all the connections and look at the signal diagram in some program, such as Audacity, or listen to the result in the record.
To eliminate the cause, you will have to replace all the problem elements, armed with a soldering iron or contacting the service center.
There is another factor - inattention. Look, do not relate to free audiokeners of the metal parts of the case or other non-isolated elements. This leads to noise.
Cause 4: Bad Grounding
This is one of the most common causes of extraneous noise in the microphone. In modern homes, such a problem does not occur, if, of course, the wiring was laid in all the rules. Otherwise, you will have to ground the apartment on my own or with the help of a specialist.
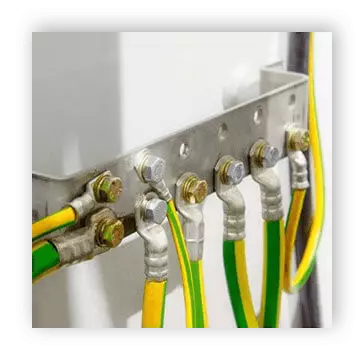
Read more: Proper computer grounding in a house or apartment
Cause 5: Household appliances
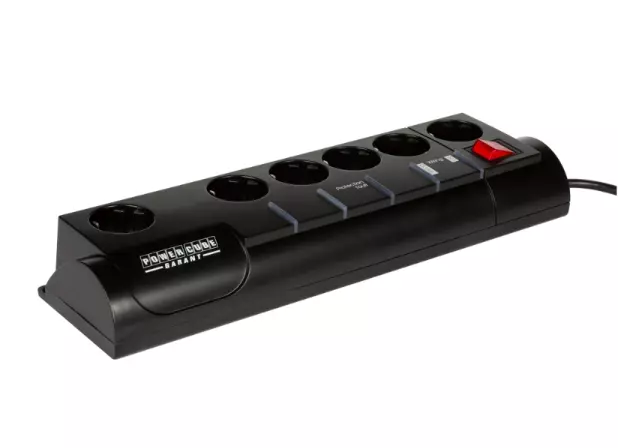
Household appliances, especially the one that is constantly connected to the electrical network, for example, a refrigerator, can translate its interference to it. Especially this effect is strong, if the same socket is used for computer and other equipment. You can minimize noise by turning on the PC into a separate power source. Also help a high-quality network filter (not a simple extension cord with switch and fuse).
Reason 6: noisy room
Above, we have already written about the sensitivity of condenser microphones, the high value of which can lead to the capture of extraneous noise. We are not talking about the loud sounds of the type of blows or conversations, but about more quiet like passing outside the window of transport, the buzz of household appliances and a common background, which is inherent in all city housing. These signals during recording or communicating merge into a single hum, sometimes with small peaks (crackle).
In such situations, it is worth thinking about the noise insulation of the room where the recording is recorded, the acquisition of a microphone with an active noise reducer or the use of its program analogue.
Soft noise reduction
Some representatives of software for working with sound "know how to" remove noise "on the fly", that is, between the microphone and the consumer of the signal - the program for recording or interlocutor - a mediator appears. This can be like some application for changing the voice, for example, AV Voice Changer Diamond and software, allowing virtual devices to control the sound parameters. The latter includes a bunch of Virtual Audio Cable, Bias SoundSoap Pro and Savihost.
Download Virtual Audio Cable
Download Bias SoundSoap Pro
Download savihost.
- Unpack all the received archives in separate folders.

Read more: Open the Zip archive
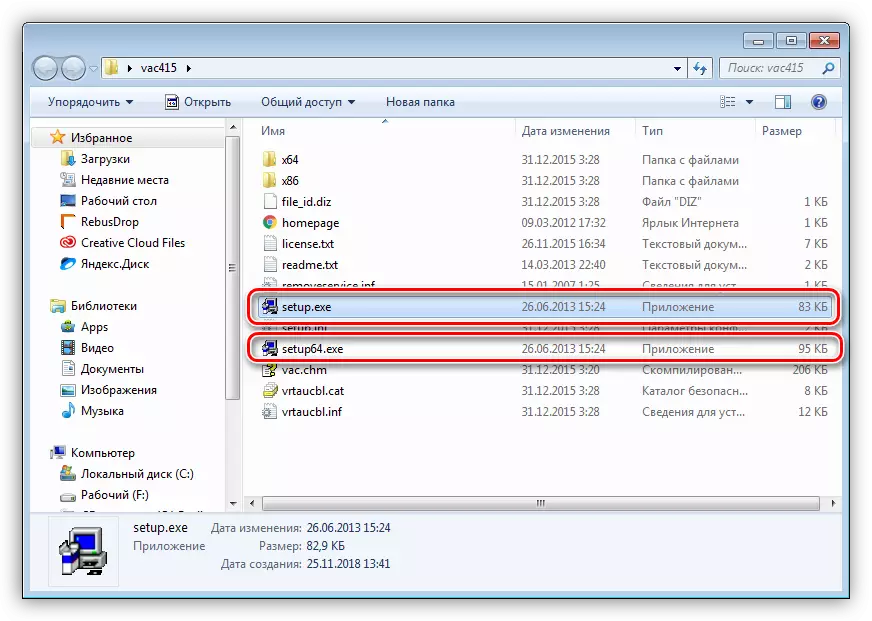
- In the usual way, install Virtual Audio Cable, running one of the installers, which corresponds to the discharge of your OS.
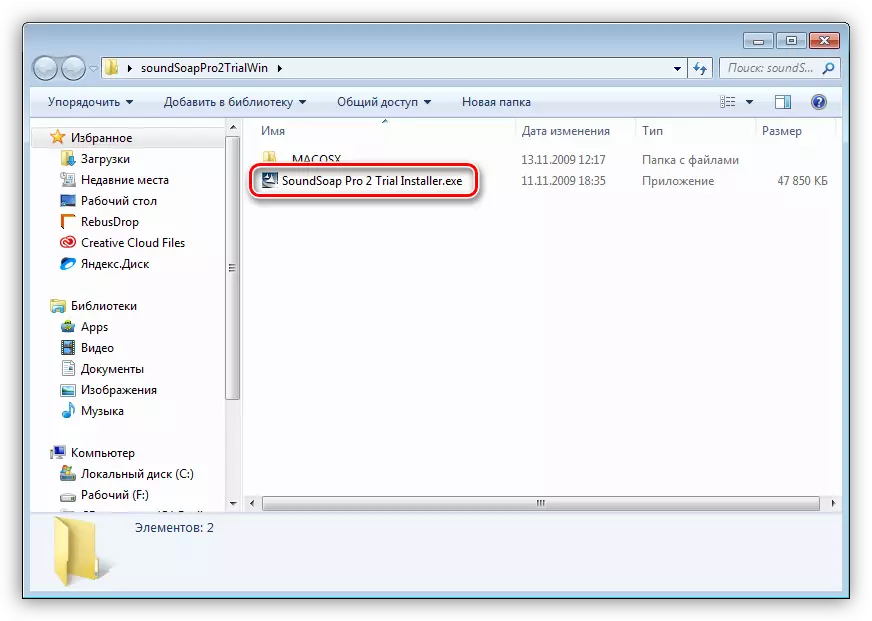
Also install and SoundSoAP Pro.
Read more: Installing and deleting programs in Windows 7
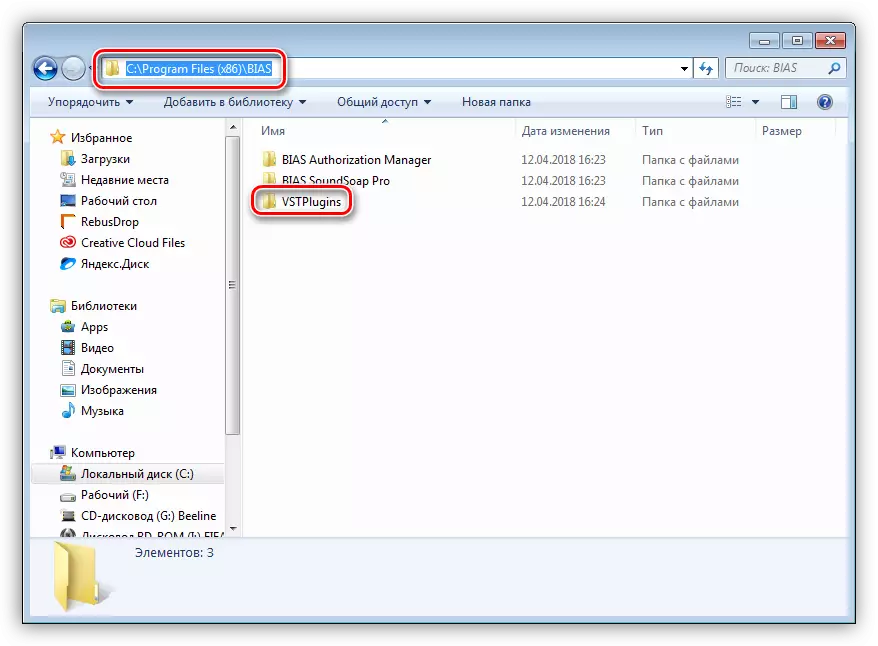
- We go along the way to install the second program.
C: \ Program Files (x86) \ Bias
Go to the "VSTPLUGINS" folder.
- Copy the only file being there.
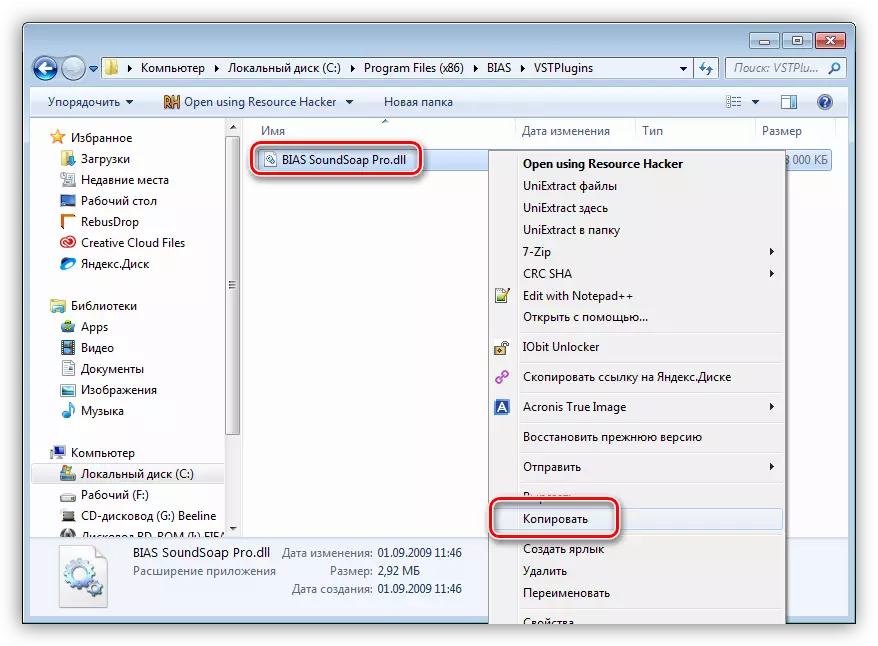
We insert into the folder with the Savihost unpacked.
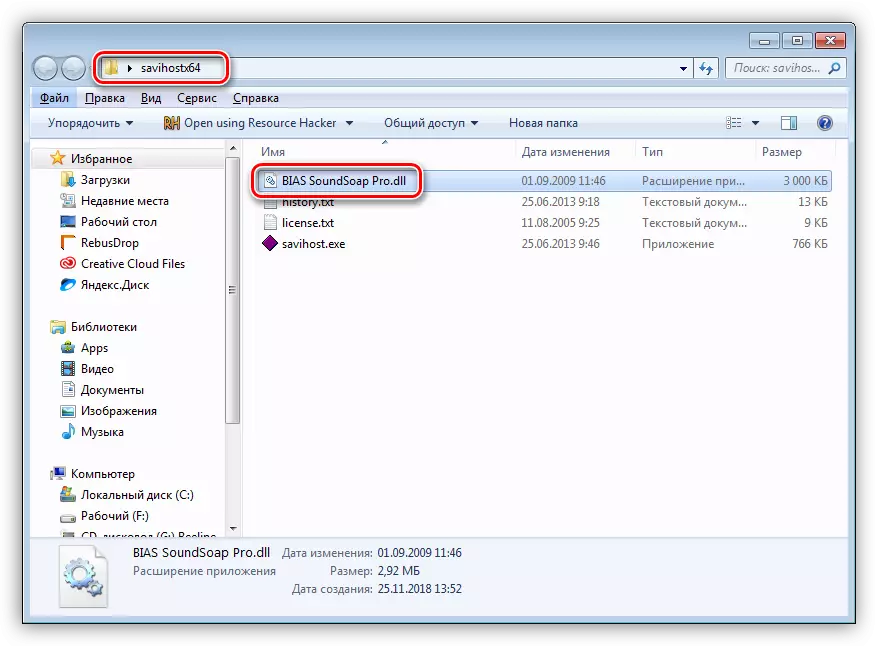
- Next, copy the name of the inserted library and assign it to the Savihost.exe file.
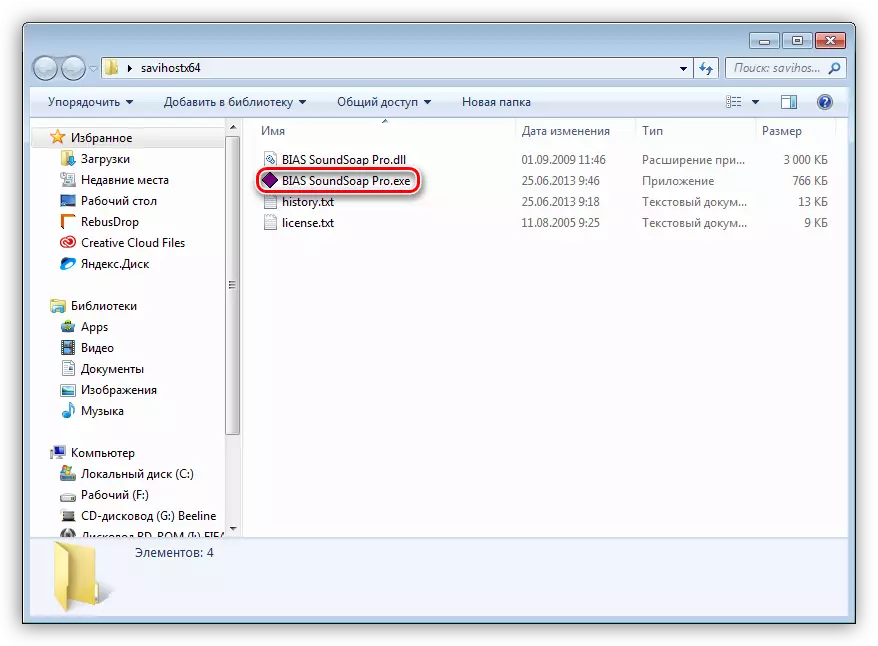
- Run a renamed executable file (Bias SoundSoap PRO.exe). In the program window that opens, go to the "Devices" menu and select "Wave".

- In the "Input Port" drop-down list, select our microphone.
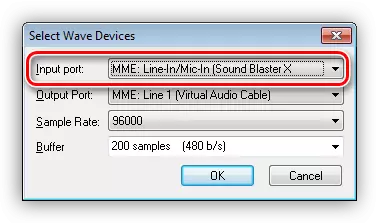
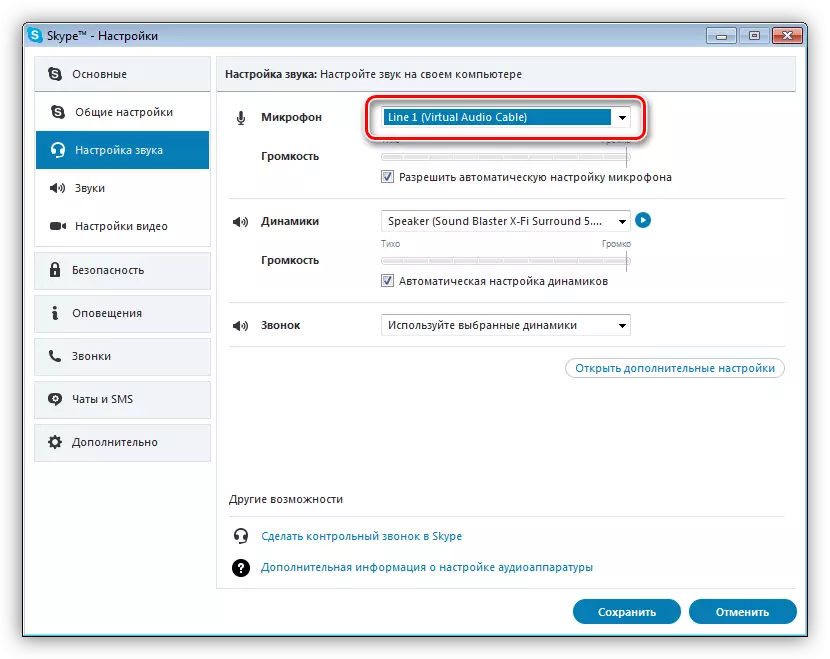
In "Output Port" We are looking for "Line 1 (Virtual Audio Cable)".
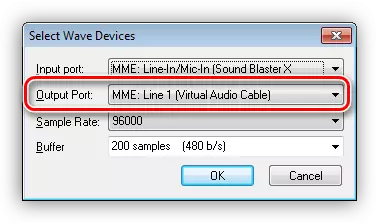
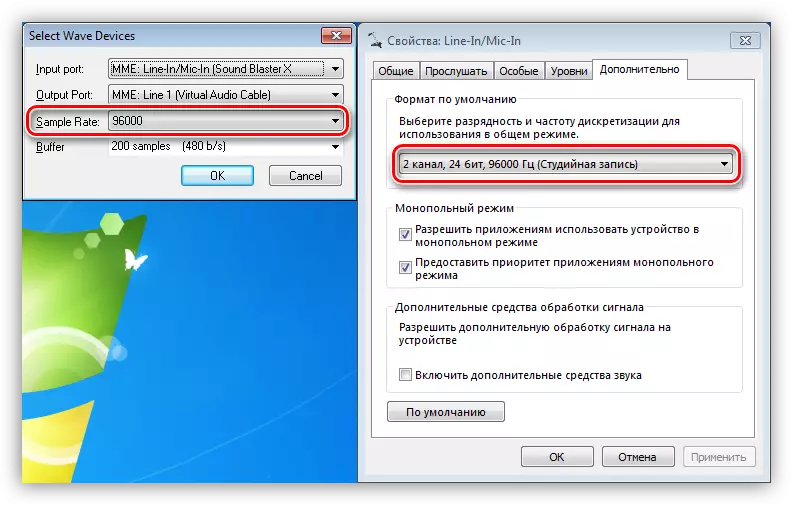
The sampling frequency should be the same value as in the microphone system settings (see the article about the sound setting on the link above).
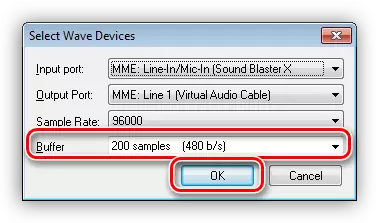
Buffer size can be minimal.
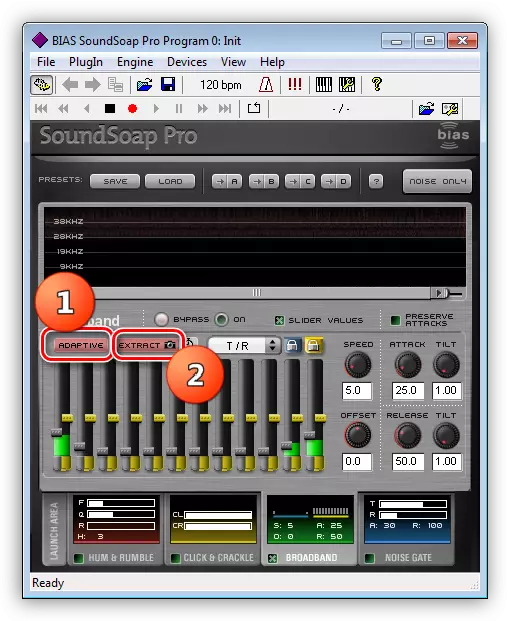
- Next, we provide the highest possible silence: we are silent, please help you, remove from the room of restless animals, then click the "Adaptive" button, and then "extract". The program considers noise and exhibit automatic settings for its suppression.
We prepared the tool, now they need to use it right. You probably guessed that the processed sound we will receive from the virtual cable. It just needs to be specified in the settings, such as Skype, as a microphone.
Read more:
Skype: Microphone Turning on
Configure a microphone in Skype
Conclusion
We disassemble the most common causes of the appearance of background noise in the microphone and ways to solve this problem. As it becomes clear from all written above, it is necessary to approach the elimination of the interference: to begin with high-quality equipment, ground the computer, to ensure noise insulation of the room, and then resort to hardware or software.