

Many users, spending a large amount of time behind the computer monitor, sooner or later begin to worry about their own eyesight and eye health in general. Earlier, to reduce the load, it was necessary to set a special program that cut out the emission outgoing from the screen in the blue spectrum. Now, similar, or even more effective, the result can be achieved by the standard tools of Windows, at least its tenth version, since it was precisely the useful regime called "night light", which we will tell you today.
Night mode in windows 10
Like most possibilities, tools and controls of the operating system, the "night light" is hidden in its "parameters", to which we will be with you and need to appeal to enable and subsequently configure this function. So, proceed.Step 1: Inclusion of "Night Light"
By default, the night mode in Windows 10 is deactivated, therefore, first of all it is necessary to enable it. This is done as follows:
- Open the "Parameters" by clicking the left mouse button first on the start menu "Start", and then on the icon of the system of interest to us on the left, made in the form of a gear. Alternatively, you can use the "Win + I" keys, pressing these two steps.
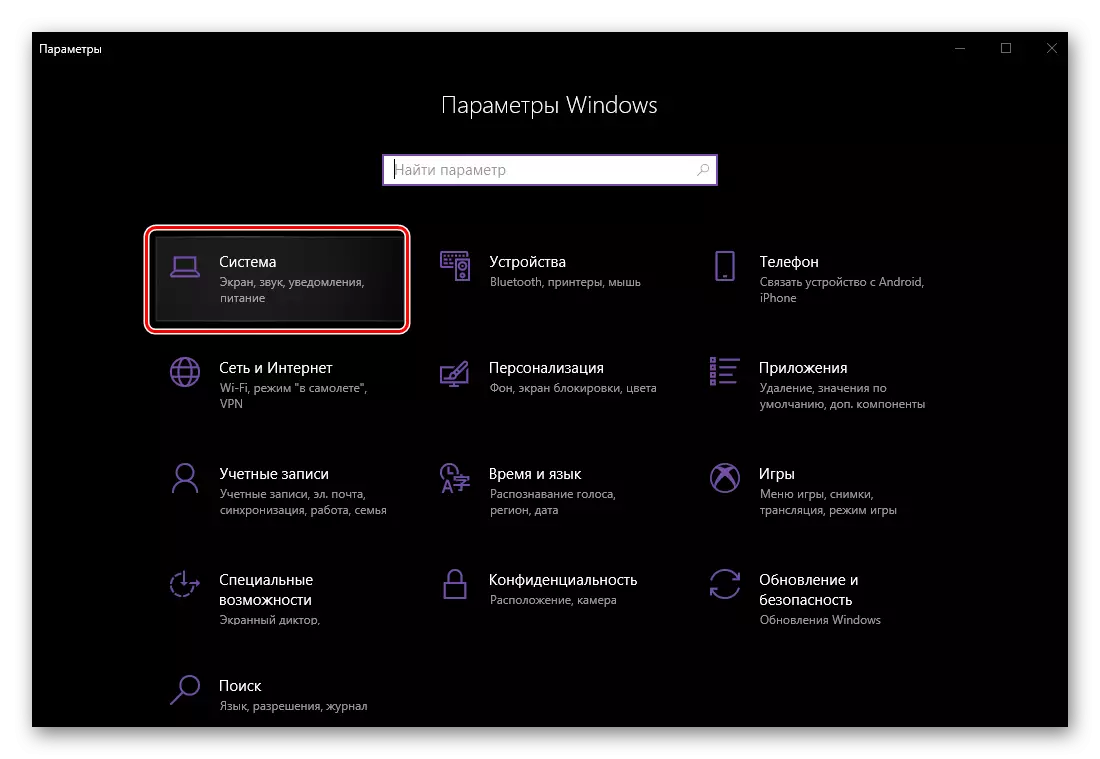
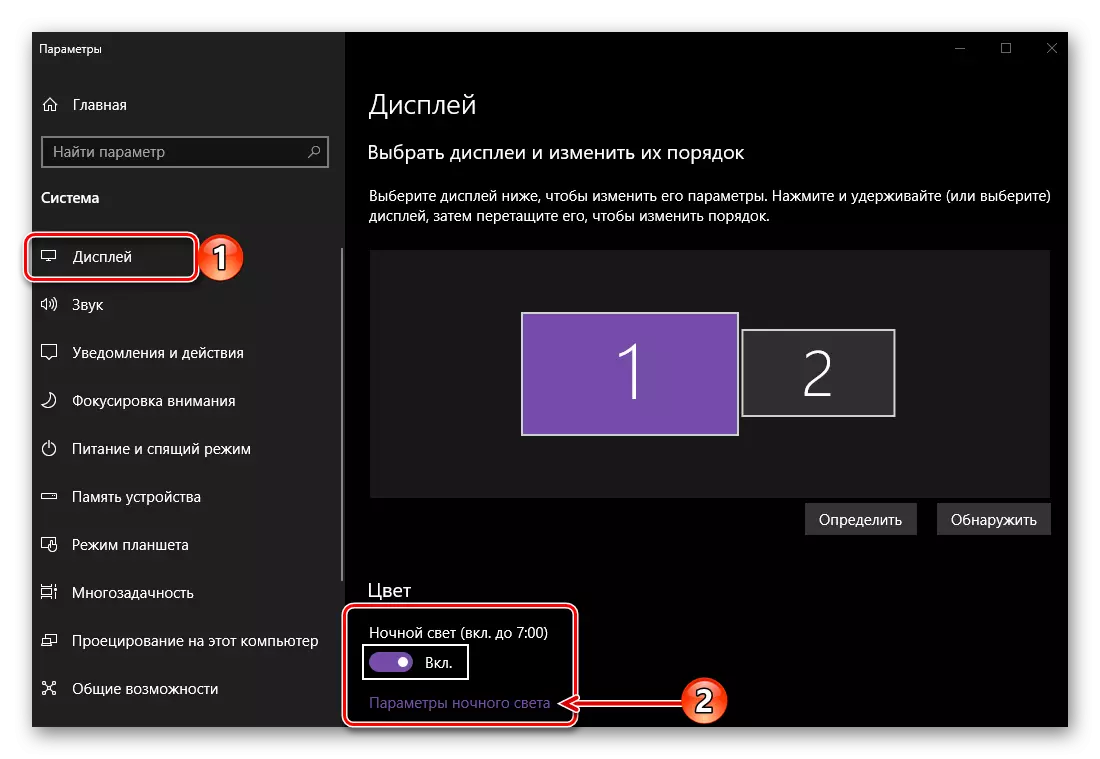
- In the list of available Windows parameters, go to the "System" section by clicking on it with LKM.
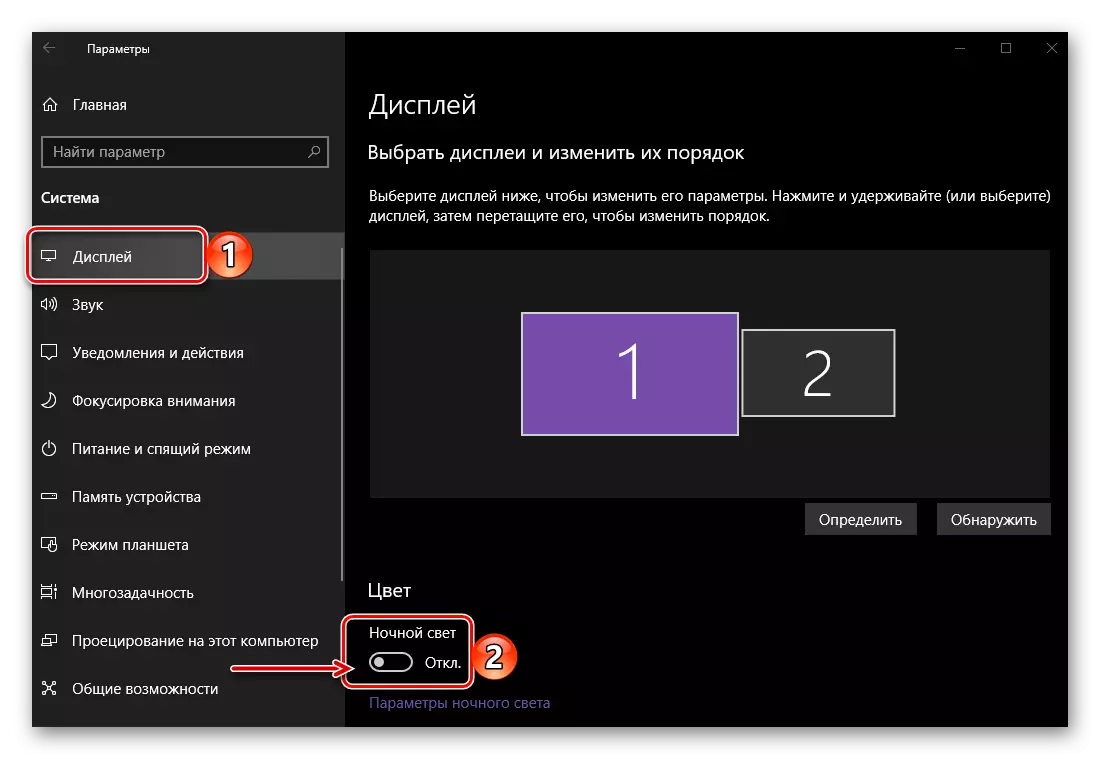
- After making sure that you will find yourself in the "Display" tab, move the "night light" switch to the active position, located in the "Color" options, under the image of the display.

By activating the night mode, you can not only evaluate how it looks like the default values, but also perform it more subtle configuration than we do further.
Step 2: Setting function
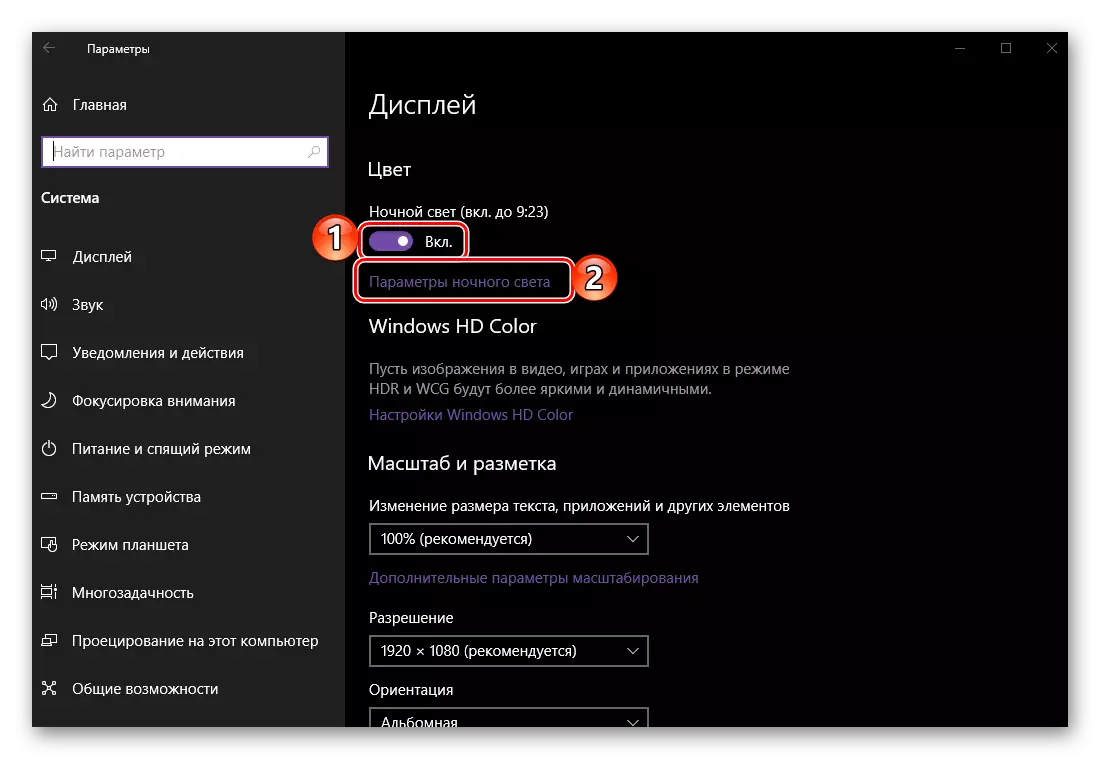
To go to the settings of the "night light", after the immediate inclusion of this mode, click on the "Night Light" links.
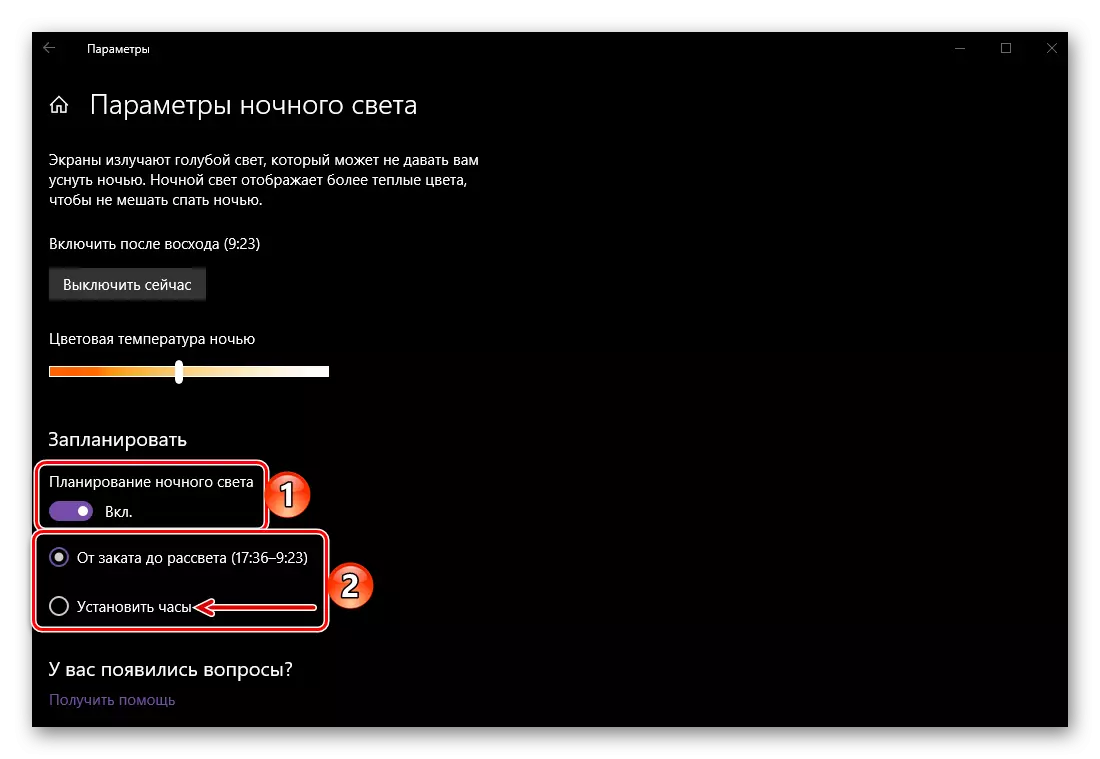
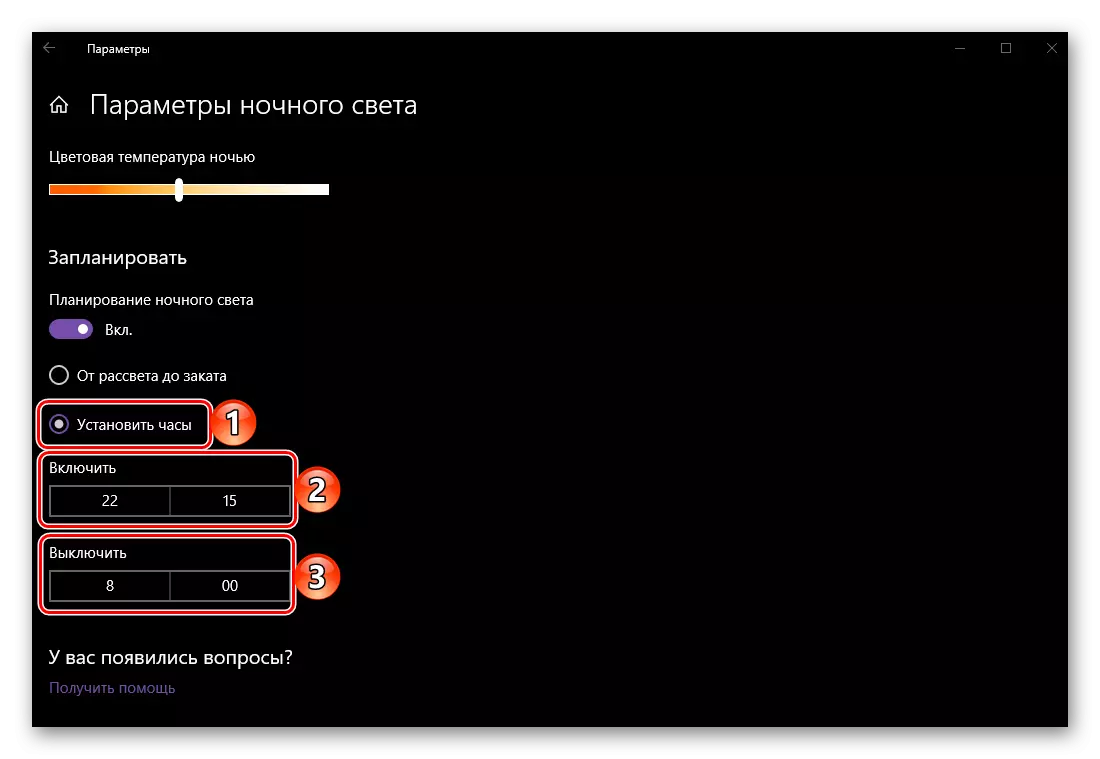
In total, three parameters are available in this section - "Enable Now", "Color Temperature at night" and "Plan". The value of the first button marked in the image below is understandable - it allows forced to turn on the "night light", regardless of the time of day. And this is not the best solution, since this mode is only late in the evening and / or at night, when it significantly reduces the load on the eyes, and every time you climb into the settings is somehow not very convenient. Therefore, to go to manual setting of the activation time of the function, move the switch "Night Light" switch to the active position.

Important: Scale "Color Temperature" Announced on the screenshot number 2 allows you to determine how cold (right) or warm (left) will be the light emitted at night with the display. We recommend to leave it at least on the average value, but even better - to move the left, not necessarily to the end. The choice of values "on the right side" is almost or actually useless - the load on the eyes will decline the minimum or at all in any way (if the right edge of the scale is selected).
So, to set your time to turn on the night mode, first activate the "Night Light Planning" switch, and then select one of the two available options - "From the sunset to dawn" or "Set the clock". Starting from late autumn and ending in early spring, when it darkens pretty early, it is better to give preference to self-configuration, that is, the second option.
After you mark the checkbox in front of the "Set clock" item, you can independently set the time for the inclusion and off "night light". If you have been chosen by the period "from sunset to dawn", it is obvious that the function will be included with the sunset in your region and disconnect at dawn (for this, Windows 10 must be right to define your location).
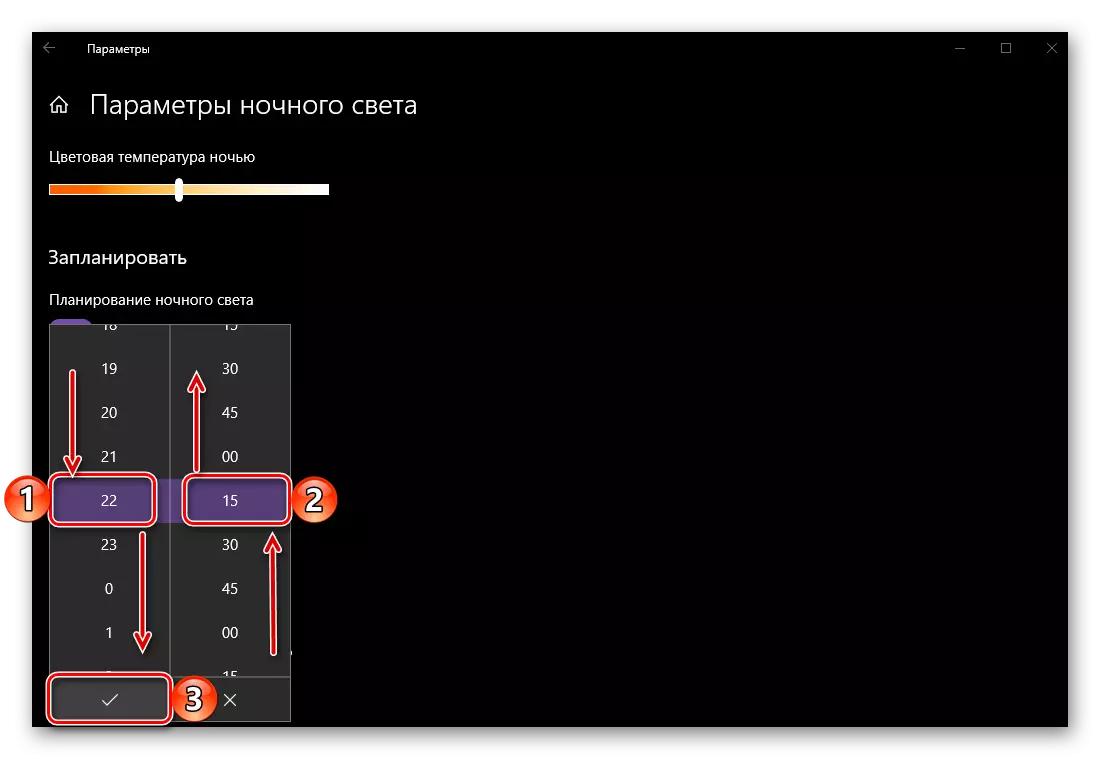
To set the period of work "Night Light", click on the specified time and select first hours and minutes of switching on (scrolling the list of wheel) by clicking then on the tick for confirmation, and then repeat similar steps to specify the shutdown time.
On this, with the immediate configuration of the night mode, it would be possible to finish, we will also tell us about the pair of nuances that simplify interaction with this function.
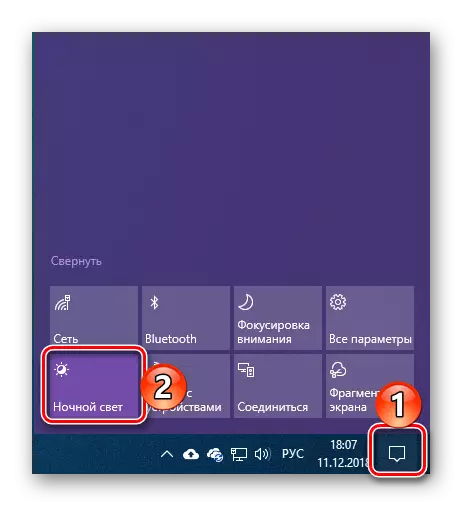
So, to quickly turn on or disconnect the "night light", it is not necessary to contact the "parameters" of the operating system. It is enough to call the "control center" of Windows, and then click on the tile responsible for the function under consideration (figure 2 in the screenshot below).
If you still need to configure the night mode again, right-click (PCM) on the same tile in the "Notification Center" and select the Options available in the context menu - "Go to the parameters".
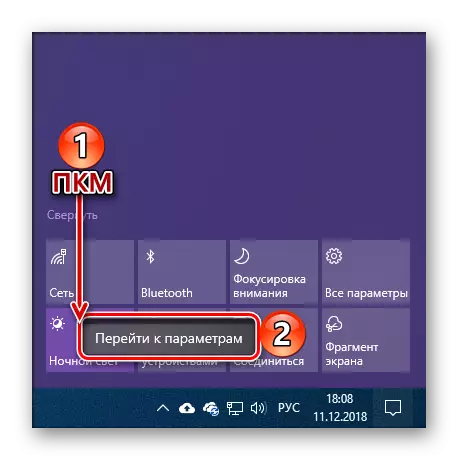
You will again find yourself in the "parameters" in the "Display" tab, from which we started considering this function.
READ ALSO: Appointment of applications by default in Windows WINTOVS 10
Conclusion
This is so easy to activate the "Night Light" function in Windows 10, and then configure it for yourself. Do not be afraid if at first the colors on the screen will seem too warm (yellow, orange, or even close to red) - it can be used to it literally for half an hour. But much more important is not addictive, but the fact that such a seemingly trifle is able to really facilitate eye load in the dark, thereby minimizing, but perhaps, and excluding impaired impairment with long-term work at the computer. We hope this small material was useful for you.