

WINDOVS or Windows Defender defender is a built-in Microsoft tool, which is a PC security solution software solution. Together with such a utility as a Windows Firewall, they provide the user with reliable protection against malicious software and make your work on the Internet more secure. But many users prefer to protect the use of another set of programs or utilities, so it is often necessary to disable this service and forget about its existence.
The process of disconnecting the defender in Windows 10
You can deactivate Windows Defender using standard operating system tools or special programs. But if in the first case, the disconnection of the defender will pass without unnecessary problems, then with the choice of third-party applications, it is necessary to be extremely careful, since many of them contain malicious elements.Method 1: WIN UPDATES DISABLER
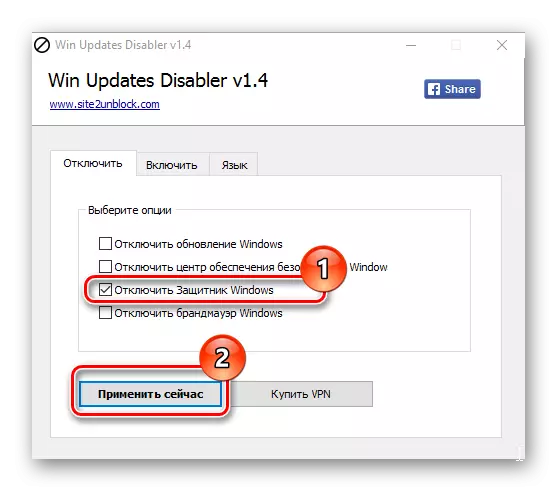
One of the easiest and most secure methods for detector Defender WINDOVS is the use of a simple utility with a user-friendly interface - Win Updates Disabler. With its help, any user without unnecessary problems in just a few clicks can solve the problem of turning off the defender without the need to dig in the operating system settings. In addition, this program can be downloaded both in the usual version and in portable, which is certainly an additional advantage.
Download Win Updates Disabler
So, to disable Windows Defender using the Win Updates Disabler application, you must pass the following steps.
- Open the utility. In the main menu, on the "Disable" tab, check the Windows Protector item on the tab and click the Apply button now.
- Restart PC.
Check if antivirus deactivation occurred.
Method 2: Windows staff
Then we will discuss how you can deactivate Windows Defender, without resorting to the use of various programs. In this way, we will analyze how to fully stop the work of Windows Defender, and in the following - its temporary suspension.
Local Group Policy Editor
This option will suit all tens of dozens except the HOME edition. There is no tool in this version, so the alternative is described slightly below - the registry editor.
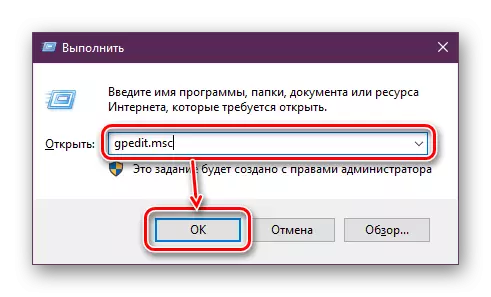
- Open the application by pressing the Win + R keys combination, scoring in the GPedit.msc field and pressing ENTER.
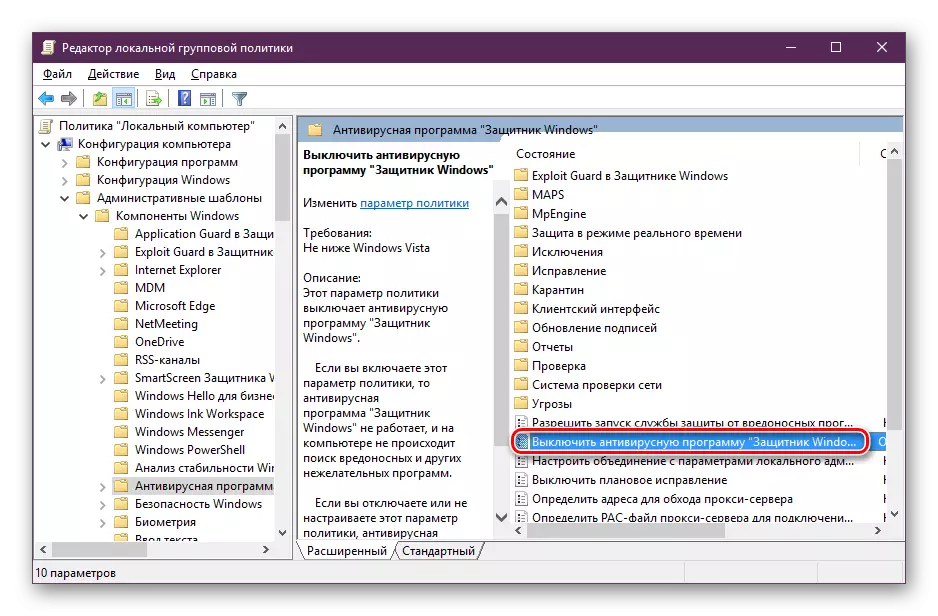
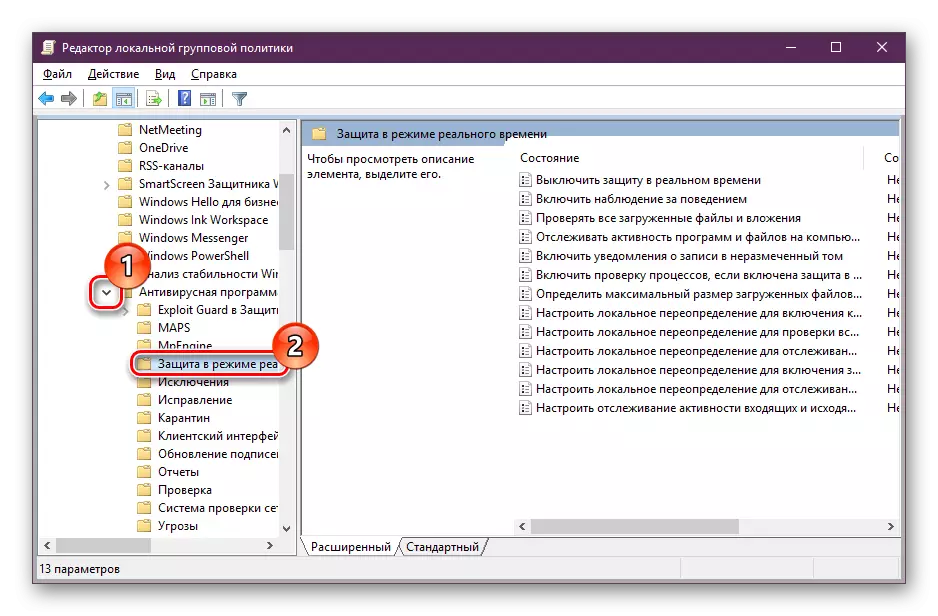
- Go along the path "Local Computer Policy"> Computer Configuration> Administrative Templates> Windows Components> "Anti-Virus Program" Windows Defender ".
- In the main part of the window, you will find the option "Disable Anti-Virus Program" Windows Defender ". Click on it twice the left mouse button.
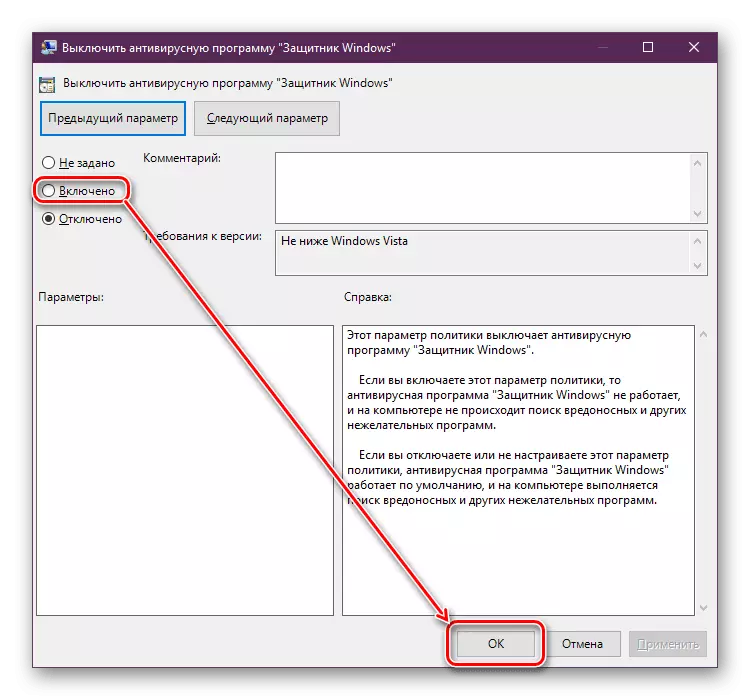
- A setup window opens where you specify the "Enabled" status and click OK.
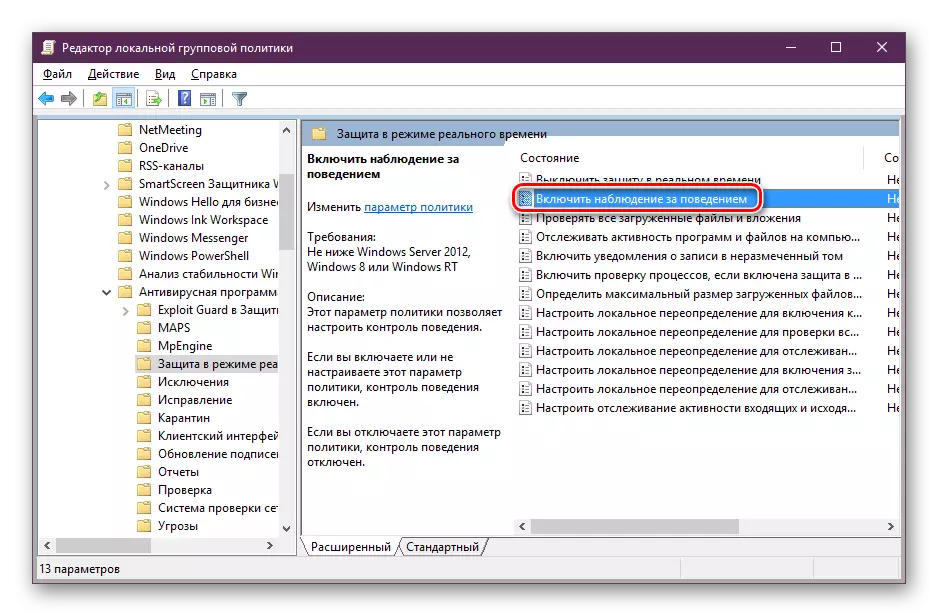
- Further, switch to the left side of the window, where expand the "Protection in Real-Time" folder.
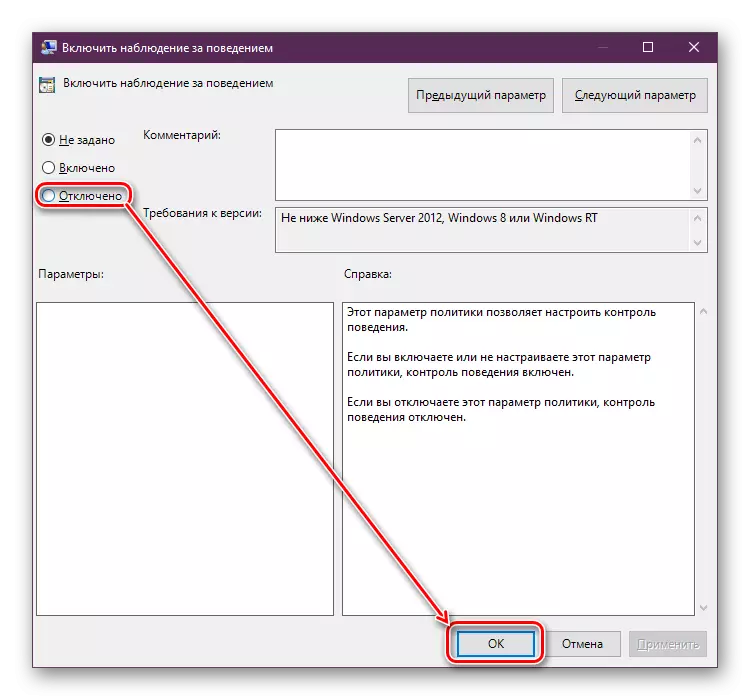
- Open the "Enable behavior monitoring" parameter by clicking on it twice the LX.
- Set the "Disabled" status and save the changes.
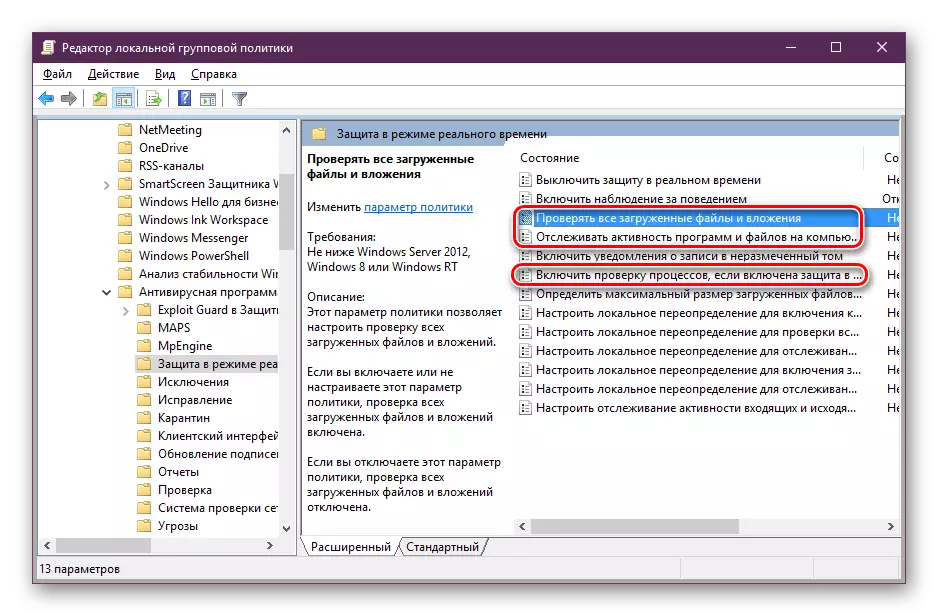
- Do the same with the "Check all downloaded files and attachments" options, "track the activity of programs and files on the computer" and "Enable process check if real-time protection is enabled" - disconnect them.

Now it remains to restart the computer and check how successful everything passed.
Registry editor
For users of Windows 10 home and all those who prefer to use the registry, this instruction will suit.
- Press Win + R, in the "Run" window, write Regedit and press ENTER.
- Insert the next path in the address bar and go through it:
HKEY_LOCAL_MACHINE \ SOFTWARE \ POLICIES \ Microsoft \ Windows Defender
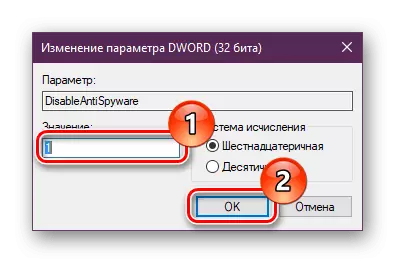
- In the main part of the window, double-click on the DisableAntispyware item, put it value 1 and save the result.
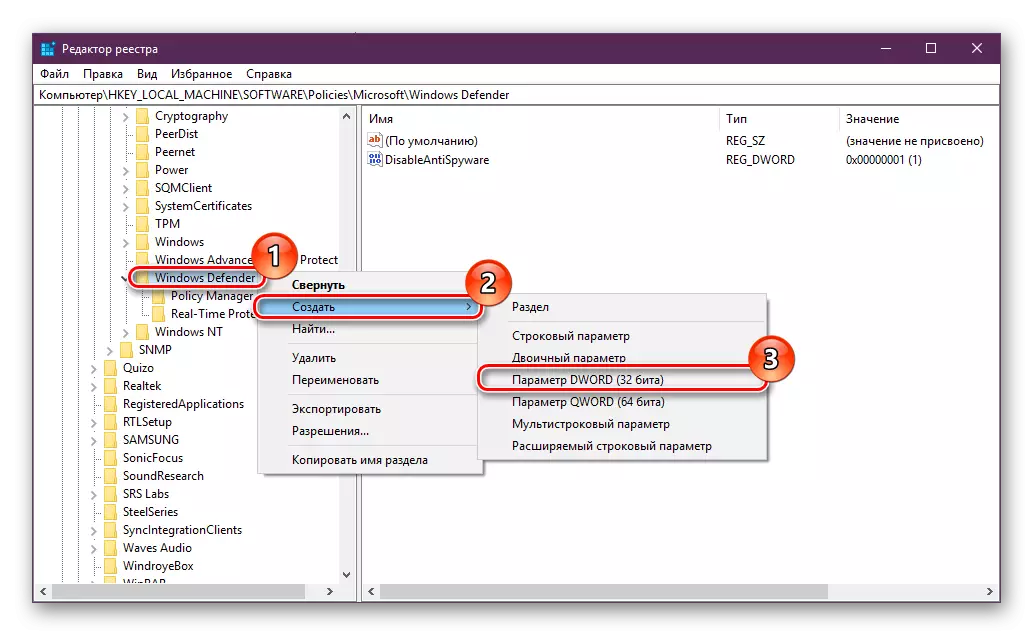
- If this parameter is missing, right-click on the folder name or on the right of the right, select "Create"> "DWORD Parameter (32 bits)". Then perform the previous step.
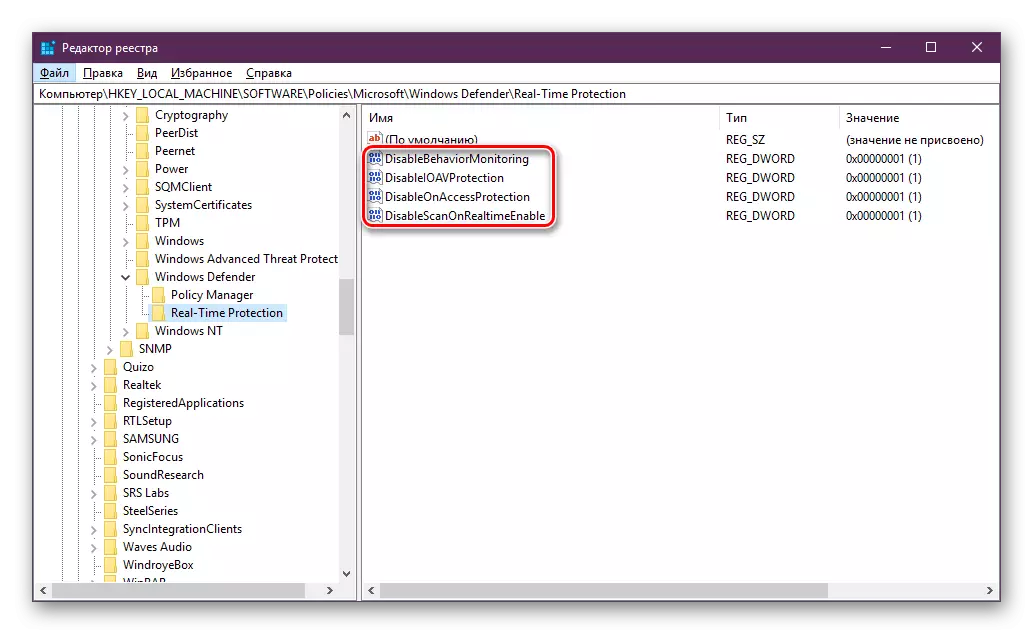
- Now go to the "Real-Time Protection" folder, which is located in Windows Defender.
- Set each of the four parameters value 1, as they did in step 3.
- If there is no such folder and parameters, create them manually. To create a folder, click on Windows Defender PCM and select "Create"> "Section". Name it "Real-Time Protection".

Inside it, create 4 parameters with the names "DisableBehaviormonitoring", "DisableonAccessProtection", "DisableScanonrealTimeEnable", "DisableScanonrealTimeEnable". Open alternately each of them, set them the value 1 and save.


Now restart the computer.
Method 3: Temporary Disabled Defender
The "Parameters" tool allows you to flexibly set up Windows 10, but the defender cannot be turned off there. There is only the possibility of its temporary shutdown before rebooting the system. This may be needed in situations when the antivirus blocks downloading / installing any program. If you are accurately confident in your actions, do the following:
- Open the alternative "Start" right click and select "Parameters".
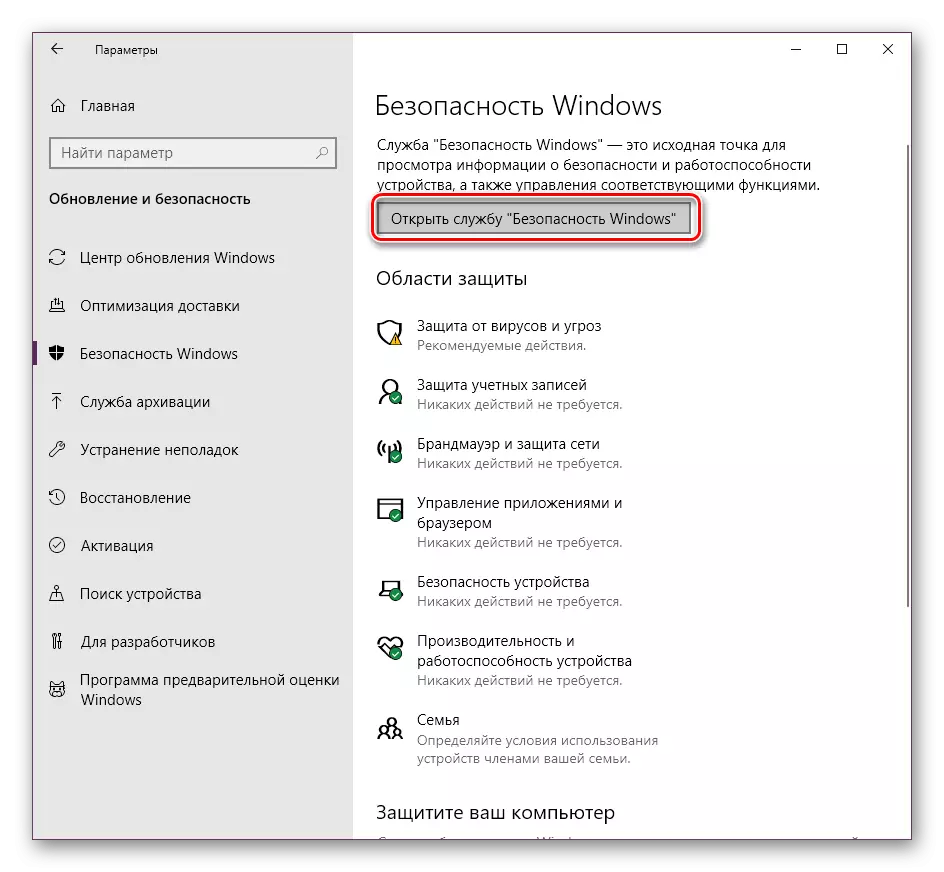
- Go to the "Update and Security" section.
- Find "Windows Security" on the panel.
- On the right side of the window, select "Open Windows Security".
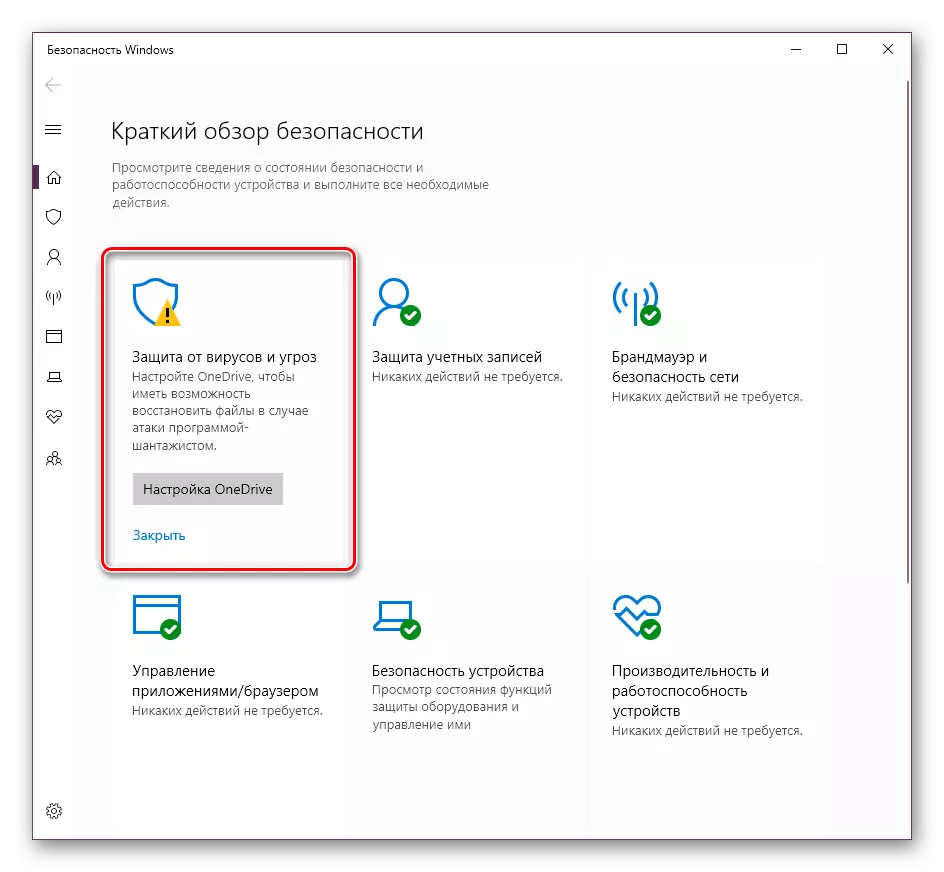
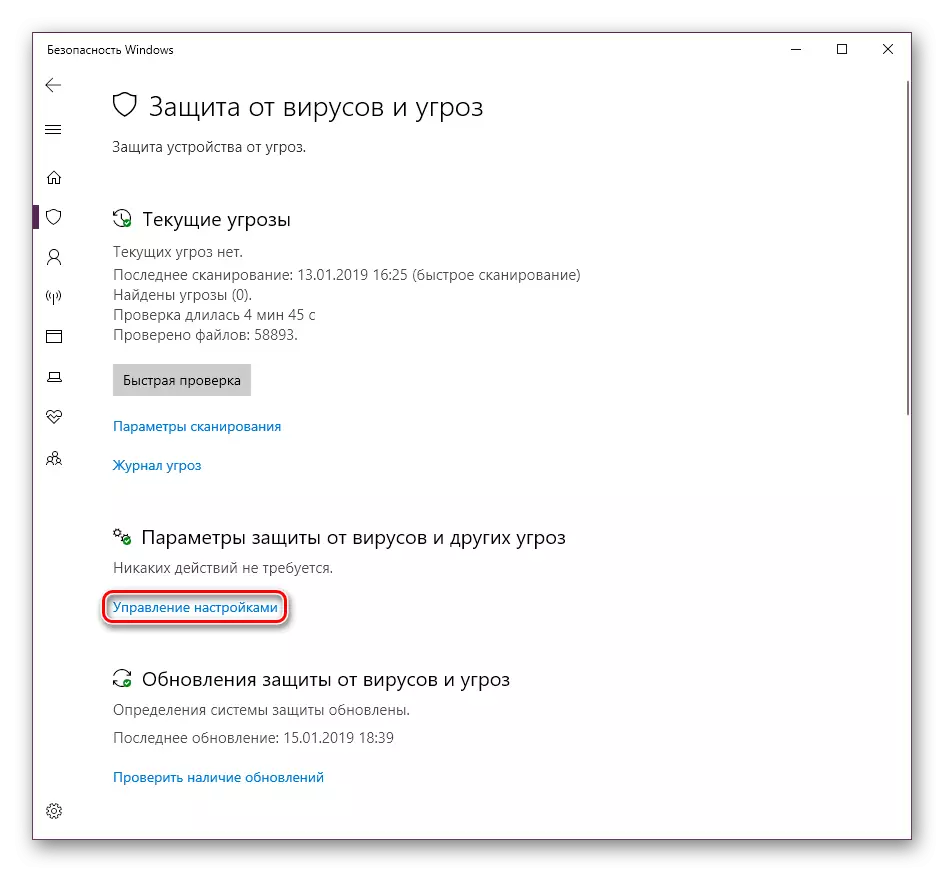
- In the window that opens, go to the "Protection against Viruses and Threats" block.
- Find the "Settings Management" link in the subtitle "Protection parameters from viruses and other threats".
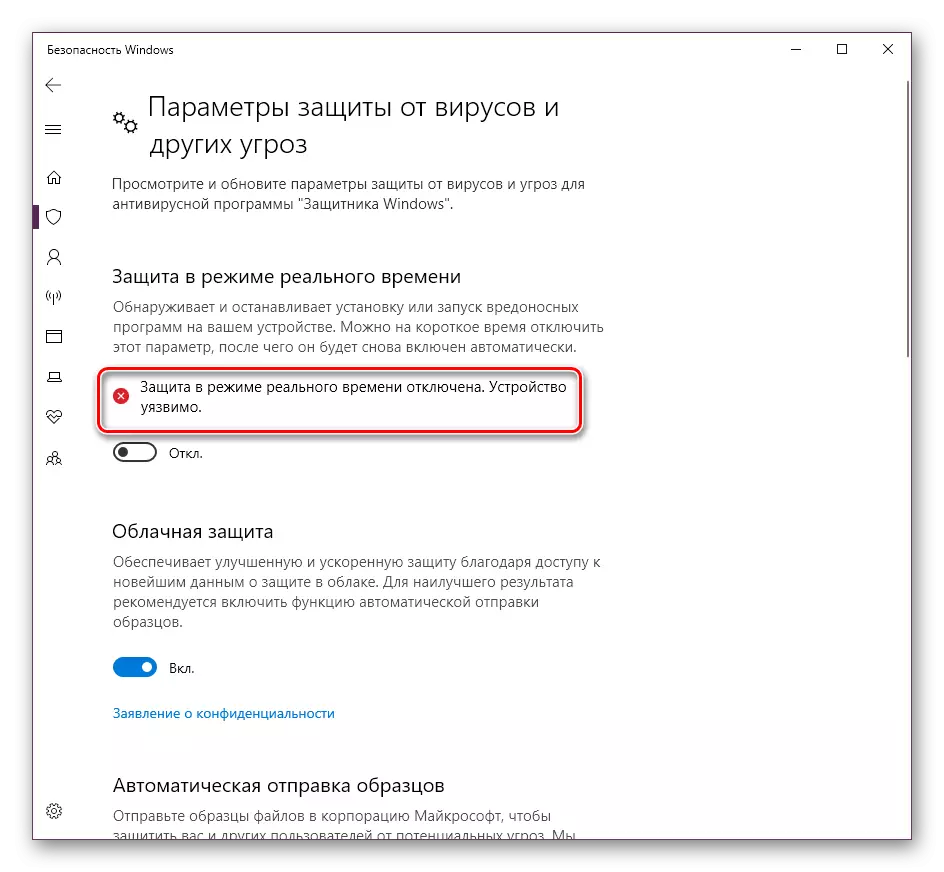
- Here in the "Protection in Real-Time" setting, click on the "On" toggle. If necessary, confirm your solution in the Windows Security window.
- You will see that the protection is disabled and this confirms the inscription appeared. It will disappear, and the defender will turn on again after the first reboot of the computer.


In such ways, you can turn off the defender of Windows. But you should not leave your personal computer without protection. Therefore, if you do not want to use Windows Defender, install another application for managing your PC security.