Share is an excellent tool if several users are working at a computer with different accounts (for example, working and personal). In our today's material, we want to introduce you to the methods of incorporating this function in the Windows operating system 10.
Share files and folders in Windows 10
Under general is usually implied by a network and / or local access option, as well as POPs. In the first case, this means providing permits for viewing and changing files to other users of one computer, in the second - provision of similar rights for users of a local network or Internet. Consider both options.
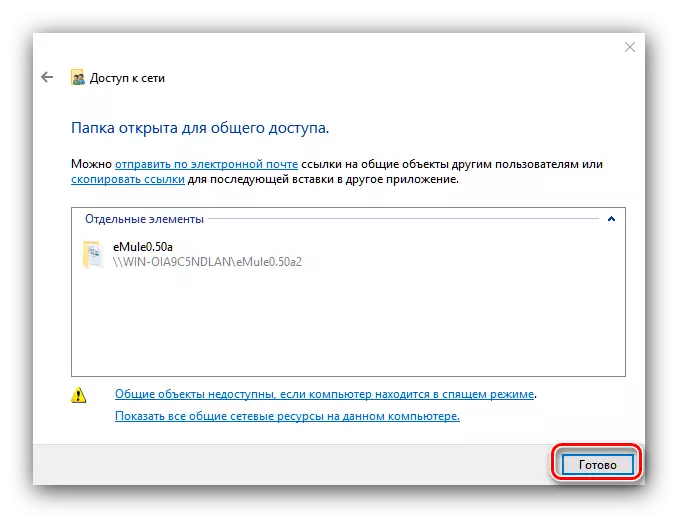
Thus, we provided general access rights to the selected directory to local users.
Option 2: Access for users online
Setting up a network share option is not too different from local, but has its own characteristics - in particular, it may be necessary to create a separate network folder.
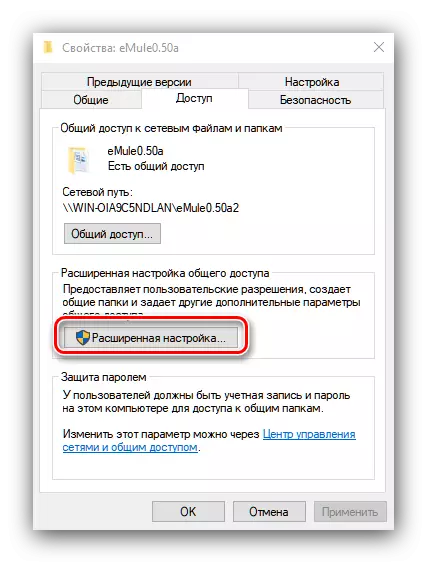
- Do steps 1-2 from the first way, but this time you use the "Extended Settings" button.
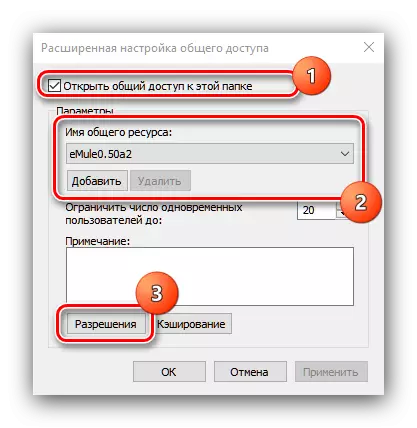
- Mark the "Open access to this folder" item. Then set the name of the directory in the "Shared Resource Name" field, if required - it is the name of the connected users selected here. After clicking "Permissions".
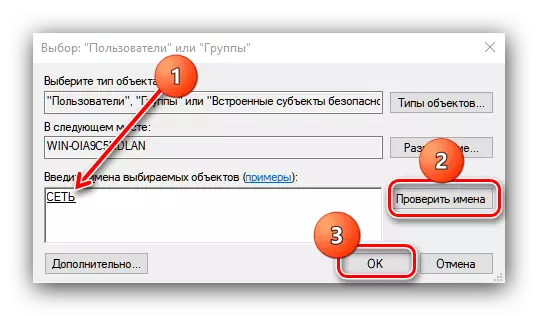
- Next, use the "Add" element.
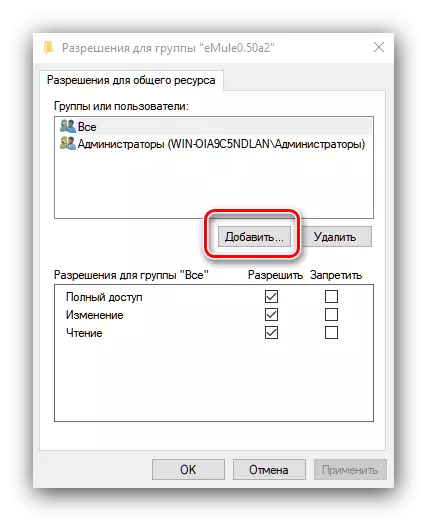
In the next window, refer to the field input field of objects. Write in it the word network, be sure to large letters, after which you can consistently click on the "Check names" and "OK" buttons.
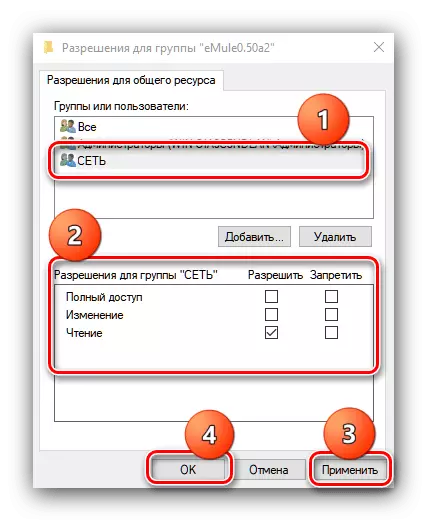
- Upon returning to the previous window, select the Network Group and set the required read-write permissions. Use the "Apply" and "OK" buttons to save the entered parameters.
- Consistently close the window opening with the "OK" buttons in each of them, then call "Parameters". The easiest way to do it with the help of "Start".
In case you do not want to leave the computer at all without protection, you can use the possibility of providing access to accounts, which have an empty password. This is done as follows:
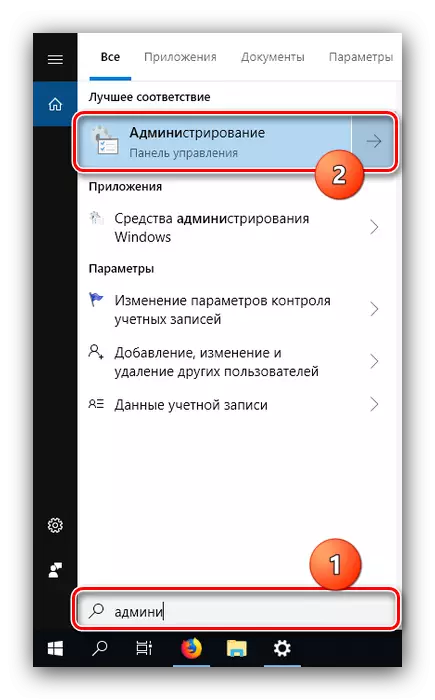
- Open "Search" and start writing administration, then click on the result found.
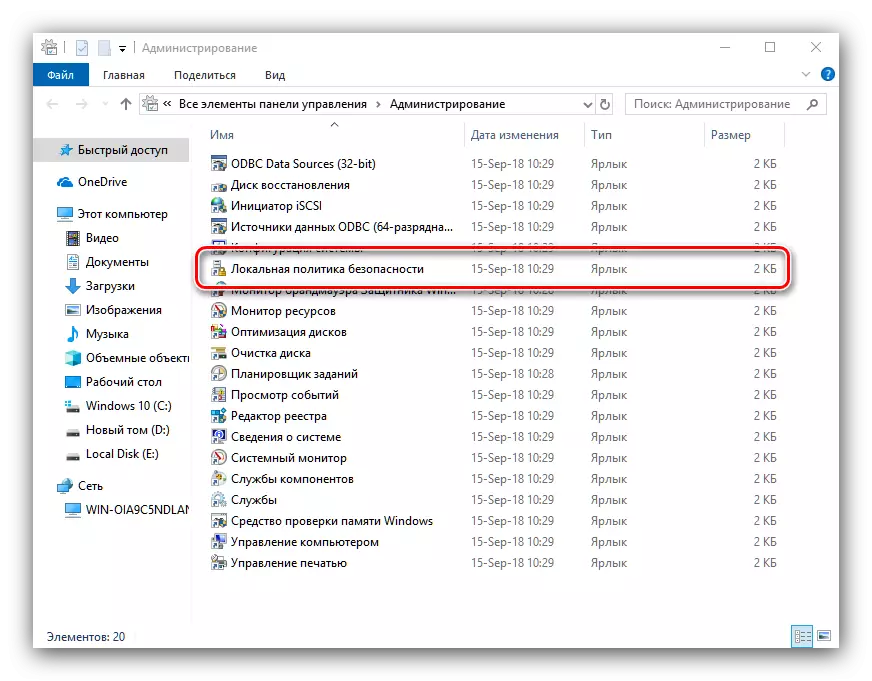
- A directory will open where to find and run the application "Local security policy".
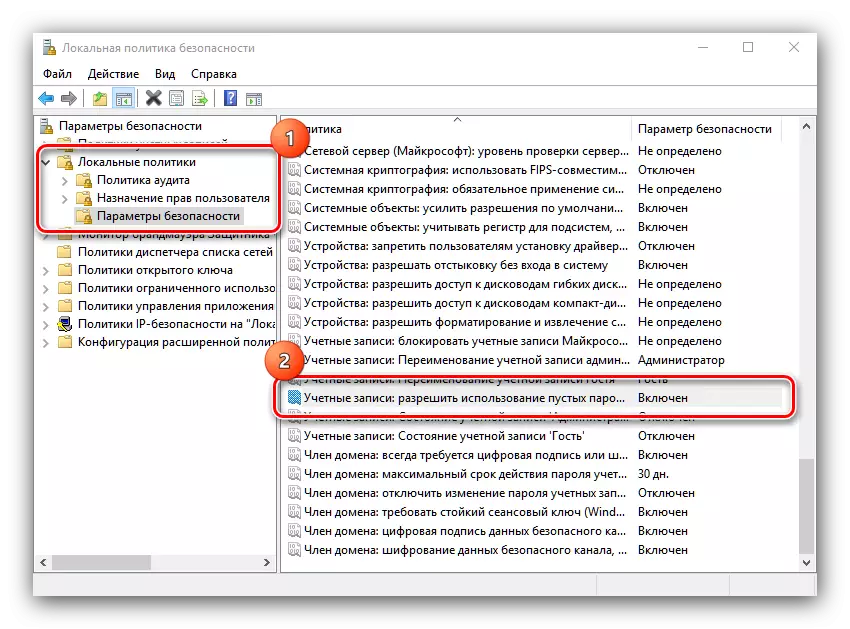
- Expand the "Local Policies" and "Security Settings" directory, then find the entry with the name "Accounts: Allow the use of empty passwords" on the right side of the window.
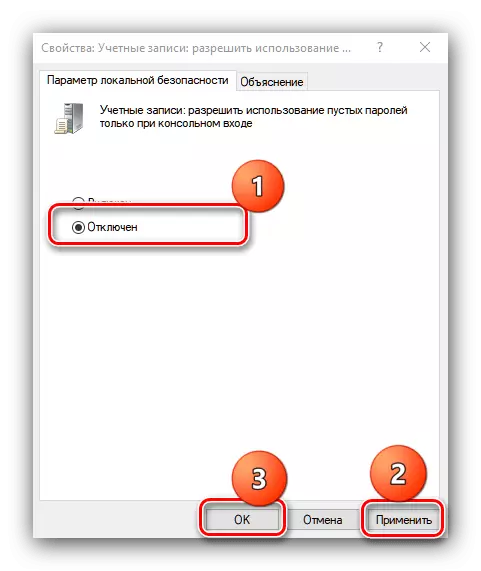
- Mark the option "Disable", after which use the "Apply" and "OK" elements to save changes.
Conclusion
We considered methods for providing general access to users to individual directories in Windows 10. The operation does not constitute difficulties, and even inexperienced users can cope with it.