
Now in many stationary computers and laptops have a video card from NVIDIA. New models of graphic adapters from this manufacturer are produced almost every year, and the old are supported both in production and in terms of software updates. If you are the owner of such a card, you are available for detailed configuration of the graphical parameters of the monitor and the operating system, running through a special brand program installed with the drivers. It was about the possibilities of this software that we would have wanted to talk under this article.
Configure NVIDIA video card
As mentioned above, the configuration is performed through a special software that has the name "NVIDIA control panel". Its installation is made with the drivers, the download of which is mandatory for users. If you have not yet installed drivers or use not the latest version, we recommend to carry out the installation process or update. Deployed Instructions on this topic can be found in our other articles on the following links.
Read more:
Installing Drivers With NVIDIA GeForce Experience
Update NVIDIA video card drivers
To get to the "NVIDIA control panel" is quite easy - press the PCM on the empty place of the desktop and in the window that appears, select the appropriate item. With the rest of the panel launch methods, see another material further.
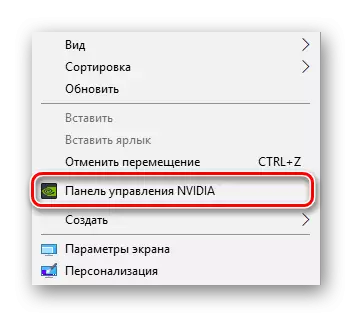
Read more: Run the NVIDIA control panel
In the event of difficulties with the launch of the program, you will need to solve them in one of the ways discussed in a separate article on our website.
Display Settings
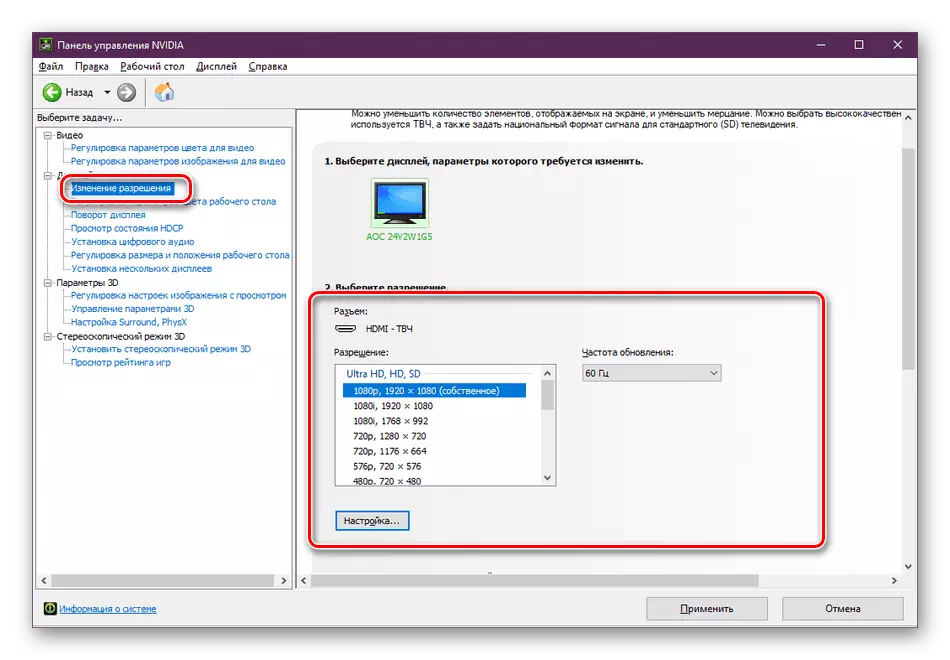
Go to the category "Display". The items here will be more, each of which is responsible for certain monitor settings to optimize the work behind it. There are here as familiar parameters used by default in Windows and branded from the video card manufacturer.
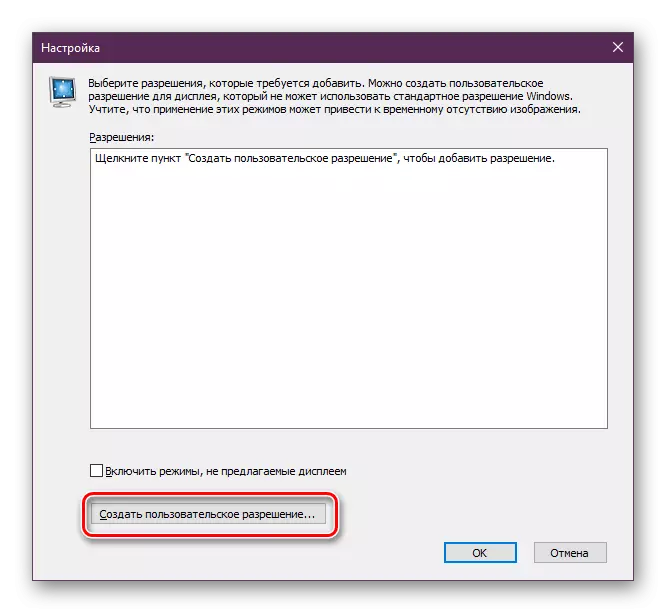
- In the "Change Resolution" section, you will see the usual options for this parameter. By default there are several blanks, one of which you can choose. In addition, the screen update frequency is also selected, just do not forget to specify an active monitor before that, if several are used.
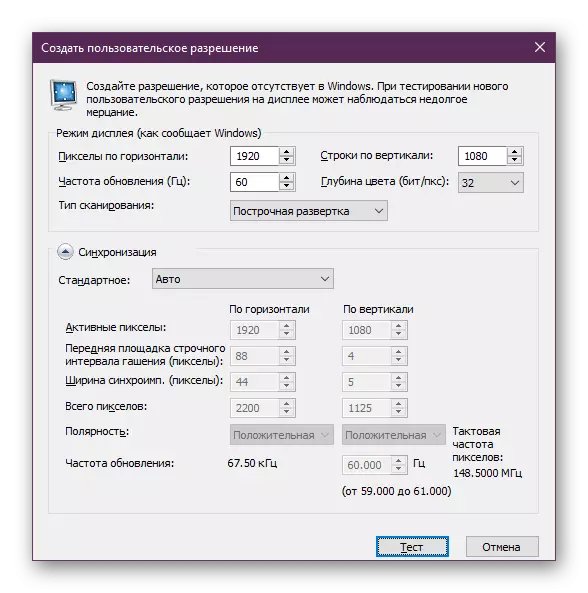
- NVIDIA also invites you to create a custom permit. This is done in the "Setup" window after pressing the corresponding button.
- Be sure to adopt the terms and conditions of legal application from NVIDIA.
- Now the additional utility will open, where the selection of the display mode is located, setting the type of scan and synchronization. Using this feature is recommended only for experienced users who have already familiarized with all the subtleties of working with similar tools.
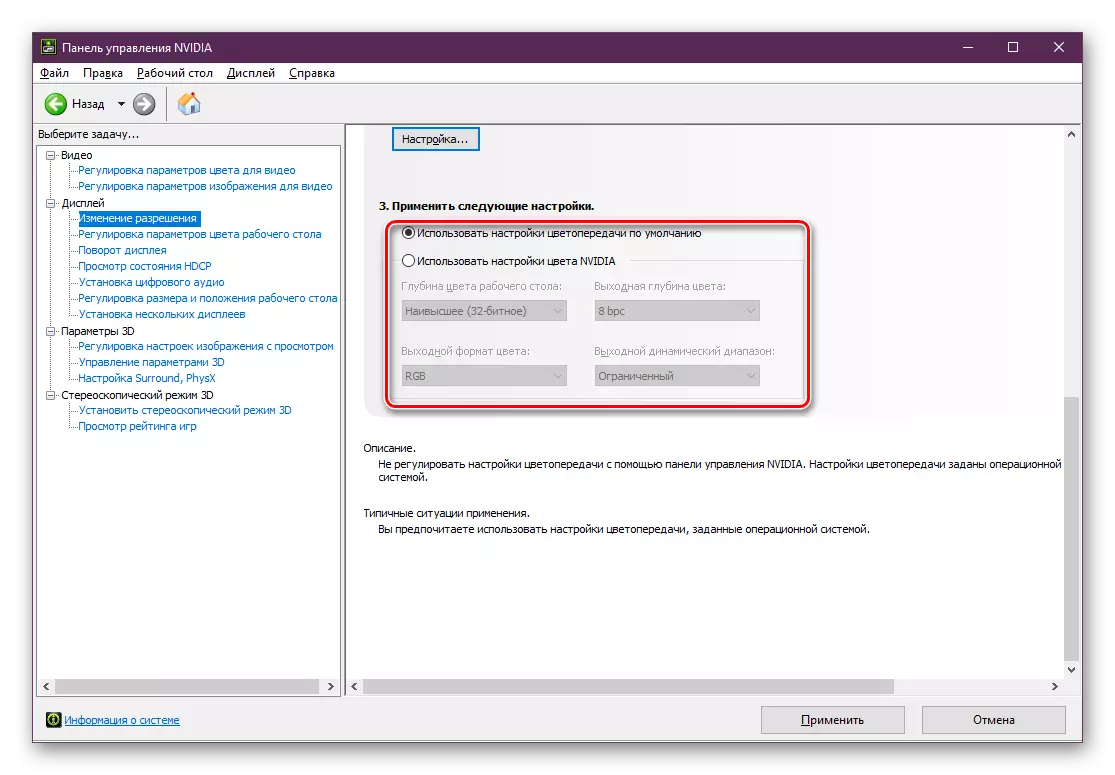
- In the "Resolution Change" there is a third item - setting up color reproduction. If you do not want to change anything, leave the default value selected by the operating system, or change the depth of the desktop color, the output depth, the dynamic range and the color format at its discretion.
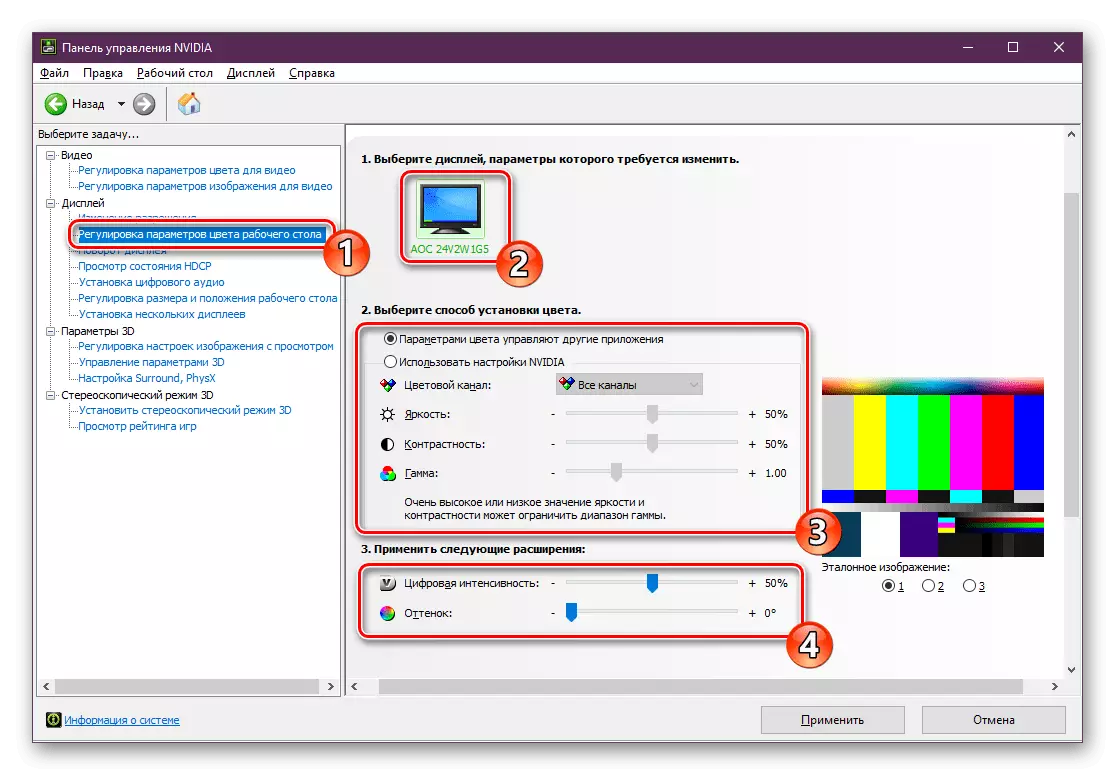
- Change the desktop color parameters is also made in the next section. Here, with the help of the slider, the brightness, contrast, gamma, tint and digital intensity are indicated. In addition, there are three options for reference images to the right so that changes can be tracked.
- The turn turn is also in the usual operating system settings, however, through the "NVIDIA control panel" is also feasible. Here you not only choose the orientation using the installation of markers, but also turn the screen using individual virtual buttons.
- There is an HDCP technology (HIGH-BANDWIDH DIGITAL CONTENT PROTECTION), which is created for protective transmission of media data between two devices. It works only with compatible equipment, so it is sometimes important to make sure that the video card supports the technology under consideration. You can do this in the HDCP Status menu.
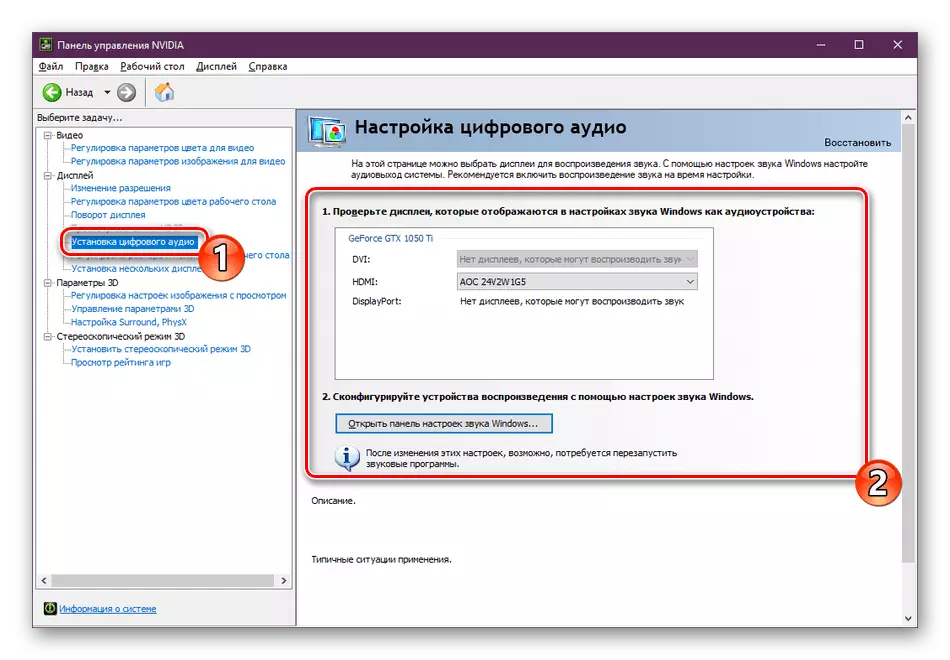
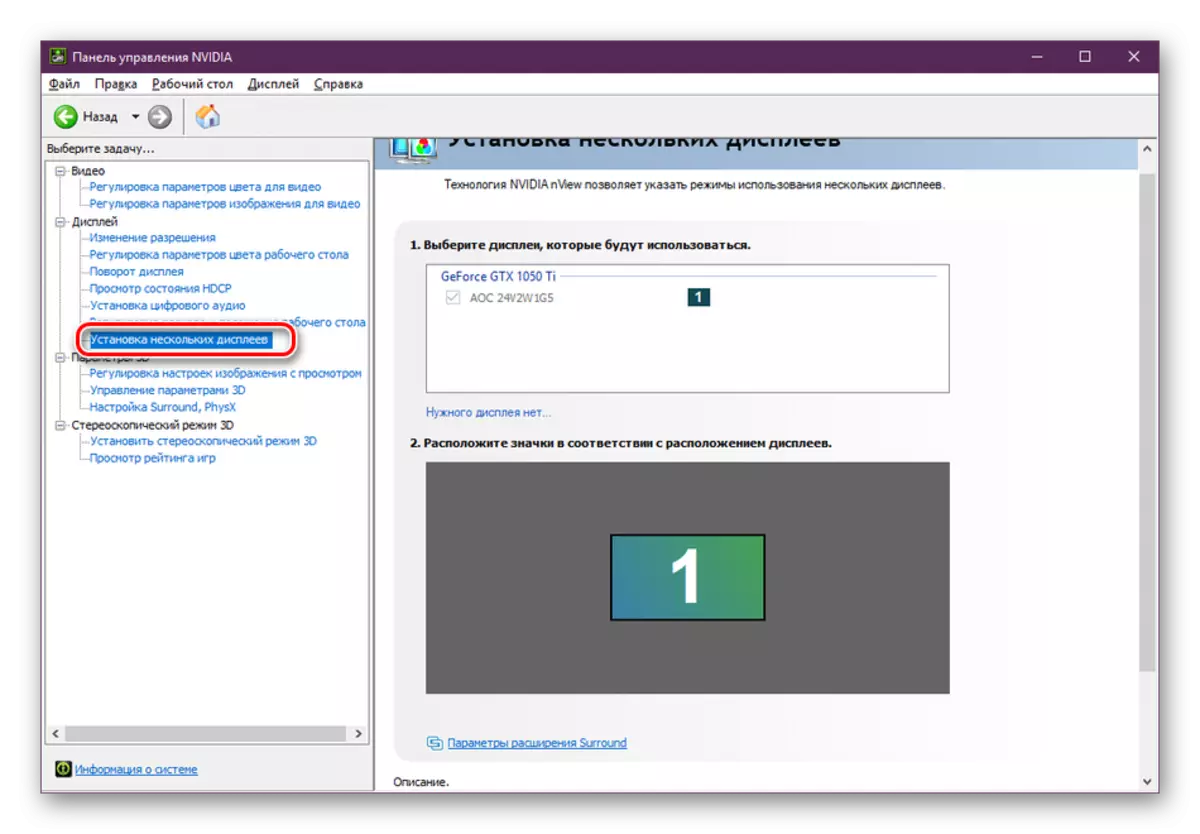
- Now more and more users are connected to a computer at once several displays to improve work comfort. All of them are connected to the video card by means of available connectors. Often the monitors have speakers, so you need to select one of them to output the sound. This procedure is carried out in "Installing Digital Audio". Here you just need to find the connection connector and specify the display for it.
- In the "Adjusting size and position of the desktop" menu, the scaling and position of the desktop on the monitor are set. Below, under the settings there is a viewing mode where you can set the resolution and the update frequency to evaluate the result.
- The last item is "setting several displays." This feature will be useful only when using two or more screens. You specify the active monitors and move the icons in accordance with the location of the displays. Detailed instructions for connecting two monitors you will find in another material more.


See also: Connecting and configuring two monitors in Windows
Parameters 3D
As you know, the graphics adapter is actively used to work with 3D applications. It performs generation and render so that the output is the necessary picture. In addition, the hardware acceleration is used using the Direct3D or OpenGL components. All items in the 3D parameters menu will be maximally useful to gamers wishing to set the optimal configuration for games. We advise you to familiarize yourself with the analysis of this procedure.
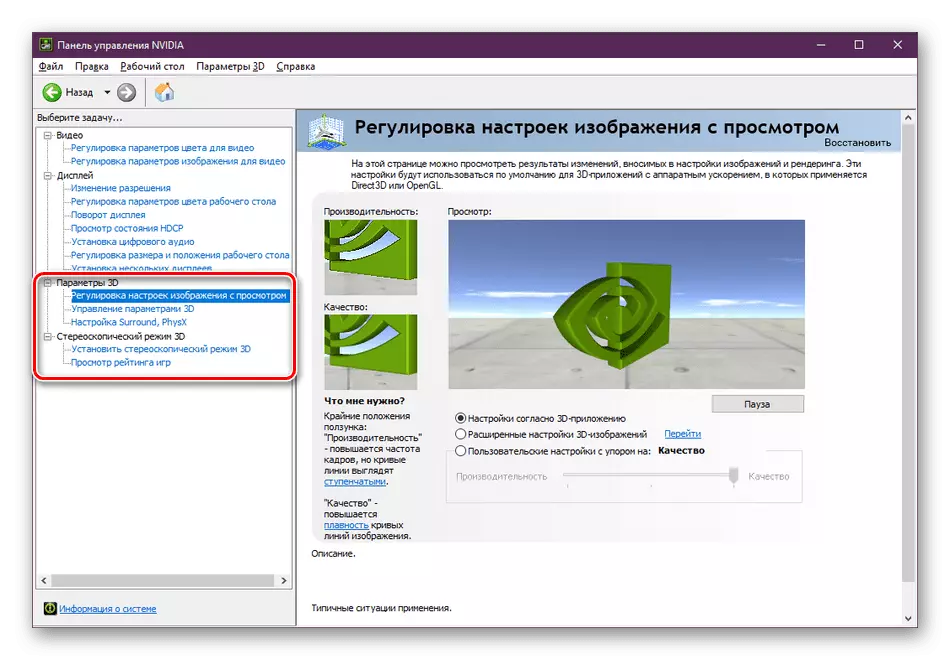
Read more: NVIDIA video card optimal settings for games
On this, our acquaintance with the configuration of NVIDIA video cards is coming to an end. All considered settings are set by each user individually under its requests, preferences and the installed monitor.