

PostgreSQL is a free control system of various databases implemented for different platforms, including Windows and Linux. The tool supports a large number of data types, has a built-in scripting language and supports the use of classic programming languages. Ubuntu PostgreSQL is installed through the Terminal using official or user storage facilities, and after that preparatory work, testing and creating tables are carried out.
Install PostgreSQL in Ubuntu
Databases are used in a wide variety of areas, but the comfort management provides the control system. Many users stop at PostgreSQL, install it in their OS and start working with tables. Next, we would like to step by step to describe the entire installation process, the first launch and setting the mentioned tool.Step 1: Install PostgreSQL
Of course, you should start with the addition of all the necessary files and libraries in Ubuntu to ensure the normal functioning of PostgreSQL. This is done using console and custom or official repositories.
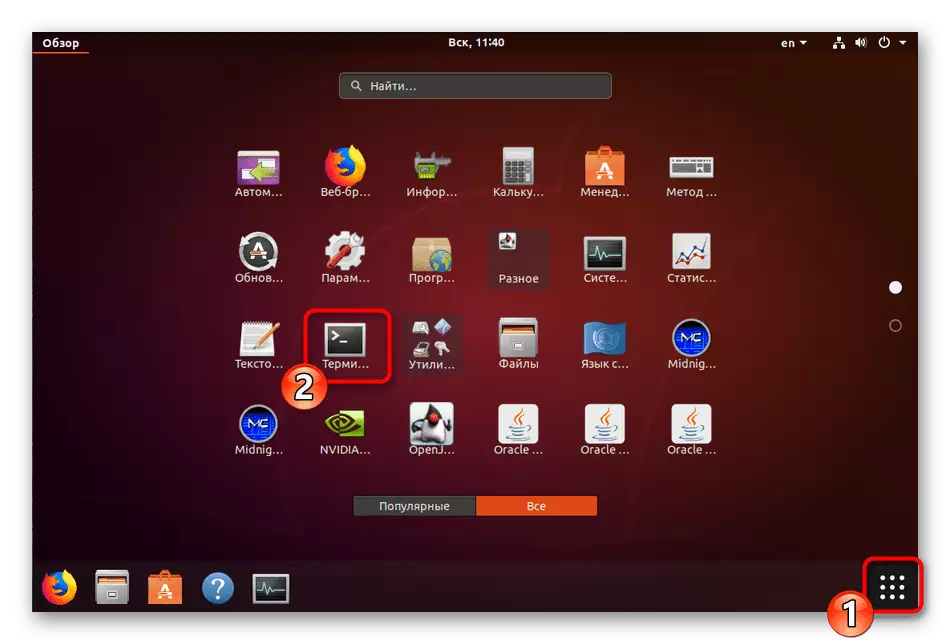
- Launch the "terminal" in any convenient way, for example, through a menu or pinch of the Ctrl + Alt + T key combination.
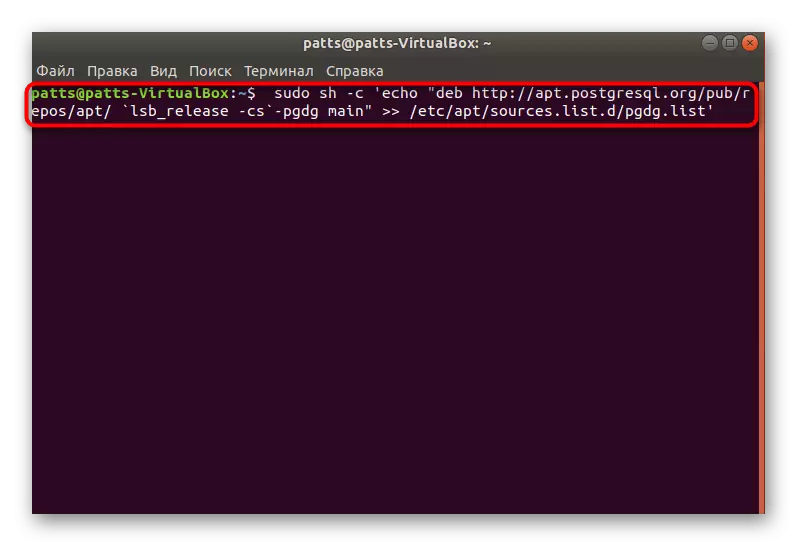
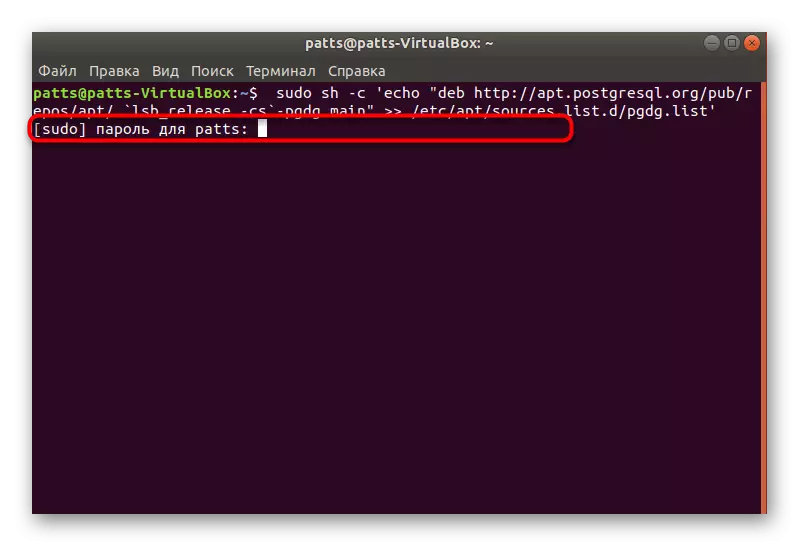
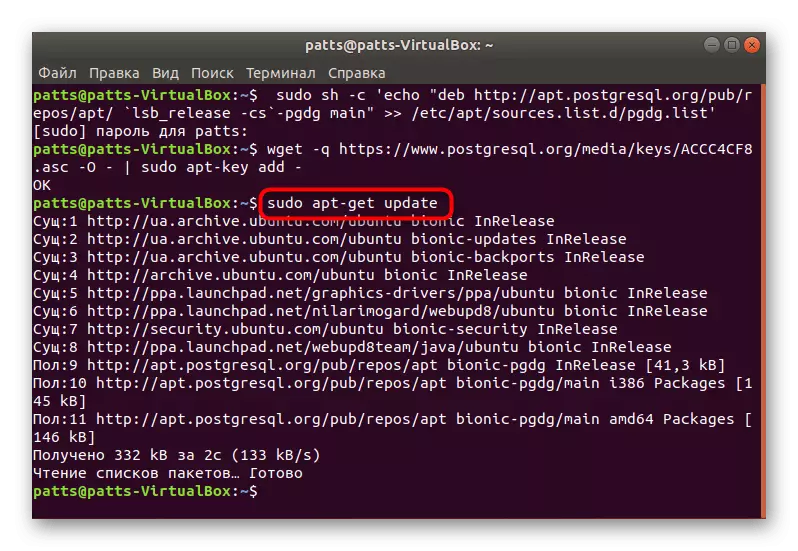
- First, we note user storage facilities, because there usually primarily unload the latest versions. Insert the Sudo SH -C 'ECHO command in the command http://apt.postgresql.org/pub/repos/apt/ `lsb_release -cs`-pgdg main" >> /etc/apt/sources.list.d/ PGDG.LIST ', and then click on ENTER.
- Enter the password from your account.
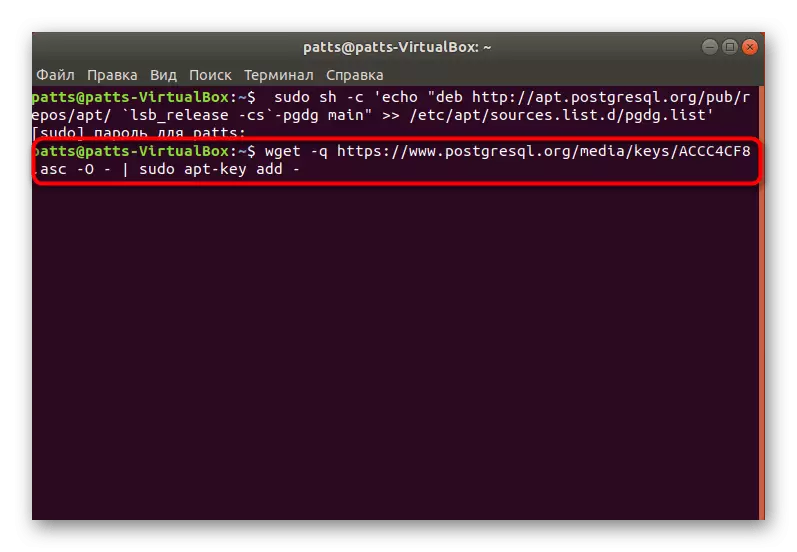
- After that, use WGET -Q https://www.postgresql.org/media/keys/accc4cf8.asc -o - | Sudo APT-KEY Add - to add packages.
- It remains only to update the system libraries by the standard Sudo APT-Get Update command.
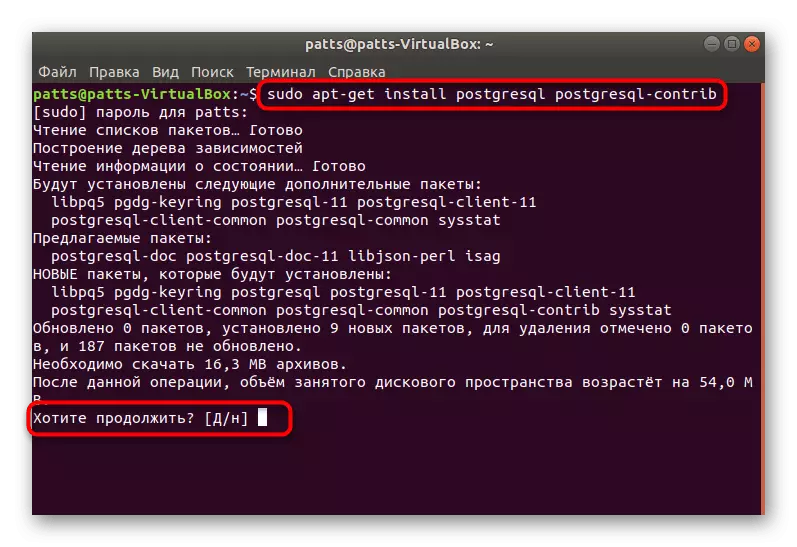
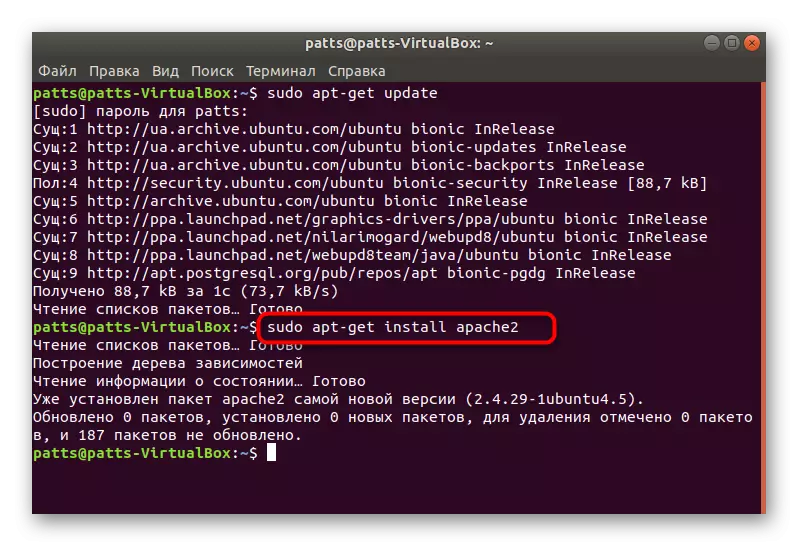
- If you are interested in obtaining the latest available postgreSQL version from the official repository, you need to write in the Sudo Apt-Get Install PostgreSQL PostgreSQL-Contrib and confirm the addition of files in the Sudo Apt-Get Install Console.
Upon completion of the successful installation, you can switch to the launch of a standard account, checking the operation of the system and the initial configuration.
Step 2: First Run PostgreSQL
Management of the installed DBMS also occurs through the "Terminal" using the appropriate commands. Appeal to the default user looks like this:
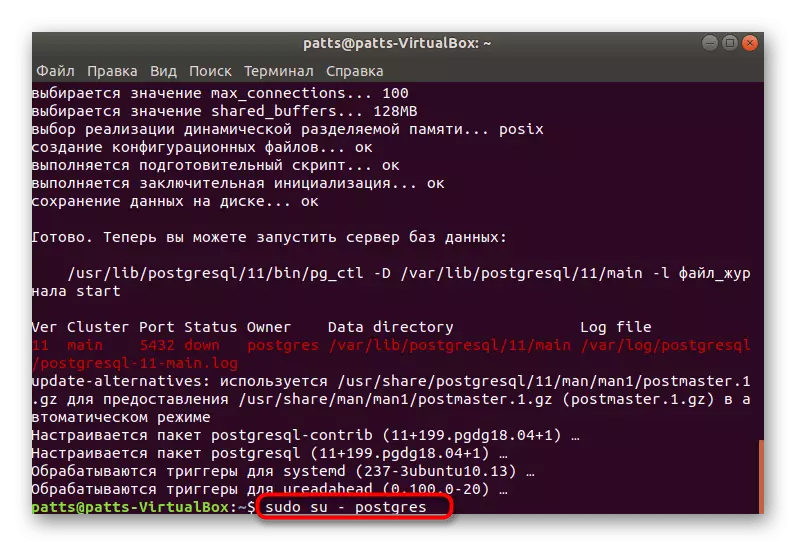
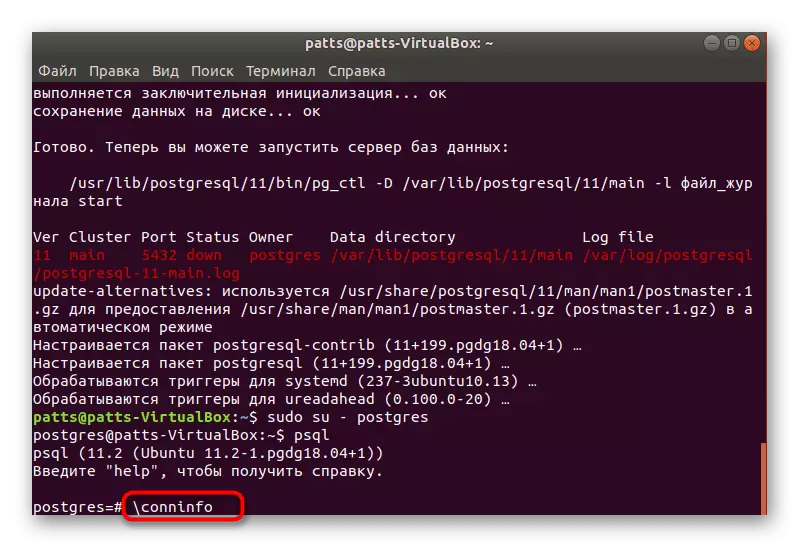
- Enter the Sudo Su - Postgres command and click on ENTER. Such an action will allow you to proceed to manage the default account created by the default account, which currently acts as the main one.
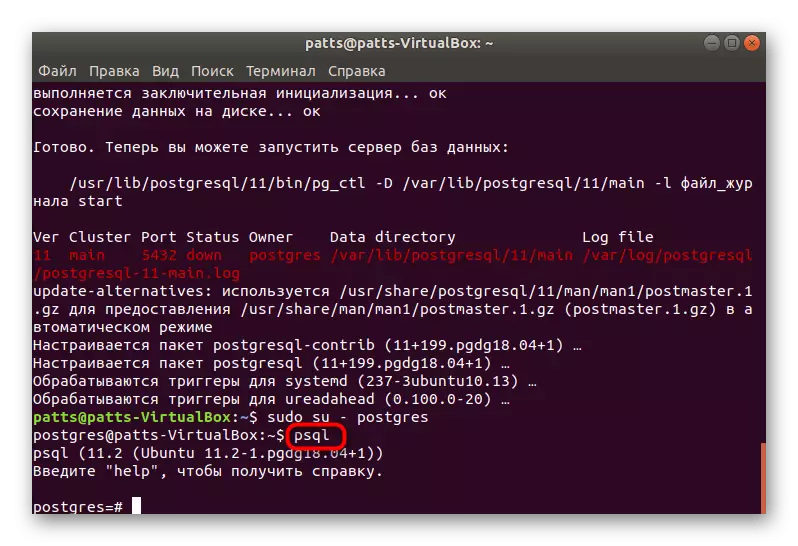
- The input into the control console under the type of profile used is carried out via PSQL. Activation Help will help you to deal with the environment - it will show all the available commands and arguments.
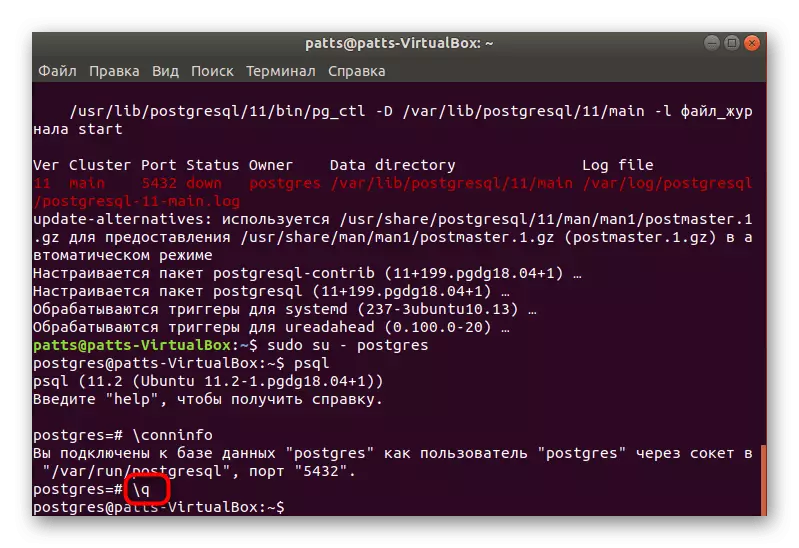
- Viewing the information about the current Session PostgreSQL is performed through \ Conninfo.
- Team \ Q will help to get out of the environment.
Now you know how to log into the account and go to the control console, so it's time to move to the creation of a new user and its database.
Step 3: Creating a user and database
It is not always convenient to work with the available standard account, and it is not always necessary. That is why we propose to consider the procedure for creating a new profile and binding to it a separate database.
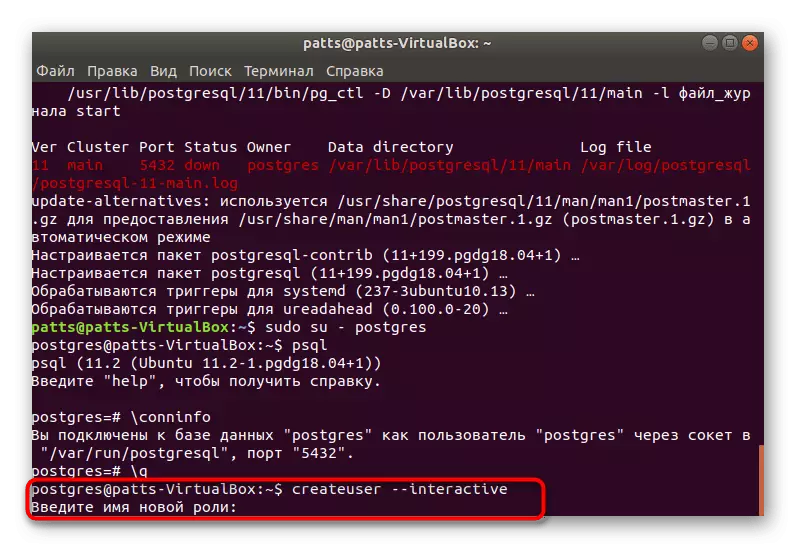
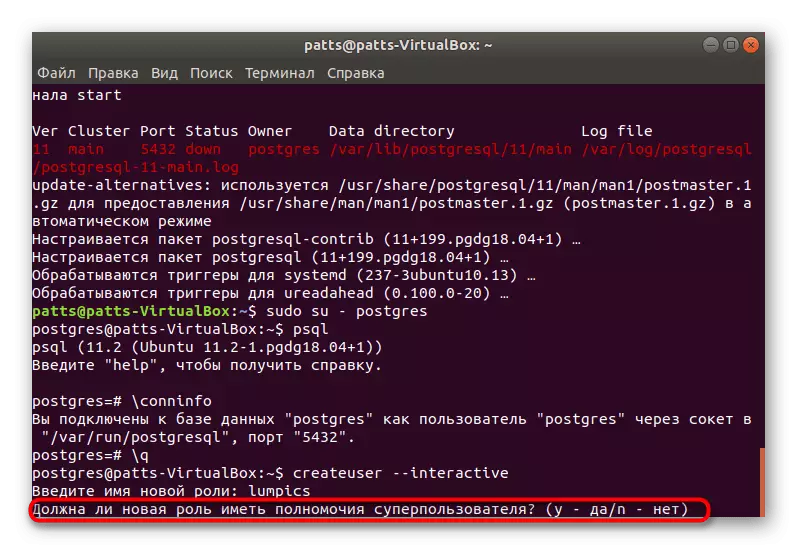
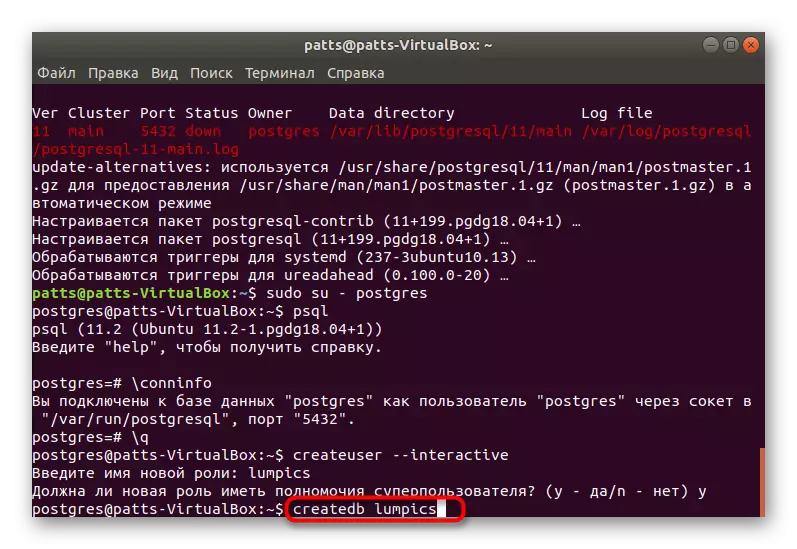
- Being in the console under the Postgres profile (SUDO SU-POSTGRES command), write CreateUser --Interactive, and then specify it a suitable name, screening characters in the appropriate string.
- Next, decide whether you want to provide the user with the rule of superuser to access all system resources. Simply select the appropriate option and go further.
- The database is best called the same name as the account was named, so it is worth using the CreatedB Lumpics command, where Lumpics is the username.
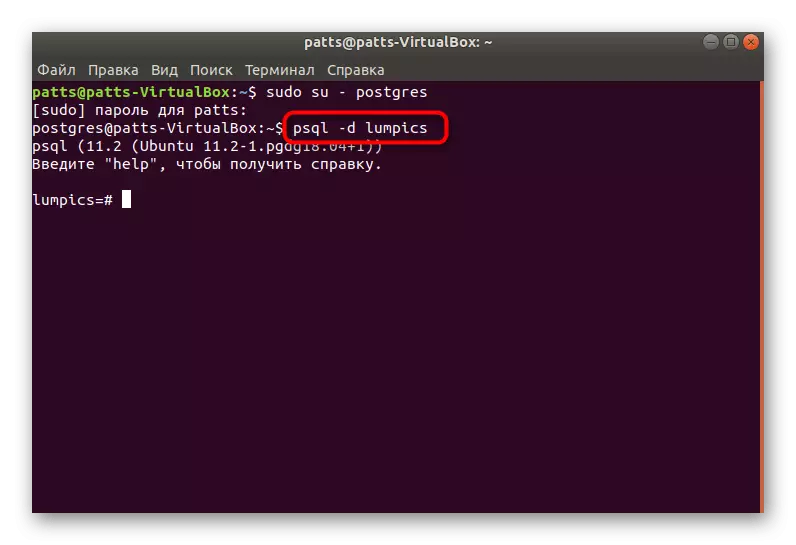
- The transition to work with the specified database occurs through the PSQL -D Lumpics, where Lumpics is the name of the database.
Step 4: Creating a table and work with rows
It is time to create your first table in the designated base. This procedure is also performed through the console, however, it will be easy to deal with the main commands, because you only need the following:
- After moving to the database, enter such a code:
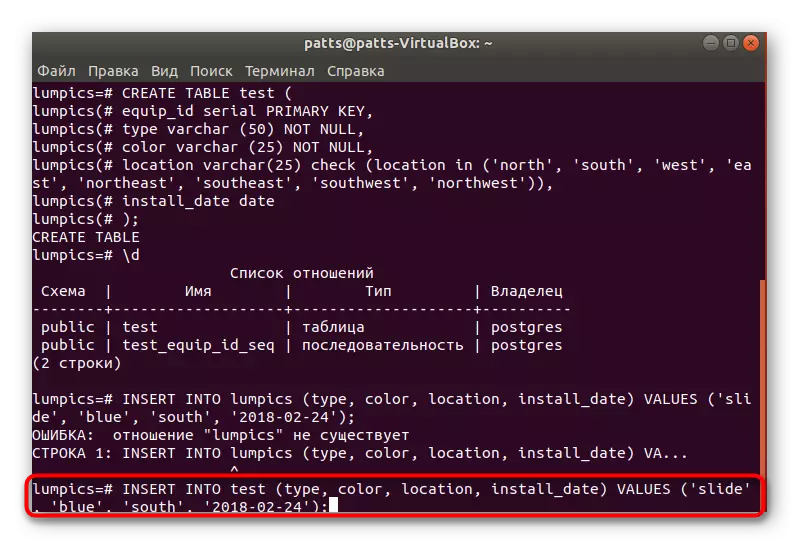
CREATE TABLE TEST (
Equip_ID Serial Primary Key,
Type Varchar (50) Not NULL,
Color Varchar (25) Not NULL,
Location Varchar (25) Check (Location In ('North', 'South', 'West', 'East', 'Northeast', 'Southeast', 'Southwest', 'Northwest')),
Install_Date Date.
);
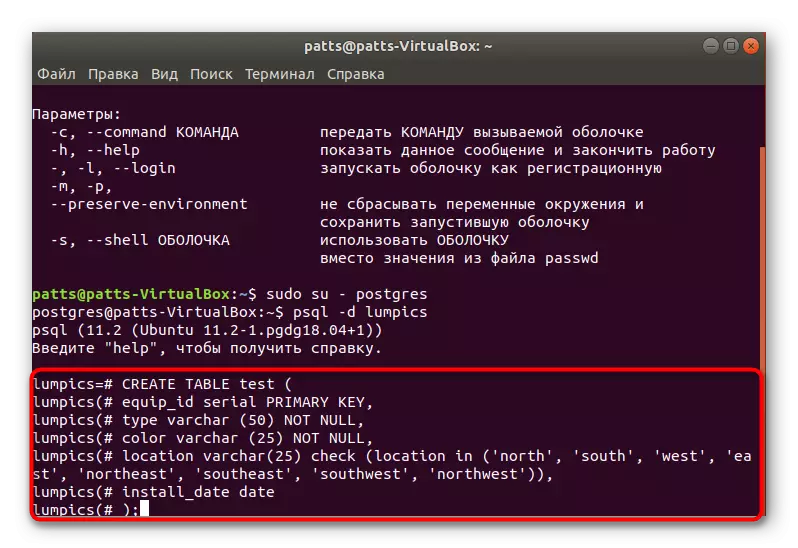
First, the TEST table name is specified (you can choose any other name). The following describes each column. We have chosen the names of Type Varchar and Color Varchar only for example, you will also have an indication of any other, but only with the use of Latin characters. The numbers in brackets are responsible for the size of the column, which is directly related to the data placed there.
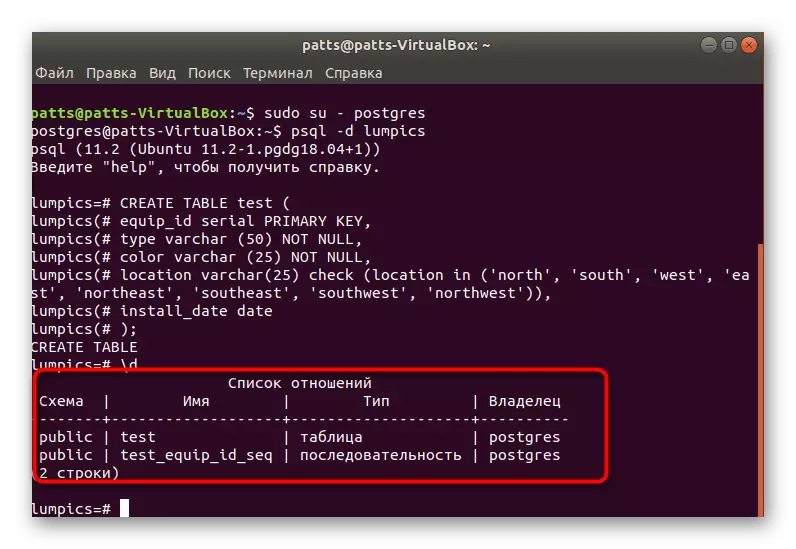
- After entering, it remains only to display the table to the screen using \ d.
- You see a simple project that does not contain any information yet.
- The new data is added via the Insert Insert Test command (Type, Color, Location, Install_Date) Values ('Slide', 'Blue', 'South', '2018-02-24'); First indicate the name of the table, in our case it is a test, then all columns are listed, and the values are specified in the brackets.
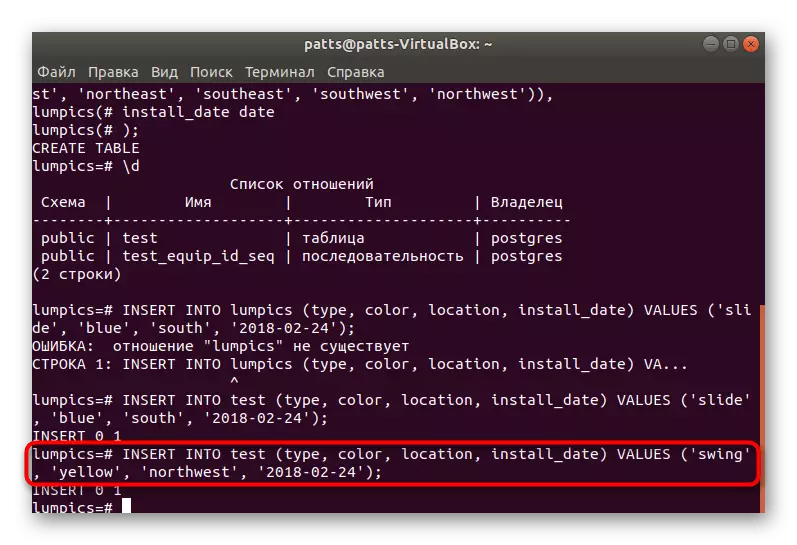
- You can then add another line, for example, Insert Into Test (Type, Color, Location, Install_Date) Values ('Swing', 'Yellow', 'Northwest', '2018-02-24');
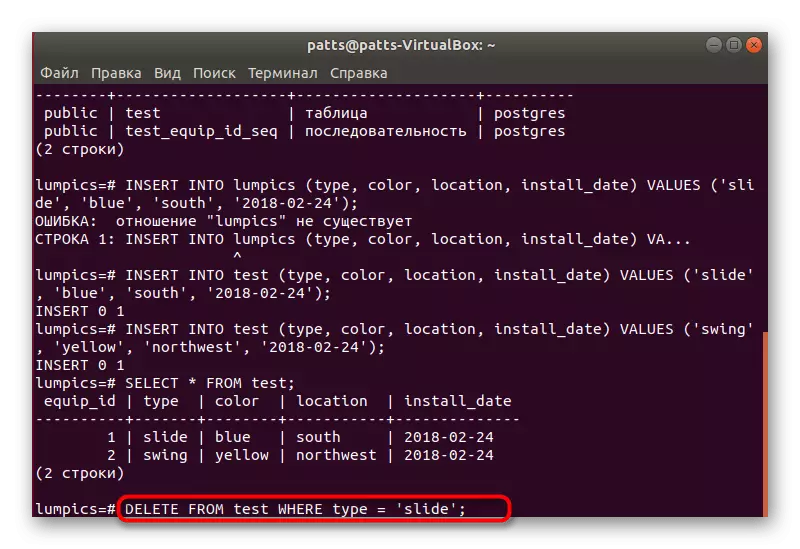
- Run the table through the SELECT * from test;, to estimate the result. As you can see, everything is set correctly and the data are made correctly.
- If you need to delete any value, do it through the DELETE FROM TEST WHERE TYPE = 'SLIDE' command;, by specifying the desired field in quotes.


Step 5: Install PHPPGAdmin
Not always the control of the database is easily performed through the console, so it is best to upgrade it, setting a special PHPPGAdmin graphical interface.
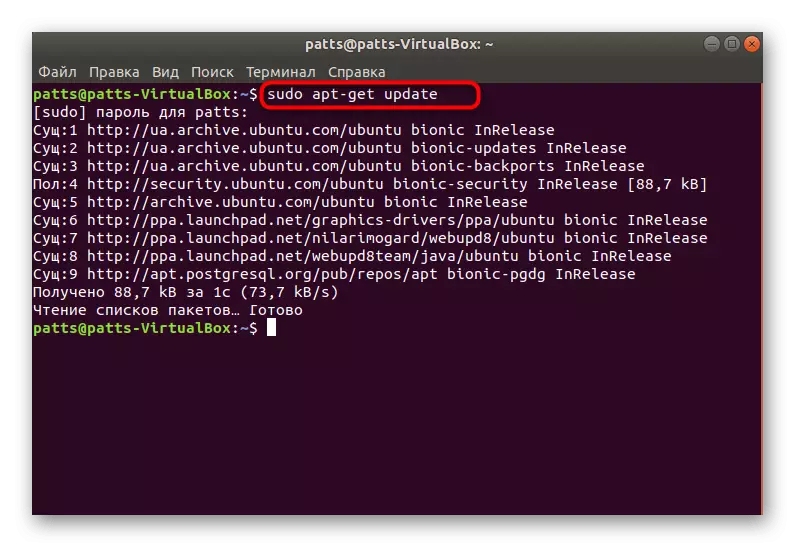
- First prior to "Terminal", download the latest updates for libraries through Sudo Apt-Get Update.
- Install the Apache Sudo APT-Get Install Apache2 web server.
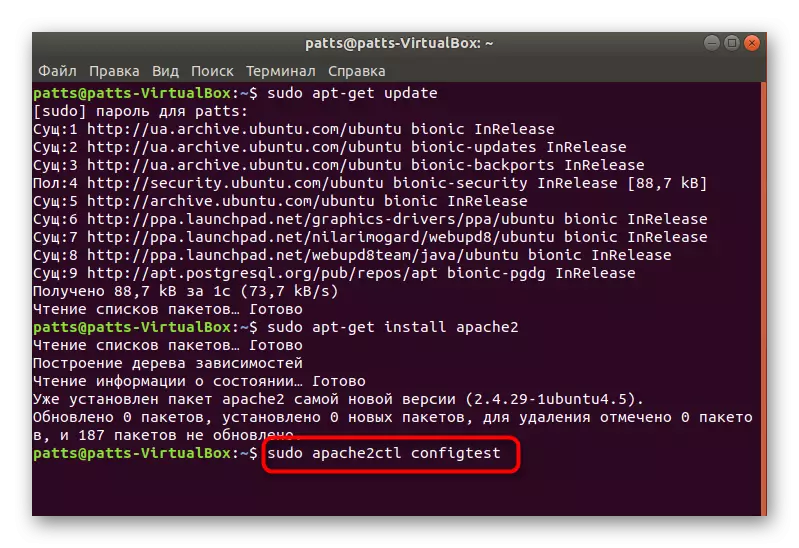
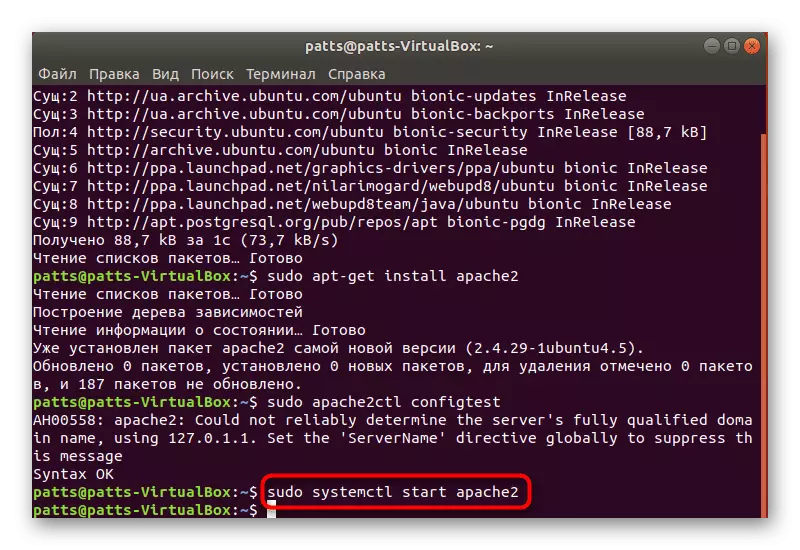
- After installing, test it with the performance and correctness of the syntax using Sudo Apache2ctl Configtest. If something went wrong, look for an error in the description on the official Apache website.
- Run the server by entering Sudo SystemCTL Start Apache2.
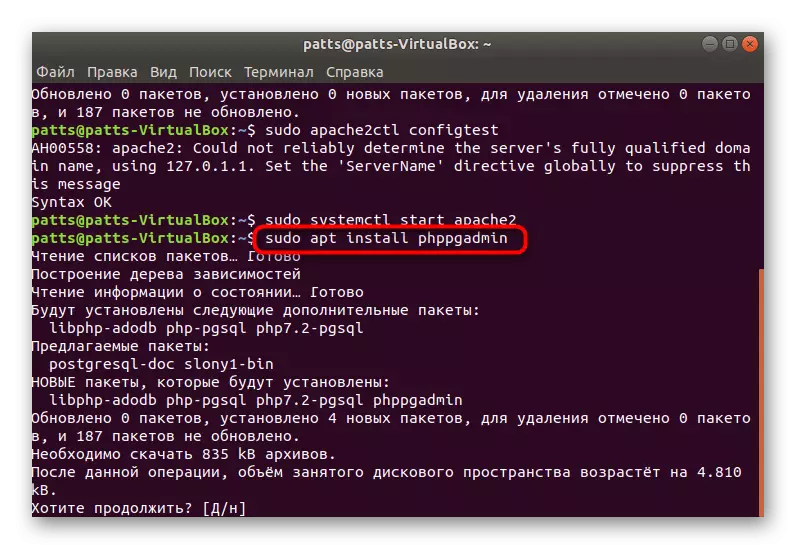
- Now that the correct operation of the server is provided, you can add the phppgadmin libraries by downloading them from the official storage through the sudo APT Install PHPPGAdmin.
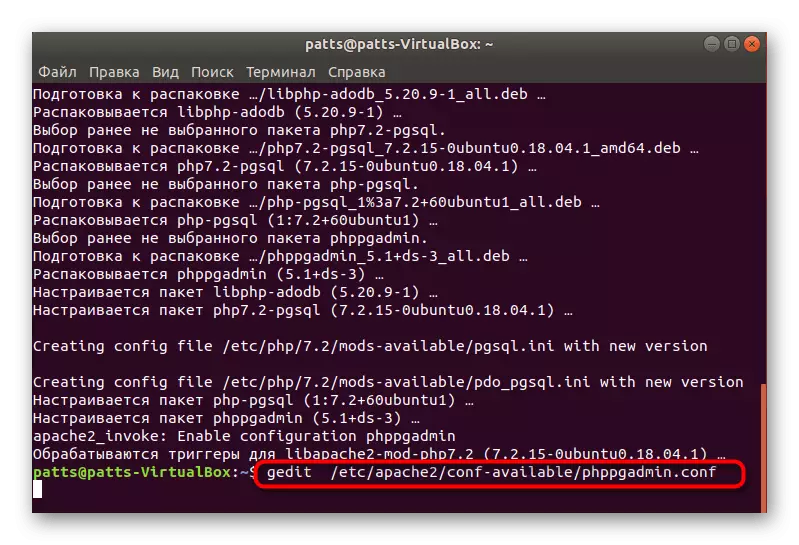
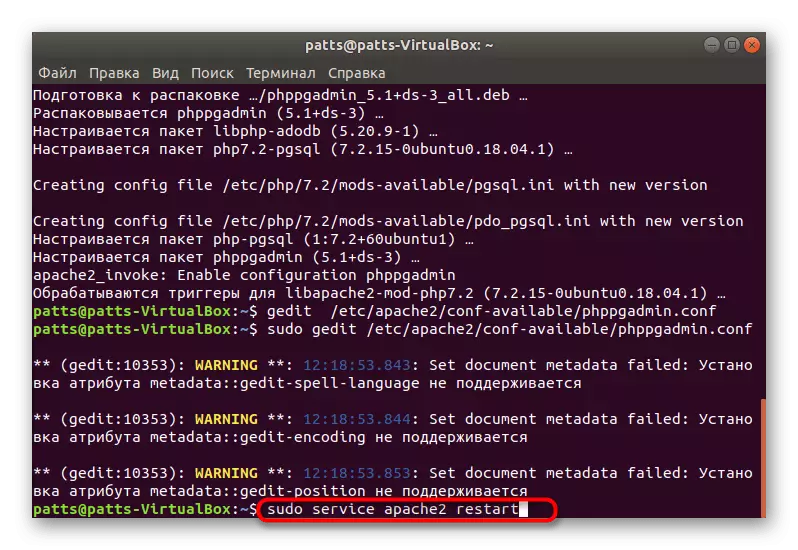
- Next, you should change the configuration file slightly. Open it through the standard notepad by specifying gedit /etc/apache2/conf-available/phppgadmin.conf. If the document is read only, you will need to specify the SUDO in front of GEDIT.
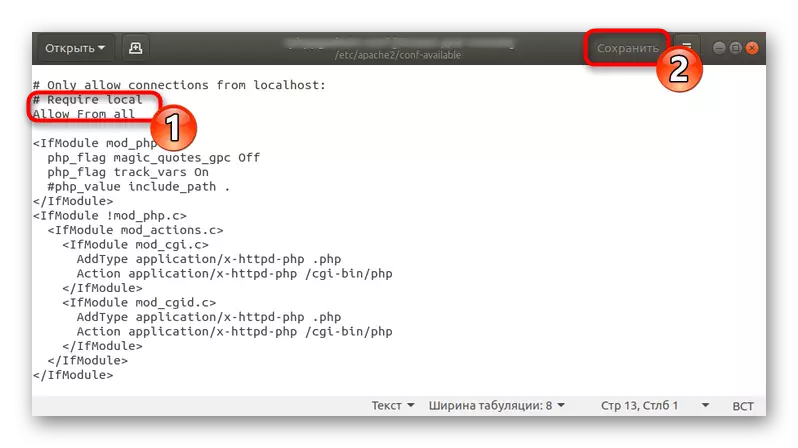
- In front of the "Require Local" line, put # to redo it in the comment, and then enter ALLOW FROM ALL. Now access to the address will be opened for all network devices, and not just for the local PC.
- Restart the Sudo Service Apache2 RESTART web server and can safely go to work with PostgreSQL.
In this article, we considered not only PostgreSQL, but also the installation of the Apache web server used in the LAMP software combining. If you are interested in ensuring the full functioning of your sites and other projects, we advise you to get acquainted with the process of adding other components by reading another article on the following link.
See also: Setting Lamp Programs in Ubuntu