

Why does not charge laptop with windows 10
As you already understand, the reasons for the situation may be different, starting with common and ending with individual.
First of all, you need to make sure that there are no problems with the element temperature. If you click on the battery icon in the tray you see the notification "Charging is not executed", probably the reason in the banal overheating. The solution here is simple - either turn off the battery for a short period, or do not use a laptop for a while. Options can be alternating.

A rare case - the sensor in the battery, which is responsible for determining the temperature, may be damaged and show incorrect temperature, although the accumulator degrees will be normal. Because of this, the system will not give to start charging. This malfunction to check and eliminate at home is extremely difficult.
When there is no overheating, and the charging does not go, go to more efficient options.
Method 1: Disabling software restrictions
This method for those in whom the laptop in general charges the battery, but does it with varying success - to a certain level, for example, up to middle or higher. Often, programs established by the user in an attempt to preserve the charge, or those installed the manufacturer before selling become the culprits of such a strange behavior.
Battery Control Programs
Often, users themselves establish a variety of utilities for monitoring the battery charge, wanting to extend the time of operation of the PC from the battery. They do not always work properly, and instead of benefit only harm. Disconnect either delete them by restarting the laptop to accurately.
Some behaves secretly, and you may not know about their existence at all, by setting by chance along with other programs. As a rule, their presence is expressed in the presence of a special icon in the tray. Inspect it, find out the name of the program and turn it off for a while, and even better uninstall it. It will not be superfluous to view and list the installed programs in the "Toolbars" or in the "Windows parameters".

Restriction in the BIOS / branded utility
Even if you have not installed anything, you can control the battery either one of the branded programs or the BIOS setting included on some default laptops. The effect of them is the same: the battery will not be charged to 100%, but, for example, up to 80%.
We will analyze how the restriction in brand software works on the example of Lenovo. For these laptops, the Lenovo Settings utility has been released, which can be found by its name through "Start". On the "Power" tab, in the "Energy Saving Mode" block, you can familiarize yourself with the principle of operation of the function - when charging is enabled only to 55-60%. Uncomfortable? Turn off by clicking on the switching toggle switch.

The same is easy to do for Nautov Samsung at Samsung Battery Manager ("Power Management"> "Extending the Battery Service"> "OFF") and programs from your laptop manufacturer with similar actions.
In BIOS, something similar can also be disabled, after which the percentage limit will be removed. However, it is important to notice here that such an option is far from every BIOS.

- Go to bios.
- Turn off the laptop and disconnect the power cord from the socket.
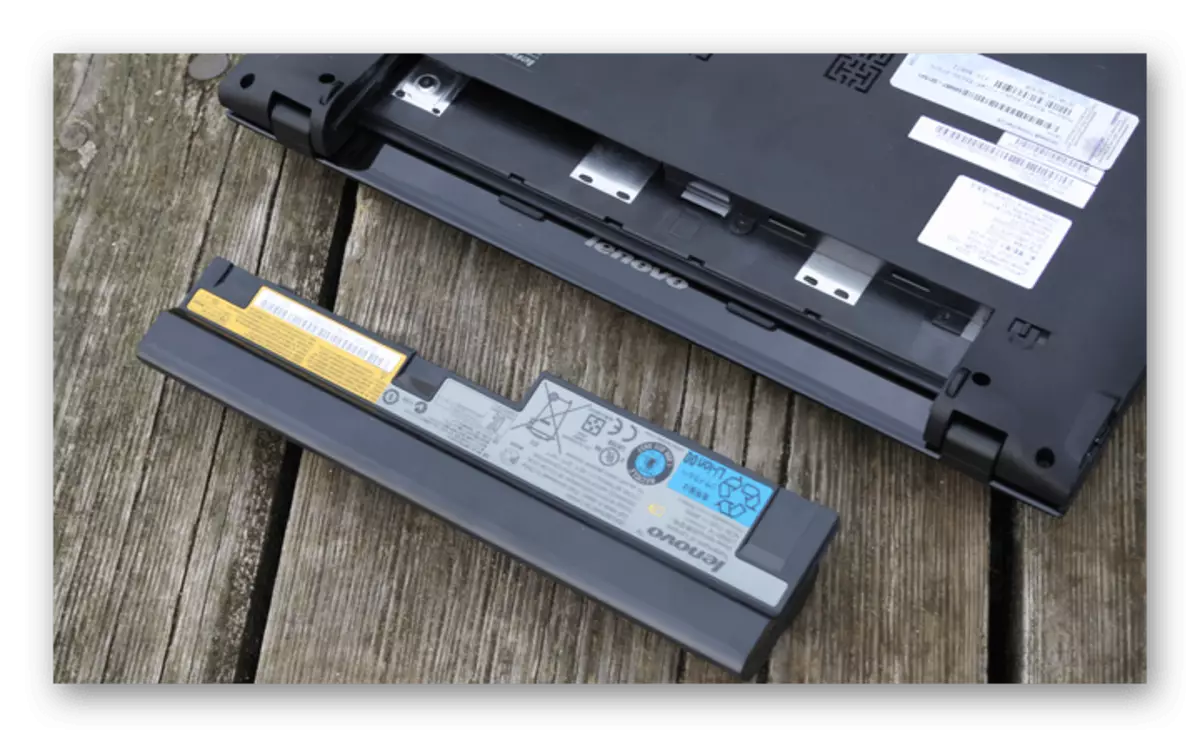
- If the battery is removable - remove it in accordance with the laptop model. If there are difficulties, contact your search engine for the appropriate instructions. In models where the battery is not removed, this step should be skipped.
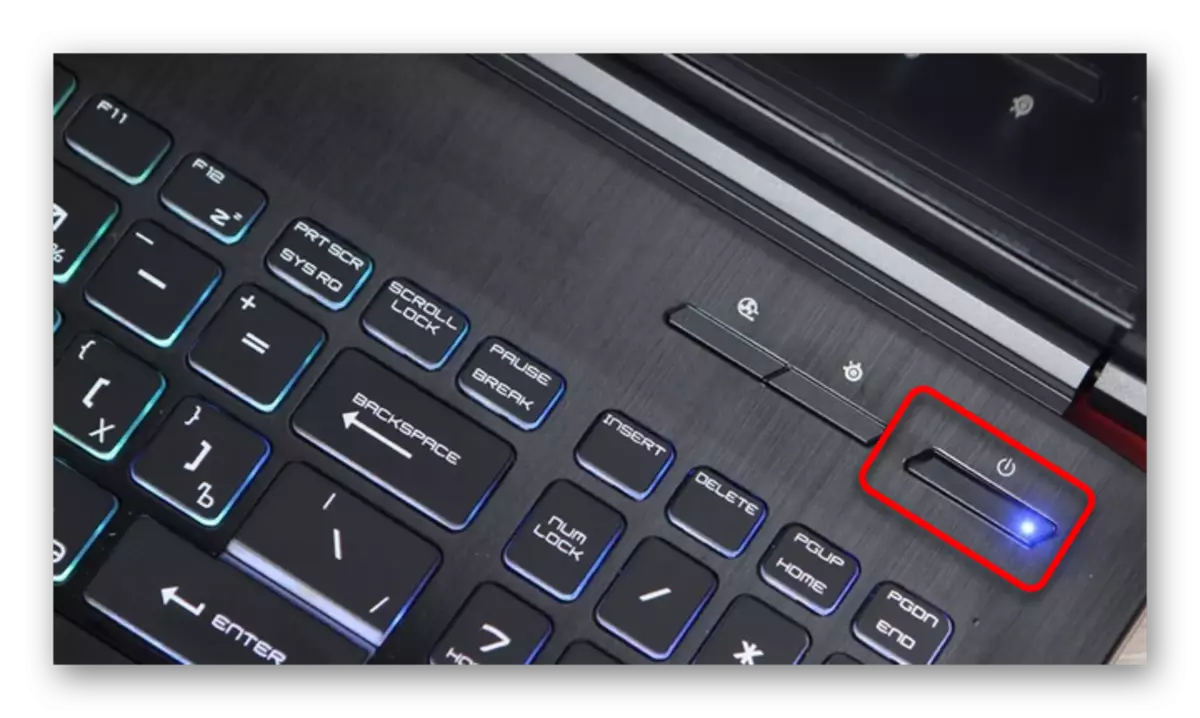
- Hold and hold the power on the laptop 15-20 seconds.
- Repeat feedback - install the battery back if it was removed, connect the power and turn on the device.
- Perform steps 1-2 from the instructions above.
- Laptop down button hold 60 seconds, then install the battery in place and connect the power cord.
- Leave the laptop turned off for 15 minutes, then turn on and check whether the charge is charged.
- Do not turn off the laptop, disconnect the power cord, but leave the battery connected.
- Hold the laptop power button until the device is completely turned off, which is sometimes accompanied by a click or other characteristic sound, and after another 60 seconds.
- Connect the cord back and turn on the laptop after 15 minutes.
- Perform steps 1-3 from method 2, option 1.
- Connect the power cord, but do not touch the battery. Go to the BIOS - turn on the laptop and press the key that is offered during the screensaver with the manufacturer's logo.
Occasionally helps updating the BIOS version, however, we strongly recommend to conduct this action to inexperienced users, since the incorrect firmware of the most important software component of the motherboard can lead to the inoperability of the entire laptop.
Method 4: Driver Update
Yes, there is even a battery driver, and in Windows 10, as many others, it was installed immediately when installing / reinstalling the operating system automatically. However, as a result of incorrect updates or other reasons, their functionality can be broken, and therefore it will be necessary to reinstall.
Driver Battery.
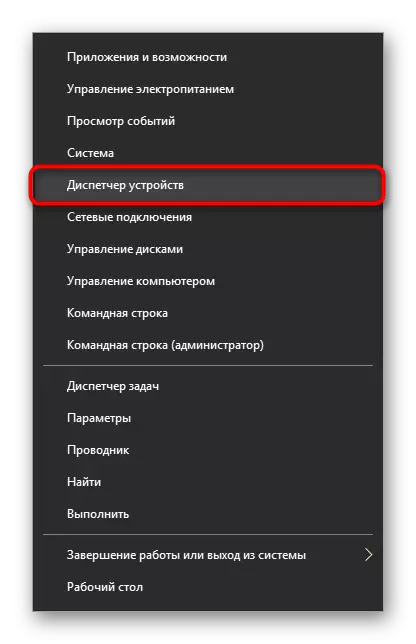
- Open the Device Manager by clicking on the "Start" right-click and selecting the appropriate menu item.
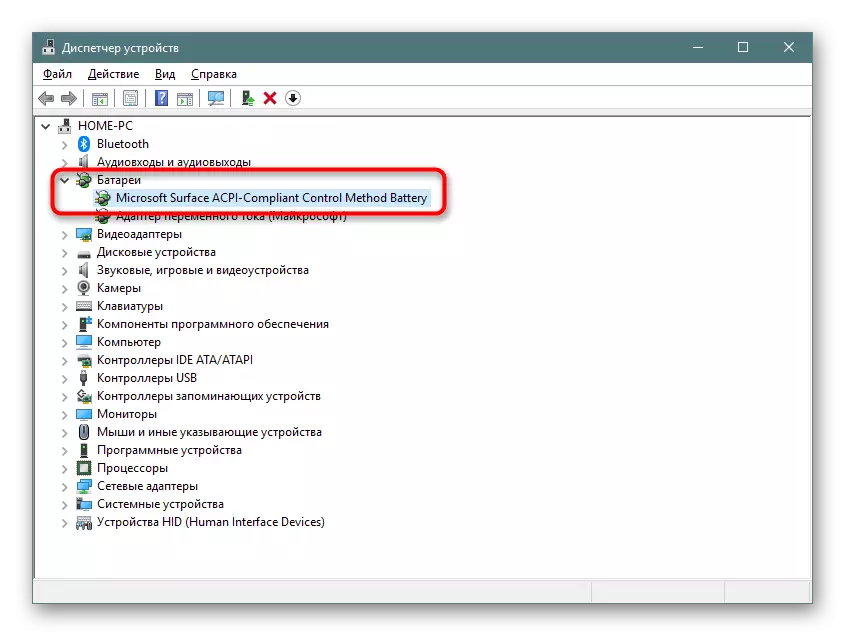
- Find the "Batteries" section, expand it - the "Battery with ACPI-Compatible Microsoft ACPI-Compatible Control Service" or with the same name (for example, in our example, the name is slightly different - "Microsoft Surface ACPI-COMPLIANT Control Method Battery").
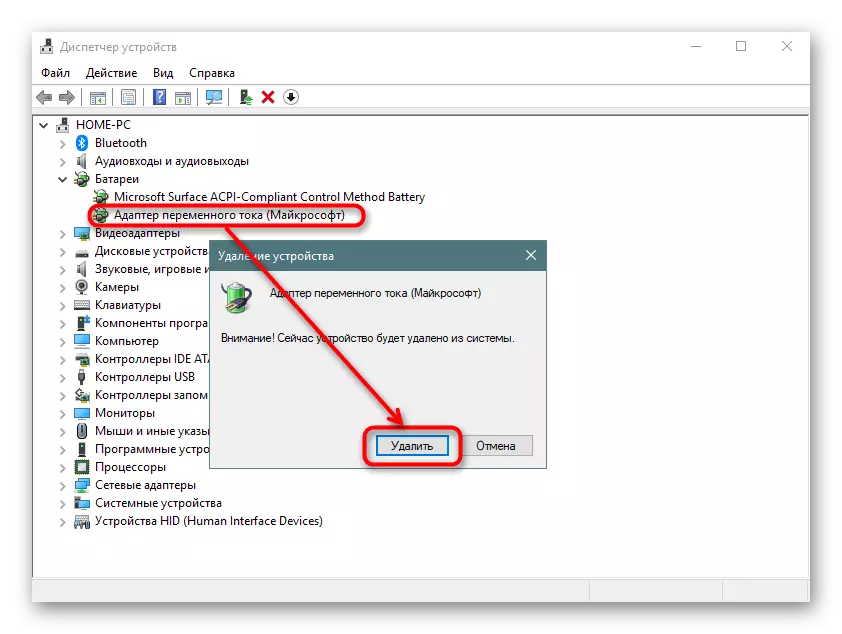
- Click on the PCM on it and select Delete Device.
- A window warning window will appear. Agree with him.
- Some recommend the same to do with the "AC adapter (Microsoft)".
- Restart the computer. Perform exactly a reboot, not a consistent "shutdown" and manual inclusion.
- The driver will have to be installed automatically after loading the system, and you will need to look after a couple of minutes if the problem has been fixed.
When the battery is missing in the list of devices, this often indicates its physical malfunction.


As an additional solution - instead of rebooting, complete the laptop turning off, disconnect the battery, charger, hold the power button for 30 seconds, then connect the battery, charger and turn on the laptop.
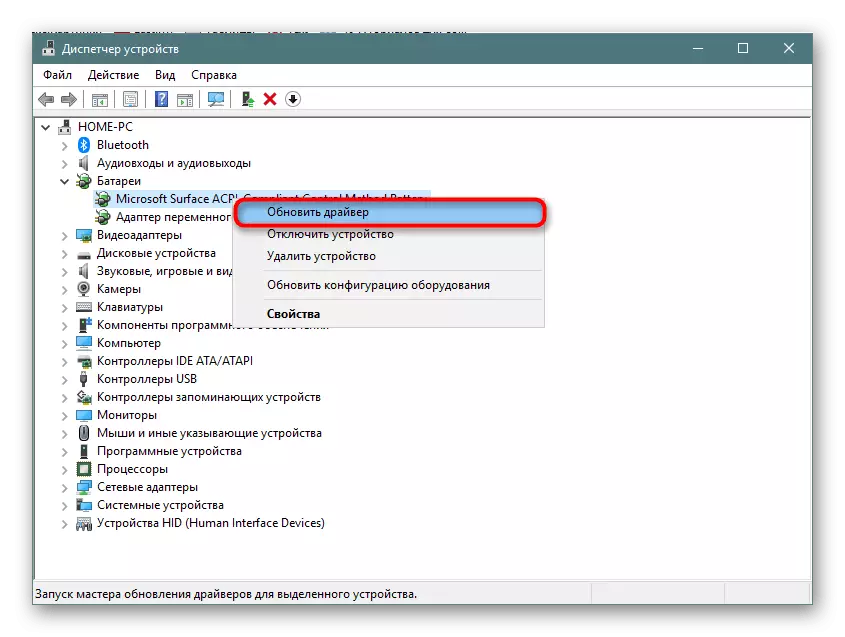
At the same time, if you install software for a chipset, which will be discussed slightly lower, it is usually not difficult, with the driver for the battery is not so simple. It is recommended to update it through the Device Manager, clicking on the PCM battery and selecting the "Update Driver" item. In this situation, the installation will occur from the Microsoft server.
In a new window, select "Automatic search for installed drivers" and follow the OS recommendations.

With an unsuccessful update attempt, in such a way you can search the battery driver for its identifier, taking the following article as the basis:
Read more: Search for hardware drivers
Driver chipset
Some laptops begins to work incorrectly the driver for the chipset. At the same time, the user will not see any problems in the form of orange triangles in the "Device Manager", which are usually accompanied by those PC elements, drivers for which are not installed.
You can always use the programs to automatically install the drivers. From the list suggested after scanning, select the software that is responsible for "chipset". The names of such drivers are always different, so if difficulties occur with the definition of the purpose of a driver to take its name in the search engine.
READ ALSO: The best programs for installing drivers
Another option is a manual installation. To do this, the user will need to visit the official website of the manufacturer, go to the support and downloads section, find the latest version for the chipset for the version and discharge of Windows, which is used, download files and install them as ordinary programs. Again, the unified instruction does not work out due to the fact that each manufacturer has its own site and different names of the drivers.

If nothing helped
The above recommendations are not always effective in eliminating the problem. This means more serious hardware problems, which are not possible similar or other manipulations possible. So why is the battery still not charging?
Wear component
If the laptop is not new for a long time, and the battery was used at least with an average periodicity for 3-4 years and more, the likelihood of its physical failure is large. Now it is easy to check using software. How to make it in different ways, read below.
Read more: Testing Battery Laptop on wear
In addition, it is worth remembering that even an unused battery over the years first loses 4-8% of the capacity, and if it is installed in the laptop, the wear continues to occur faster, since it is constantly discharged and recharges.
Incorrectly purchased model / factory marriage
Users who have encountered such a problem after self-replacement of the battery are recommended to make sure that the right purchase was made. Compare battery marking - if they are different, of course, you will need to return to the store and pass the battery. Do not forget to take with you the old battery or laptop to immediately pick up the faithful model.

It also happens that the marking coincides, all the previously discussed methods are made, and the battery still refuses to work. Most likely, here the problem lies in the factory marriage of this device, and it is also required to return the seller.
Malfunction AKB
The battery can be physically damaged during various events. For example, contact problems are not excluded - oxidation, fault of the controller or other components of the battery. Disassemble, look for a source problem and try it to eliminate without proper knowledge is not recommended - it's easier to replace the new copy.
See also:
Disassemble the battery from the laptop
Battery recovery from laptop
Network Cord Damage / Other Proceedings
Ensure that the culprit of all events is the charging cable itself. Disconnect it and check if the laptop works on the battery.
See also: How to charge a laptop without a charger
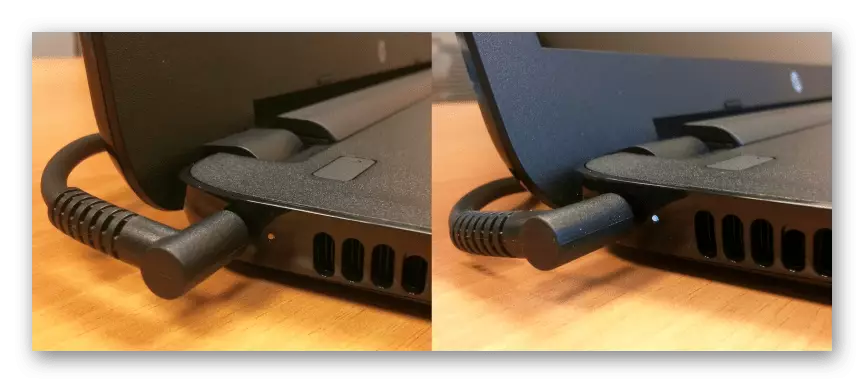
On some power units, there is also a LED that lights up when the outlet is turned on. Check if there is this light bulb, and if yes, whether it glows.

This light bulb happens on the laptop itself next to the plug socket. Often, instead, it is located on the panel with the rest of the indicators. If there is no place when connecting the glow is another sign that the battery is not to blame.
To all of the time, it may be trite not enough power - look for other sockets and connect the network block to one of them. Do not exclude damage to the charger connector, which can oxidize, be spoiled by pets or other reasons.
You should also take into account the damage to the power connector / circuit of the laptop power, but the exact reason for the ordinary user almost always fails to recognize without the necessary knowledge. If the replacement of the battery and the network cable did not bring any fruits, it makes sense to contact the Laptop manufacturer's service center.
Do not forget that the alarm is false - if the laptop has been charged to 100%, and then disabled for a short time from the network, when you repeatedly connect, there is a chance to get the message "Charging is not executed", but it will resume independently when the percentage of battery charging will fall .
Method 2: Reset CMOS Memory
This option sometimes cuts out new and owners and not very devices that do not know what to do if the laptop does not charge. Its essence is to reset all BIOS settings and eliminate the effects of failure, due to which it is not possible to correctly determine the battery, including a new one. For laptops, there are 3 options for resetting the memory through the "Power" button: the main and two alternatives.
Option 1: Main

Option 2: Alternative
Option 3: Alternative too
Check if charging is charging. In the absence of a positive result, go further.