

Any updates of the Windows operating system come to the user through the update center. This utility is responsible for automatic scanning, package installation and rollback to the previous state status in case of unsuccessful file installation. Since Win 10 cannot be called the most successful and stable system, many users disable the update center at all or download assemblies, where this item is turned off by the author. If necessary, return it to an active condition will not be difficult to be one of the options discussed below.
Enabling the update center in Windows 10
To get the latest update versions, the user need to download them manually, which is not very convenient, or optimize this process by activating the operation of the update center. The second option has both positive and negative sides - the installation files are downloaded by the background, so they can spend traffic, if you, for example, periodically use a network with limited traffic (some tariffs 3G / 4G-modem, low-cost LED tariff plans from the provider, mobile Internet ). In this situation, we strongly advise you to enable "limit connections", limiting downloading and updating at a certain time.Read more: Set up limit connections in Windows 10
Many also know that the latest updates "dozens" were not successful, and it is not known whether Microsoft will be corrected in the future. Therefore, if you are important than the stability of the system, we do not recommend including the update center ahead of time. In addition, you can always install updates and manually, making sure of their compatibility, a few days after the release and mass installation by users.
Read more: Install updates for Windows 10 manually
To all those who decided to include the CSC, it is proposed to use any convenient method of disassembled below.
Method 1: WIN UPDATES DISABLER
Easy utility that can enable and disable OS updates as well as other system components. Thanks to her, you can a couple of clicks flexibly manage the center of management and safety dozens. The user is downloaded to download from the official site as an installation file and the portable version that does not require installation. Both options weigh only about 2 MB.
Download Win Updates Disabler from the Official Site
- If you downloaded the installation file, install the program and run it. The portable version is enough to unpack from the archive and run EXE according to the battery of the OS.
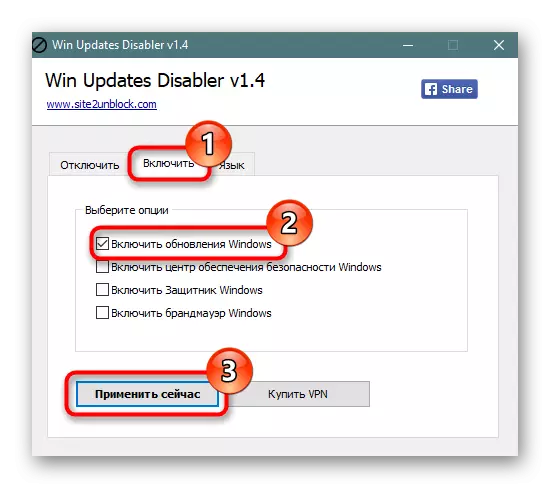
- Switch to the "Enable" tab, check whether the check mark next to the "Enable Windows Updates" item (it must be there by default) and click "Apply Now".
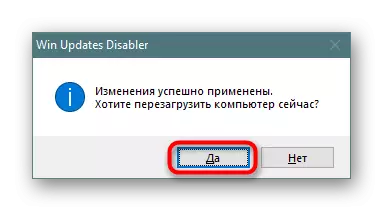
- Let us consent to restart the computer.
Method 2: Command Line / PowerShell
Without difficulty, the service responsible for the update can be forcibly running via CMD. It is done very simple:
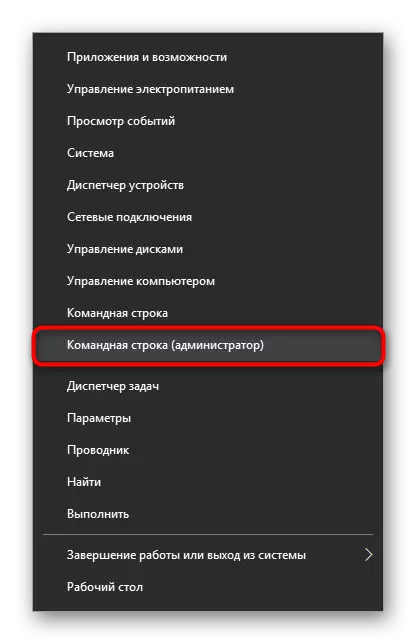
- Open the command line or PowerShell with administrator rights in any convenient way, for example, by clicking on the "Start" of the right mouse button and selecting the appropriate item.
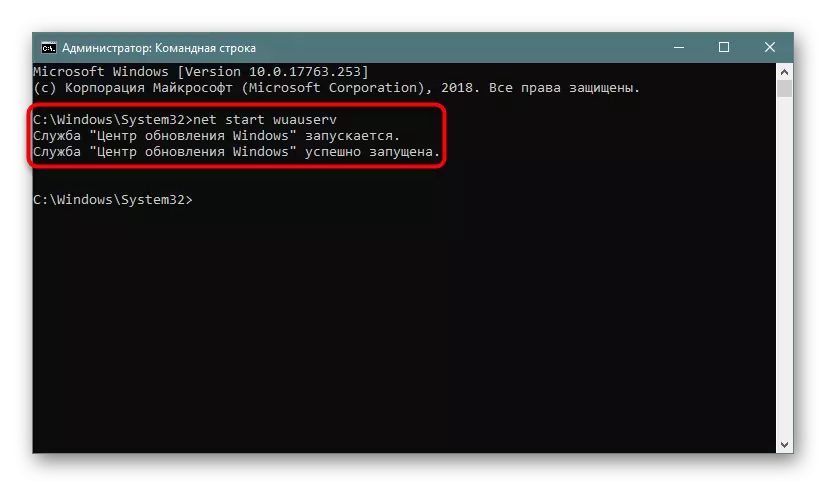
- Write the Net Start Wuauserv command and press ENTER. With a positive response from the console, you can check if updates are found.
Method 3: Task Manager
This utility is also without much difficulty allows you to flexibly control the inclusion or disconnection of the Tens.
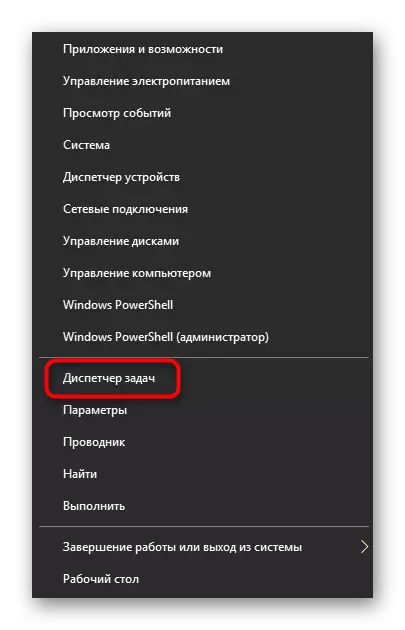
- Open the "Task Manager" by pressing the Ctrl + SHFT + ESC hot key or clicking on the "Start" PCM and selecting this item there.
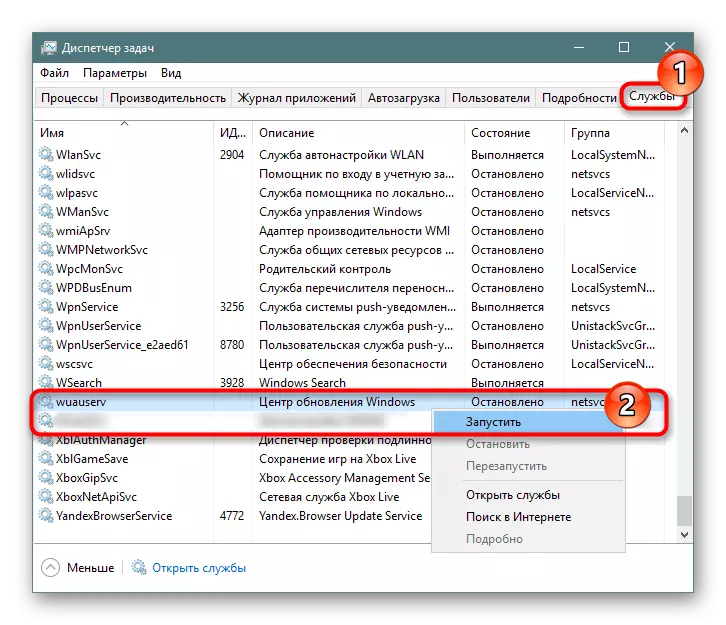
- Click the "Services" tab, find in the Wuauserv list, click on it right-click and select "Run".
Method 4: Local Group Policy Editor
This option requires the user more clicks, but it allows you to set additional service parameters, namely the time and frequency of the update.
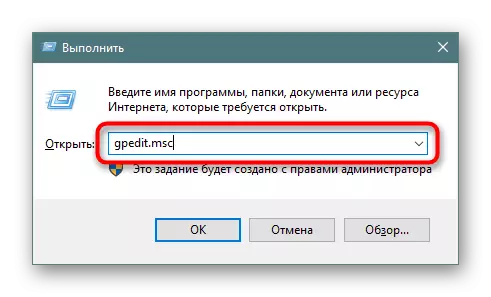
- Hold the Win + R keys combination, enter the gpedit.msc and confirm the entry on enter.
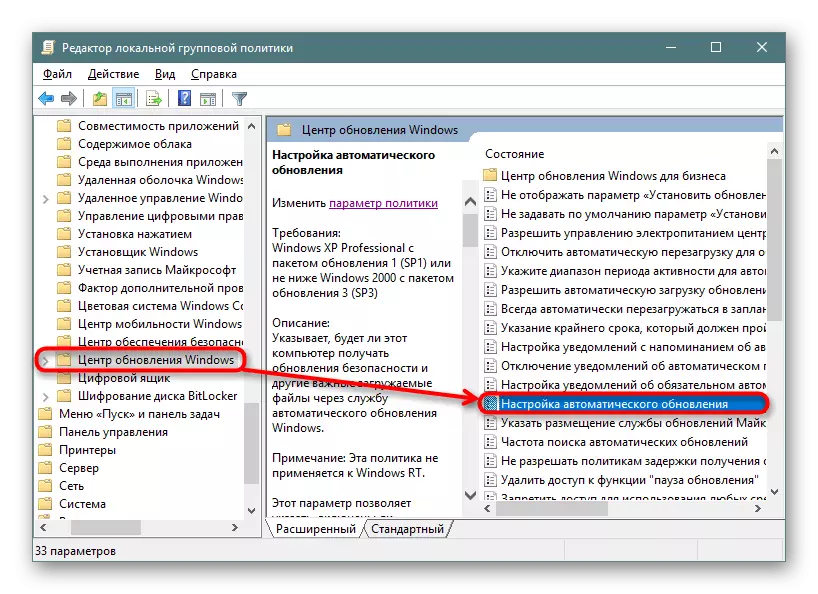
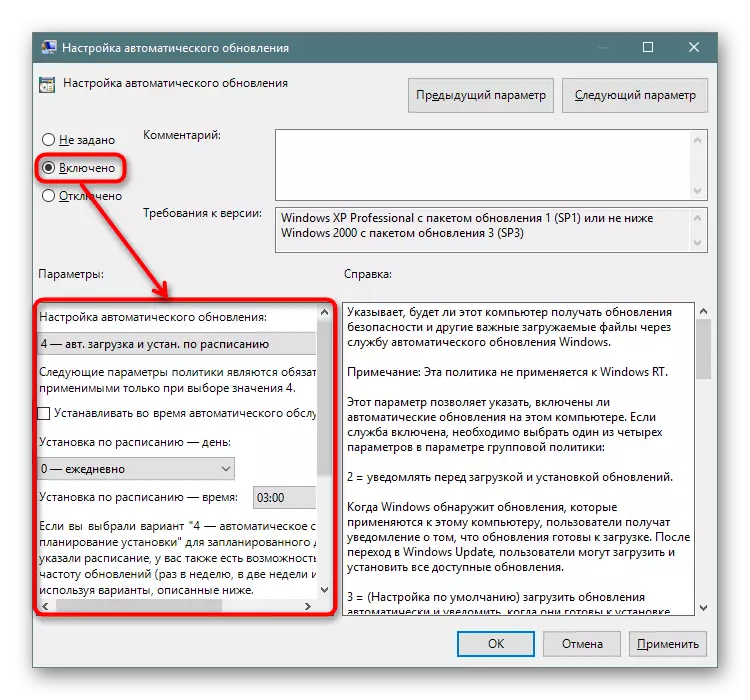
- Remove the Computer Configuration Branch> Windows Update Center> Administrative Templates> Windows Components. Find the Windows Management Center folder and, without turning it out, find the "Automatic Update Settings" parameter on the right side. Click on it twice the LCM to open the setting.
- Set the status of "enabled", and in the "Parameters" block you can configure the type of update and its schedule. Note that it is available only for the "4" value. A detailed explanation is given in the "Help" block, which is right.
- Save the changes to OK.
We reviewed the basic options for inclusion of updates, while lowering less efficient ("Parameters" menu) and not very convenient (registry editor). Sometimes updates may not be installed or incorrectly. About how to fix it, read in our articles on the links below.
See also:
Solve problems with installing updates in Windows 10
Delete updates in Windows 10
Restore the previous build of Windows 10