

If Windows Windows is used in a small organization, to simplify it to install it into several computers, you can use the installation method on the network with which we want to introduce you today.
Windows 10 network installation procedure
To install "dozens" over the network, you will need to perform several actions: install the TFTP server by means of a third-party solution, prepare the distribution files and configure the network bootloader, configure sharing a directory with the distribution files, add an installer to the server and directly install the OS. Let's go in order.Step 1: Installing and Configuring TFTP Server
To facilitate the network installation process of the tenth version of "Windows", you should install a special server implemented as a third-party solution, a free TFTP utility in the editorial board 32 and 64 bits.
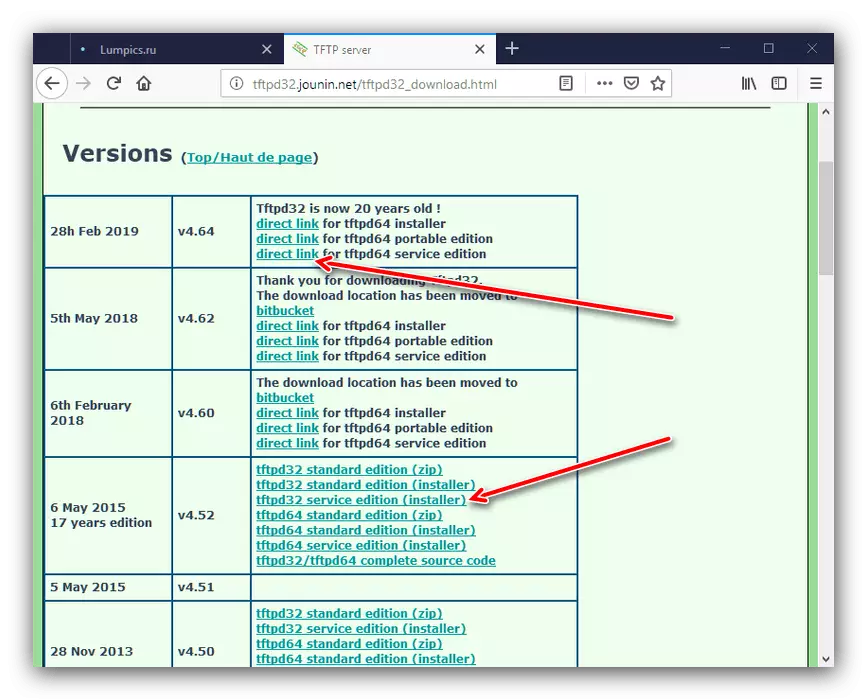
TFTP download page
- Follow the link above. Find a block with the latest version of the utility. Please note that it is only available for X64 OS, so use previous audits if the server is installed under 32-bit windows. For the purpose of the target, we need the Service Edition version, click on the link "Direct Link for Service Edition".
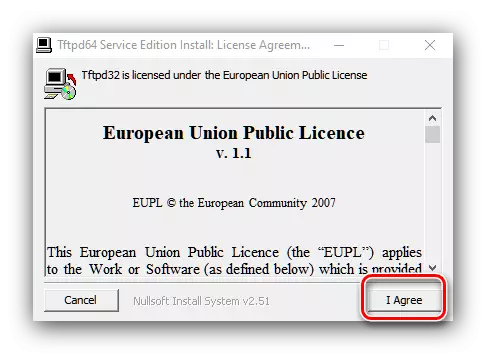
- Load the TFTP installation file to the target computer and run it. In the first window, accept the license agreement by pressing the "I Agree" button.
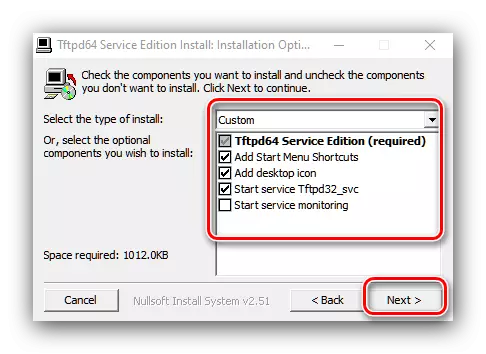
- Next, select the desired components, as indicated in the screenshot below, and press "Next".
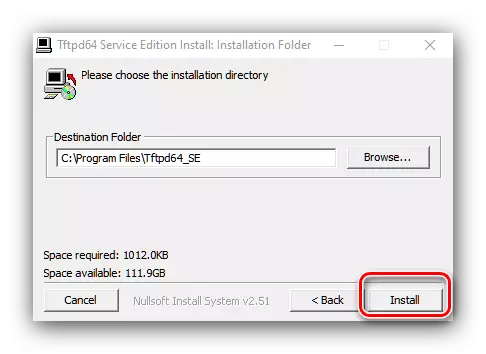
- Since the utility adds a special service to the already existing, it should be installed only on the system disk or section. By default, it is chosen, so press "Install" to continue.
After installation, go to the server settings.
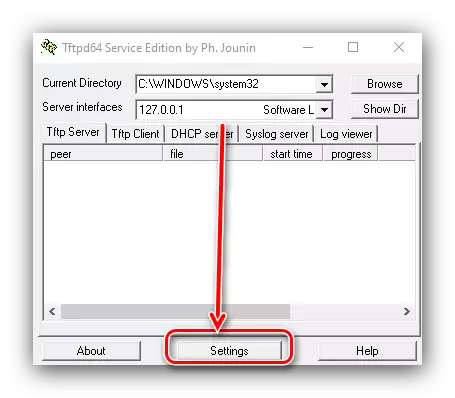
- Run TFTP and in the main program window, click on the Settings button.
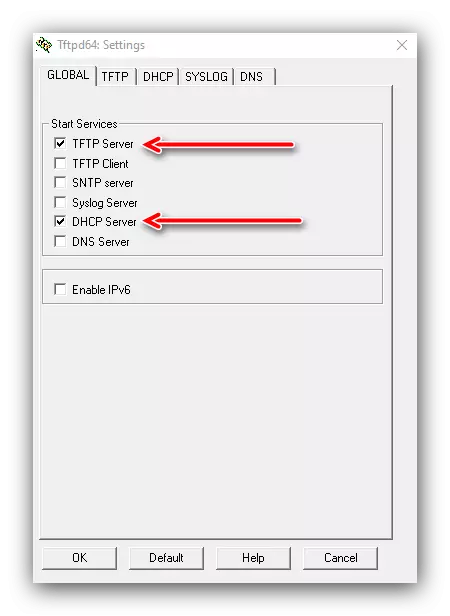
- On the "Global" settings tab, only the "TFTP Server" and DHCP Server "options are enabled.
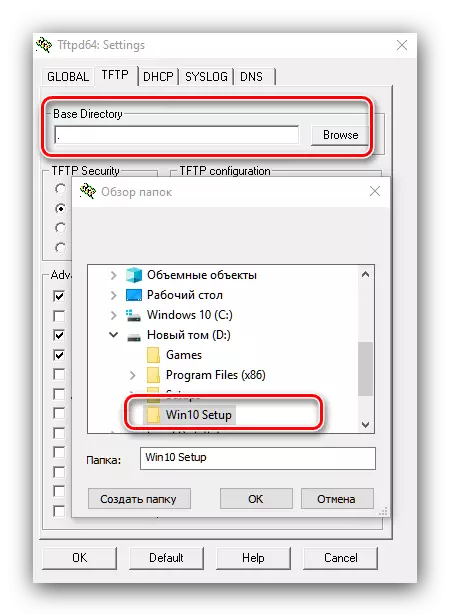
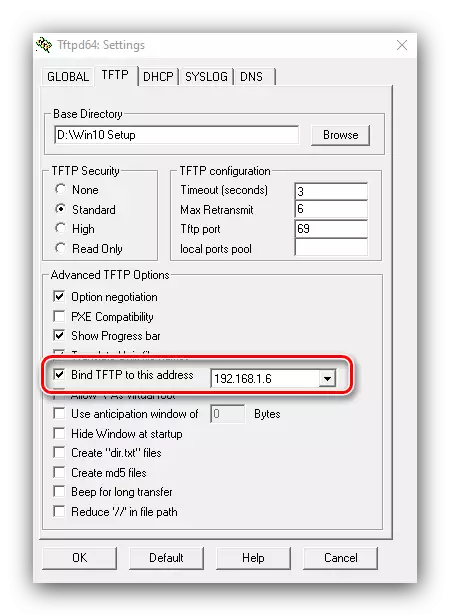
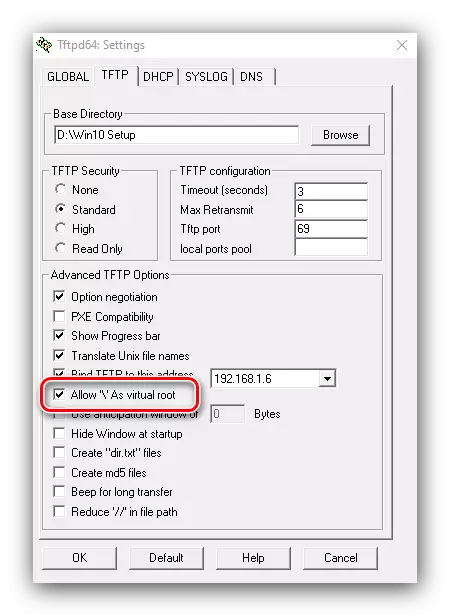
- Go to the tab "TFTP". First of all, use the "Base Directory" setting - it will take it to select a directory in which the source of the installation files will be installed for installation over the network.
- Next, check the box "Bind TFTP to This Address" checkbox, and select the IP address of the source machine in the list.
- Mark the option "Allow" \ "AS Virtual Root."
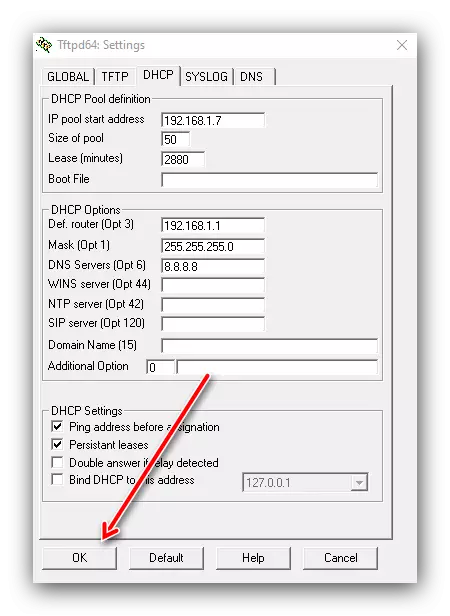
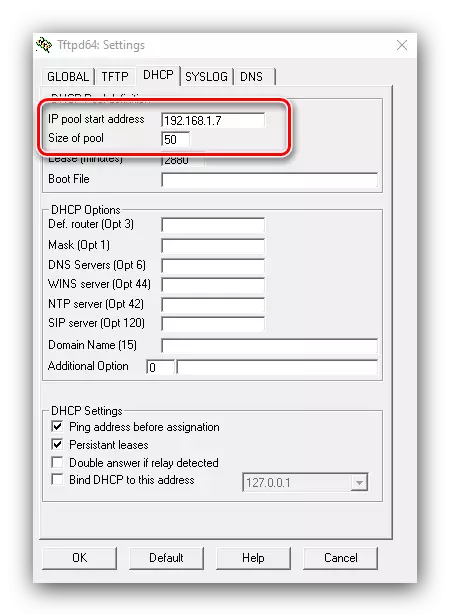
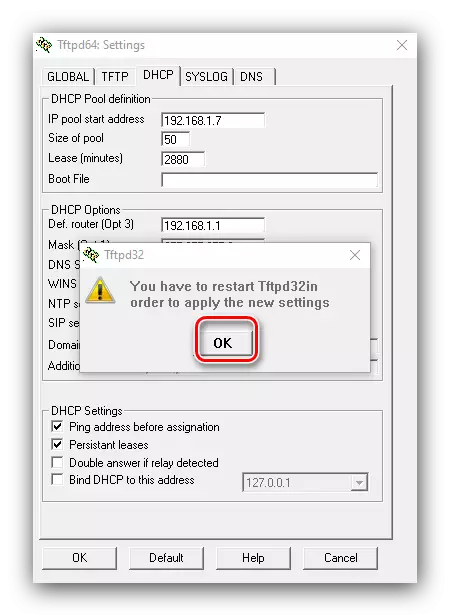
- Go to the "DHCP" tab. If this type of server is already present on your network, then you can refuse the built-in in the utility - in the existing suction value 66 and 67, which are the address of the TFTP server and the path to the Windows installer directory, respectively. If there are no servers, then refer to the "DHCP Pool Definition" block: in "IP Pool Start Address" enter the initial value of the range of issued addresses, and in the Size of Pool field, the number of available positions.
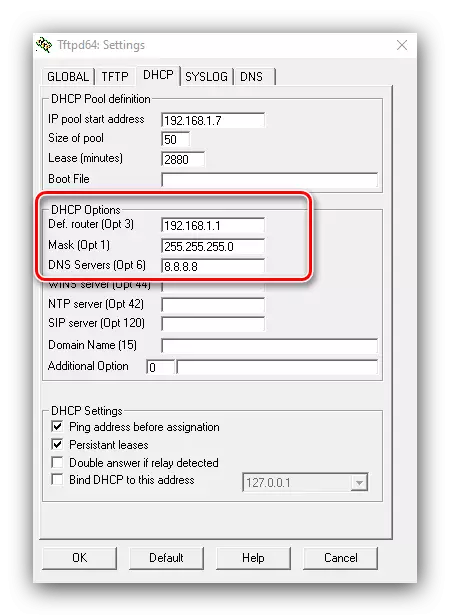
- In the field "DEF. Router (OPT 3) »Enter the IP router, in the" Mask (OPT 1) "and" DNS (OPT 6) "- the gateway mask and DNS addresses, respectively.
- To save the entered parameters, click on the "OK" button.
A warning will appear that you will need to restart the program to save, press OK again.
- The utility will restart, already correctly configured. It will also be necessary to create an exception for it in Firewall.

Lesson: adding an exception to Windows 10 firewall
Stage 2: Preparing distribution files
The preparation of Windows installation files is required due to differences in the installation method: the network mode uses a different environment.
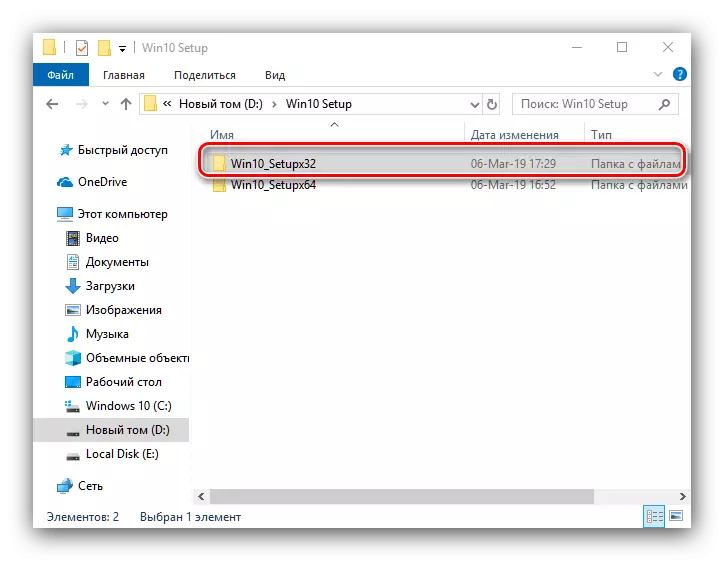
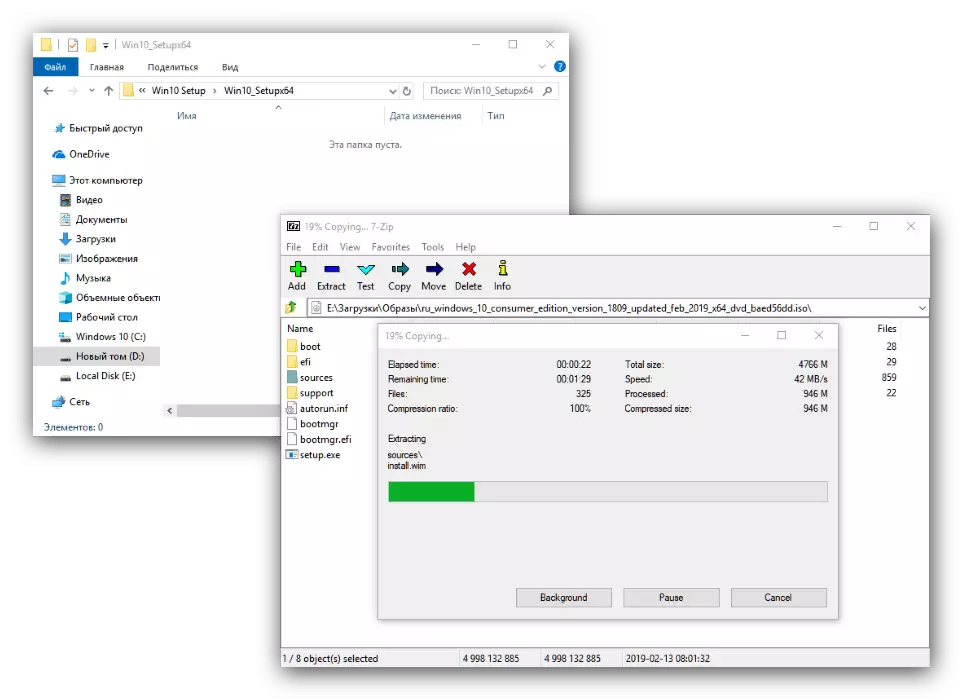
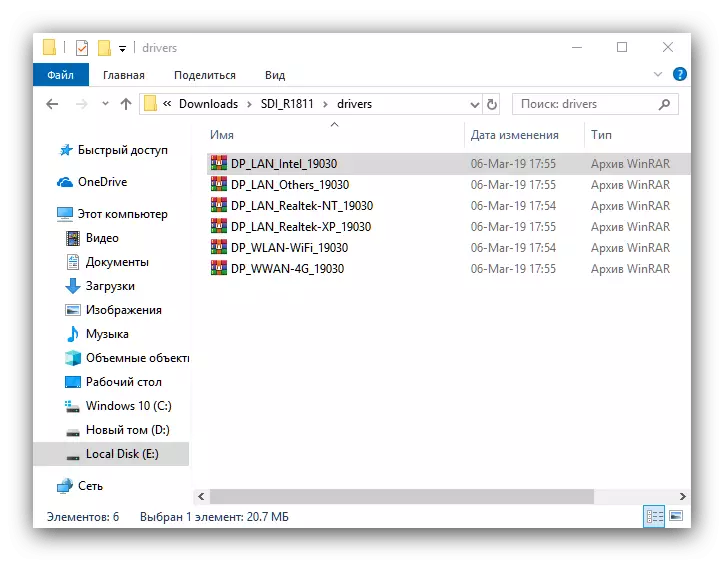
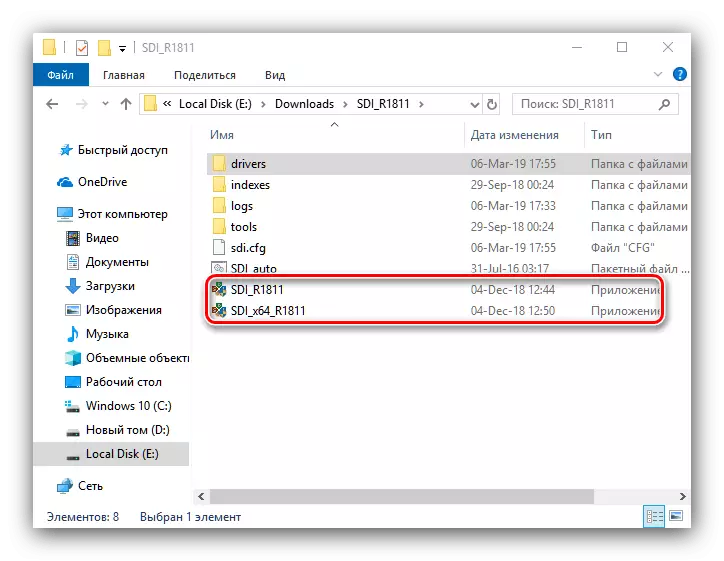
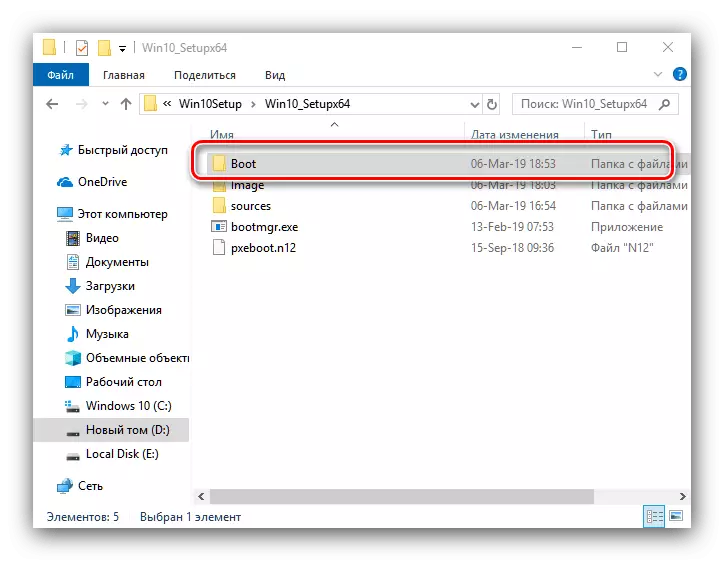
- In the root folder of the TFTP server created at the previous stage, create a new directory with the name of the operating system - for example, Win10_SetupX64 for the "dozens" of the discharge X64. In this folder, place the SOURCES directory from the corresponding image section - in our example from the x64 folder. To copy from the image directly, you can use the 7-ZIP program in which the desired functionality is present.
- If you plan to use a 32-bit version distribution, create a separate directory with another name in the root directory of the TFTP server and place the corresponding Sources folder in it.
Attention! Do not attempt to use the same folder for setting files of different visits!
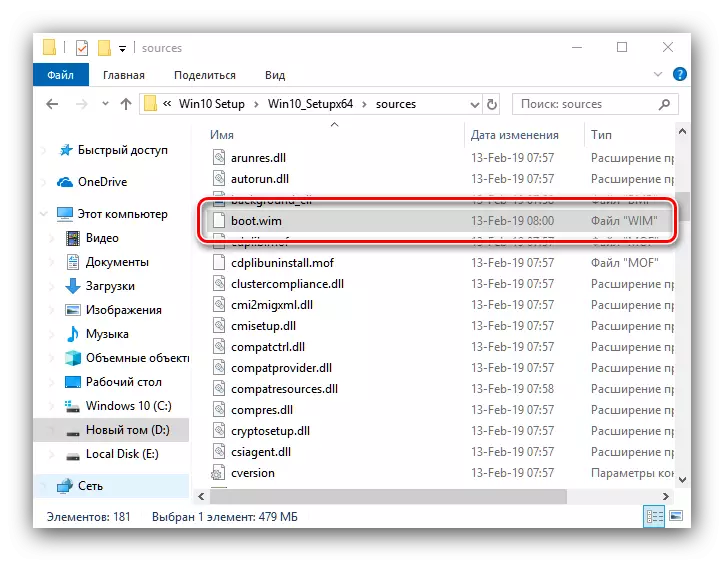
Now you should configure the bootloader image submitted by the boot.wim file at the Sources directory root.
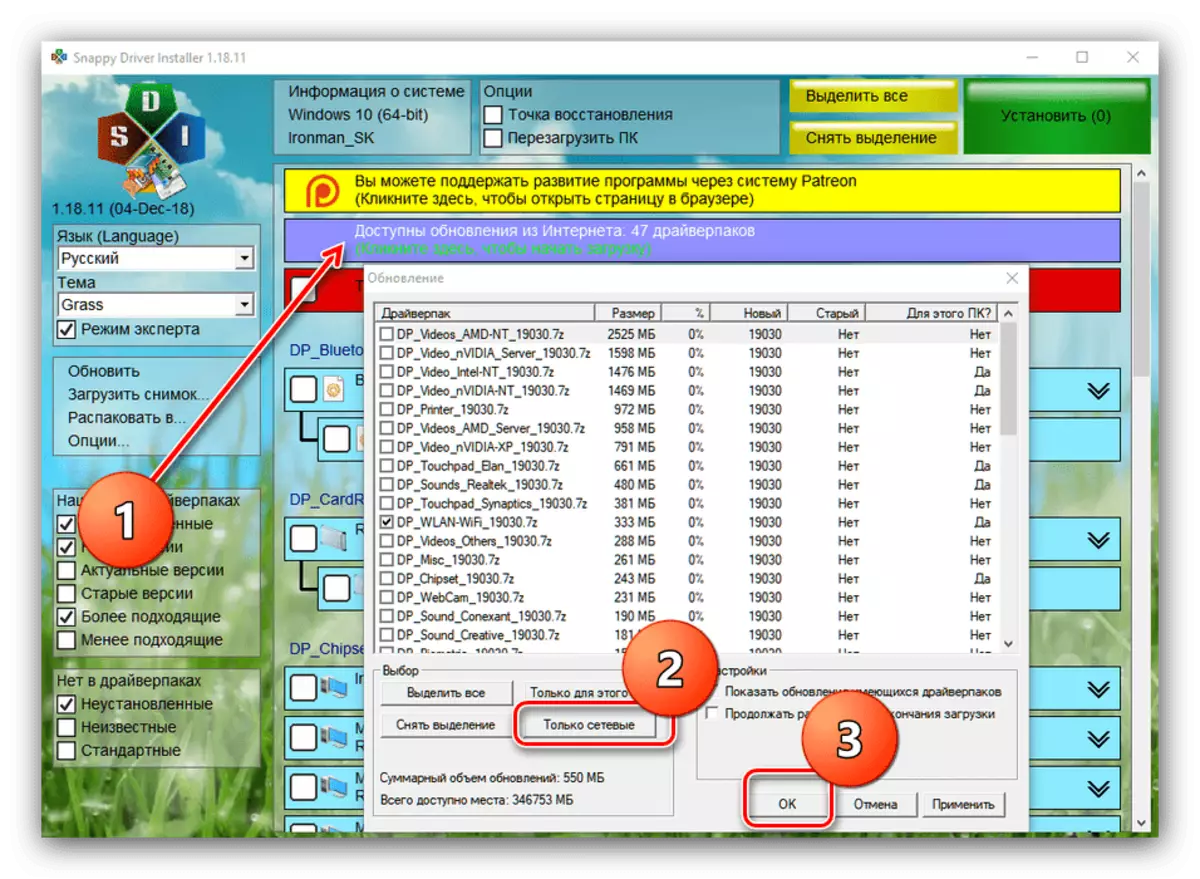
To do this, we will need to add network drivers to it and a special script to work with it. Pack of network drivers is easiest to get using a third-party installer called Snappy Driver Installer.
- Since the portable program, it is not necessary to install it on the computer - simply unpack the resources at any convenient place, and launch the SDI_x32 or SDI_X64 executable file (depends on the current operating system).
- Click on the "Updates available" item - the driver load selection window will appear. Click on the "Network only" button and click OK.
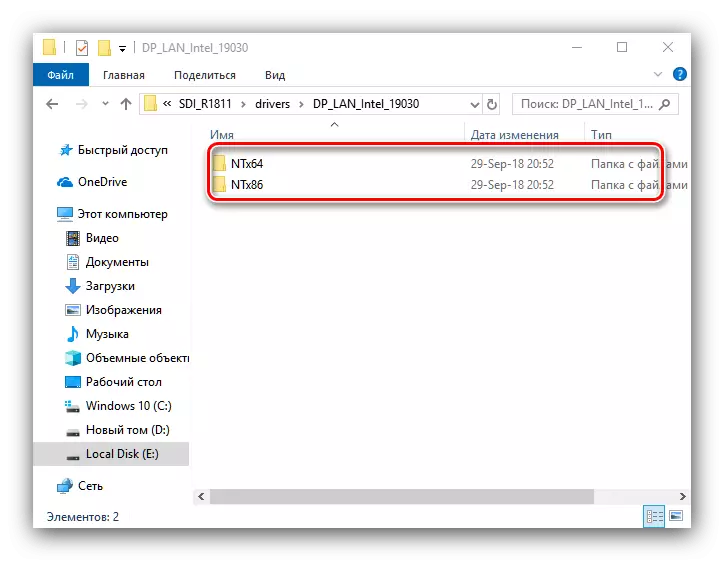
- Wait until the end of downloading, after which go to the Drivers folder in the root directory of the Snappy Driver Installer. There must be several archives with the necessary drivers.
It is recommended to sort the drivers by bit: install the X86 versions for 64-bit windows inexpedient, as the opposite. Therefore, we advise you to create individual directories for each of the options where it is separately moving 32- and 64-bit variations of system software.
Now we will make preparation of boot images.
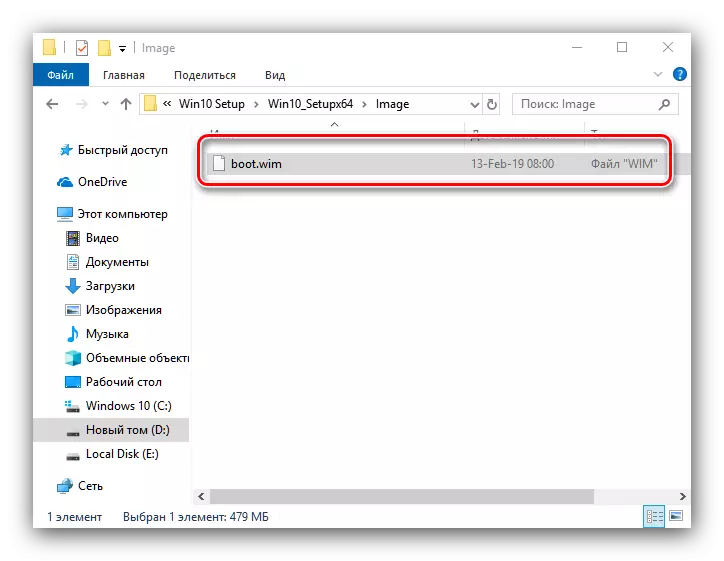
- Go to the TFTP server root directory and create a new folder with the name image. This folder should copy the boot.wim file from the distribution of the desired bit.
If the combined X32-X64 image is used, you need to copy each one in turn: 32-bit should be called boot_x86.wim, 64-bit - boot_x64.wim.
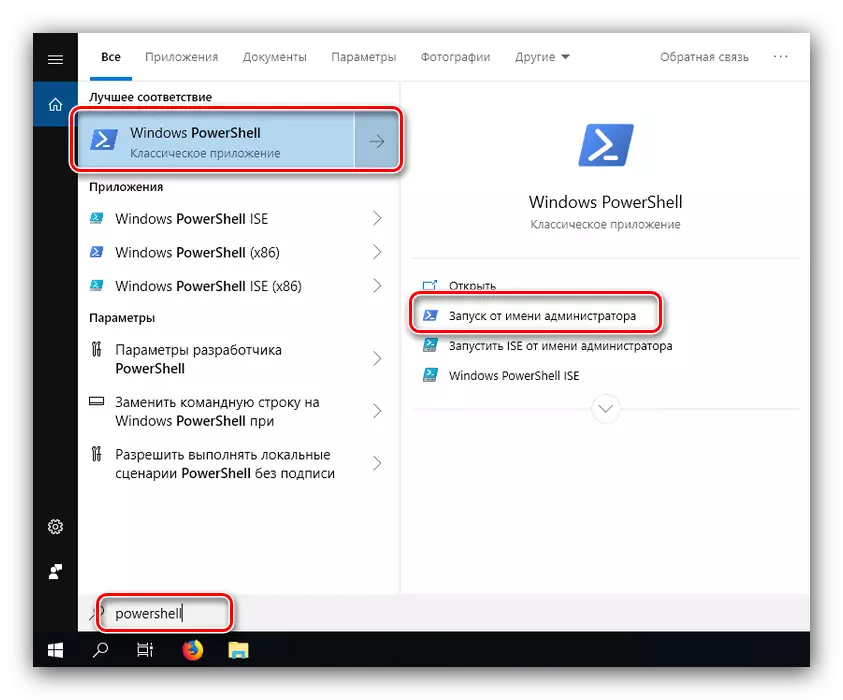
- To modify images, we use the tool PowerShell - Find it through "Search" and use item "Run on behalf of the administrator".
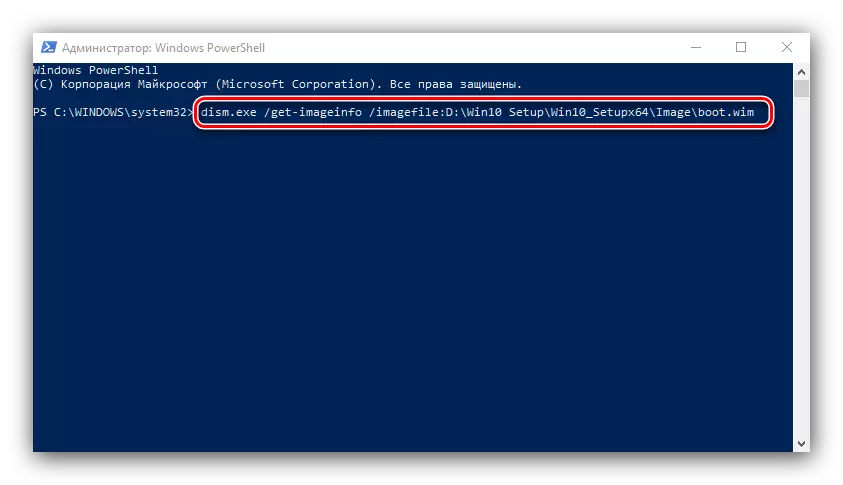
For example, we will show a modification of a 64-bit boot image. After opening, you check the following commands in it:
Dism.exe / Get-ImageInfo / ImageFile: * Add Address Image * \ Boot.wim
Next, enter such an operator:
Dism.exe / Mount-Wim / Wimfile: * Image * \ boot.wim / index folder Address: 2 / Mountdir: * directory address where the image is mounted *

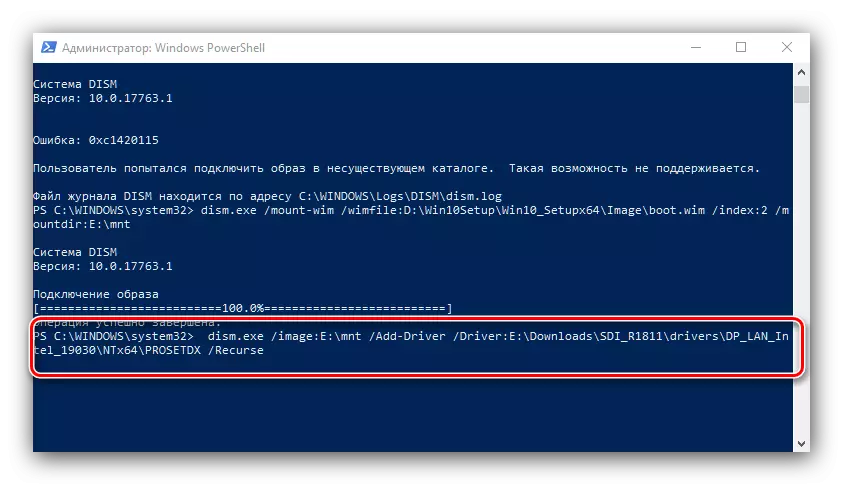
With these commands, we mount the image for manipulations with it. Now go to the directory with the packs of network drivers, copy their addresses and use the following command:
Dism.exe / Image: * Catalog address with mounted manner * / Add-Driver / Driver: * Address folder with driver's desired bit * / recurse
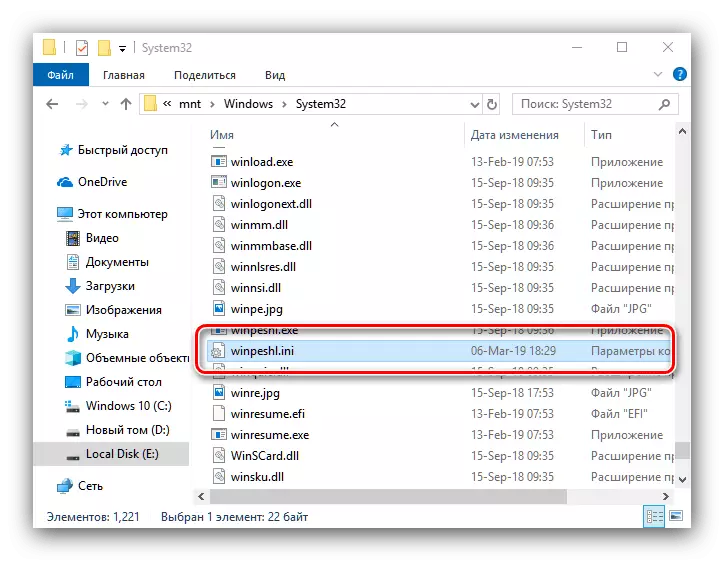
- Without closing PowerShell, go to the folder to which the image is connected - you can do it through this computer. Then create a text file with the name WinPeshl. Open it and insert the following contents:
[Launchapps]
init.cmd.
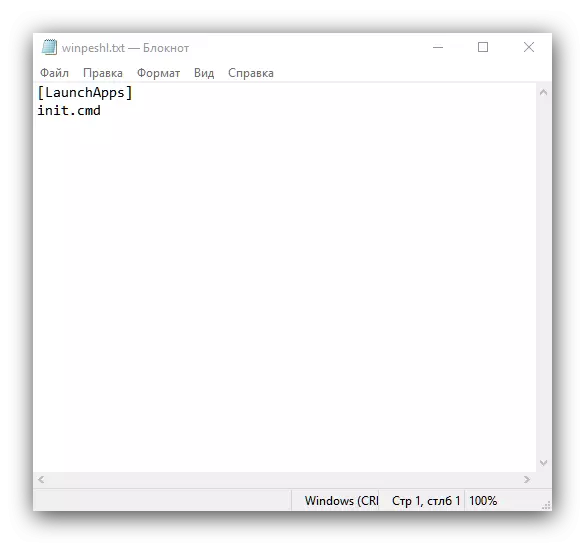
Turn on the display of file extensions, if you have not done this earlier, and change the TXT extension on the INI from the WinPeshl file.
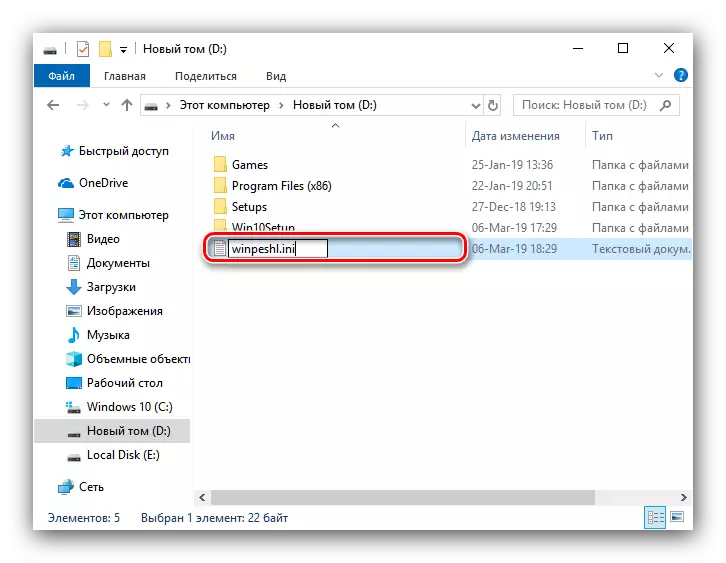
Copy this file and go to the directory into which the boot.wim image was mounted. Expand the Windows / System32 directory from this directory, and paste the received document.
- Create another text file, this time named init inserting the following text:
:::::::::::::::::::::::::::::::::::::::
:: init script ::
:::::::::::::::::::::::::::::::::::::::
@echo off
Title Init Network Setup
Color 37.
CLS.
:: INIT VARIABLES.
set NetPath = \\ 192.168.0.254 \ share \ setup_win10x86 :: There must be a network path to the folder containing installation files
SET User = Guest
SET PASSWORD = Guest
:: Wpeinit Start.
Echo Start Wpeinit.exe ...
wpeinit.
Echo.
:: MOUNT NET DRIVE
ECHO MOUNT NET DRIVE N: \ ...
NET USE N:% NETPATH% / USER:% User% password%
IF% Errorlevel% GEQ 1 Goto Net_error
Echo Drive Mounted!
Echo.
:: RUN Windows Setup
Color 27.
Echo Starting Windows Setup ...
PUSHD N: \ Sources
setup.exe.
Goto Success.
: NET_ERROR.
Color 47.
CLS.
Echo Error: CANT MOUNT NET DRIVE. Check Network Status!
Echo Check Network Connections, Or Access to Network Share Folder ...
Echo.
cmd.
: Success
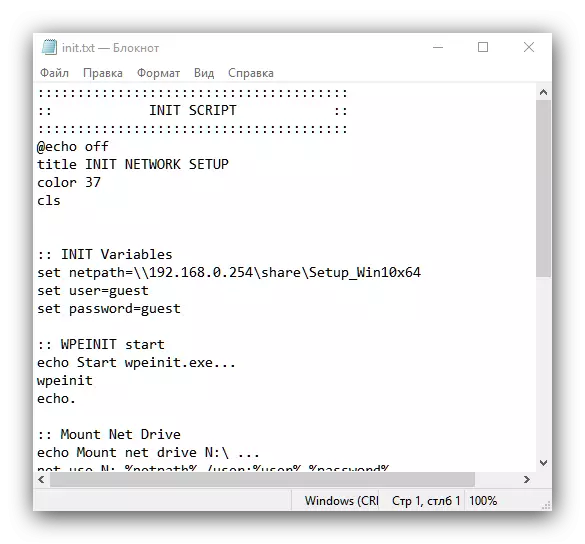
Save the changes, close the document, change it to the CMD extension and also move to the Windows / System 32 folder of the mounted image.
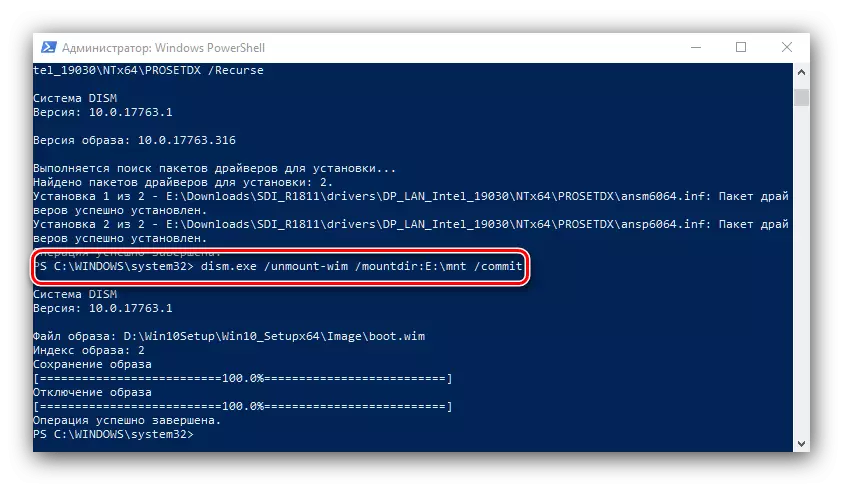
- Close all folders related to the mounted manner, then return to refund, where enter the command:
Dism.exe / Unmount-Wim / Mountdir: * Catalog address with mounted manner * / COMMIT
- If multiple boot.wim is used, steps 3-6 will need to be repeated for them.
Stage 3: Installing the downloader to the server
At this stage, you will need to install and configure the network bootloader to install Windows 10. It is located inside the catalog named PXE in the boot.wim. You can get access to it using the mounted method, which is described in the previous stage, or using the same 7-zip, and use it.
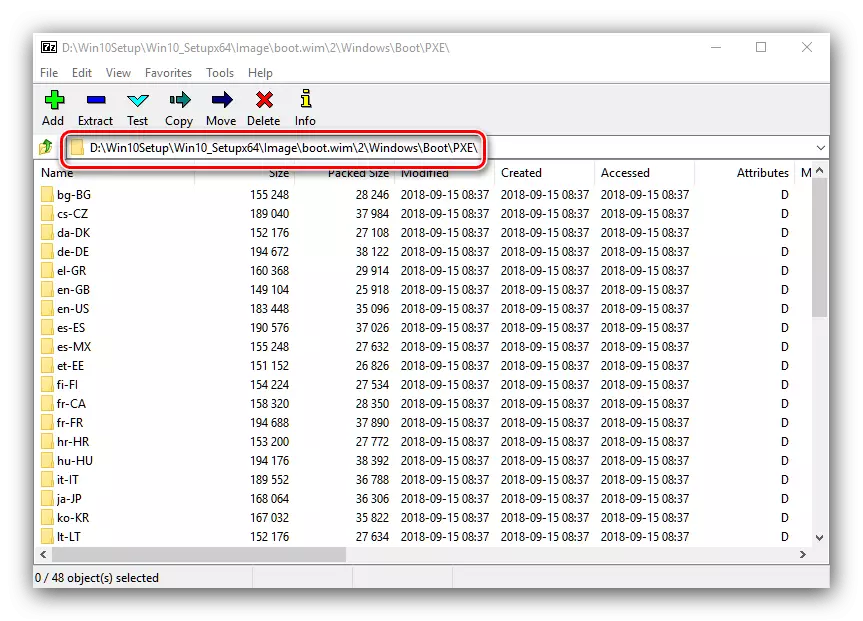
- Open the boot.wim of the desired bit with 7-zip. Navigate the largest size folder.
- Go to the Windows / Boot / PXE directory.
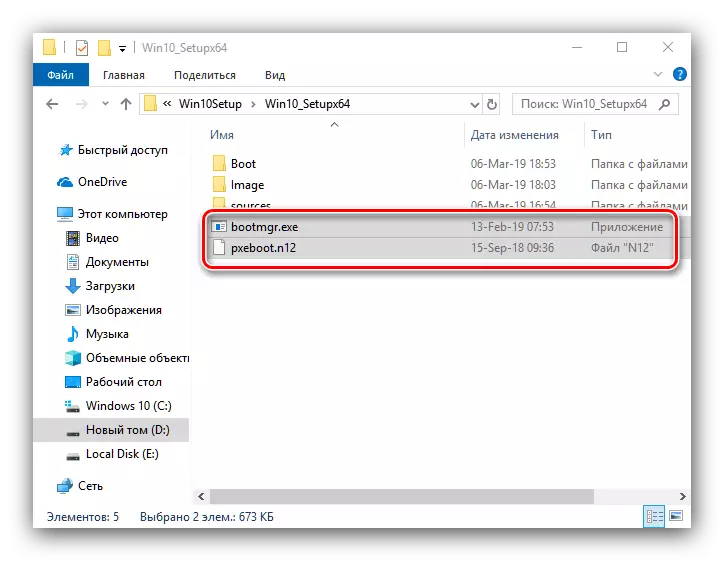
- First of all locate the pxeboot.n12 files and bootmgr.exe, copy them to the root directory of the TFTP server.
- Next in the same directory, create a new folder named Boot.
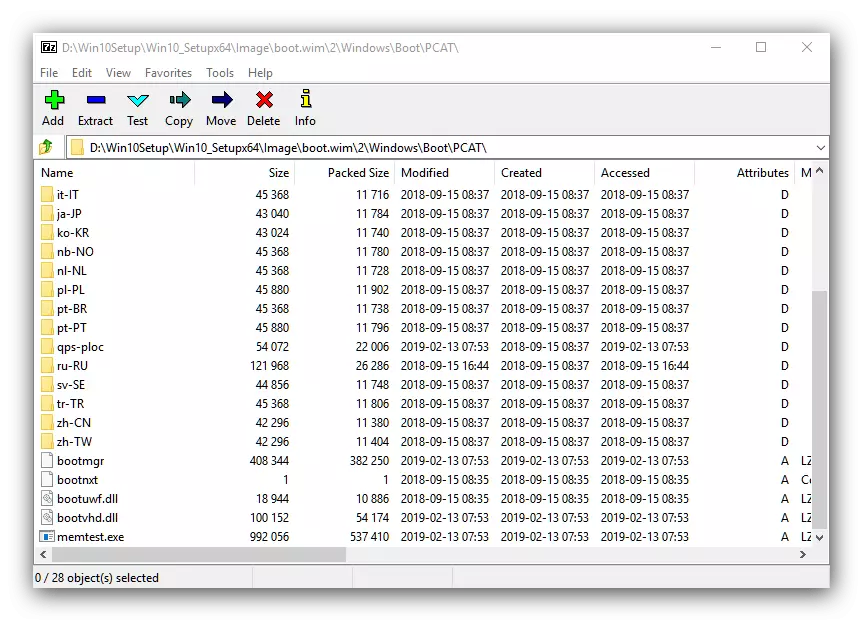
Now return to an open 7-zip, in which go to the root of the image of boot.wim. Open the directories at Boot \ DVD \ PCAT - copy from there BCD files, boot.sdi, as well as the RU_RU folder, which insert into the BOOT folder created earlier.
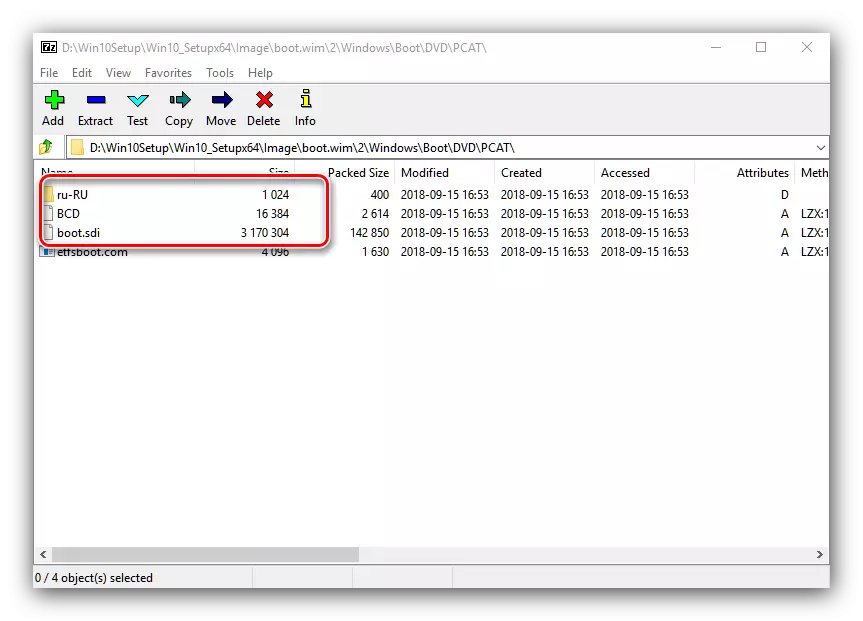
You will also need to copy the Fonts directory and the MemTest.exe file. The accurate location depends on the specific image image, but most often they are located at boot.wim \ 2 \ windows \ pcat.

Normal copying files, alas, everything does not end: you need to still configure BCD, which is a configuration file of Windows loader. You can do this through a special Bootice utility.
Download Bootice from the official site
- The utility is portable, so at the end of the download, simply start the executable file corresponding to the discharge of the working OS of the source machine.
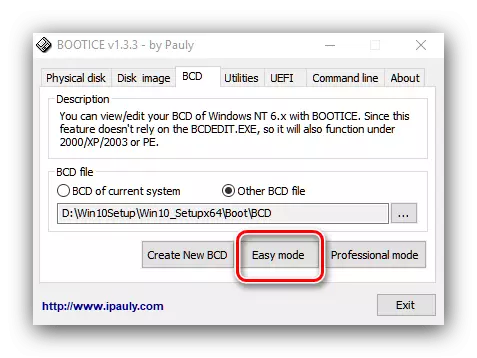
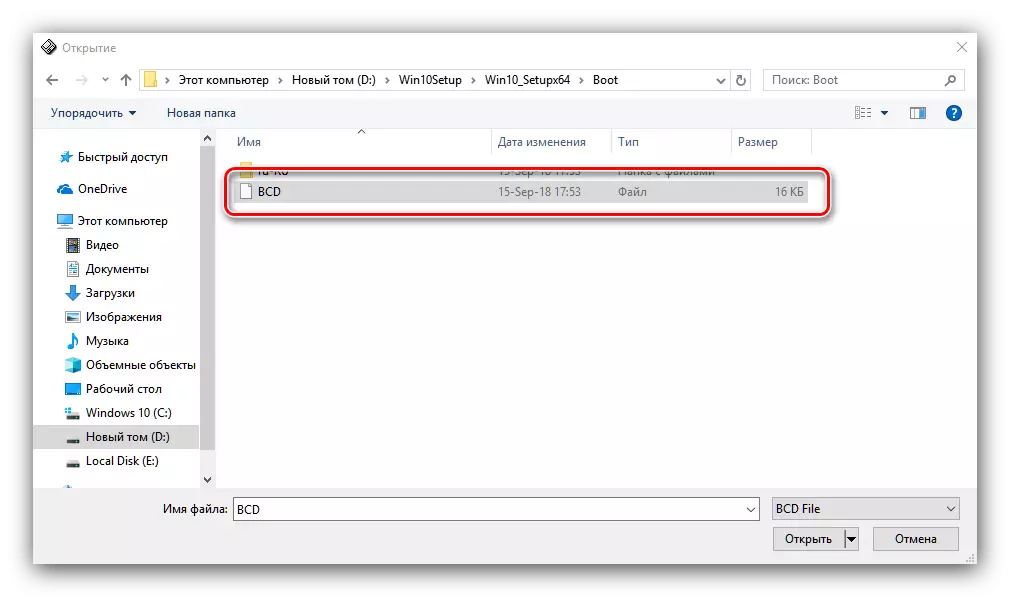
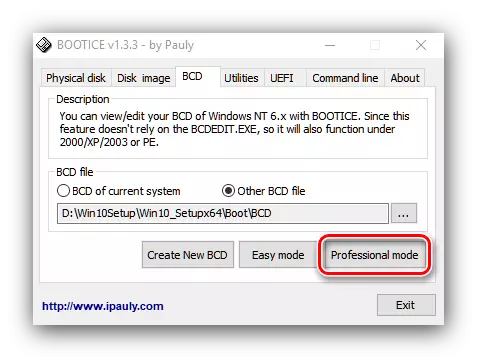
- Go to the BCD tab and check the Other BCD File option.
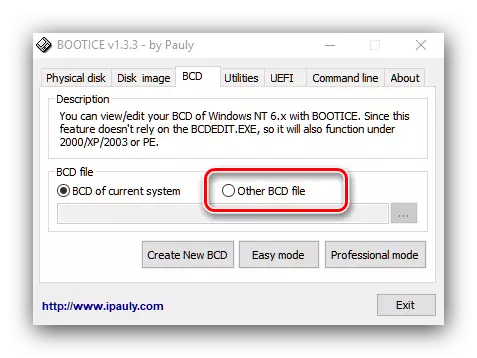
The "Explorer" window opens, in which you want to specify the file located at the address * TFTP * / BOOT root directory.
- Click on the "Easy Mode" button.
The simplified BCD configuration interface will start. First of all, refer to the "Global Settings" block. Disconnect the timeout - instead of 30 enter 0 to the appropriate field, and remove the checkbox from the item.
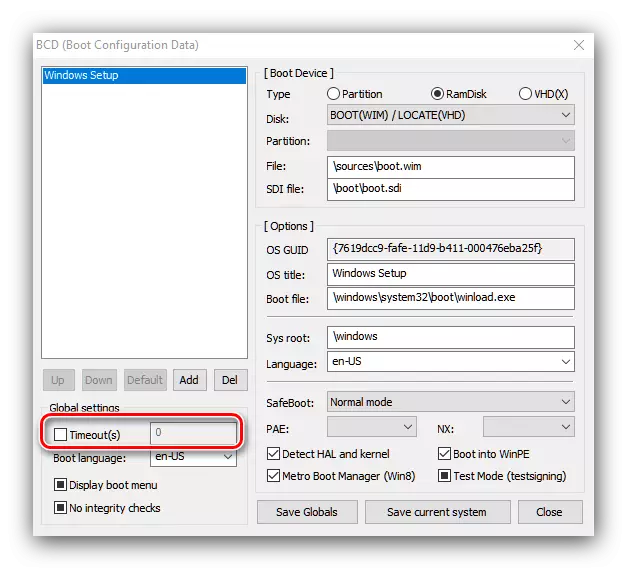
Next, in the Boot Language list, install "RU_RU" and check the items "Display Boot Menu" and "No Integrity Checks".
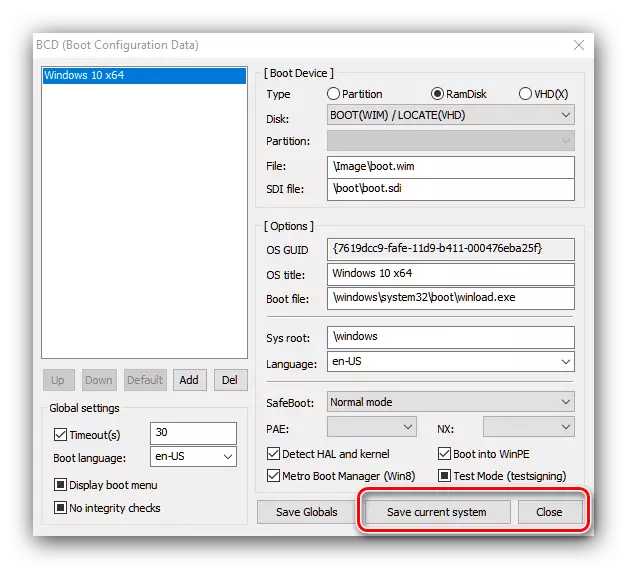
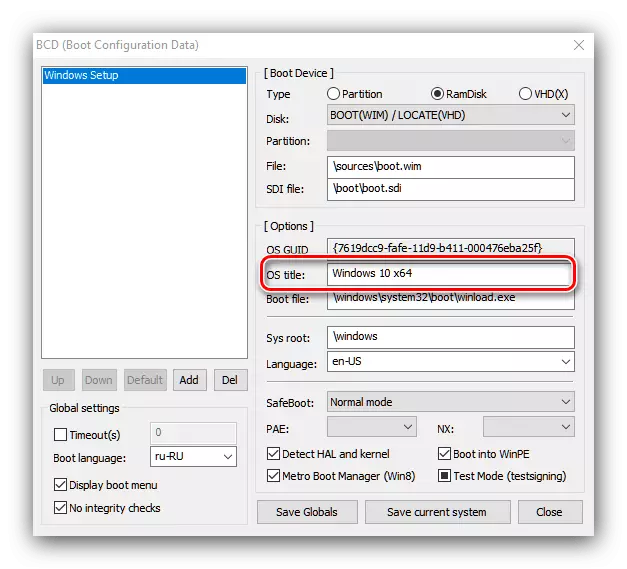
- Next, go to the "Options" section. In the OS Title field, write "Windows 10 x64", "Windows 10 x32" or "Windows X32_X64" (for combined distributions).
- Move to the Boot Device unit. In the "File" field, you must register the location address of the WIM image:
Image / boot.wim

In the same way, specify the location of the SDI file.
- Click on the "Save Current System" and "Close" buttons.
Upon returning to Main Window, use the "Professional Mode" button.
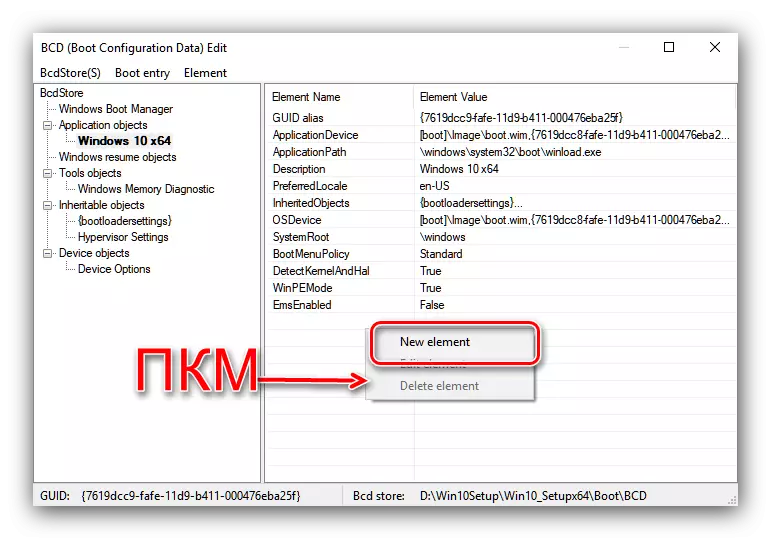
- Open the Application Objects list, in which you find the name of the system previously set in the OS TITLE field. Highlight this item click the left mouse button.
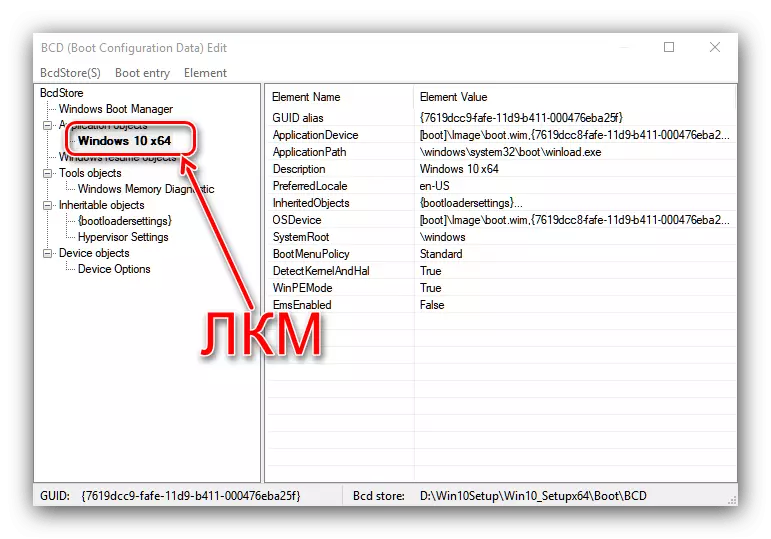
Next, move the cursor to the right side of the window and right-click. Select "New Element".
- In the "Element Name" list, select "DisableintegrityChecks" and confirm by pressing "OK".
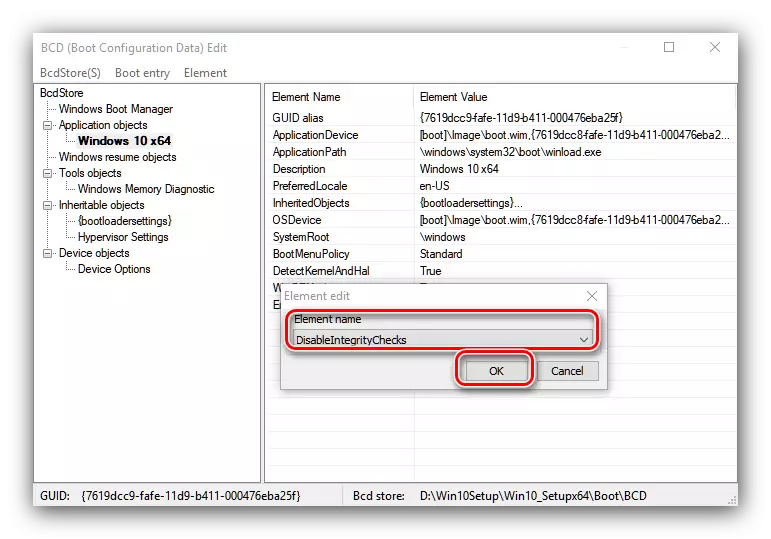
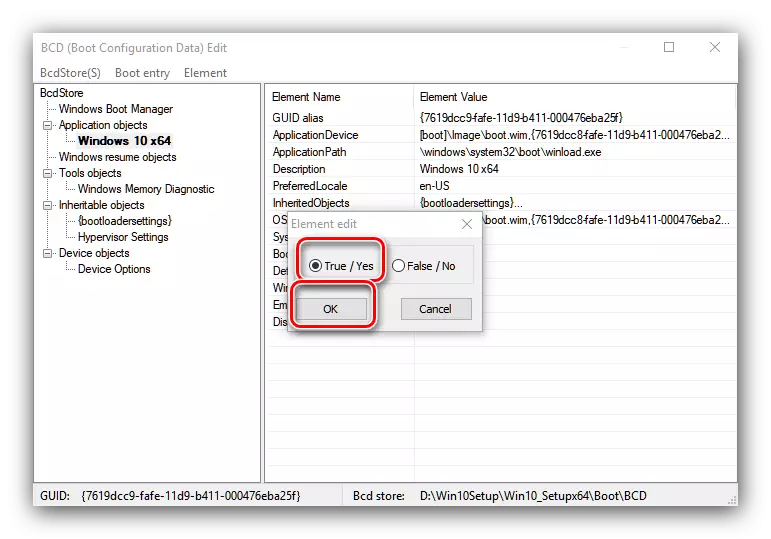
A window will appear with the switch - set it to the "True / Yes" position and click OK.
- You do not need to confirm the save changes - just close the utility.

This loader setting is over.
Stage 4: Providing general access to catalogs
Now you need to configure sharing the TFTP server folder on the target. We have already considered the details of this procedure for Windows 10, so we recommend using instructions from the article below.
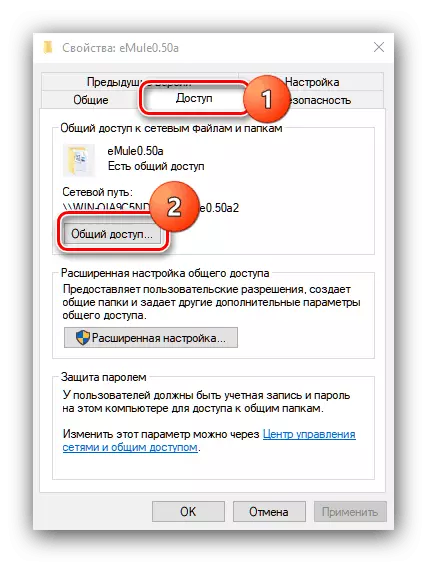
Lesson: Sharing folders in Windows 10
Stage 5: Installing the operating system
Perhaps the easiest of the stages: directly installing Windows 10 over the network is practically no different from installation from a flash drive or CD.
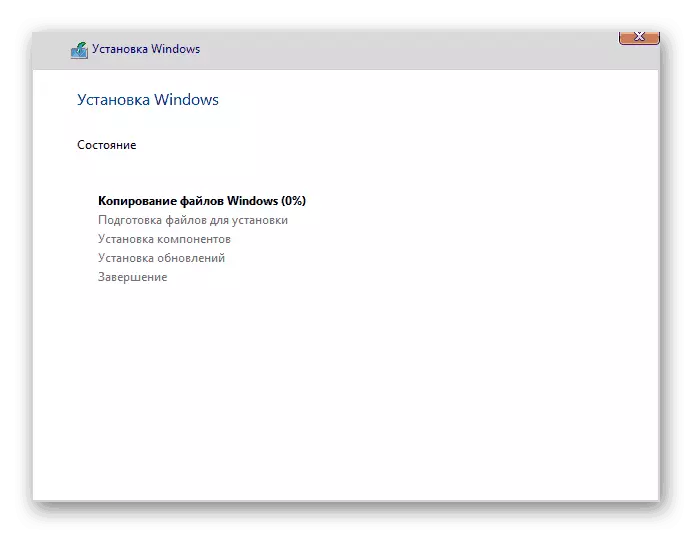
Read more: How to install Windows 10
Conclusion
Installing the Windows operating system 10 over the network is not too complex lesson: the main difficulties are to properly prepare the distribution files and configuring the bootloader's configuration file.