
Smartphones on the Android platform are often used to create snapshots using a built-in front camera and special applications. To achieve greater convenience and the quality of final photos, you can use the monopod. It is about the process of connecting and configuring a selfie stick, we will tell you in the course of this instruction.
Connecting and configuring monopod on Android
Within the framework of the article, we will not consider the possibilities of different applications providing certain advantages when using selfie sticks. However, if you are interested in this, you can familiarize yourself with the other material on our website. Next, it will be specifically about connecting and primary configuration with the participation of one single application.This procedure can be considered completed.
Step 2: Setting in Selfishop Camera
This step is essentially individual for each individual situation, since different applications are found in their own way and connect to the self-stick. As an example, we take as a basis the most popular monopod application - Selfishop Camera. Further actions are identical for any Android devices, regardless of the version of the OS.
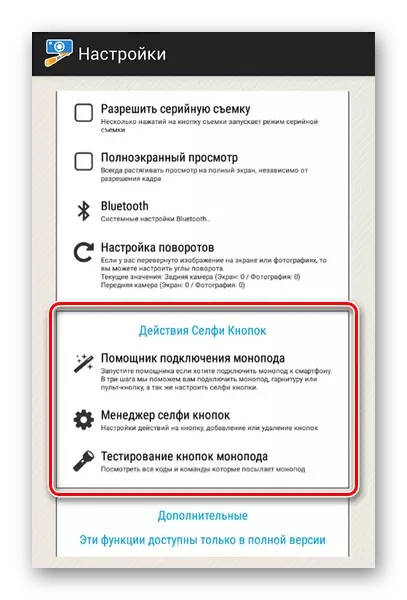
- After opening the application in the upper right corner of the screen, click the menu icon. Once on the page with the parameters, locate the "Actions of the Selfie Buttons" block and click on the "Manager of the Selfie Button" bar.
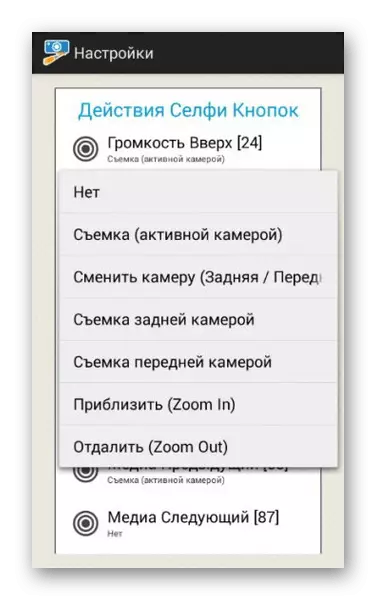
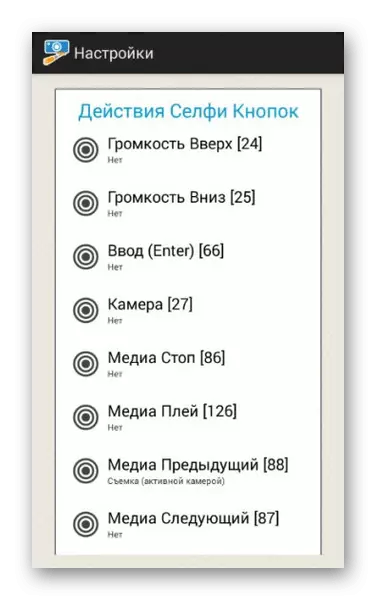
- In the list represented, read the buttons. To change the action, select any of them to open the menu.
- From the list that opened the list, specify one of the desired actions, after which the window will automatically close.
When the setup is completed, simply exit the section.
This is the only option to adjust the monopod through this application, and therefore we complete this article. At the same time, do not forget to use the parameters of the software aimed at creating photos.