
The Android platform is significantly different from the usual Many Windows operating system, in particular due to the lack of file support in EXE format. However, if necessary, open the executable files is still possible. It is about this that we will tell in today's article.
Opening EXE files on Android
Most tasks on Android are usually solved by installing one or more special applications that allow you to open this or that extension. However, in the case of EXE files, it is more complicated - it will have to use emulators to work with them.Method 1: BOCHS
To date, there are many programs created to run Windows on smartphones and android tablets. Such applications include BOCHS, acting as free, but at the same time convenient emulator with a huge number of functions.
Download BOCHS from Google Play Market
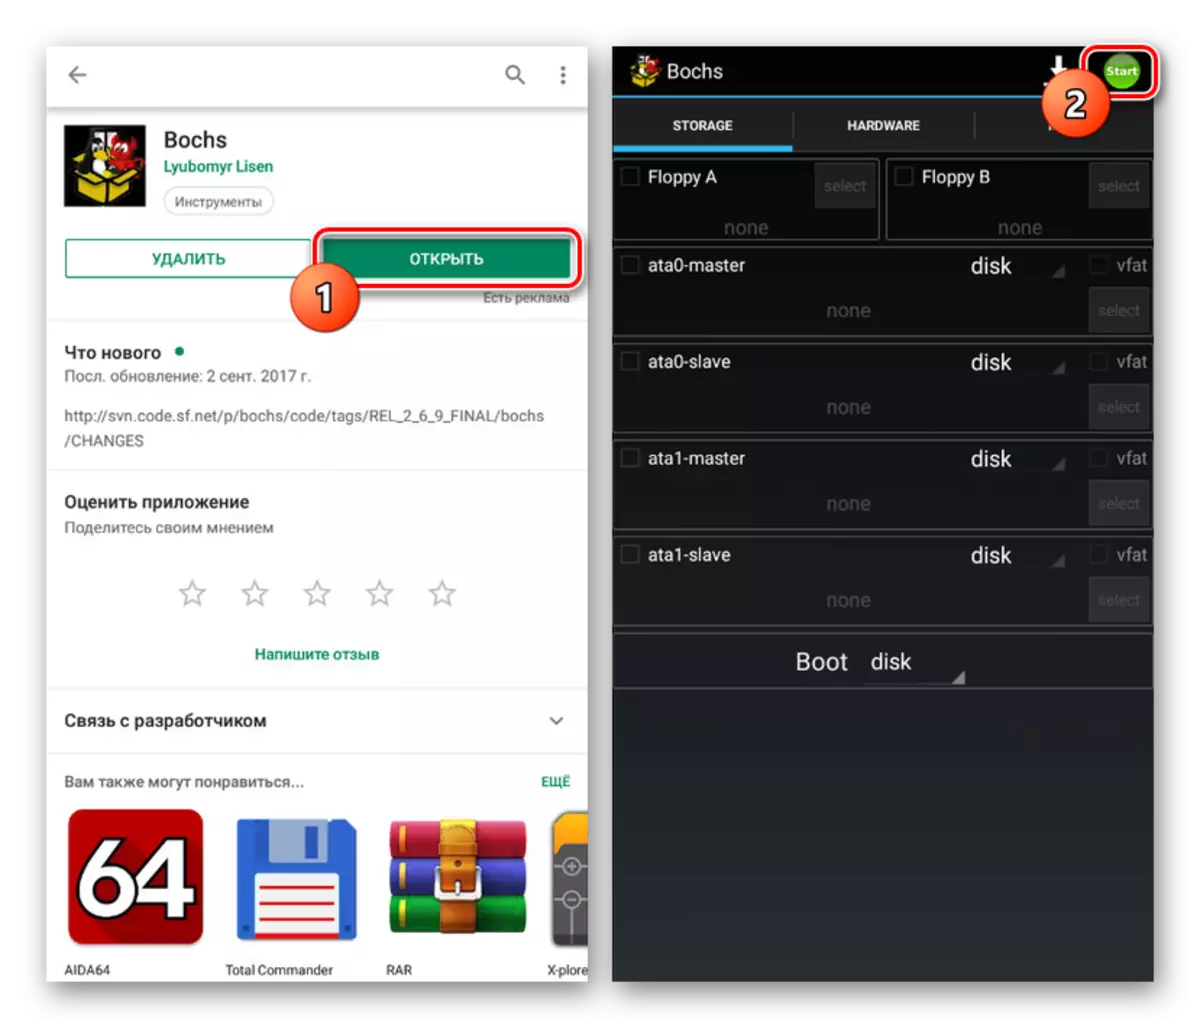
Step 1: Installing BOCHS
- Use the above link and download the application to the phone. After that, run BOCHS and, without changing anything in the settings, press the "Start" button in the extreme upper corner of the screen.
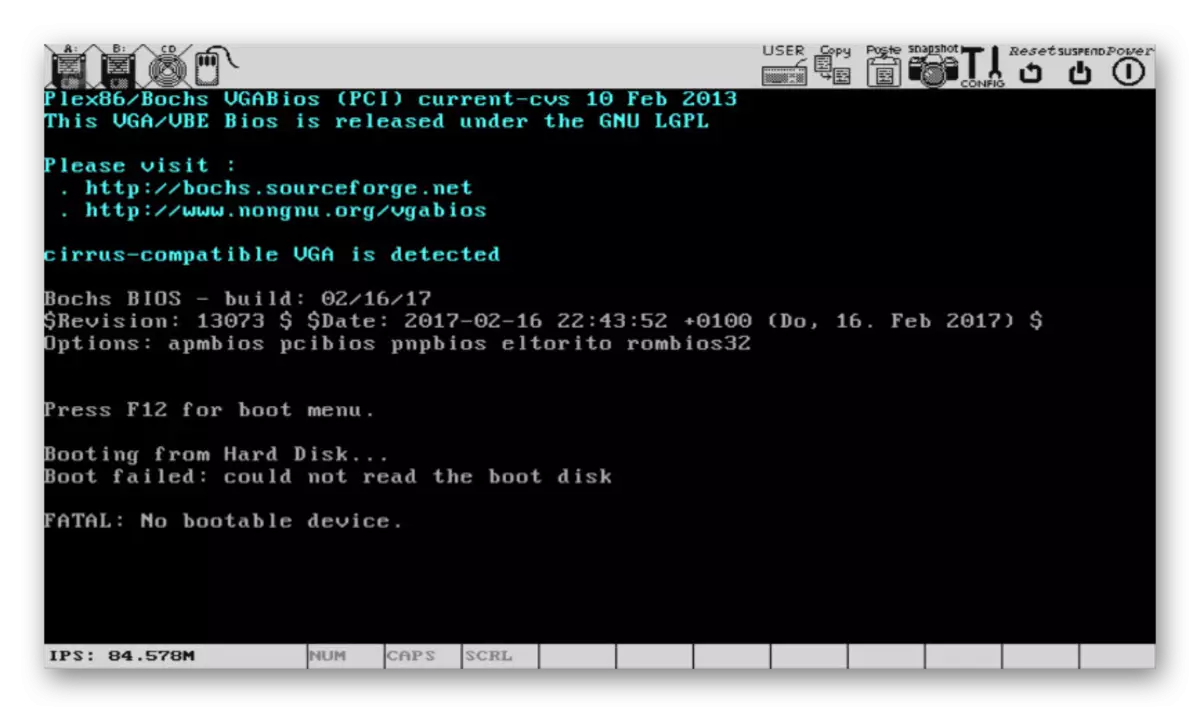
- Wait for the completion of the file copy and the appearance of the BIOS.
- On this work with the application can be temporarily finished. Be sure to turn it off so that there are no problems with parameters during further changes.
Step 2: File Preparing
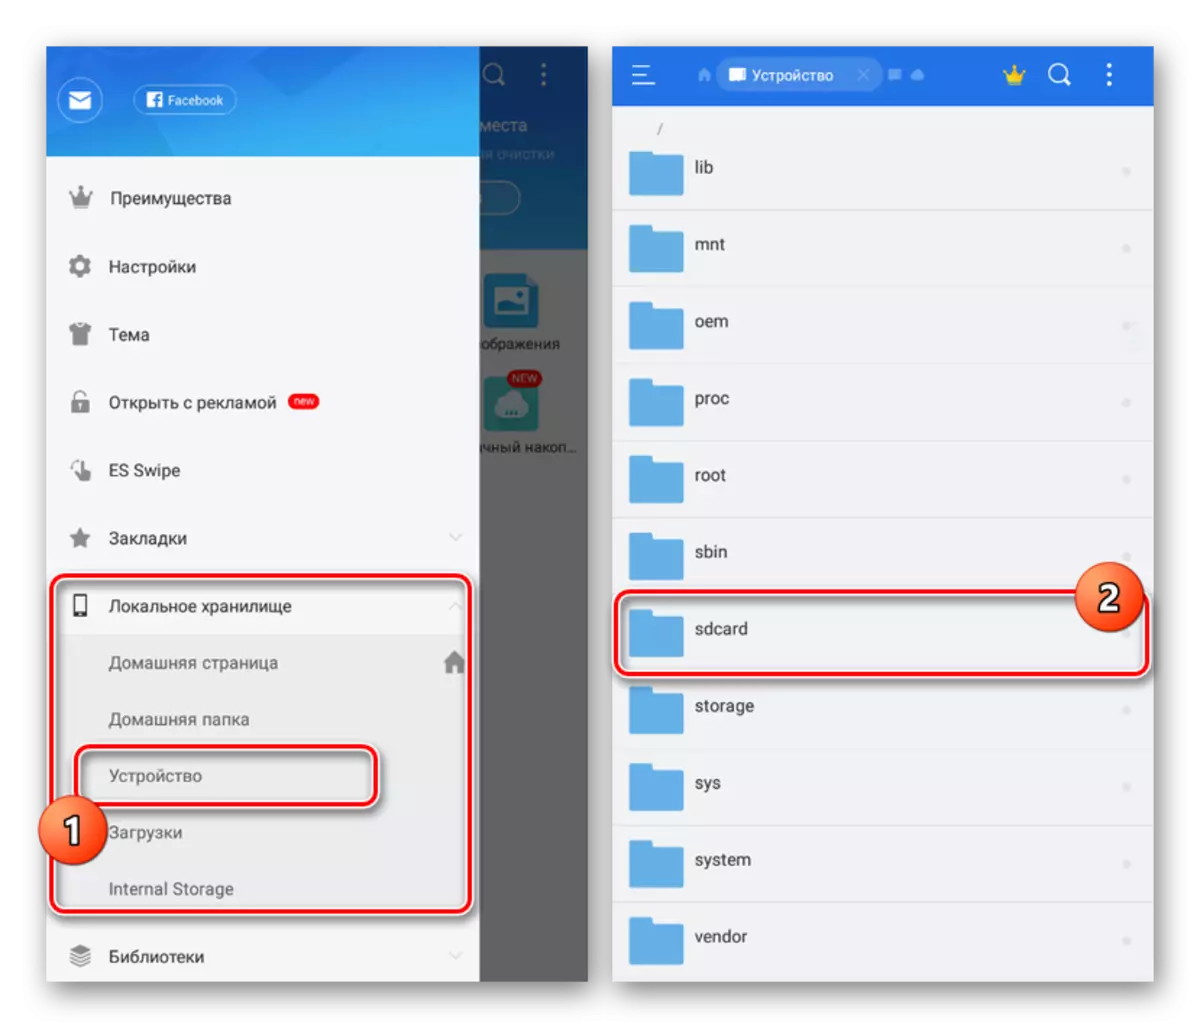
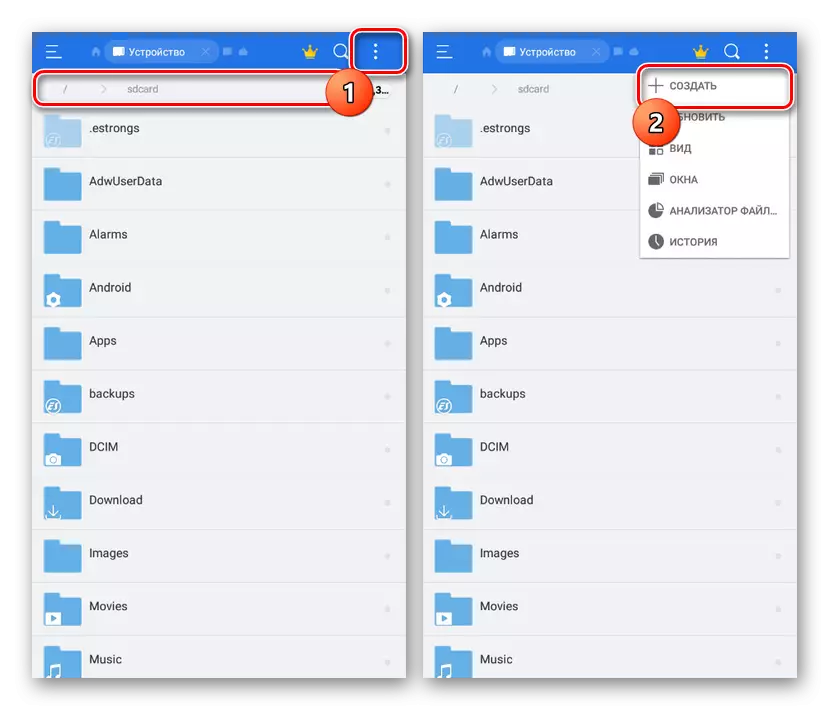
- Use any convenient file manager, such as "ES Explorer", and go to the root directory of the device through the main menu.
- Further Open the "SDCard" folder and tap on the three-point icon in the upper right corner of the screen. From the list presented you need to select "Create".
- Through the window that appears, specify the type of "folder" object and enter any convenient name. It is best to give the name "HDD" to avoid confusion in the future.
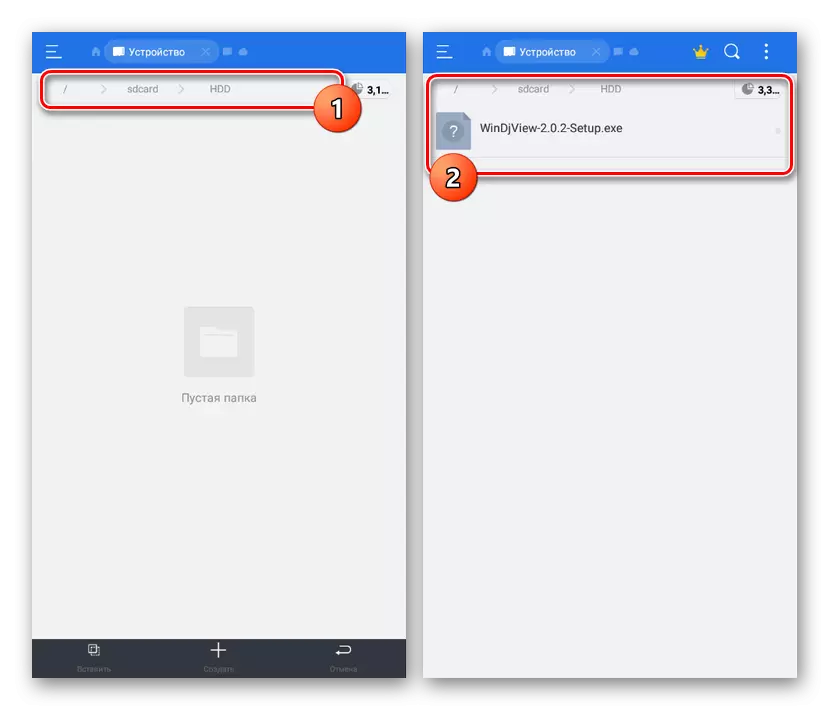
- This directory will be the repository of all EXE files that can be opened on the device. For this reason, add the necessary data to "HDD" immediately.

Step 3: Adding an Image
- Now you need to download the image of Windows in IMG format. You can find the highest quality assemblies to the following link on the 4PDA forum. At the same time, in our case, the version of Windows 98 will be taken as the basis.
Go to download the image of the BOCHS system
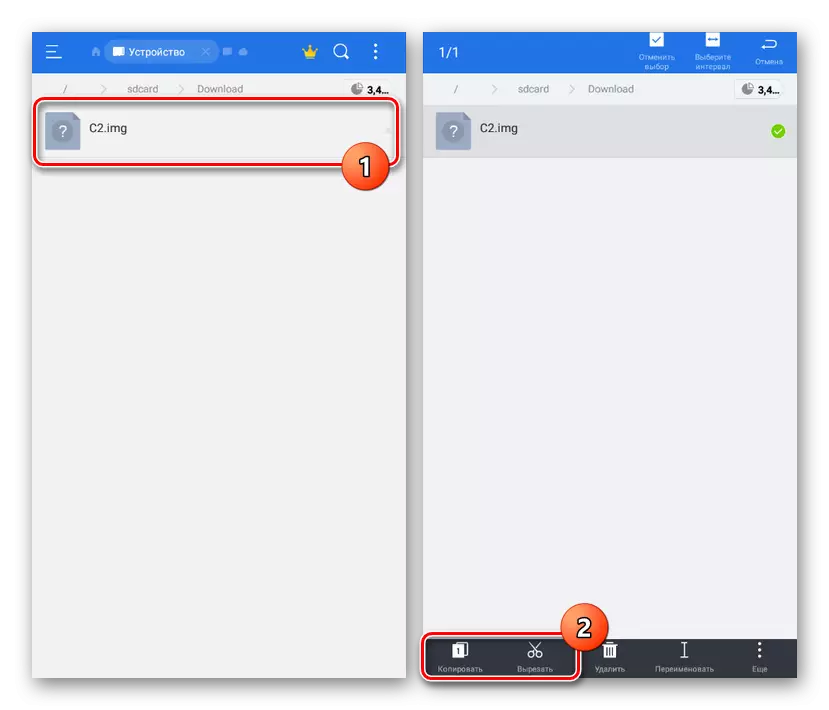
- The file loaded to the device must be unzipped and transfer to the main directory of the application. If you use a smartphone when downloading and transferred, then copy it using the "ES Explorer" tools.
- Open the "SDCARD" folder and go to the "Android / Data" section.
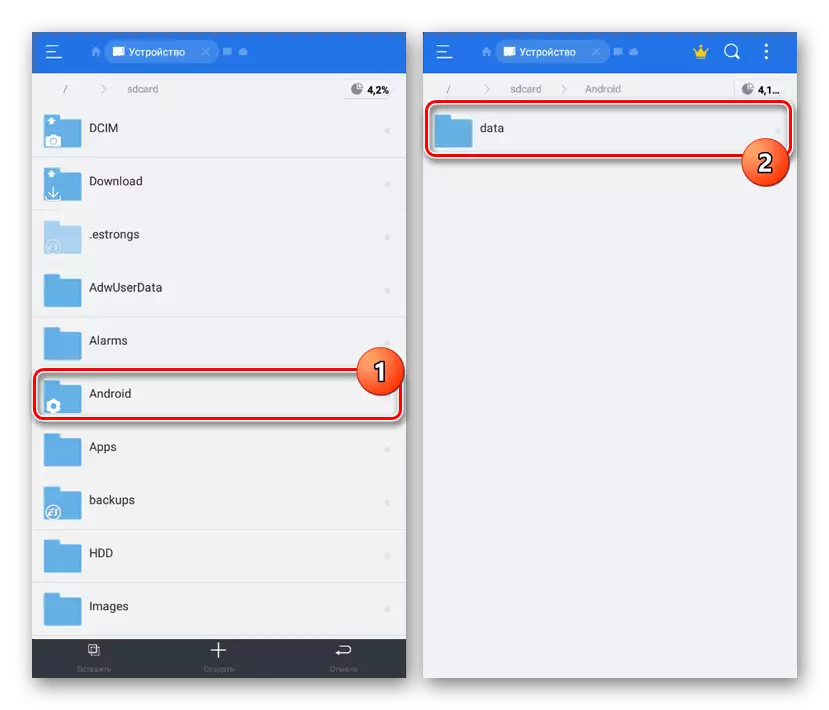
Here you need to deploy the Net.SourceForge.Bochs application directory and go to Files.
- When copying is completed, rename the file to "C.img".
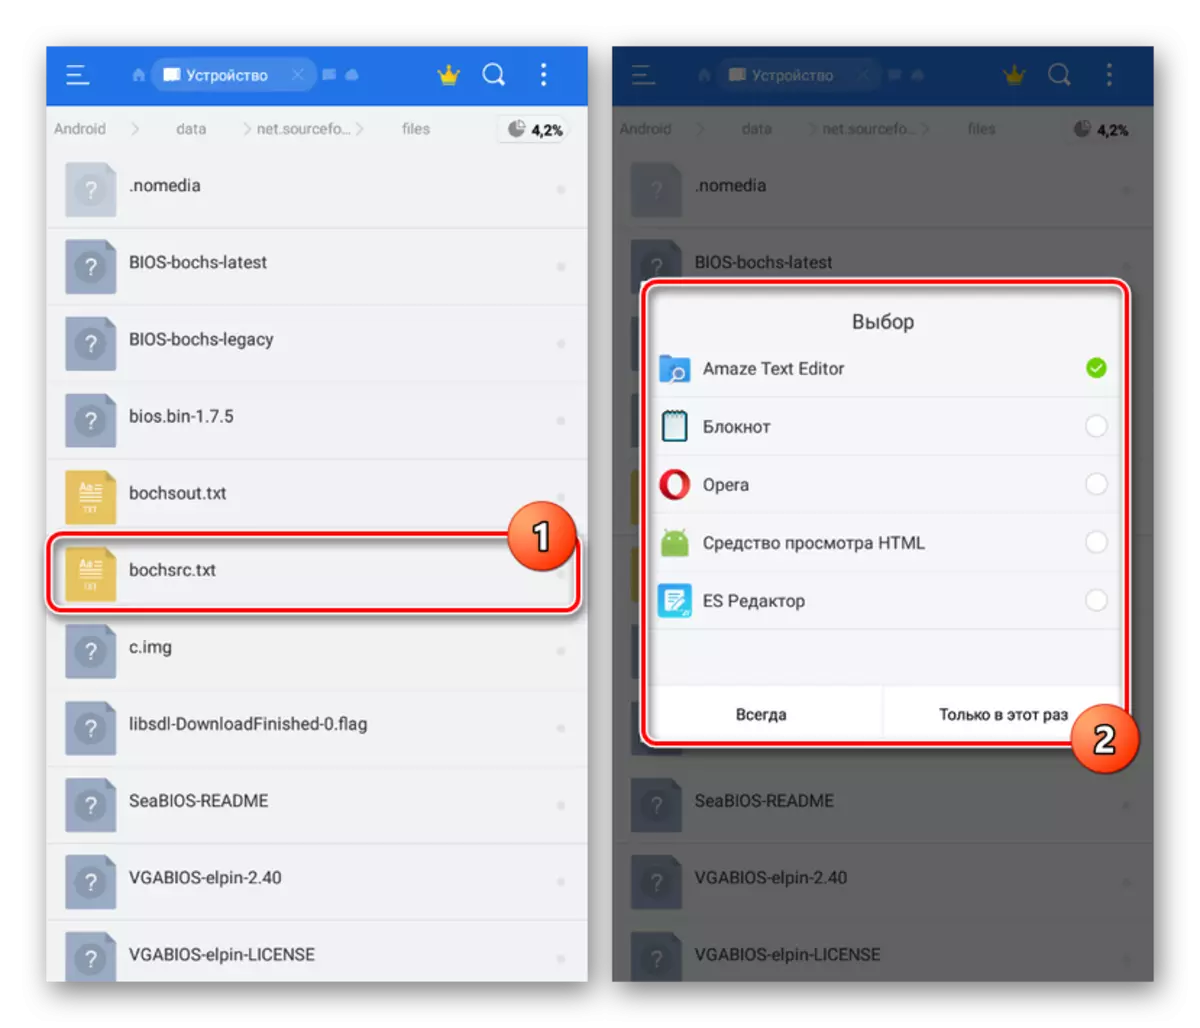
- In the same directory, click on "BOCHSRC.TXT" and select any text editor from the installed.
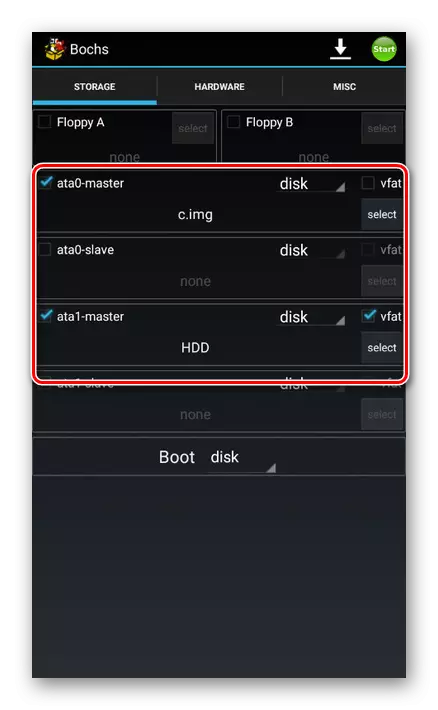
- Find the value "ATA1: Enabled = 1", make the row transfer and add the submitted code below. At the same time, the "HDD" folder can be called otherwise.
ATA0-MASTER: Type = Disk, Path = C.img
ATA1-Master: Type = Disk, Mode = VVFAT, PATH = / SDCard / HDD
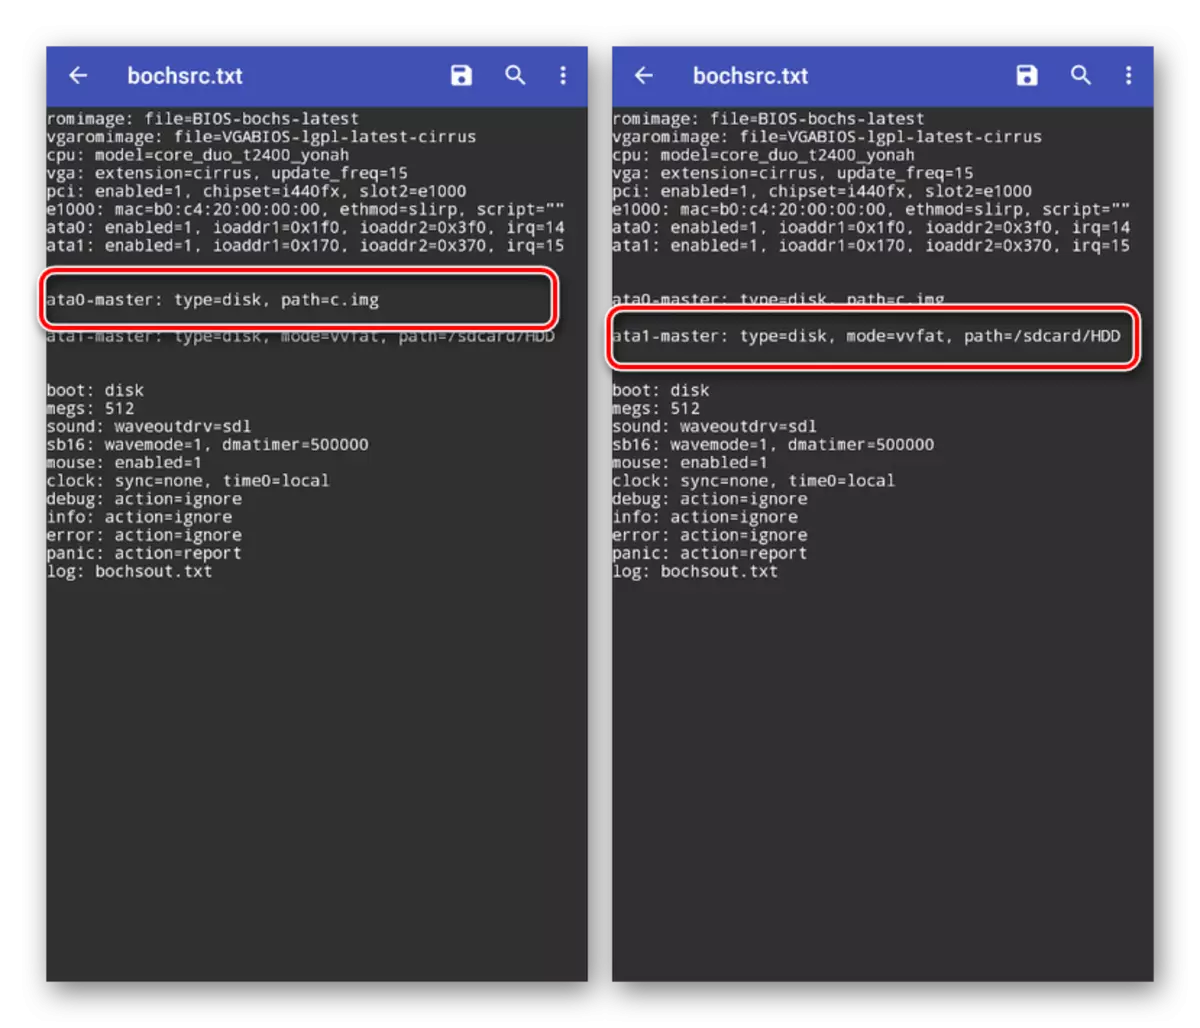
Only recovery changes, tap the save button and close the text editor.


Step 4: Opening EXE Format
- Taking advantage of the application icon, open the BOCHS and make sure the checkboxes at the first and third paragraph on the Storage tab.
- Go to the Hardware page and select Emulated Components. From this directly depends the speed of operation of the system and processing files.
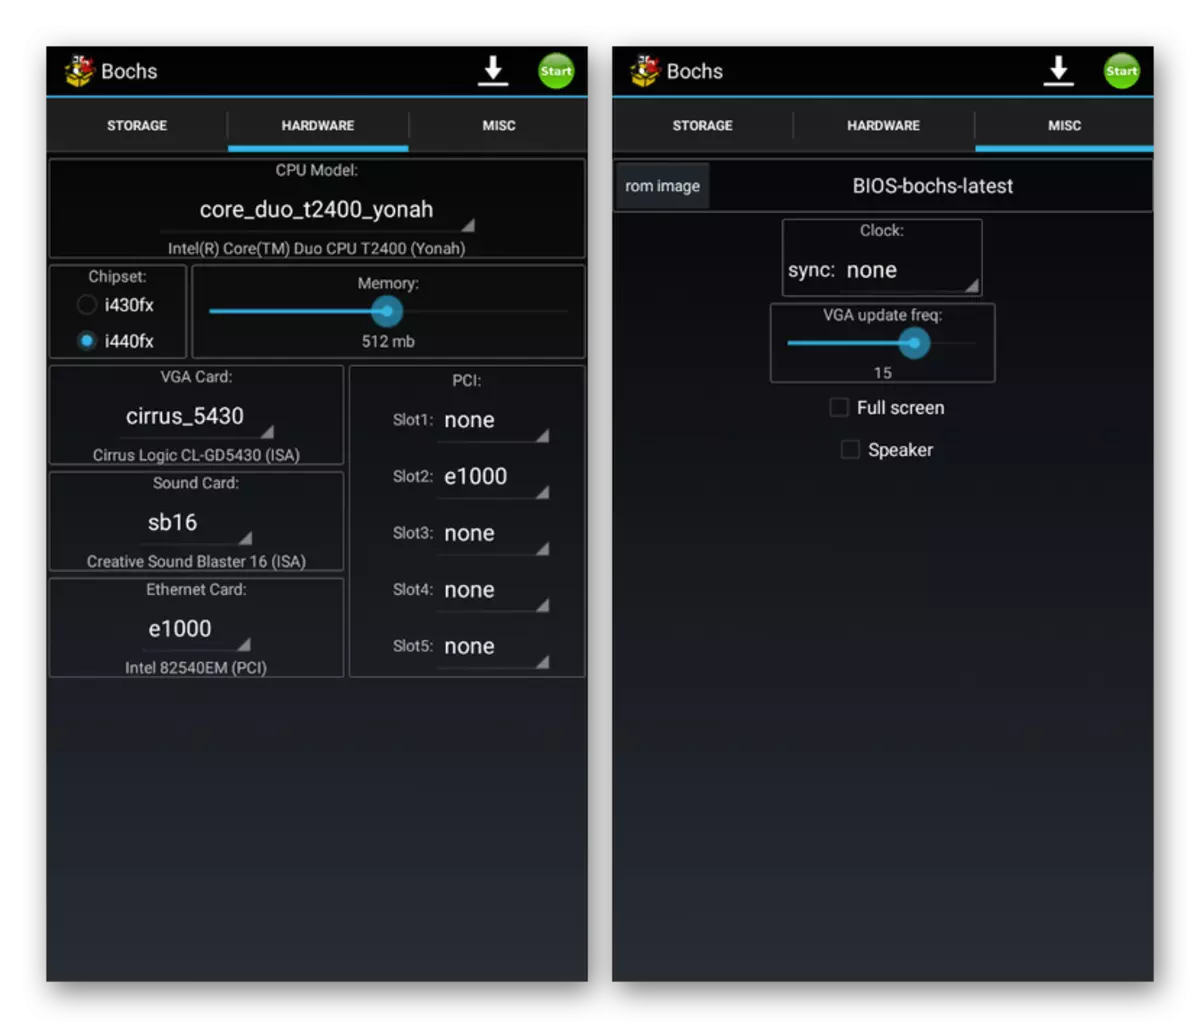
On the MISC tab, additional parameters are located, the change in which will be minimally reflected on performance.
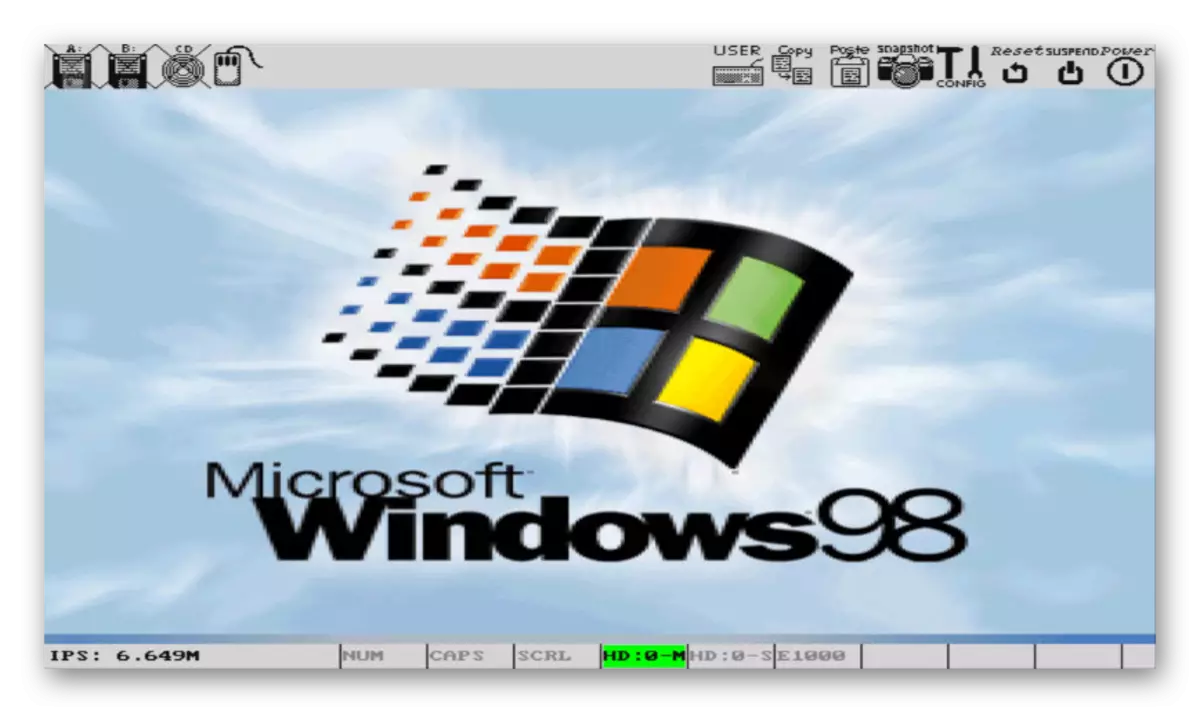
- To start the OS, click the "Start" button on the top panel. After that, the standard Windows start procedure will begin in accordance with the version used.
- To open the file, first of all should be ledging:
- The "A" icon on the top panel will cause a virtual keyboard;
- Double pressing in the area corresponds to the lcm click;
- You can emulate the work of PCM by pressing two fingers.
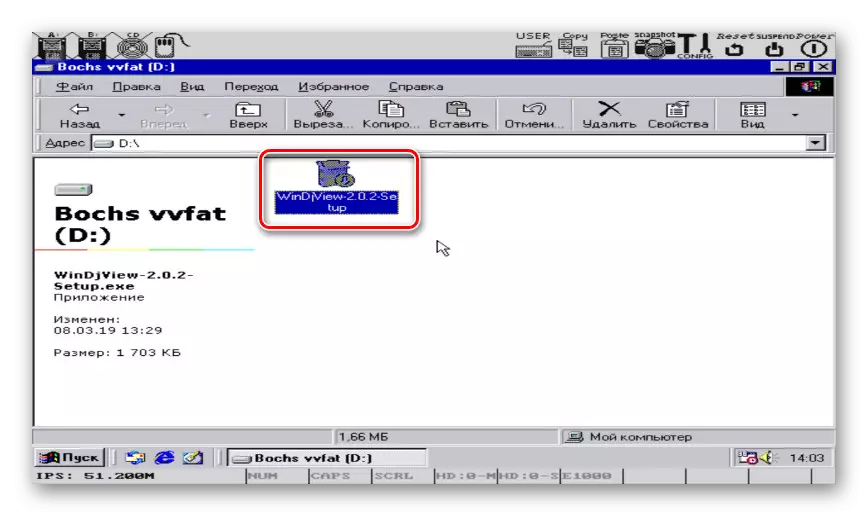
- Further actions, as it is not difficult to guess, similar to Windows. Click on the "My Computer" label on the desktop.
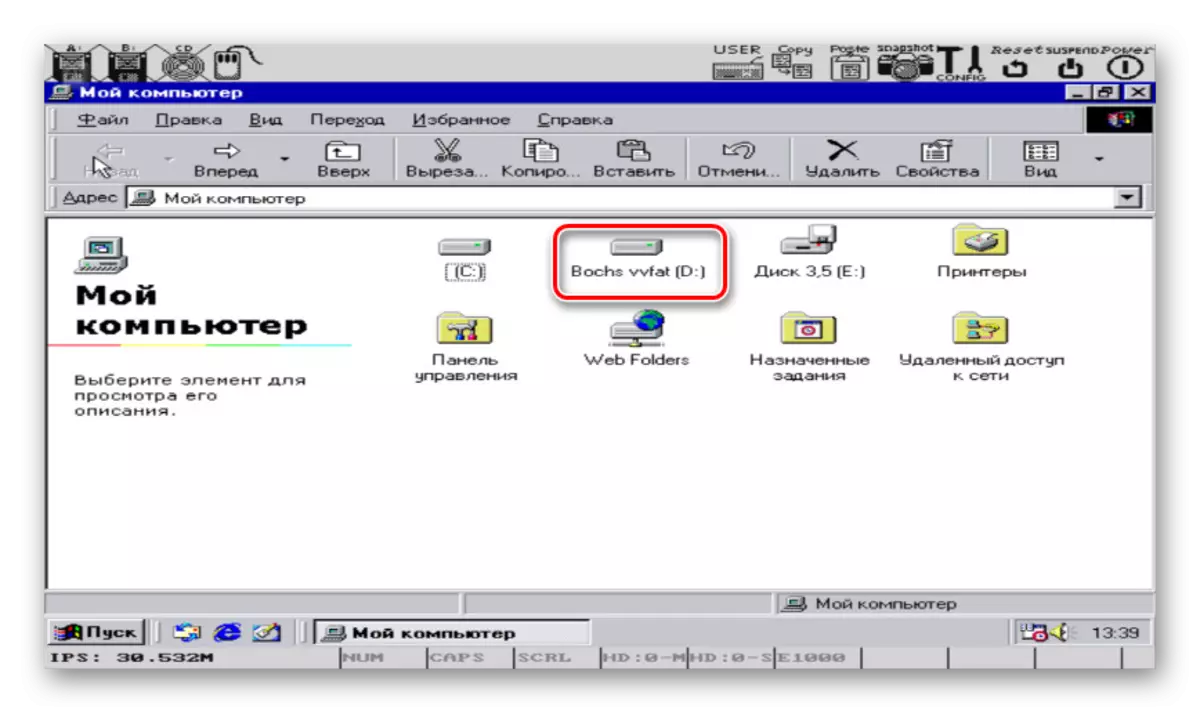
- Open the local disk "BOCHS VVFAT (D)". This section includes everything in the "HDD" folder in the Android device.
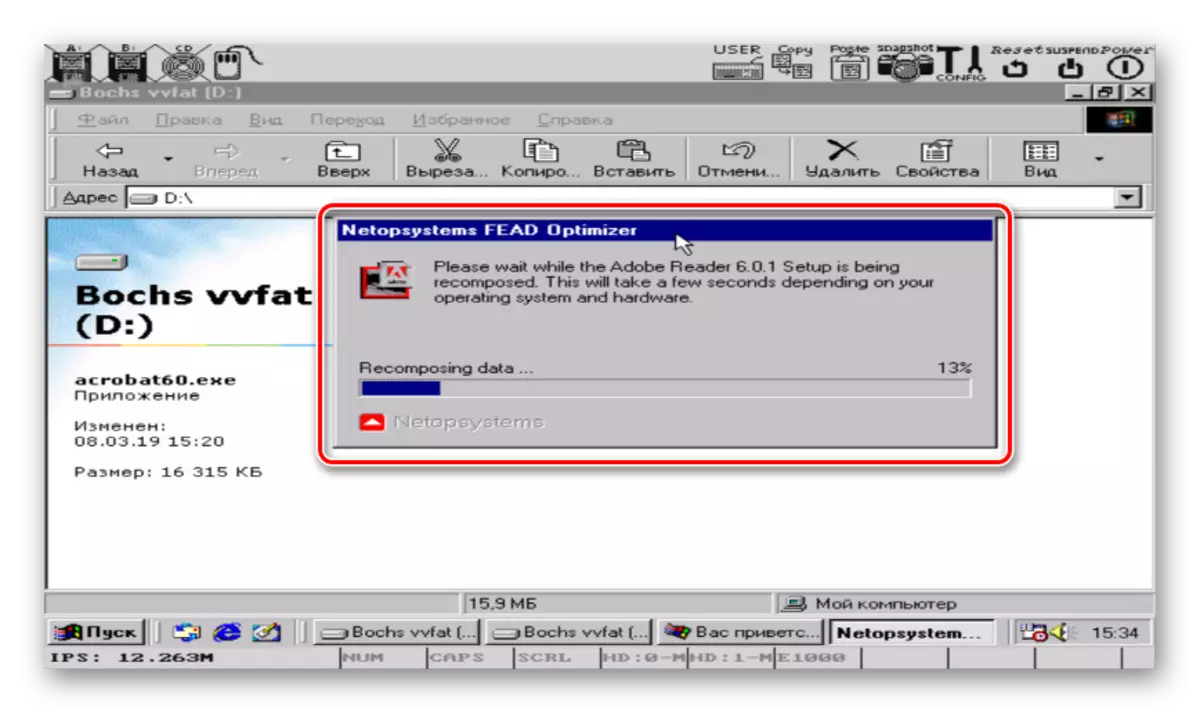
- Select the desired exe file by running it using double pressing. Please note when using old, although less demanding versions of Windows, many files will issue an error. That is what we are shown in the example below.
However, if the program is supported by the system, there will be no problems with the opening. The same can be said about games, but for their launch it is better to use another software.
Note: When the emulator is completed, close it in traditional ways through the menu "Start" Since the system image is easy to damage.

We tried to describe in detail the Windows emulation procedure on Android, because without this executable files are not possible. In accuracy, following instructions, there will be no problems using software. The only significant disadvantage of the application comes down to support far from all Android versions.
Method 2: Exagear - Windows Emulator
Unlike BOCHS, EXAGAR Windows Emulator does not deploy a full version of the Windows operating system. Because of this, it does not require an image for its use, but there are a number of problems associated with the installation. But even so it works much faster than any existing analogue.
Note: The application is missing on Google Play Market, and therefore the 4pda forum is the only trusted source.
Go to Exayaar Windows Emulator on 4pda
Step 1: Installing the Application
- Go to the page on the submitted link and download the exagear. Consider all the files will need to be removed from the archive, in connection with this install the archiver in advance.
Step 2: EXAGER activation
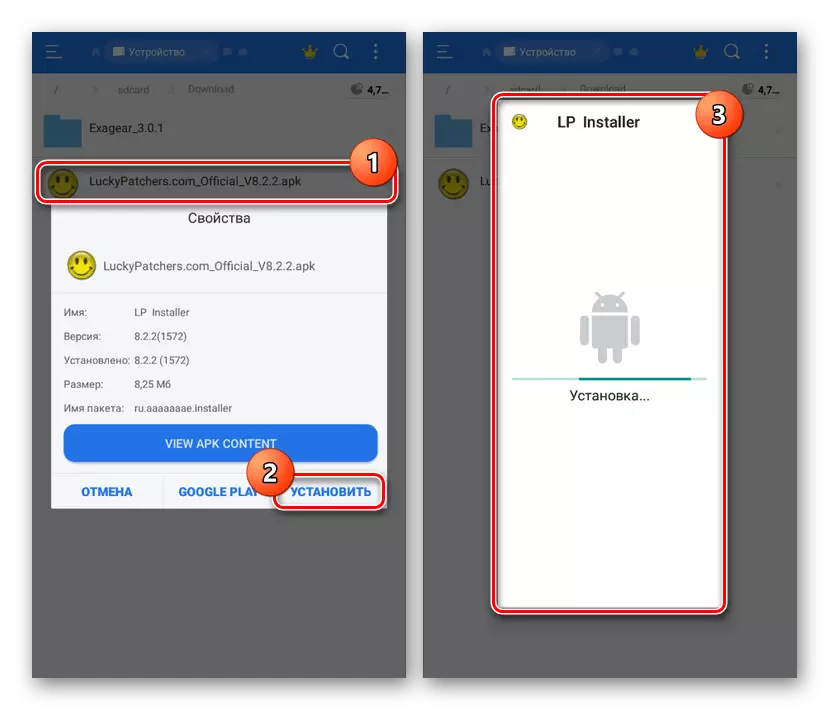
- Take advantage of the following link and download the LuckyPatcher application. It is also necessary to install it and run.
Download LuckyPatcher from the official site
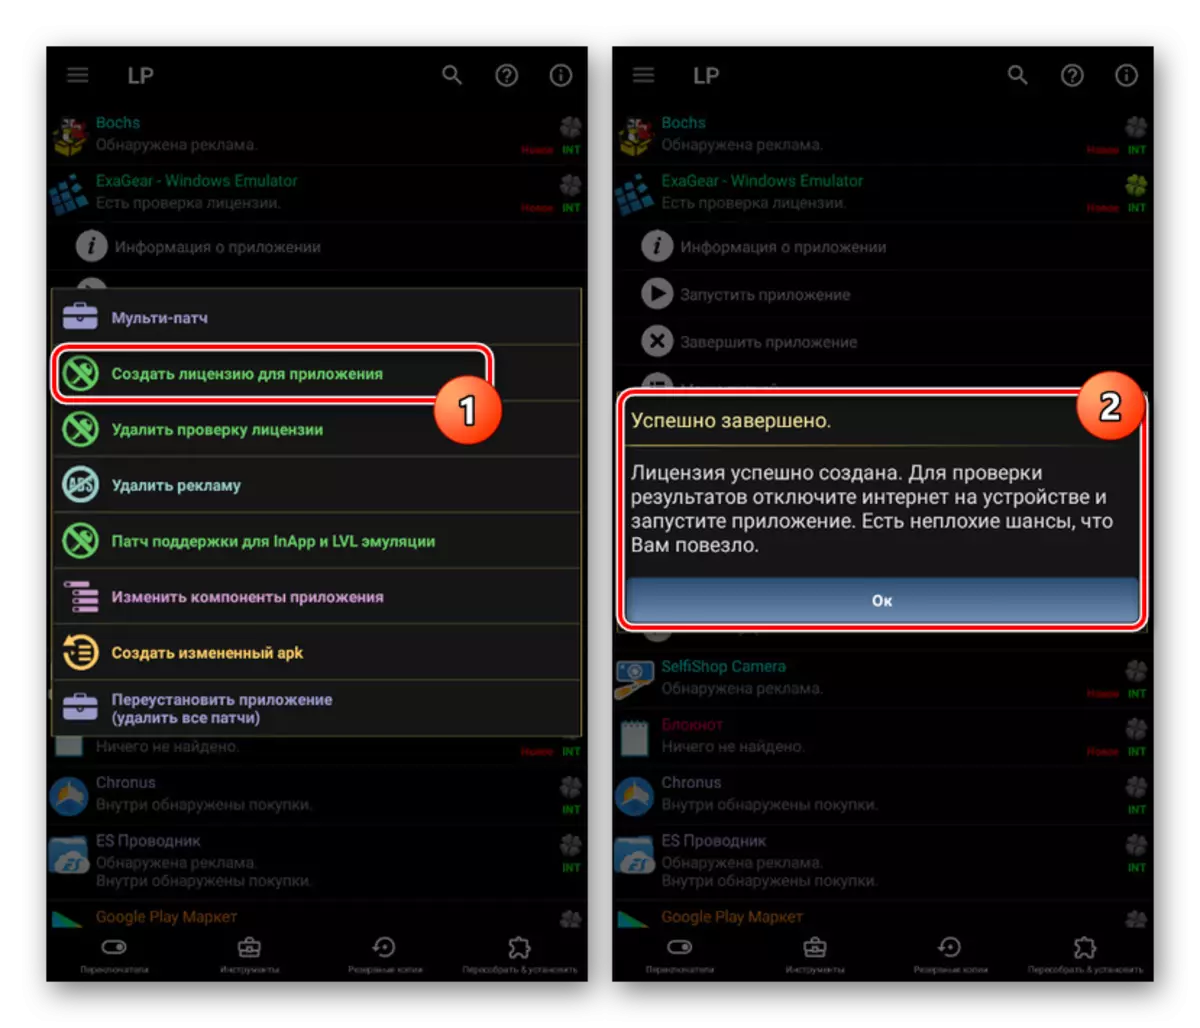
- By installing and providing rort-rights, wait for scanning. From the list that appears, specify Exagear Windows Emulator and click "Patches".
- To complete the registration, tap on the "Create License" line.
- Alternatively, if there are no root-rights on the device, you can try the modified version from the topic of the application to 4PDA. However, performance in this case is in doubt.

Step 3: Working with Files
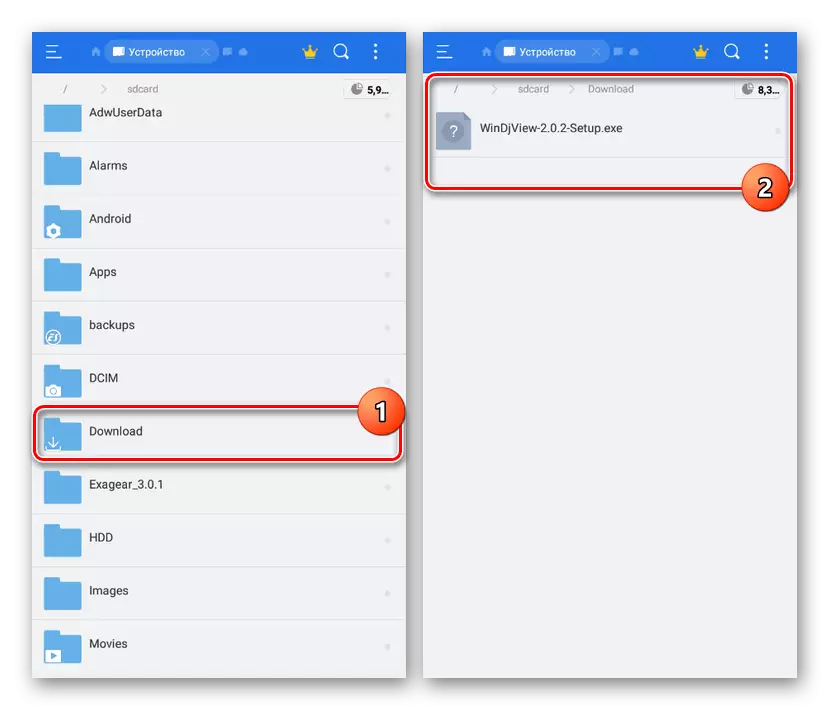
- Having understood with the preparation, go to the SDCARD directory and open the "Download" folder. It is in this directory that all EXE files must be placed.
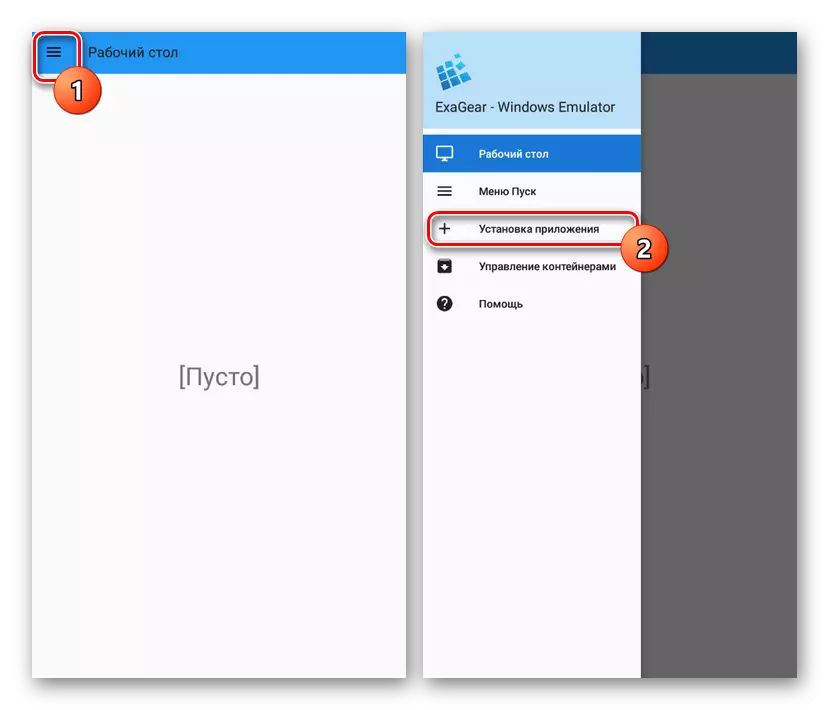
- Run EXAGAR, expand the main menu and select "Installing the Application".
- On the Select one of the options proposed or click "Other App".
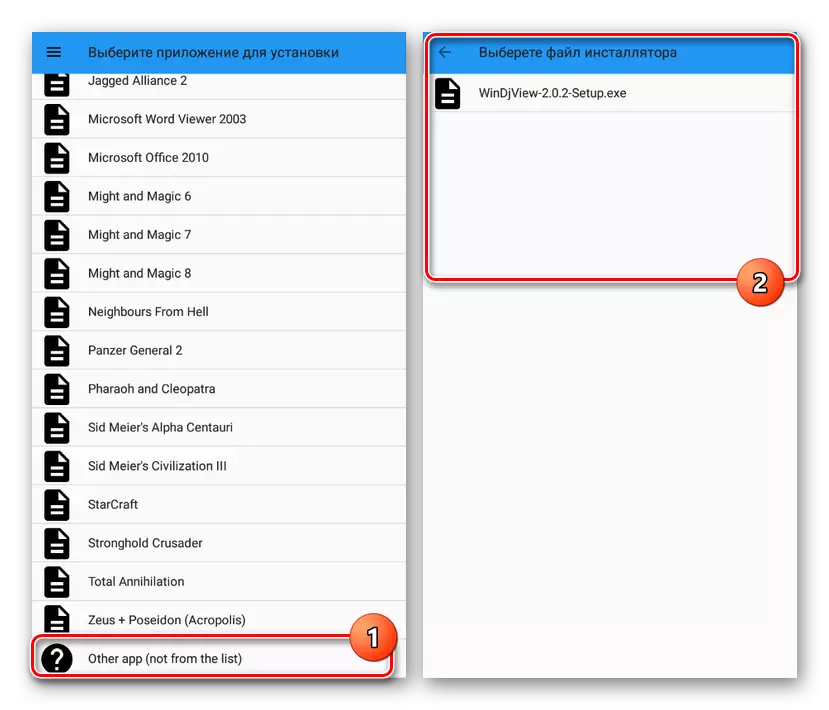
Specify the exe-file that interests to start emulation, and the task is considered solved.
The big advantage of the application is not only the possibility of opening programs using the EXE files, but also the launch of some games. However, errors may occur on more modern devices.
Method 3: DOSBOX
The latter within this article, the DosBox application is the easiest to use, but has a number of significant limitations in terms of supported programs. With it, you can run EXE files under DOS, but it is impossible to install. That is, a program or a game should be in a unpacked form.
Download Dosbox Free from Google Play Market
DOSBOX TURBO page in Google Play Market
Dosbox Turbo page on 4pda forum
- We led different sources to download the application, since there are several versions of Dosbox. During the instructions, the Turbo version from the 4PDA forum will be used.
- Download and install the application on the Android device. Upon completion of installing it is not required to open it.
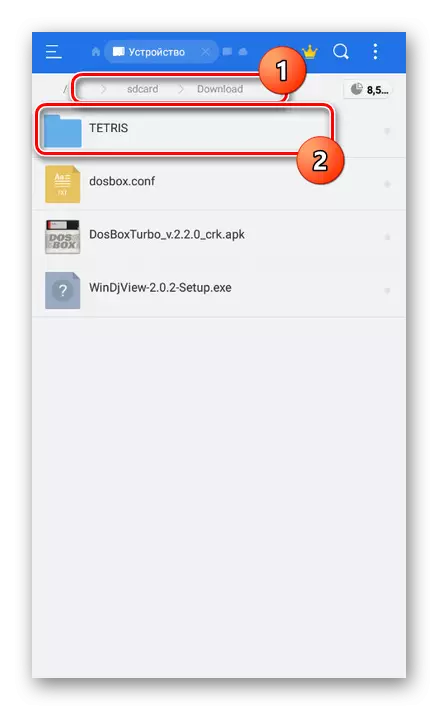
- Go to the root directory "SDCARD / DOWNLOAD", create a folder with an arbitrary name and place the EXE files opened in it.
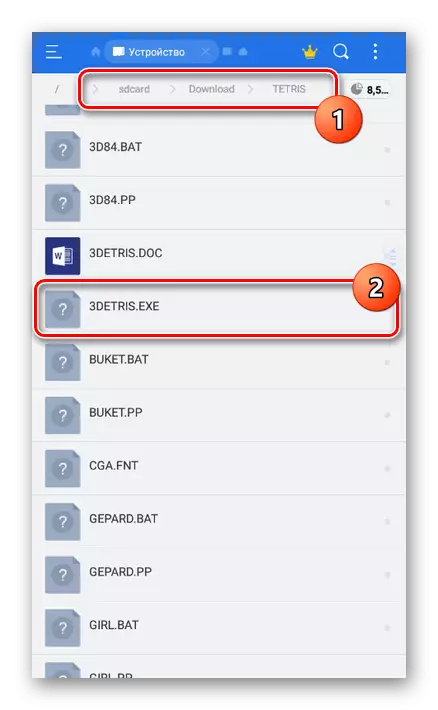
- Remember the path to the folder with executable files and open the DOSBOX application.
- After "C: \>", enter the CD command_name command, where the "Pail_name" must be replaced with a suitable value.
- Then specify the name of the opened EXE file without expansion.
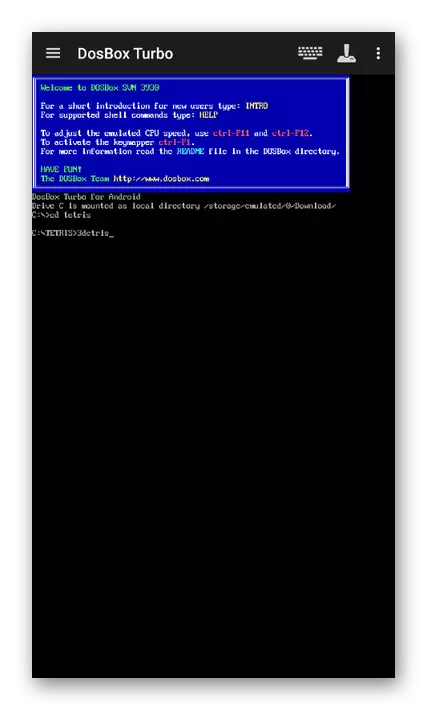
- If the program or the game is in working condition, it will start.


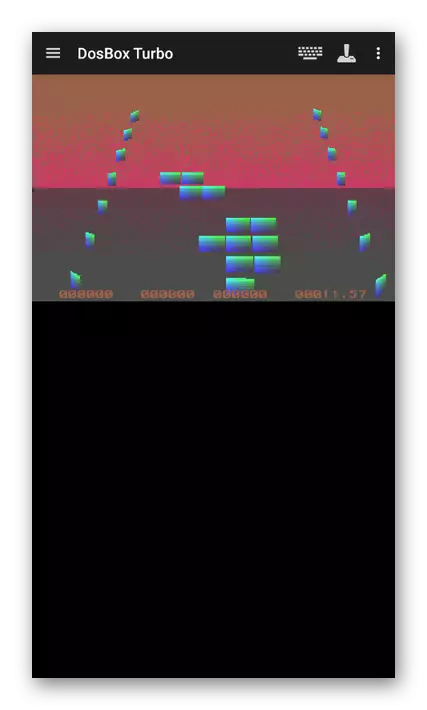
The advantage in this case is the launch of almost any application under DOS with more or less acceptable control. In addition, most games work smoothly without freezes.
We considered three different options, each of which is suitable in certain cases and will help you with the launch of the EXE files on the phone. Unlike the launch of modern Android applications, emulators are more consistently working on obsolete versions of the platform.
- Take advantage of the following link and download the LuckyPatcher application. It is also necessary to install it and run.