

Despite the widespread free messengers for communication, Android users are still actively used by standard tools for sending SMS. With their help, you can create and send not only text messages, but also multimedia (MMS). We will describe the correct settings of the device and the shipment procedure further during the article.
Working with MMS on Android
The MMS procedure can be divided into two steps in the preparation of the phone and creating a multimedia message. Please note, even with the correct settings, considering each aspect that we named, some phones simply do not support MMS.Step 1: MMS Setup
Before proceeding to sending multimedia messages, you must first check and add manually settings according to the features of the operator. We give only four basic options as an example, while unique parameters are required for any cellular supplier. Also, do not forget to connect the MMS support tariff plan.
- Each operator has when activating a SIM card, as in the case of mobile Internet, MMS settings must be added automatically. If this does not happen and multimedia messages are not sent, try to order automatic settings:
- Tele2 - Call 679;
- MegaFon - Send an SMS with a number "3" to number 5049;
- MTS - Send a message with the word "MMS" to the number 1234;
- Beeline - Call 06503 or use the USSD command "* 110 * 181 #".
- When problems with automatic MMS settings, you can be added manually in the Android device system parameters. Open the "Settings" section, in "Wireless Networks", click "More" and go to the "Mobile Networks" page.
- If required, select the SIM card used and click on the "Access Point" row. If there are MMS settings here, but when not working, delete them and tap on the "+" on the top panel.
- In the "Change Access Point" window, you must enter the data below, in accordance with the operator used. After that, press three points in the corner of the screen, select "Save" and, returning to the list of settings, install the marker next to the one created.

Tele2:
- "Name" - "Tele2 MMS";
- "APN" - "MMS.tele2.ru";
- "MMSC" - "http://mmsc.tele2.ru";
- "Proxy MMS" - "193.12.40.65";
- "MMS port" - "8080".
Megaphone:
- "Name" - "Megafon MMS" or any;
- "APN" - "MMS";
- "User Name" and "Password" - "GDATA";
- "MMSC" - "http: // MMSC: 8002";
- "Proxy MMS" - "10/10/10";
- "MMS port" - "8080";
- "MCC" - "250";
- "MNC" - "02".
MTS:
- "Name" - MTS Center MMS;
- "APN" - "MMS.mts.ru";
- "Username" and "Password" - "MTS";
- "MMSC" - "http: // MMSC";
- "Proxy MMS" - "192.168.192.192";
- "MMS port" - "8080";
- "Type APN" - "MMS".
Beeline:
- "Name" - "Beeline MMS";
- "APN" - "MMS.Beeline.Ru";
- "Username" and "Password" - "Beeline";
- "MMSC" - "http: // MMSC";
- "Proxy MMS" - "192.168.094.023";
- "MMS port" - "8080";
- "Authentication type" - "PAP";
- "Type APN" - "MMS".


Named parameters will allow you to prepare an Android device to send MMS. However, due to the inoperability of settings in some situations, an individual approach may be required. To contact us in the comments or the technical support of the operator used.
Step 2: Sending MMS
To start sending multimedia messages, in addition to the previously described settings and connecting a suitable tariff, nothing more needs. An exception is except any convenient application "Messages", which, however, must be preset on the smartphone. You can send a shipment to both the user at a time and several even in the absence of the recipient the possibility of reading MMS.
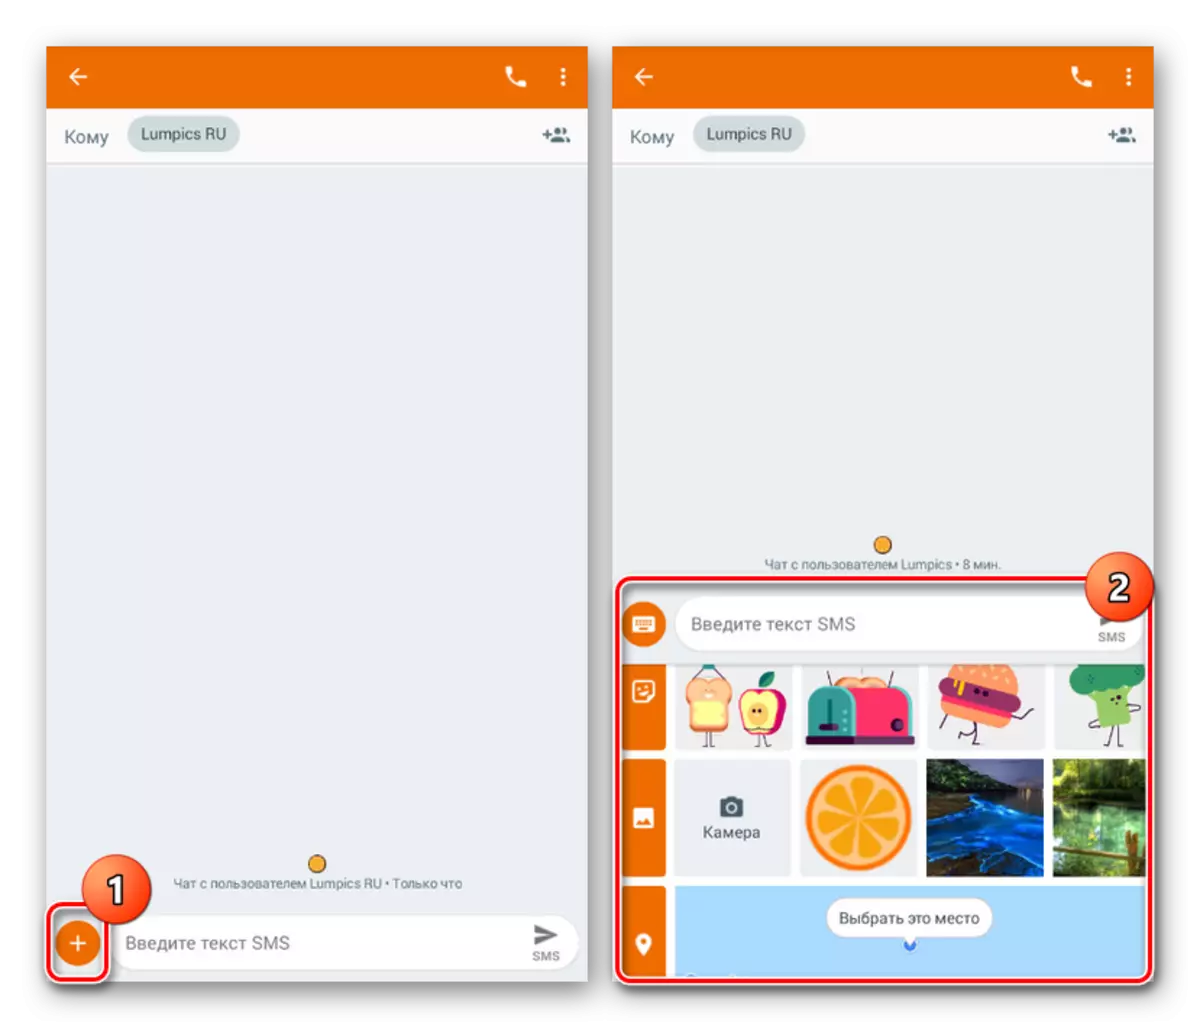
- Run the "Messages" application and tap the "New Message" icon with the image "+" in the lower right corner of the screen. Depending on the platform, the signature may vary on "Start Chat".
- In the Text field "Who" enter the name, phone or mail of the recipient. You can also choose a contact available on your smartphone from the corresponding application. At the same time, by clicking the "Start Group Chat" button, you can add several users at once.
- Pressing once the "Enter SMS text" block, you can create a regular message.
- To convert SMS in MMS, click on the "+" icon in the lower left corner of the screen next to the text field. From the presented options, select any multimedia element, be it smiley, animation, photo gallery or location on the map.
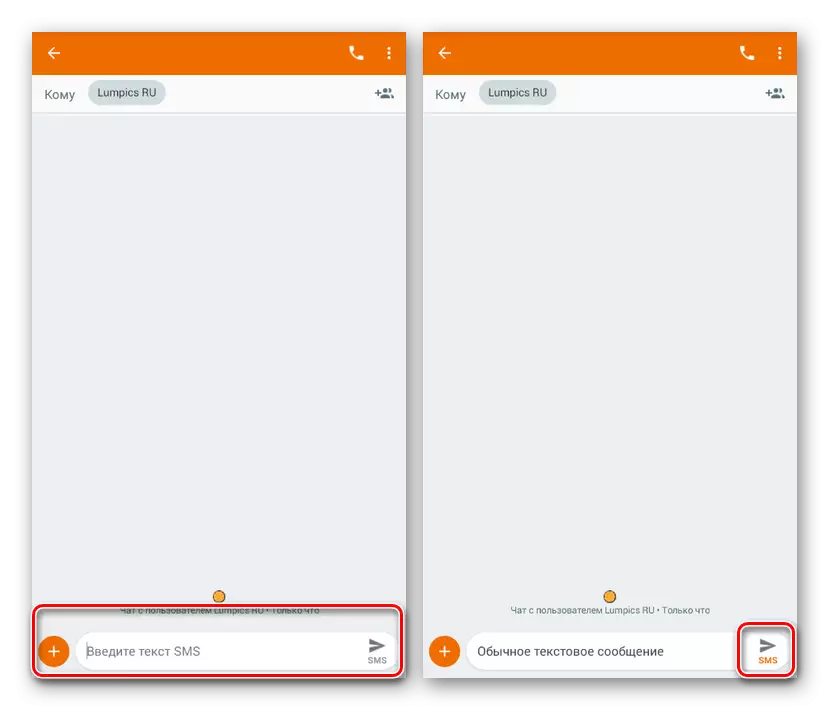
By adding one or more files, you will see them in the message creation unit over the text field and can be removed as needed. At the same time, the signature under the send button will change to MMS.
- Complete editing and tap the specified button to forward. After that, the shipment procedure will begin, the message will be delivered to the selected recipient together with all multimedia data.


We have considered the most affordable and at the same time using the standard way to use which you can on any phone if there is a SIM card. However, even given the simplicity of the described procedure, MMS is significantly inferior to most messengers, by default providing a similar, but fully free and advanced set of functions.