

Some users of the Ubuntu operating system need to install an intermediate server called Proxy. Transmission of data between chains in this case becomes more protected and anonymous. The specified OS already has a built-in tool, which allows you to establish such a connection, but sometimes the optional utility will be installed a more optimal option. Today we would like to tell immediately about two ways to set up proxy-connections on this platform.
Install Proxy Server in Ubuntu
Of course, it is primarily necessary to find outdoor servers independently or buy a special resource subscription. You will be provided with data for filling - port, network address and host. Through the indication of this information in the system and the connection is processed. If you wish to familiarize yourself with the proxy server technology, we advise you to read our separate article on this topic by clicking on the following link, and we go to the analysis of the methods.If you have any problems with connecting after changing the configuration file, carefully read its contents and make sure that the parameters input correctly. In addition, you can contact the support of the proxy used and tell about your problem so that specialists provide available options for its solutions.
Method 2: Standard Gsettings Team
Proxy settings are available in the desktop environment using the graphical interface or embedded commands. The GSETTING utility is quite suitable for the completion of today's task, and all actions, as in the previous method, will be performed through a standard "terminal".
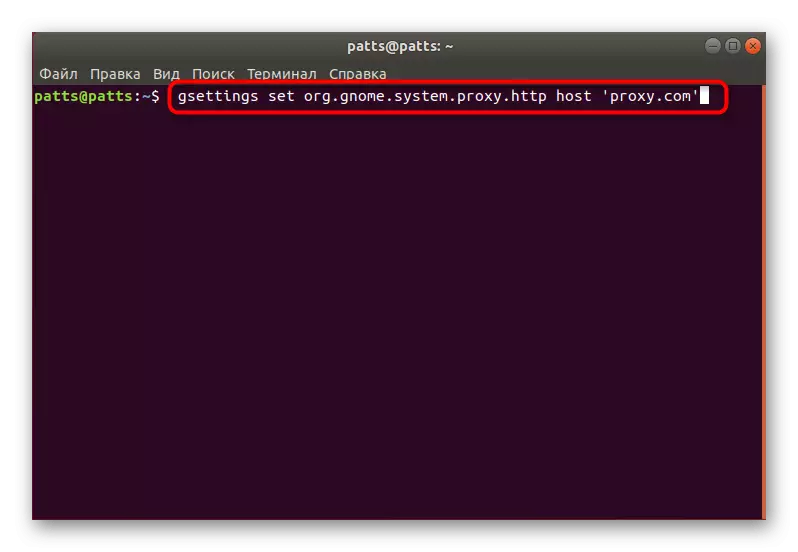
- To begin with, set the host on the example of the HTTP protocol. Insert the GSETTINGS SET ORG.GNOME.SYSTEM.PROXY.HTTP host command in the input string, where Proxy.com is the host name, and then click on ENTER.
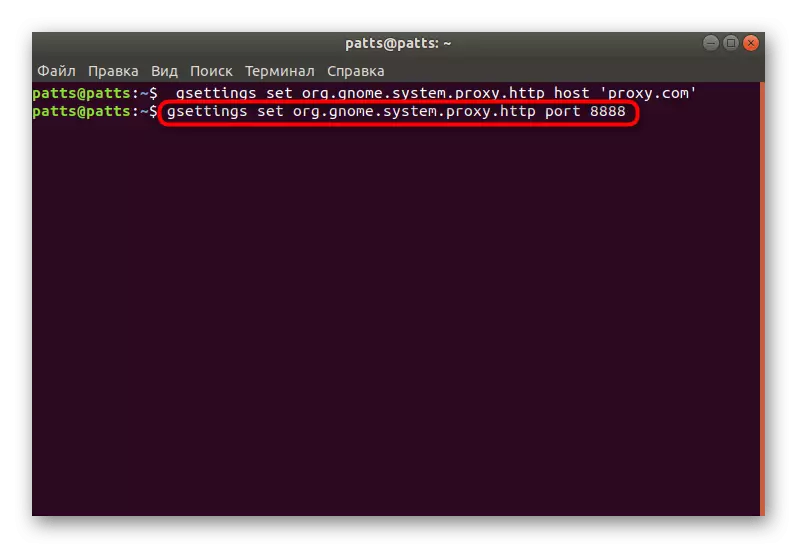
- Set the port using the Gsettings set org.gnome.system.proxy.http port 8000.
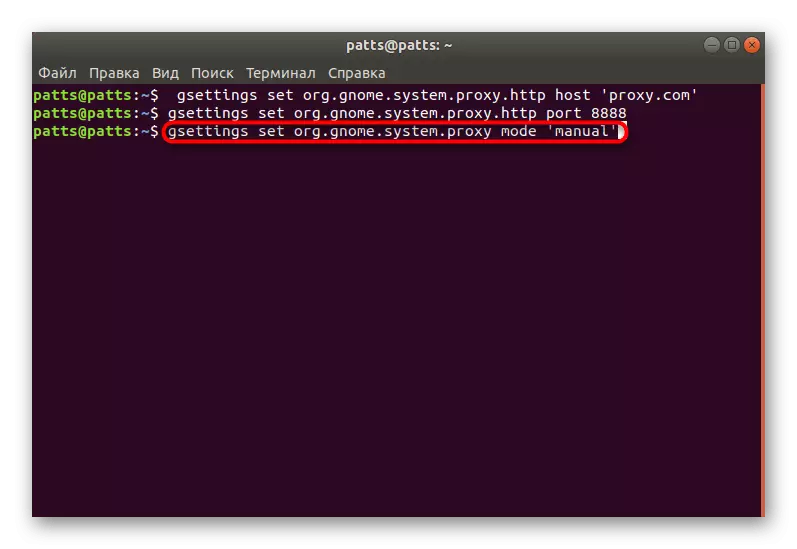
- Upon completion of the input of previous commands, run the connection using Gsettings Set org.gnome.System.Proxy Mode 'Manual'.
If you use HTTPS or FTP protocols to configure the connection, the command type will change slightly and will be as follows:
Gsettings Set Org.gnome.System.Proxy.https Host 'proxy.com'
Gsettings Set Org.gnome.System.Proxy.https port 8000
Gsettings Set Org.gnome.System.Proxy.ftp Host 'proxy.com'
Gsettings Set Org.gnome.System.Proxy.ftp port 8000
In the case of the SOCKS protocol, use:
GSETTINGS SET ORG.GNOME.SYSTEM.PROXY.SOCKS HOST 'PROXY.COM'
Gsettings Set Org.gnome.System.Proxy.Socks Port 8000
The settings entered in this way will be applied only for the current user. If there is no need to apply them for all users, before the start of each team, you will need to add sudo.
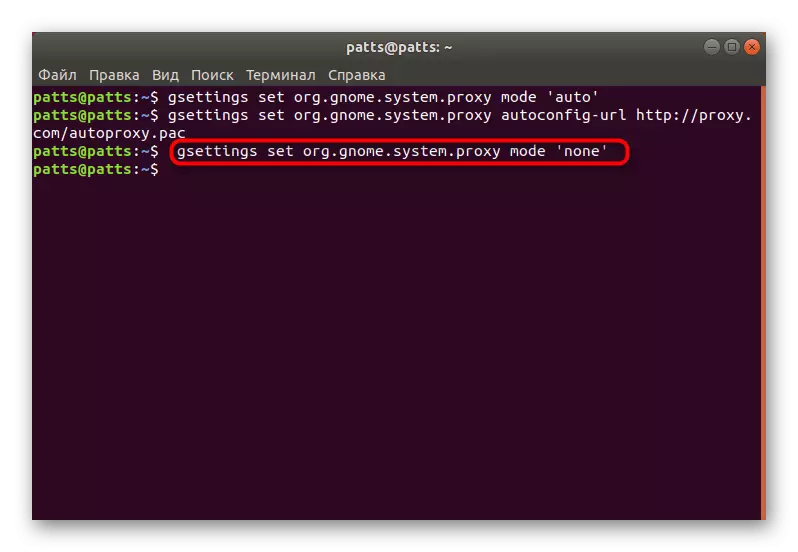
Some sites provide a file to automatically set up a proxy server, which greatly simplifies the compound procedure. Then you need to enter only two teams alternately:
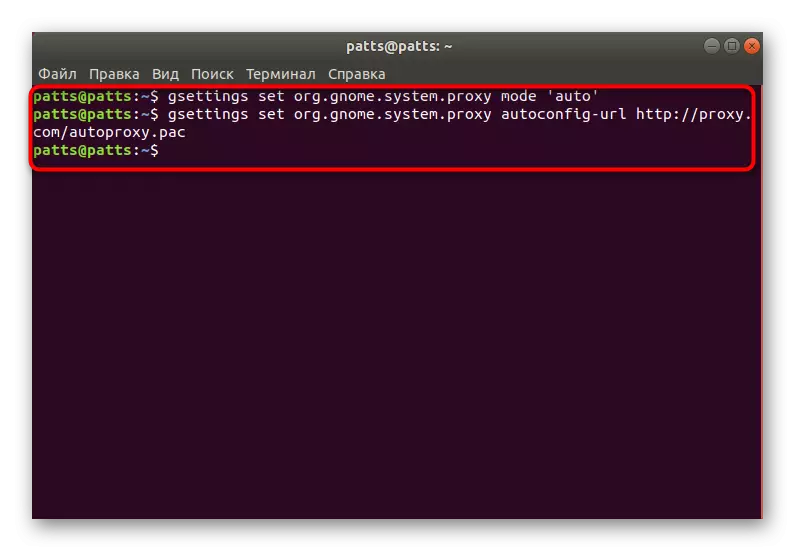
Gsettings Set Org.gnome.System.Proxy Mode 'Auto'
Gsettings Set Org.gnome.System.Proxy Autoconfig URL http://proxy.com/autoproxy.pac
With the urgency of the use of previously installed settings, they are cleaned using one GSETTINGS SET ORG.GNOME.System.Proxy Mode 'None command, after activating which the connection will be broken.
Thanks to the above instructions, you can easily organize a secure proxy control on a computer running Ubuntu. However, it should be understood that it does not always guarantee complete safety and anonymity, as well as in some aspects is inferior to the private server. If you are interested in the topic of VPN, instructions for setting up this technology in Ubuntu you will find at the following link.
See also: Installing VPN in Ubuntu