

Wireless technologies, such as Wi-Fi, are a very convenient means of communication. At the same time, in some situations it is required to limit the PC access or laptop to the network for one reason or another. In this article, we give several ways to disable Wi-Fi.
Disable Wi-Fi
There are several ways to disable the device from a wireless network. The means that are used are quite varied - from special switches and keys to the software tools built into the operating system.Method 1: "Taskbar"
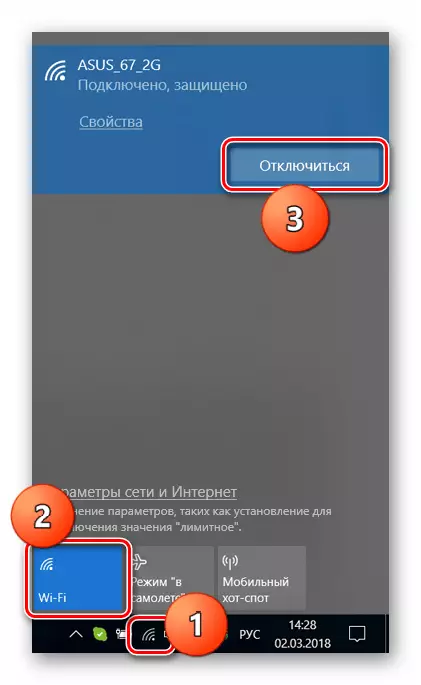
This is the easiest way to break the connection. In the area of the "Taskbar" notification, we find the network icon and click on it. In the pop-up window, select the Wi-Fi network, click on the active connection and click the "Disconnect" button.
Method 2: Buttons and Function Keys
On the enclosures of some laptops there is a separate button or switch to control the Wi-Fi adapter. Find them is easy: it is enough to carefully inspect the device. Most often, the switch is located on the keyboard panel.
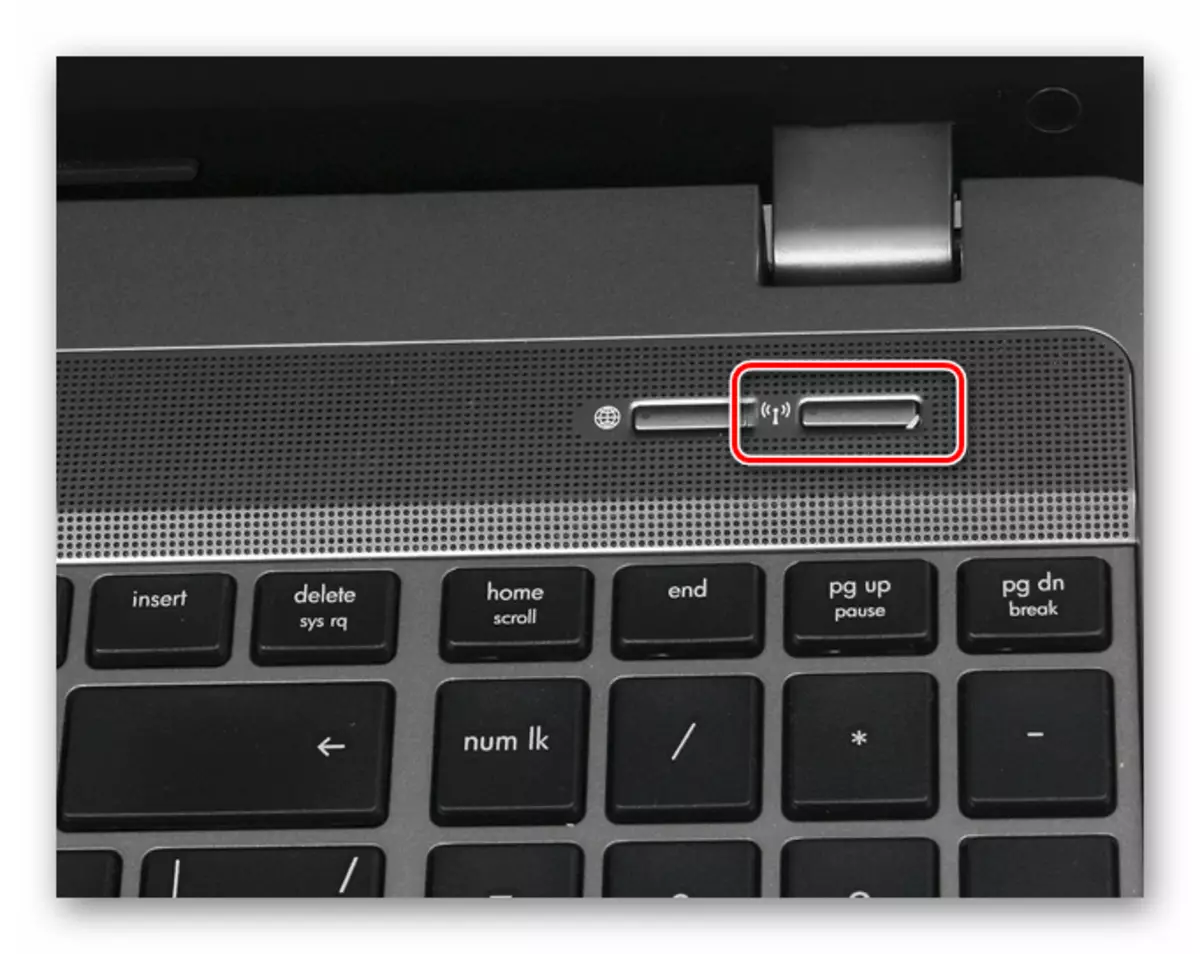
Another location is on one of the ends. In this case, we will see a small lever with a network icon near it.

On the keyboard itself there are also special keys to turn off the wireless connection. Usually they are located in the F1-F12 row and wear the corresponding icon. To use the function, you must additionally clamp Fn.

Method 3: Turn off the adapter in network parameters
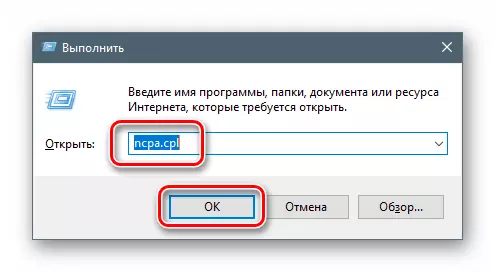
This operation implies work with the "Network and Common Access Center". A universal way to access the necessary partition for all versions of Windows is the "Runt" string.
- Click the Windows + R keys combination and enter the command.
NCPA.cpl
Click OK.
- The system window opens with a list of all network connections. Among them, we find that through which access to the wireless network is carried out, click on it right-click and select the "Disable" item.

Method 4: Disable the adapter in "Device Manager"
The lack of the previous method is that after rebooting it is possible to re-activate the adapter. If a more stable result is required, you must use the devices manager tools.
- Access to the desired snap is also carried out from the "Run" string.
Devmgmt.msc.

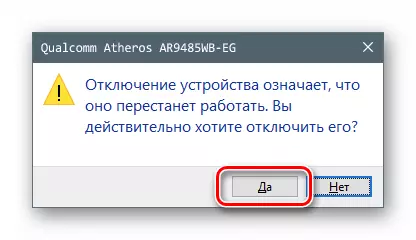
- Open a branch with network devices and find the appropriate adapter. Usually in his name is the word "Wireless" or "Wi-Fi". Click on it by PCM and in the context menu, click on the "Disable" item.

"Dispatcher" will warn us that the device will stop working. We agree by clicking the "Yes" button.
Conclusion
Limiting the laptop access to the wireless network increases the safety of the device when using it in public places, and also allows you to reduce electricity consumption. In general, all the methods discussed above allow you to achieve the desired result, but have some differences. In the first case, it is not necessary to make complex actions, just press the button on the housing. True, turn on Wi-Fi again, and do it quickly, you can not only you, but also a stranger. For greater reliability, it is better to use the system software, including the Device Manager, if you need to exclude accidental activation of the adapter when rebooting.