

Sometimes the owners of the ipads face the problem when the device does not turn on or the apple icon is simply lit on the screen. The reasons for the possible breakage can be immediately somewhat, some of which can be solved at home without referring to the service center.
What to do if the iPad does not turn on
The problem with turning on the tablet can be caused by several reasons: breakdown of any internal component or a failure in the system. In the latter case, simple actions that do not require the autopsy of the device can help.Option 1: Charging
The first and most common reason why iPad is not turned on - low battery charge. The tablet is just included for a split second, the Apple logo appears on the screen, then everything goes out. In this case, the low charging icon may not appear, the user will only see the black screen.
The solution is very simple - plug the ipad to the network using the charger and wait 10-20 minutes. During this time, the battery will be able to consume enough energy for further inclusion. After run iPad again.

It is important to connect the ipad to the power source only through the "native" charger. If possible, do not use charging from iPhones and other iPad models, as well as any analogues. Often they overheat the tablet, and it can cause the breakdown of the tablet itself. In the screenshot below, you can compare what the iPad and iPhone adapters look like.

If after a 20-minute charging of the ipad does not all turn on, check the performance of the usb cable itself and / or outlet. Connect with your help another phone or tablet and see if it is charging. If so, go to other solutions to the problem.
Option 2: Reboot
The restart of the tablet helps many users with software failures, since in the process the system is cleared of unnecessary data, thereby preventing further failures and eliminating the previous ones. It can be performed in different ways, but in our case you will have to use the so-called "hard" reboot. About how to do it, we told in the following two article.Read more: Restart iPad when hanging
Option 3: Ipad recovery
The most radical solution to the problem with the non-inclusive of the ipad is its flashing and recovery. In addition, this option is the latter that the user can apply at home.
Please note that it is impossible to create a backup at this stage, so if shortly before the breakdown, it has not been created automatically or manually, the user risks losing all files without the possibility of recovery.
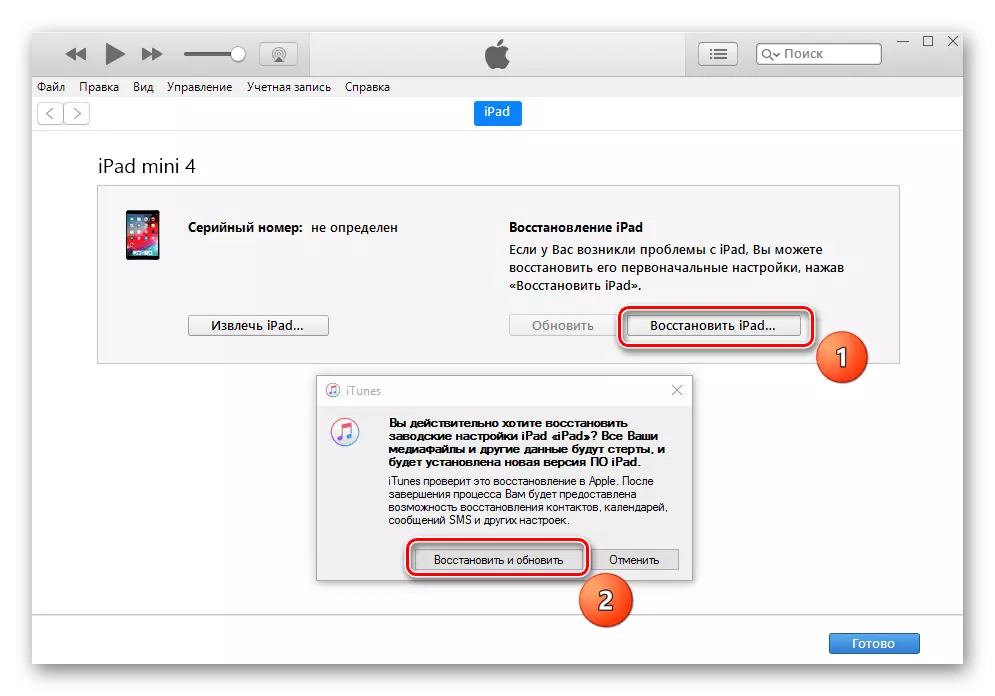
In a situation with a non-working tablet, only iTunes will help reset the iPad and set it up as a new one.
- Using the USB cable, connect the iPad to the computer and open the iTunes program.
- Click on the device icon on the top panel.
- Press and hold the Power and Home buttons. An apple icon will appear on the screen, which will almost immediately go out.
- In the iTunes program dialog box that opens, click "Restore iPad" - "Restore and update". Please note that after flashing to the device, the latest version of iOS will be installed.
- After rebooting the device, the system will offer the user to configure it as a new one or restore data from the backup.

Option 4: IOS Error Correction
Another way to restore Apad is to use a third-party program that allows you to correct IOS devices errors, and DFU mode. Using this option, the user will not lose important data. In this article we will look at work with Dr.Fone.
Download Dr.Fone from the official site
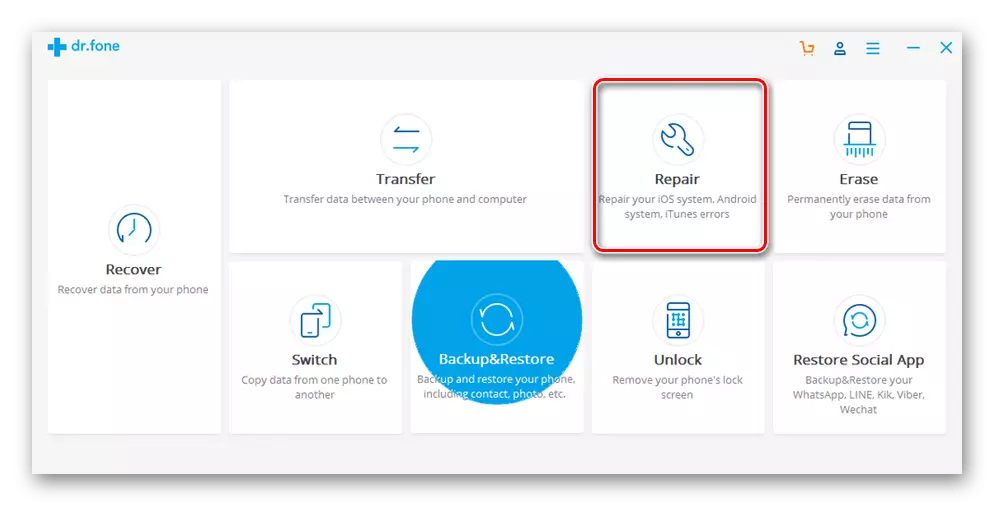
- Connect the iPad to the computer and open Dr.Fone. Close the iTunes program, as it will interfere with recovery.
- Press "REPAIR".
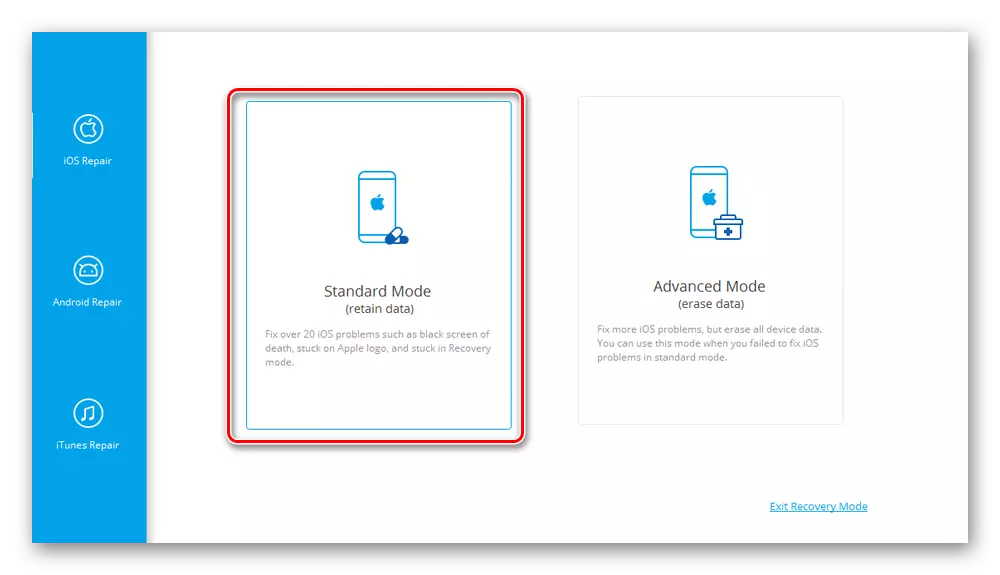
- Click on Standard Mode. This feature allows you to fix some system errors and cannot delete data from the device. However, the user can use the Advanced Mode advanced mode, where the larger list of problems is eliminated, but all the data from the iPad is deleted.
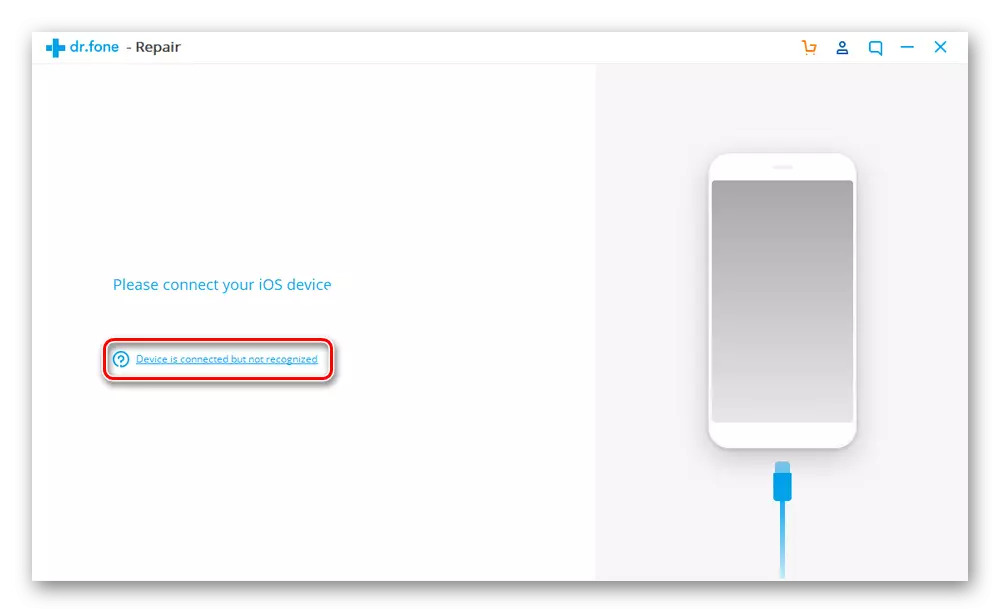
- In the next window, the user will see the inscription that the device is not connected. First, we must enter it into the DFU mode. Click "Device IS Connected But Not Recognized".
- Hold and hold the "Food" and "Home" buttons for 10 seconds. Then release the "Power" button, but continue to keep the "home" for another 10 seconds. Wait for Apad Program.
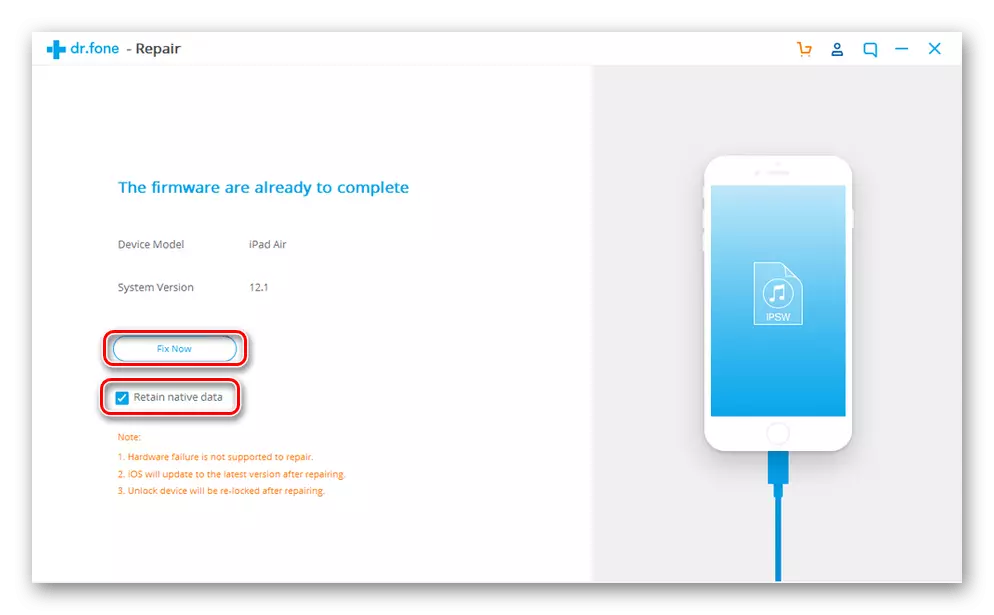
- In the window that opens, click "Next" - "Download" - "Fix Now". Make sure the check mark next to the "Retain Native Data" is installed, which ensures the safety of data on the tablet.
Option 5: Repair
The options to solve the problem described above with the inability to enable ipad are suitable only if the tablet has not been subjected to mechanical damage. When, for example, the drop in moisture may be damaged by components, which led to failures.

We list the main features by which the user can understand that the problem is the fault of the "indoors" iPad:
- Flashing screen when turned on;
- Before the image goes down, interference, stripes, etc. are observed;
- The appearing apple icon has a fuzzy white color.
When coincided by any sign, it is not recommended to engage in independent repair and disassembling tablet. Contact the service center for qualified help.
Today we disassembled why the iPad may not be included and how to solve this problem with your own. However, in the situation of mechanical damage it is worth contacting a specialist.