
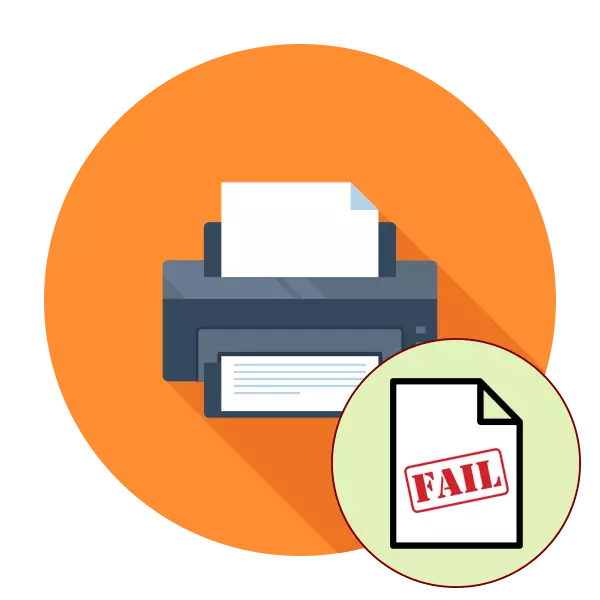
Some users periodically encounter various problems when trying to send any file to print. One of the common errors is the appearance of notification "Could not print this document." In most cases, such difficulty is solved by software methods, but should not be excluded and hardware breakdowns. Next, we want to talk about the well-known reasons for the emergence of this problem and the variants of their corrections, starting with the most banal and common.
Correct the error "Could not print this document"
First you need to check the cable connected to the computer from the printer. It should sit tightly in both connectors and not have external damage. If there is such an opportunity, try connecting it to another computer and make sure the device is detected. In case of malfunction, replace the wire. Before performing all subsequent instructions, we recommend cleaning the print queue immediately. A detailed guide to implement this task you will find in another article on the following link.Read more: Cleaning the print queue in Windows
Method 1: Purpose of the default printer
In most cases, users do not look at the selected printer in the program, through which printing starts, and immediately send a document into processing. Sometimes this leads to the fact that the default equipment is the disabled equipment, therefore the problem under consideration appears. To avoid such errors, it is recommended to manually specify the desired machine or assign it the main ones.
Read more: Purpose of the default printer in Windows
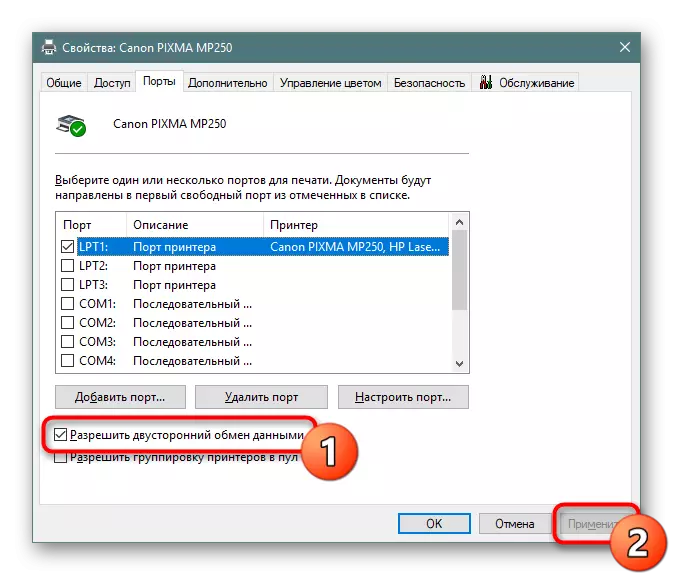
Method 2: Disable two-sided data exchange functions
The standard configuration of the printer includes the active parameter of the automatic transmission of settings from the system to the printer, and is called this item "Bilateral Data Exchange". Even the device developers themselves indicate that the active mode of operation of this tool often leads to a seal malfunction. Therefore, we propose to turn it off.
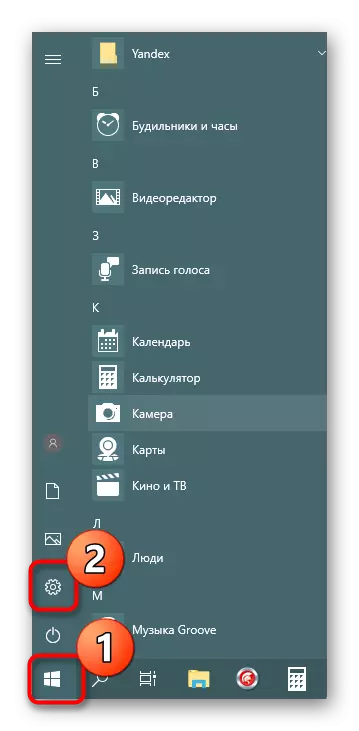
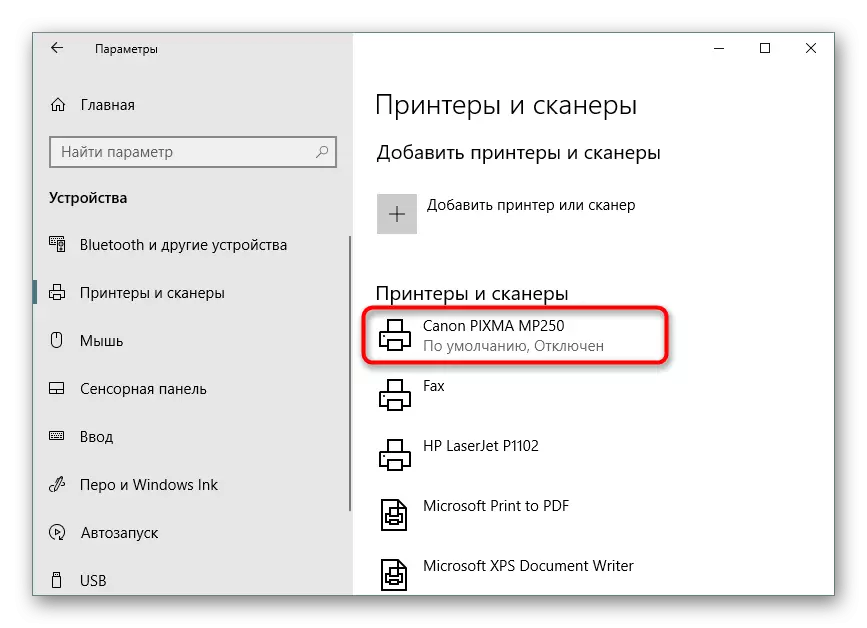
- Open "Start" and go to "Parameters". In the case of old versions of Windows, you will need to select "Devices and Printers".
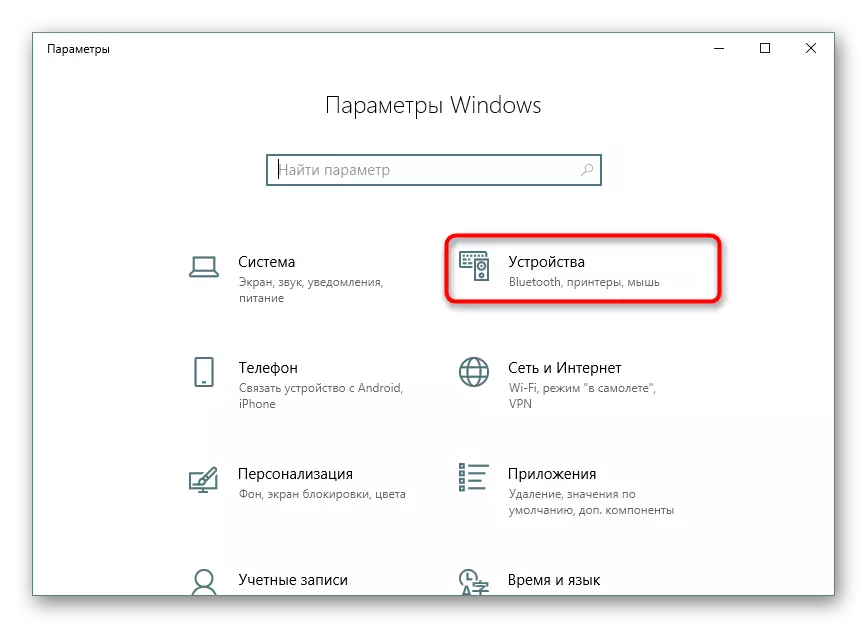
- Move to the "Devices" section.
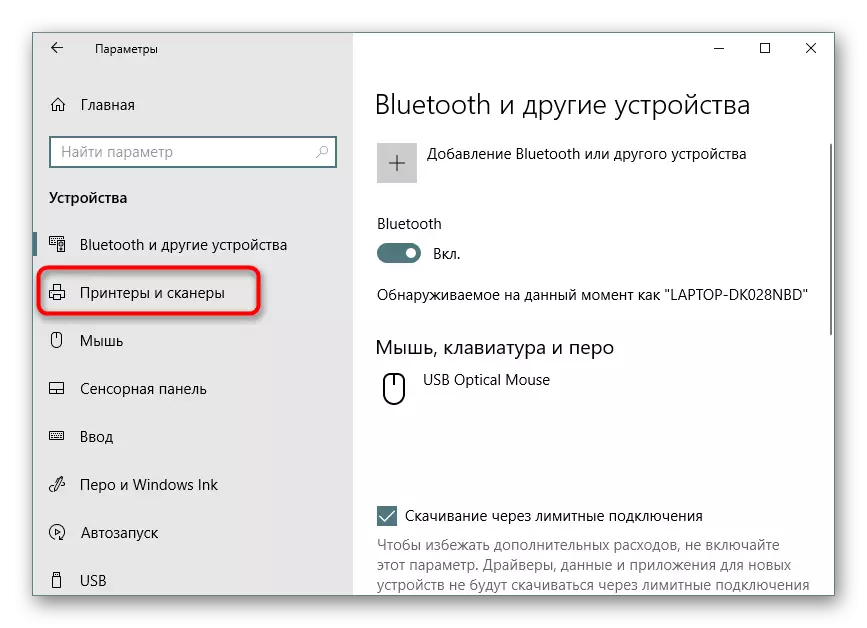
- On the left panel, select a category with Printing Equipment.
- In the List, find the desired printer and click on it with LKM.
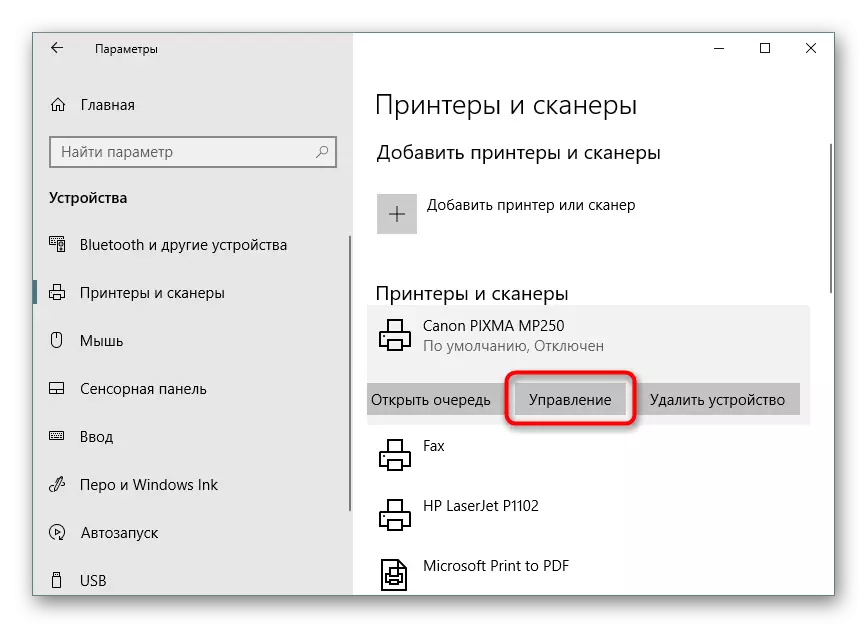
- Click on the "Management" button.
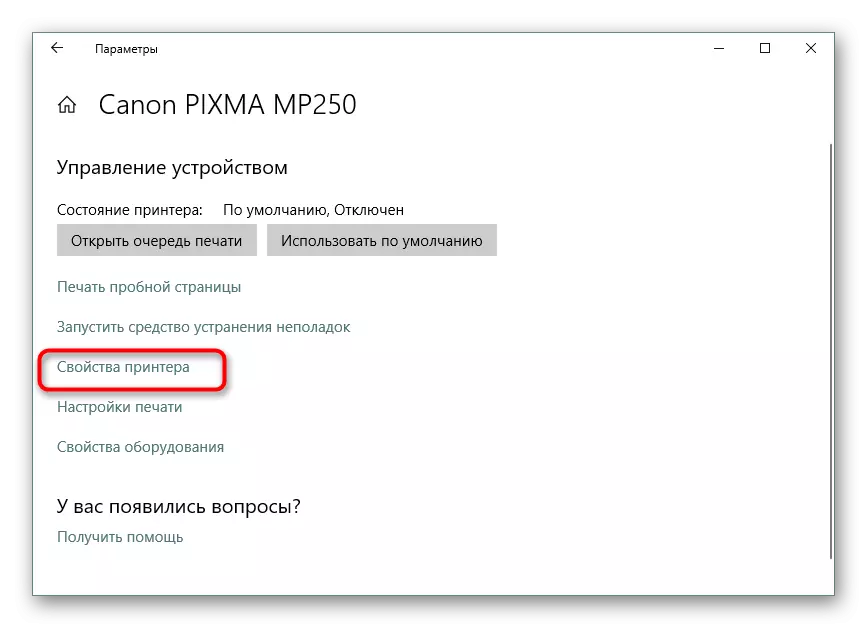
- The inscription "Printer Properties" will be highlighted in blue, click on it with LKM.
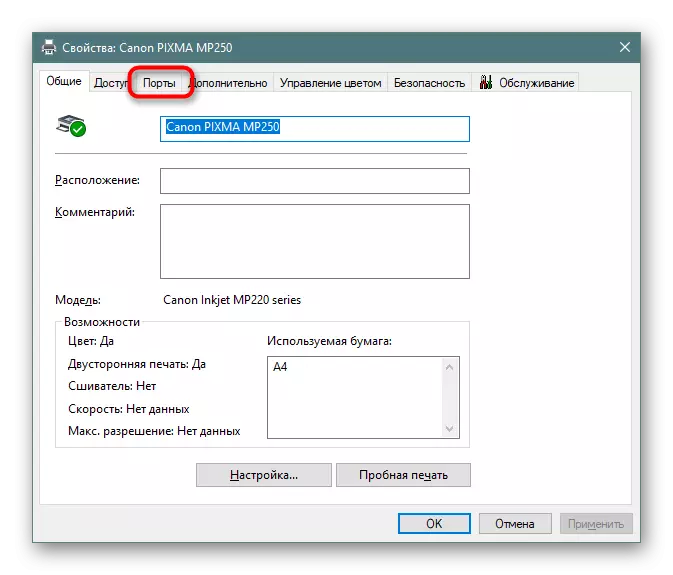
- Go to the "Ports" tab.
- Remove the checkbox from the "Allow two-way data sharing" item and apply changes.
After executing the above instructions, it will only be restarted to restart the device so that new settings have entered into force, and try sending a document to re-seal.
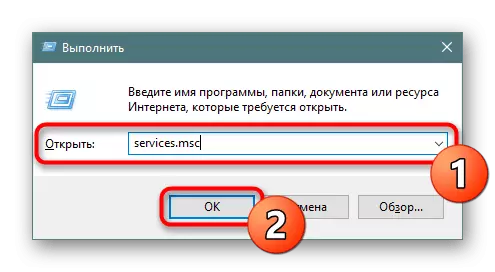
Method 3: Restarting the Print Manager service
For the correct implementation of all actions with the printer, one system service manager "Print Manager" is responsible. Because of various errors or failures in the OS, it could be disconnected or stopped functioning normally. Therefore, we advise manually to restart it, which is done like this:
- Open the "Run" utility by holding the Win + R keys combination. In the Enter Services.msc field and click on OK.
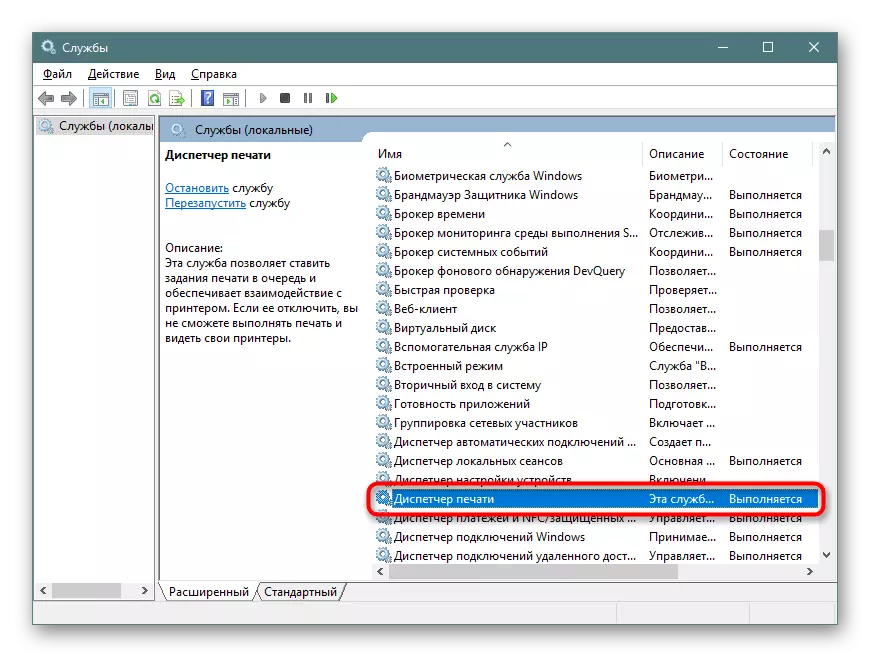
- In the list, find the "Print Manager" string and double-click on it with the left mouse button.
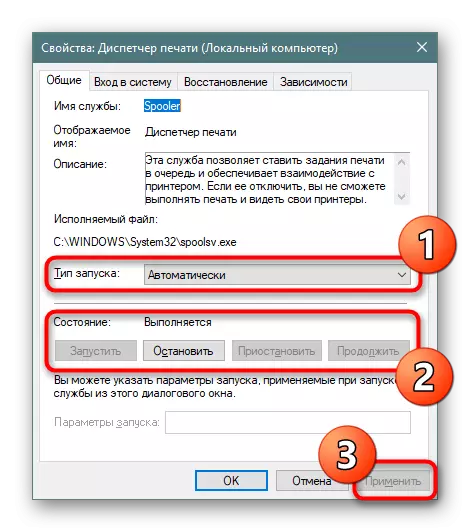
- Make sure that the startup type is set to the "Automatically" state, then stop the service and re-run it.
Sometimes there is a situation that the "Print Manager" turns off by itself after some time of work. This may be with different problems, each of which has a separate solution. Deployed guides to correct this difficulty you will find in the article Next.
After these actions, be sure to restart the printer, and also do not forget to clear the queue. If there is no
The parameters delaying printing, the problem must immediately disappear.
Method 5: Disable autonomous mode
Sometimes the printer enters offline mode, which is associated with system errors or cable shutdown. It almost always comes out of it automatically, but there are exceptions, then when you try to print on the screen, the "Printer's work is suspended" appears on the screen, but on some models another code is triggered and the inscription changes to "this document cannot be printed." We advise you to get acquainted with the material below to understand how to independently translate the printer into the active mode and correct the difficulty arise.Read more: Solving the problem "Printer's work is suspended"
Method 6: Reinstall driver
The printer driver is responsible for the normal functioning of its program part. Problems with the work of this component or incorrect installation leads to discontinuation of performance. Therefore, we recommend completely removing the old driver as shown in the article on the following link.
Read more: Deleting the old printer driver
After that, it will only be left to find the driver of the latest version by any convenient method, download it and install it. The priority search place is the official website that comes with a license disk or utility from the developer.
Read more: Installing drivers for printer
Method 7: Using troubleshooting
Above, we reviewed all programming methods to solve the problem that does not hide the standard system troubleshooting tool. If nothing of the previously listed earlier brought the result, run this tool so that it controls the automatic diagnostics.
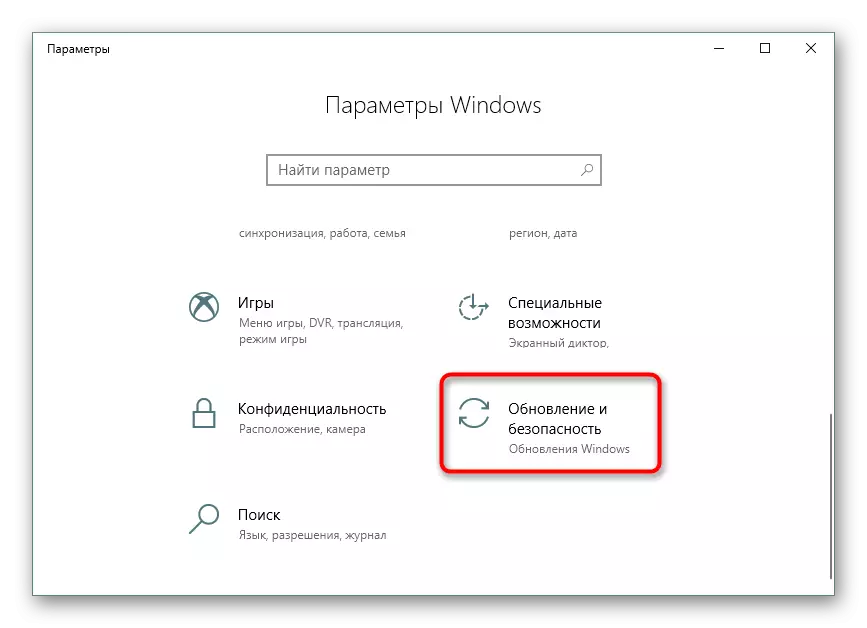
- Open the "Parameters" menu through the "Start" and go to the "Update and Security" section.
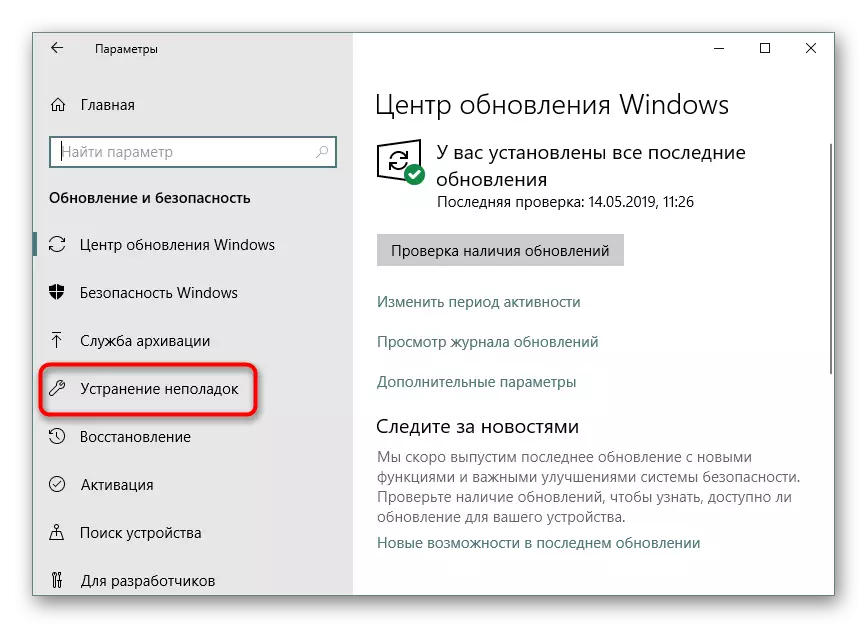
- Through the left panel, go down to the "Troubleshooting" category.
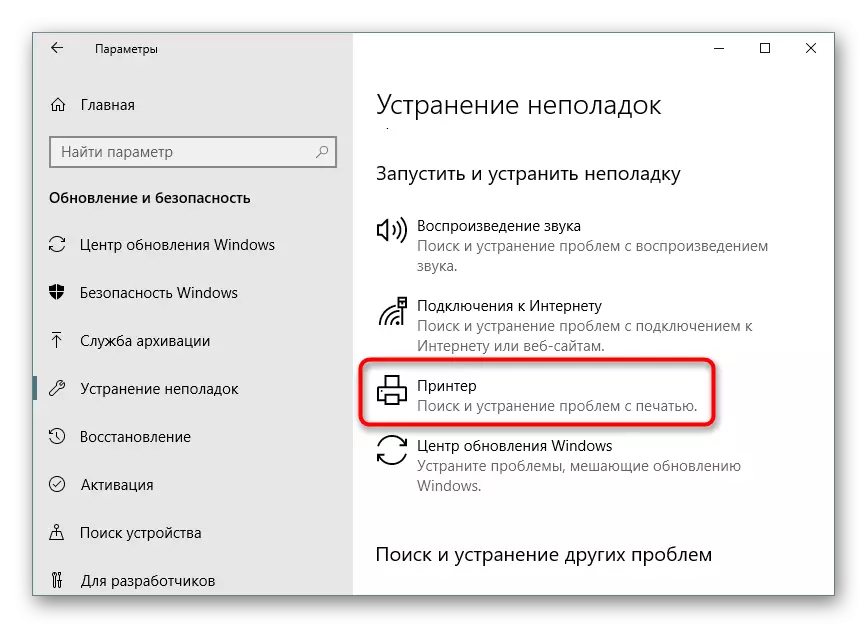
- Select "Printer".
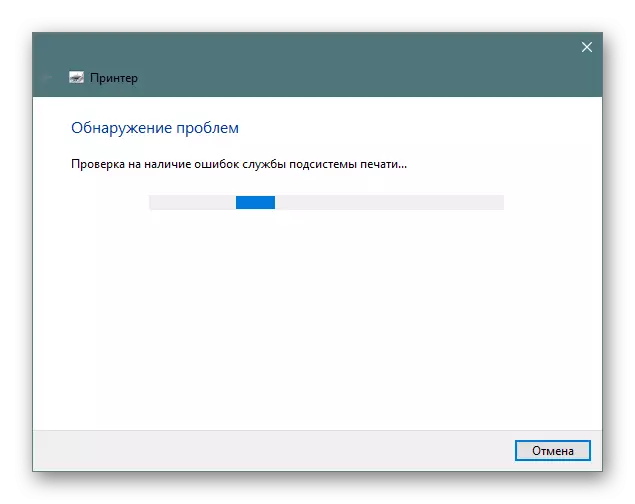
- Wait until the problem detection wizard completes scanning. When displaying the list with printers, select non-working and follow the displayed recommendations.
Method 8: extraction of stuck paper
As it has already been said earlier, not all models of printing equipment display errors correctly, which happens and when the situation has occurred from the paper stuck. Her bugs do not allow the capture roller to take a new sheet or notify whether inside the extraneous objects. In this case, you need to independently disassemble the printer and check its insides for the presence of pieces of paper or, for example, clips. If foreign items are found, they need to be carefully removed.Read more:
Full disassembly of printers
Solving a problem with paper stuck in the printer
Solving paper capture problems on the printer
Method 9: Check cartridges
If none of the above methods brought no one result, the cartridges are required to check. Not always the software shows the notification that the paint ends. You must manually reach the inkwell and check their contents. In addition, sometimes the printer does not see the cartridge at all, so other measures need to be taken. All the necessary information on working with cartridges can be found in our other articles.
See also:
Replacing cartridges in printers
Correction of the error with the detection of the printer cartridge
Printer Cleaning Printer Cartridge
How to fix the printer cartridge
Above, we demonstrated all the well-known methods for solving the problem "Could not print this document." You should necessarily take turns to check each of them to identify the problem. Additionally, try using another print application or check other files, perhaps the problem is precisely in this, and not in the printer.
See also:
Check printer for print quality
Solving problems with printing PDF files