
Often in your life we faced with the need to reduce the drawing or photo. For example, if you need to put a photograph for a screensaver on a social network or the picture is planned to be used instead of a screensaver in the blog.
Reducing pictures in photoshop
If the photograph is made by a professional, its weight can reach several hundred megabytes. Such large images are extremely uncomfortable in a computer or use them to publish on social networks. That is why before publishing an image or save it on the computer, it takes a little to reduce it. The most "advanced" program to solve our today's task is Adobe Photoshop. Its main plus is that it has not only tools to reduce, but it is possible to optimize the picture quality.Before reducing the picture in Photoshop, you need to understand what it is - a decrease. If you want to use photos as an avatar, it is important to comply with certain proportions and maintain the desired permission. Also, the image must have a small weight (about a few kilobytes). You can find all the required proportions on the site where you plan to place your "avu". If in your plans to place pictures on the Internet, size and volume required to reduce to acceptable sizes, that is, when your snapshot will open, it should not "fall out" beyond the browser window. The permissible volume of such images is approximately a few hundred kilobytes.
In order to reduce the snapshot for the avatar and to display in the album, you will need to make absolutely different procedures. If you reduce the photo for the profile image, you will need to cut only a small fragment. A photograph, as a rule, is not cut, it is completely preserved. If the image required you need size, but with much weighs, you can worsen its quality. Accordingly, there will be less memory to save each of the pixels. If you used the correct compression algorithm, the original image and processed almost will not differ.
Method 1: Crop
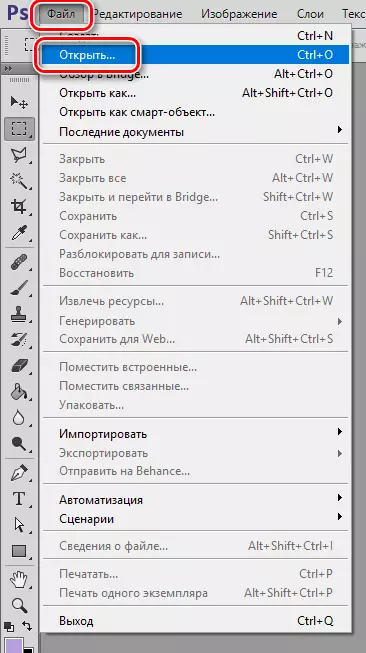
Before reducing the size of the photo in Photoshop, you need to open it. To do this, use the program menu: "File - Open" . Next, specify the location of the snapshot on your computer.
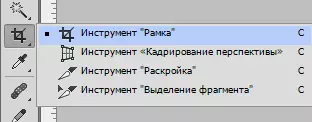
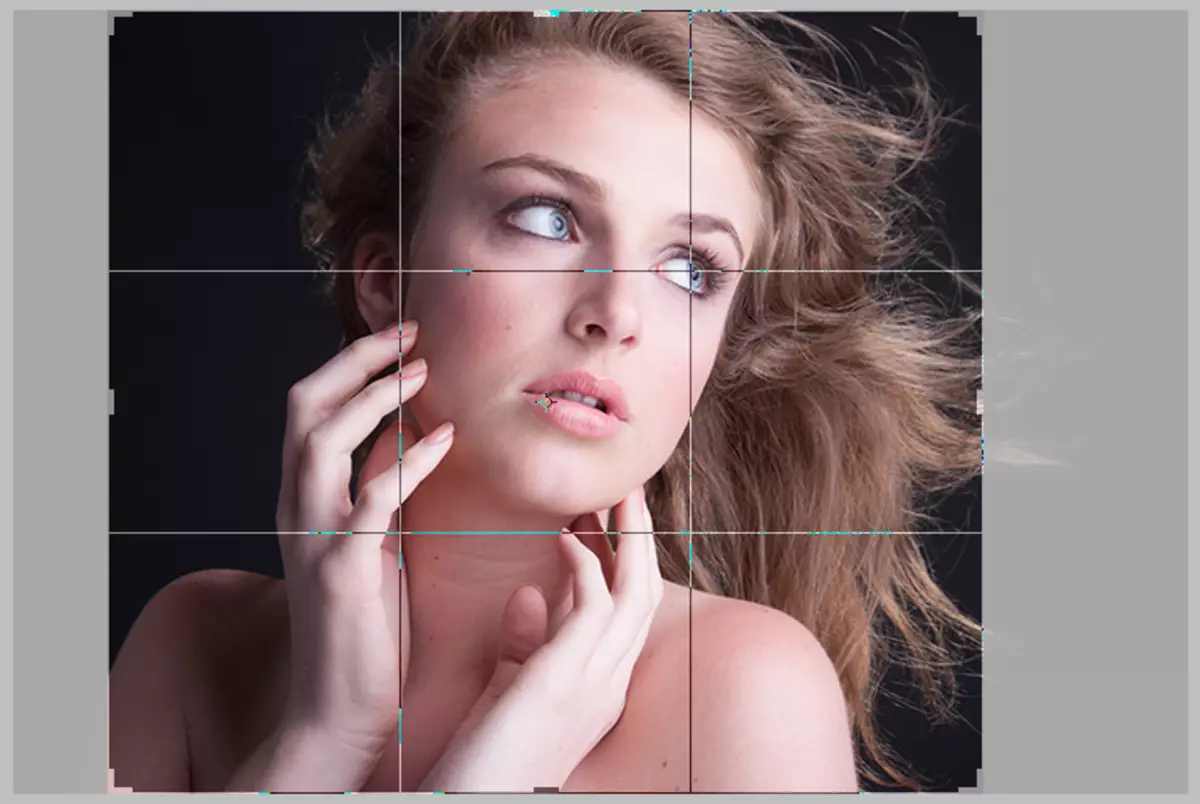
- After the photo is displayed in the program, you need to carefully consider it. Think whether all objects that are in the picture are needed. Cut object in two ways. The first option is the "Frame" tool.
- After selecting the tool on the canvas, a grid will appear, with which you can limit the area within which the desired content will be located. Apply the changes with the Enter key.
Second option - application tool "Rectangular region".
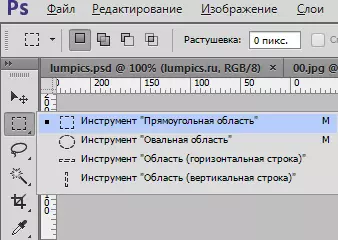
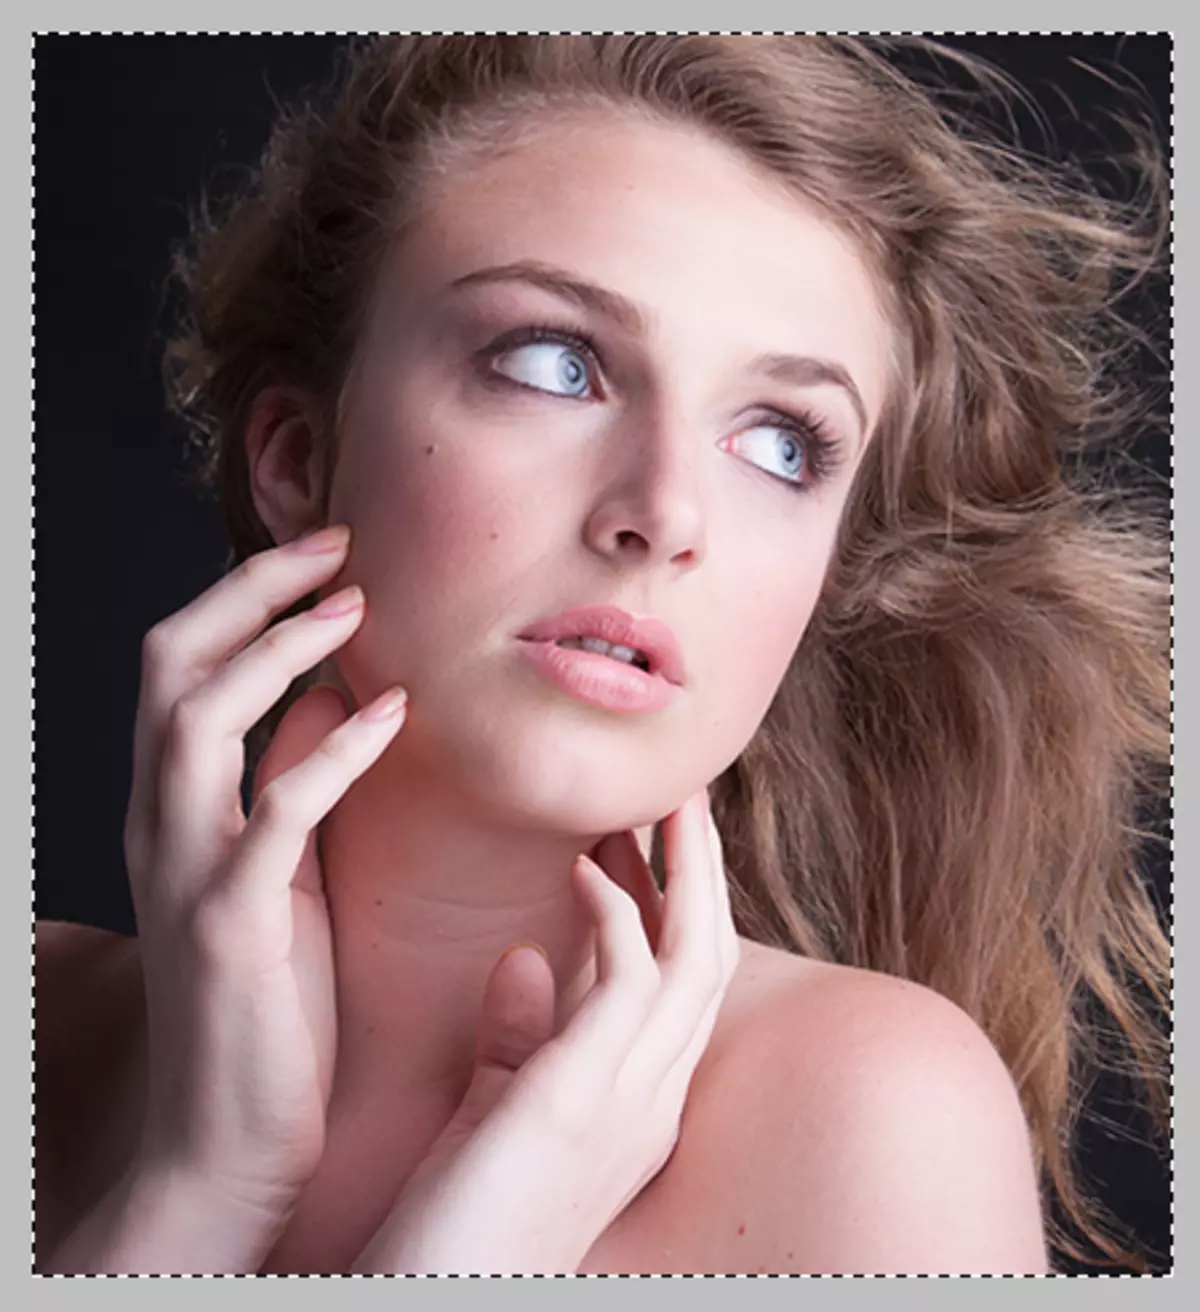
- We highlight the desired photo.

- Go to the menu "Image - Cry".
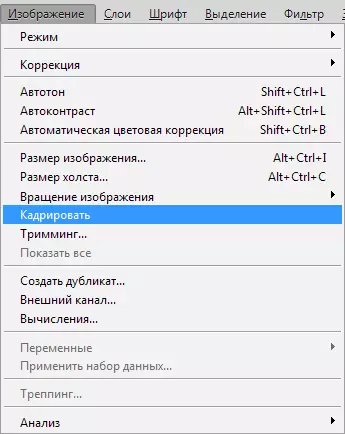
All canvas will be cut on the selection.
Method 2: Function "Canvas Size"
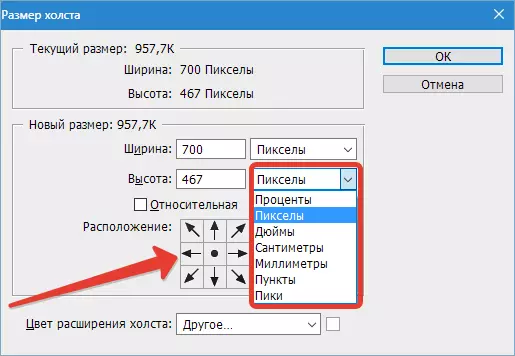
If you need a cropping image to specific sizes, with the removal of the extreme parts, the menu item will help: "Canvas size" . This tool is indispensable if you need to remove something superfluous from the edges of the picture. This tool is located in the menu: "Image - canvas size".
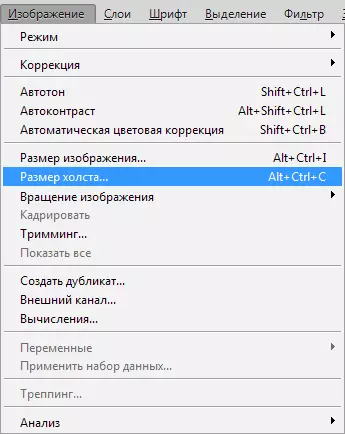
"Canvas size" It is a window in which the existing parameters of the photograph and those that will be after editing are indicated. It will only be necessary to specify which dimensions you need, and clarify, which side need to be cropping the picture. Size You can set in any convenient unit of measurement (centimeters, millimeters, pixels, etc.). The side with which you want to start trimming can be specified using the field on which the arrows are located. After all the necessary parameters are set, click "OK" - Crop your picture will occur.
Method 3: Function "Image Size"
After the picture will take the species you need, you can safely start changing its size. To do this, use the menu item: "Image - image size".

In this menu, you can adjust the sizes of the picture, change their value in the desired unit of measurement. If you change one value, you will automatically change and all others. Thus, the proportions of your image are saved. If you need a snapshot distortion, use the icon between the width and height indicators.
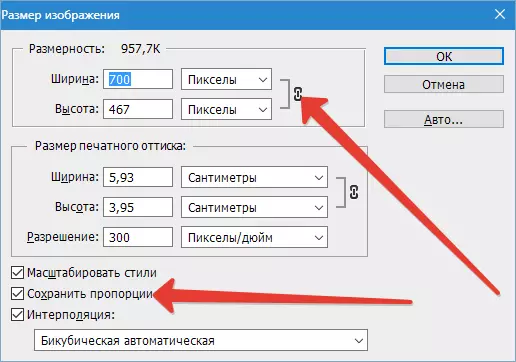
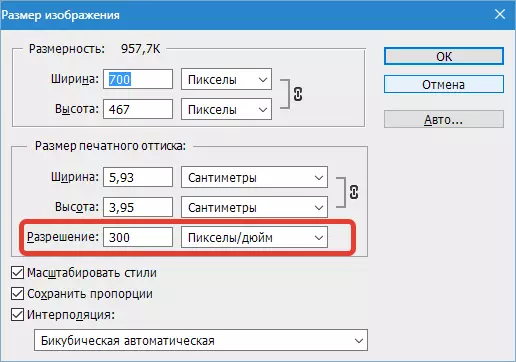
Amend the size of the picture can also be reduced or increasing the resolution (use the menu item "Permission" ). Remember, the smaller the photo permission, the lower the quality, but the low weight is achieved.
Save and image optimization
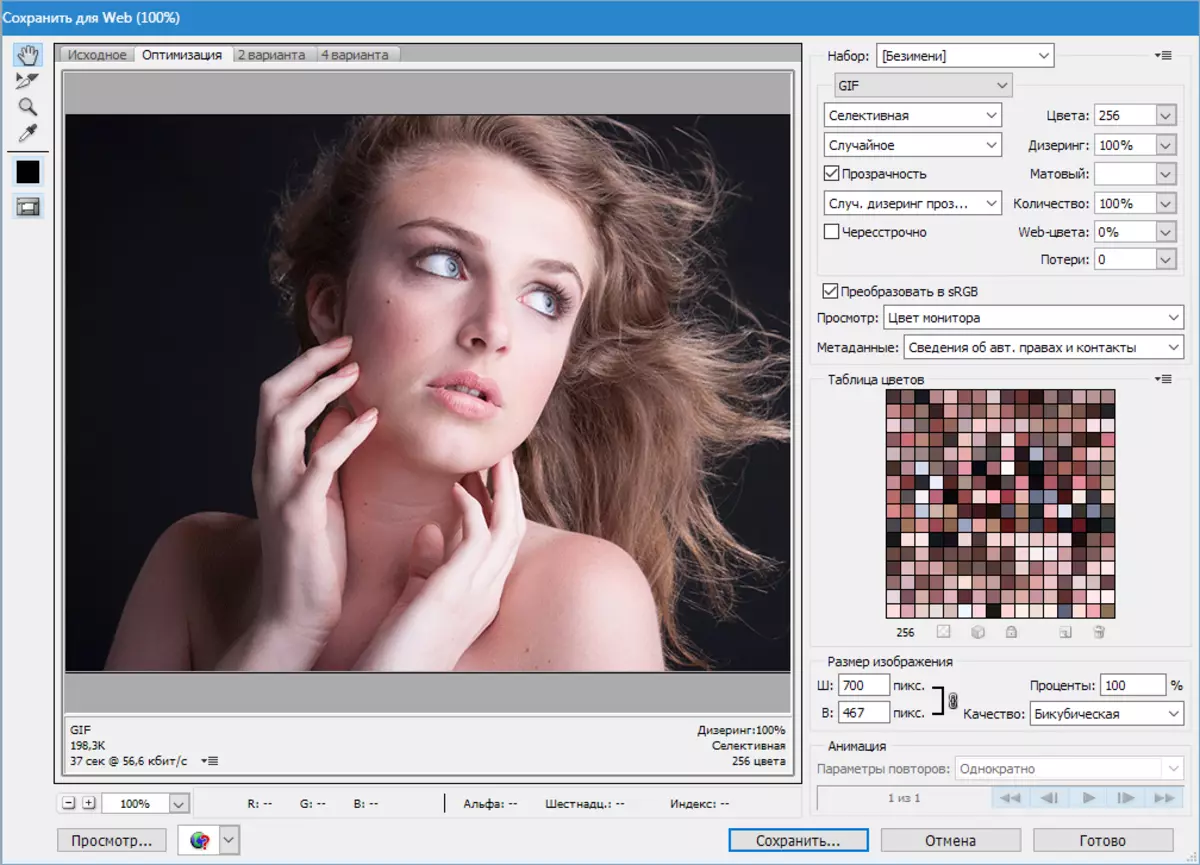
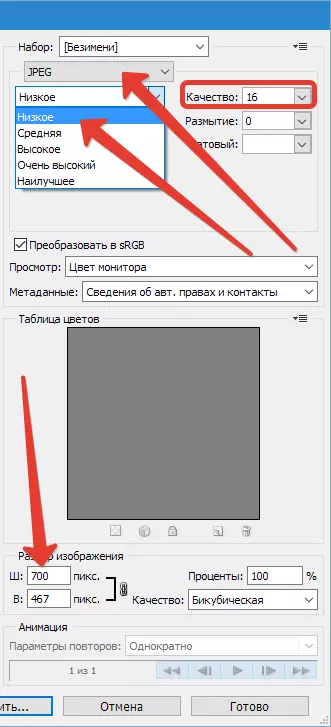
After you have installed all the necessary sizes and proportions, you need to save the snapshot. In addition to the team "Save as" You can use the program tool "Save for Web" located in the menu item "File".

The main part of the window takes the image. Here you can see it in the same format, in which it will be displayed on the Internet. In the right part of the interface, you can specify parameters such as the figure format and its quality. The higher the indicators, the better the quality of the picture. You can also change the quality very much using the drop-down list. You choose in it any suitable value (low, secondary, high, best) and evaluate the quality. If you need to fix some little things in size, use Quality . At the bottom of the page you can see how much the picture weighs at this stage of editing.
Using the "Image Size", you specify the settings for you to save the photo.
Using all of the above tools, you can create an ideal snapshot with a slight weight and necessary for publishing on the network.