

Most users have a BIOS preparation for installing a system from a flash drive no problems, while the reverse procedure (installation of the primary carrier of the hard disk with the system) is sometimes not too obvious. Sometimes also the installation of the system from the flash drive is not available for some reason, and you have to use the drive of optical disks. Today we want to describe the BIOS configuration method for downloading with HDD or CD / DVD.
Installation of primary carrier
It goes without saying that to configure the BIOS it will require in it. In most systems, this is done using the keyboard: while the computer loads, press the function channel keys (F1, F2, F8) or DELETE / INSERT. The most frequent combinations, as well as other methods can learn from a separate article.Lesson: how to enter BIOS
We also note one important point - coexist as "ordinary" interfaces BIOS (two or three-color exceptionally text tools) and graphic variants of the UEFI (a full-fledged sheath with control of both the keyboard and the mouse). There are quite a lot of variations both the first and second; To consider everything within the same article looks inexpedient, so we will dwell on the most common options.
Text BIOS.
Outdated firmware textual interfaces remained now only on old or budget PCs or laptops, but are still relevant.
AMI
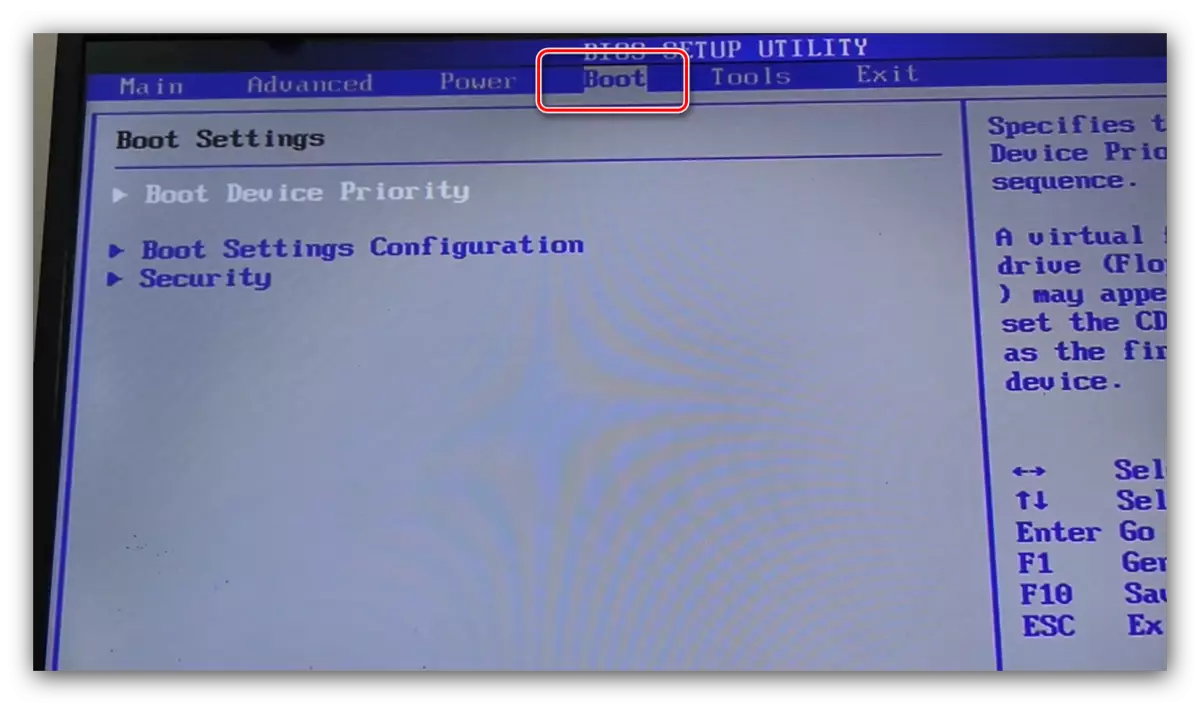
- In this option, there is a separate section "BOOT" - enter it using the arrows and the Enter key.
- Inside this section should be the "Boot Device Priority" item, open it.
- A list of the recognized drive system will open. The hard disk is typically designated as "SATA", the CD / DVD drive is like "CDROM". Use the + and - keys to move the desired media to the 1st Boot Device position.
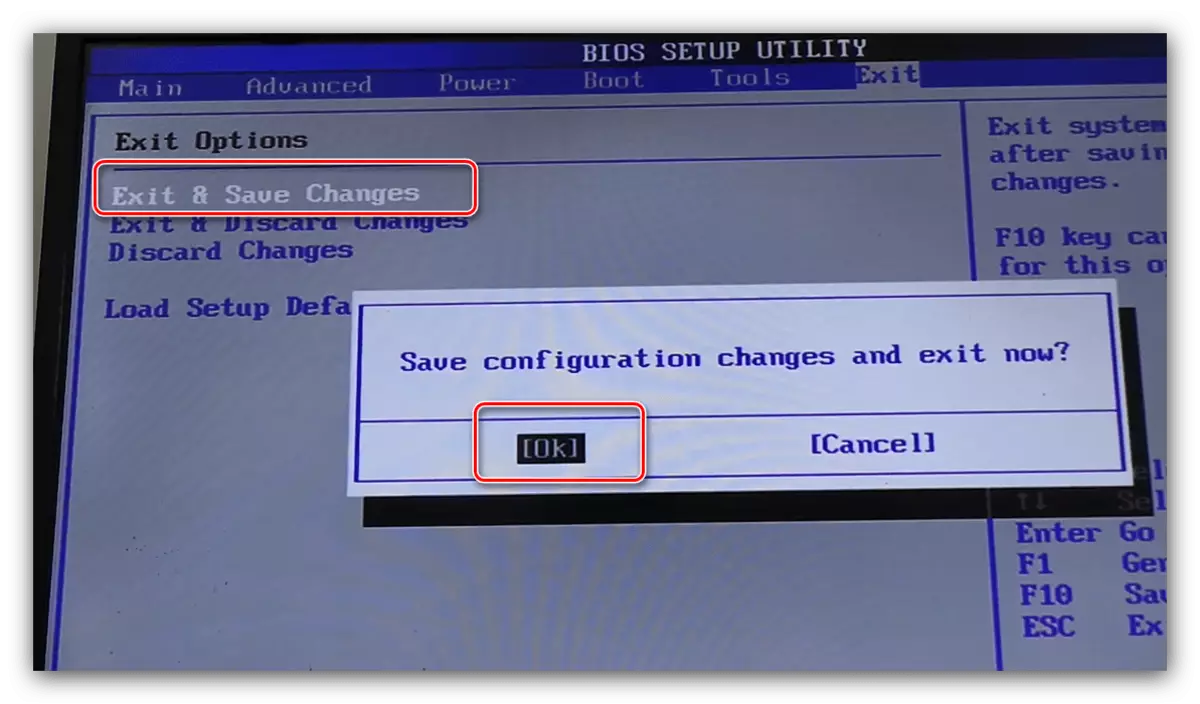
- Click on the F10 to call the save dialog, and confirm the making of the changes to the "OK".


Award
- In this embodiment, the options are located in the Advanced Bios Features section, open it.
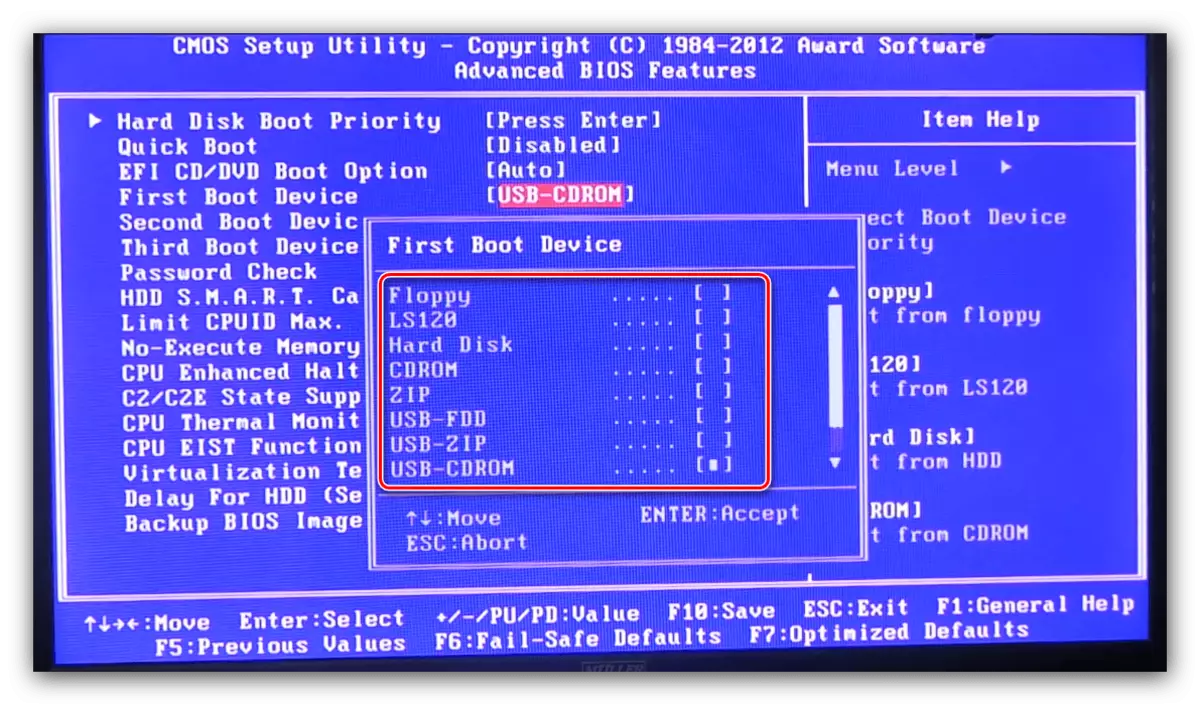
- Go to the "First Boot Device" string and press ENTER.
- A list of media appears - with the arrows, select the "Hard Disk" option, which corresponds to the main hard disk, or "CDROM", which corresponds to the optical drive, and press ENTER.
- As with the case with AMI BIOS, press F10 to save and confirm with it by pressing Y.


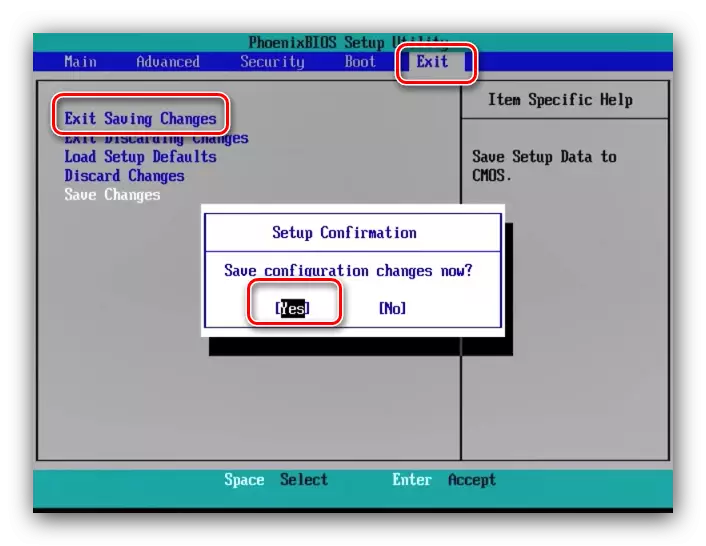
Phoenix.
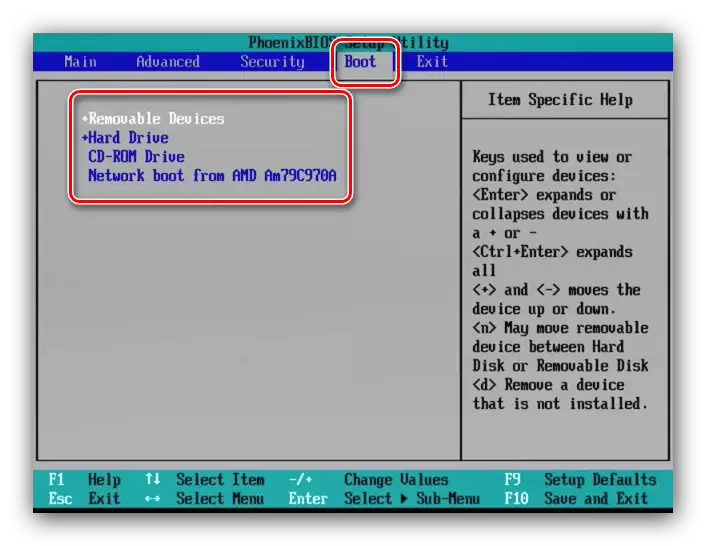
- This variant of the bios is like a version from AMI, so also use the "Boot" item.
- In the same way, by pressing the + and - and - move the required medium to the beginning of the list.
- Save the settings via Serial Pressing the F10 key and select "Yes".

As you can see, the procedure for text BIOS is very simple.
G-graphical interface UEFI
More popular today is a UEFI shell, which greatly facilitates users to interact and adjust the firmware. Improvements touched and installing the loading media.
ASRock
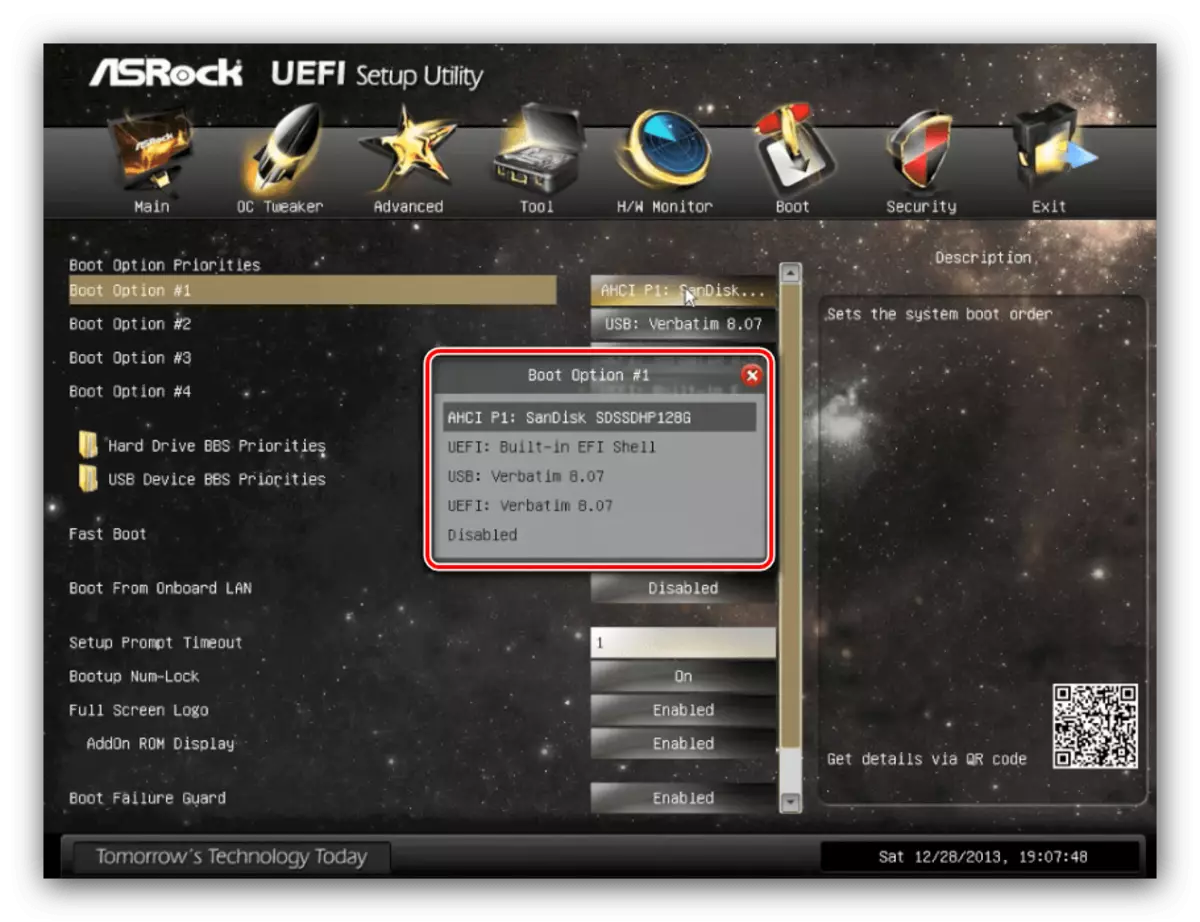
- Go to the bios shell and go to the Boot tab.
- Use the "Boot Option # 1" parameter.
- A pop-up menu appears. The hard disk is designated in it as "AHCI P0: * model HDD *", and the CD / DVD drive, respectively, "AHCI P1" or "AHCI P3", if the hard drives are two. Focus first on the name of the models, the device itself is usually indicated in them. Use the mouse or arrows and ENTER to select the desired drive.
Note: Values P0, P1, P2, P3 and so on - these are sequence numbers of SATA ports on the motherboard. By default, the device (hard drives, drives, etc.) are connected in the indicated order, but when equipped with the equipment to the board (for example, when assembling a PC), its replacement, service and other intervention, this order may vary. In this case, to search for the desired HDD or CD / DVD, you need to focus primarily on the name, and not the number indicated before it.
- To save the changes, go to the "EXIT" tab, where you use the option "Save Changes and Exit".


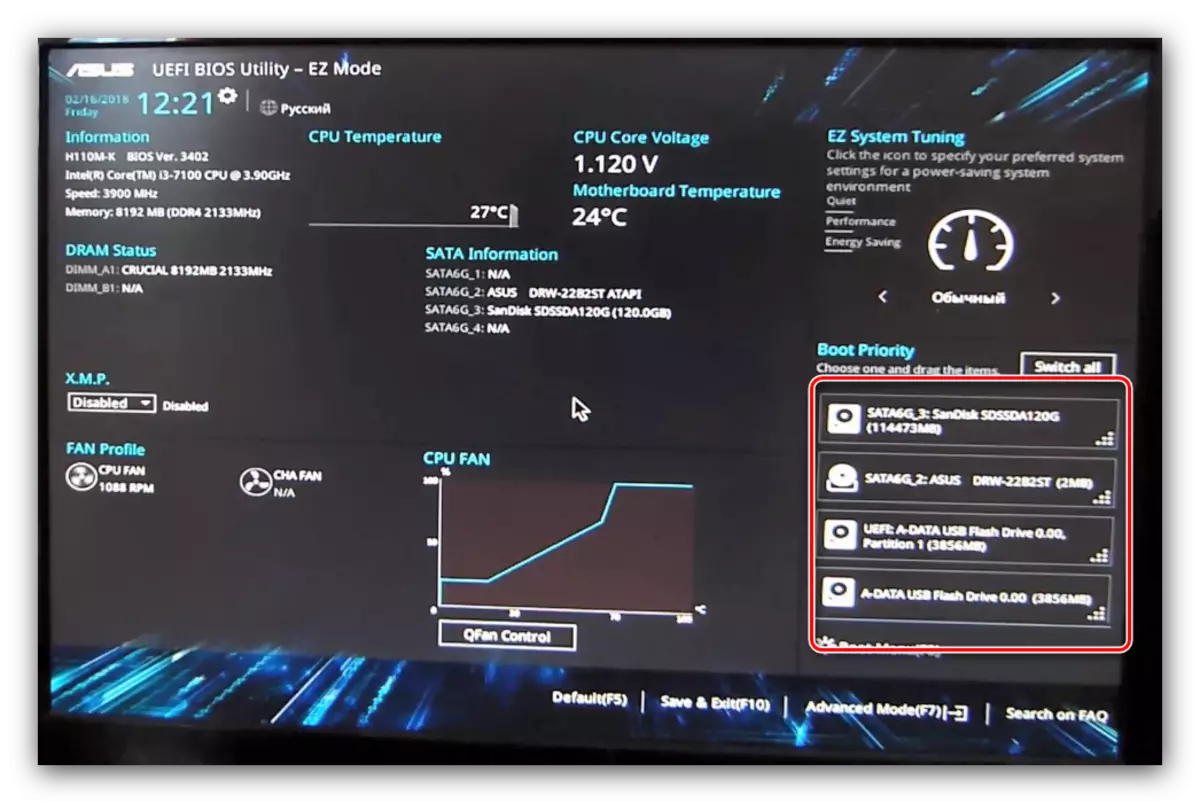
ASUS
- In this BIOS, the operation is very simple. Find on the main shell screen Boot Priority.
- The available media is indicated by the corresponding icons: number 1 in the screenshot below the optical media drive is, and at number 2 - a hard disk.
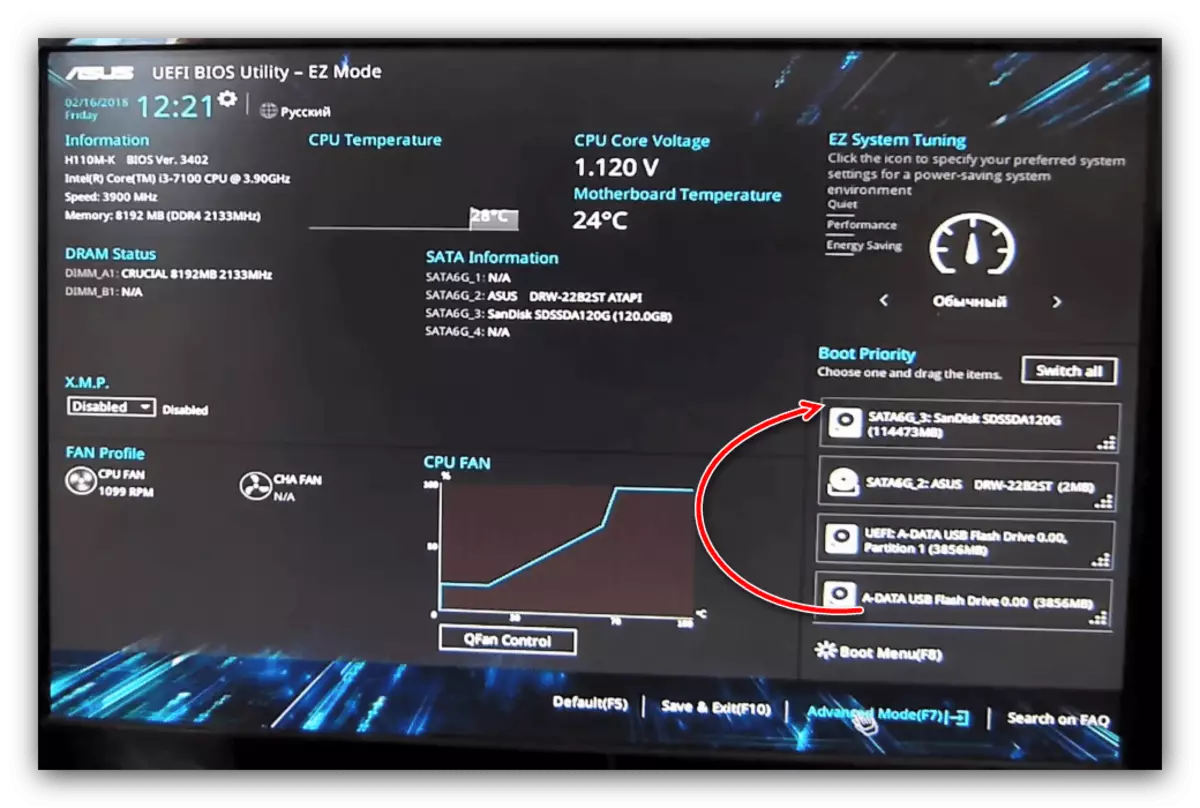
- To change the order, simply drag the icon of the desired device to the very top of the list.
- As in the case of ASRock BIOS, go to the output tab and use the settings item.


MSI
- The procedure does not differ from the ASUS UEFI described above - find the "Boot Priority" section and use the mouse to transfer the required media to the top of the list.
- Find a cross button in the upper right corner and click it. A proposal to save changes will appear, use the "Save Changes & Exit" option.


Gigabyte
- The UEFI from Gigabyte is very similar to the ASRock, differs only by the design of the interface. The options we need are located on the BIOS tab.
- Next, use the option "BOOT OPTION # 1" and select the desired drive, focusing on the device name.
- You can also save the changes on the "EXIT" tab, the item "Save & Exit Setup".


Bios laptop
In general, the bios of most laptops use the above-mentioned solutions like AMI, Award, Phoenix or UEFI manufacturer's company, so instructions for these shells are suitable for laptop options. Separately, consider the BIOS devices from Hewlett-Packard.
New option
- Log in to the BIOS and go to the System Configuration tab on which you select "Boot Options".
- First, enable the "Legacy Support" option.
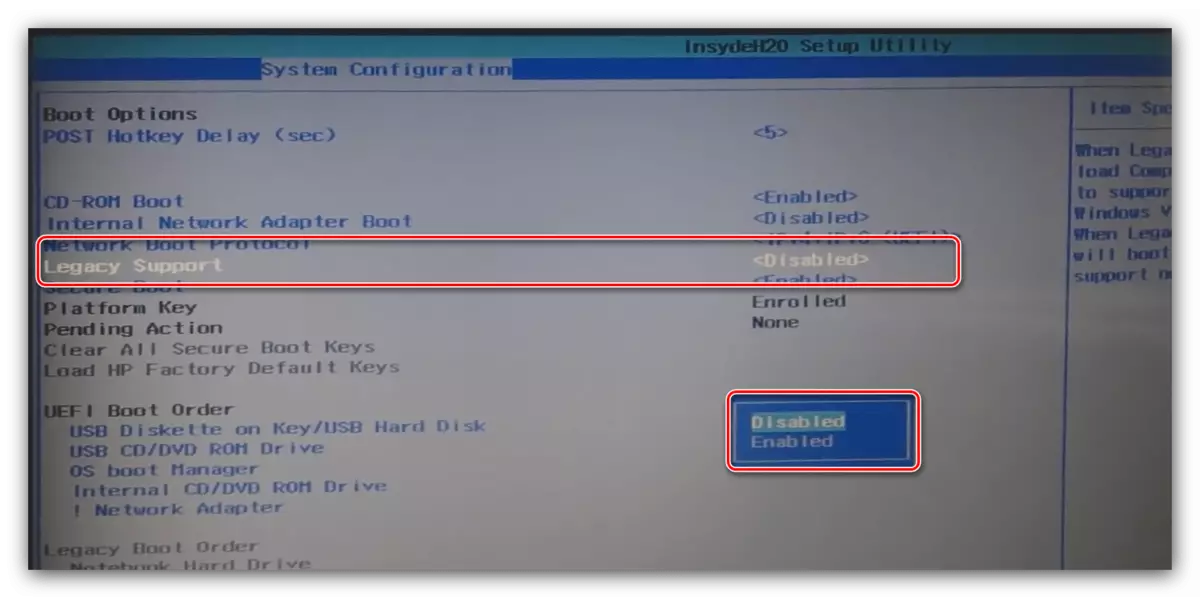
Confirm the desire by clicking on "YES", for which you use the arrows and the Enter key.
- Now you can change the download lists - the "UEFI Boot Order" and "Legacy Boot Order" options are identically edited. Select the desired disc (Winchester corresponds to the "OS Boot Manager" / "Notebook Hard Drive" position, the optical disk drive - "Internal CD / DVD ROM Drive") and move it up the list of the pagepu key.
- Click the "EXIT" tab, where use the Exit Saving Changes option.


Old option
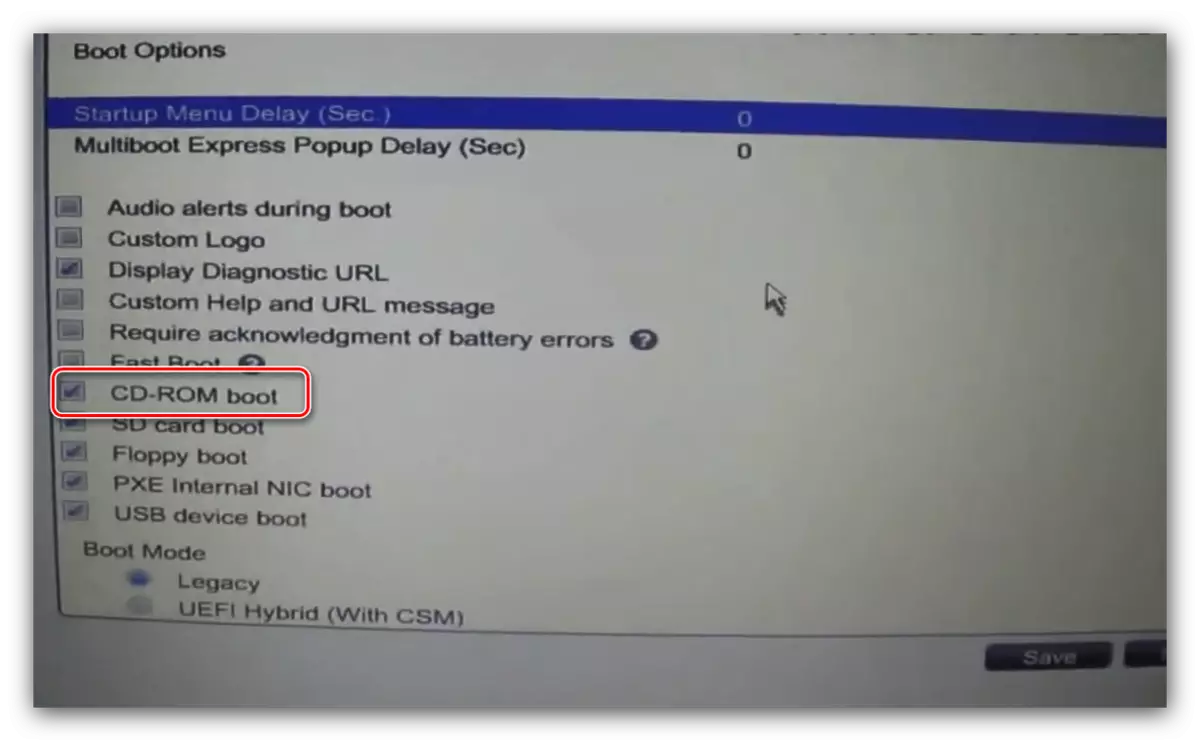
- Opening the BIOS, go to the System Configuration section.
- Open the "Boot Options" section.

Scroll the list of options and check the CD-ROM items.
- Next, in the Boot Mode block, check the "Legacy" option.
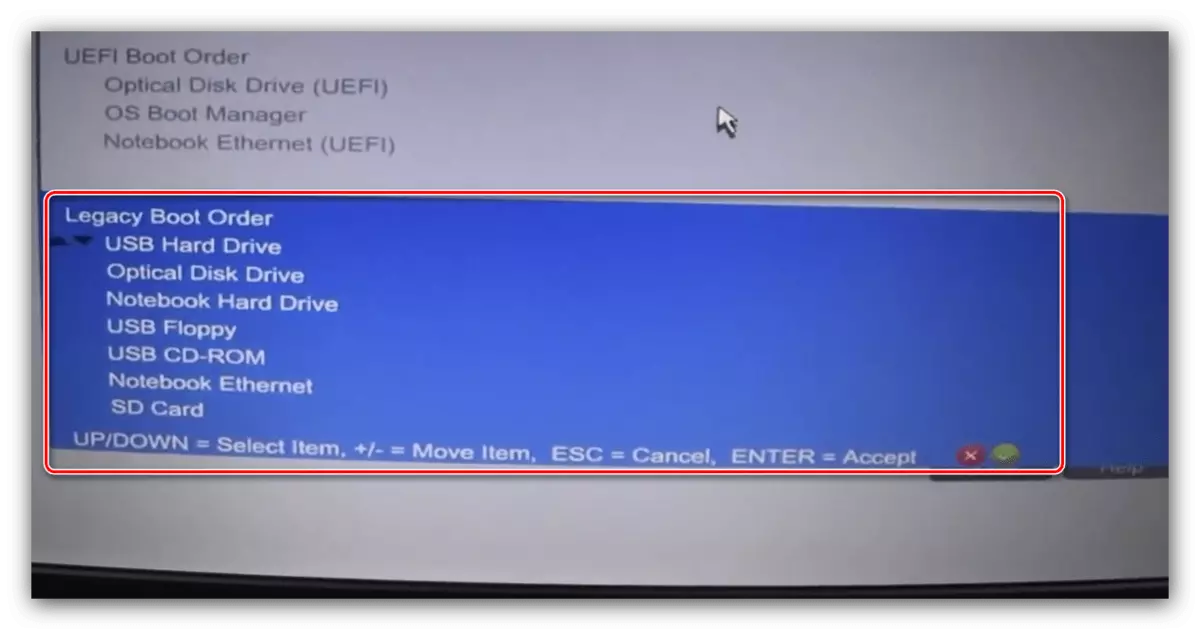
- Run at the bottom of the page to the LEGACY BOOT Option block and press ENTER. Use the arrows to highlight the required media, and the +/- keys to move it up or down, respectively. By setting the desired order, press ENTER.
- Return to the "File" section, in which use the Exit Saving Changes item.


Conclusion
We looked at the method of incorporating booting from disks on the main models of BIOS desktop computers or laptops. The procedure in most cases is quite simple, especially considering similar parameter names and their location.