
Most modern Android devices have high power indicators, allowing you to create and edit media. Among the tools for this kind of tasks, a multiple files enjoy more popular. In the course of our today's instructions, we will consider the procedure for adding music to the video detect on the example of several applications.
Music overlay on Android video
By default, regardless of the version on the Android platform, there are no funds for overlaying music files on a video with subsequent saving. In this regard, one way or another will have to choose and upload one of the special programs. To add the best effect, be sure to combine editors' options, including sent to work only with music or video.At the expense of simplicity in the use of this particular editor, attention should be paid primarily. Other solutions provide a more complex interface.
Method 2: videoshop
To overlay music on video, an excellent option is the Videoshop application containing multiple video editing tools and audio records. A significant advantage of the program is reduced to high speed at low demands and the absence of restrictions on most functions.
Download videoshop from Google Play Market
- On the start page of the Application, use the Import button to select an entry on the device. If you have already worked with the editor, you will need to click "+" on the top panel.
- Click the "Video" tab in the left corner, among the list presented, select the roller and tap on the "ready" on the top panel. At the same time, you can add several entries at once.
- In case of successful processing, it will be redirected to a page with a editor consisting of several panels and timeline. To continue, click on the "Audio" icon on one of the blocks.

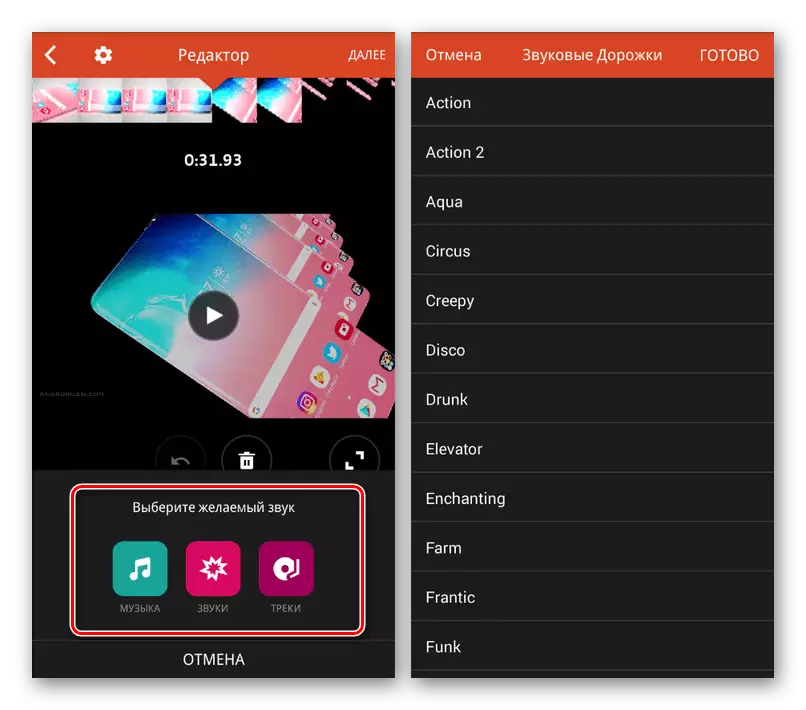
With the help of the buttons you have, you can select the type of audio track added, be it standard "tracks" or custom "music".
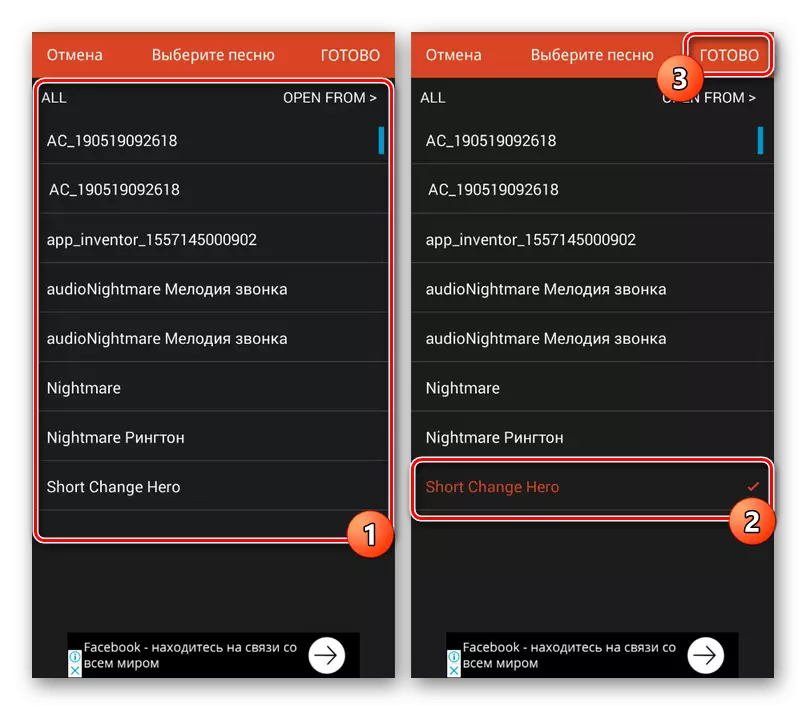
- Select one or more files from the list and click Finish on the top panel.
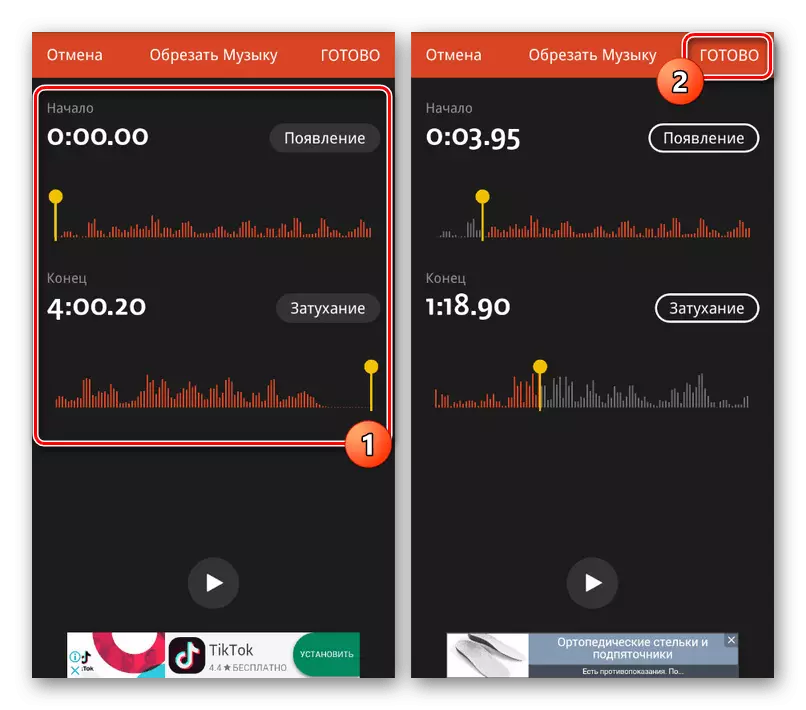
- After that, the composition editor opens, allowing to cut music and add additional effects. After completing the change, tap the "Finish" link again.
- Now the music file icon will appear under the video sequence. Move it into the right place on the timeline to designate the beginning of playback, if necessary, change the volume and press the button with the check mark.

If you select this file, an additional editor will open, just as allowable to cut the track, thereby limiting the music within the video.
- To correctly connect the sound, you can select a video, click on the volume icon at the bottom of the screen and change the value to the corresponding slider.
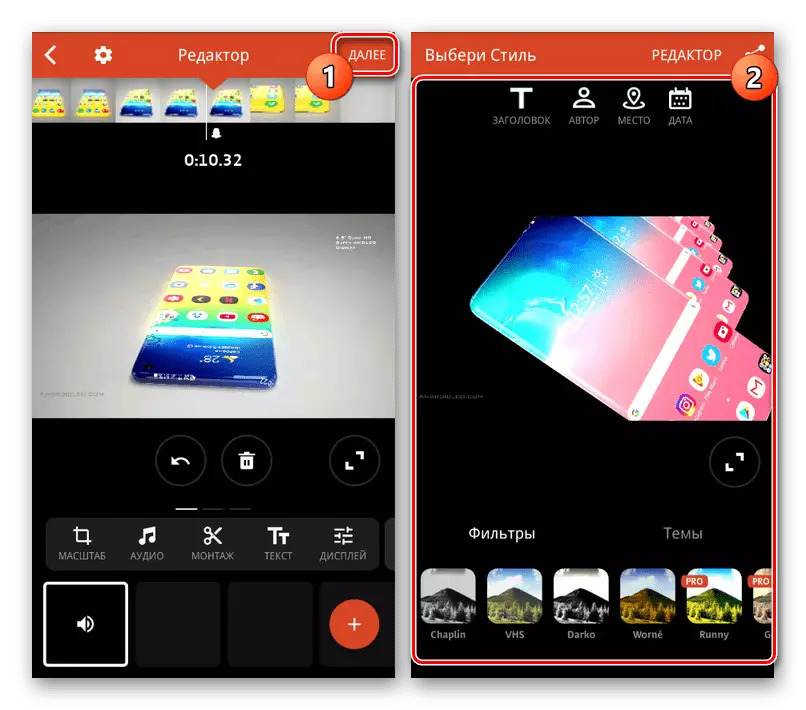
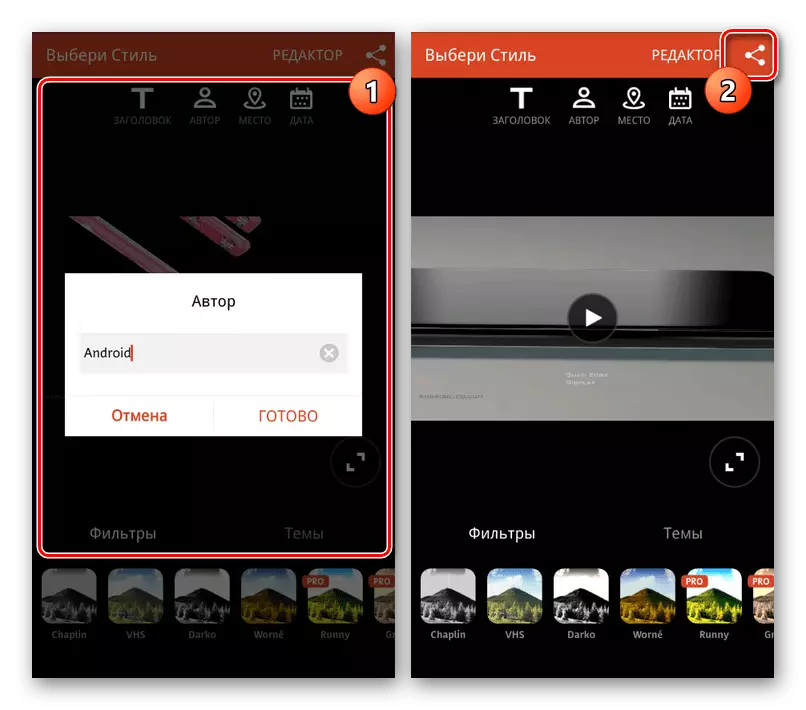
- You can complete the processing, tapping on "Next" in the upper right corner. On the "Choose Style" page, filters, tags and much more can be added.
When specifying the data you need, in the corner of the screen, click on the publication icon.
- At the last stage, in the "Extended" section, change the video quality settings. After that, use the Save to Gallery button or select one of the additional options.


This editor practically does not have negative qualities, not counting some paid functions, which, however, do not affect the procedure under consideration.
Method 3: Kinemaster
One of the most beautiful and no less functional media editors is Kinemaster, which allows you to edit rollers with a large number of free tools. In this case, the program only works in horizontal mode, but is not demanding of the smartphone resources.
Download Kinemaster from Google Play Market
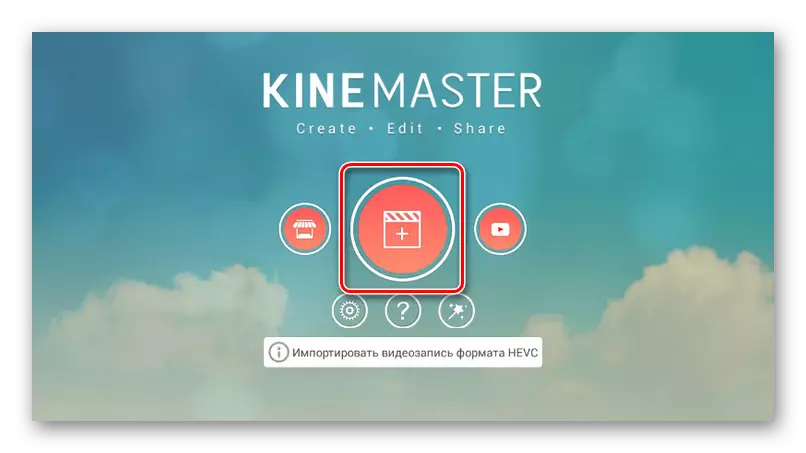
- On the main page of the application, click "+" to import recording. You can also download video from other sources, including YouTube.
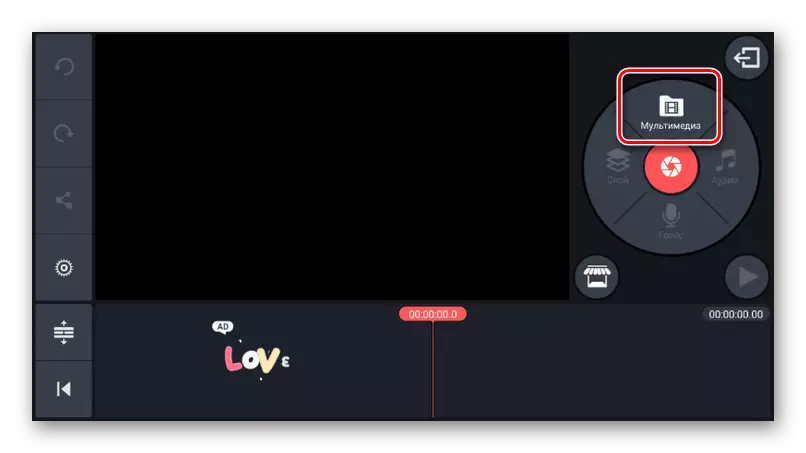
- After selecting one of the aspect ratio options, the main program interface will open. Click "Multimedia" on the control panel on the right side of the screen.
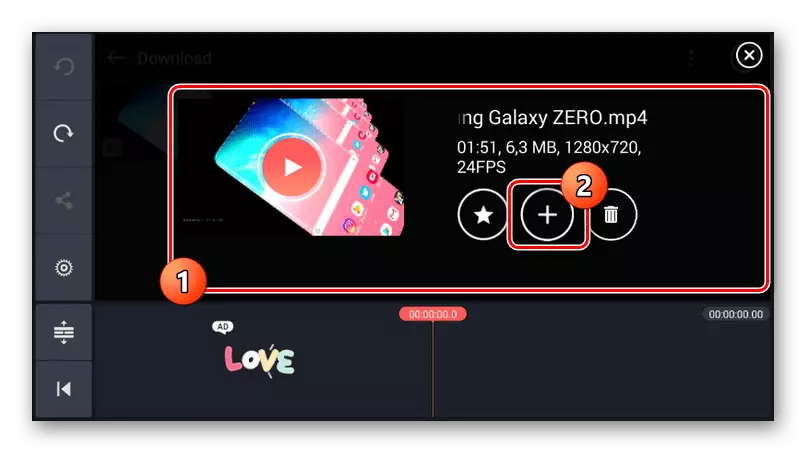
- Using the Media Browser, open the video folder, clamp the desired option for a few seconds and use the "+" icon to add a record. You can choose several video at once.
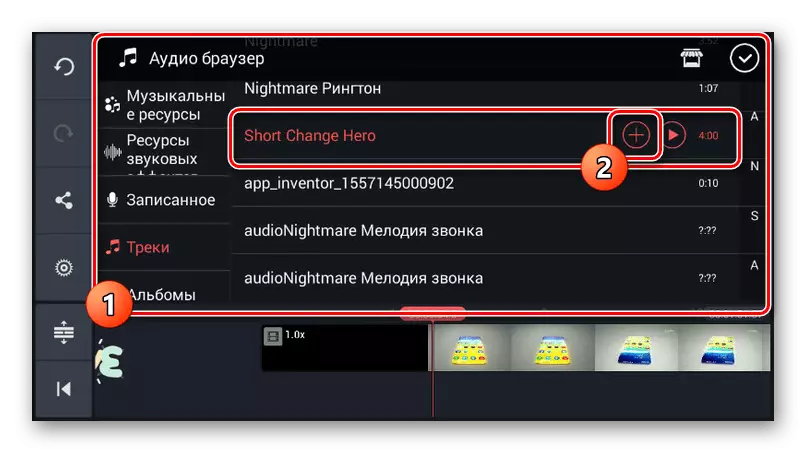
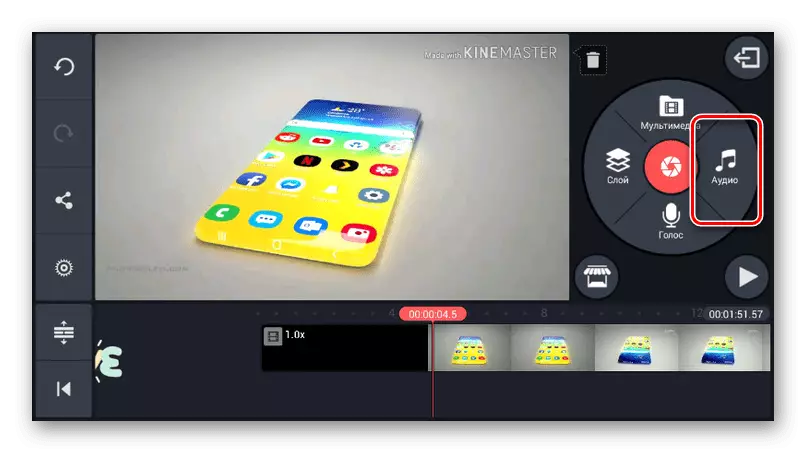
- To impose music to the selected roller, on the toolbar, click the "Audio" button.
- Here you must click on one of the files found on the device and add it "+". This uses the choice of several songs from different sources at once, including musical resources.
A added audio track appears at the bottom of the timeline. Use Dragging to move the file.
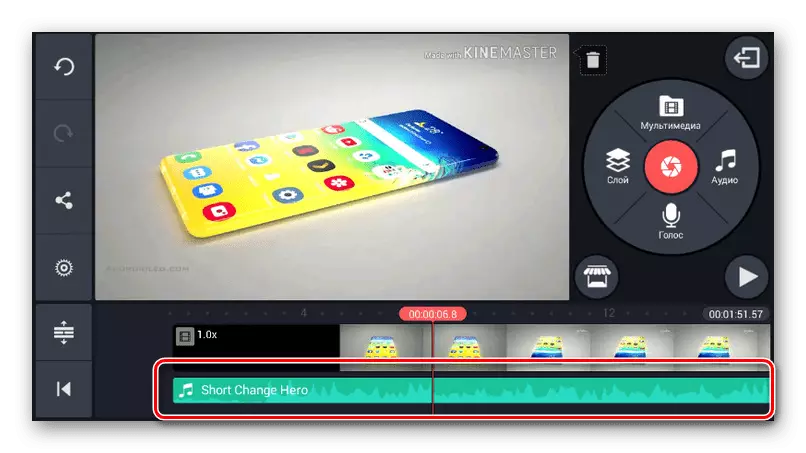
By clicking on the track and thereby highlighting it in a yellow frame, buttons at the end and beginning you can change the duration of the recording.
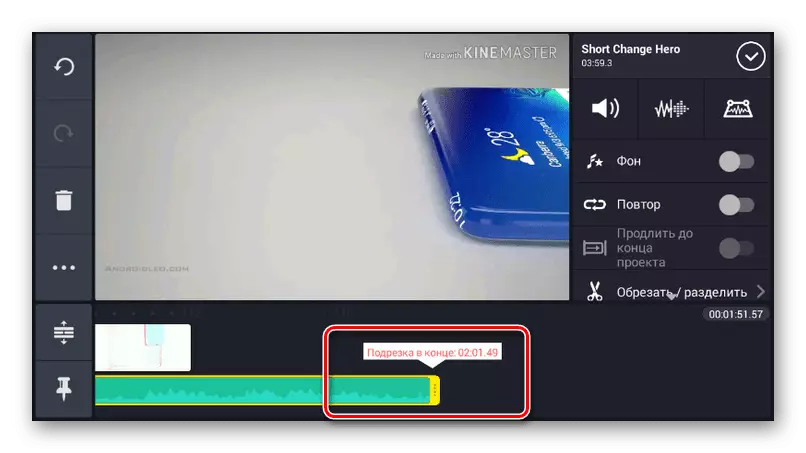
In the upper right unit there are several tools for editing the file. Change the parameters, for example, lowered the volume of music on the background of the video.
- By analogy with the processing of music, you can select and edit the video. Especially useful is the volume tool that allows you to add a harmonious combination of audio and video recordings.
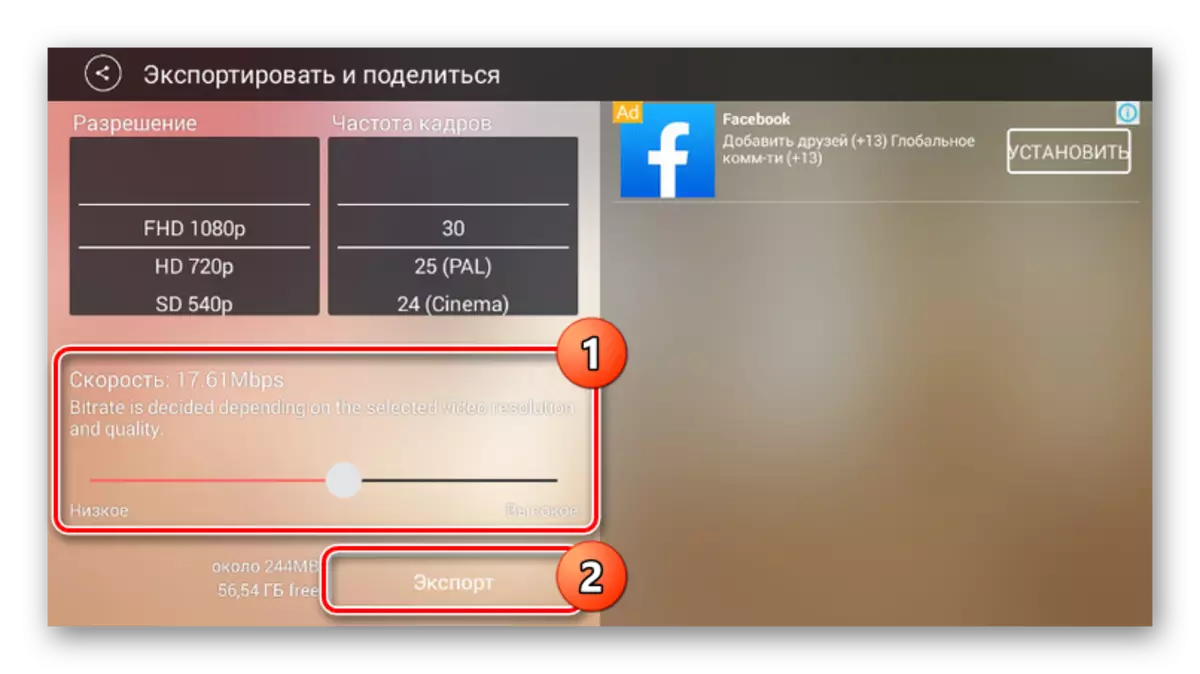
- You can complete editing by clicking the Publish button on the panel on the left side of the window.
- Select the desired quality option and tap "Export". After that, preservation will begin, and on this procedure for overlaying music is completed.


The main disadvantage of the application is the presence of a Kinemaster watermark in the upper right corner of the recording, remove that can be removed only after purchasing the paid version. Otherwise, this tool is deserved one of the best.
Method 4: QUIK Video Editor
Through the Appendix Quik Video Editor from Gopro, you can create your own videos, combining various media files and positioning on a total timeline. Most functions are available free of charge and without advertising. However, this program is supported only by new versions of the Android platform, starting with the fifth.
Download QUIK Video Editor from Google Play Market
- First of all, on the main page, pay attention to the icon with the image of the gear. Through this section, you can adjust the operation of the editor, in particular, to set quality for final records.
- To go to the main program interface, click on the "+" icon or use "Create a video". On the page that appears can select one or more records found on your smartphone in a supported format, and to complete click the checkbox button.

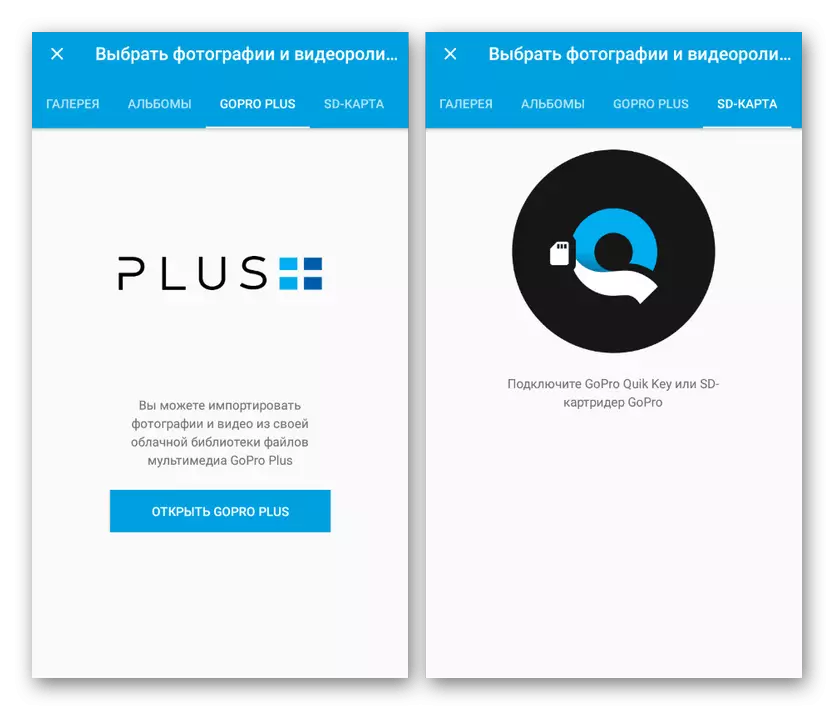
One of the main features of software, directly dependent on the developer, is support for services and devices Gopro. Due to this, you can import video from the relevant sources.
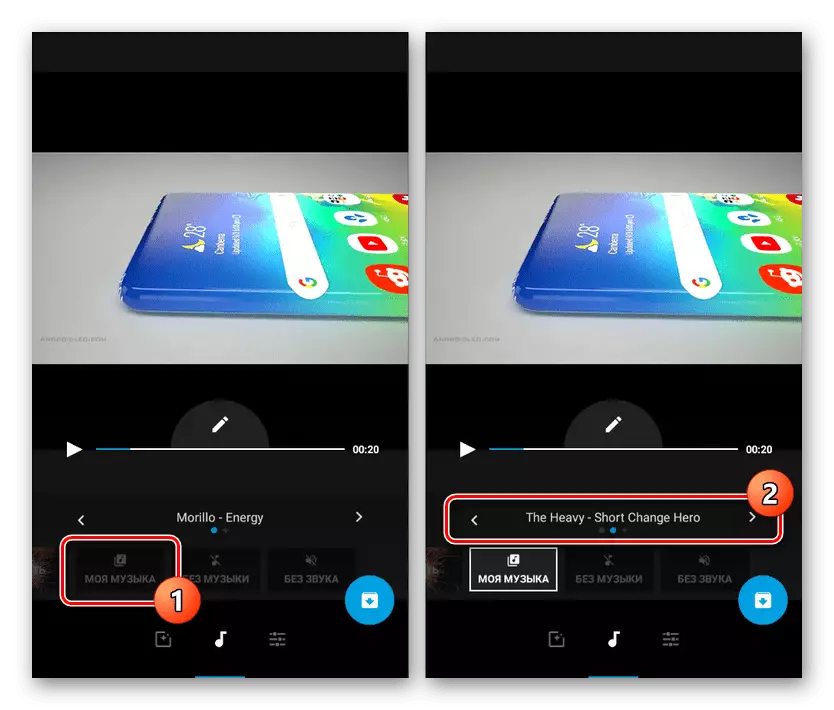
- To insert music, you must on the start page at the bottom of the screen, click on the middle button with the image of the note. Here you can select a background melody from the standard application gallery.

To specify a user file, on the same panel at the very end, find and click "My Music". After detecting audio records, you can switch between them by side arrows.
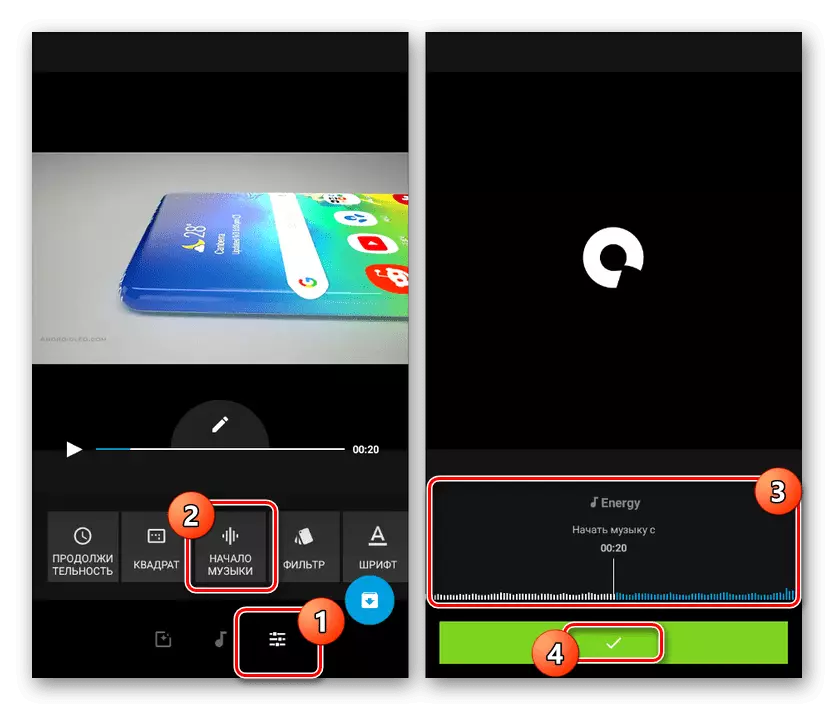
- You can change the location of the music file on the total timeline on the last third tab by clicking on the "Start of Music". After selecting this tool, change the "Start Music" band to the desired location and press the button with the check mark.
Note: The place of completion of the music is set in the same way.
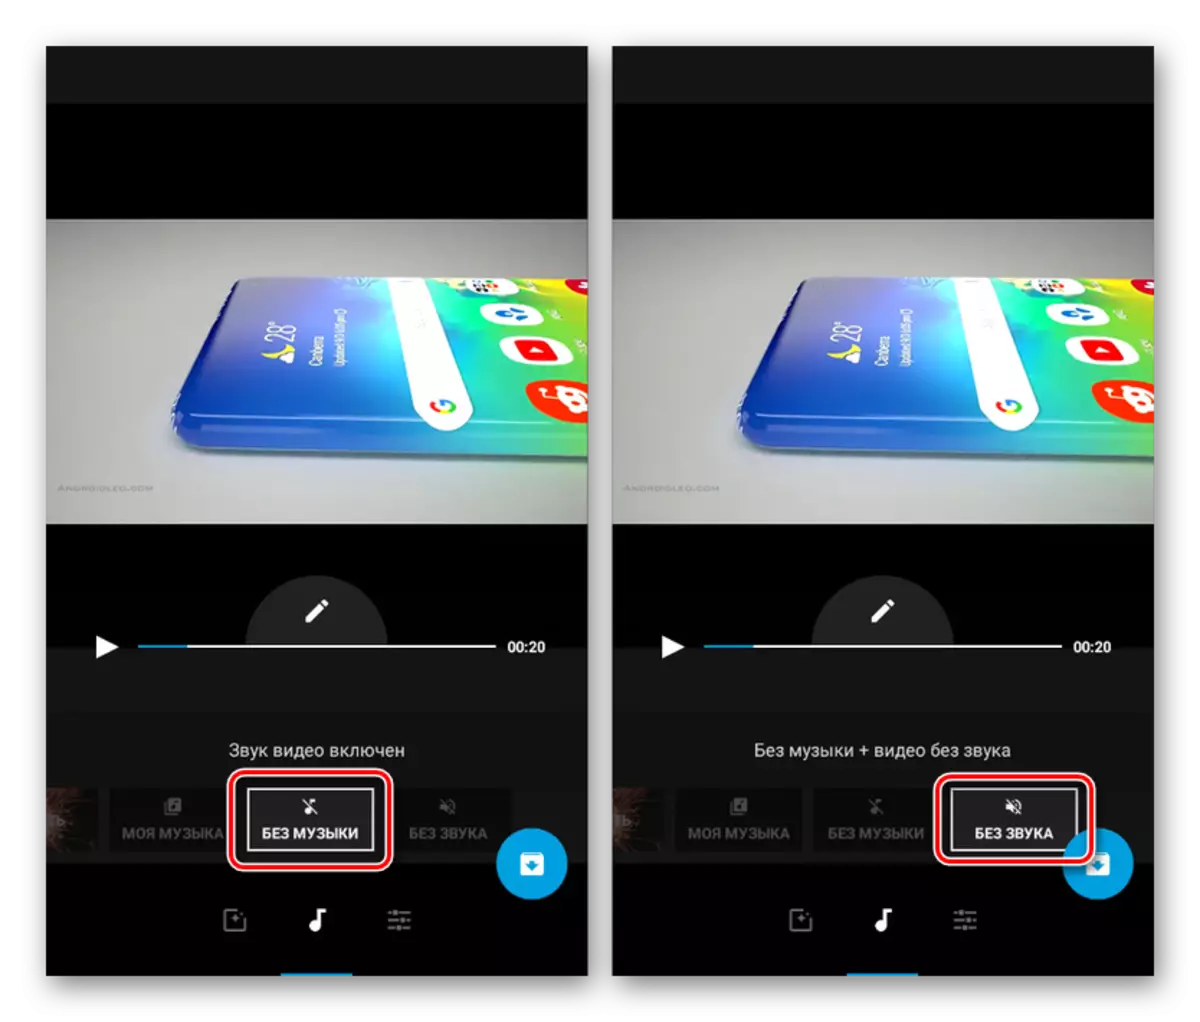
As a supplement you can cut music and sounds from the video with the corresponding buttons.
- To save while on any page editor, press the button with the arrow in the lower right corner. A total of several options are available, including publication. You can add an entry to the device by clicking "Save without Publication".

Immediately after that, the recording will automatically begin. Upon completion, you will be redirected to the built-in QUIK video player.


After creating and saving a video, you can find it in the working folder on the SD card or in the memory of the smartphone. The default record is saved in MP4 format, while the resolution depends on the previously mentioned application parameters. In general, QUIK Video Editor is one of the best solutions due to the high speed of work, the lack of significant restrictions and advertising.
Conclusion
In addition to the applications that we have, it is possible to produce music overlay in video through special online services. Such resources work in a similar way, but are not suitable for processing large video files due to the need to load the roller to the site. We will not consider the issue of using such services, as a separate instruction will be required for this. This article is coming to completion.