
Very often, when designing work in Photoshop, you need to add a shadow to the object to be placed in the composition. This technique allows you to achieve maximum realism. The lesson you will study today will be devoted to the Azam shadow creation in Photoshop.
Creating a shadow
For clarity, we use the text, as it is easier to show the reception.

- Create a copy of the layer with the text ( Ctrl + J. ), and then go to the layer with the original. We will work on it.

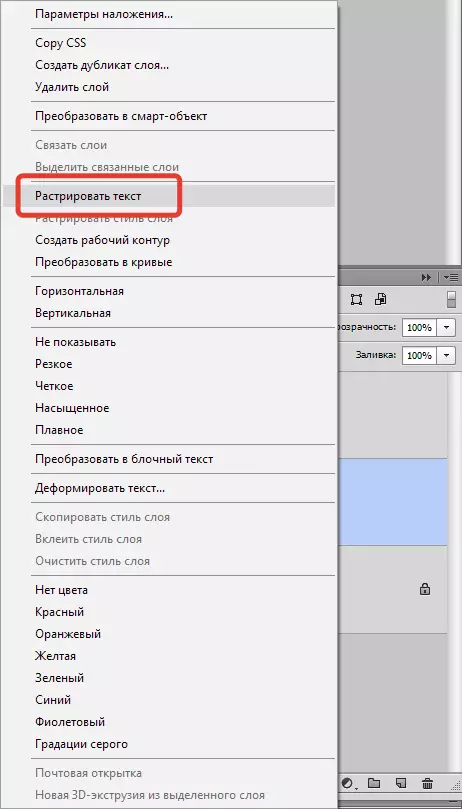
- In order to continue working with the text, it must be frustrated. Click right-click on the layer and select the corresponding menu item.
- Now call the function "Free Transformation" Combination of keys Ctrl + T. , click right-click inside the appeared frame and find item "Distortion".

Visually will not change anything, but the frame will change its properties.
- Next, the most responsible moment. It is necessary to put our future shadow on the imaginary plane behind the text. To do this, we carry the mouse for the top central marker and pull in the desired side.

After completing click ENTER.
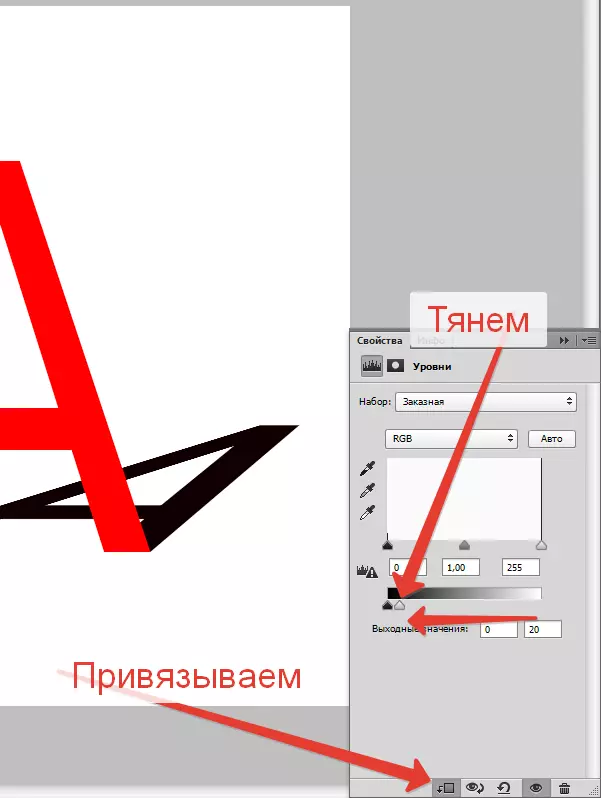
- Next, we need to make our object look like a shadow. Being on the layer, which we processed, call the correction layer "Levels".

- In the properties window (the properties do not have to do - they will appear automatically) we will bind the "levels" to the layer with the shadow and completely darke it:
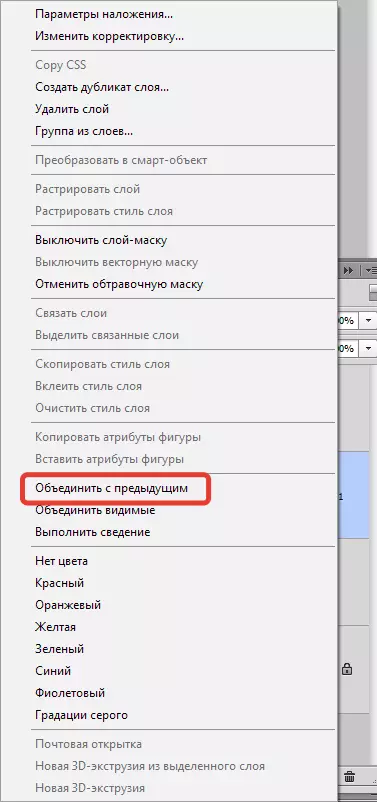
- We combine the layer "Levels" with a layer with shadow. For this, click on "Levels" In the palette of the layers with the right mouse button and choose the item "Combine with the previous".
- Then add a white mask to a layer with a shadow.

- Choose tool "Gradient".
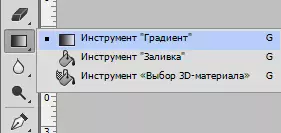
Type - linear, from black to white.

- Staying on the layer mask, stretch the gradient from top to bottom and at the same time to the right left.

It should be about this result:

- Next, the shadow must be blurred a little. We apply a layer mask by right-clicking on the mask and selecting the appropriate item.

- Then create a copy of the layer ( Ctrl + J) and go to the menu "Filter - Blur - Blur in Gauss".

Blur radius is chosen based on the image size.

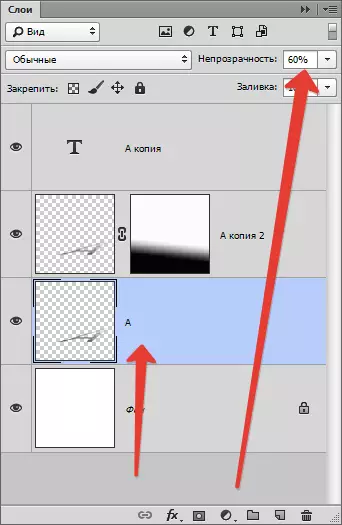
- Next, we create a white mask again (for layer with blur), we take a gradient and carry out the mask tool, but this time is upwards.

- The final step is to reduce the opacity for the subject to the layer.
Shadow is ready.

Owning this technique and possessing at least a small fiction, you can portray a rather realistic shadow from the subject in Photoshop.