
Any pictures made by even a professional photographer require mandatory processing in a graphic editor. All people have drawbacks that need to be eliminated. Also during processing you can add something missing. This lesson is devoted to processing photos in Photoshop.
Snapshot processing
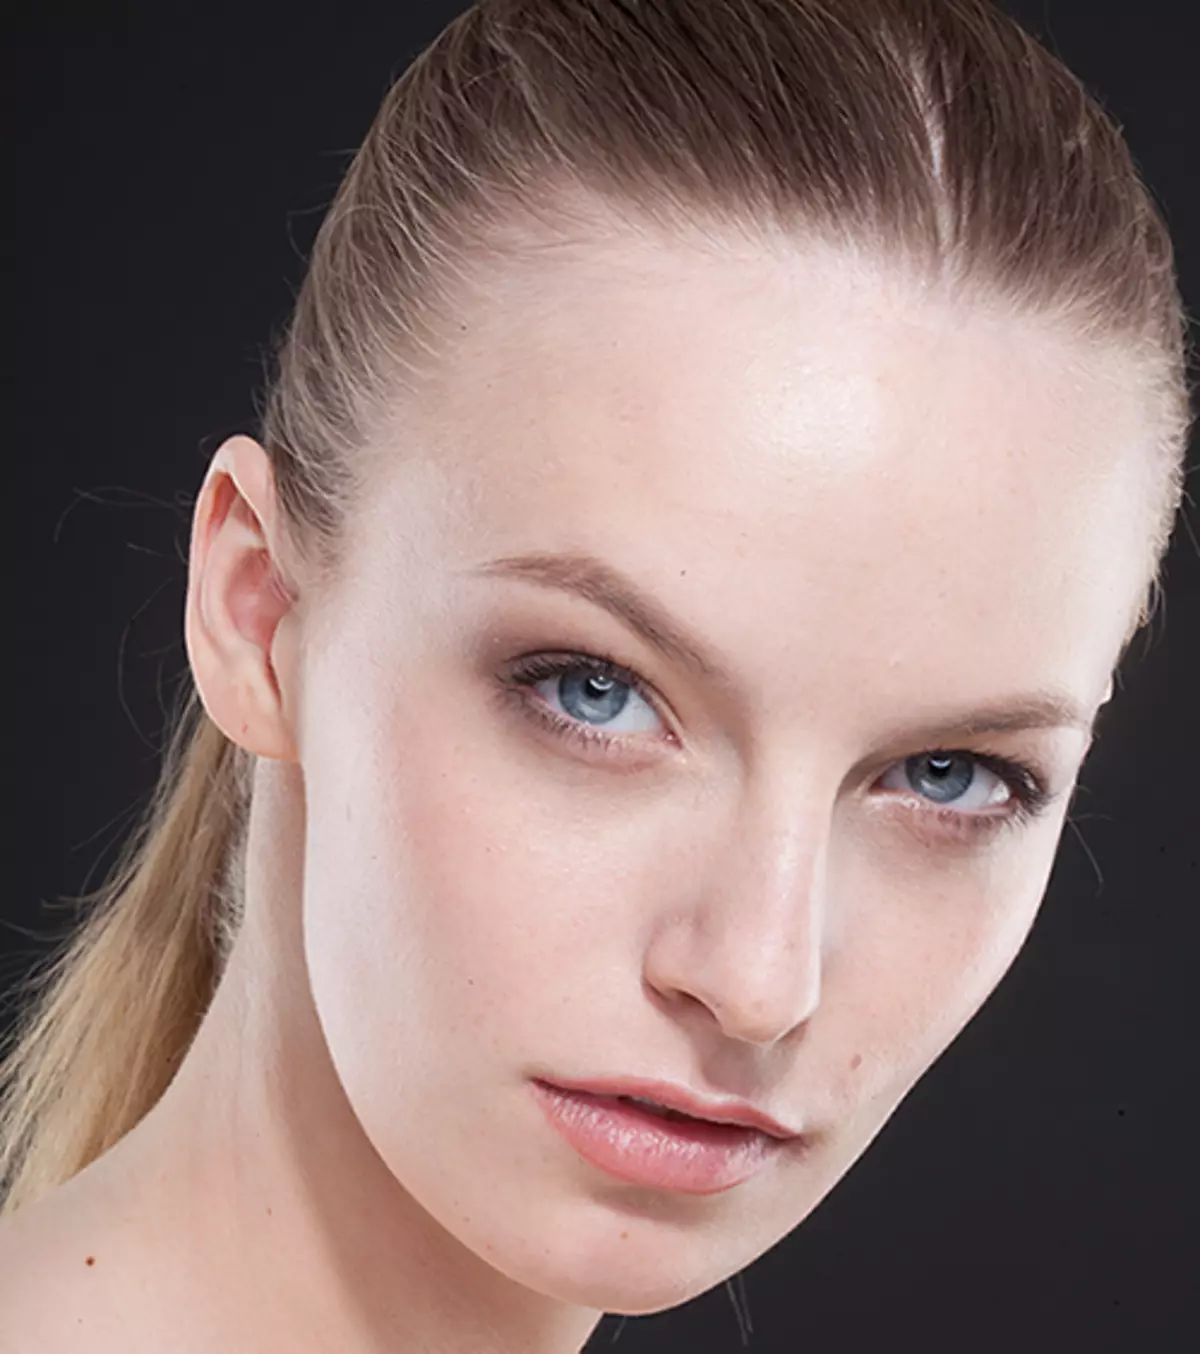
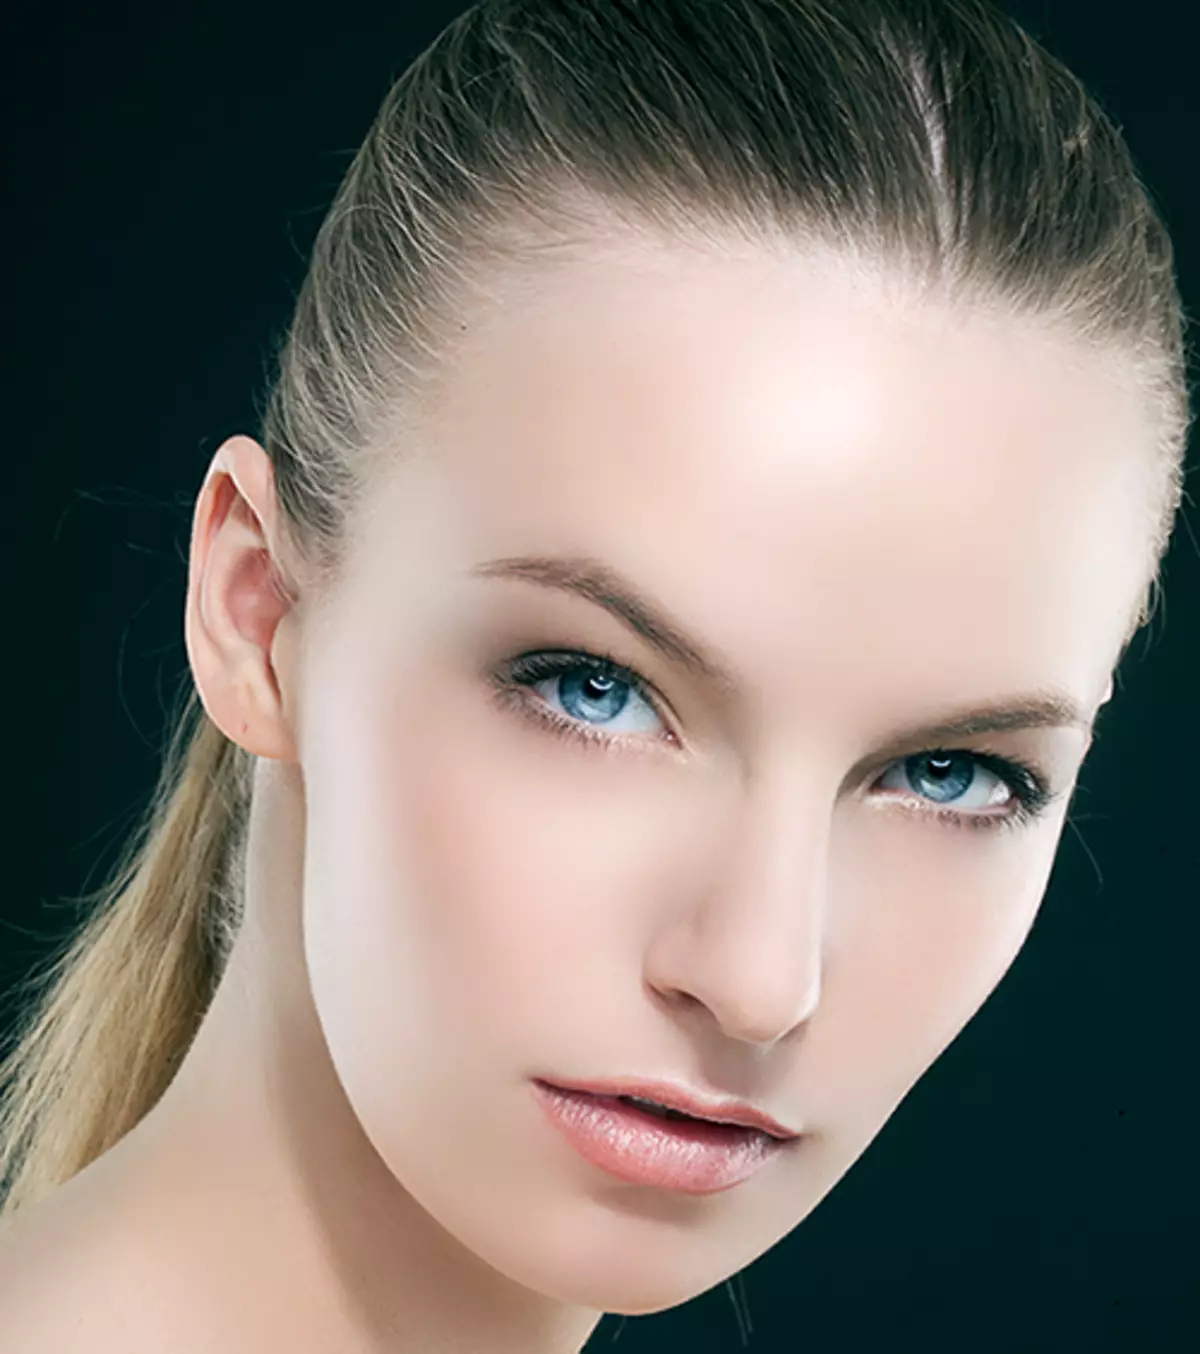
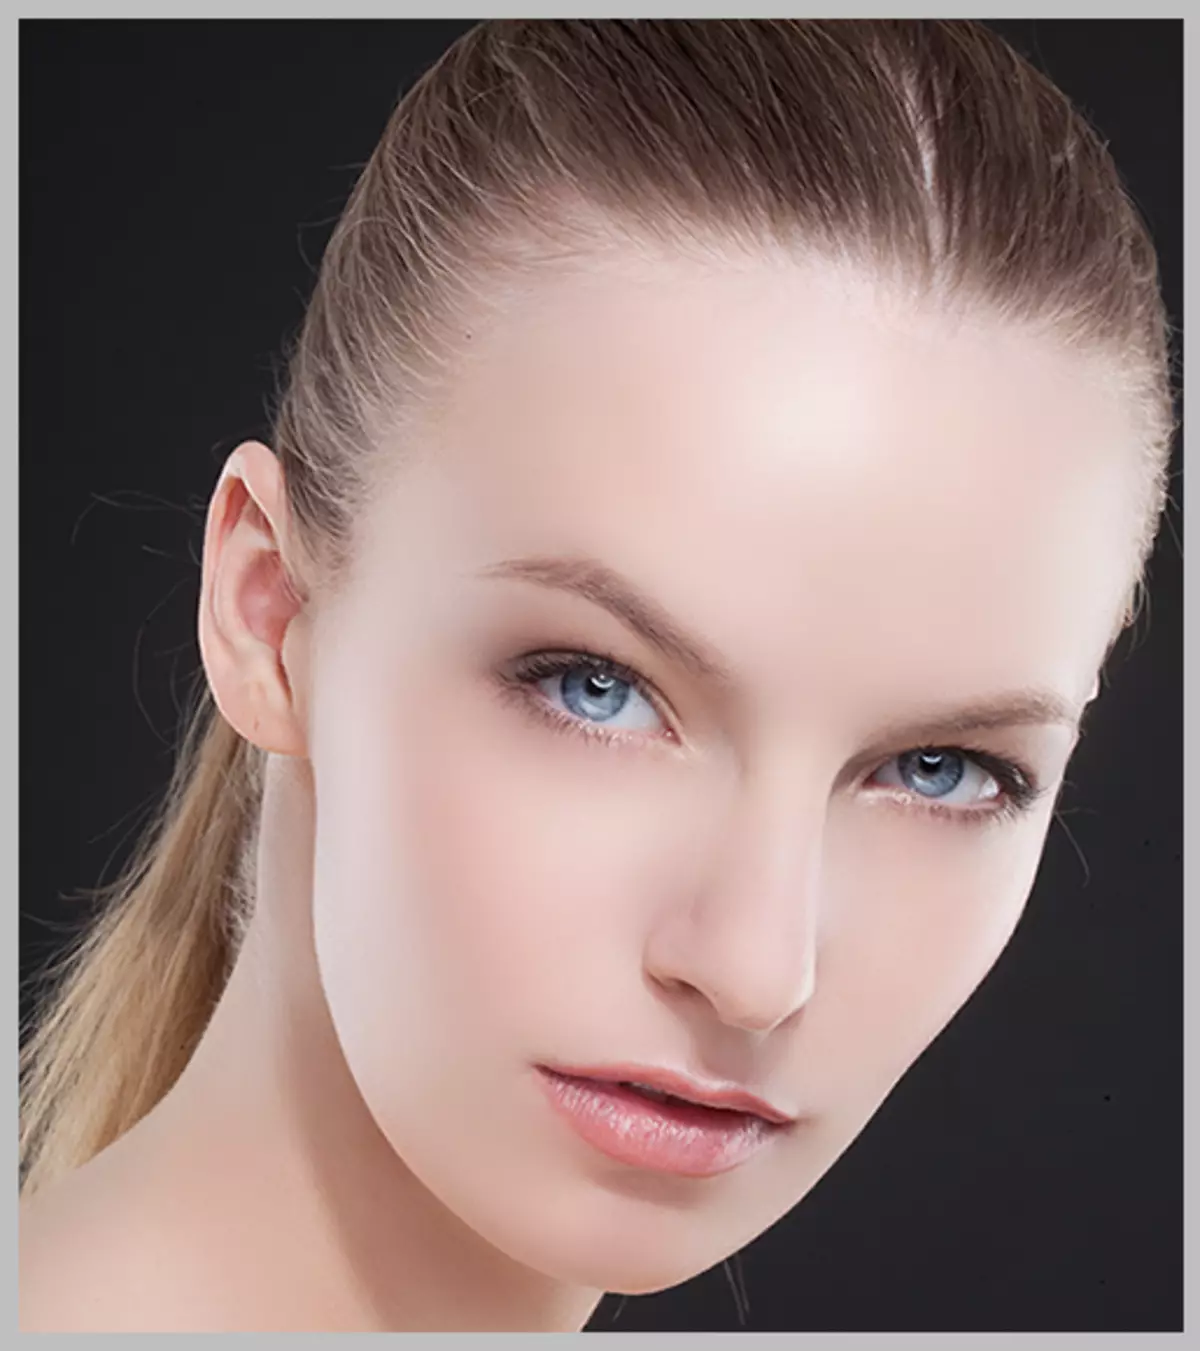
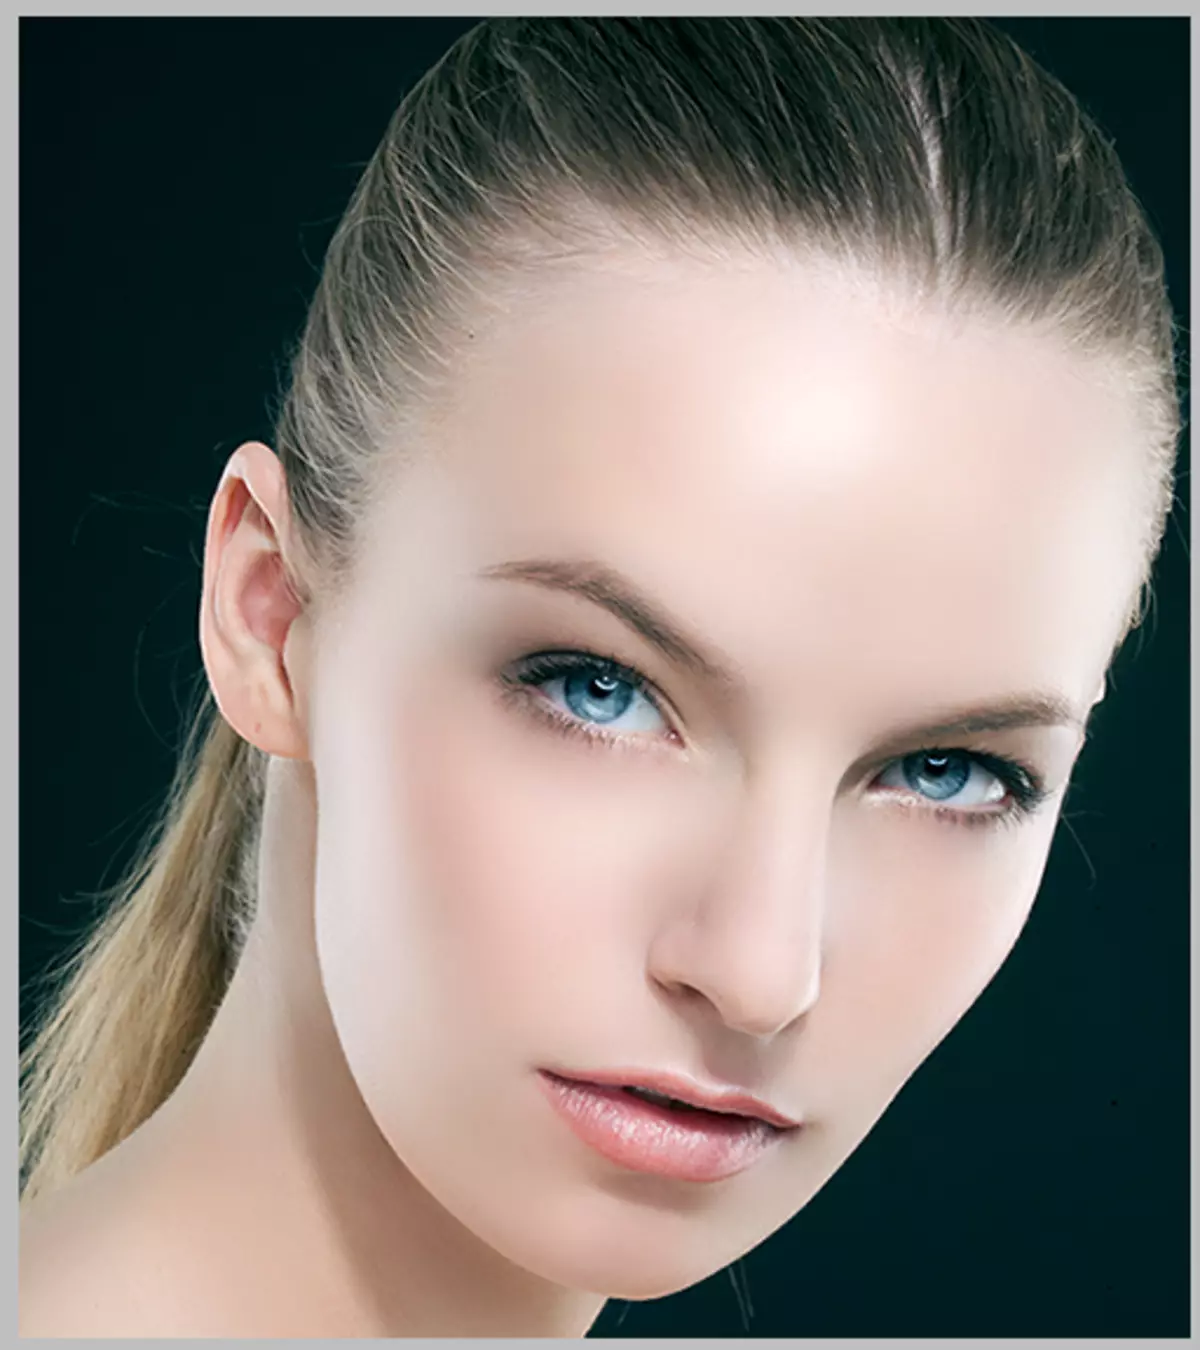
Let's take a look at the original photo and the result that will be achieved at the end of the lesson. We will show the main techniques of processing photos of the girl and make it with the maximum "pressure" so that the effects are better visible. In a real situation, such a strong correction (in most cases) is not required.
Source image:
Processing result:
Steps taken:
- Elimination of small and large skin defects;
- Clarification of the skin around the eyes (elimination of circles under the eyes);
- Finishing skin smoothing;
- Work with eyes;
- Underscore light and dark areas (two passages);
- Small color correction;
- Strengthening the sharpness of key areas - eye, lips, eyebrows, hair.
Before you start editing a photo in Photoshop, you need to create a copy of the source layer with the Ctrl + J keys.
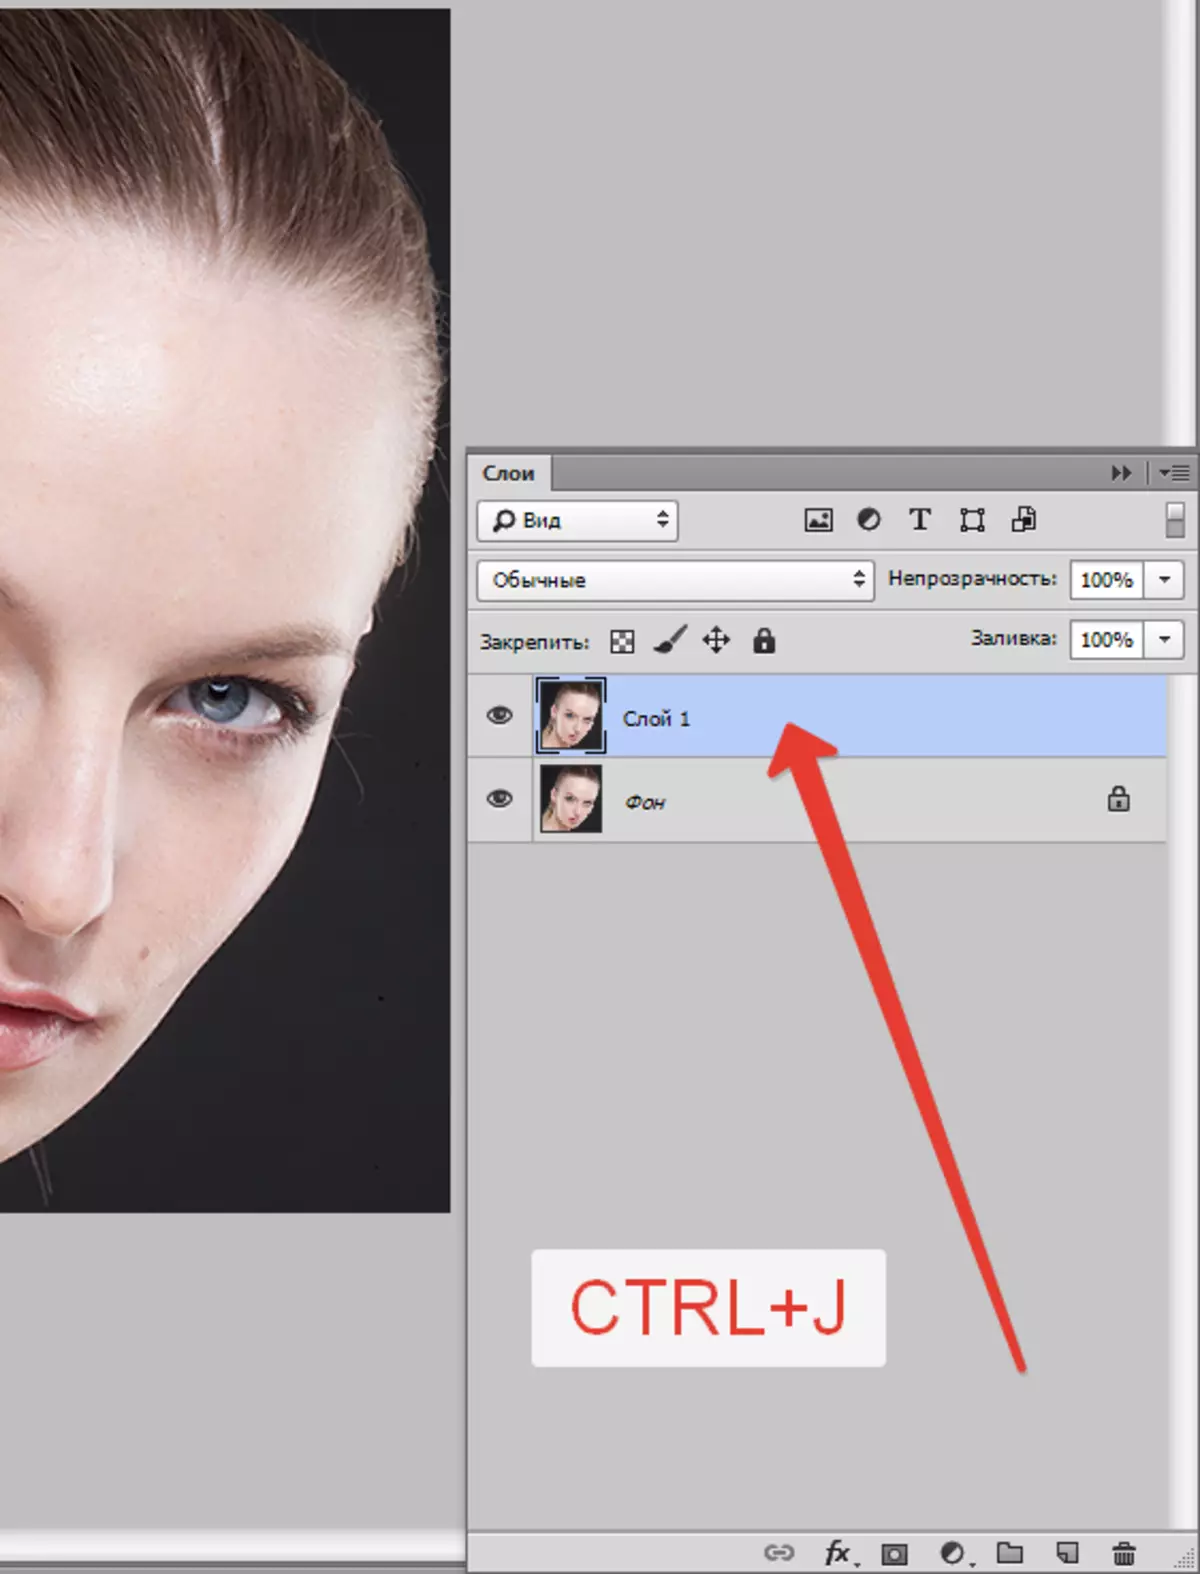
So we will leave the untouched background (source) layer and we can look at the intermediate result of our works. It's just done: clamp Alt. And click on the eye icon near the background layer. This action will turn off all the upper layers and discovers the source. Enable layers in the same way.
Step 1: Eliminate skin defects
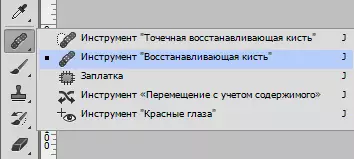
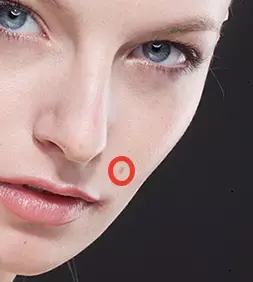
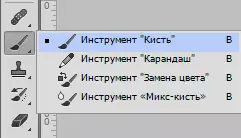
Carefully look at our model. We see a lot of moles, small wrinkles and folds around the eyes. If the maximum naturalness is required, then moles and freckles can be left. We, for educational purposes, remove everything that falls at hand. For defect correction, you can use the following tools: "Restoring brush", "stamp", "Patch" . In the lesson we use "Restoring brush".
It works as follows:
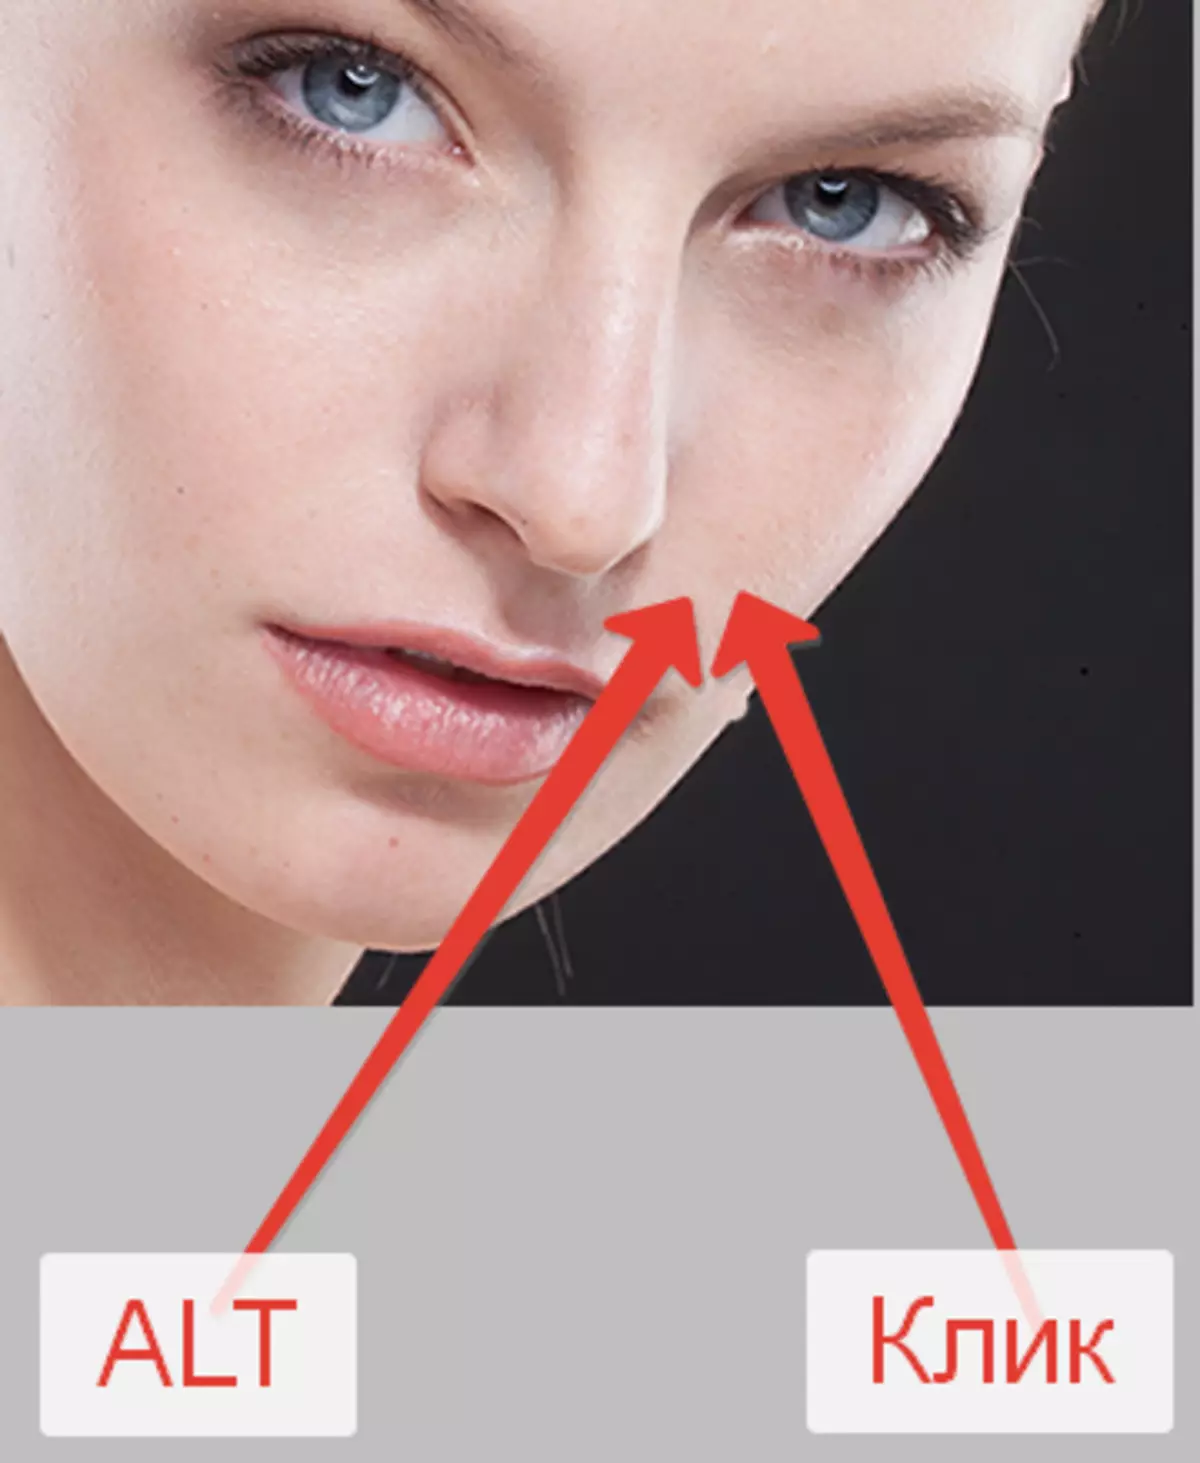
- Clamp Alt. And we take a sample of clean skin as close as possible to the defect.
- Then we transfer the resulting sample to the defect and click again. The brush will replace the defect tone on the sample tone.
The size of the brush must be picked up so that it overlaps the defect, but not too big. Usually 10-15 pixels are enough. If the size choose more, the so-called "texture repetitions" are possible. Thus, delete all the defects that do not suit us.
Read more:
Regenerating Brush in Photoshop
Align the complexion in Photoshop
Step 2: Lighten your skin around the eyes
We see that the model has dark circles under the eyes. Now we will get rid of them.
- Create a new layer by clicking on the icon at the bottom of the palette.
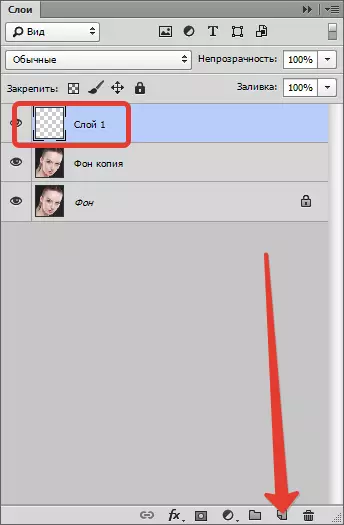
- Then change the overlay mode for this layer on "Soft light".
- Take a brush and configure it, like on screenshots.
Form "Soft Round".
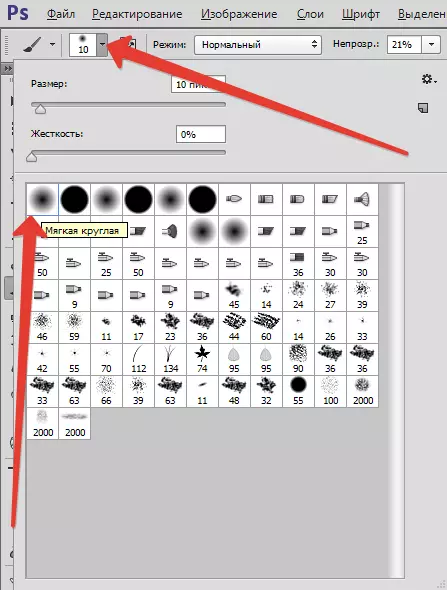
Opacity 20 percent.
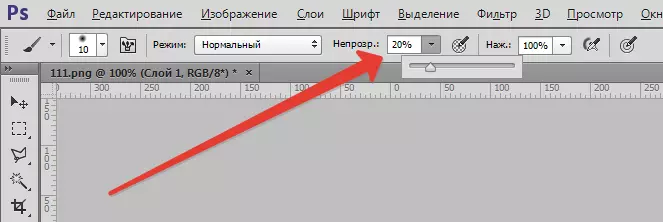
- Clamp Alt. And we take a sample of light skin next to the problem area. This brush (obtained tone) and paint the circles under the eyes (on the created layer).

Read more: Remove bags and bruises under the eyes in Photoshop
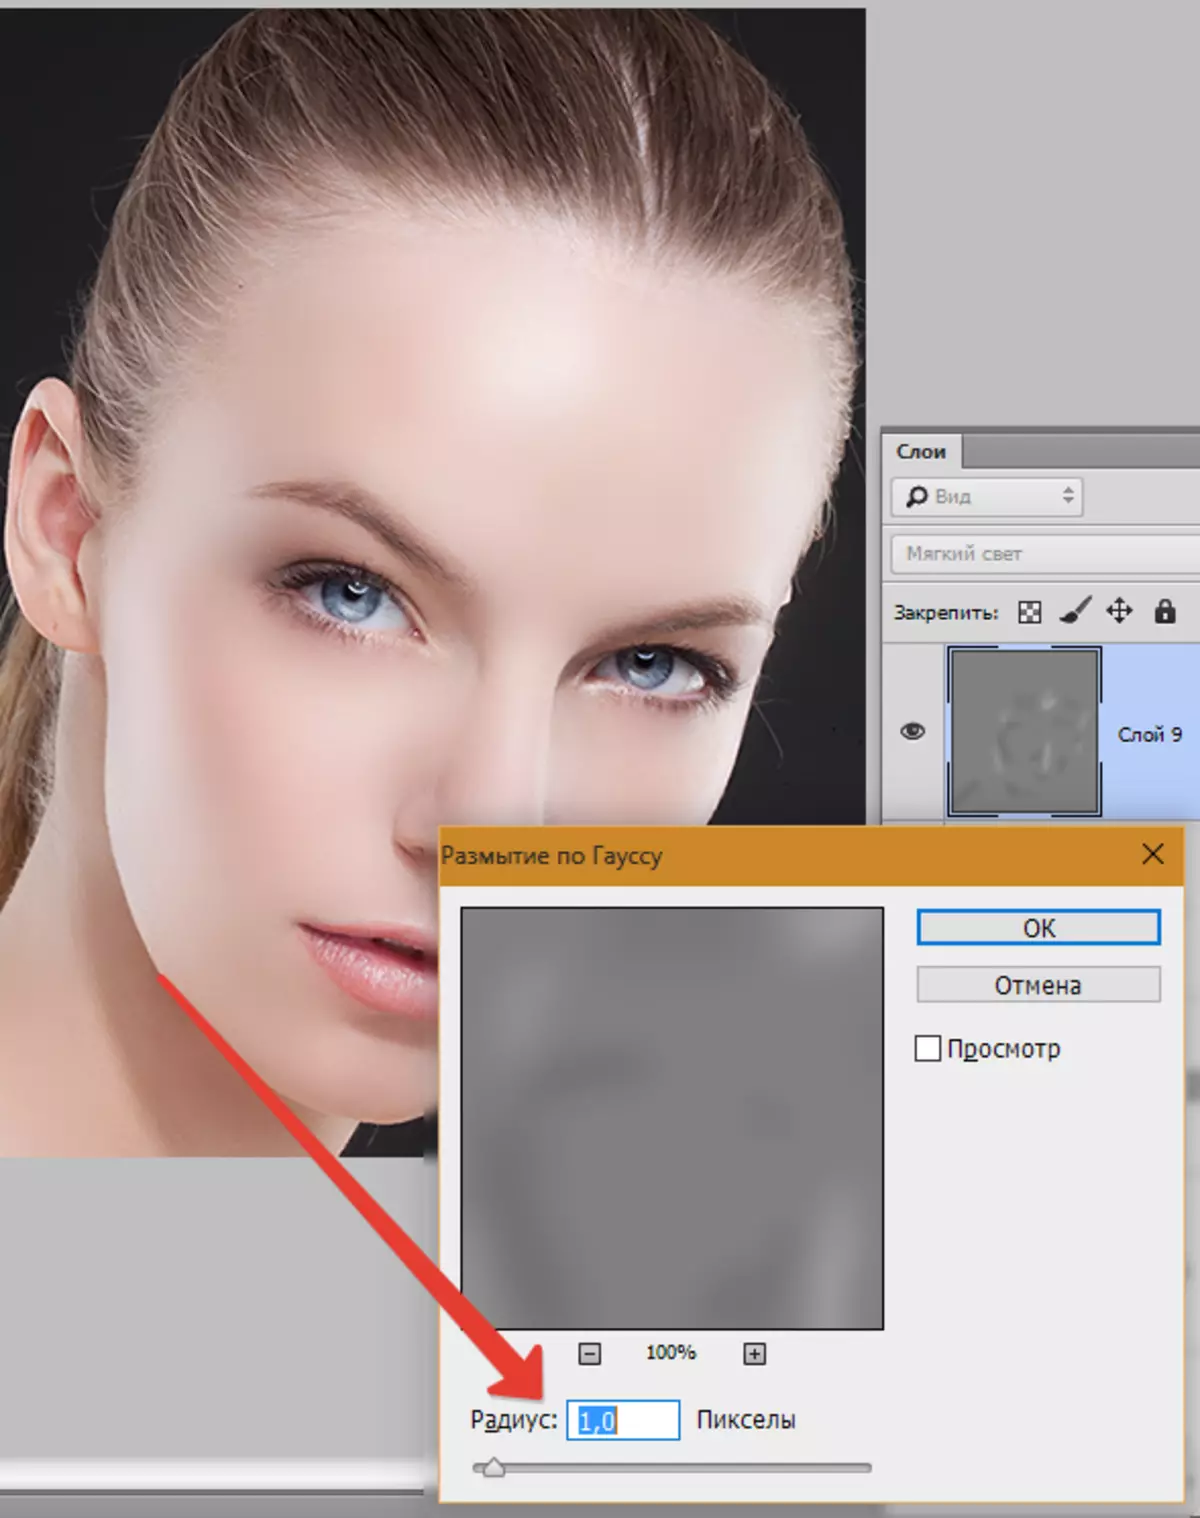
Step 3: Finish skin smoothing
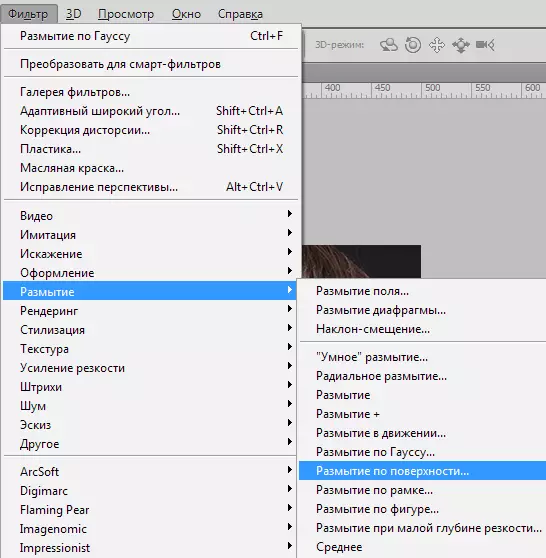
To eliminate the smallest irregularities, use the filter "Blur over the surface".
- First we will create a layer imprint combination Ctrl + Shift + Alt + E . This action creates a layer at the very top of the palette with all the effects applied to this.
- Then create a copy of this layer ( Ctrl + J. ). Palette layers after these two steps:

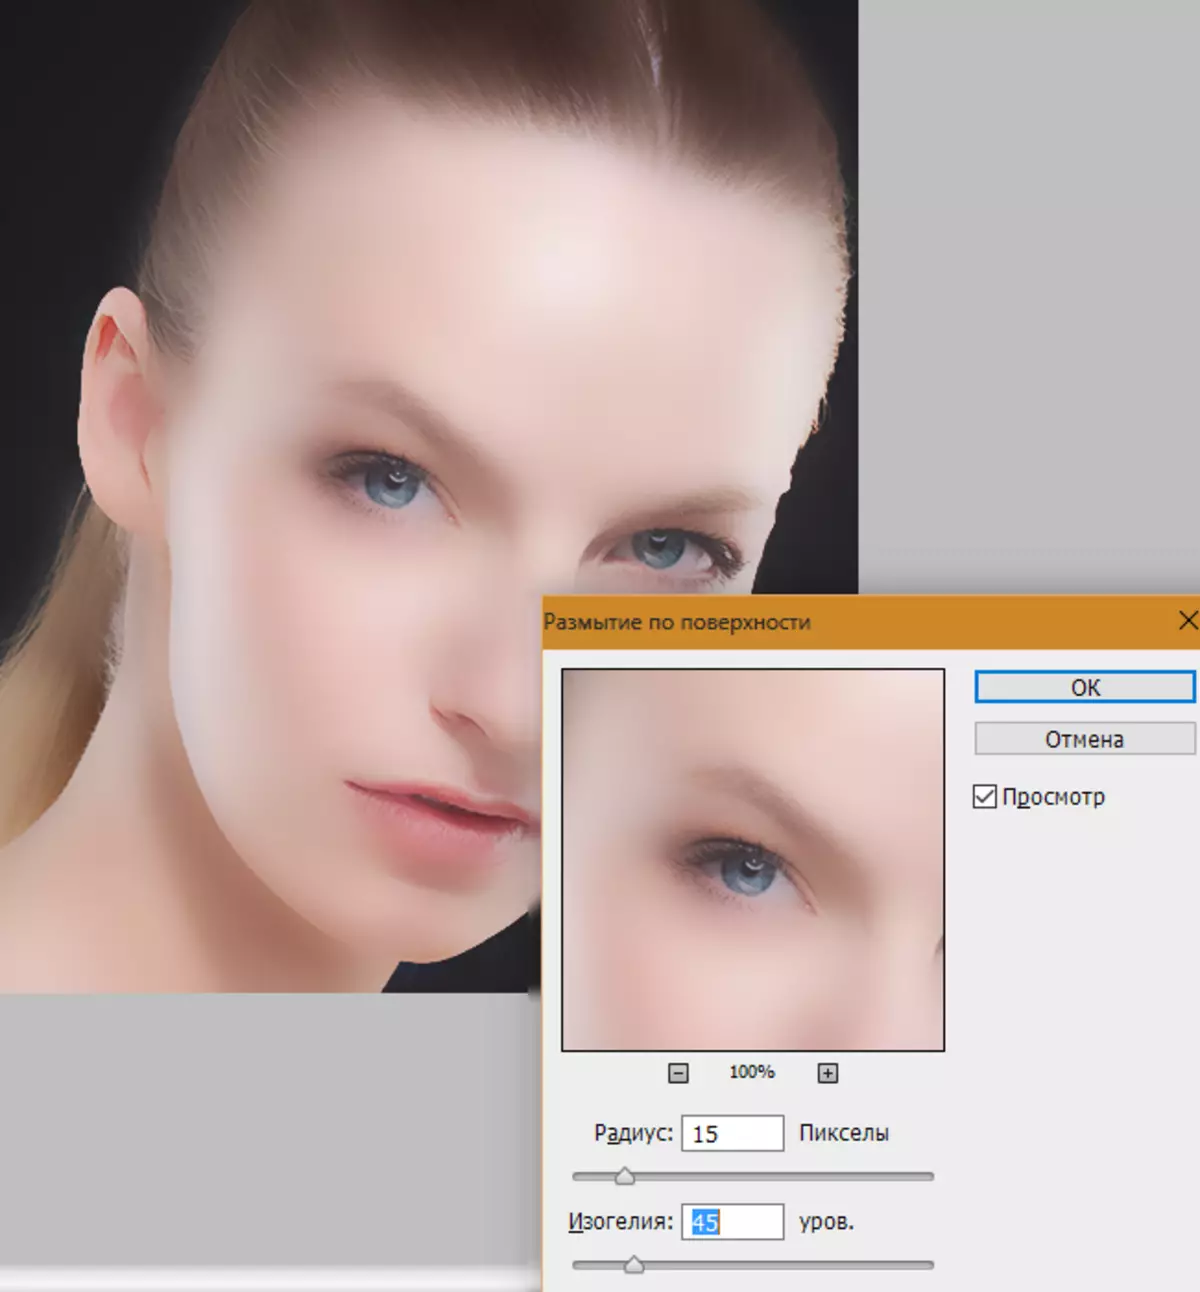
- Being on top copies, looking for a filter "Blur over the surface".
- Blur the image is approximately as in the screenshot. The value of the parameter "Isaohellius" should be about three times more value "Radius".
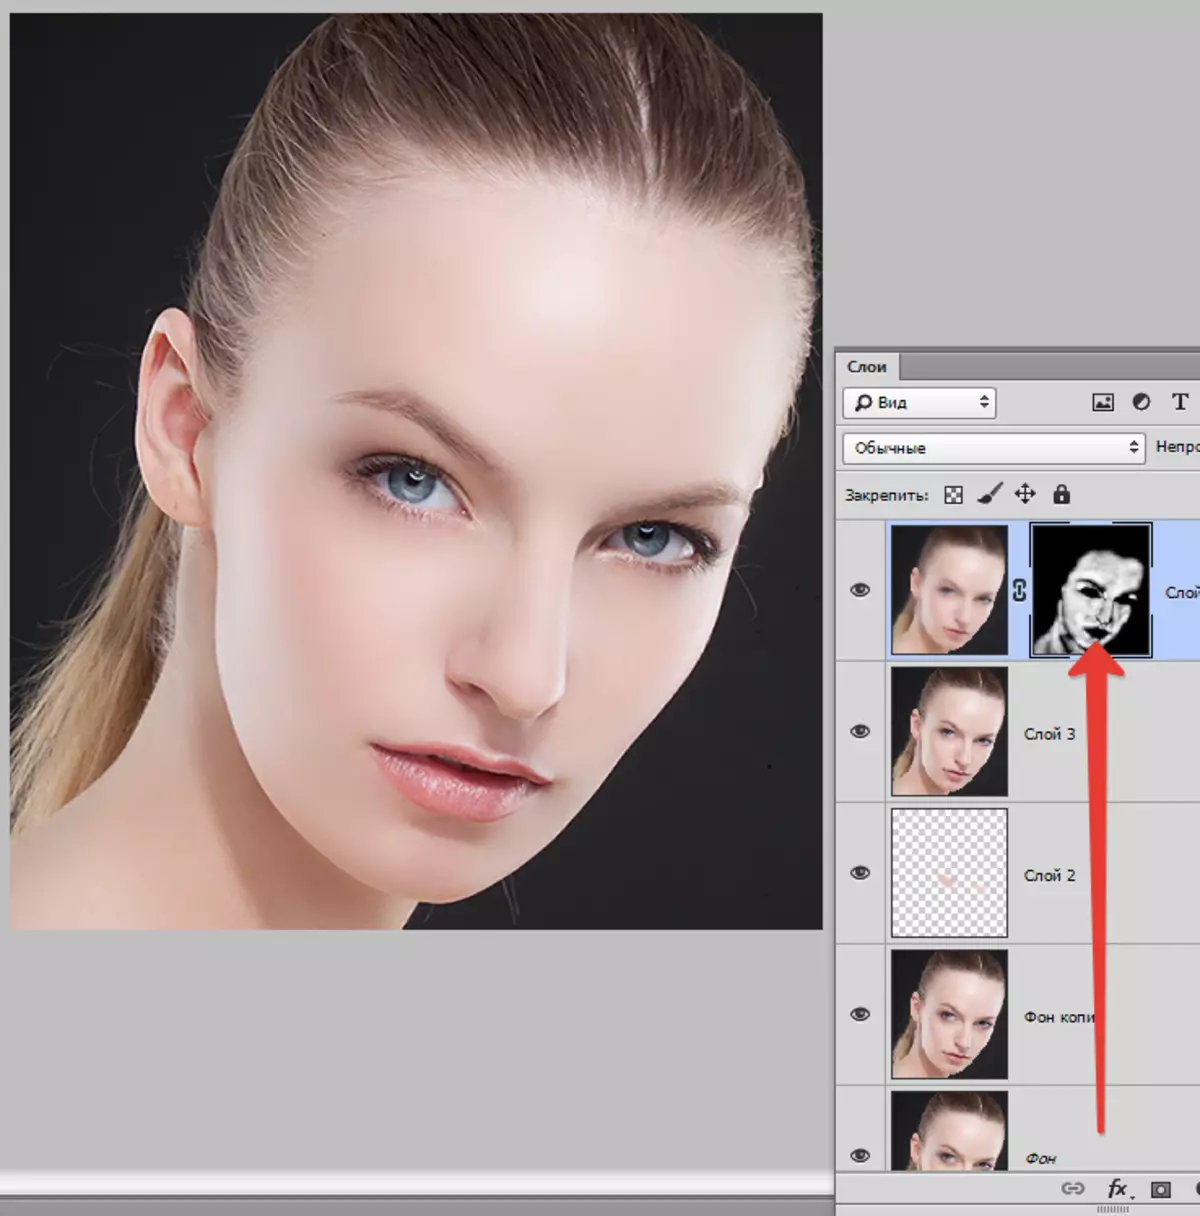
- Now this blur must be left only on the skin of the model, and then not in full strength. To do this, create a black mask for a layer with the effect. Clamp Alt. And click on the icon of the mask in the palette of the layers.

As we see, the created black mask completely concealed the effect of blur.
- Next, take a brush with the same settings as before ("soft round", 20% opacity), but color choose white. Then you can make this brush the skin of the model (on the mask). We try not to touch those details that do not need to wash. The strength of blur depends on the amount of smears.
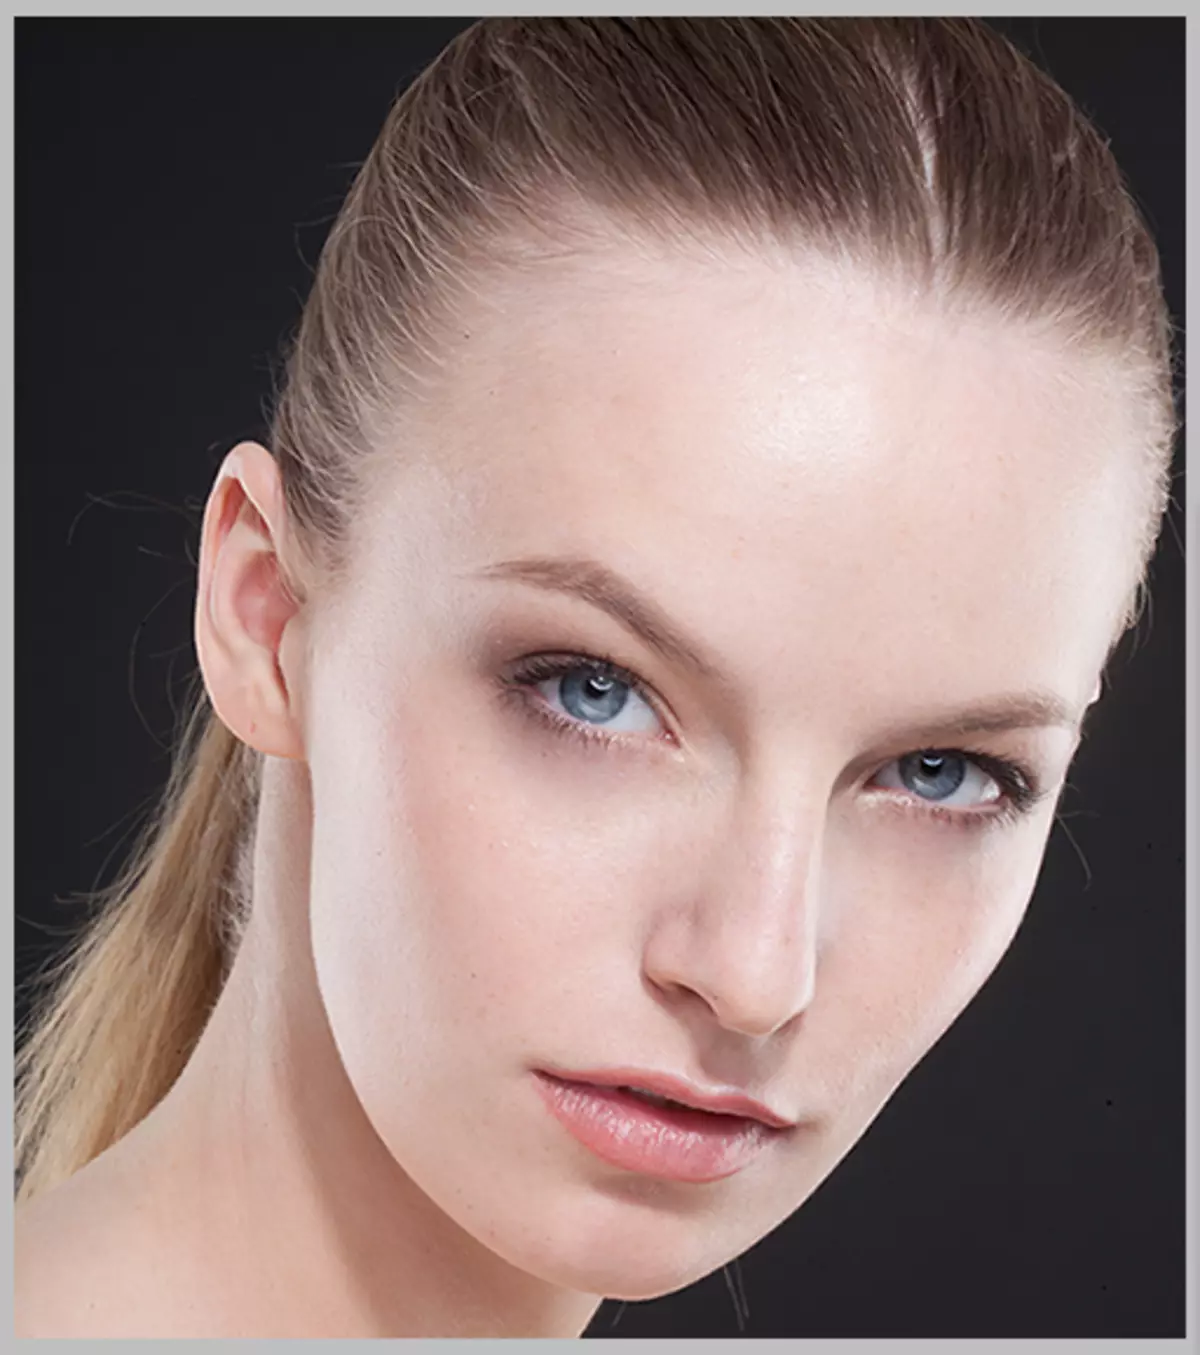
Result:
Step 5: We emphasize the bright and dark areas
There is nothing to tell here. To high-speedly sip the photography, we slightly clarify the eyes of the eyes, shine on the lips. Dimming the upper eyelids, eyelashes and eyebrows. You can also brighten the gloss on the hair of the model. It will be the first passage.
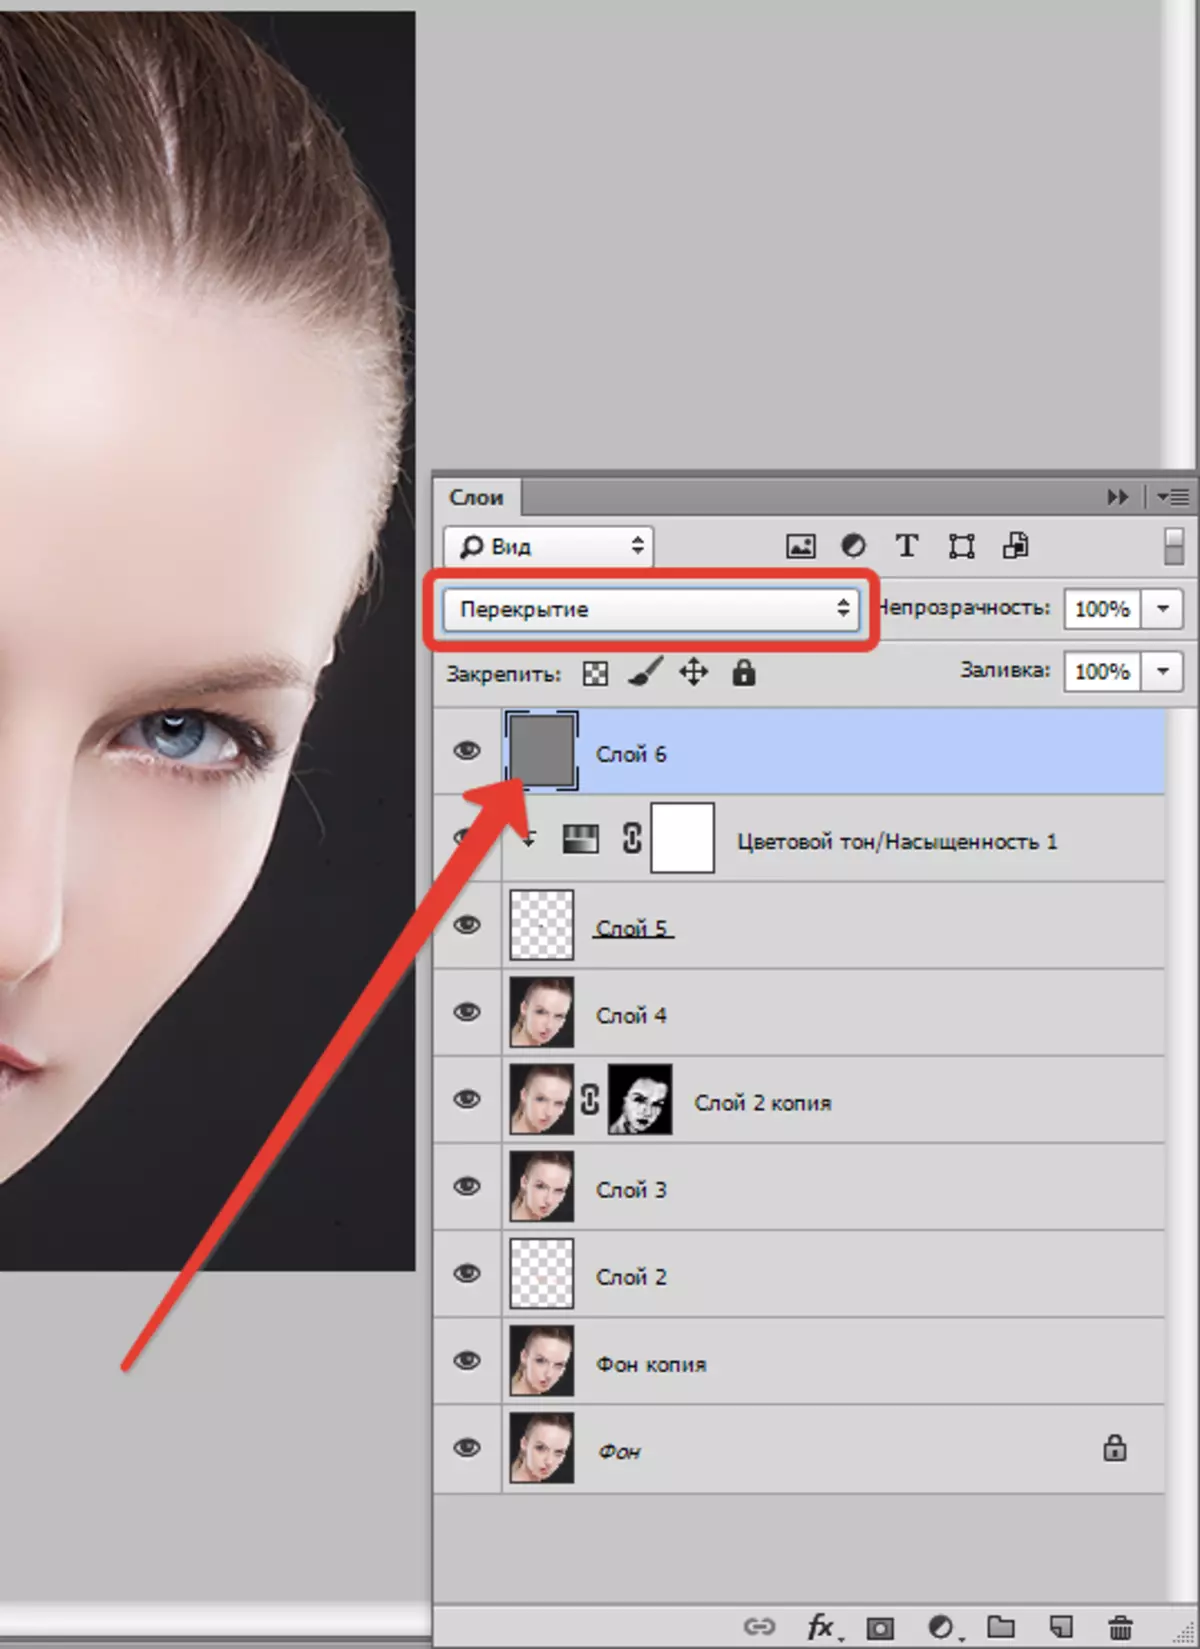
- Create a new layer and click SHIFT + F5. . In the window that opens, choose the fill 50% gray.
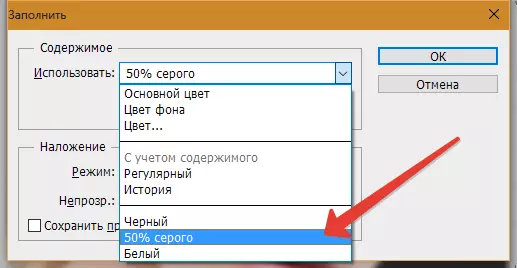
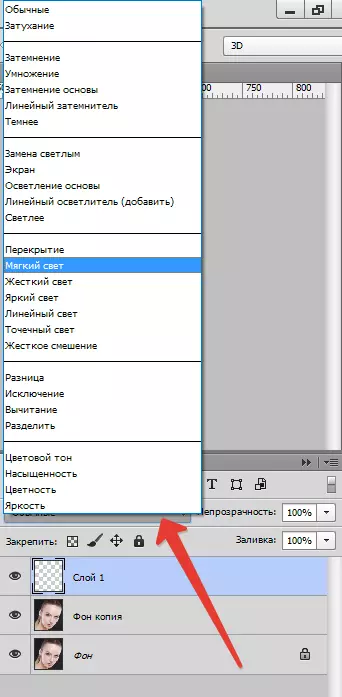
- Change the overlay mode for this layer on "Overlapping".
- Next, take turns tools "Lighter" and "Dimmer".

Exposure exhibit 25 percent.

We go through the sections specified above. Subtotal:
- Second pass. Create another same layer and the same tools with the same settings we go on dark and bright areas on the cheeks, forehead and nose of the model. You can also emphasize the shadows (makeup) slightly. The effect will be very pronounced, so it will be necessary to blur this layer. Go to the menu "Filter - Blur - Blur in Gauss" . Exhibit a small radius (on the eye) and click OK.
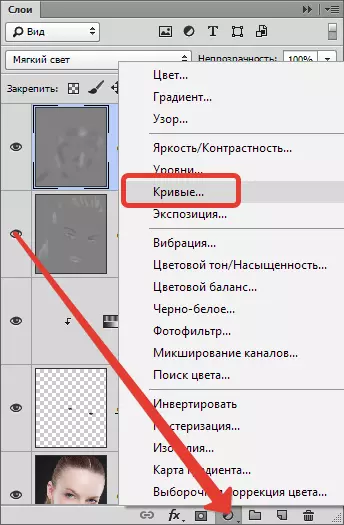
Step 6: Flowerrection
At this stage, we change a little saturation of some colors in the photo and add contrast.
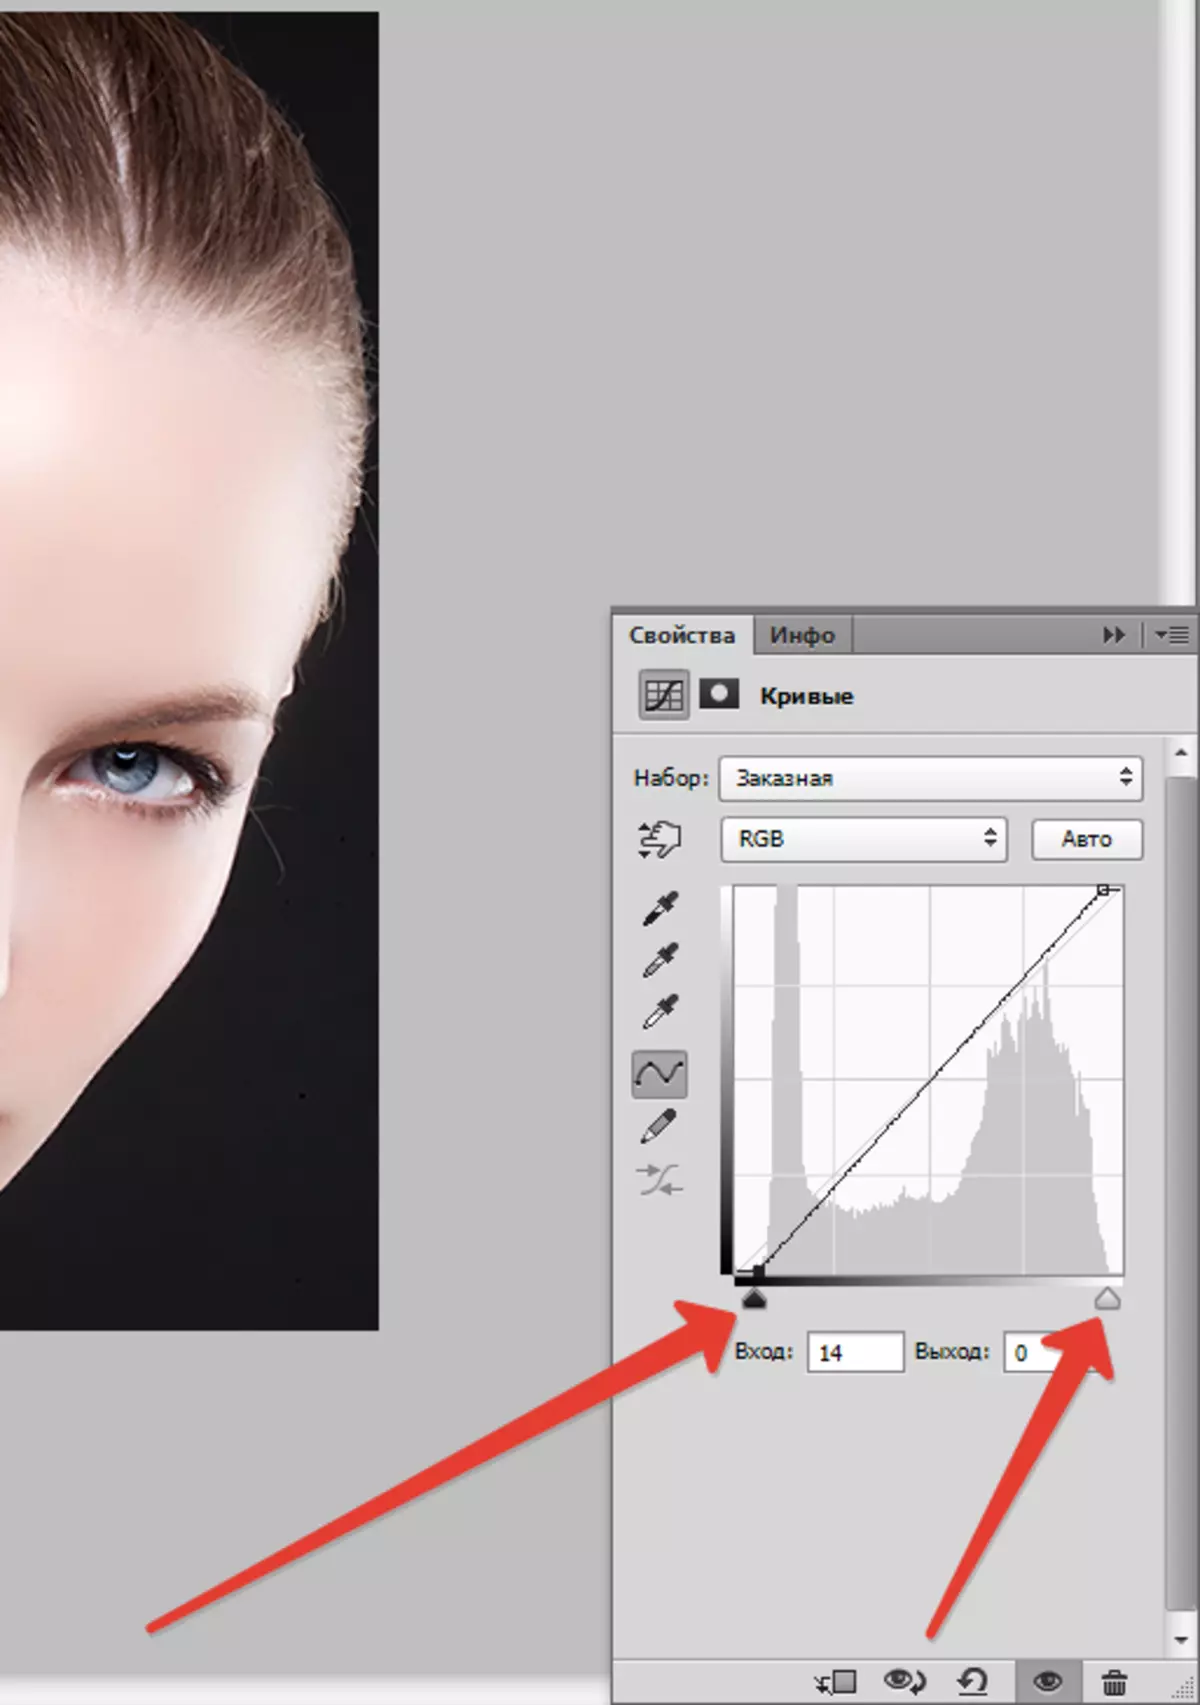
- We use a corrective layer "Curves".
- In the layer settings, at first slide slide to the center, enhancing the contrast in the photo.
- Then we turn into a red canal and pull the black slider to the left, relaxing the red tones.
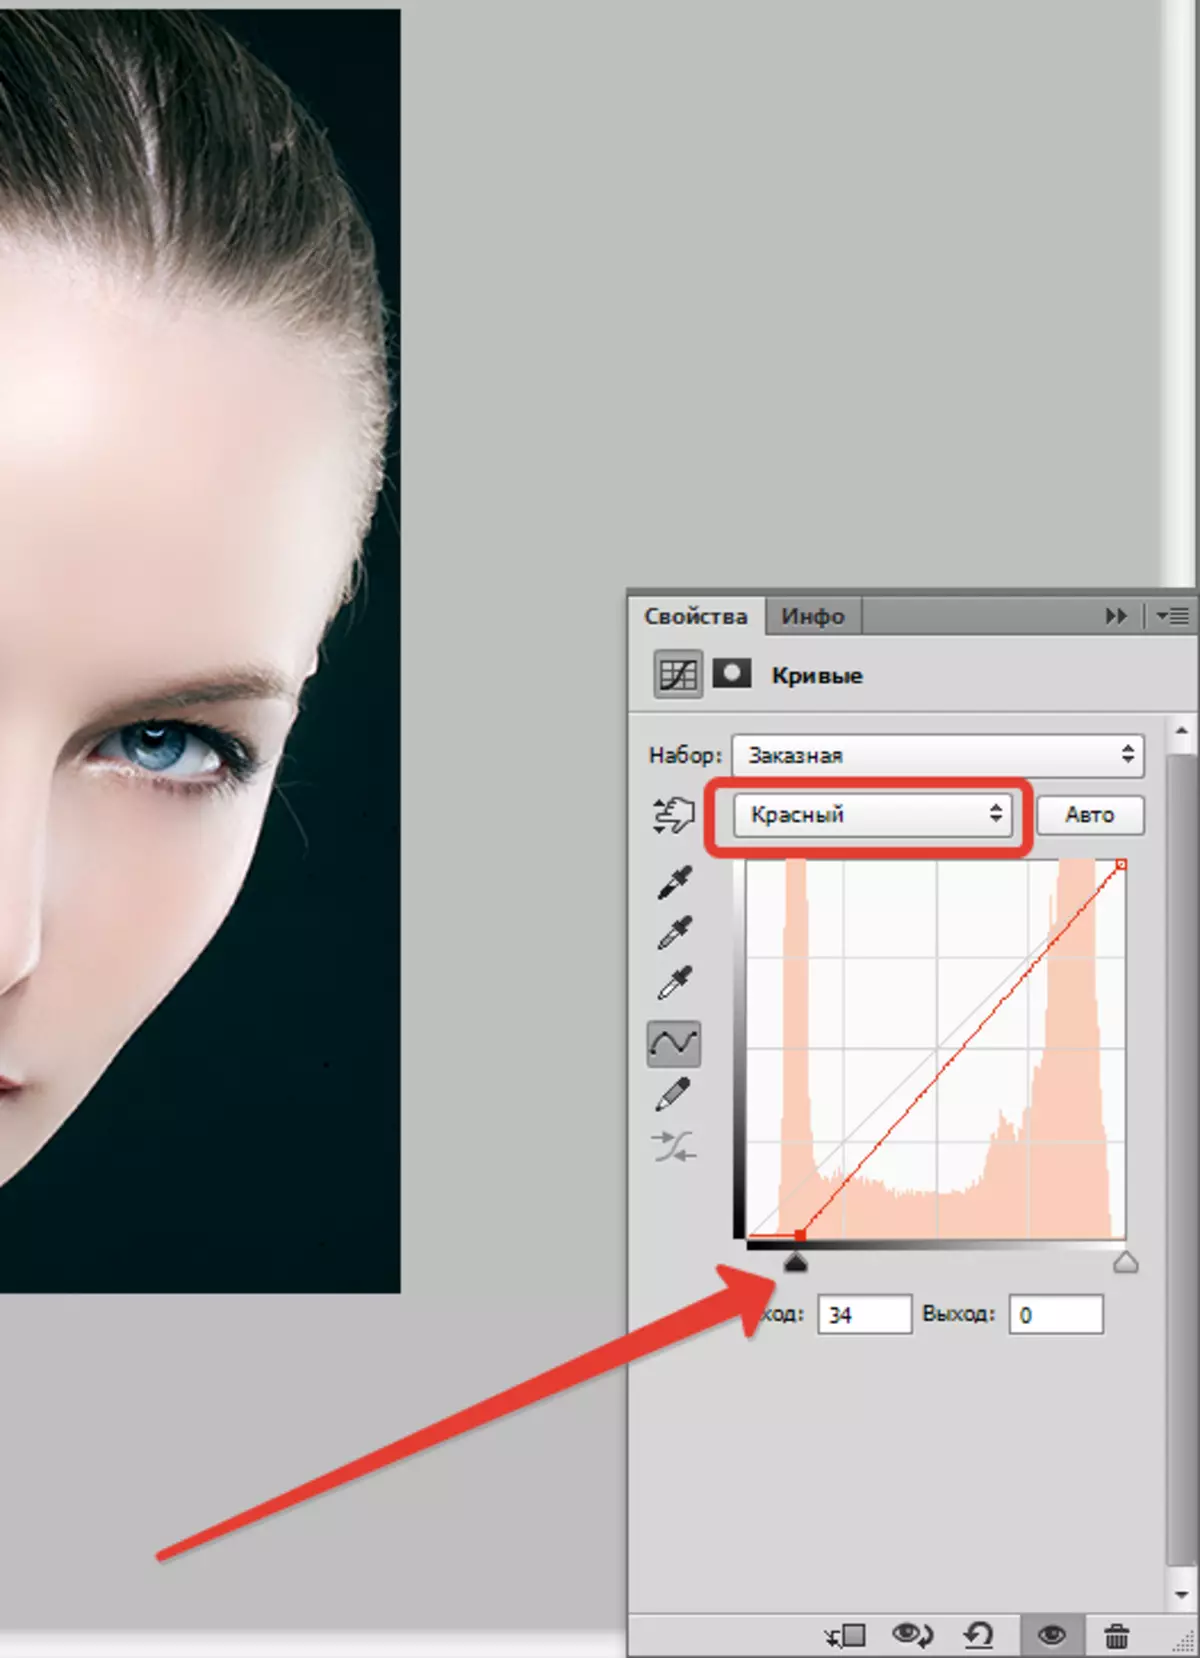
Let's look at the result:
Read more: Flower correction in Photoshop
Step 7: Strengthening
The final stage is to enhance sharpness. You can do this throughout the picture, and you can only distinguish your eyes, lips, eyebrows, in general, key sites.
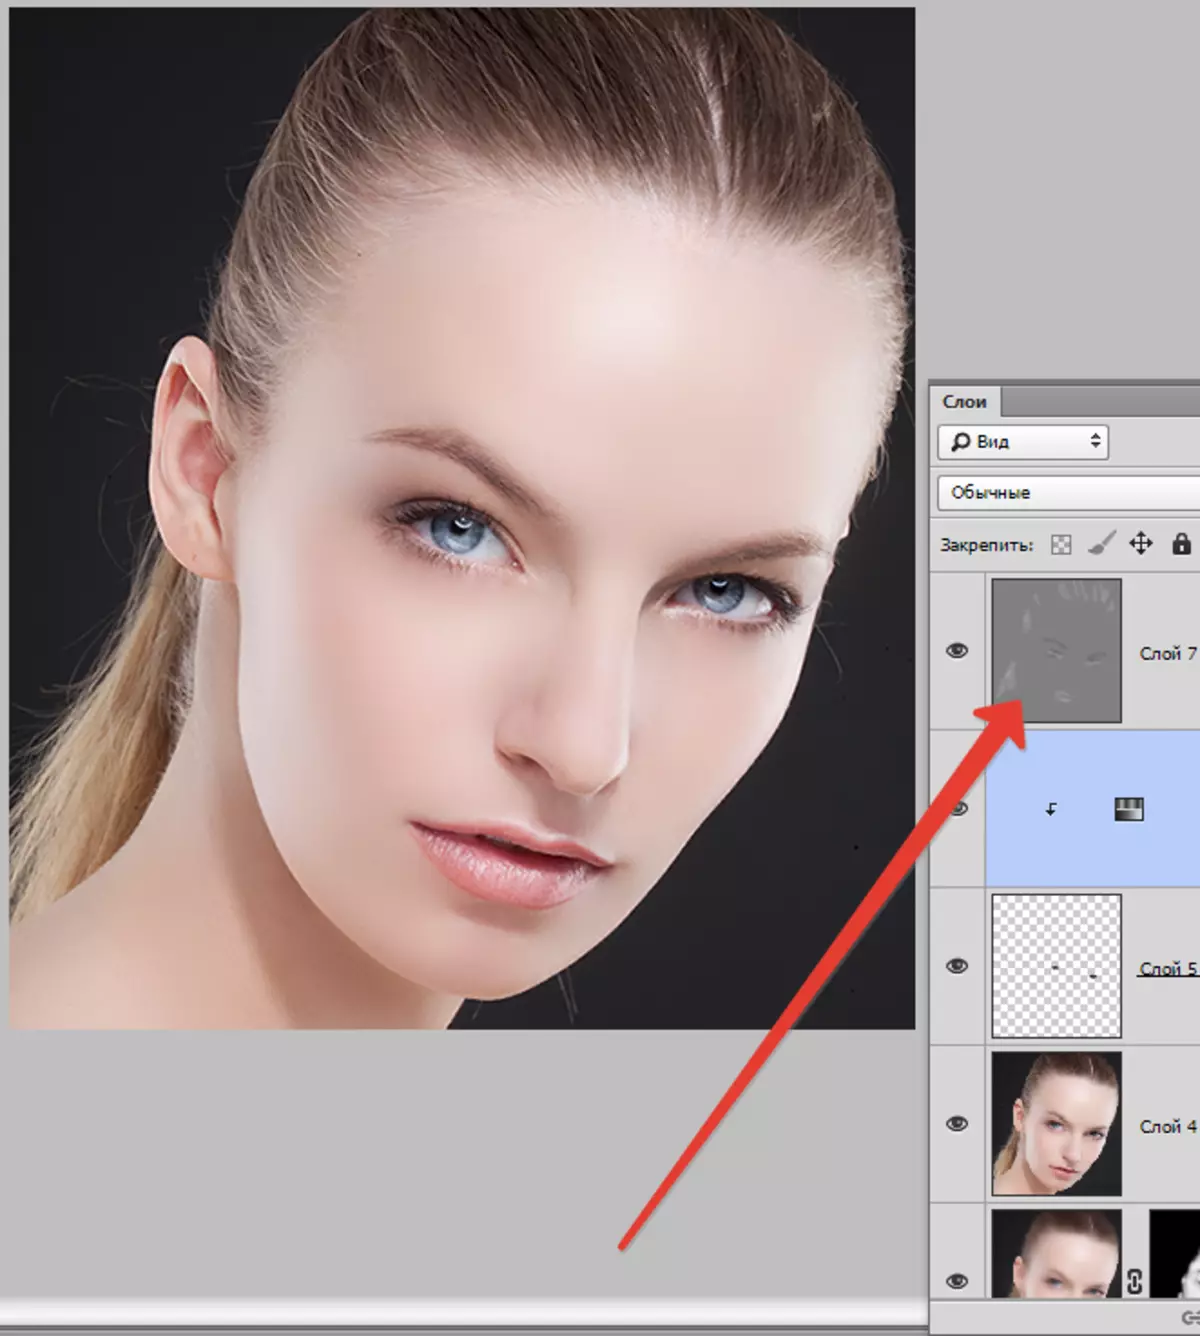
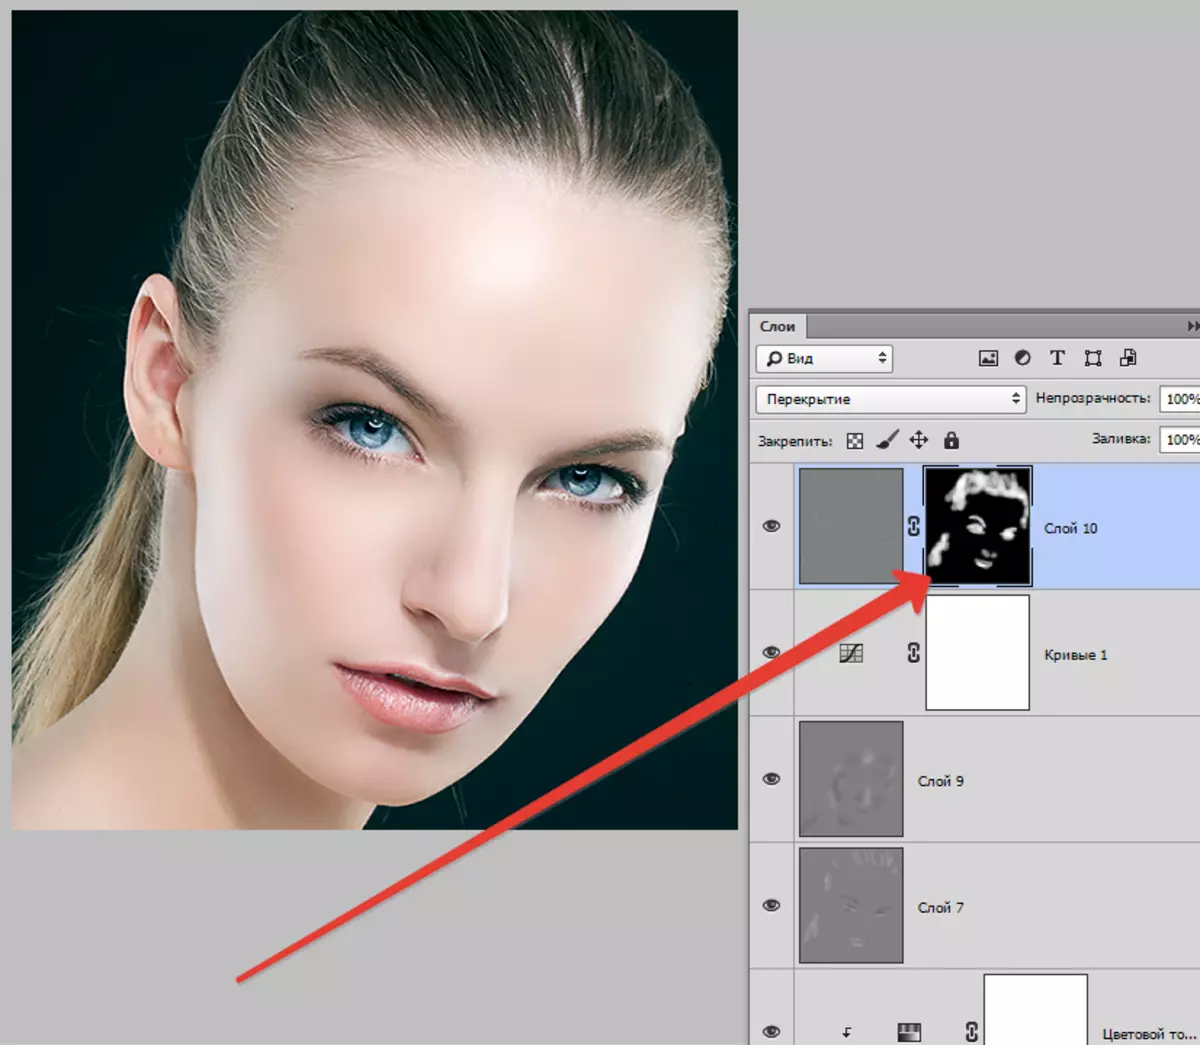
- Create a footprint ( Ctrl + Shift + Alt + E ), then go to the menu "Filter - Other - Color Contrast".

- Configure the filter so that only small details can be visible.
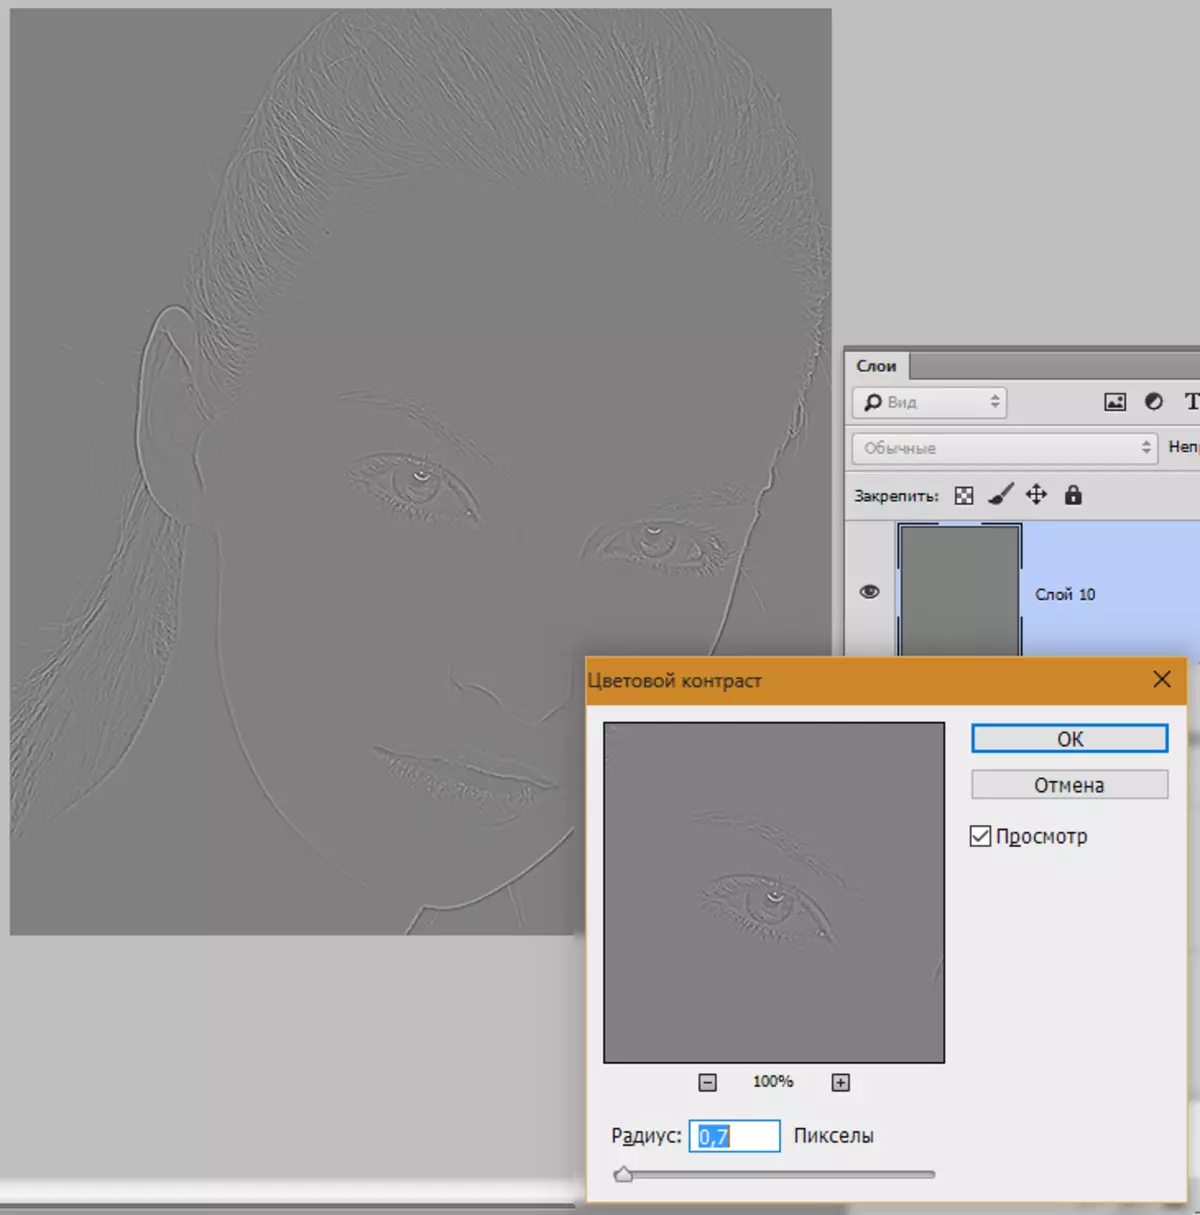
- Then this layer must be discouraged by a combination of keys. Ctrl + SHIFT + U , and after changing the imposition mode on "Overlapping".
- If we want to leave the effect only in separate areas, we create a black mask and a white brush open the sharpness where necessary. How it is done, we have already considered higher.
Read more: How to increase the sharpness in photoshop
On this, our acquaintance with the main techniques for processing photos in photoshop is over. Now your photos will look much better.